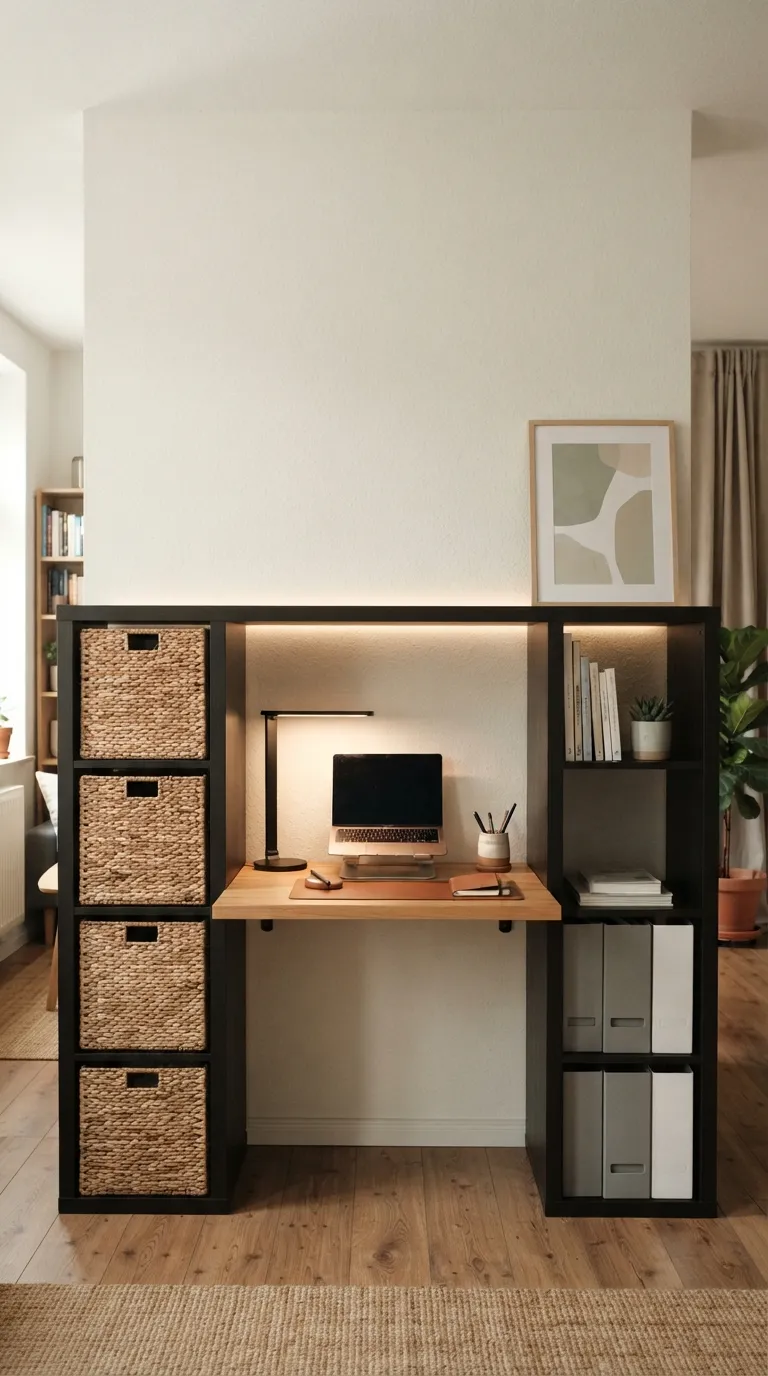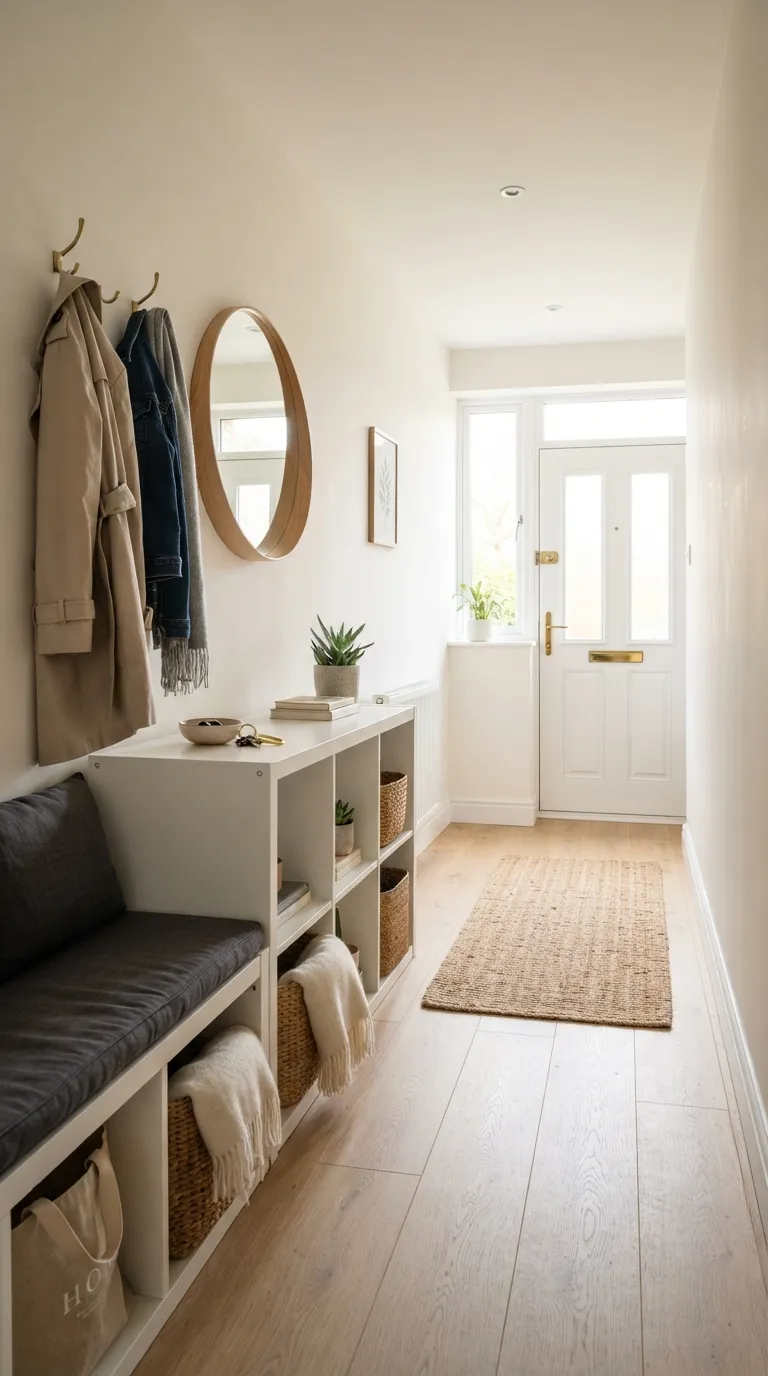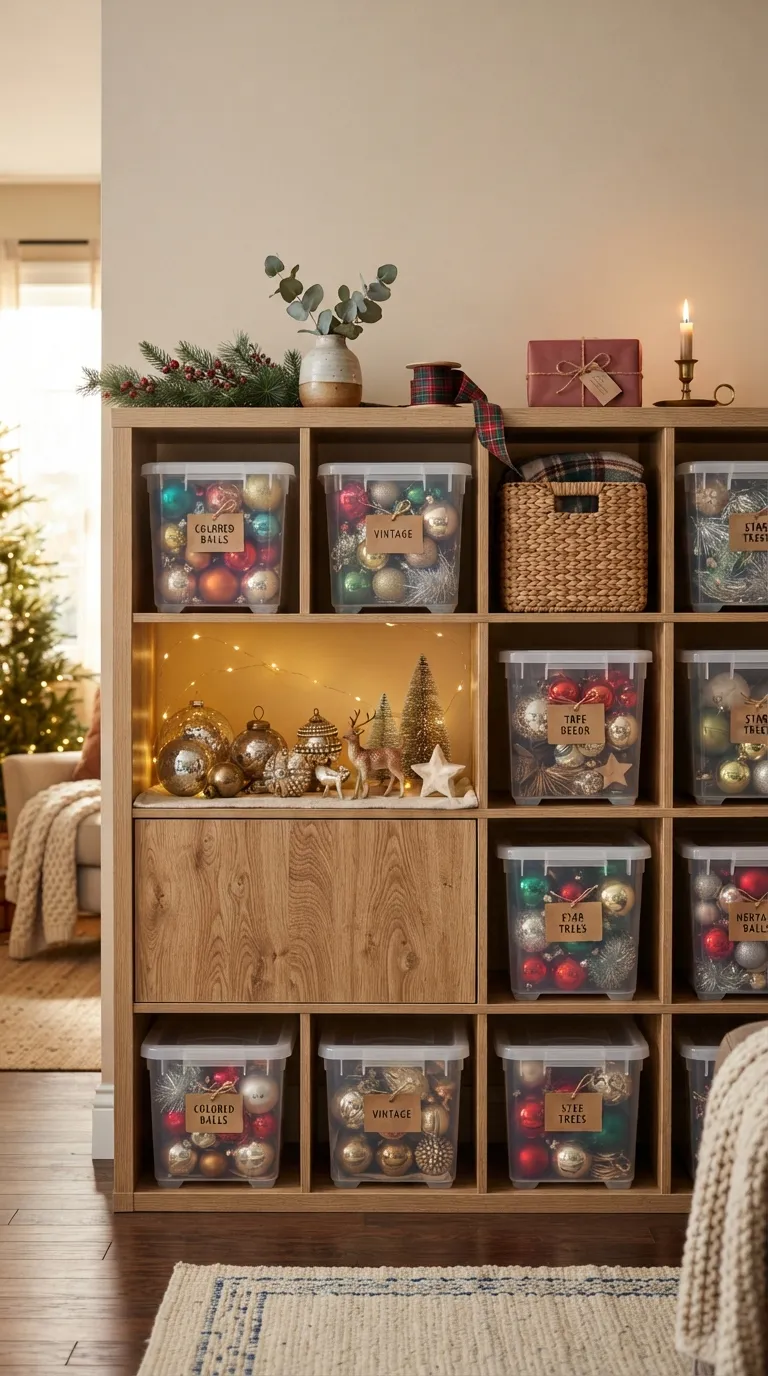
20 IKEA Kallax Christmas Storage and Display Ideas That Keep the Season Under Control
A Kallax unit turns from everyday bookshelf into a full holiday command center the second you swap in a few bins and add some styling touches no new furniture required. Here are 20 IKEA Kallax Christmas storage and display ideas that keep ornaments intact, wrapping paper contained, and your favorite decorations visible instead of buried in the attic.
There’s a particular kind of relief that comes with opening a cube and finding exactly what you need not a crushed ornament, not three tangled strands of lights. Christmas storage done right doesn’t just protect what you own. It makes the season feel a little more held together. Some of these ideas are pure function. A few are pure glow. Most do both.
Grab a cube (or twelve) and let’s get into it.
Jump To
- Why IKEA Kallax Christmas Storage Makes Such a Difference
- 20 IKEA Kallax Christmas Storage and Display Ideas
- How to Start Your IKEA Kallax Christmas Storage Transformation
- Ready to Create Your Dream Kallax Christmas Setup?
Why IKEA Kallax Christmas Storage Makes Such a Difference
Kallax storage earns its reputation with holiday decor because the cubes are a fixed size, so bins, baskets, and drawer units bought off the shelf almost always fit without trimming or shimming. That consistency matters most for ornaments and wrapping supplies the two categories that multiply every single year and are the first things to get crushed in an attic box.
A tucked-away Kallax also works in a home with no dedicated storage room; a single narrow unit in a hallway or closet corner absorbs more than people expect. Start with bins before touching lighting or styling contained storage is the part that saves your ornaments.
| Best starting point | Clear plastic bins sized to one cube (about 13 x 13 x 15 in) |
| Biggest impact area | Ornament and wrapping-paper storage |
| Budget to start | $60–150 for a 4-cube section |
| Time to complete | One weekend afternoon, plus a quick post-holiday reset |
20 IKEA Kallax Christmas Storage and Display Ideas
1. Clear-Bin Ornament Sorting Wall
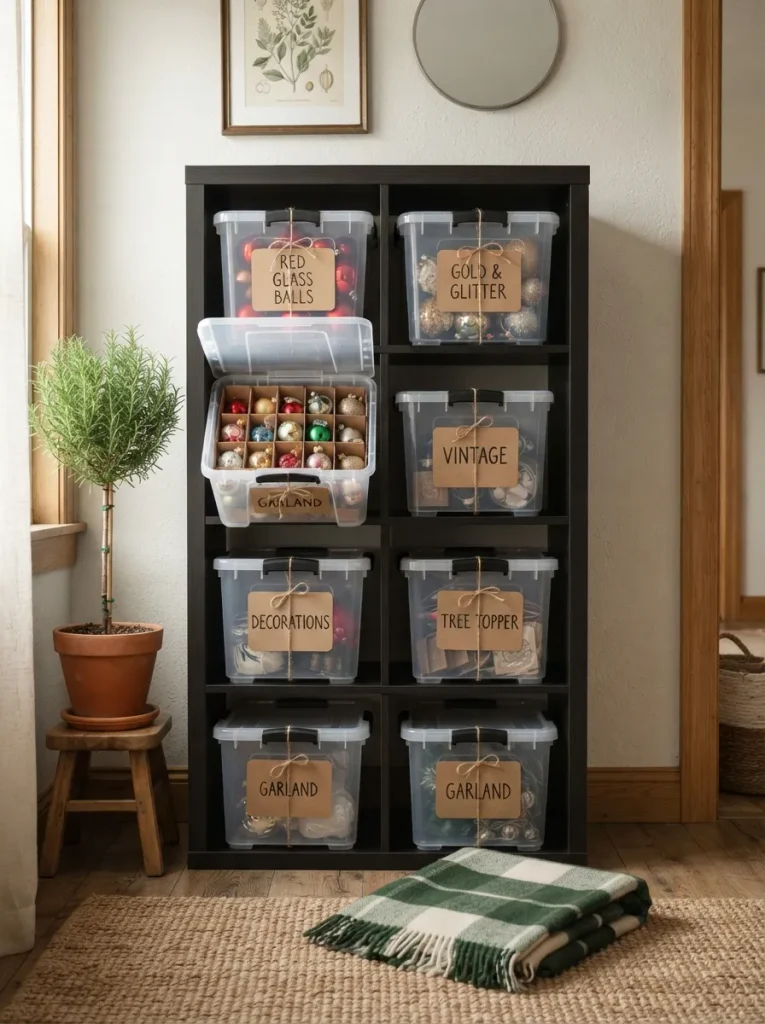
What it looks like: Every cube holds one clear bin, snapped shut, with a strip of kraft paper labeling exactly what’s inside no guessing, no digging.
Why it works: Clear bins solve the single biggest failure point in holiday storage: not being able to see what’s broken until you unwrap it in December. Stacking by category glass ornaments, felt ornaments, tree toppers instead of by year keeps fragile pieces from bearing weight they weren’t built for. It also matches the same visibility logic behind most closet organization systems, just applied to a shelf instead of a rod.
How to copy it: Buy bins in one size that matches a single cube exactly, roughly 13 inches square, so nothing wobbles or overhangs. Add a layer of tissue paper between glass ornaments, and store the heaviest category on a bottom cube, never stacked two-high.
Best for: Anyone who’s opened a storage box in December and found half the ornaments in pieces.
Warning: Stacking two full ornament bins inside a single Kallax cube looks tidy but crushes whatever’s on the bottom by year three. One bin per cube, always.
| Product |
|---|
| Clear stackable storage bins with snap lids, cube-size |
| Ornament divider tray insert with cardboard compartments |
| Kraft paper gift tags or labels |
| Cotton twine |
| Small tissue paper roll for wrapping fragile pieces |
2. Vertical Gift-Wrap Cubby
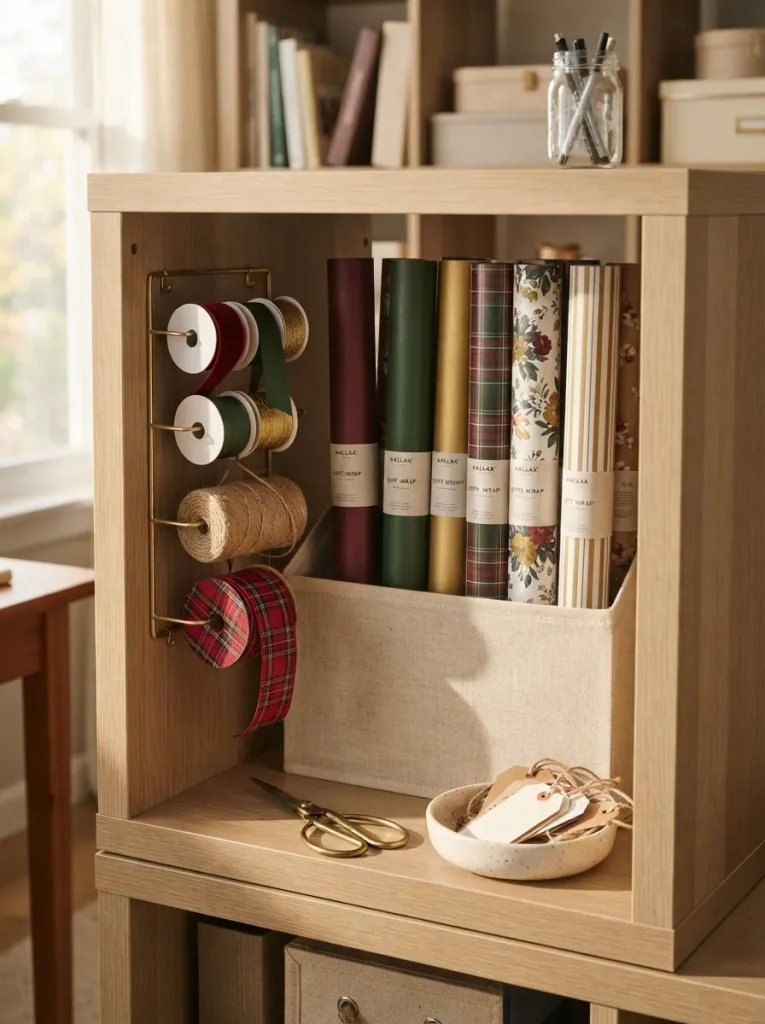
What it looks like: Wrapping paper rolls stand upright like books on a shelf instead of rolling around loose on a closet floor, each one visible from the top.
Why it works: Vertical storage uses the cube’s full depth instead of wasting it, and standing rolls upright prevents the slow crease-and-crush that happens when paper lies flat under other boxes for eleven months. Visual access matters here you grab the pattern you want in three seconds instead of unrolling five to check, which is the same time-saving logic behind handmade gift wrapping setups people build for the whole year, not just December.
How to copy it: A tension rod mounted top to bottom inside one cube, paired with a fabric roll-divider insert, keeps 8 to 10 rolls upright and separated. Sort by occasion rather than by paper type, so the cube stays useful past January.
Best for: Small apartments with no linen closet or dedicated wrapping station.
Budget Version: Skip the purpose-built divider and use two cardboard shipping tubes cut to cube height, taped upright inside costs nothing and holds four rolls apart just as well.
| Product |
|---|
| Tension rod, adjustable length |
| Fabric roll organizer insert with dividers |
| Wall-mounted ribbon spool rack |
| Small scissors with a sheath |
| Gift tag multipack |
3. Color-Blocked Holiday Bin Liners
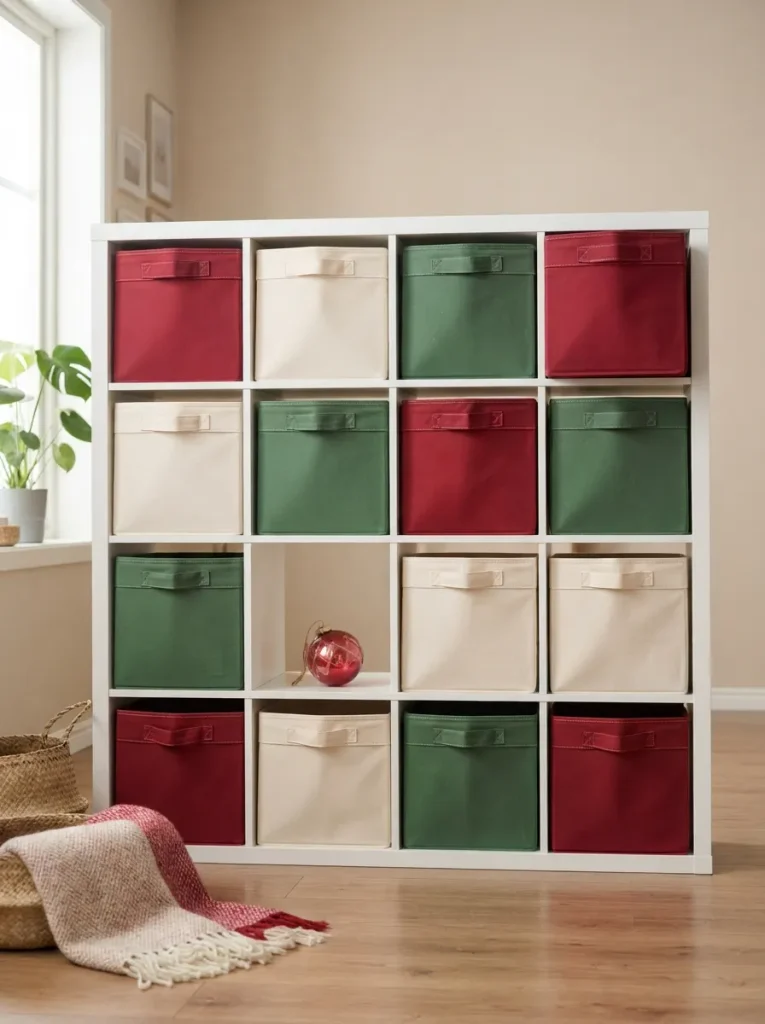
What it looks like: Alternating red, cream, and pine-green fabric liners turn a plain grid of cubes into something that reads as decorated the moment you walk past it no ornaments required yet.
Why it works: This is color theory doing the heavy lifting instead of accessories. A repeating three-color pattern gives the eye a rhythm to follow across the unit, which reads as styled even when the cubes themselves are just holding storage. Canvas liners protect the shelf material from scuffs, too.
How to copy it: Buy liners in multiples of three and alternate the pattern rather than grouping colors red, cream, green, red, cream, green across each row. Stick to matte, unpatterned fabric; a busy print fights the simplicity that makes this trick work.
Best for: People who want a Christmas look without buying a single ornament.
Styling Note: Fold the liner cuff down an inch before inserting it that clean fabric edge is what reads as intentional instead of thrown together.
Up next: the trick that makes garland look intentional instead of stapled on.
4. Woven Faux Garland Trim
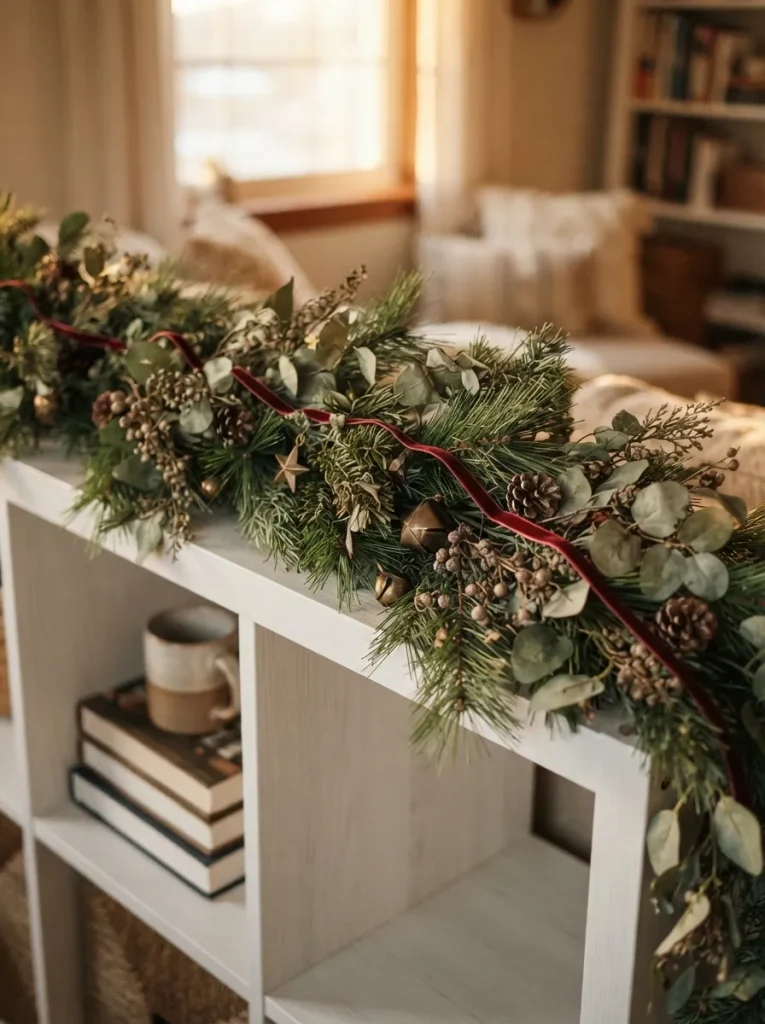
What it looks like: A single garland run threads across the top of the unit and drapes just slightly over the front edge soft, textured, a little wild at the ends.
Why it works: Garland introduces organic texture against the Kallax’s flat, engineered surfaces, which is the same contrast principle that makes boho styling work on this unit year-round. The eye rests on texture contrast more than color, so even a plain white Kallax gets visual interest without paint or new hardware.
How to copy it: Attach garland with small removable adhesive hooks along the back top edge, not tape, so the finish survives takedown. Let six inches trail off each end instead of trimming it flush that asymmetry is what keeps it from looking like a kit.
Best for: Renters who want texture without committing to paint or wallpaper.
Pro Tip: Fluff faux garland by hand before hanging it straight out of the box, the branches sit flat and read as fake. Bending each stem outward at a slight angle sells the illusion.
5. Warm White Fairy Light Backdrop
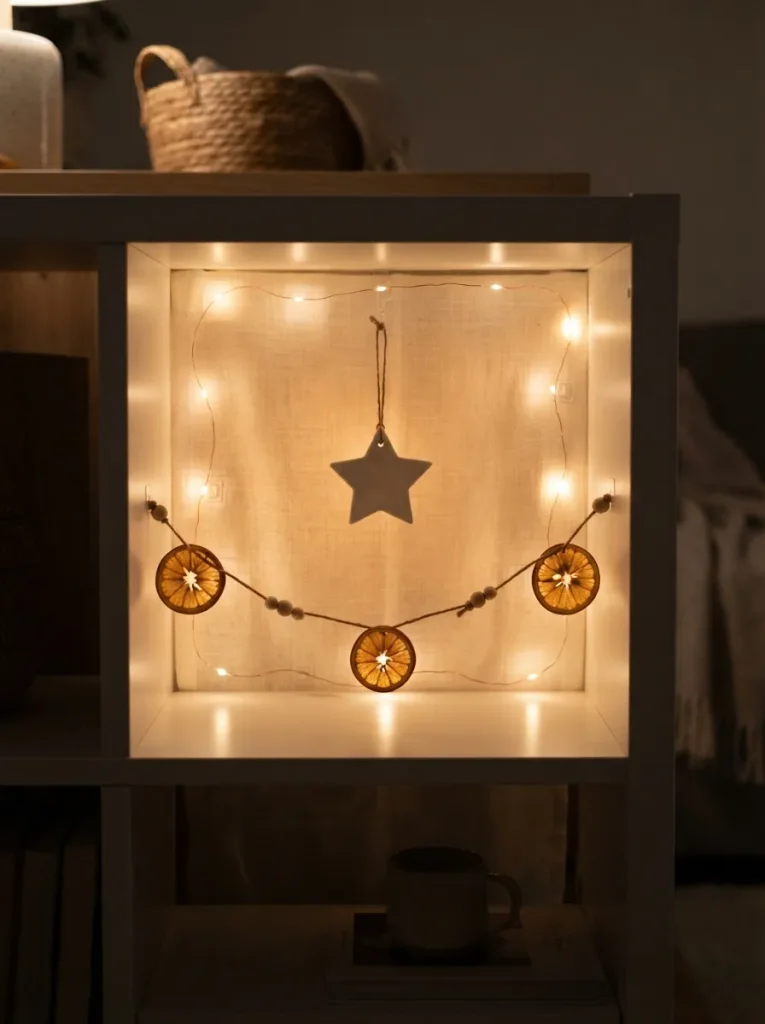
What it looks like: One cube glows from the inside soft and amber, like a little lit window inside the shelf.
Why it works: Light behaves differently through fabric than it does bare, which is why a sheer backdrop turns a basic LED strand into something that looks intentional rather than decorative-store leftover. It also draws the eye to one focal cube instead of competing with everything else on the unit.
How to copy it: Stretch a piece of sheer fabric across the back panel of one cube, then run a battery-powered warm white strand of 100 lights or fewer behind it in loose loops. Battery power means no visible cord running across the front.
Best for: Anyone without an outlet near their Kallax unit.
Quick Win: Battery fairy lights with a built-in timer turn themselves on at dusk automatically set it once in November and forget it until January.
6. Vintage Nutcracker Display Ledge
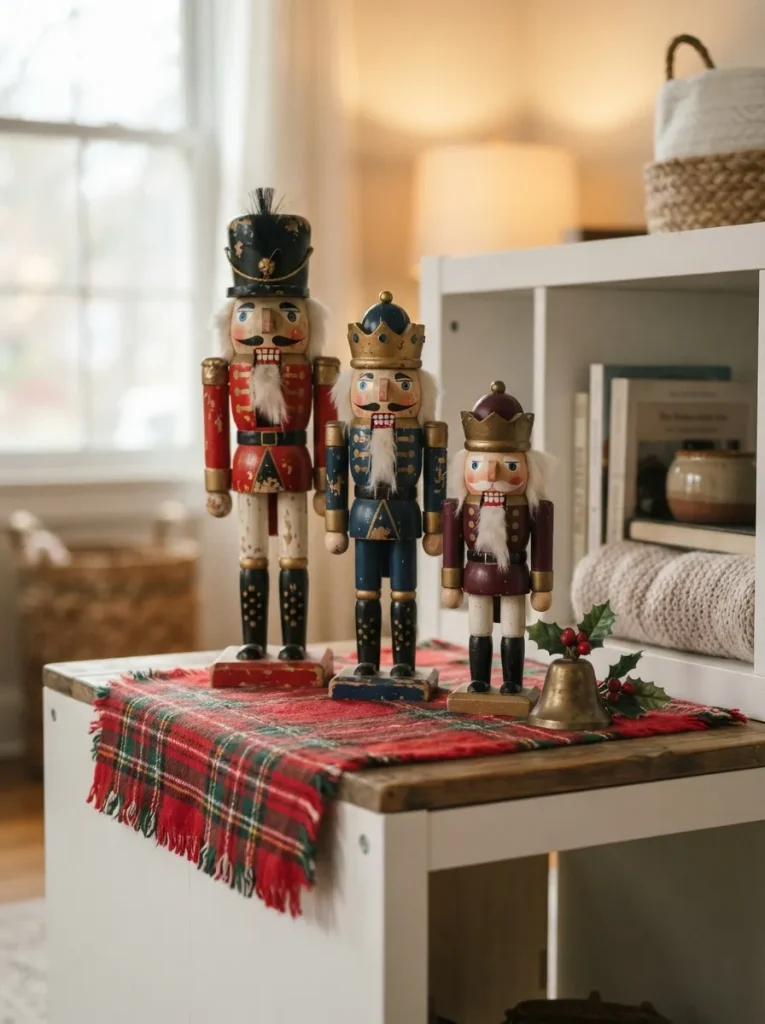
What it looks like: A short row of nutcrackers, tallest to shortest, stands on the flat ledge of one open cube like a tiny parade that never marches anywhere.
Why it works: Grouping collectibles by height instead of color creates a visual staircase the eye follows naturally, the same shelf-styling logic used in display shelf styling year-round. It keeps a small collection from reading as clutter.
How to copy it: Use odd numbers three or five pieces, never four and leave equal breathing room between each one rather than pushing them shoulder to shoulder. A folded runner underneath grounds the grouping visually.
Best for: Collectors with a handful of sentimental pieces who don’t want a whole cube dedicated to them.
Mistake to Avoid: Lining collectibles up in a perfectly even row front-to-back makes them read as a factory display. Stagger them slightly forward and back instead.
Up next: the storage trick that makes a plain rattan basket look expensive.
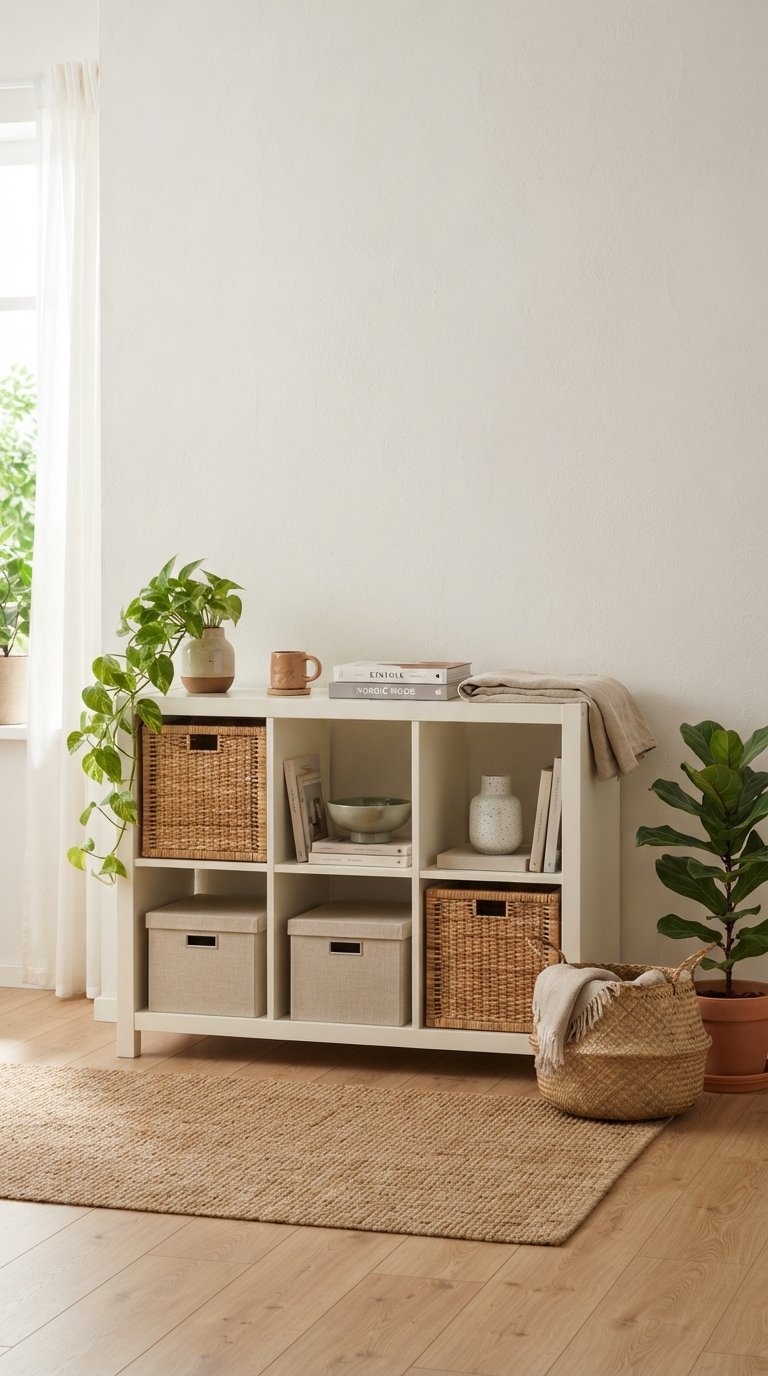
7. Rattan Basket Inserts for Soft Storage
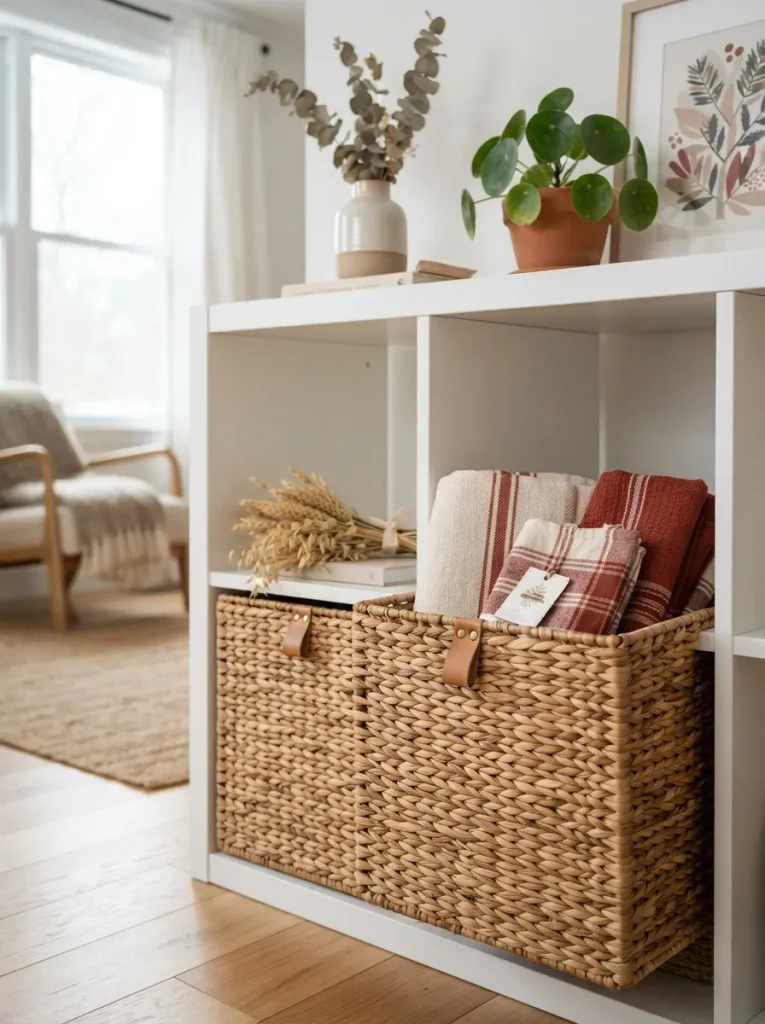
What it looks like: Two woven rattan baskets sit flush inside their cubes, leather pull tabs the only clue that something’s stored behind that natural texture.
Why it works: Rattan softens the hard edges of engineered wood and reads as considered rather than purely functional the same material logic running through most Scandinavian styling on this unit. It’s also forgiving storage: linens and soft goods don’t need the rigid protection ornaments do.
How to copy it: Measure basket width before buying. Anything over 13 inches won’t slide in flush and will sit proud of the frame, which looks unfinished. Reserve rattan for soft items only; it won’t protect glass the way a lidded plastic bin does.
Best for: Table linens, stockings, tree skirts, and other fabric-based holiday items.
Important: Most rattan baskets are sized in centimeters even when sold on U.S. sites, so double-check the actual inch measurement before ordering a basket listed as “fits Kallax” can still run a half-inch too wide.
| Product |
|---|
| Natural rattan storage basket with handles |
| Leather pull tab hardware kit |
| Cotton holiday table linens |
| Quilted cotton tree skirt |
| Small dried wheat or grass bundle |
8. Pine-Green Painted Cube Backs
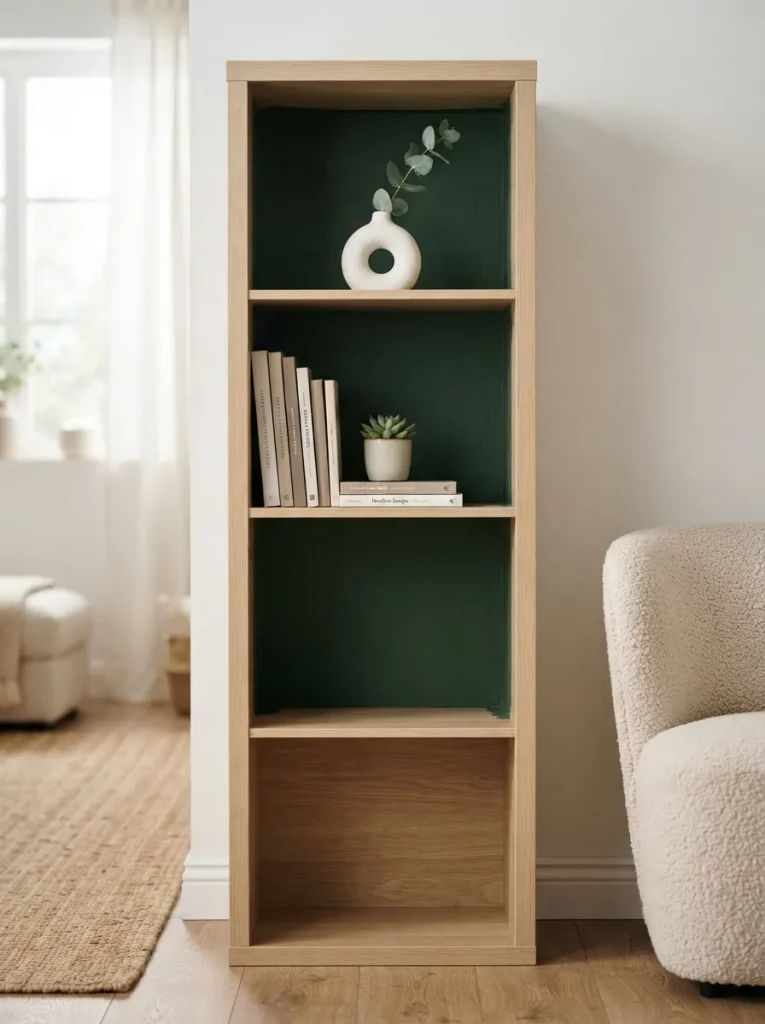
What it looks like: Every other cube’s back panel goes from plain white to deep pine green, so the whole unit reads as intentional the second you look at it head-on.
Why it works: Painting only the back panels, not the whole frame, creates depth without committing to a full furniture repaint. It’s the same negative-space logic as a gallery wall: the color recedes, so whatever sits in front of it becomes the visual focus instead.
How to copy it: Tape off the frame edges carefully and use a true pine green, not a mint or sage this needs to read as saturated, not pastel. Two coats, and let it cure 24 hours before loading the cube.
Best for: Anyone who wants a seasonal look but isn’t ready to buy holiday-specific decor.
Budget Version: A single sample-size pot of paint covers every back panel on a full unit with room to spare this whole idea costs under $20 in most cases.
9. Advent Calendar Drawer Insert
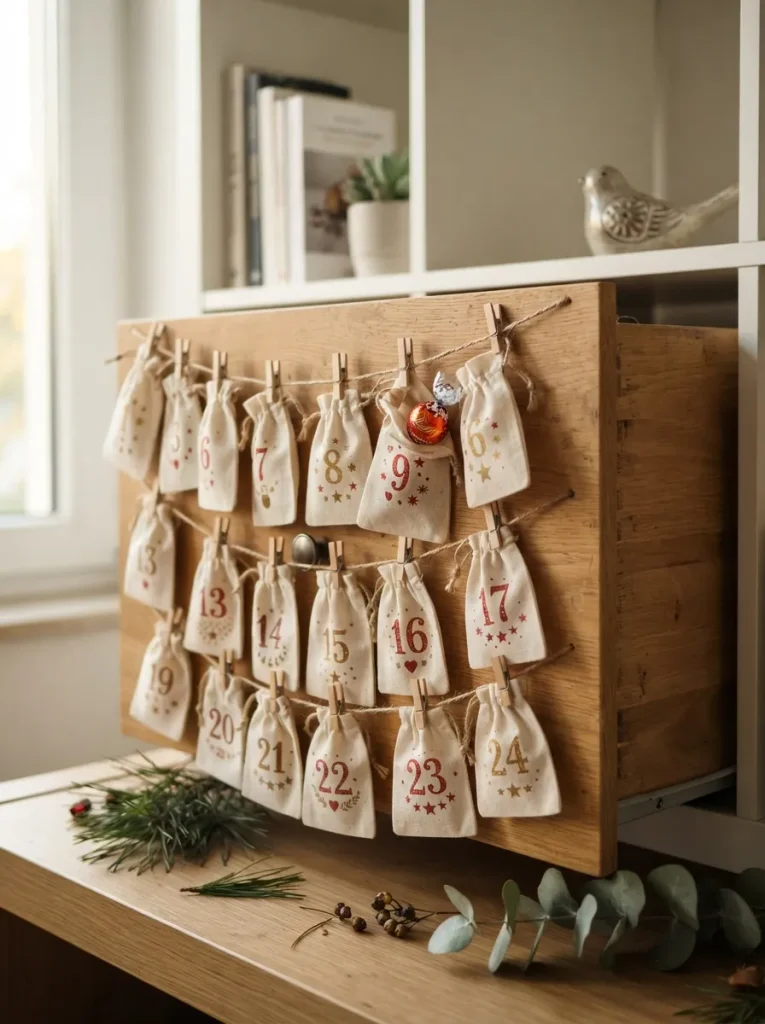
What it looks like: Twenty-four small numbered pouches hang in a row along the front lip of a pulled-open drawer, one for each day of counting down.
Why it works: Using the drawer’s front edge as a display rail means the advent calendar lives inside the furniture instead of taking up separate wall or counter space a different use of the same insert most people fill with paperwork the other eleven months.
How to copy it: Clip small numbered muslin pouches to a length of twine, then hang the twine across the open drawer front using two small removable hooks. Fill pouches the night before, not all at once, so the drawer stays flexible.
Best for: Families using their Kallax drawers as everyday storage the rest of the year.
Quick Win: Reuse the same twine and hooks every year only the pouches and their contents need refreshing, which keeps this idea nearly free after year one.
Here’s the idea most people skip because they think their village figurines don’t “match.” They’re wrong.
10. Mini Christmas Village Shelf
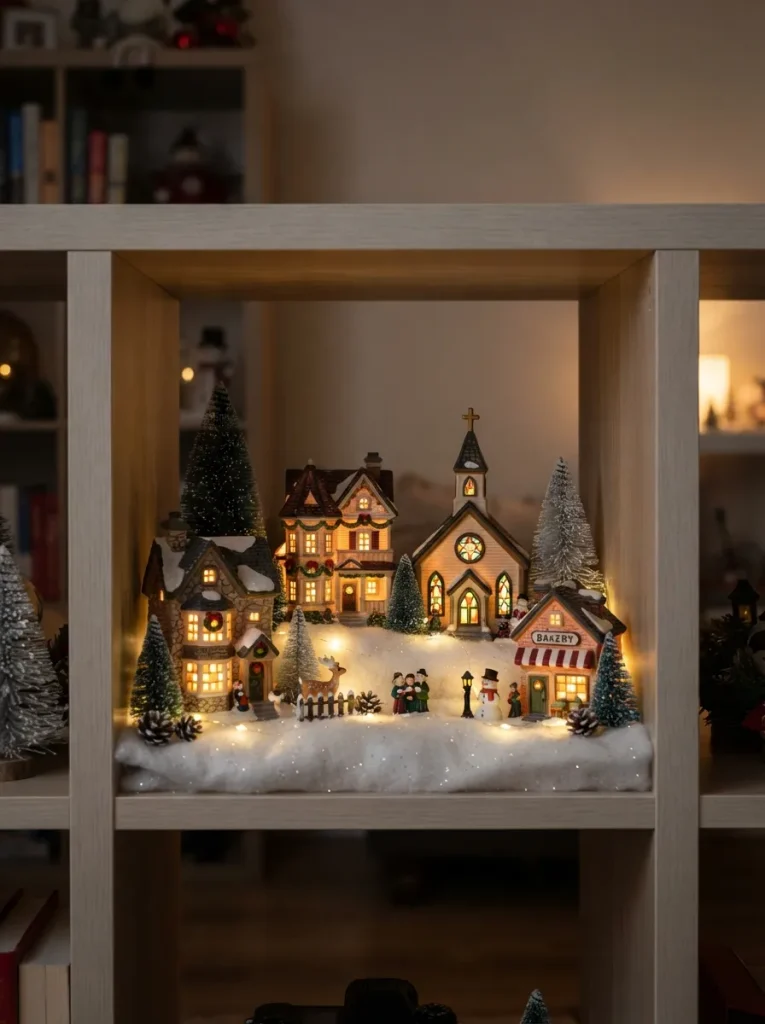
What it looks like: Tiny ceramic houses cluster together on a thin bed of faux snow, each one glowing faintly from a bulb tucked inside.
Why it works: Scale variation between the houses, not uniform size, is what makes a miniature village feel like a real street instead of a matched set from a box the same varied-scale principle carried over from shelf styling techniques used on this unit the rest of the year.
How to copy it: Cluster pieces in odd-numbered groups of three or five rather than spacing them evenly across the cube. Tight clusters with open space around them read as a scene; evenly spaced pieces read as a shelf display.
Best for: People who collect village pieces slowly, one or two a year.
Pro Tip: Battery tea lights inside each house last longer and run cooler than the tiny bulbs some villages ship with swap them out and the glow looks nearly identical.
11. LED Puck Light Glow Cubes
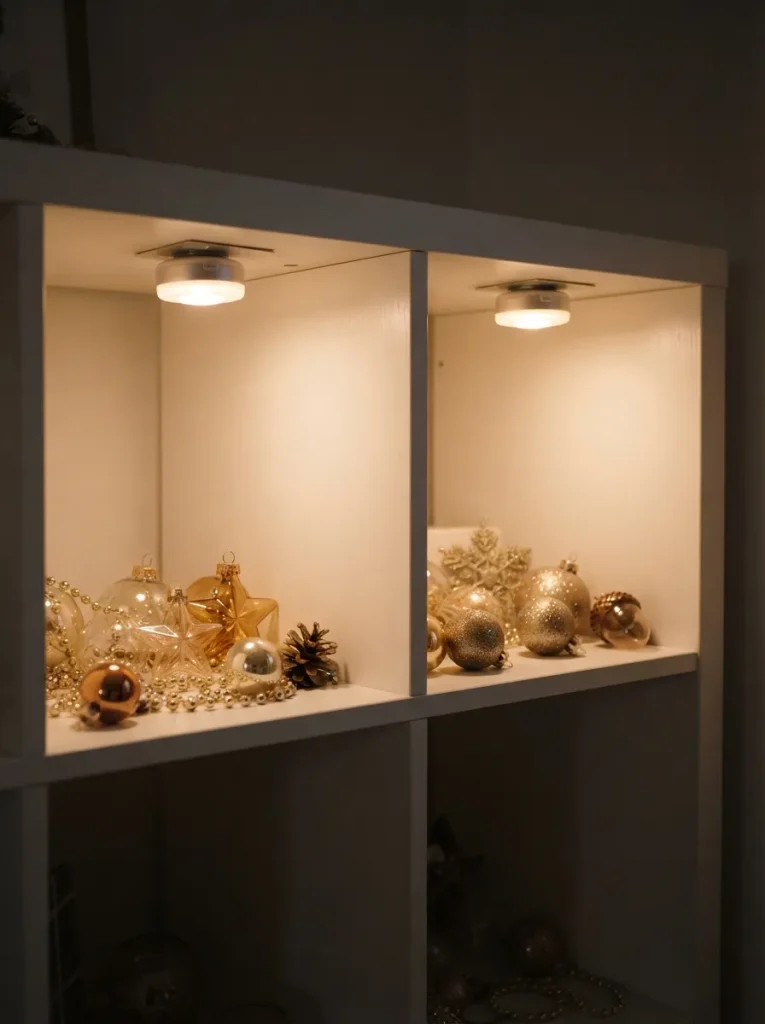
What it looks like: Two small puck lights tucked in the top corners of a cube throw warm pools of light down onto whatever’s displayed below, almost like a tiny gallery case.
Why it works: Top-down lighting is what real display cases use, and it’s the reason museum objects look more valuable than they might on a plain shelf. Applying that same light behavior to a Kallax cube instantly elevates whatever’s sitting in it.
How to copy it: Stick two battery-powered puck lights to the top interior corners, angled slightly inward toward the center of the cube rather than straight down. Warm white bulbs only cool white reads clinical against holiday decor.
Best for: Small apartments where a single well-lit cube can substitute for a whole mantel display.
Small-Space Tip: One lit cube reads as a focal point even in a studio apartment you don’t need to light the whole unit for it to feel decorated.
12. Velvet Stocking Rail Along the Top Edge
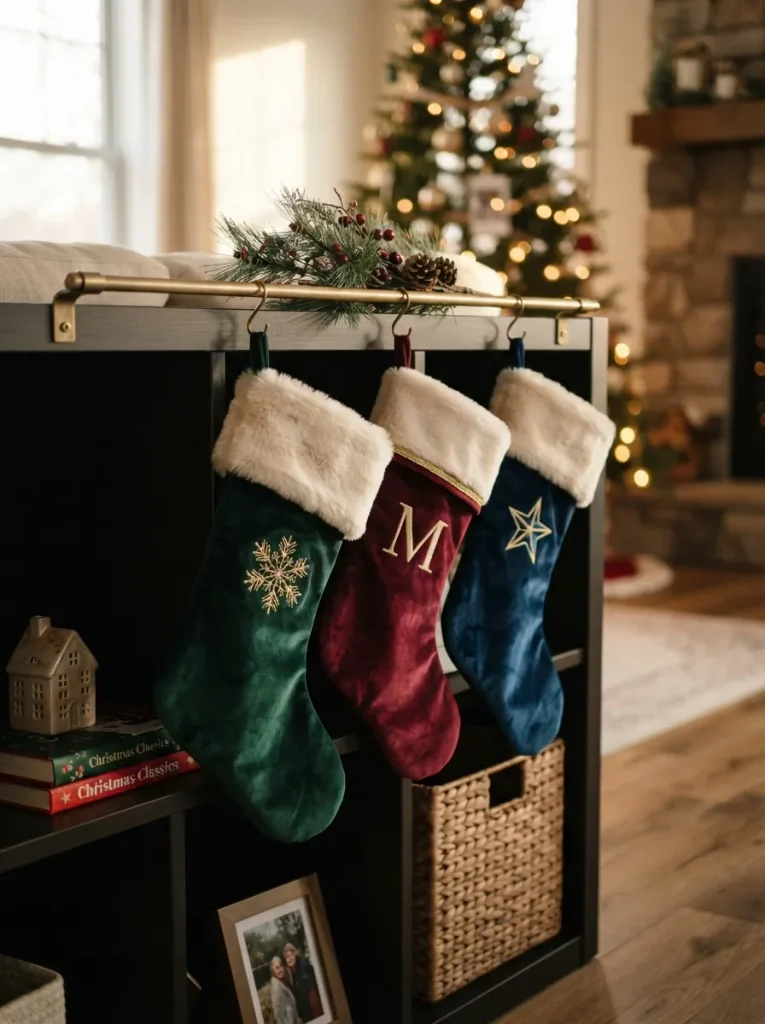
What it looks like: Velvet stockings hang from a slim brass rail along the top edge, doing the job a mantel would do in a house that doesn’t have one.
Why it works: A Kallax unit has a flat, sturdy top edge that’s a better hanging surface for heavy stockings than most people expect narrower than many fireplace mantels, but far more stable. Weight distributes evenly along the rail instead of tugging at a single hook.
How to copy it: Mount a thin brass or black rod using small screw-in brackets rather than adhesive hooks; filled stockings are heavier than they look and adhesive alone will eventually give way. Space stockings evenly with at least four inches between them.
Best for: Apartments and homes without a fireplace or mantel.
Mistake to Avoid: Adhesive hooks feel secure when the stocking is empty. Once it’s loaded with gifts, most lightweight hooks release overnight use hardware that’s actually screwed in.
This next one solves the fabric-covered cube problem nobody talks about.
13. Fabric Curtain Cube Inserts
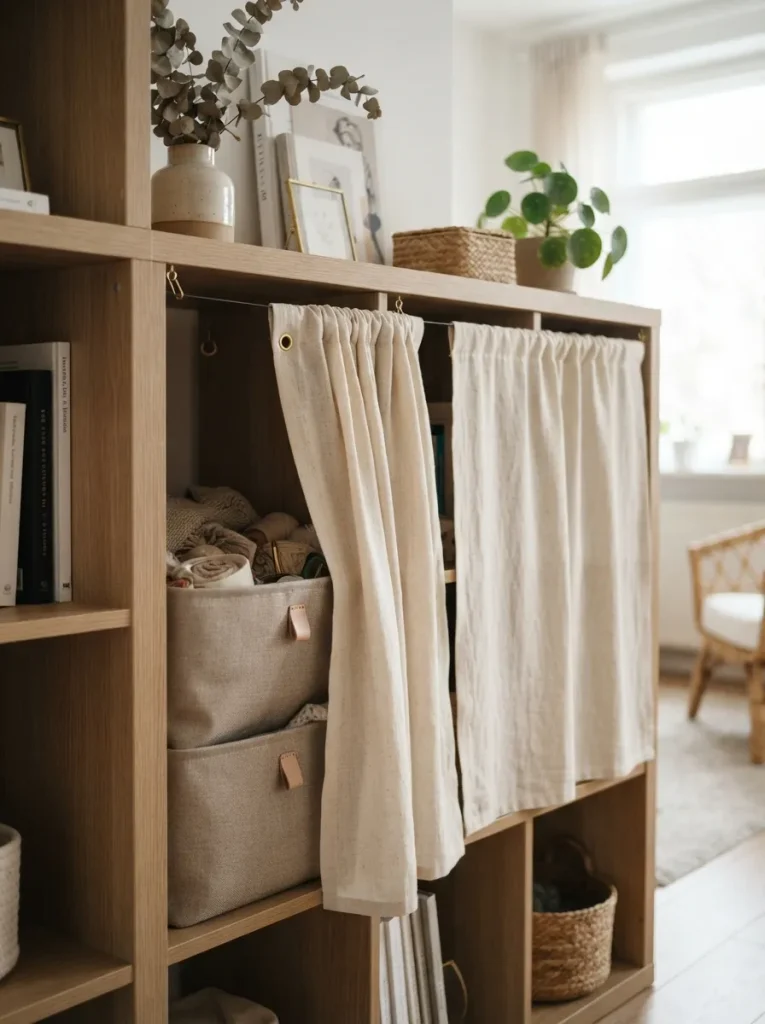
What it looks like: Small linen curtains hang across the front of two cubes on a thin wire, hiding whatever’s stored behind a soft fabric gather instead of a lid.
Why it works: Fabric fronts solve the visual noise problem that comes with mismatched bins instead of hiding clutter behind a dozen different containers, you hide it behind one consistent texture. It’s fully renter-friendly, too, which lines up with the same approach behind these no-drill hacks.
How to copy it: Mount a tension wire just inside the top lip of the cube using adhesive hooks, then gather a linen panel onto the wire with small curtain rings. Leave the panel loose enough to push aside easily a tight fit defeats the point.
Best for: Storing mismatched or ugly bins without buying new ones.
Important: Fabric fronts hide visual clutter, not physical clutter they still need actual organization behind them, or the curtain just becomes a bag for chaos.
| Product |
|---|
| Linen curtain panel, cube width |
| Tension wire kit |
| Small curtain rings |
| Adhesive ceiling hooks, no-drill |
| Fabric clips for gathering |
14. Deep Burgundy Bin Pulls with Ribbon Trim
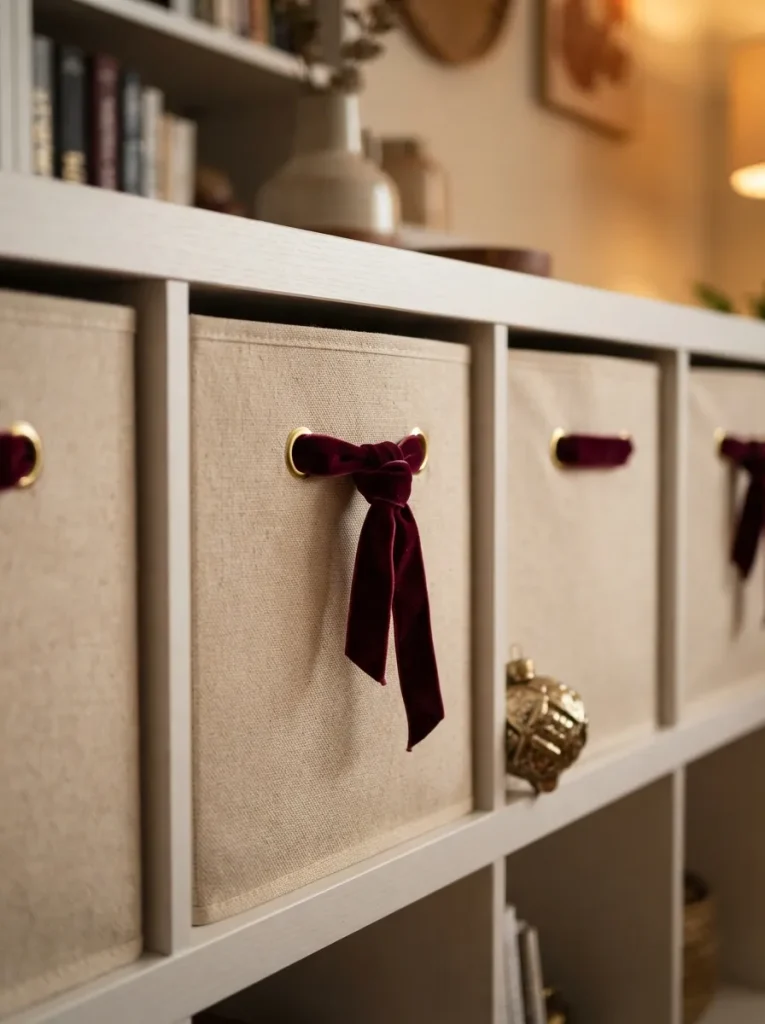
What it looks like: Plain canvas bins get a small upgrade a loop of burgundy velvet ribbon knotted through a grommet where a plastic handle used to be.
Why it works: Small hardware swaps are the cheapest way to make matched storage look custom rather than store-bought, and burgundy velvet reads as considerably more expensive than it costs. It’s a detail most people notice without being able to say why the bins look nicer.
How to copy it: Punch or use an existing grommet hole, loop 8 inches of ribbon through, and finish with a simple double knot rather than a bow bows sag and fray with repeated pulling.
Best for: Anyone upgrading plain canvas bins they already own instead of replacing them.
Styling Note: Match the ribbon color to one other accent in the room a throw pillow, a vase so the detail feels connected instead of random.
15. Gift-Wrap Station with Tool Dividers
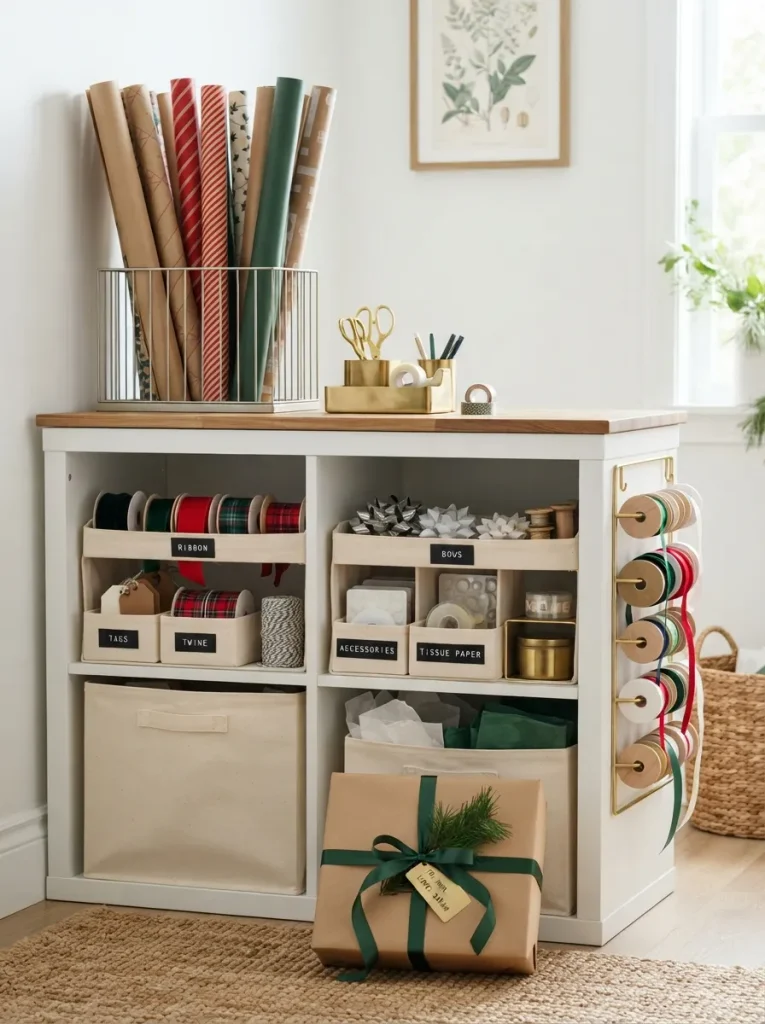
What it looks like: Two full cubes, divided into paper, ribbon, tags, and tools everything needed to wrap a gift lives in arm’s reach of itself.
Why it works: This is the idea that turns Kallax from passive storage into an actual workstation, which matters because wrapping supplies get used constantly through December, not just once. Grouping by function instead of color or size is what makes a station work, the same functional grouping used in craft closet setups you reach for “tape and scissors” as a unit, not separately.
How to copy it: Assign one full cube to paper standing upright, one half-cube to ribbon on a side rack, and a small caddy or drawer insert for scissors, tape, and a tag pen. Keep the caddy portable so it can move to wherever the actual wrapping happens.
Best for: Anyone who wraps more than a handful of gifts each year.
✅ Quick Setup Checklist:
- [ ] Measure the cube depth and choose a paper divider insert sized to fit
- [ ] Sort existing wrapping paper by occasion and discard anything under a quarter-roll
- [ ] Mount a ribbon rack to the inside wall of the adjacent cube
- [ ] Fill a small caddy with scissors, tape, and a tag pen, and label it
- [ ] Do a trial wrap of one gift to confirm everything’s within reach
The next idea is the reason renters love this unit so much.
My Views:
Here’s something most guides won’t tell you: the cube that looks best styled for Christmas is almost never the top one. On a full-size Kallax, the second row down carries the most visual weight in the room roughly eye level for most people standing nearby so that’s where glow, collectibles, and anything meant to be seen belong. Save the top row for flat, closed bins nobody’s meant to notice. I put all the pretty pieces up top on my first styling job, and every photo came out looking like the ceiling was decorated instead of the room.
16. Two-Cube Vertical Christmas Closet
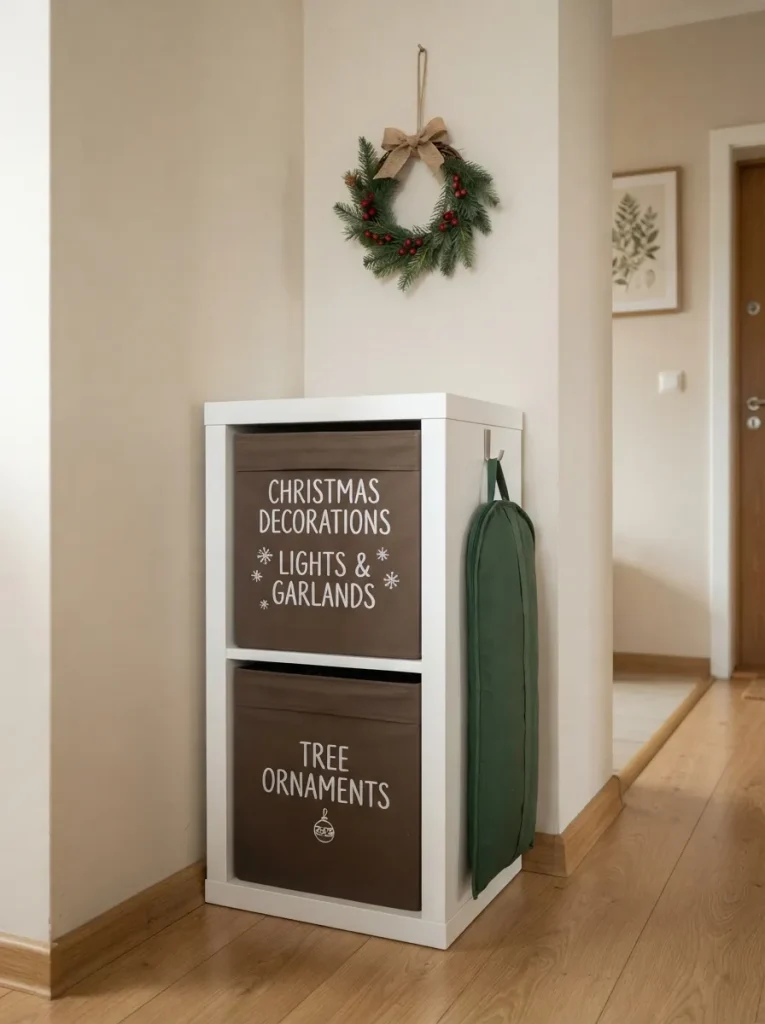
What it looks like: A slim, narrow Kallax tucked into a hallway corner holds an entire household’s Christmas storage in a footprint smaller than a single closet shelf.
Why it works: Vertical footprints solve the real problem small-space decorators have with holiday storage it’s not that they don’t want to decorate, it’s that there’s nowhere to put everything the other eleven months. A narrow unit uses wall space instead of floor space, the same logic behind most closet conversion projects on this unit.
How to copy it: Choose the narrowest configuration rather than trying to squeeze a wide unit into a tight hallway. Add a side-mounted hook for a garment bag holding tree skirts or table linens that’s dead space most people don’t use.
Best for: Apartments and small homes with no attic, basement, or spare closet.
Budget Version: A single narrow Kallax runs a fraction of the cost of a full-size unit and still holds an entire small household’s worth of holiday storage.
17. Gold Metallic Accent Cube
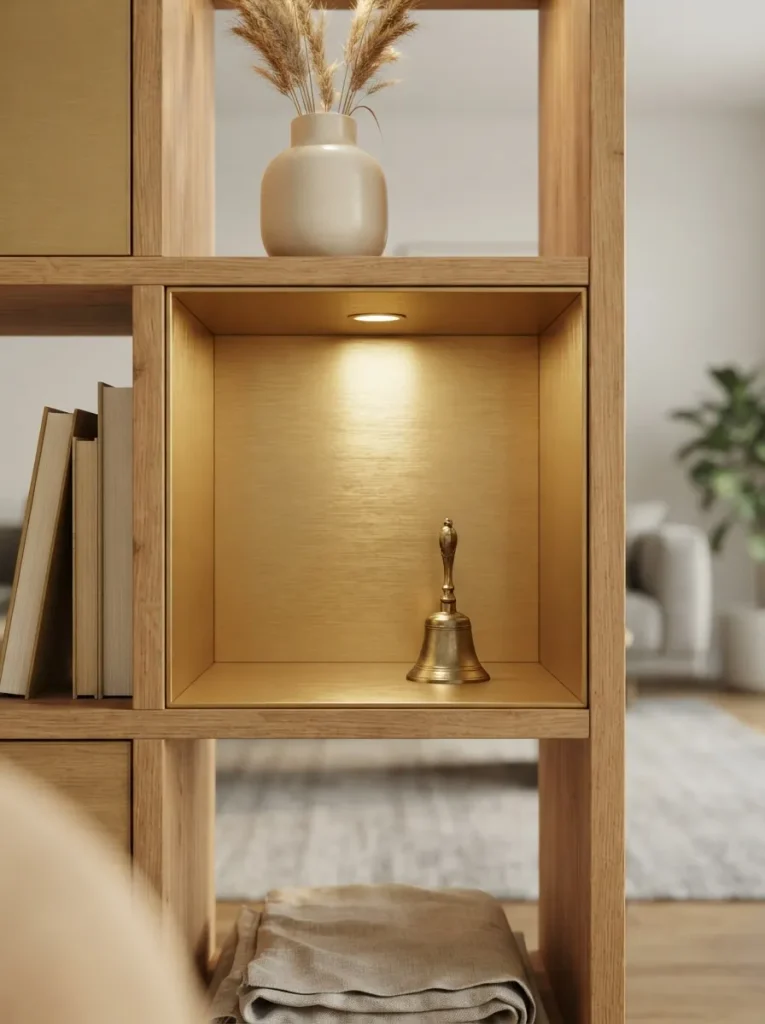
What it looks like: One cube out of sixteen gets a brushed gold metallic back panel the rest stay plain, which is exactly why that single cube pulls focus.
Why it works: Restraint is the actual design principle here. Metallic finishes overwhelm a room fast when overused, but isolated to one cube, gold reads as a deliberate accent rather than a theme. Visual weight concentrated in one spot is stronger than the same amount of shine spread thin.
How to copy it: Use metallic contact paper sized to one cube’s back panel only never more than one or two cubes on a full unit. Choose brushed rather than mirror-finish gold; mirror reads more disco than holiday.
Best for: People who want one statement moment without a full metallic theme.
Pro Tip: Contact paper applies easiest with a squeegee or old gift card, pushing air bubbles out from the center outward rushing this step is the difference between a clean finish and visible ripples.
| Product |
|---|
| Brushed gold metallic contact paper |
| Squeegee or plastic smoothing tool |
| Gold ornament for display |
| Small brass bell accent |
| Craft knife for trimming edges |
18. Room-Labeled Bin System
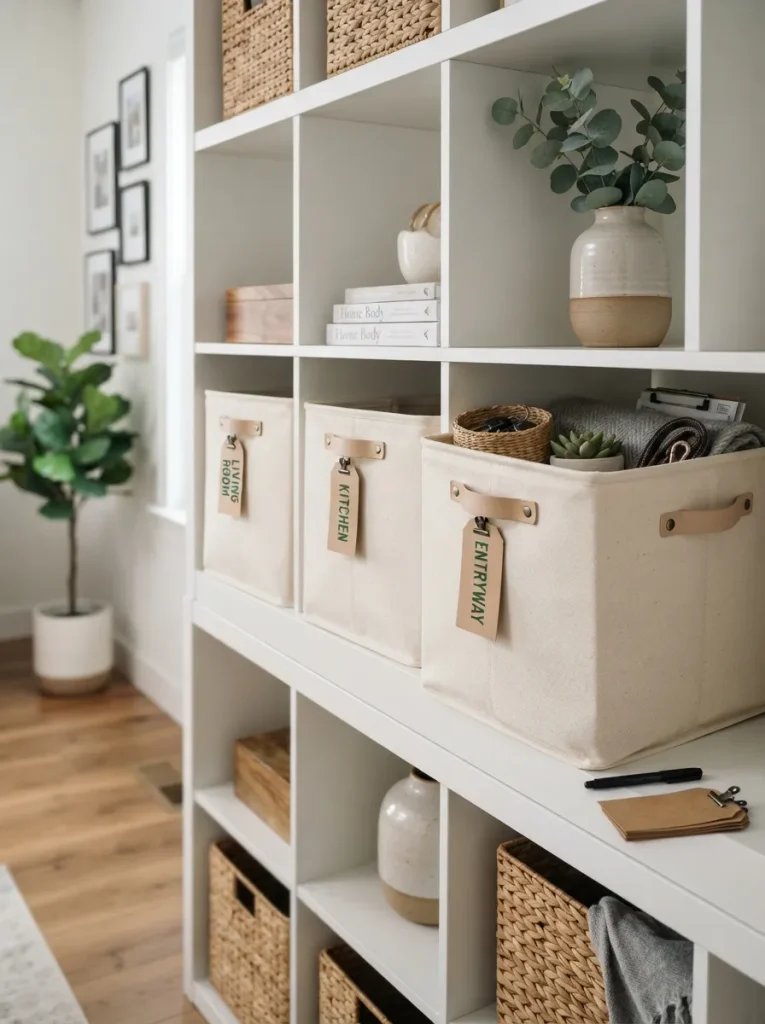
What it looks like: Bins are labeled by destination, not category entryway, kitchen, living room so decorating day becomes a delivery route instead of a sorting project.
Why it works: Most storage systems sort by object type, which sounds logical but creates more work at the moment it matters most: decorating day, when you need everything for one room at once. Sorting by destination front-loads that work into takedown, when there’s more patience for it similar zone-based thinking to under-stairs storage systems.
How to copy it: When taking decorations down each January, sort directly into room-labeled bins instead of one generic “Christmas” bin. It takes the same amount of time during takedown and saves real time during setup.
Best for: Larger homes decorating multiple rooms each year.
Quick Win: Relabel bins the day you take decorations down, not the day you put them up you’ll remember what’s in them.
Two more ideas left and the last one solves the no-mantel problem for good.
19. Holiday Bar Cart Pairing
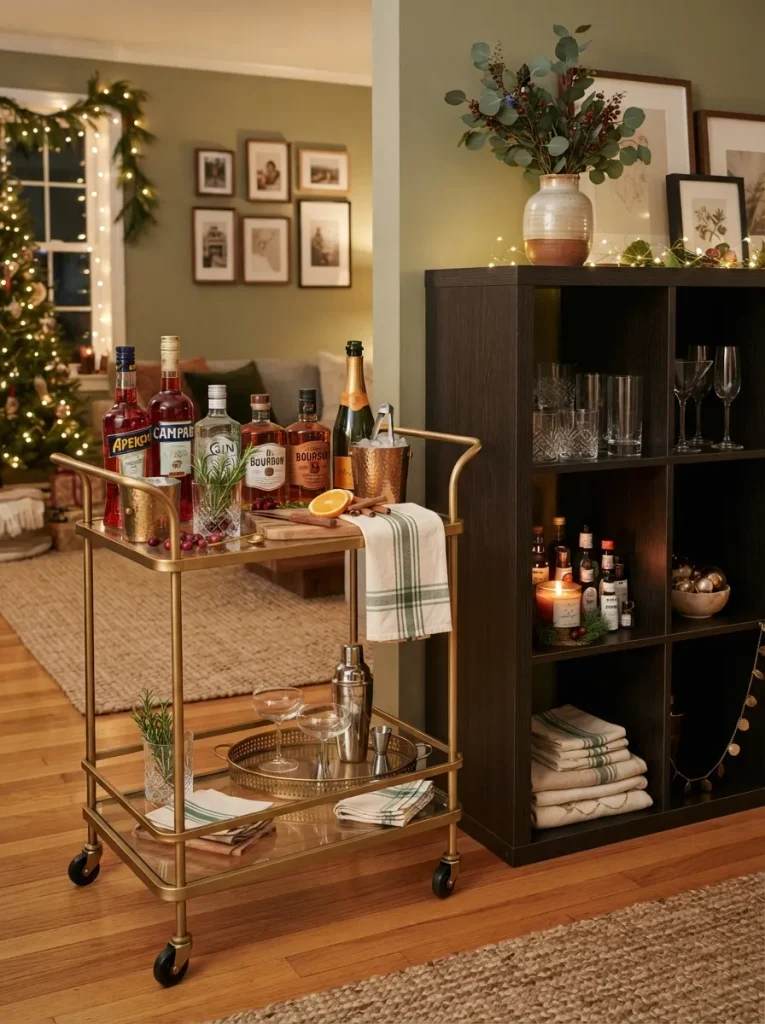
What it looks like: A small bar cart sits flush against the end of the Kallax unit, with matching glassware storage tucked into the cube directly behind it.
Why it works: Pairing furniture by function, not just proximity, turns two separate items into one cohesive entertaining zone similar to how a coffee bar setup uses the same unit for a different daily ritual. Guests read the pairing as one intentional station instead of two unrelated pieces of furniture.
How to copy it: Position the cart so its top surface lines up close to cube height, and dedicate the adjacent cube entirely to backup glassware and bottles rather than mixing it with unrelated storage.
Best for: People who host during the holidays and want a self-serve drink station.
Mistake to Avoid: Mixing everyday pantry items into the same cube as bar supplies makes the whole station look unfinished the moment a guest opens it looking for a mixer.
20. No-Mantel Garland + Lights Display
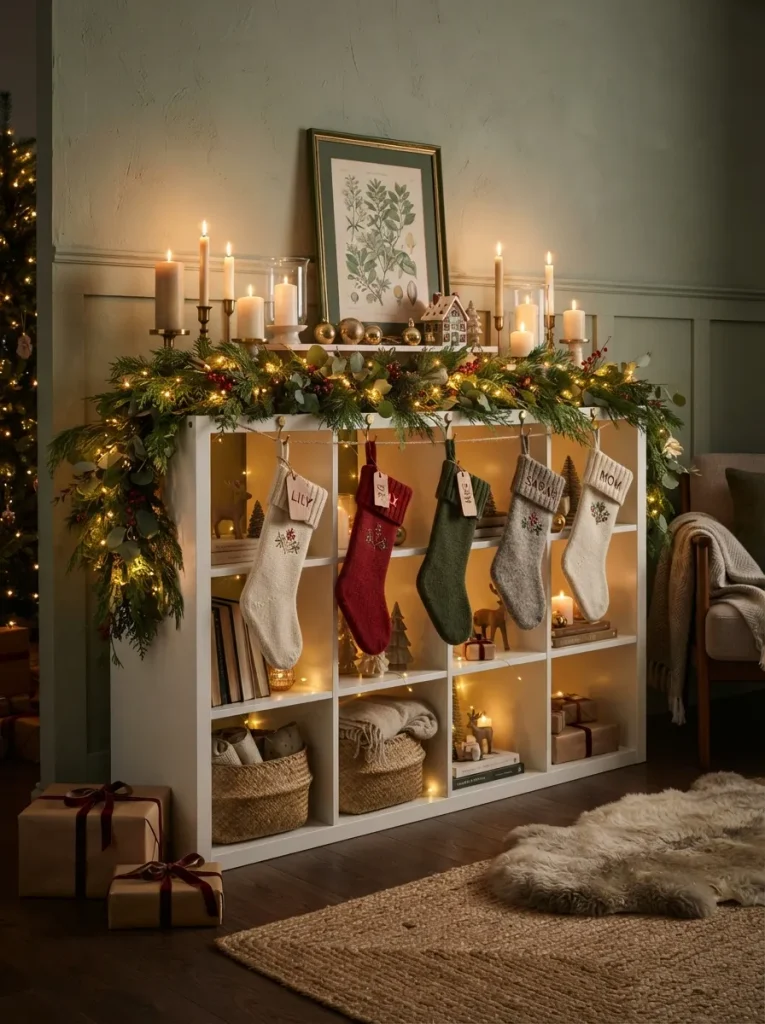
What it looks like: Garland, lights, candles of varying height, and hanging stockings turn the top of the Kallax into everything a mantel would hold just without the fireplace underneath.
Why it works: This idea layers nearly every technique from this list into one display, which is exactly what a real mantel does: it’s never one decoration, it’s several working together at different heights. Height variation among the candles is what keeps it from looking flat.
How to copy it: Layer three elements minimum: garland along the base, lights woven through the garland rather than laid separately, and at least two candle heights on top. Add stockings last, after the rest is arranged, so their spacing responds to what’s already there.
Best for: Homes without a fireplace that still want a traditional focal display.
Styling Note: Odd-height candle groupings one tall, two short read more natural than matched pairs. Matched pairs look purchased as a set; uneven ones look collected over time.
How to Start Your IKEA Kallax Christmas Storage Transformation
What I’ve found with real spaces is that ornament bins should always be the first purchase, before a single string of lights gets touched. Buy clear, cube-matched bins in one style and stick to it, because a matched set stacks predictably and a mismatched one never quite fits back in place by January. That first system is what protects what you own; everything else is decoration.
The mistake almost everyone makes is buying open bins for the top row because they’re easier to grab. Open storage on a Kallax collects a full year of dust before it’s touched again, and it leaves fragile ornaments exposed to whatever gets tossed on top during the January cleanup rush. Lidded bins only, even on the row you use most.
Three things under $50 that make an immediate difference: a roll of kraft paper labels with a ball of cotton twine for bin tagging, a warm white battery-powered fairy light strand that needs no outlet, and a fabric roll-divider insert for wrapping paper. None require tools or drilling.
A full conversion bins, labels, one lighting element, and basic styling takes about a weekend afternoon, roughly three to four hours once the bins arrive. Budget $60 to $150 depending on how many cubes get the full treatment; a starter version with just ornament bins and labels can be done for well under $50.
Ready to Create Your Dream Kallax Christmas Setup?
Twenty ideas, and not one of them required buying new furniture just color, texture, a little light, and bins that actually fit the cubes you already own. None of this needs to happen in one weekend; even converting two cubes this year is a real improvement over a taped-shut cardboard box in the attic.
Start today with the smallest possible move: pull one cube’s worth of ornaments into a single labeled bin before doing anything else. A Kallax that’s organized for the holidays doesn’t just look better in photos it makes the fifteen minutes of tree-trimming chaos each December feel more like a tradition and less like a scavenger hunt. Pin your favorites now, especially the ones using bins or baskets you might already own, since most of these ideas can be started with what’s already in the house.
You Might Also Like
- 12 IKEA Kallax New Year Reset Ideas for Post-Holiday Storage
- 15 IKEA Kallax Craft Corner Ideas for Wrapping Every Gift at Home
- 10 Christmas Closet Organization Ideas Beyond the Kallax Unit