17 IKEA Kallax Entryway Ideas for Narrow Hallways (That Actually Work)
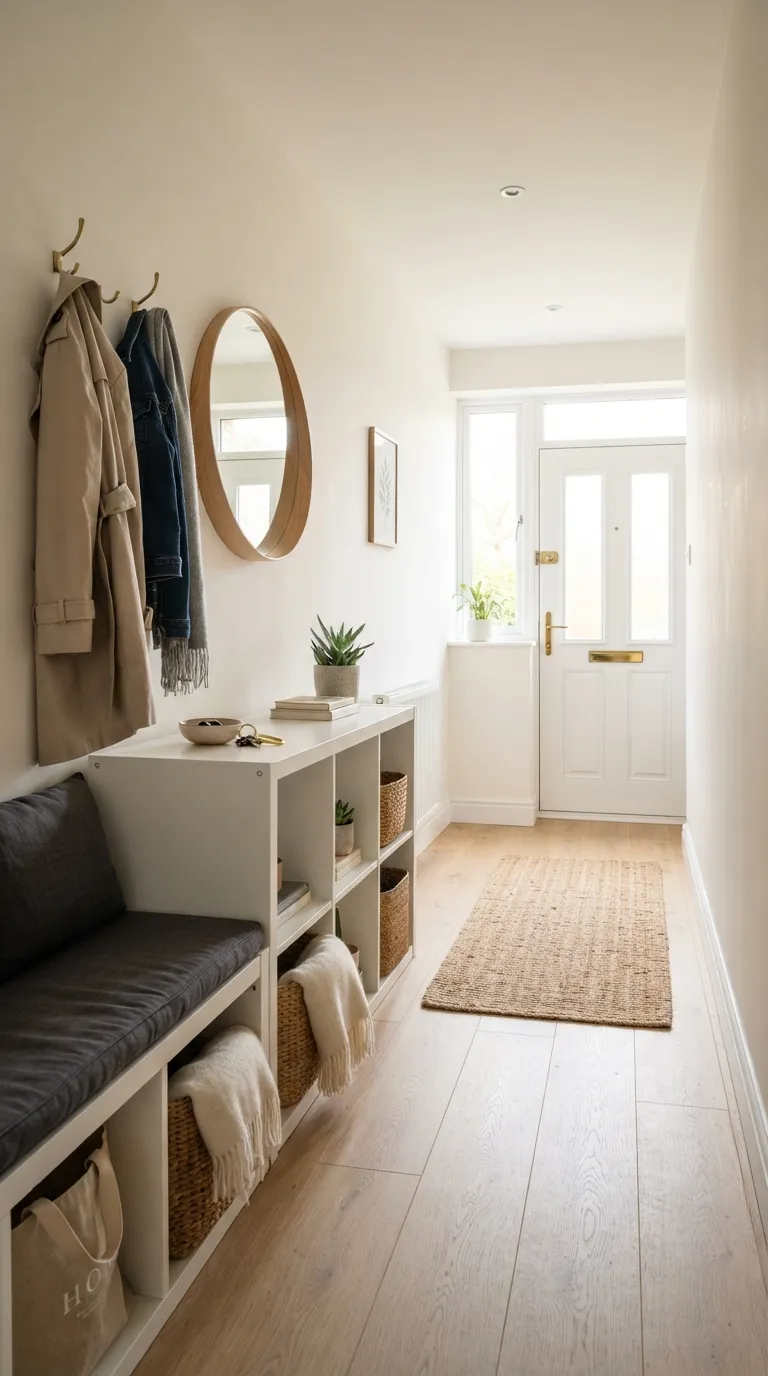
A narrow hallway doesn’t leave you much room for storage until you turn one wall into a Kallax entryway station. Below are 17 real ways to use the IKEA Kallax shelving unit to catch shoes, coats, mail, and everything else that piles up by your front door.
There’s a specific kind of relief in walking through a front door that isn’t blocked by a shoe pile. A narrow hallway can either feel like a chute you rush through, or a small, working system that quietly does its job every single day. Done right, a Kallax entryway doesn’t just store things it shortens the gap between “walking in exhausted” and “everything has a spot.” That’s the whole point.
Jump To
- Why IKEA Kallax Entryway Storage Makes Such a Difference
- 17 IKEA Kallax Entryway Ideas for Narrow Hallways
- How to Start Your Kallax Entryway Transformation
- Ready to Create Your Kallax Entryway?
Why IKEA Kallax Entryway Storage Makes Such a Difference
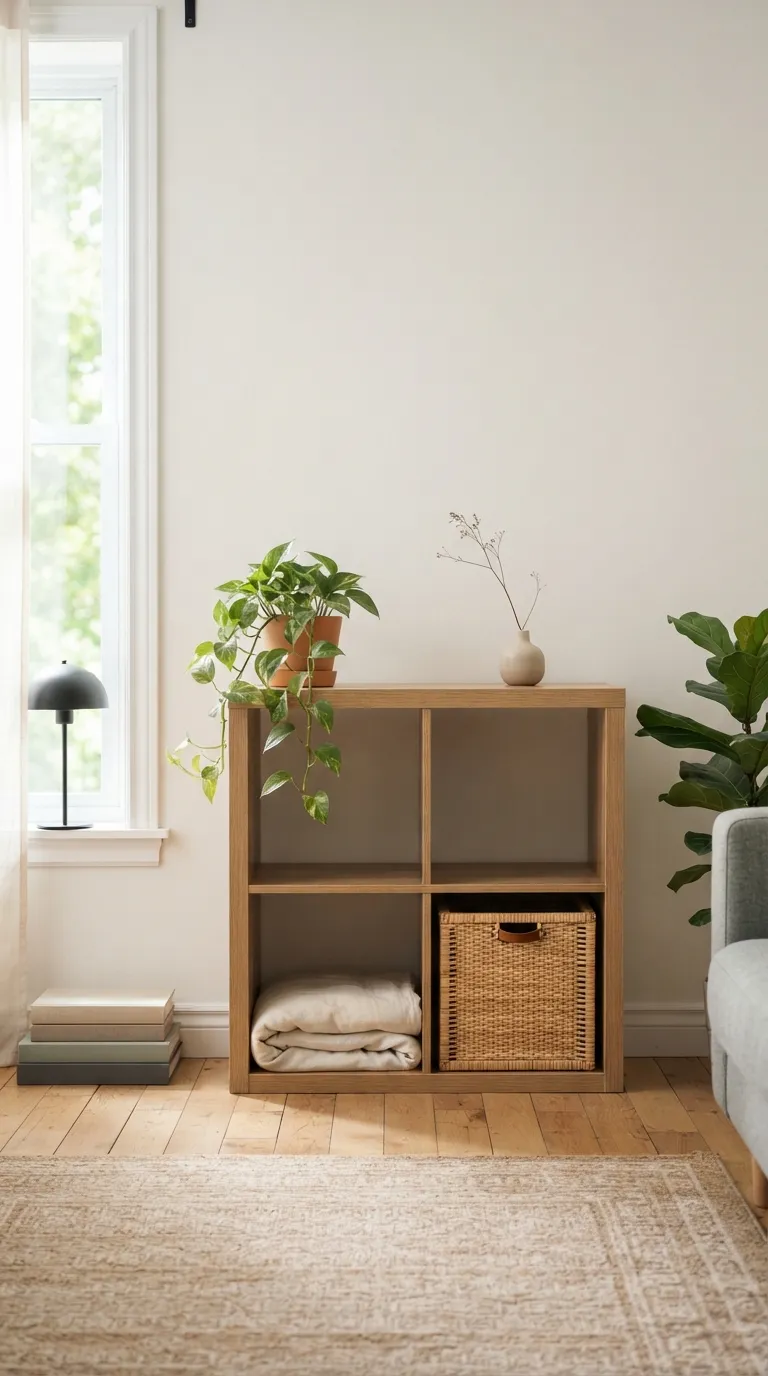
The Kallax system works in an entryway because it’s modular a 2×2 cube gives you a bench-height surface with two open cubes, while a 1×4 turns a narrow wall into vertical storage without eating floor space.
In a tight hallway, floor space is the real currency, so anything that stacks up instead of out earns its spot over a deep console table. Matte white or black finishes hide daily scuffs better than laminate wood-tone doors. If you’re starting small, prioritize a shoe zone first it’s the item that causes the most floor clutter, fastest.
| Best starting point | A 2×2 Kallax turned bench-height, positioned along the wall opposite the door swing |
| Biggest impact area | Shoe storage — it causes the most daily floor clutter |
| Budget to start | $80–$150 for one 2×2 unit, cushion, and baskets |
| Time to complete | A weekend for one wall; 2–3 weekends for a full system with lighting and hooks |
17 IKEA Kallax Entryway Ideas for Narrow Hallways
1. The Blocked-Door Kallax Bench Fix
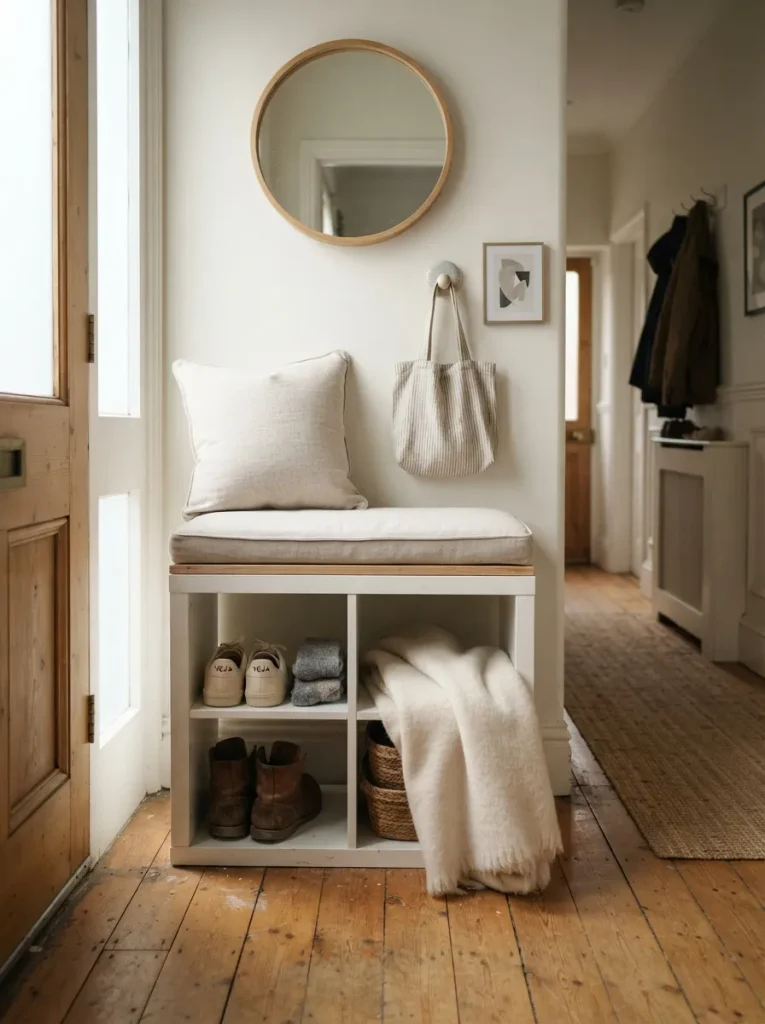
What it looks like: Low, quiet, and completely out of the door’s swing path.
Why it works: A door that swings inward is the biggest constraint in a narrow hallway, and most storage furniture ignores it placing a 2×2 Kallax (roughly 30 inches tall) flat against the wall opposite the hinge side keeps the full door arc clear while still giving you a seat.
How to copy it: Measure your door’s full swing radius before buying anything, then place the Kallax so its front edge sits at least 2 inches outside that arc. Add a 2-inch foam cushion cut to the unit’s exact top dimensions. If you want more ways to style the surface once it’s assembled, our Kallax styling ideas roundup covers finishing touches for the top and sides.
Best for: Anyone whose front door currently hits a shoe pile, bag, or bench every time it opens.
Pro Tip: Most people cut cushion foam to the outer edge of the Kallax leave a half-inch overhang instead so it doesn’t slide when you sit down.
What You’ll Need:
| Product |
|---|
| 2×2 white cube storage bench unit |
| Bench-height foam cushion insert, custom-cut |
| Woven storage baskets, cube-fit size |
| Non-slip rubber cushion grips |
| Door swing stopper hardware |
2. One Wall Only, Never Both
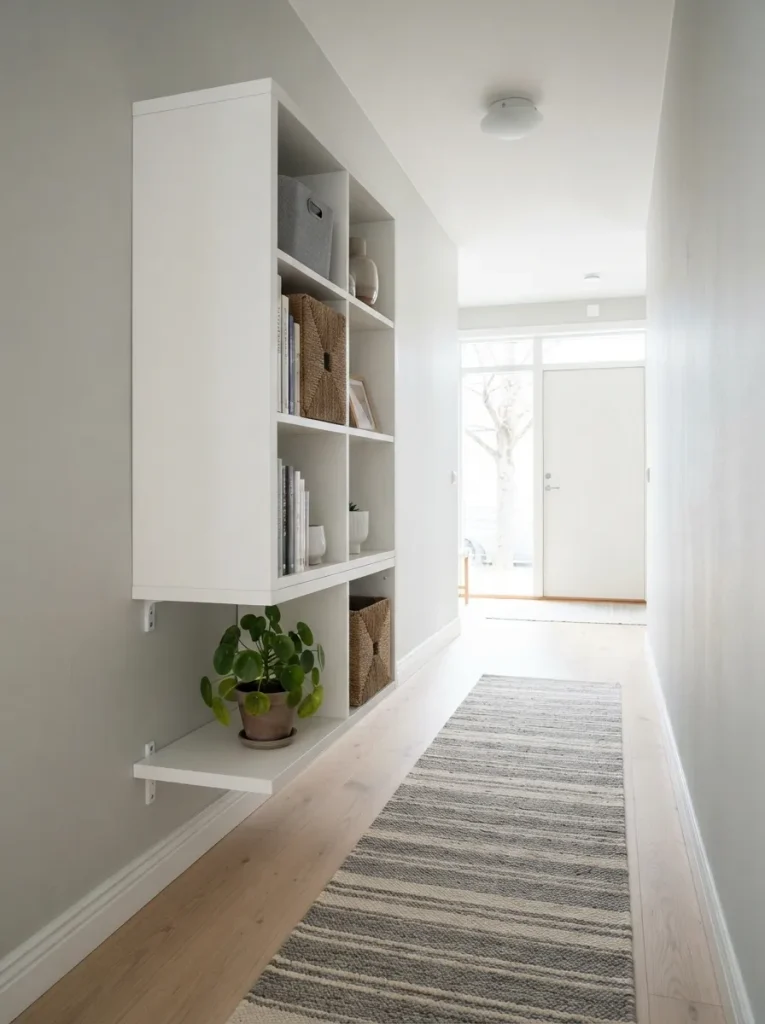
What it looks like: A single tall unit on one wall, corridor left fully open.
Why it works: A narrow hallway usually measures 36 to 42 inches wide, and storage on both walls turns it into a genuine pinch point one 2×4 Kallax on a single wall keeps at least 30 inches of clear walking width, the minimum most building codes recommend for a hallway.
How to copy it: Measure your hallway’s total width first, subtract 30 inches for clearance, and that’s your maximum unit depth a standard Kallax is 15.75 inches deep, so it fits most halls this way. This same width math shows up in our guide to dorm room ideas that make small rooms bigger, if your entry hall shares square footage with a tight bedroom or landing.
Best for: Hallways under 45 inches wide, or households with strollers or wheelchairs.
Small-Space Tip: Mount the unit a half-inch off the floor on furniture risers the visible gap under it reads as more floor space than it actually is.
3. Warm White Over Bright White
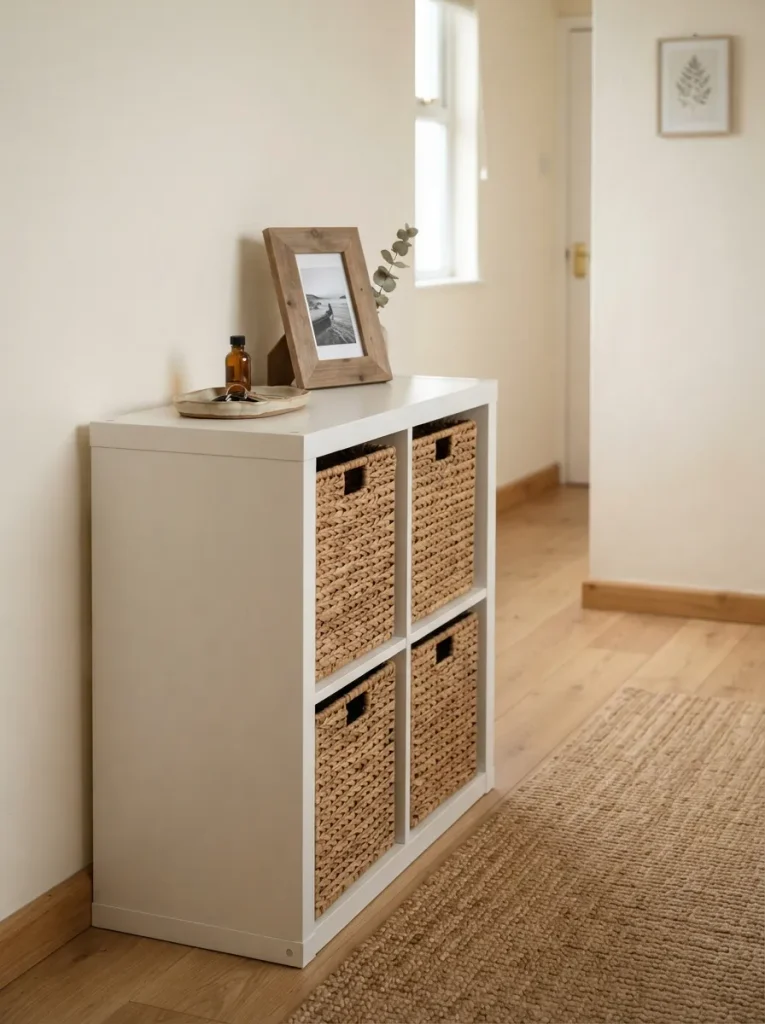
What it looks like: Soft and warm instead of stark and clinical.
Why it works: Bright white Kallax’s stock finish reflects blue-toned light and can feel cold in a hallway that already gets limited natural light. A warm white or cream-painted version absorbs light more evenly, so the space reads calmer instead of sterile.
How to copy it: Lightly sand the factory laminate, prime with a bonding primer made for melamine, then paint with two coats of a warm white like Benjamin Moore’s Simply White.
Best for: Hallways with only one small window or no natural light at all.
Styling Note: Skip pure white hardware here brushed brass or matte black pulls keep warm-white cabinetry from looking flat.
Up next: the one basket mistake that makes a Kallax entryway look messier than no storage at all.
4. Baskets That Actually Fit the Cube
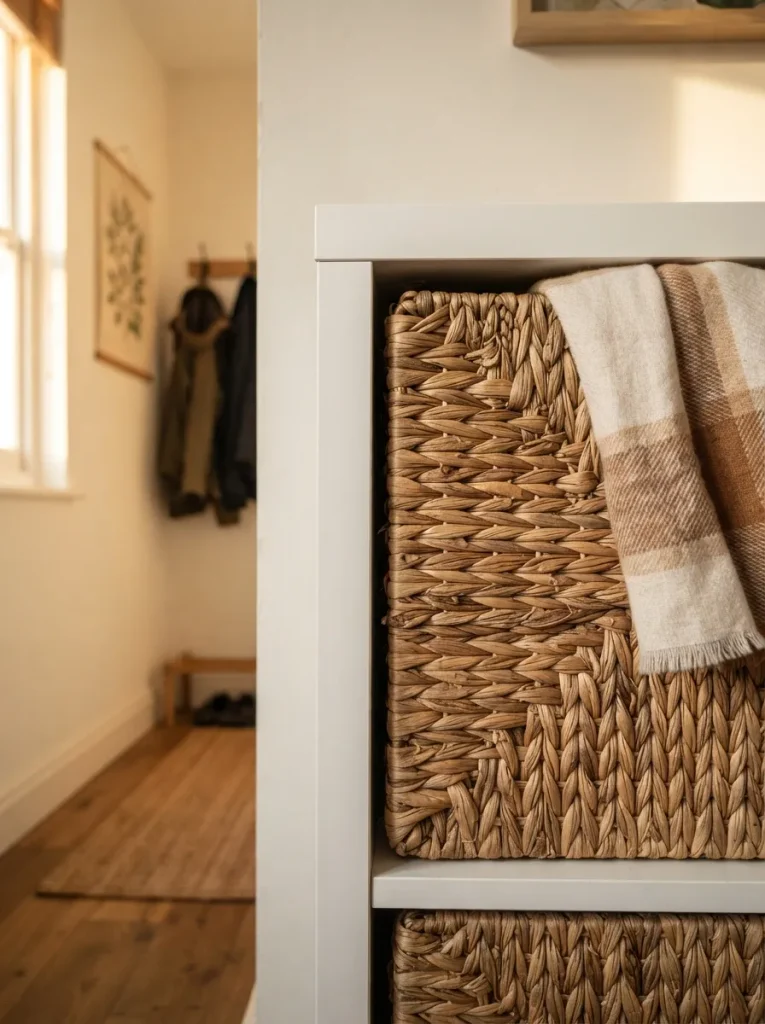
What it looks like: Baskets that sit flush, not baskets that stick out or sag inward.
Why it works: A standard Kallax cube opening measures 13×13 inches, and most off-the-shelf baskets are sized for generic shelving. Using baskets built for 13×13 openings keeps the front face flat, which matters more in a narrow hall where every basket edge sits at elbow height as you walk past.
How to copy it: Measure your actual cube opening before ordering, not the outer unit dimensions, and choose baskets rated exactly 13×13 or 12.75×12.75 for a snug push-fit. We cover more cube-fit storage options, including bin styles beyond baskets, in our Kallax craft room storage ideas guide.
Best for: Anyone who’s already bought baskets that don’t sit flush and is wondering why the wall looks cluttered anyway.
Warning: Baskets sized “13 inches” from big-box stores are often the outer basket size, not the opening-fit size they’ll jam halfway in and stick out 2 to 3 inches, exactly the width you don’t have to spare in a narrow hall.
What You’ll Need:
| Product |
|---|
| Seagrass woven storage bin, cube-fit 13×13 |
| Felt storage bin with handles, cube-fit |
| Canvas drop-front storage bin |
| Labeled fabric bin set |
5. A Light Strip Along the Base
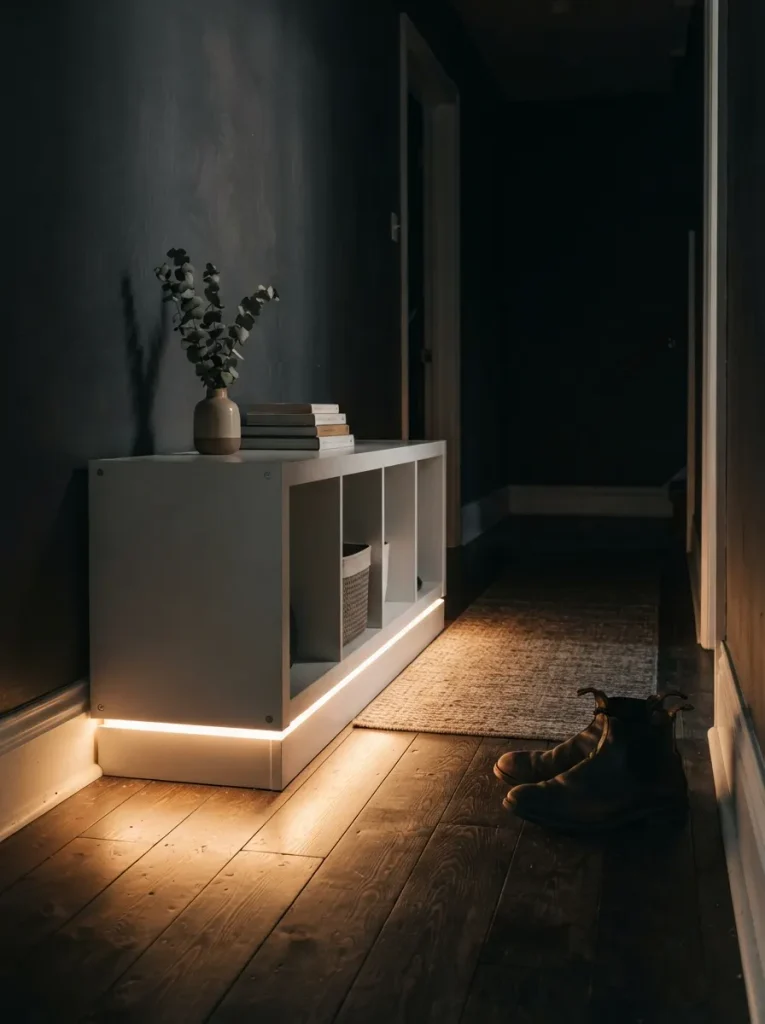
What it looks like: A soft glow along the floor instead of one harsh overhead bulb.
Why it works: Narrow hallways often rely on a single ceiling fixture that leaves the floor near the Kallax in shadow exactly where shoes, cords, and bag straps become trip hazards. A battery or plug-in LED strip mounted under the unit’s base lights the floor without adding another switch to remember.
How to copy it: Stick a motion-activated LED strip to the underside front edge of the Kallax, angled slightly toward the floor rather than straight down, so light spreads instead of pooling in one spot.
Best for: Households that come home after dark, or hallways with no nearby light switch.
Quick Win: Battery-powered motion strips need zero wiring a full installation takes under 10 minutes.
6. Bins Labeled by Person, Not Category

What it looks like: Each bin belongs to a specific person, not a vague category.
Why it works: “Mail” and “keys” bins tend to become catch-all dumping grounds because nobody’s specifically responsible for them, while a bin labeled with an actual name creates ownership. People sort their own bin far more reliably than a shared one a small shift that keeps the whole system from collapsing within a month.
How to copy it: Assign one bin per household member plus one shared “outgoing mail” bin, and use a label maker rather than handwriting so it looks intentional, not makeshift. The same labeling logic works well beyond the entryway see our closet organization ideas for more on assigning storage by person instead of category.
Best for: Families with kids old enough to manage their own backpack and shoe routine.
Budget Version: Skip matching labeled bins entirely a $6 label maker and any baskets you already own does the same job for under $10.
The next idea is one most people overlook entirely and it costs almost nothing.
7. A Bench That Doubles as Boot Storage
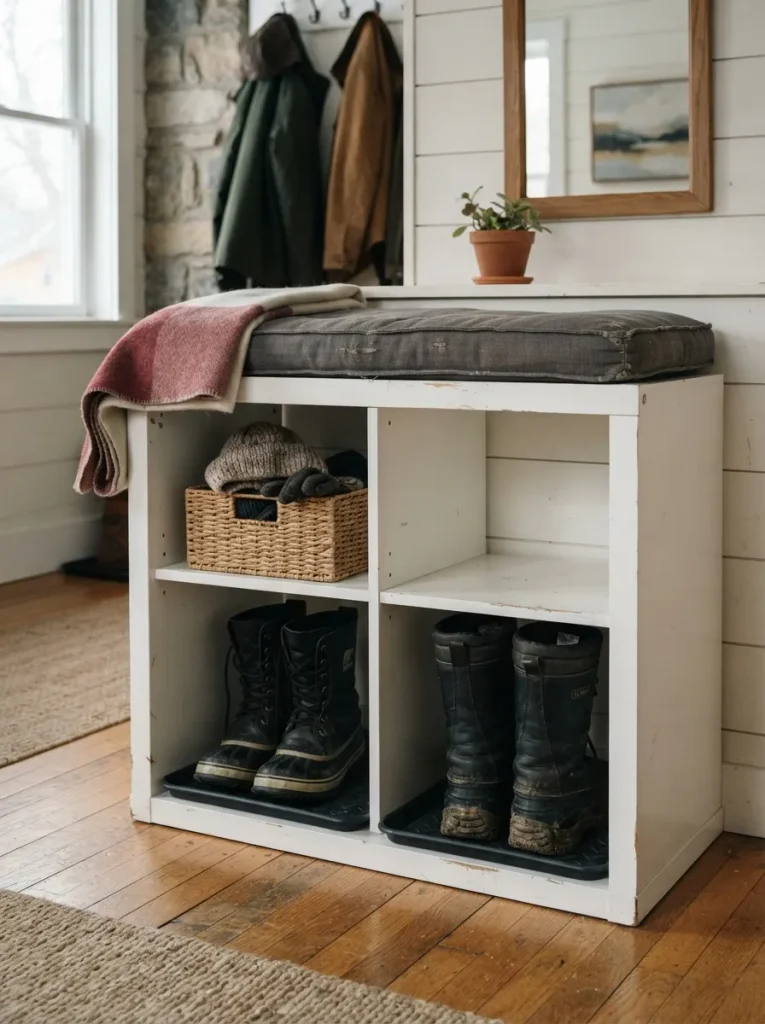
What it looks like: Tall boots standing upright inside the open cubes, cushion doing double duty above.
Why it works: A 13-inch cube opening is tall enough to fit most boots standing up, which solves a problem baskets can’t boots laid sideways in bins take up nearly double the horizontal space, and in a narrow hall that horizontal space is what you’re actually short on.
How to copy it: Skip bins in the bottom two cubes entirely and let boots stand directly on a rubber boot tray liner, which also catches melted snow or rain runoff before it reaches the laminate. If you’re renting and can’t drill into studs for this setup, our Kallax no-drill hacks guide has anchoring workarounds.
Best for: Cold-climate households dealing with wet boots most of the year.
Important: Rubber boot liners left wet against laminate for weeks can warp the cube’s interior panel dry the liner separately once a week instead of leaving it in place permanently.
8. Two-Tone: Dark Below, Light Above
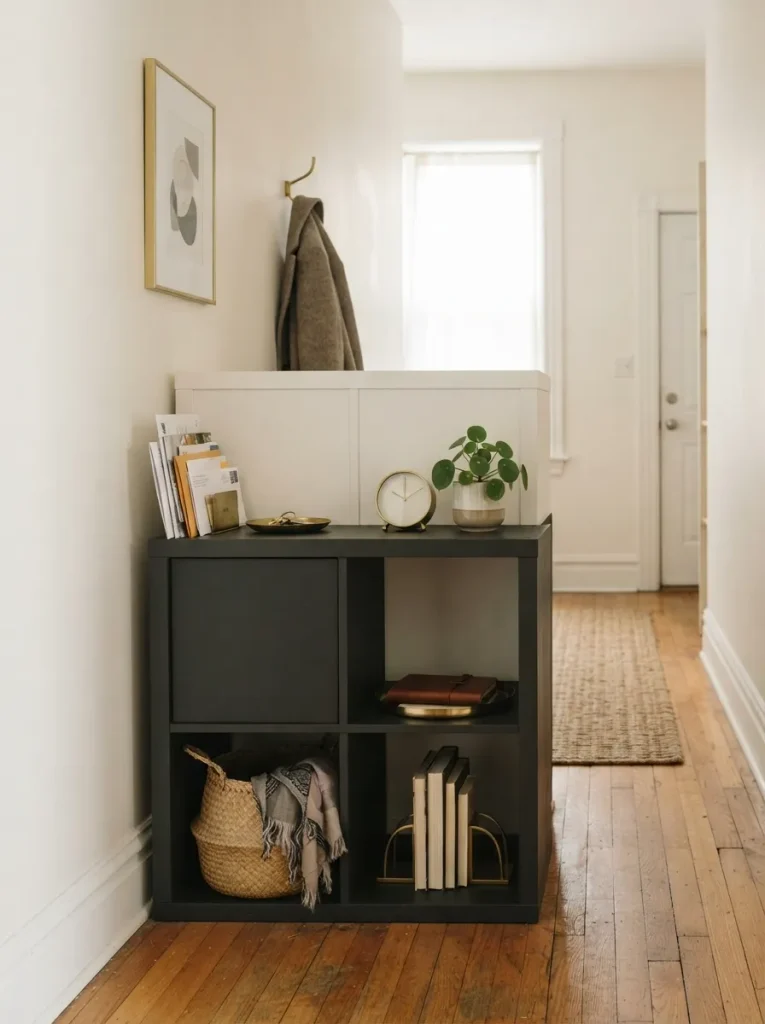
What it looks like: Dark cubes at scuff-height, lighter cubes above eye level.
Why it works: Scuffs, dirt, and dropped bag straps happen almost exclusively in the bottom third of any entryway unit. A darker tone in that specific zone hides daily wear without repainting or replacing panels a maintenance decision disguised as a color choice.
How to copy it: Paint only the bottom row of cubes in matte black or deep charcoal, taped off cleanly at the shelf seam, and leave the top row in the factory white or a lighter tone.
Best for: Households with kids, muddy shoes, or pets that track dirt in daily.
Mistake to Avoid: Painting in a satin or gloss finish here shows every scuff more, not less matte or eggshell hides marks far better on high-contact panels.
9. A Wood Cap for Your Kallax Top
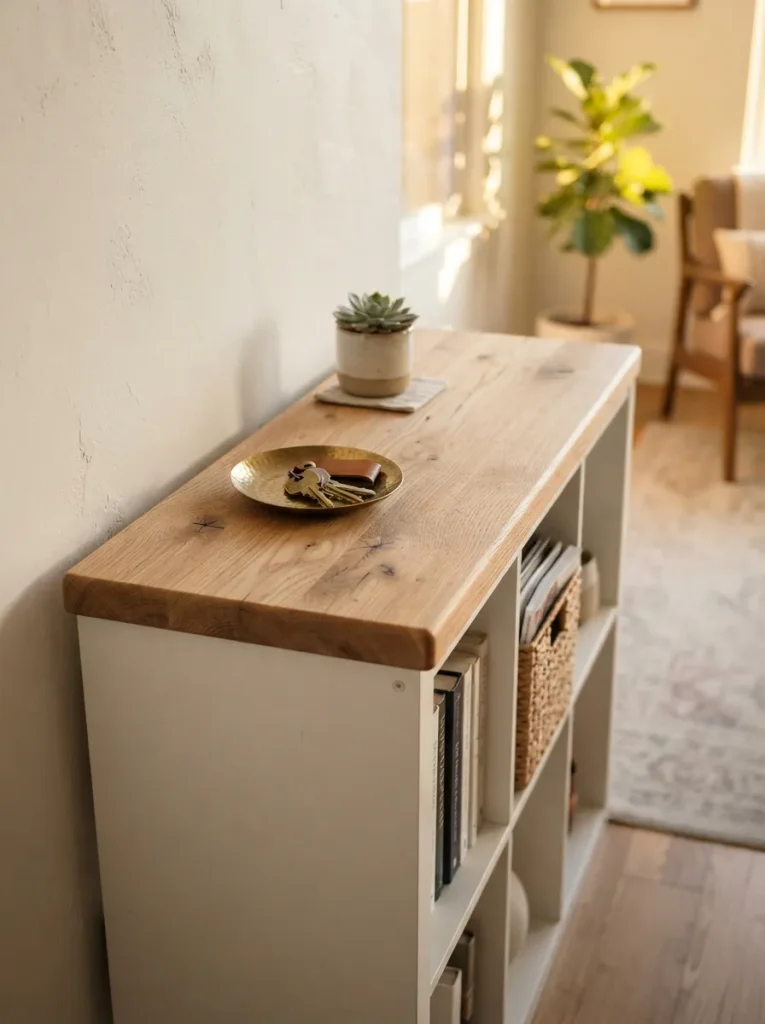
What it looks like: A solid wood surface instead of the bare particleboard top edge.
Why it works: The factory top of a Kallax is a thin laminate edge that chips easily and doesn’t hold up to keys, bags, or mail set down daily. A cut-to-size wood cap, even an inexpensive one, adds a real work surface and covers the seam where most visible wear starts.
How to copy it: Order an unfinished oak or birch panel cut to your unit’s exact top dimensions plus a half-inch overhang on the front edge, then attach with wood glue and finishing nails from underneath. For more ways to dress up a Kallax top beyond a wood cap, our Kallax bookshelf styling ideas guide has additional finishing touches.
Best for: Anyone using the top of their Kallax as a daily drop zone for keys and mail.
What You’ll Need:
| Product |
|---|
| Unfinished oak project panel, cut-to-size |
| Wood glue, exterior-grade |
| Finishing nail set |
| Matte wood sealant |
This next one surprised even experienced decorators the first time they tried it.
10. Sconces Instead of an Overhead Fixture
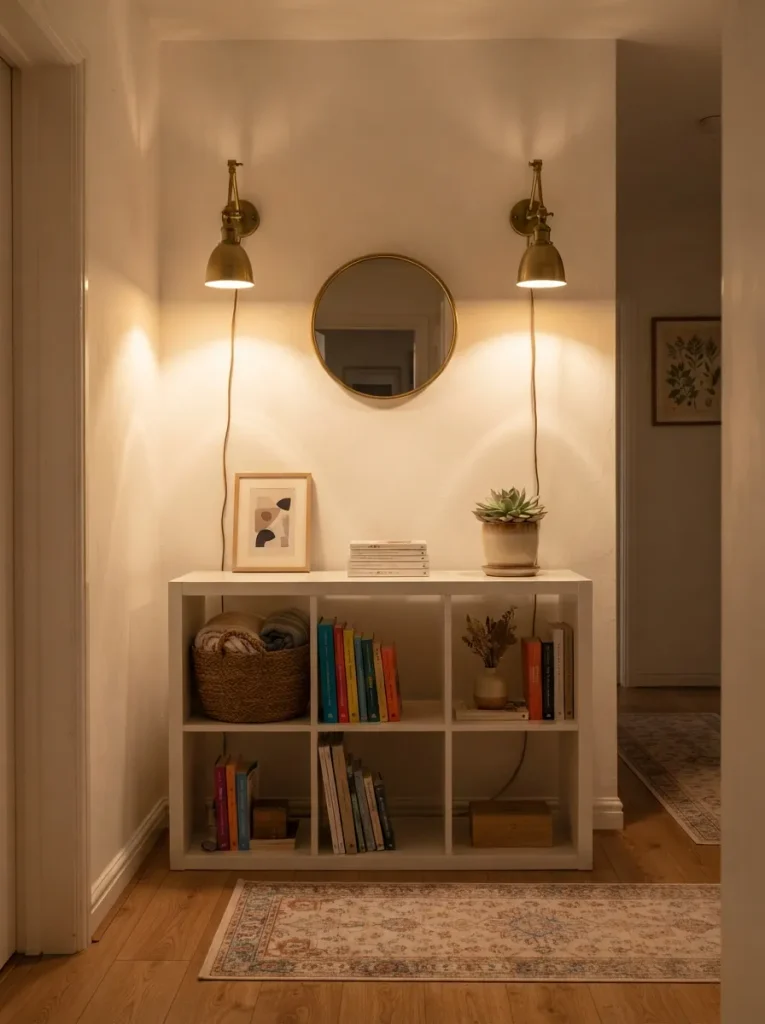
What it looks like: Light coming from the sides at eye level, not from directly overhead.
Why it works: A single overhead fixture in a narrow hallway creates flat, even light that makes the space read smaller. Two sconces mounted at eye level on either side of the Kallax create depth through shadow and highlight the same principle gallery lighting uses to make narrow corridors feel intentional rather than leftover.
How to copy it: Mount sconces roughly 60 inches from the floor, spaced to flank the Kallax rather than centered above it, and choose a warm 2700K bulb over a cooler white.
Best for: Hallways with existing wall outlets or anyone comfortable with basic hardwiring.
Pro Tip: Battery-operated sconces with a similar look exist now and avoid an electrician entirely check the wattage rating matches before buying, since some battery versions run dimmer than their plug-in equivalents.
11. Hooks Above, Not Instead Of
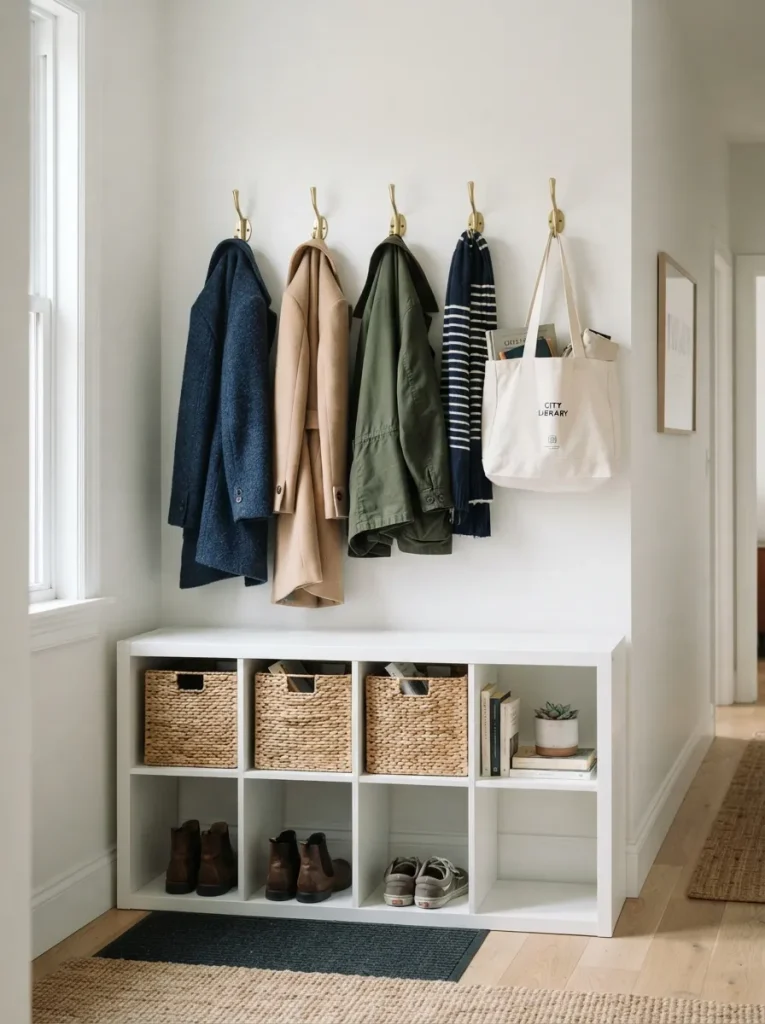
What it looks like: Coats hanging above, cubes doing separate work below.
Why it works: Hooks alone leave coats piling on the floor once the row fills up, and a Kallax alone leaves nowhere for outerwear. Mounting a hook rail 14 to 16 inches above the top of the unit uses the dead wall space neither piece addresses on its own.
How to copy it: Space hooks 6 inches apart, mounted into studs where possible, and keep the rail’s total width no wider than the Kallax below it so the wall composition stays aligned.
Best for: Multi-person households where coats are the most common floor clutter.
Quick Win: A single hook rail with 5 hooks installs in under 20 minutes with just a stud finder and a drill.
Up next: the trick that makes even a narrow hall feel wider without moving a single wall.
12. Turn One Kallax 1×4 Vertical
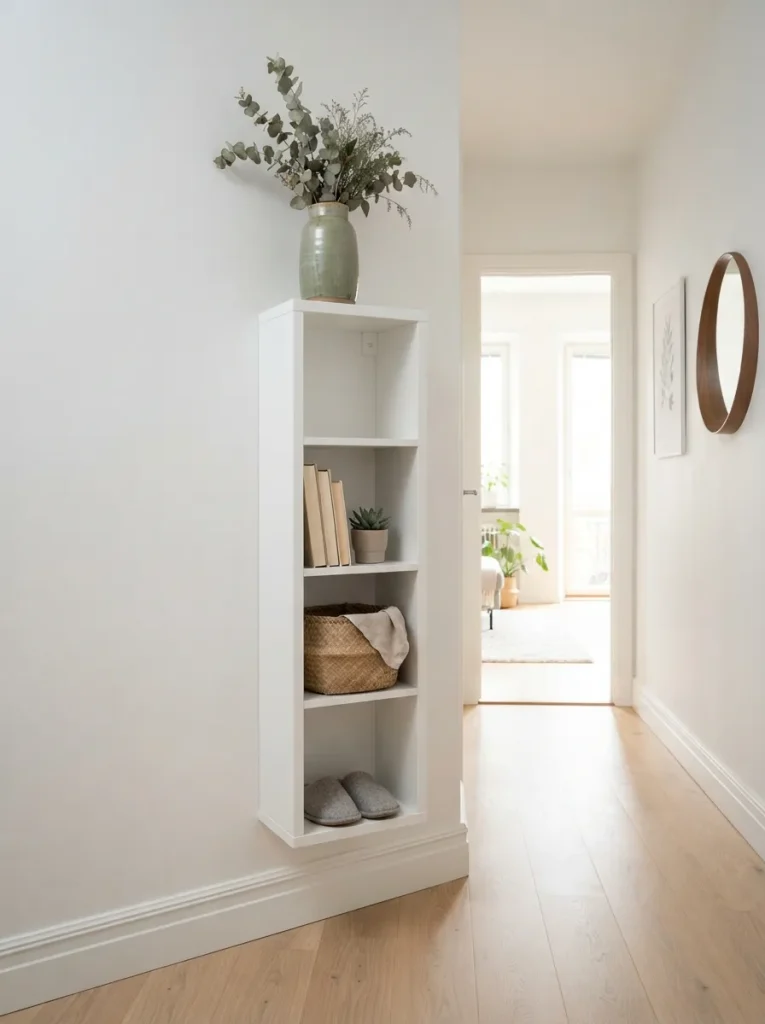
What it looks like: Storage that climbs the wall instead of running along it.
Why it works: A 1×4 Kallax turned vertically occupies the same 15.75-inch depth as any horizontal configuration but adds height instead of length, which matters in hallways under 8 feet long where a horizontal 2×4 would eat nearly a third of the available wall run.
How to copy it: Anchor the unit to studs with an anti-tip bracket, since a tall narrow unit has a higher center of gravity than a low, wide one. This vertical-over-horizontal approach shows up again in our Kallax dorm room ideas, where floor space is just as limited.
Best for: Very short entry halls where floor length is more limited than wall height.
Small-Space Tip: Leave the top cube empty or nearly empty a visually “light” top makes the whole vertical run feel less like a wall of storage closing in.
This next one is a quiet fix, but it’s the one guests notice first.
13. Black Kallax as a Grounding Base
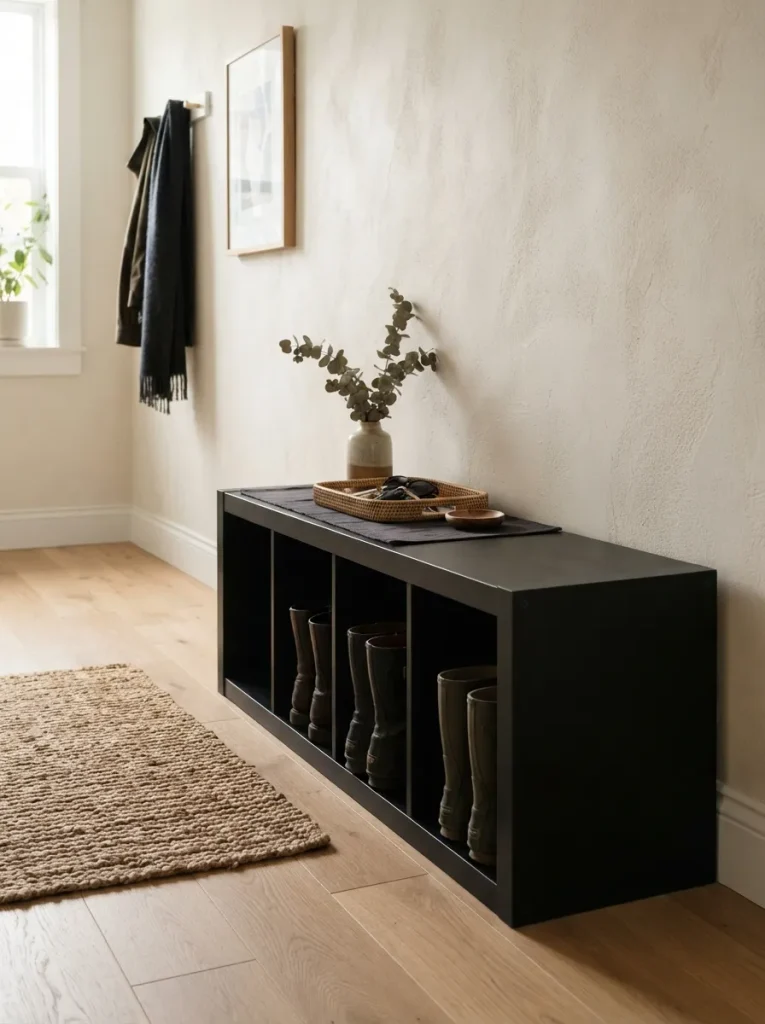
What it looks like: A dark anchor piece against light walls, not blending in but not competing either.
Why it works: An all-white unit against a white wall can visually disappear in a narrow hall, which removes a design anchor the eye needs. A matte black base gives the hallway a clear starting point, and matte finishes hide scuffs noticeably better than gloss black, which shows every scratch under hallway traffic.
How to copy it: Choose the factory black-brown Kallax finish over painting white to black, since factory laminate resists scuffing better than most DIY paint jobs will over daily use.
Best for: Hallways painted white or a pale neutral that need a visual anchor point.
Important: Gloss black finishes show dust and fingerprints far more than matte if you’re set on black, confirm the specific finish before ordering, since IKEA’s black-brown option is matte by default.
My Views:
In my experience, the biggest mistake in narrow entryways isn’t the storage piece at all it’s leaving a 3-inch gap between the Kallax and the wall corner because the hallway wasn’t perfectly square. That gap collects dust, shoes slide behind it, and it reads as unfinished. Measure both the top and bottom of the corner before installing, not just one point older homes especially are rarely square, and a unit that fits flush at the floor can still leave a gap higher up.
14. Fabric Inserts Over Solid Bins
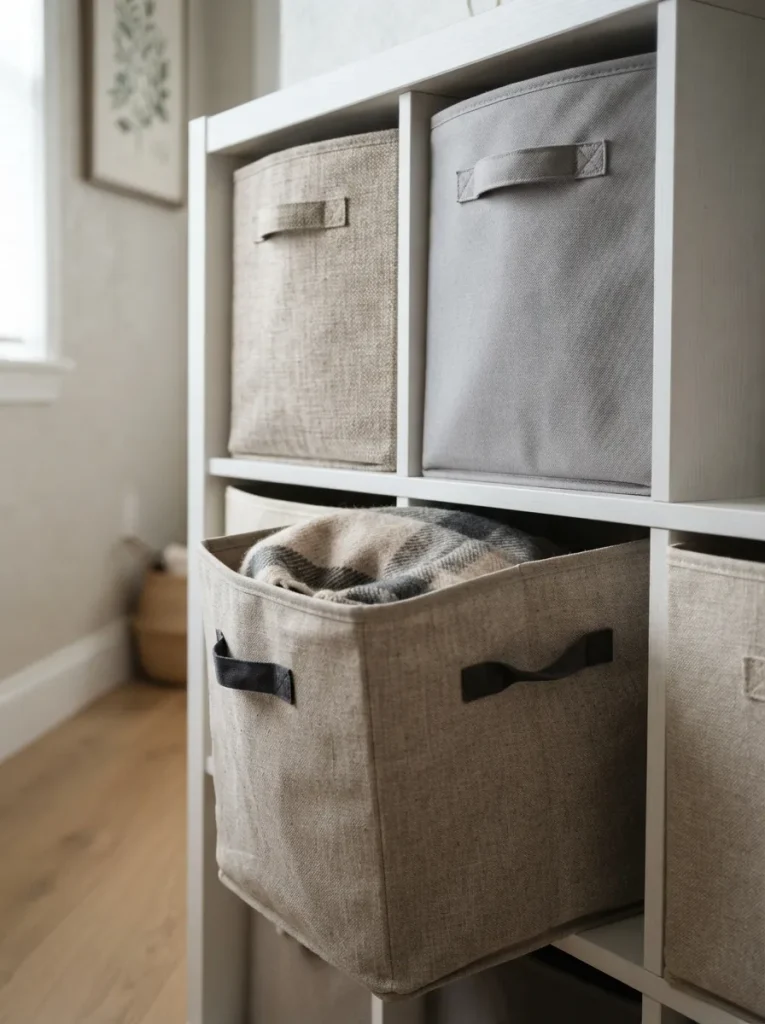
What it looks like: Soft-sided bins that collapse flat when empty instead of rigid boxes that always take up the same space.
Why it works: A narrow hallway rarely has anywhere to store an extra empty bin, so fabric inserts that fold flat solve a problem rigid baskets create. When a cube sits half-empty between seasons, a collapsible bin doesn’t hold its shape awkwardly the way a rigid basket does.
How to copy it: Choose canvas or felt bins with a stiffened base panel only, not stiffened sides, so they keep enough shape to look tidy but still collapse when you need to swap seasonal gear. We use the same collapsible-bin logic in our nursery storage hacks guide, where gear also rotates by season and size.
Best for: Anyone rotating seasonal items sandals in winter, boots in summer through the same cubes.
Budget Version: Repurposed canvas tote bags with the handles tucked inside work as a near-identical stand-in for purchased fabric bins.
15. A Mirror That Bounces Light Down the Hall
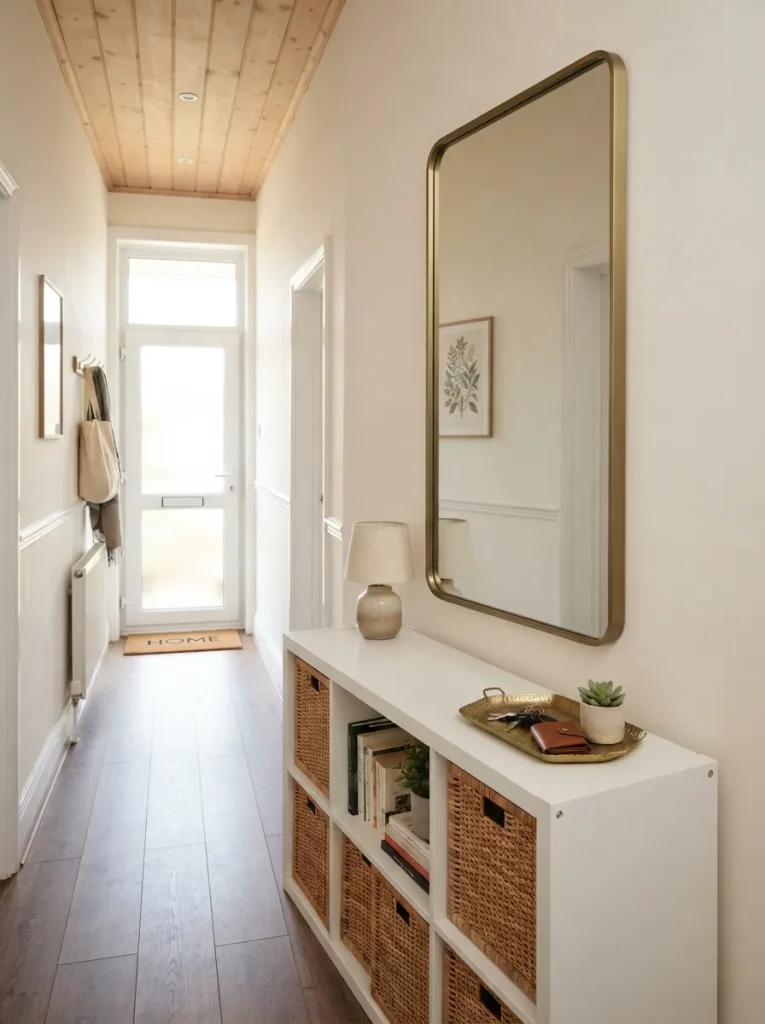
What it looks like: A mirror positioned to catch and throw light, not just to check your reflection.
Why it works: Narrow hallways often have one light source usually a front door and a mirror hung directly across from or angled toward that source doubles the perceived light without adding a single fixture, since reflected light behaves the same as direct light in how a room reads.
How to copy it: Hang the mirror at a slight outward angle rather than flush against the wall, aimed to catch the doorway’s light and throw it further down the hall rather than back at the door. For more on mirror placement and sizing, our bathroom mirror ideas guide covers similar light-bouncing principles in a smaller room.
Best for: Hallways with only one natural light source and no budget for added lighting.
Quick Win: A mirror at least 24 inches wide reflects meaningfully more light than anything smaller size matters more than shape here.
Last up: the two additions most people add after living with their setup for a few months, not before.
16. A Built-In Charging and Drop-Zone Cube
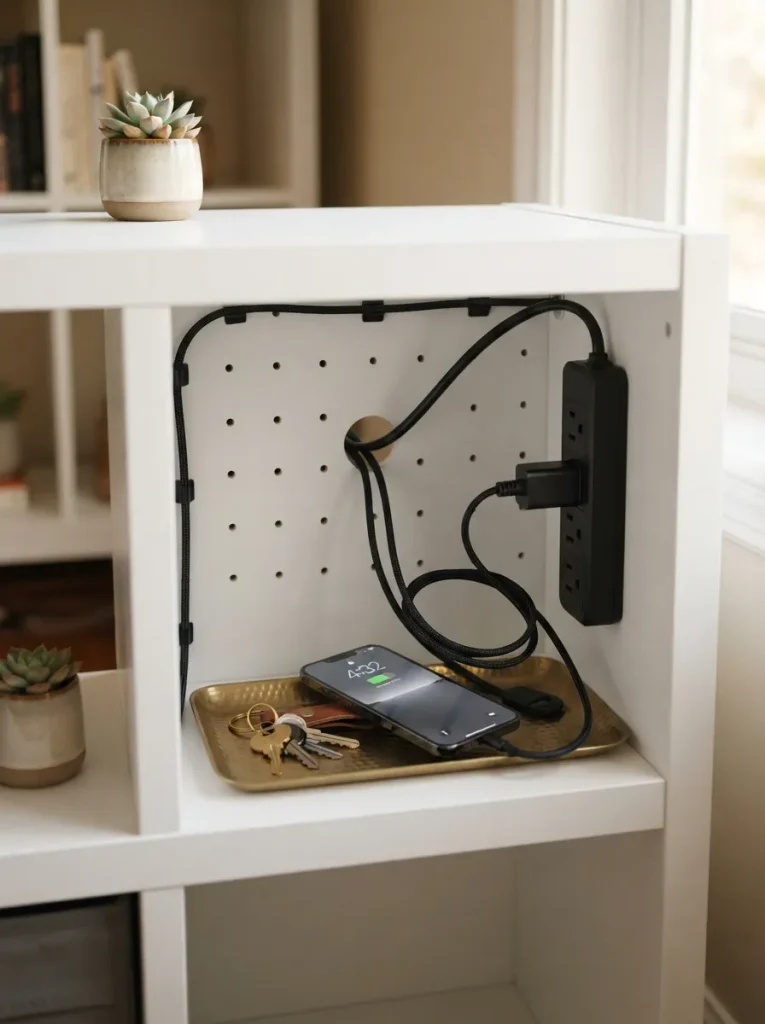
What it looks like: One cube quietly doing the job of a charging drawer.
Why it works: Phones and keys tend to land wherever there’s an open outlet, which in most homes means a kitchen counter far from the front door. Converting a single Kallax cube into a mini charging station keeps that habit contained to the entryway instead of spreading through the house.
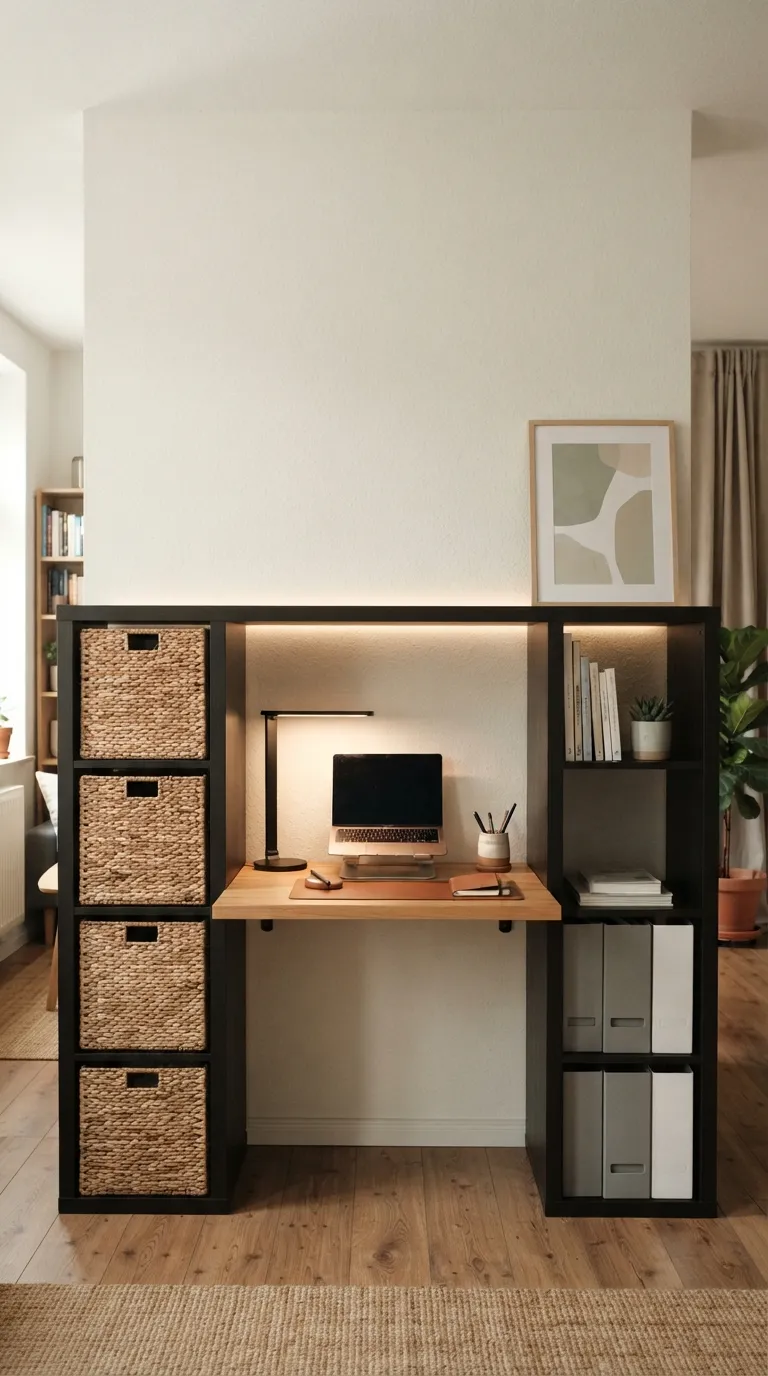
How to copy it: Drill a 1-inch cord hole through the cube’s back panel, mount a slim power strip to the interior wall of the cube, and add a small tray on the cube floor to keep devices from sliding around. If the drop zone extends into a full workspace, our Kallax home office ideas guide covers cable management at a larger scale.
Best for: Anyone who currently charges their phone in three different rooms depending on the day.
Charging Cube Setup Checklist:
- [ ] Confirm a wall outlet is within 3 feet of the chosen cube
- [ ] Drill a 1-inch cord access hole through the back panel
- [ ] Mount a slim power strip to the interior cube wall with adhesive strips
- [ ] Route cords through the hole, then plug in
- [ ] Add a small tray or dish to prevent devices from sliding
What You’ll Need:
| Product |
|---|
| Slim surge-protected power strip |
| Adhesive cable clips |
| Small wooden catch-all tray |
| Cord management sleeve |
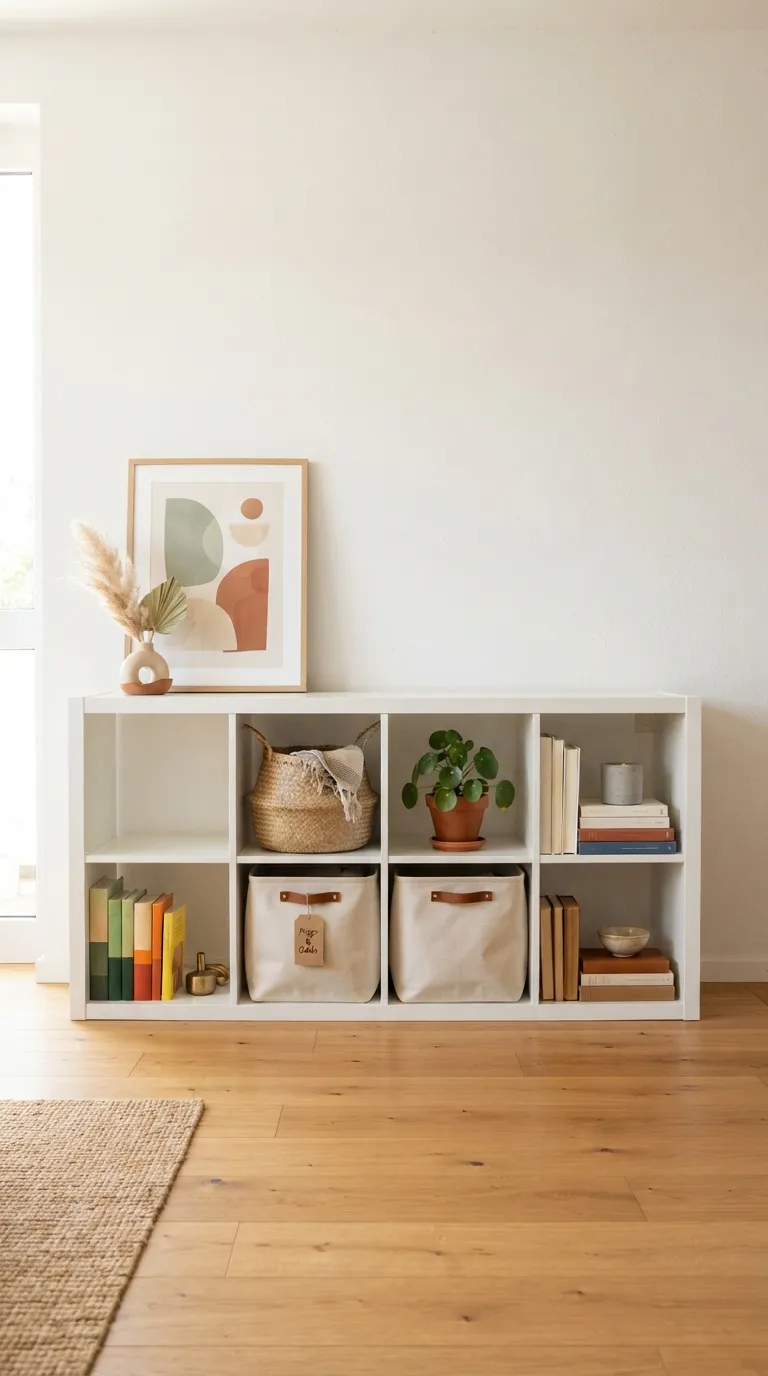
17. A Styled Top Instead of a Cluttered One
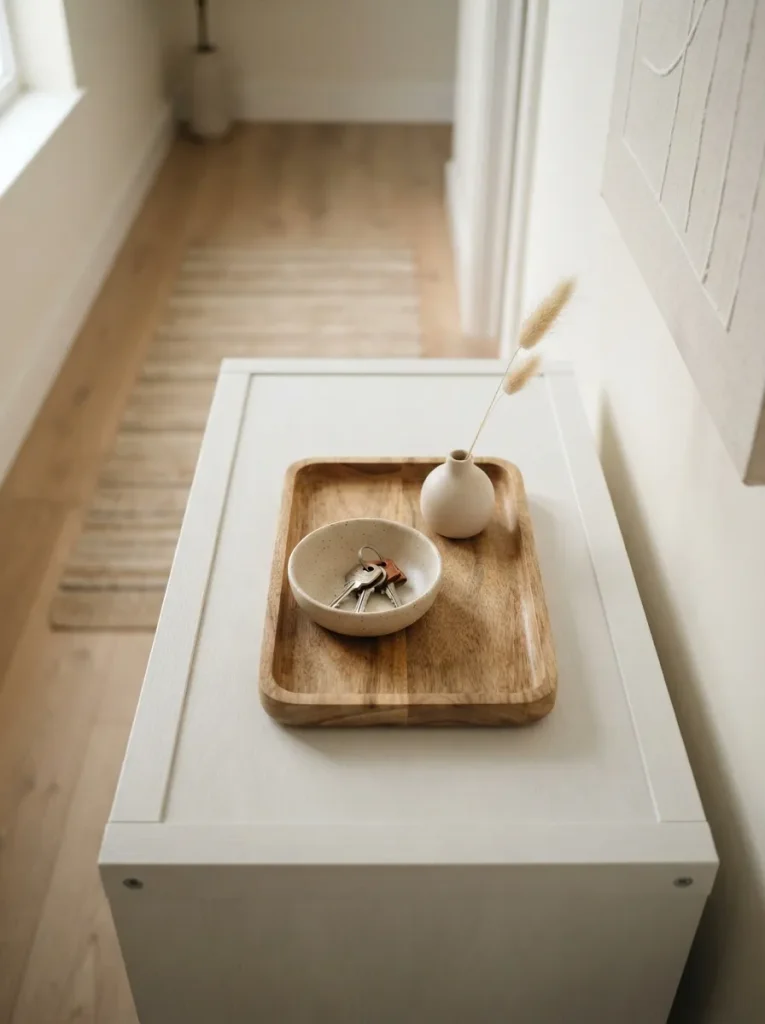
What it looks like: A tray that contains the clutter instead of letting it spread across the whole surface.
Why it works: The top of any entryway unit becomes a landing pad for whatever’s in your hands when you walk in, and without a defined boundary that pile spreads across the entire surface. A single tray gives loose items one contained spot, keeping the rest of the top clear for actual use.
How to copy it: Use one tray no larger than a third of the unit’s total top surface, and limit it to three items maximum: a catch-all bowl for keys, a small stack of mail, and one object that isn’t functional at all.
Best for: Anyone whose Kallax top currently collects a little of everything with no order to it.
Styling Note: An odd number of items three, not two or four reads as more intentional to the eye, a small trick worth applying to any flat surface in the house.
How to Start Your Kallax Entryway Transformation
What I’ve found with real hallways is that shoes should be solved before anything else start with one 2×2 Kallax turned bench-height along the wall with the most linear footage, even before you think about bins or color. Everything else on this list is an upgrade on top of that first move; the shoe pile is what actually blocks the door and starts the clutter chain reaction.
The most common fixable mistake is buying a unit sized to the wall instead of sized to the door swing people measure wall length and forget the door itself needs 30-plus inches of open arc. Fix it by measuring the swing radius first, and treat that as your true starting boundary, not the wall corner.
A rubber boot tray liner under $15 protects the bottom cubes from wet shoes. A set of two woven seagrass bins under $35 organizes loose items without buying a full cube’s worth. A single stick-on LED motion light under $20 solves the dark-floor problem without an electrician.
A single wall with one 2×2 or 2×4 Kallax, cushion, and baskets is a realistic weekend project, landing somewhere between $120 and $220 depending on finish. A fuller system lighting, hooks, a wood cap, and a charging cube usually spreads across two to three weekends and runs closer to $300 to $450 total.
Ready to Create Your Kallax Entryway?
Between color choices, boot storage, lighting tricks, and one very useful charging cube, these 17 Kallax entryway ideas cover a lot more than just “add a shelf by the door.” None of this needs to happen in one weekend most narrow hallways get built up piece by piece over a few months as you figure out what your household actually drops there.
If you’re doing one thing today, measure your door’s swing radius before you buy anything else; it’s the single detail that determines whether the rest of this works. A hallway that quietly catches shoes, keys, and coats without a fight is a small thing, but it’s the difference between walking in and immediately exhaling instead of stepping over something. Save the ideas that fit your specific hallway width and door swing narrow halls are unforgiving of anything that doesn’t actually fit.
Read Next
- 12 IKEA Kallax Mudroom Ideas for Rainy-Climate Entryways
- 9 Narrow Hallway Lighting Ideas That Don’t Need an Electrician
- 14 Small Entryway Storage Ideas for Apartments Without a Closet