10 IKEA Kallax No-Drill Hacks for Renters (That Still Look Built-In)
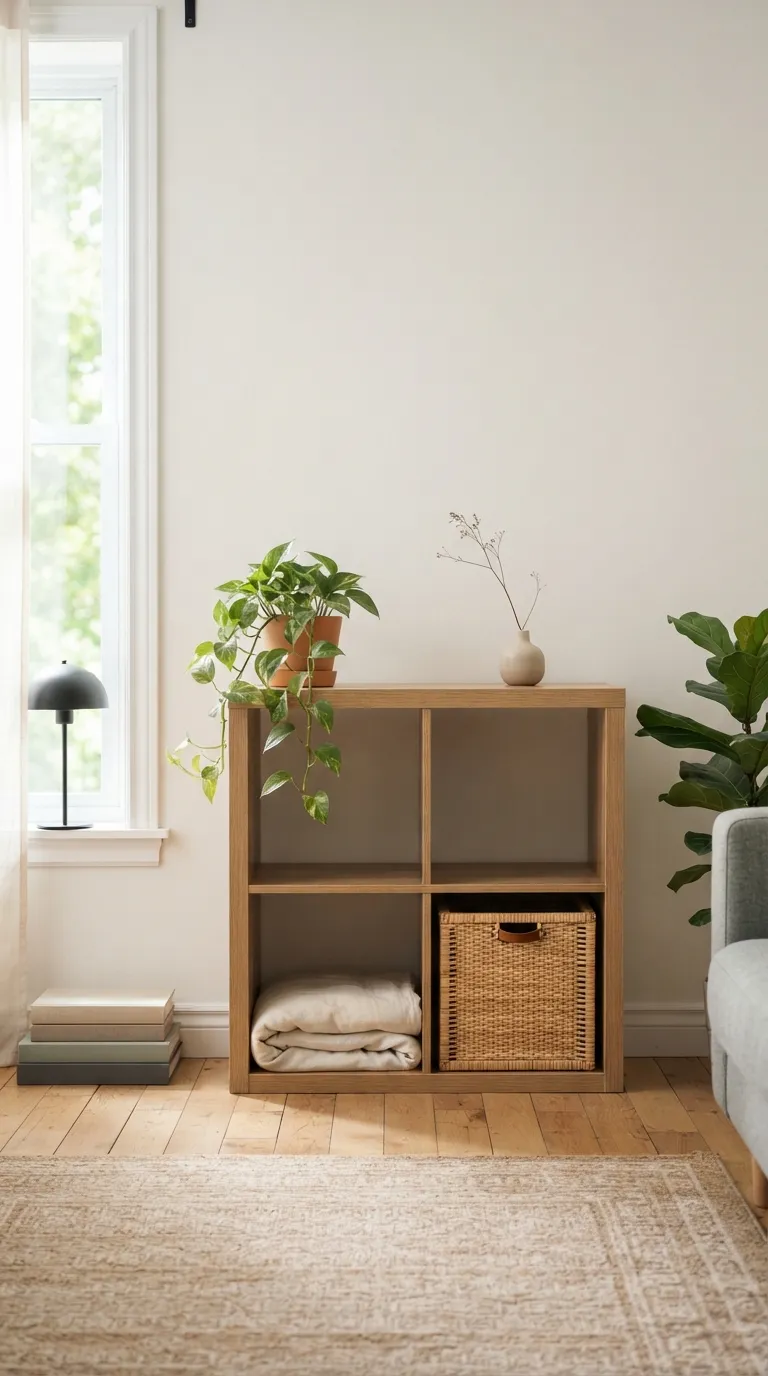
A no-drill Kallax hack is any way to dress up, secure, or restyle IKEA’s cube shelf without touching your rental’s walls, floors, or original finish. Here are 10 renter-safe ideas some purely cosmetic, some structural that turn a plain cube unit into something that looks custom-built.
Done right, a no-drill setup doesn’t feel like a compromise. It feels considered color and texture layered in, storage that actually solves a problem, nothing wobbling when the cat jumps up. There’s a particular kind of calm in a rental that still looks like yours. Some of these take an hour. One or two take a weekend. All of them come off clean.
Jump To
- Why No-Drill Kallax Hacks Make Such a Difference
- 10 No-Drill Kallax Hacks for Renters
- How to Start Your No-Drill Kallax Transformation
- Ready to Transform Your Rental with No-Drill Kallax Storage?
Why No-Drill Kallax Hacks Make Such a Difference
No-drill Kallax hacks restyle, secure, or repurpose IKEA’s modular cube shelf using only adhesive, weight, and placement never a wall anchor. The approach has picked up fast among renters, since most leases flag any wall damage at move-out, and a cube shelf is flexible enough to take on color, texture, even new functions like bench seating or a room divider without a screw touching drywall.
It works especially well in small apartments, where the unit becomes the room’s structure instead of competing with it. Start with stability pairing units or adding felt pads before touching color or lighting.
| Best starting point | Felt pads on every leg and back corner |
| Biggest impact area | Entryway or living room console |
| Budget to start | $40–$120 for one hack |
| Time to complete | One weekend per hack |
10 No-Drill Kallax Hacks for Renters
1. Pair Two Units Back-to-Back for a Self-Stabilizing Console
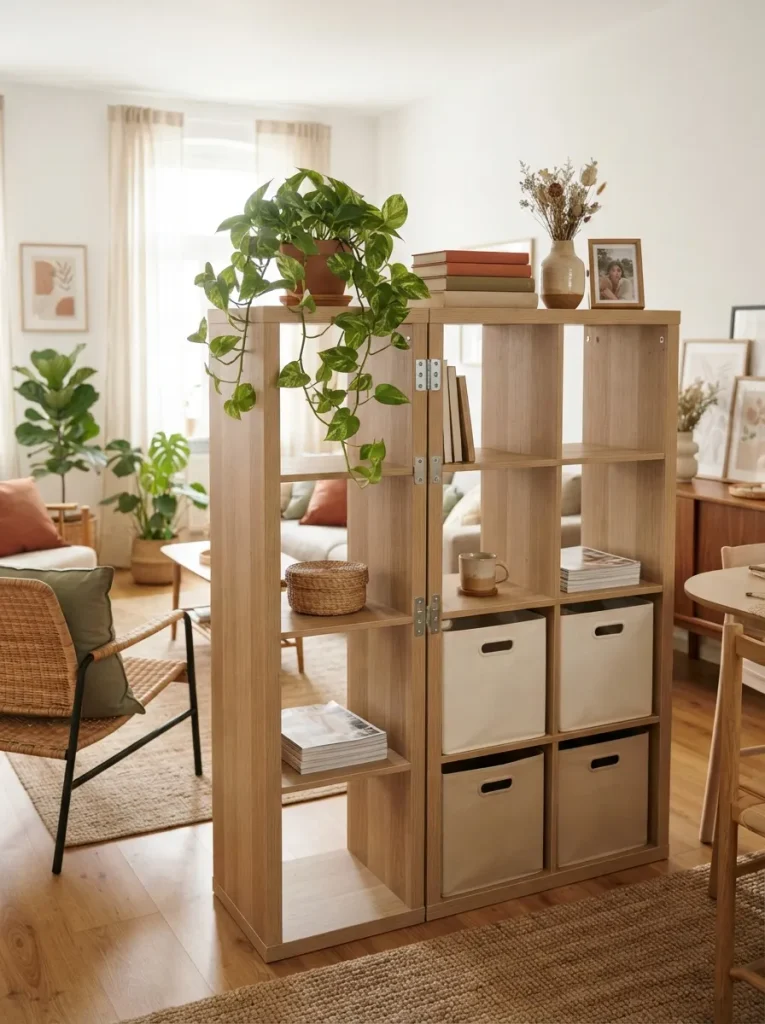
What it looks like: Two identical Kallax units, spines together, standing as one thick freestanding wall down the middle of the room sturdy, low, deliberate.
Why it works: Pairing two units back to back roughly doubles the base footprint, which drops the center of gravity and makes the whole structure tip-resistant without a single wall anchor. It’s a physics fix, not a decorating one.
How to copy it: Buy two units of the same height, join the back panels with heavy-duty furniture connector brackets or long carriage bolts run through the backs only never the wall and load the bottom row heaviest, books instead of throw pillows.
Best for: Renters who want a real room divider or console, similar to the layouts in our Kallax TV unit ideas, and can’t risk a single wall anchor showing up at the move-out inspection.
✅ Before You Bolt Two Units Together:
- [ ] Confirm both units are the exact same height and depth
- [ ] Measure the total footprint against your floor space, including clearance for nearby doors or drawers
- [ ] Buy connector brackets rated for at least the combined weight of both units fully loaded
- [ ] Load the bottom two rows first, heaviest items closest to the floor
- [ ] Give the joined unit a firm push test before adding anything breakable to the top
What You’ll Need
| Product |
|---|
| Heavy-duty furniture connector brackets |
| Long carriage bolts with locking nuts |
| Furniture felt pads for the base |
| Woven cotton storage bins, cube-size |
| Rubber non-slip shelf liner |
2. Wrap the Frame in Removable, No-Drill Vinyl Instead of Paint
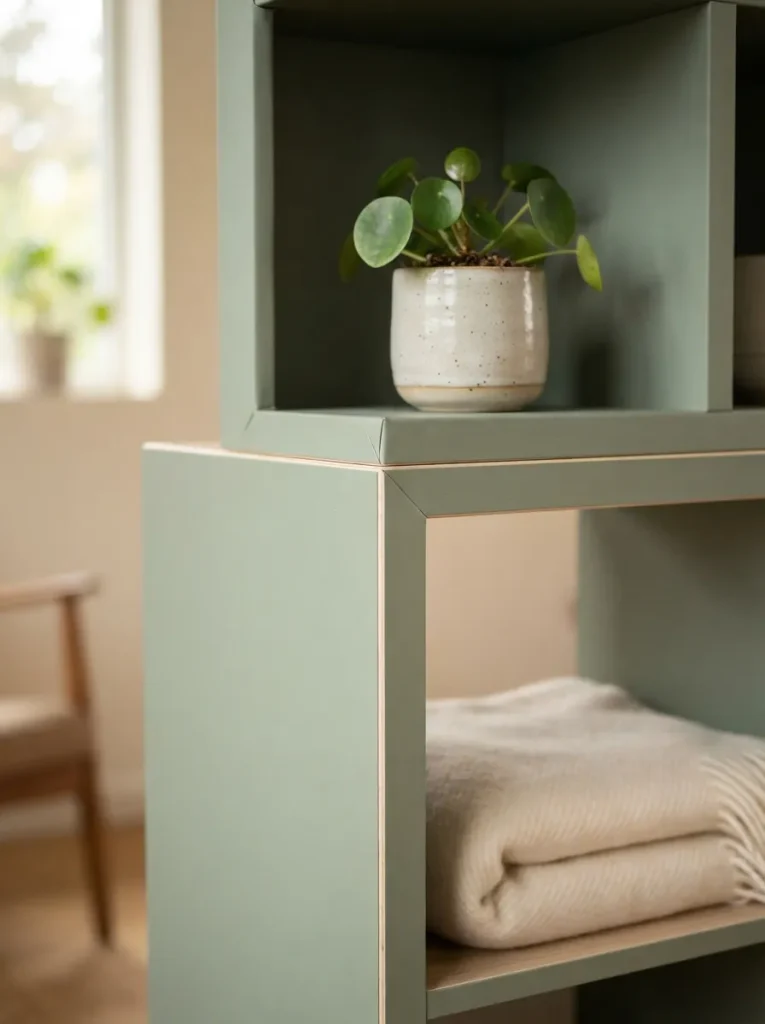
What it looks like: The same boxy grid, just recolored matte sage or clay instead of raw birch, with none of the plywood grain showing through.
Why it works: Color does more visual work than any accessory. A saturated matte tone on the frame reads as an intentional, built-in piece rather than a rental-store shelf, and vinyl film comes off clean because it never touches drywall or the security deposit.
How to copy it: Measure each panel before ordering, apply the film dry with a plastic smoothing card working from the center outward, and use a hairdryer on low heat to release any trapped bubbles at the seams.
Best for: Renters who want a real color change but know paint chips will show up on the walk-through. If you’re rethinking the room’s palette beyond just the shelf, our home color combinations for modern-style homes is a good next stop.
Quick Win: Order 2 extra square feet of film beyond your measurements corners and edges eat more material than the math suggests, and running short mid-application means visible seams.
3. Turn One Unit Into an Open-Backed Room Divider
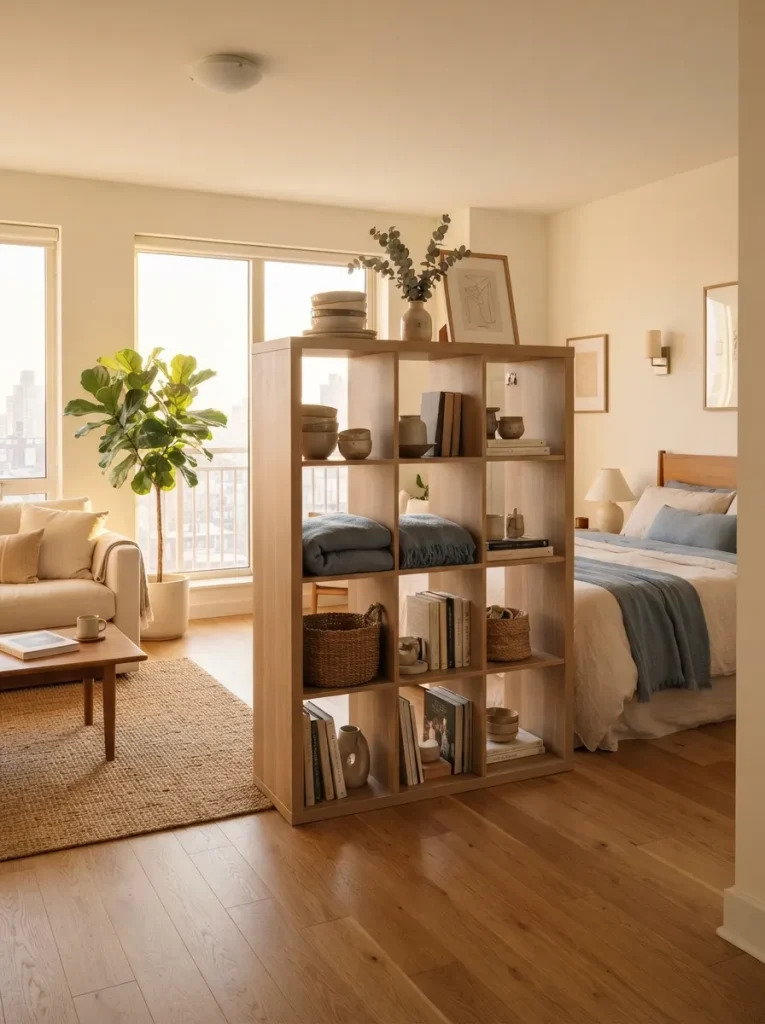
What it looks like: A single shelf standing perpendicular to the wall instead of against it, splitting one room into two without a single stud finder in sight.
Why it works: Placement, not construction, does the dividing here. A unit angled into the room reads as a boundary the same way a low wall does, and because nothing attaches to the floor or wall, it moves with you at lease renewal.
How to copy it: Position the unit so its narrow edge faces the entry, leave 24 to 30 inches of walking clearance on the open side, and style both faces guests will see the back as often as the front.
Best for: Studio and one-bedroom renters splitting a sleep zone from a living zone without construction for more small-footprint layouts, see our Kallax dorm room ideas.
Styling Note: Skip identical baskets on both sides mismatched textures front-to-back are what make a divider feel like furniture instead of a wall you forgot to build.
The next one solves a problem most renters don’t think about until the bins start sagging.
4. Swap Fabric Bins for Woven Rattan Inserts
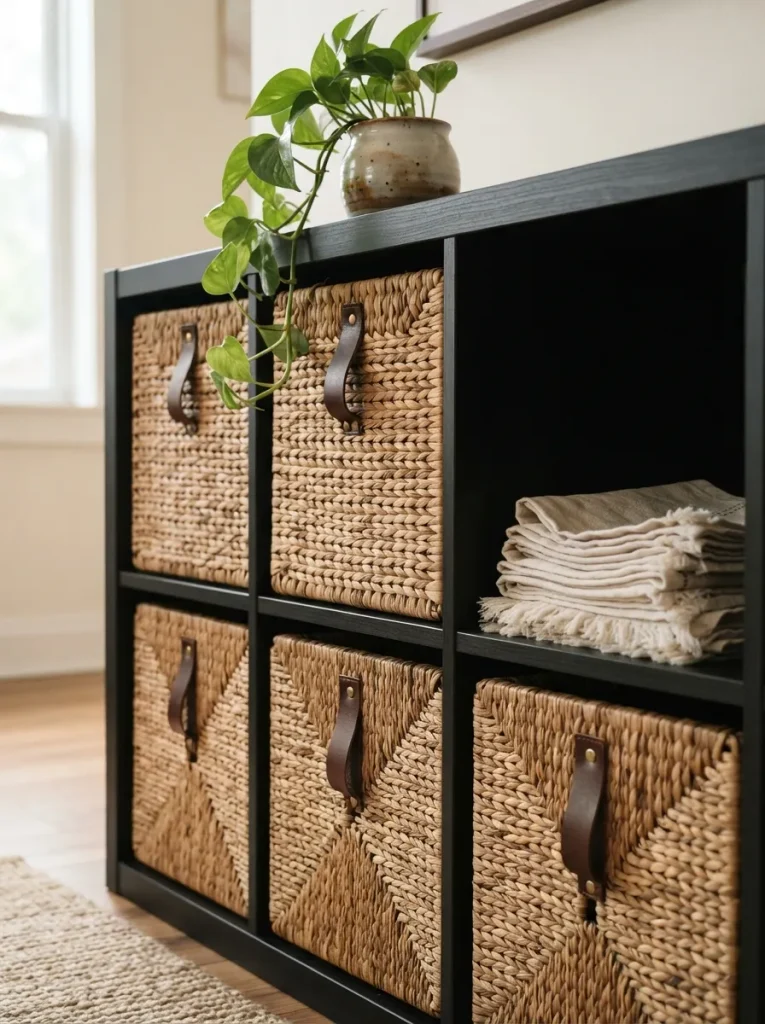
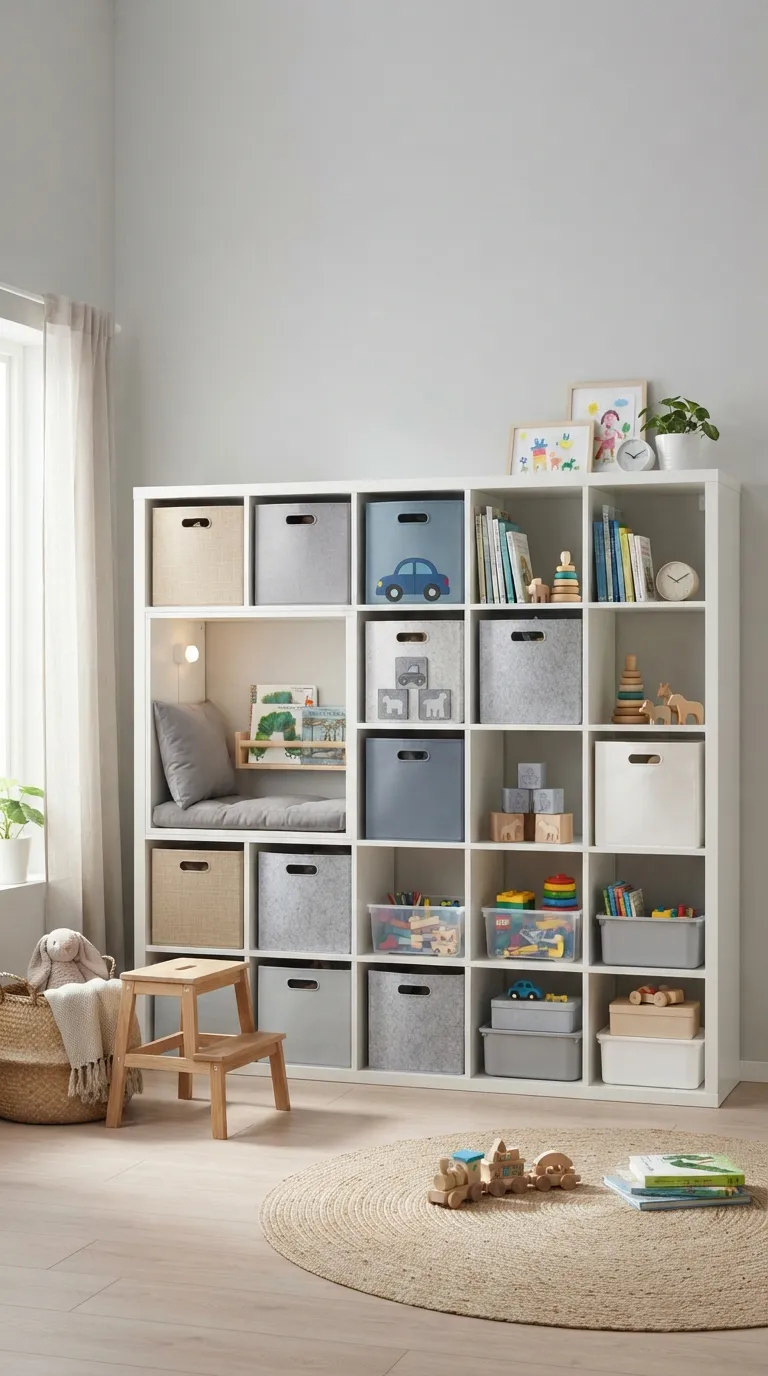
What it looks like: Tight, hand-woven rattan cubes sitting flush in the grid texture doing the job color usually does.
Why it works: Rattan introduces a natural material against the flat plywood surface, and that texture contrast is what keeps a cube shelf from reading as one flat block of storage the same principle stylists use to break up a plain built-in.
How to copy it: Choose bins sized for a snug fit, not a loose one a half-inch gap on every side is what makes inserts look intentional instead of borrowed from a different set. Pick bins with a leather or rope pull tab so they can be pulled fully out without snagging the weave.
Best for: Anyone tired of the fabric-bin look who wants texture without touching a single wall browse more Kallax styling ideas for other insert swaps.
Pro Tip: A light coat of clear furniture wax on the rattan every six months keeps the weave from drying out and catching on sweaters most people skip this and regret it by year two.
What You’ll Need
| Product |
|---|
| Woven rattan storage bins, cube-size |
| Leather pull-tab replacement straps |
| Natural fiber liner inserts |
| Clear furniture wax for rattan |
| Small trailing houseplant in a terracotta pot |
5. Lay a Unit on Its Side as a Headboard-Nightstand Combo
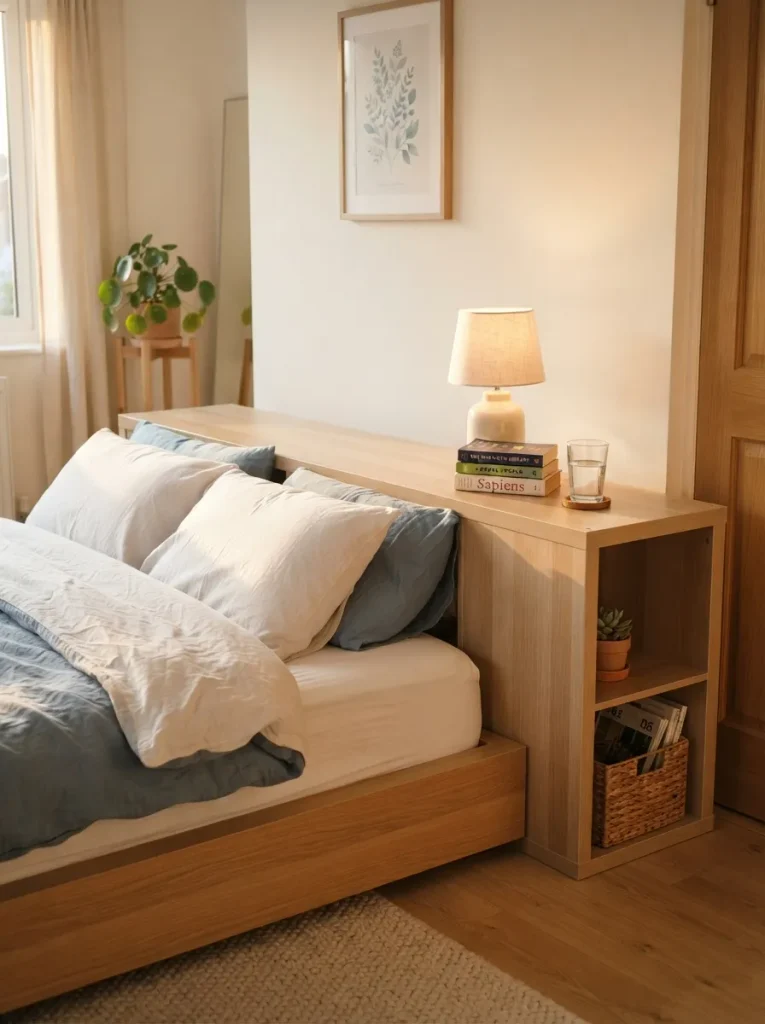
What it looks like: The whole unit on its side, low and long behind the mattress half headboard, half built-in nightstand, cubbies doing double duty on both sides of the bed.
Why it works: Turning a vertical unit horizontal changes its function entirely without a single new screw hole the same eight cubbies that stored books upright now flank a bed at nightstand height, which is a proportion trick more than a storage one.
How to copy it: Push the bed frame directly against the long side of the unit so it can’t slide forward, use the two end cubbies closest to the mattress edges as nightstands, and keep anything you’d reach for half-asleep glasses, a phone charger in those two spots only.
Best for: Small bedrooms and studios where a separate headboard and nightstands would eat floor space you don’t have.
Warning: A horizontal Kallax next to a bed can still tip forward if it’s pushed or climbed on, and this is the one spot in the apartment where that matters most. Anchor it to the bed frame itself with furniture safety straps rated for the unit’s loaded weight, since you can’t drill the wall behind it.
6. Tuck Battery LED Pucks Inside the Top Row of Cubbies
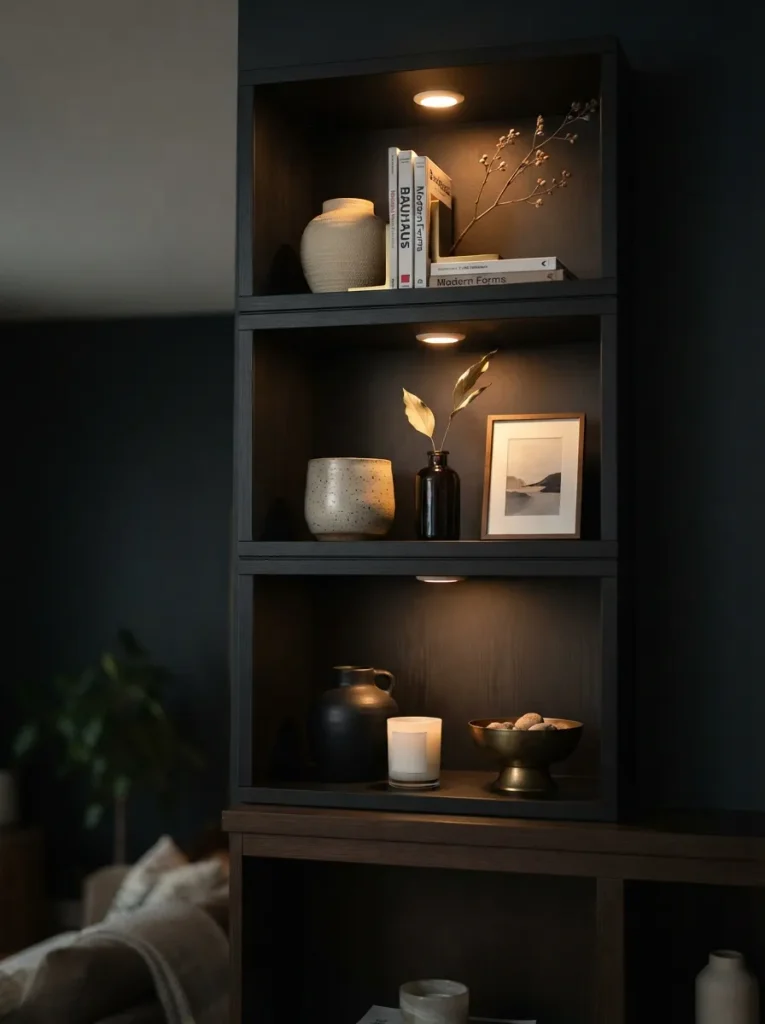
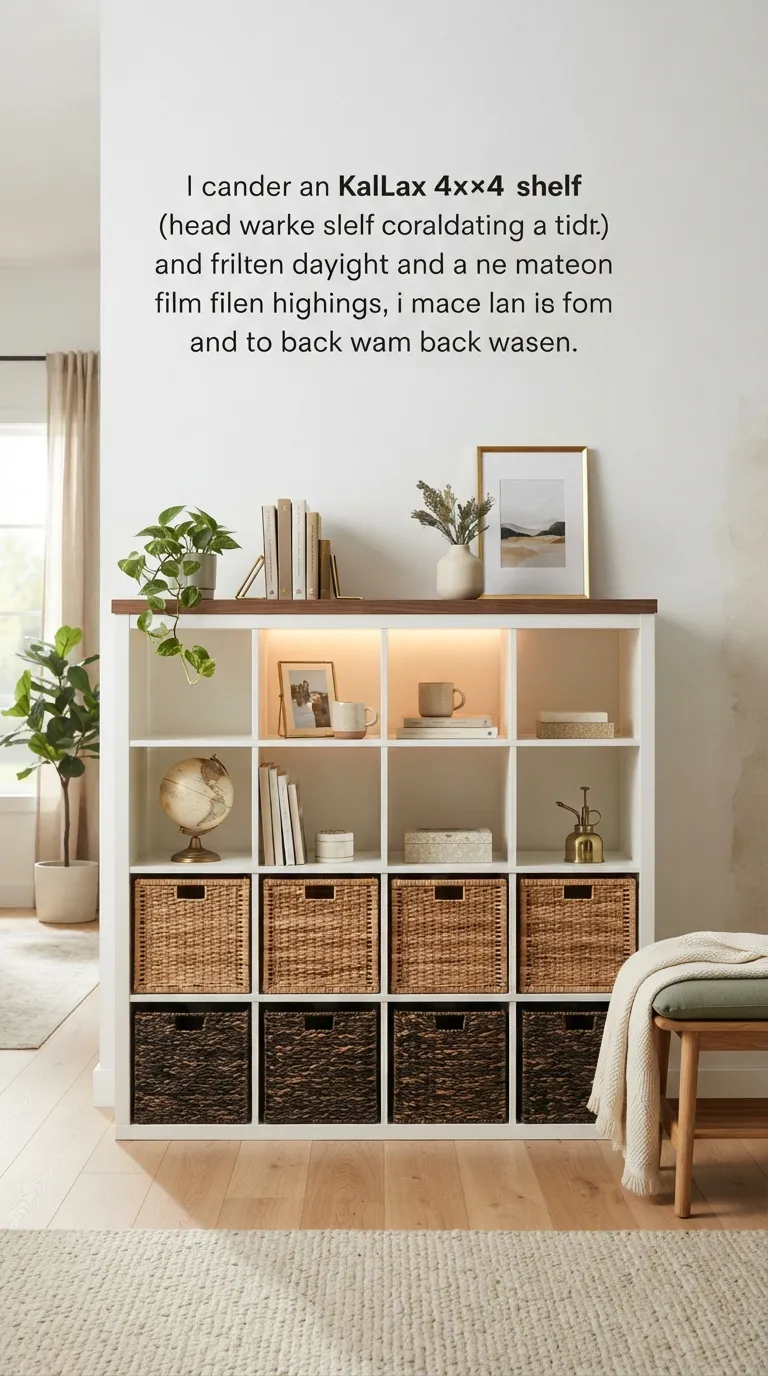
What it looks like: Soft pools of warm light glowing from inside two or three cubbies at dusk, like a lit display case instead of a shelf.
Why it works: Light inside the negative space of a cube does what a spotlight across the room can’t — it makes the shelf itself the light source, which draws the eye to whatever’s styled inside instead of the shelf’s edges.
How to copy it: Stick battery-powered LED pucks to the underside of the shelf above, angled down, and only light the top row. Lighting every cubby flattens the effect and just looks like a display case at a mall.
Best for: Renters who want ambient lighting in a room with no outlet near the shelf.
Budget Version: A three-pack of basic battery puck lights under $20 does this job just as well as a smart version save the smart-home budget for somewhere the dimming actually matters.
What You’ll Need
| Product |
|---|
| Battery-powered LED puck lights, warm white |
| Adhesive mounting pads rated for indoor use |
| Small ceramic display vases |
| Dried pampas or branch stems |
| Rechargeable AA batteries with charger |
This next one solves the bag-and-coat pile-up by the door and it comes off without a trace.
7. Mount a No-Drill Hook Rail on the Side Panel with Heavy-Duty Adhesive Strips
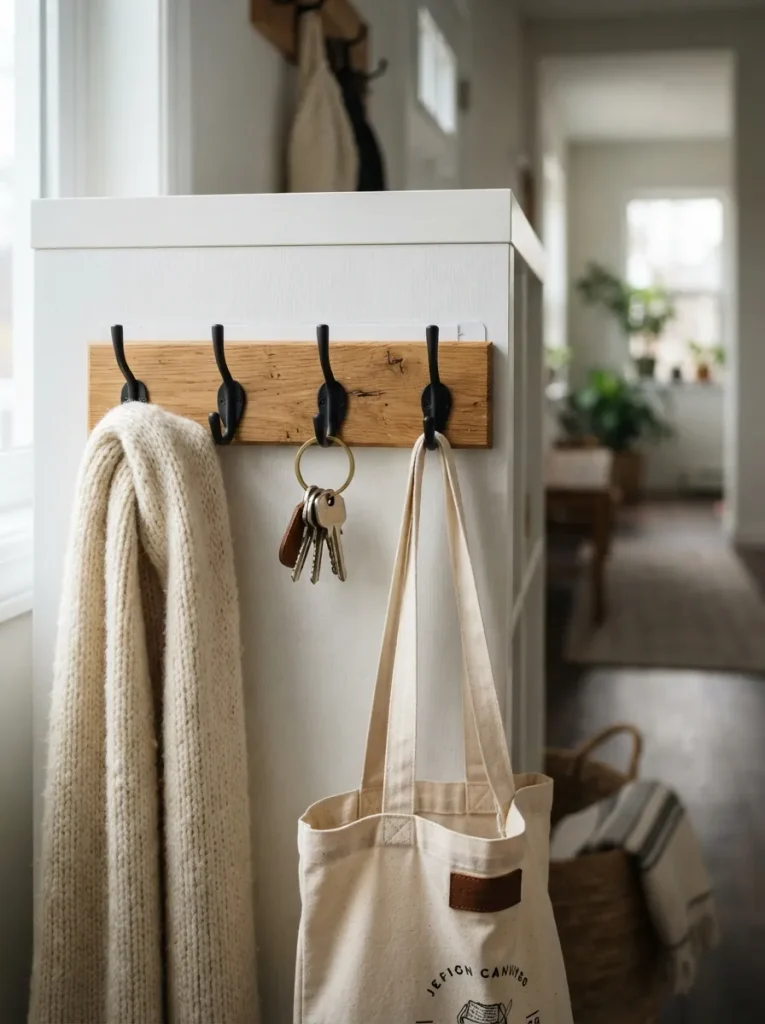
What it looks like: A short row of hooks running down the exposed side of the shelf, holding bags, scarves, and keys right where you drop them anyway.
Why it works: The side panel of a Kallax is flat, smooth, and sturdy enough to hold real weight, which makes it a better adhesive-hook surface than most rental walls you’re mounting to furniture you own instead of drywall you don’t.
How to copy it: Clean the side panel with rubbing alcohol before applying anything, use heavy-duty mounting strips rated for at least double the weight of what you’ll hang, and let the adhesive cure a full hour before hanging a single bag.
Best for: Entryway or hallway placements where coats and bags need a landing spot, especially alongside our closet organization ideas.
Important: Most people assume any Command strip works for this, but the light-duty picture-hanging strips are rated for a pound or two. A loaded tote bag and a winter coat need the heavy-duty furniture-rated version, or the rail comes down with everything on it.
8. Line Select Cubby Backs with No-Drill Peel-and-Stick Wallpaper
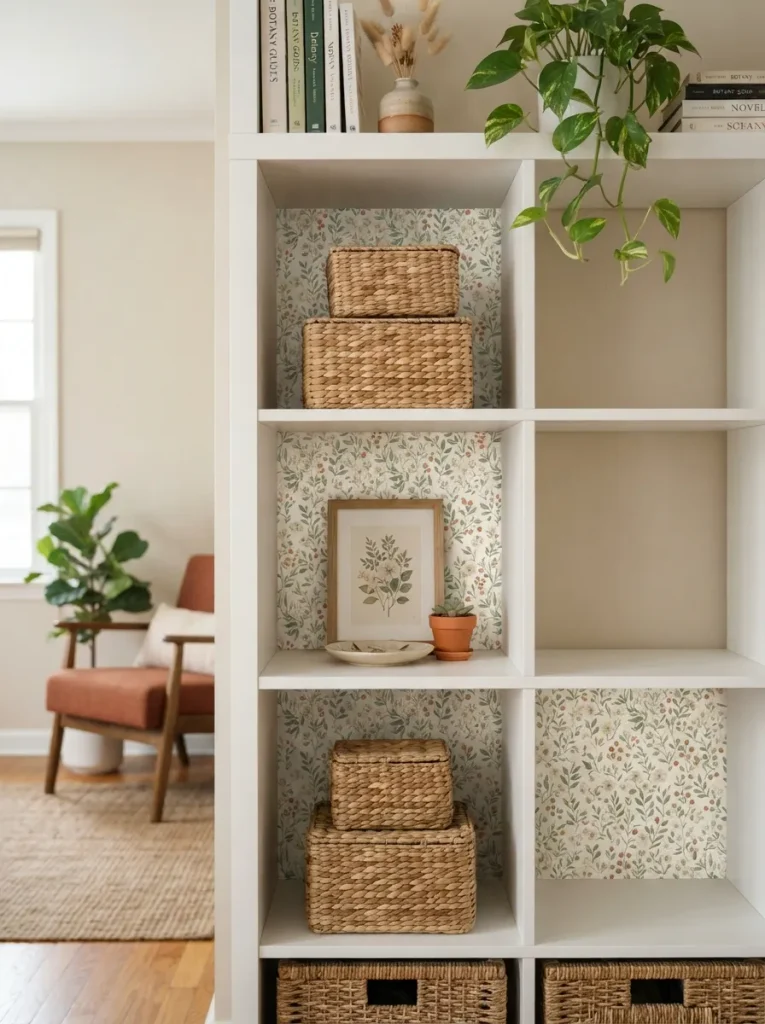
What it looks like: A flash of pattern at the back of two or three cubes only, peeking out behind whatever’s stored in front of it.
Why it works: Lining every cubby back turns the whole shelf into wallpaper; lining only two or three treats the pattern as an accent instead of a backdrop the difference between a styled shelf and a busy one.
How to copy it: Measure the exact interior back panel it’s smaller than a full sheet cut the wallpaper an eighth of an inch short on all sides so it won’t buckle at the edges, and apply it to non-adjacent cubbies so the pattern reads as intentional spacing.
Best for: Renters who want pattern without wallpapering an actual wall.
Mistake to Avoid: Wallpapering every single cubby back is the most common overcorrection here it competes with whatever’s stored in front of it instead of framing it, so stop at two or three.
My Views:
What I’ve seen in actual rental projects: a cushion cap or a wallpapered cubby back gets photographed constantly, but the detail that actually saves security deposits is the felt pad under every single leg and back corner even on units that never touch a wall. Hardwood floors scuff from friction alone, and that’s the line item renters get charged for at move-out, not the missing paint.
9. Cap the Top With a Removable Cushion for Instant Bench Seating
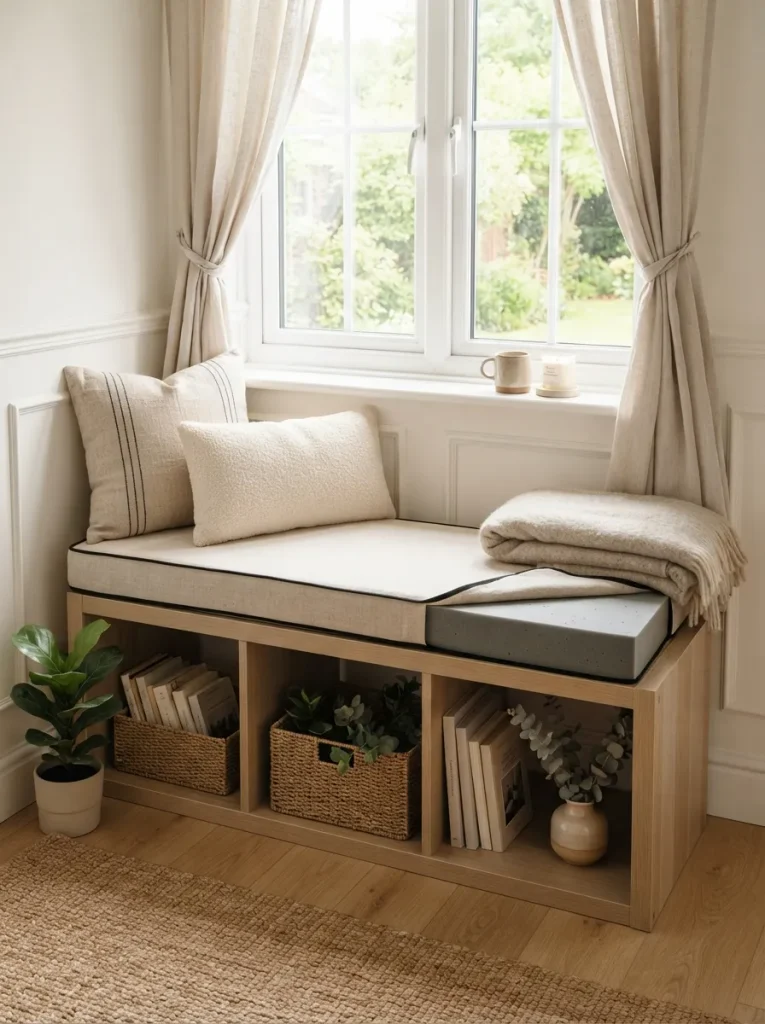
What it looks like: A flat cushion sitting on top of the unit, fitted edge to edge, turning a shelf under a window into a spot to actually sit.
Why it works: A cushion cap changes what the eye registers a shelf’s function to be the same eight cubbies read as a window seat’s base the moment there’s upholstery on top, no built-in carpentry required.
How to copy it: Order high-density foam cut to the exact top dimensions of your unit, choose a removable zippered cover so it can be washed, and add a thin non-slip rubber sheet between the foam and the shelf top so the whole cushion doesn’t slide when someone sits down.
Best for: Window nooks and entryways where extra seating matters more than extra storage.
Pro Tip: Go with at least 3 inches of high-density foam, not the 1.5-inch craft-store version anything thinner compresses flat within a few months and stops feeling like a bench.
What You’ll Need
| Product |
|---|
| High-density foam, cut to size |
| Removable zippered cushion cover, linen |
| Non-slip rubber grip sheet |
| Lumbar throw pillows |
| Folded knit throw blanket |
Last one and it’s the cheapest fix on this whole list.
10. Weave Battery Fairy Lights Through the Open Grid
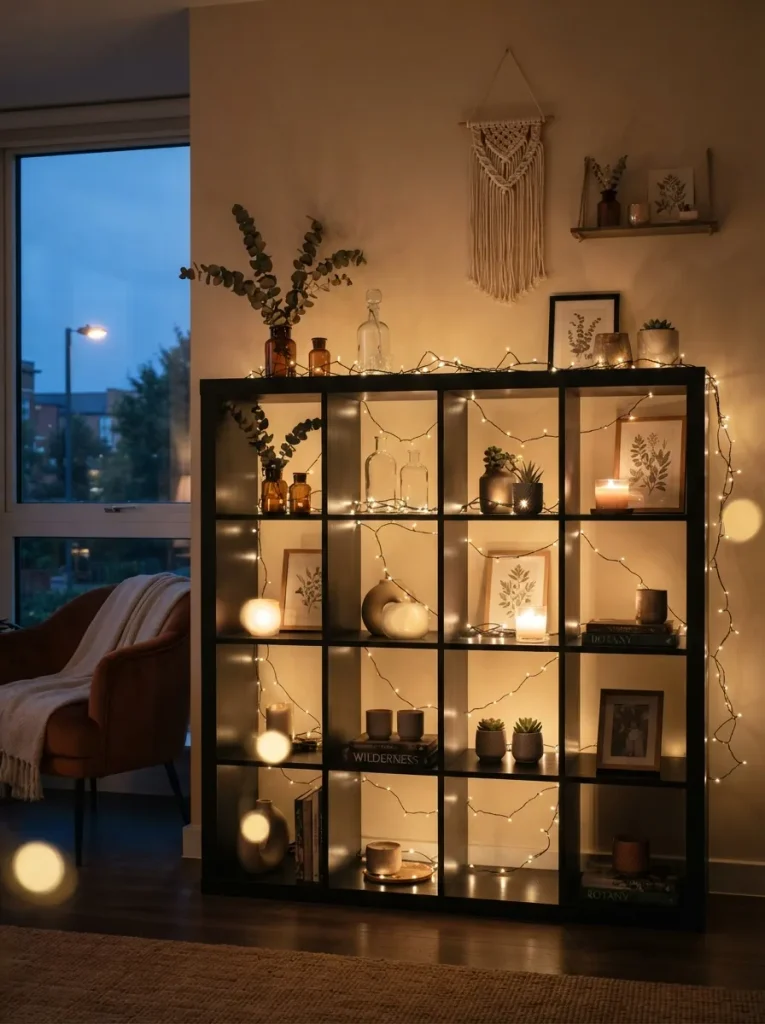
What it looks like: A single strand of warm white fairy lights threaded loosely through two or three open cube edges, left visible instead of tucked away.
Why it works: Weaving the strand through the frame itself, rather than hiding it inside a cubby, uses the shelf’s grid structure as the display the lights become part of the architecture instead of an accessory sitting on top of it.
How to copy it: Loop the strand loosely enough that it hangs in soft curves between openings, keep the battery pack tucked behind a bin on a lower shelf where it’s invisible, and use warm white bulbs only cool white reads as a garage light in a living room.
Best for: Small apartments where a lamp would eat outlet access or floor space.
Small-Space Tip: Running the strand along the vertical edges instead of horizontal ones visually pulls the eye upward, which makes a low shelf feel taller in a room with limited square footage.
How to Start Your No-Drill Kallax Transformation
What I’ve found with real spaces is that the felt pads go on before anything else every leg and back corner, on day one, before a single bin or cushion goes in. It’s the least visible move on this whole list and the one that protects the actual deposit, since floor scuffs and wall friction marks are what move-out inspections flag first.
The most common fixable error is stacking two units without checking they’re the exact same depth. Off-brand or older Kallax models vary by a half-inch, and that gap is what makes a joined pair wobble instead of standing solid measure both units front to back before buying any connector hardware.
Three items under $50 that create immediate impact: a three-pack of battery LED pucks under $20, a roll of heavy-duty furniture-rated mounting strips under $15, and a single yard of removable peel-and-stick wallpaper under $12. Together they cover lighting, hanging storage, and a pattern accent without a single tool.
A single hack the vinyl wrap or the cushion cap is a weekend project, start to finish, running $40 to $120 depending on the size of the unit. A full room using four or five of these ideas together is realistically a two-to-three-weekend project and lands between $150 and $400, most of which goes to the units themselves if you’re buying new.
Ready to Transform Your Rental with No-Drill Kallax Storage?
Ten ideas, and not one of them touched a wall from a back-to-back console that fixes tip-over risk, to a cushion cap that turns storage into seating, to a wallpapered cubby back that adds pattern without a single roll on drywall. None of this has to happen at once; picking just one hack this weekend still moves the space forward. Start with the felt pads and one styling change the vinyl wrap or the rattan bins and build from there as budget allows.
The whole point of a no-drill approach is that the space still feels finished, considered, yours, even though every piece of it can leave with you when the lease does. Save the ones that fit your unit’s proportions now, since the wallpaper-back trick and the headboard combo solve two very different problems.
Read Next
- 15 Command Hook Hacks for Renters Who Can’t Drill a Single Hole
- 8 No-Drill Ways to Add Color to a Rental Living Room
- 12 Small Studio Apartment Storage Ideas That Actually Work