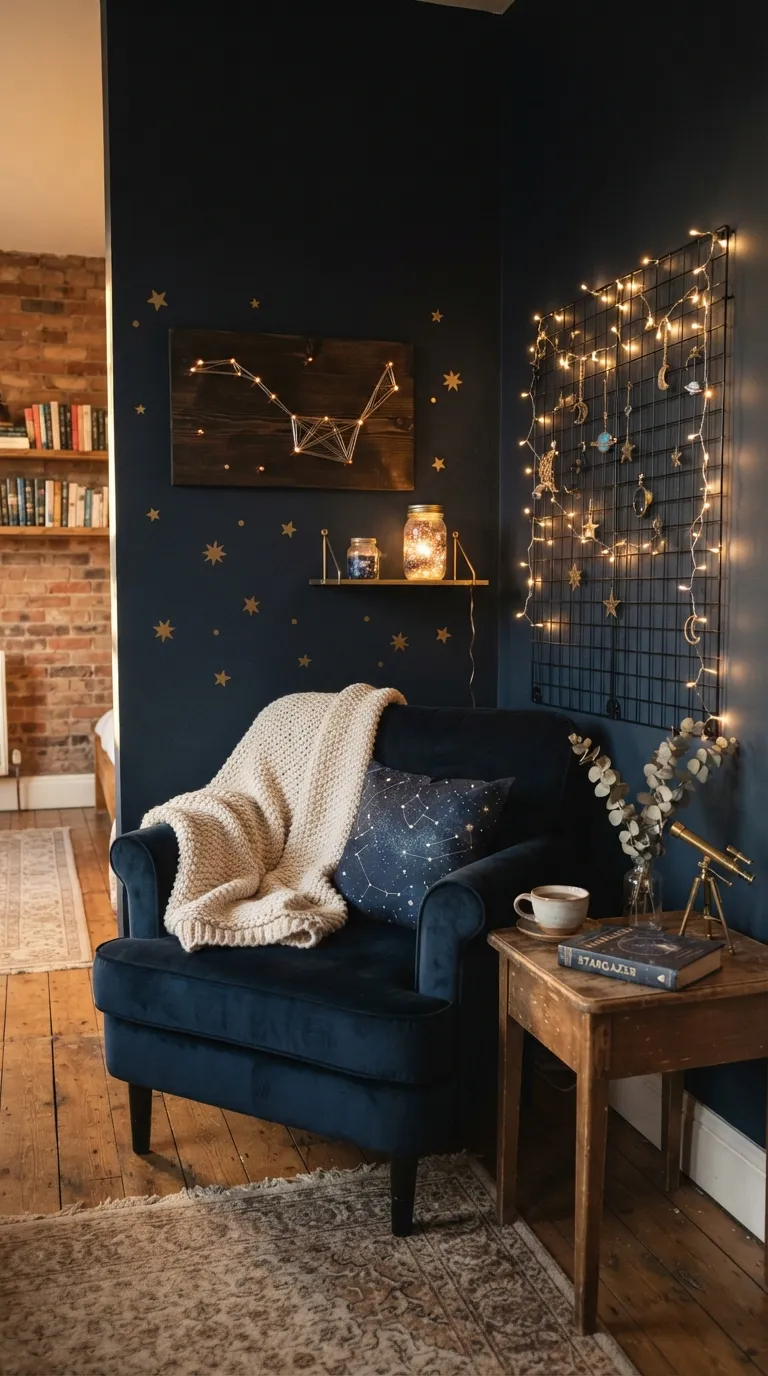
13 Starry Night Themed Crafts to Bring the Cosmos Into Your Home
A starry night themed craft is any handmade project that pulls the drama of a midnight sky deep navy, scattered gold, that quiet glow into something you can touch. Here are 13 starry night themed crafts, ranging from a five-minute mason jar project to a full ceiling installation, that do exactly that.
There’s a specific stillness that comes from a room lit like dusk. Shadows soften. Gold flecks catch the light and vanish again a second later. Something about a deep navy wall makes even a cluttered room feel like it’s holding its breath. Let’s get your hands dirty.
Quick Navigation
- Why the Starry Night Aesthetic Works So Well
- 13 Starry Night Themed Crafts to Try
- How to Start Your Starry Night Craft Collection
- Ready to Bring the Cosmos Home?
Why the Starry Night Aesthetic Works So Well
The starry night aesthetic borrows from actual astronomy deep indigo skies, scattered gold and silver, the soft blur of a Milky Way and translates it into paint, fabric, and resin. It traces back to nursery decor as much as it does to Van Gogh, and it’s having a moment right now because moody, saturated color is replacing all-white minimalism in bedrooms and reading nooks.
The look scales down beautifully for small spaces; start with one jar or one pillow before committing to a ceiling.
| Element | Core Trait 1 | Core Trait 2 |
|---|---|---|
| Philosophy | Wonder over polish | Handmade over mass-produced |
| Materials | Resin, glass, black paper | Fairy lights, glow paint, embroidery thread |
| Color palette | Midnight navy, ink black | Gold leaf, warm white, silver |
13 Starry Night Themed Crafts to Try
1. Mason Jar Galaxy Nightlights
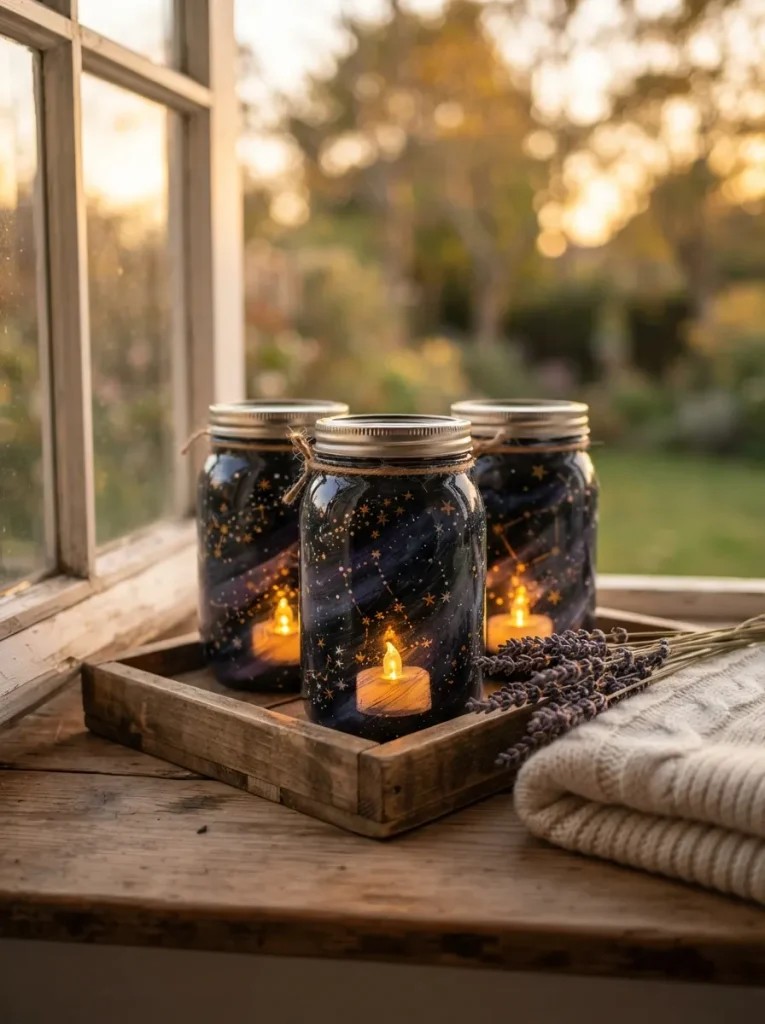
What it looks like: Hushed, glowing jars that look lit from within rather than decorated on the outside.
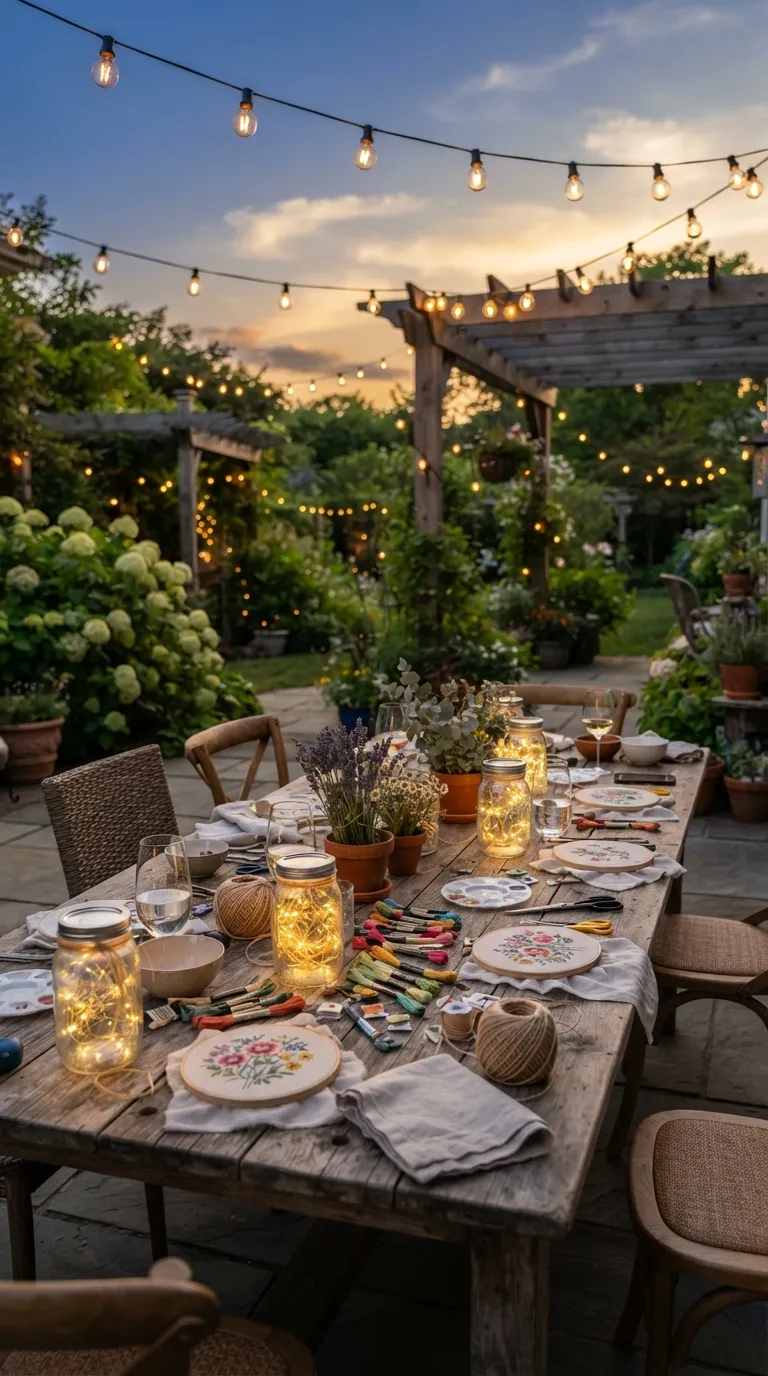
Why it works: Layering translucent navy paint over glass lets light scatter unevenly through it, which is exactly how real starlight behaves inconsistent points of brightness instead of a flat glow. That inconsistency is what reads as “night sky” instead of “blue jar.”
How to copy it: Mix acrylic paint with a few drops of water so it stays semi-transparent, dab it onto the inside of a clean jar with a sponge, then flick white and gold paint off an old toothbrush for a Milky Way spatter effect before it dries. Drop in a flameless tea light once fully cured.
Best for: Beginners, renters, and anyone who wants a full project done in under 20 minutes especially if you’re already into mason jar crafts.
Pro Tip: Paint the inside of the jar, not the outside it hides brush marks completely and the glass itself becomes the glossy top coat.
Shop This Look
| Product |
|---|
| Wide-mouth glass mason jars, 16 oz |
| Battery-operated flameless tea lights |
| Acrylic paint set — navy, black, gold, white |
| Fine natural sea sponge for dabbing |
| Gold metallic paint pen |
2. Ombré Midnight Canvas Wall Art
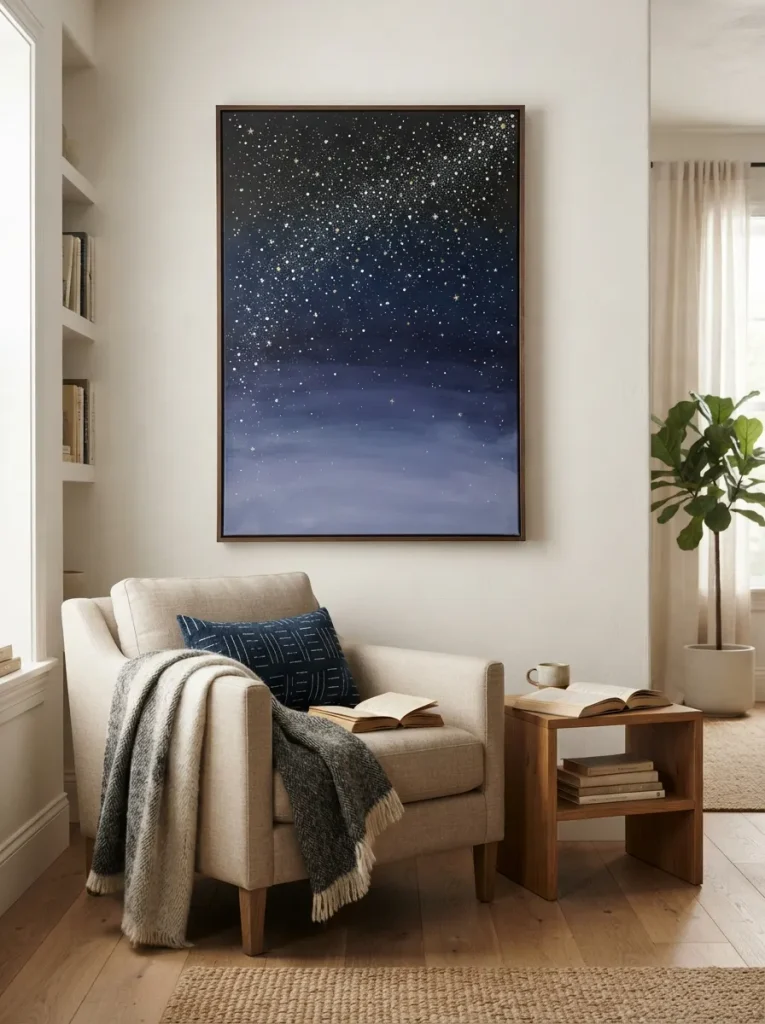
What it looks like: A gradient so smooth it reads more like a photograph of dusk than a painting.
Why it works: Value gradation moving gradually from near-black to lighter indigo creates depth on a completely flat surface, tricking the eye into seeing distance where there’s only two feet of canvas. Uneven star density, heavier near the dark top, sells the illusion further, and picking the right palette matters as much as technique our guide to home color combinations covers pairing moody tones so they don’t fight each other.
How to copy it: Block in three paint bands black, navy, dusty periwinkle while wet, then blend the seams with a dry brush in long horizontal strokes. Flick white paint for stars only after the base layer is bone dry, heaviest near the top third.
Best for: Anyone who wants one statement piece instead of a full room commitment.
Styling Note: Lean the canvas against the wall instead of hanging it dead-center. A slight asymmetry keeps the piece from feeling like a poster.
3. Constellation String Art
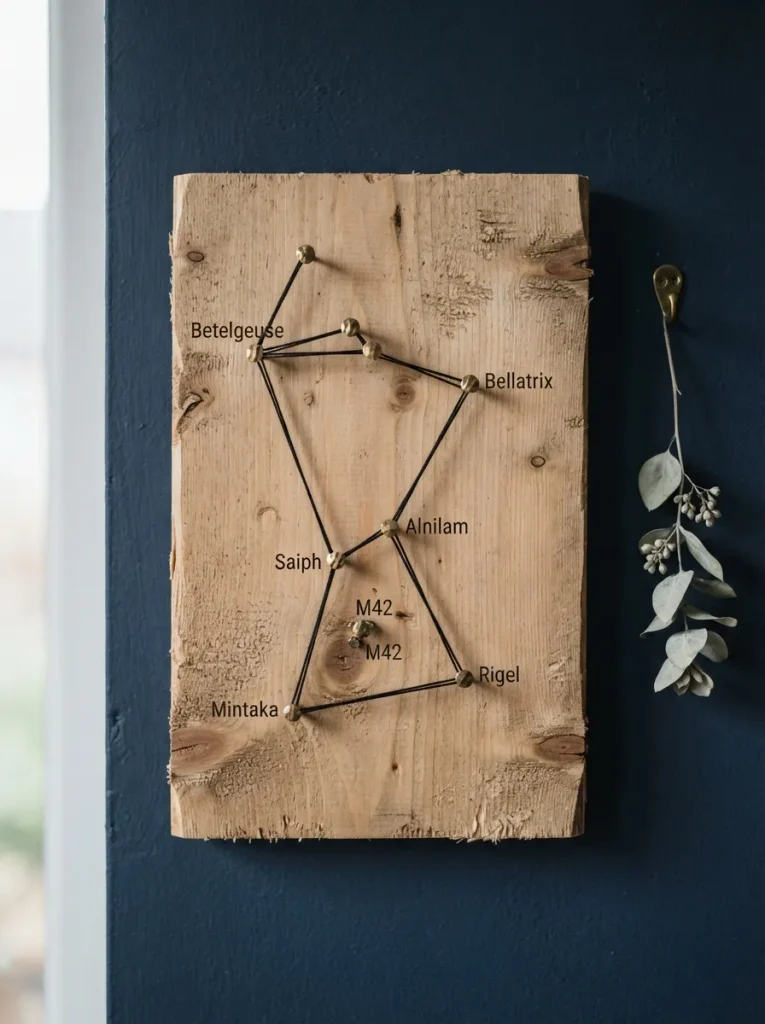
What it looks like: Sharp, geometric lines against soft raw wood more sculpture than craft.
Why it works: Negative space does the heavy lifting here. Leaving most of the board bare draws the eye straight to the thread pattern, which is why string art always fails when people crowd the nails too close together.
How to copy it: Print a constellation map, tape it to the board, hammer a brass nail at each star point, then remove the paper and wrap black embroidery thread nail to nail following the actual star lines not a random zigzag.
Best for: People who like a project with a clear finish line and minimal cleanup the same appeal behind these crochet wall hangings if fiber art interests you more than nails and thread.
Quick Win: Skip the printed template and use a phone star-map app instead hold your phone over the board and copy the pattern point by point.
The next idea is one that turns an entire wall into a backdrop no painting required.
4. Fairy Light Star Curtain
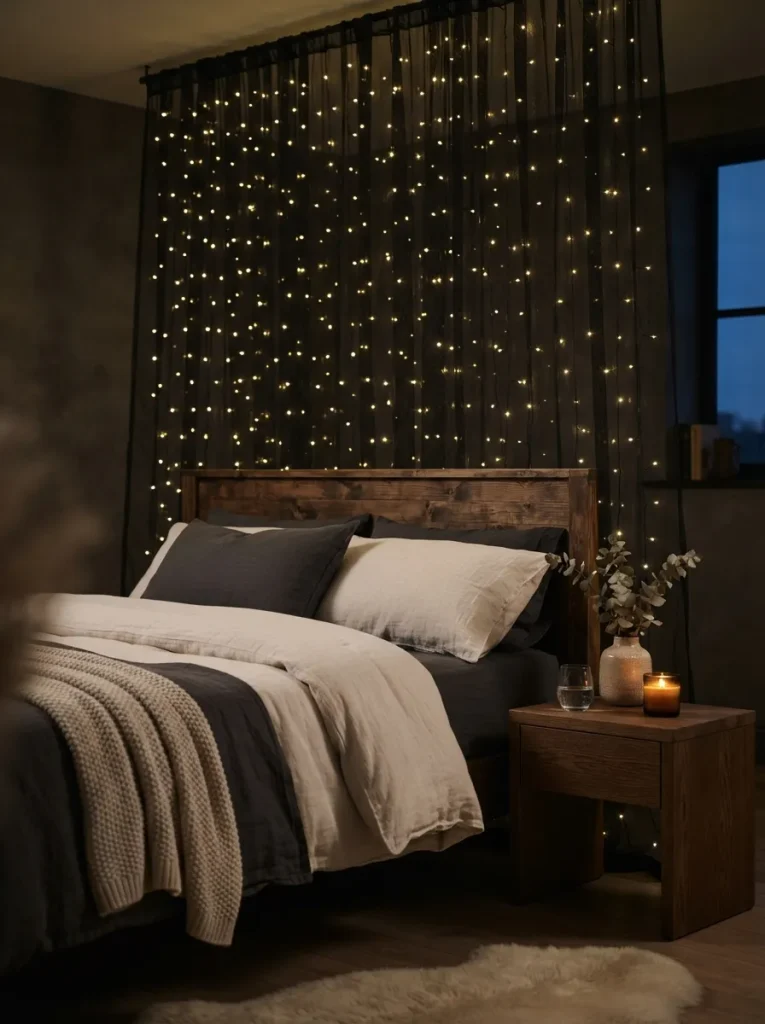
What it looks like: A wall that looks like it’s holding a night sky instead of a string of lights someone taped up.
Why it works: Black mesh absorbs ambient light instead of reflecting it, so only the LED points register that’s the difference between “string lights on a wall” and an actual starfield. Scale and randomness matter more than density.
How to copy it: Buy black tulle or mesh fabric, thread a battery-powered fairy light strand through it in loose, irregular loops rather than a tight grid, then mount with removable hooks along a curtain rod or command strips.
Best for: Renters and anyone who wants the effect without touching paint or the ceiling.
Warning: Never bunch fairy lights tightly behind fabric trapped heat from LED strands can scorch synthetic mesh over hours of use. Space bulbs at least two inches apart and skip incandescent mini-lights entirely.
Shop This Look
| Product |
|---|
| Black tulle or mesh fabric, 2 yards |
| Battery-powered warm white fairy lights, 100+ count |
| Adjustable tension-mounted curtain rod |
| Removable adhesive wall hooks |
| Fabric scissors |
5. Salt Dough Moon Phase Garland
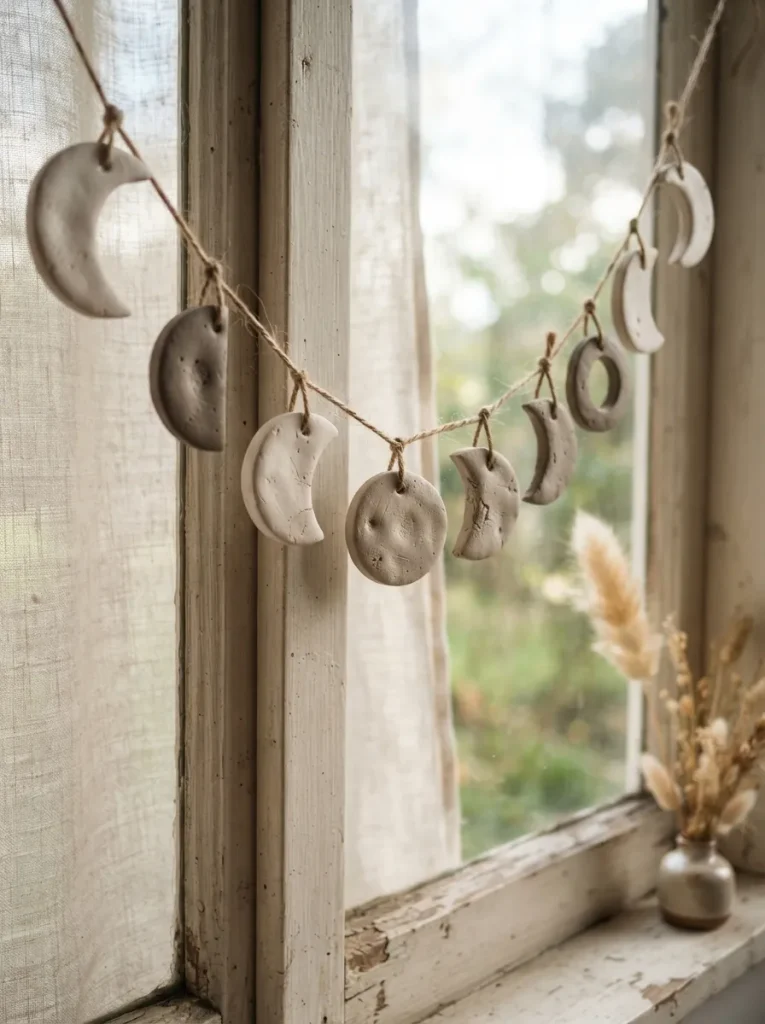
What it looks like: Chalky, hand-pressed discs that look pulled from a riverbed rather than a craft store.
Why it works: Texture does what paint alone can’t pressing a sponge or toothpick into the dough before baking creates real shadow and highlight, so each moon phase reads correctly even under flat indoor lighting.
How to copy it: Mix two cups flour, one cup salt, and roughly half a cup of water into a firm dough, roll it to quarter-inch thickness, cut eight circles, then carve away crescent shapes with a butter knife before air-drying 48 hours or baking at 200°F for two hours.
Best for: People who want a craft session that skips paint entirely.
Budget Version: Skip the twine and hang the moons from a bare branch pruned from the yard costs nothing and adds texture the string version doesn’t have.
6. Watercolor Nebula Throw Pillow
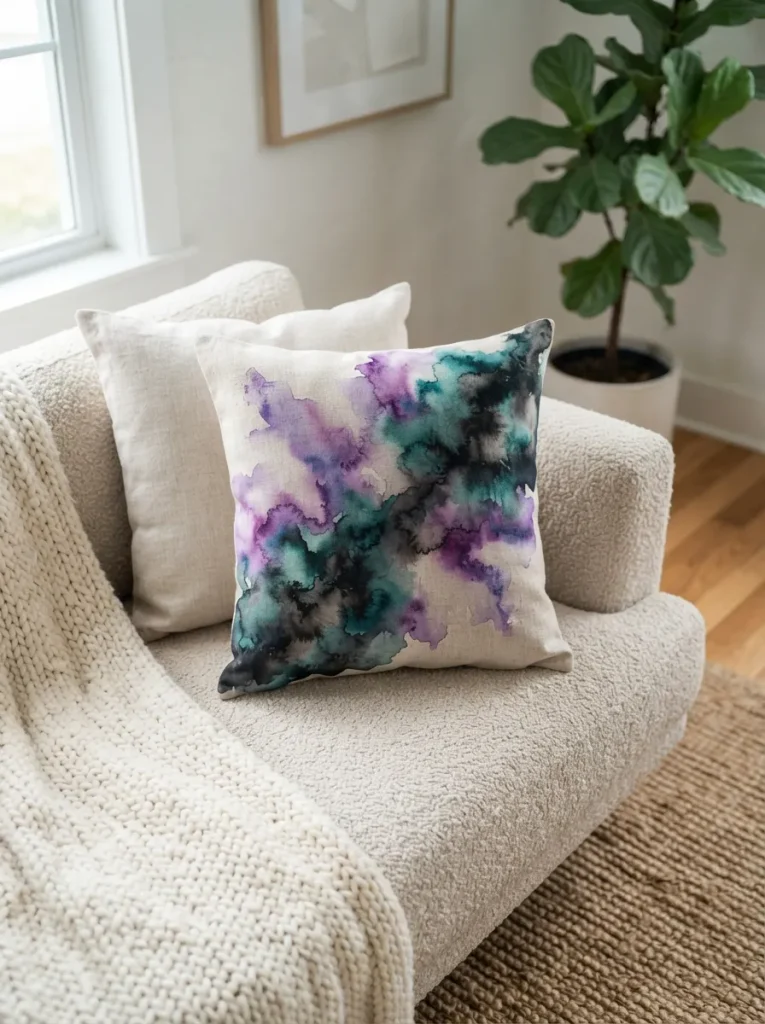
What it looks like: Soft, bleeding color that pools rather than sitting in hard edges.
Why it works: Wet-on-wet fabric dye lets colors bleed into each other unpredictably, mimicking how actual nebula photographs look no two clouds of gas have a clean border, so a crisp edge would break the illusion instantly.
How to copy it: Wet a plain linen pillow cover with water first, then drop diluted fabric dye violet, teal, black directly onto the damp fabric and let gravity and capillary action blend it. Heat-set with an iron once fully dry, before stuffing.
Best for: People who already sew or have a plain pillow cover they’re willing to experiment on.
Important: Fabric dye needs a protein or cellulose fiber to bond properly cotton and linen work well, but polyester-blend covers will resist the dye and look patchy no matter how careful the technique.
The next idea finally uses that leftover furniture piece nobody knows what to do with.
7. Painted Night-Sky Accent Dresser
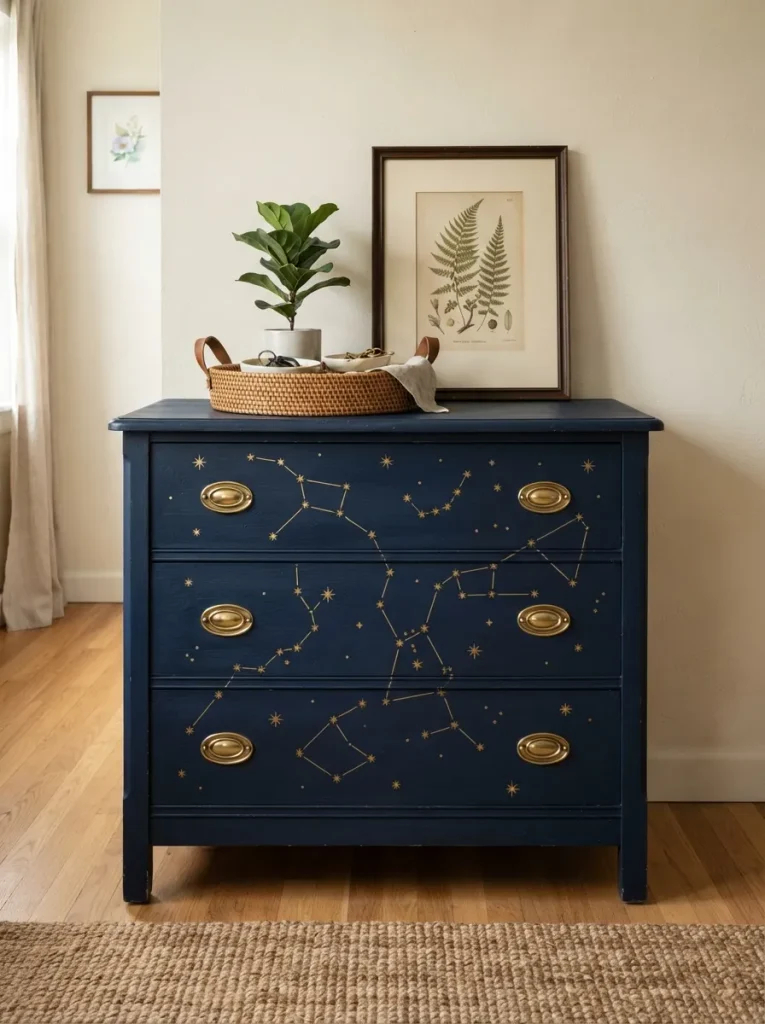
What it looks like: A single dark, confident piece that anchors a room instead of blending into it.
Why it works: Visual weight one large, dark object in an otherwise light room gives the eye somewhere to land first, the same principle behind a dark kitchen island in an all-white kitchen. Gold constellation lines keep it from reading as heavy or gloomy.
How to copy it: Sand and prime the dresser, apply two coats of navy chalk or mineral paint, then use a paint pen and a printed star map to connect dots freehand across two or three drawer fronts only covering every surface flattens the effect.
Best for: People with a plain dresser already in the room who want one bold move instead of five small ones.
Mistake to Avoid: Painting every drawer with a different constellation is the most common overcorrection here it turns a statement piece into visual noise. Pick one pattern and let it flow across the drawers as a single connected line.
8. Resin Galaxy Coasters
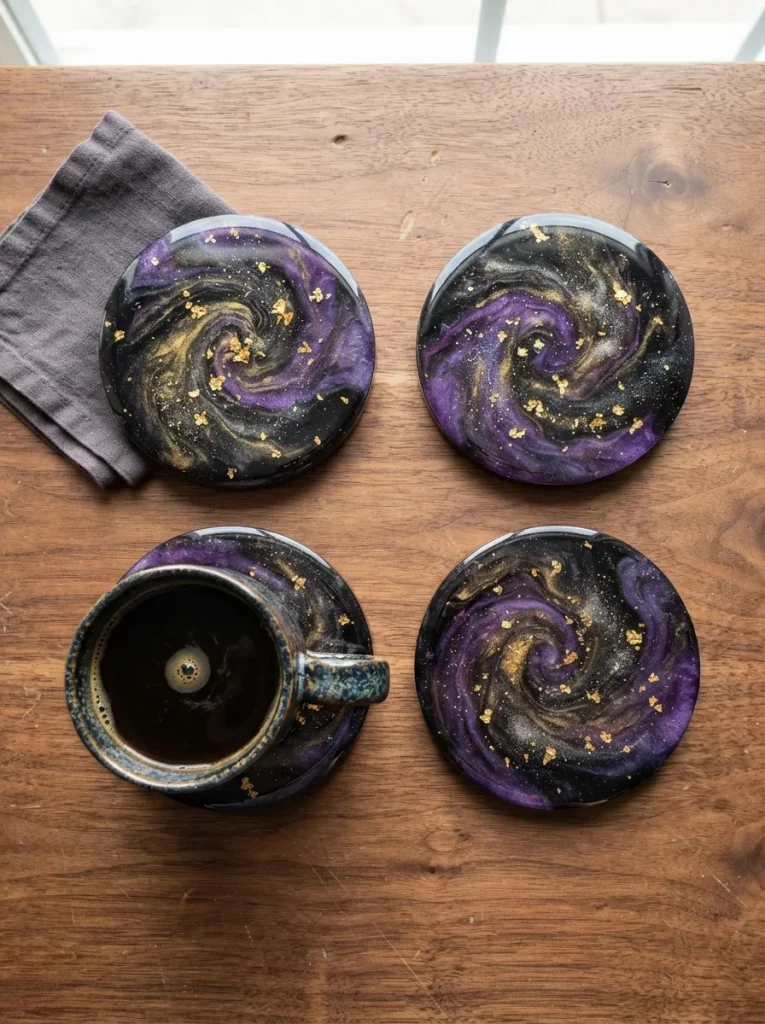
What it looks like: Deep, glassy swirls that look three-dimensional under light.
Why it works: Resin’s transparency lets you build actual depth by pouring pigmented layers in stages rather than mixing colors flat light passes through each layer and refracts differently, creating that suspended, floating-nebula look.
How to copy it: Pour a black-tinted base layer into silicone coaster molds, let it reach a tacky gel stage, then add a second layer swirled with purple and gold mica powder using a toothpick before it fully cures never mix all your colors into one pour.
Best for: Crafters comfortable with a slightly messier, multi-step project.
✅ Before You Pour: Resin Coaster Setup
- [ ] Cover the work surface with wax paper or a silicone mat
- [ ] Measure resin and hardener in exact equal parts by volume
- [ ] Stir slowly for a full three minutes to avoid trapped air bubbles
- [ ] Torch or heat-gun the surface briefly after pouring each layer
- [ ] Cover coasters loosely to keep dust out during the 24-hour cure
Shop This Look
| Product |
|---|
| Clear casting epoxy resin kit |
| Round silicone coaster molds, set of 4 |
| Mica powder set — black, purple, gold |
| Butane mini torch or heat gun |
| Disposable mixing cups and stir sticks |
9. Glow-in-the-Dark Ceiling Star Map
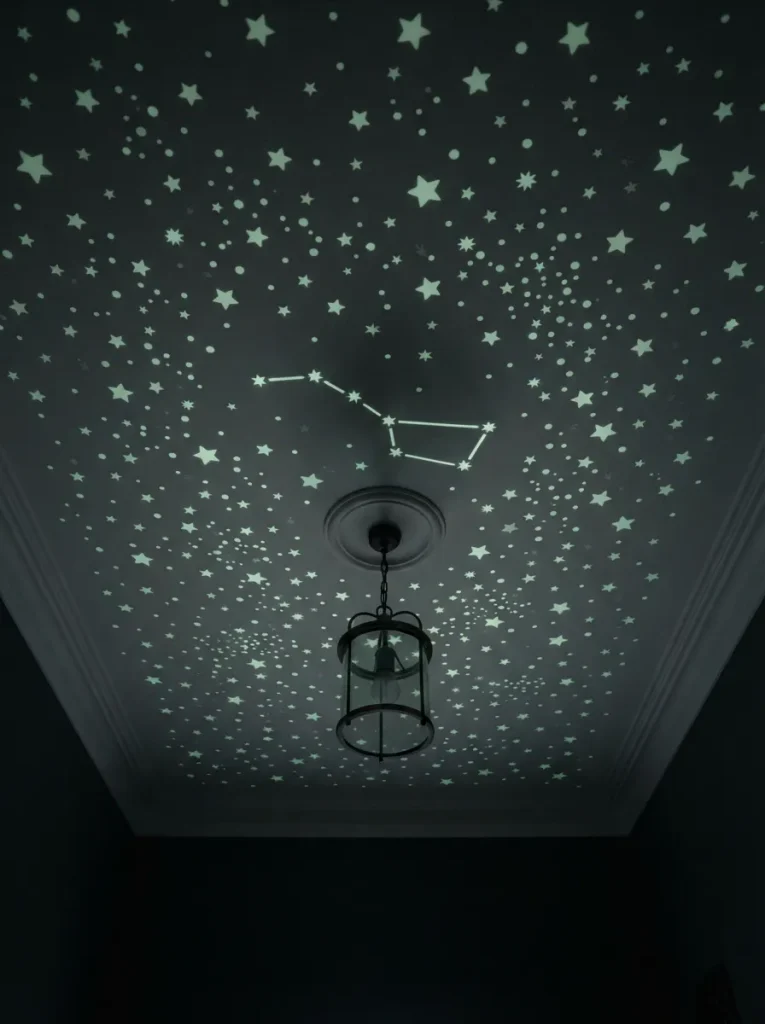
What it looks like: Barely-there by day, then a genuine sky by the time the lights go out.
Why it works: Randomized star sizing mimics real stellar magnitude actual night skies have a handful of bright points and hundreds of faint ones, so a uniform grid of identical dots is the fastest way to make this look like a kid’s craft instead of a sky.
How to copy it: Print a real star chart of a constellation you like, tape it to the ceiling as a guide, then apply glow decals in three sizes a heavy scatter of small dots, a few medium ones, and only two or three large “bright star” dots total.
Best for: Bedrooms and kids’ rooms where the effect only needs to work after dark see our full night themed craft roundup for more after-dark project ideas.
Small-Space Tip: Renters can get the same effect with a temporary glow decal set instead of paint they peel off clean and work on any ceiling texture, popcorn included.
Up next: the arrangement trick that makes a handful of prints look like a real collection.
My Views:
Here’s something most guides won’t tell you: glow-in-the-dark star decals lose most of their charge under LED bulbs specifically, not incandescent ones. I’ve seen a full Saturday of ceiling work barely glow because the house switched to LED years ago. If you’re going this route, plan on a 15-minute incandescent lamp charge a cheap clip light works right before bed, or the effect just won’t show up.
10. Gallery Wall of Astronomy Prints
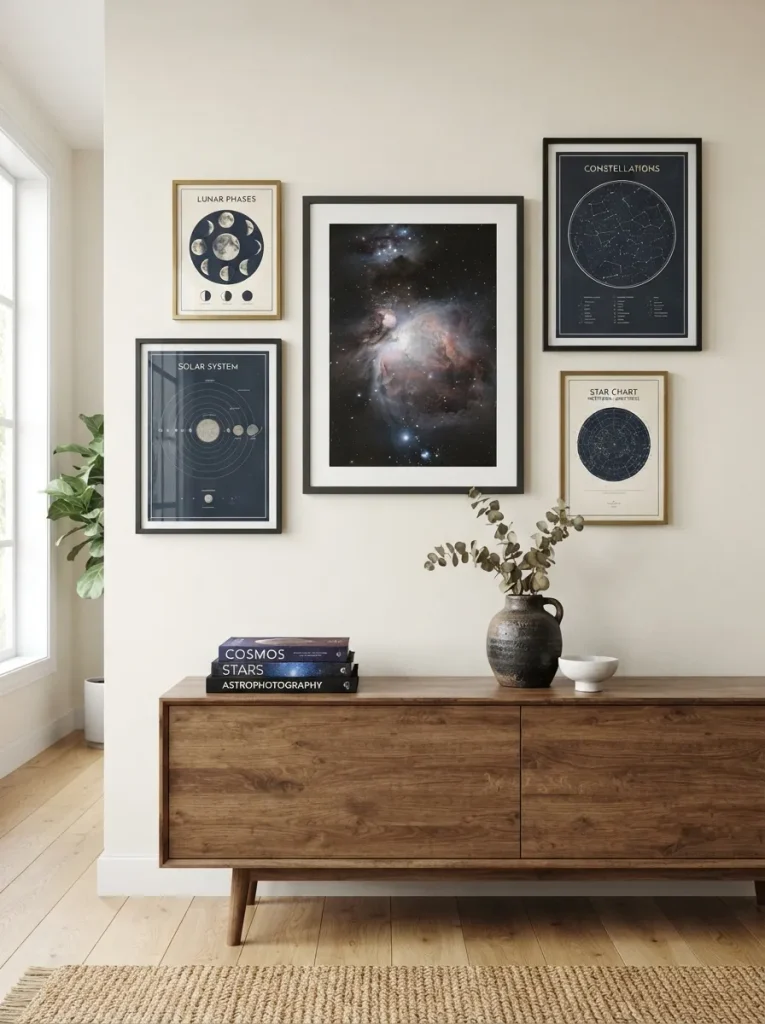
What it looks like: A cluster of frames that reads as one composition instead of five separate pictures.
Why it works: Visual rhythm comes from varying print size and frame finish deliberately evenly spaced identical frames read as a chain-store display, while mismatched sizes anchored by one consistent color story read as curated.
How to copy it: Lay the prints on the floor first and arrange them until the negative space between each one feels roughly even, then transfer that spacing to the wall using painter’s tape as a placement guide before hammering a single nail.
Best for: People who already own a few celestial prints and just need an arrangement strategy.
Pro Tip: Anchor the arrangement with your largest print slightly below eye level, then build outward starting with a small print in the center is the most common reason gallery walls end up feeling scattered.
Shop This Look
| Product |
|---|
| Framed moon phase print, 11×14 |
| Framed nebula photography print |
| Constellation diagram art print |
| Mixed black and brushed brass picture frames |
| Painter’s tape for layout planning |
11. Mini Terrarium Galaxy Jars
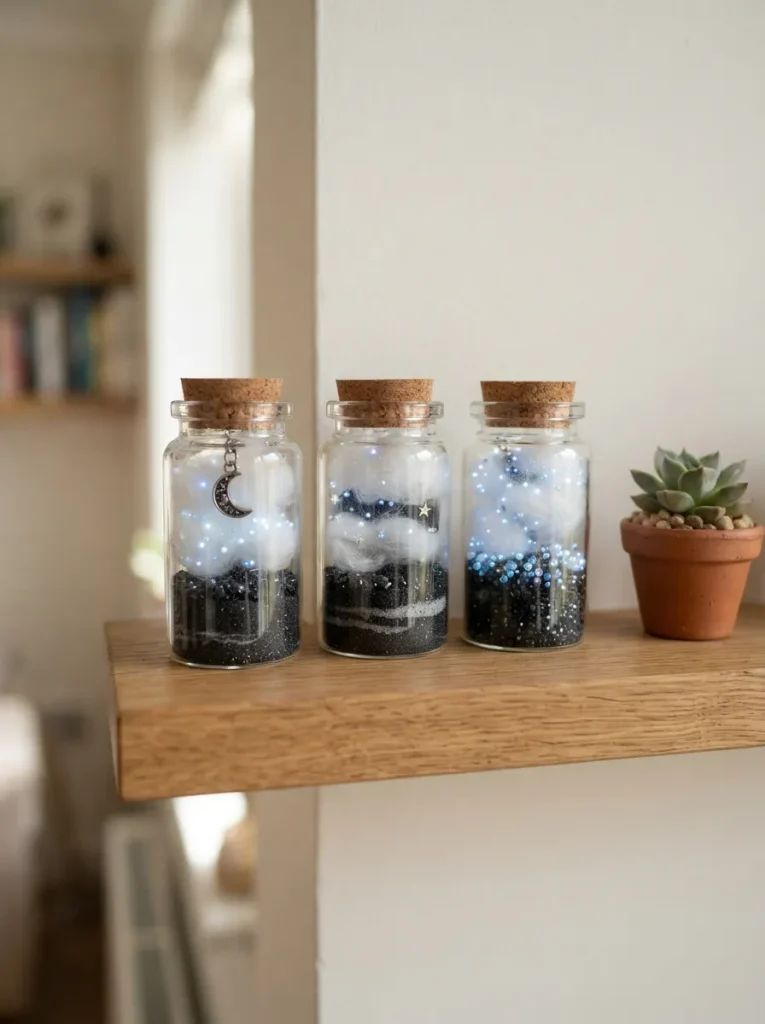
What it looks like: A whole galaxy shrunk down to something that fits in one hand.
Why it works: Layering, not painting, creates the depth here black sand at the base, a cotton cloud layer suspended above it, then a scatter of beads on top reads as three-dimensional space in a way flat paint on glass never fully achieves.
How to copy it: Pour a base layer of black aquarium sand into a small jar, pull apart a cotton ball into a thin cloud shape and lay it flat on top, then scatter tiny glow-in-the-dark or iridescent beads over the cotton before sealing the lid.
Best for: Apartment dwellers and anyone decorating a single narrow shelf instead of a full wall, right alongside a few succulent planters for contrast.
Styling Note: Group jars in odd numbers three, not two or four and vary their height slightly with a small stack of books underneath one of them.
12. Celestial Drawer Pulls & Hardware
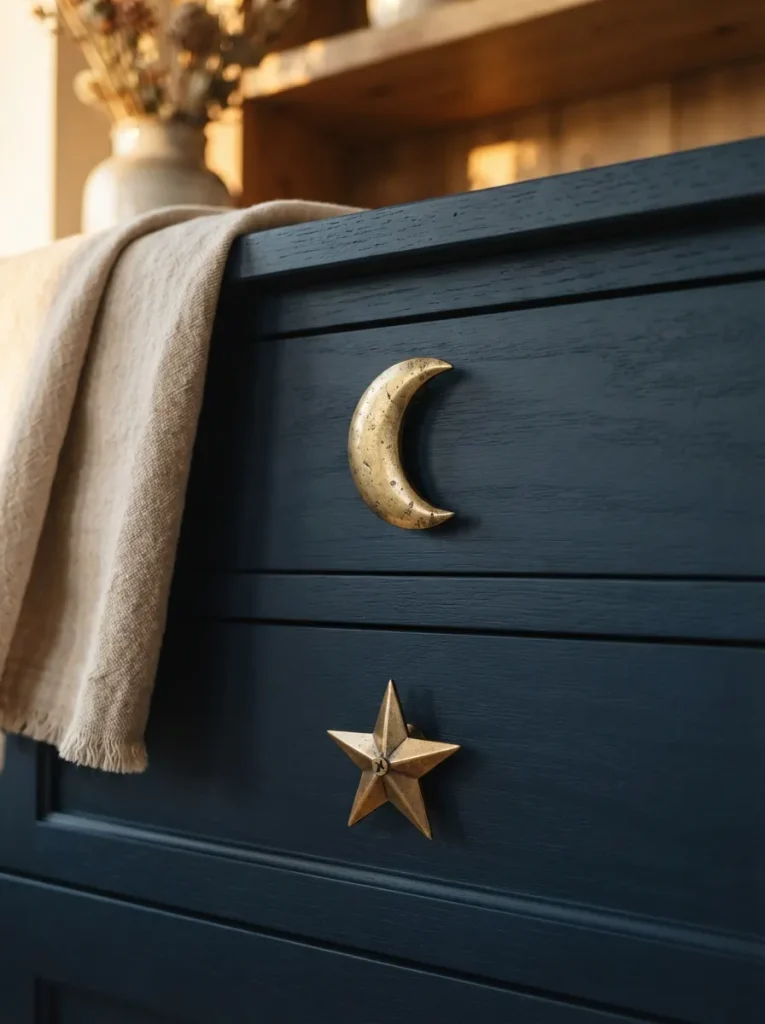
What it looks like: A small detail that changes how a whole piece reads without a drop of paint.
Why it works: Hardware functions as jewelry for furniture it’s the detail people notice up close even when they can’t name why a piece feels finished. Star and moon shapes tie the theme in without committing an entire surface to it.
How to copy it: Measure existing hardware spacing before ordering replacements, since most standard dressers use either 3-inch or 3.75-inch spacing between screw holes. Swap pulls with a basic screwdriver no tools beyond that are needed.
Best for: Renters or commitment-averse decorators who want the theme in without a big project.
Mistake to Avoid: Ordering hardware before measuring existing screw spacing is the single most common return reason always measure first, even if the new pulls look like a universal fit.
Last one, and it’s the piece that ties every other idea on this list together.
13. Glitter Constellation Lampshade
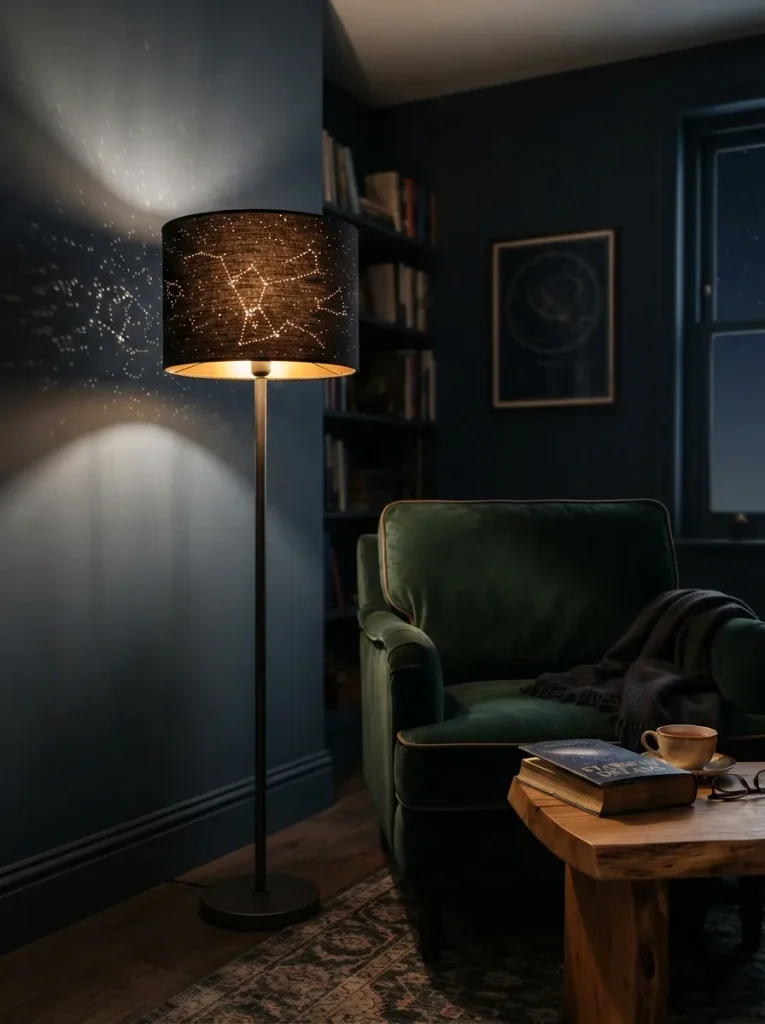
What it looks like: A lamp that projects its own tiny sky onto the ceiling and walls once the room goes dark.
Why it works: Light-through-perforation is the same principle behind a pinhole camera small, precisely placed holes control exactly where light escapes, turning a plain shade into a functional star projector rather than just a decorated object.
How to copy it: Print a constellation pattern sized to your shade, tape it around a plain black fabric or paper shade, then use a fine awl or thumbtack to punch through at every marked star point before removing the paper template.
Best for: People who want the theme to function after dark, not just look the part in daylight.
Important: A punched-hole shade needs a low-wattage bulb 40 watts or less since the fabric sits closer to the bulb than a solid shade does, and higher wattage can scorch the punched edges over time.
Shop This Look
| Product |
|---|
| Plain black fabric drum lampshade |
| Fine leather-working awl or thumbtack |
| Constellation template printable pattern |
| Low-wattage LED bulb, 40W equivalent |
| Floor lamp base, matte black finish |
How to Start Your Starry Night Craft Collection
What first? In practice, the fastest way in is a can of deep indigo chalk paint on one small surface a dresser drawer or a single mason jar. Starting with color instead of a lighting installation lets you test whether the theme actually suits the room before buying resin or fairy lights.
What mistake? The most common fixable error is going too literal printing an actual NASA photograph onto fabric or a mug instead of interpreting the palette and texture by hand. Literal astrophotography reads as a gift-shop poster; hand-mixed navy, black, and gold reads as craft.
What three items under $50? A roll of black tulle under $8, a gold metallic paint pen around $6, and a pack of battery fairy lights under $15 together, those three items cover roughly half the projects on this list.
What timeline and budget? A single small project the jars, the coasters, the string art takes an afternoon and rarely runs past $25 in materials. A full room, dresser included, realistically spans two or three weekends and lands somewhere between $80 and $200 depending on what furniture is already on hand.
Ready to Bring the Cosmos Home?
Between the resin coasters, the painted dresser, and that ceiling star map, these 13 ideas cover color, texture, and light not just one look repeated thirteen times. None of it needs to happen this weekend; one mason jar on a shelf is still progress toward the whole thing.
Start today with the smallest project on this list the string art or a single painted jar and see how it feels in the room before going bigger. There’s something calming about a space that borrows its palette from the night sky instead of fighting for brightness all day. Save this one before it disappears into your feed you’ll want the resin coaster steps again the next time you’re staring at a blank Saturday.
You Might Also Like
- 15 DIY Wall Art Ideas for a Reading Nook on a Budget
- 12 Moody Bedroom Ideas That Still Feel Cozy
- 9 Easy Resin Crafts for Beginners to Try This Weekend