17 Craft Closet Ideas That Actually Solve the Chaos (Not Just Hide It)
A craft closet is really just one thing: a system that lets you find the glue gun in under ten seconds. This roundup walks through 17 craft closet ideas that turn a jammed cabinet into a space you actually want to open, covering everything from shelving zones to lighting fixes.
There’s a particular kind of relief that comes from opening a closet and seeing everything in its place no digging, no loose ribbon spilling onto the floor. No guessing. Good storage has a rhythm to it: labeled bins, visible surfaces, a spot for every stray brad and washi tape roll. It feels less like organizing and more like giving your hobby room to breathe. Once the system clicks, you’ll wonder why you tolerated the chaos this long.
Jump To
- Why Craft Closet Organization Makes Such a Difference
- 17 Craft Closet Ideas Worth Trying
- How to Start Your Craft Closet Transformation
- Ready to Create Your Dream Craft Closet?
Why Craft Closet Organization Makes Such a Difference
Craft closet organization comes down to visibility and zoning grouping supplies by project type rather than by shape or size, so paint sits near brushes and ribbon sits near scissors. Right now, with more people running small craft businesses and Pinterest-driven DIY projects from home, a functional closet matters more than ever.
Materials that hold up here are clear acrylic bins, stackable canvas totes, and pegboard anything that keeps contents visible without opening five containers to find one spool of thread. In a small closet, prioritize vertical space first; floor space fills up fast, but wall and door space rarely gets used.
| Best starting point | Sorting supplies into 4–6 project-based zones |
| Biggest impact area | Vertical wall and door storage |
| Budget to start | $50–$150 for bins, labels, and a pegboard |
| Time to complete | One weekend for a full closet |
17 Craft Closet Ideas Worth Trying
1. Fix the Overflow First: A Zone-Based Craft Closet Shelving System
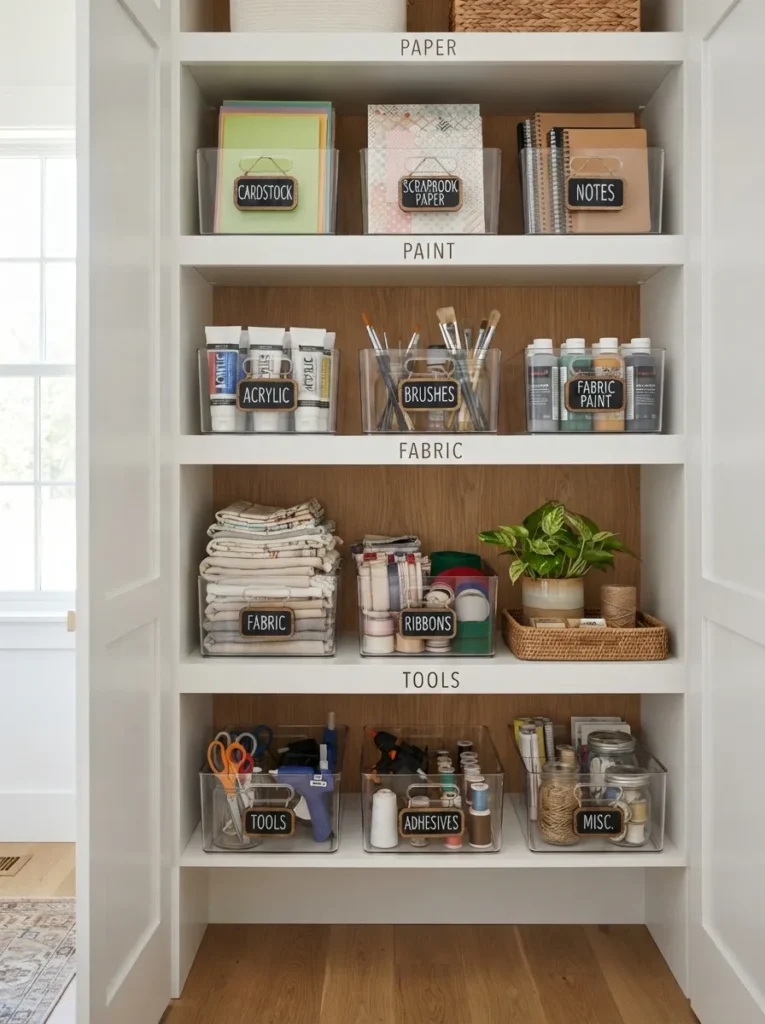
What it looks like: Shelves read like a library, not a junk drawer each zone visually distinct, nothing stacked past eye level.
Why it works: Zoning taps into a simple design principle proximity. Grouping by project type instead of container size means your hands go straight to what they need instead of scanning six shelves.
How to copy it: Sort everything into four to six categories first paper, paint, fabric, tools, embellishments, works-in-progress before you buy a single bin. Assign each category its own shelf, and keep the zone you use most at chest height, not on the floor or top shelf.
Best for: Anyone starting from a fully jammed closet who needs a system, not just new bins.
Zone-Setup Checklist:
- [ ] Empty the closet completely and group items by project type
- [ ] Measure your shelf depth and width before buying bins
- [ ] Assign your most-used zone to the middle shelf
- [ ] Label each zone before you put anything back
- [ ] Leave one empty shelf section for overflow
2. Solve the “I Can’t Find Anything” Problem with Clear Labeling
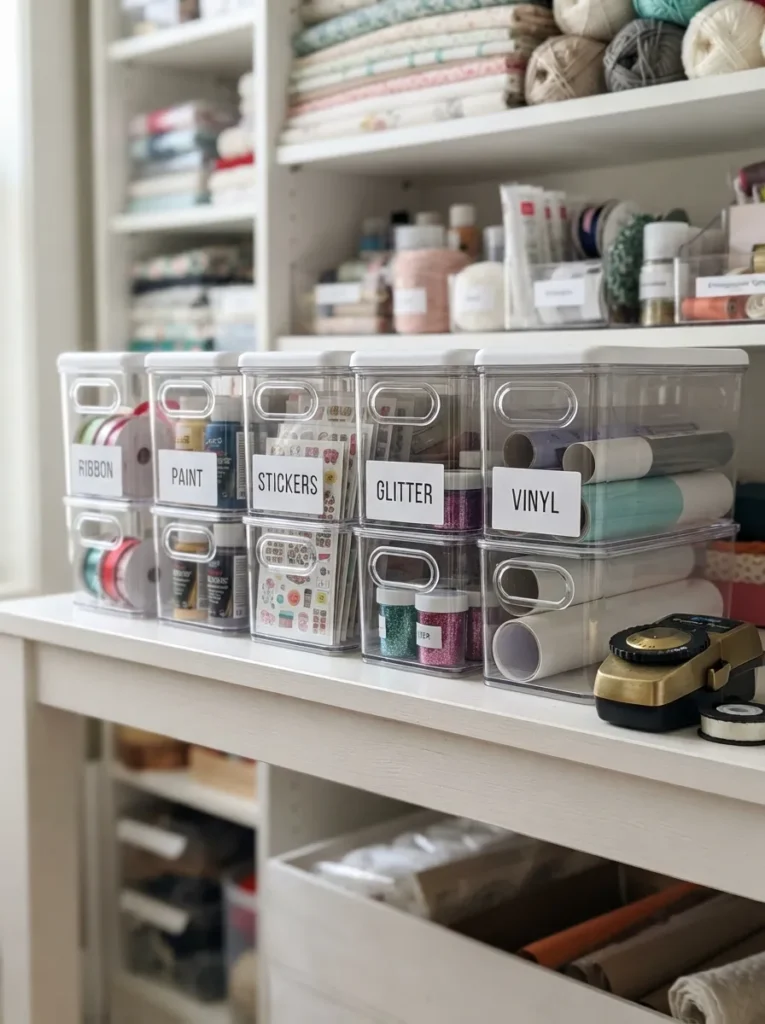
What it looks like: Every bin announces its contents before you touch it no opening three containers to find washi tape.
Why it works: This solves a visibility problem, not a storage problem the design principle here is legibility. Opaque bins hide contents and quietly encourage clutter to build up behind them.
How to copy it: Use a label maker with clear tape and black text, not handwritten cardstock, which fades and peels within a few months. Label by category, not by exact item, so bins stay useful even as your supplies change.
Best for: Visual organizers and anyone tired of digging through unlabeled totes.
Pro Tip: Label the front AND the short side of each bin closet shelves are often deeper than they are wide, so a side label saves you from pulling bins out just to read them.
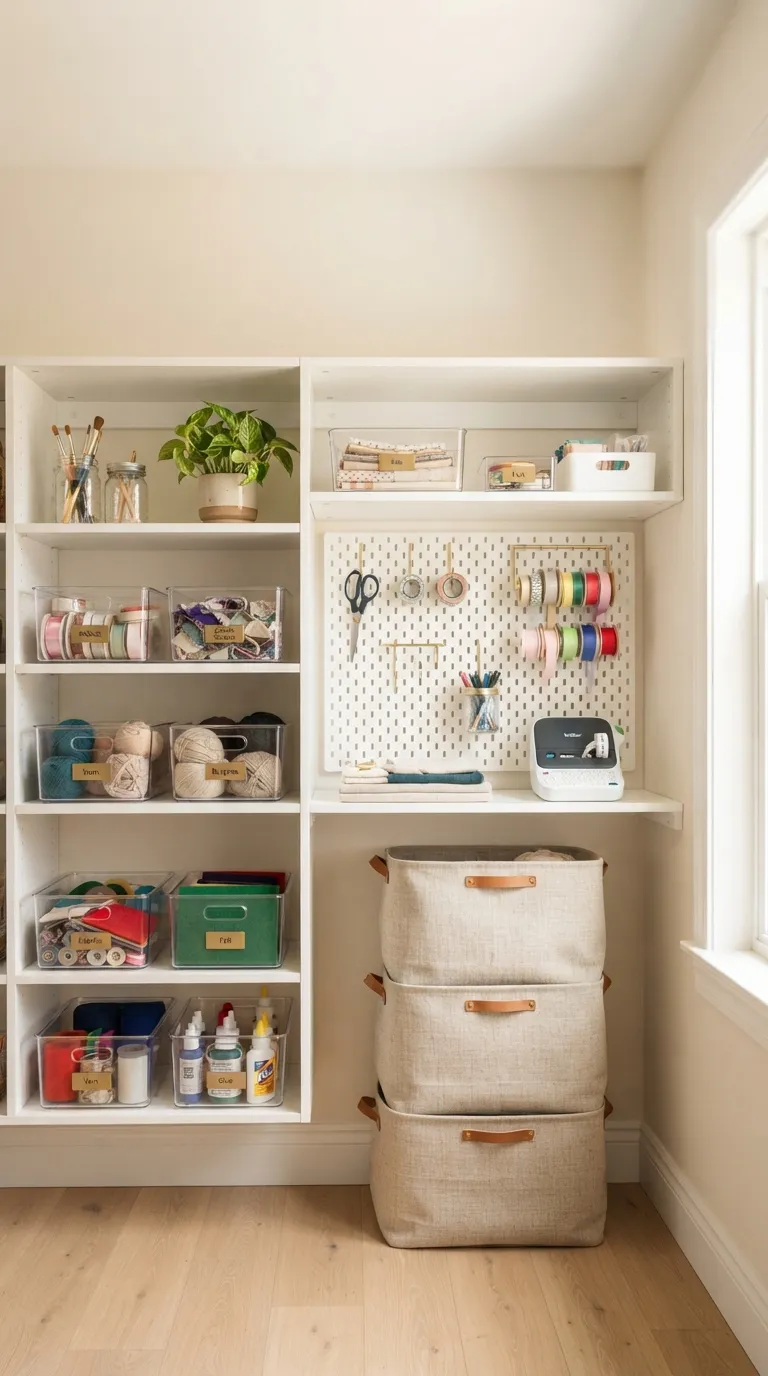
3. A Pegboard Wall for Tools, Ribbon, and Scissors
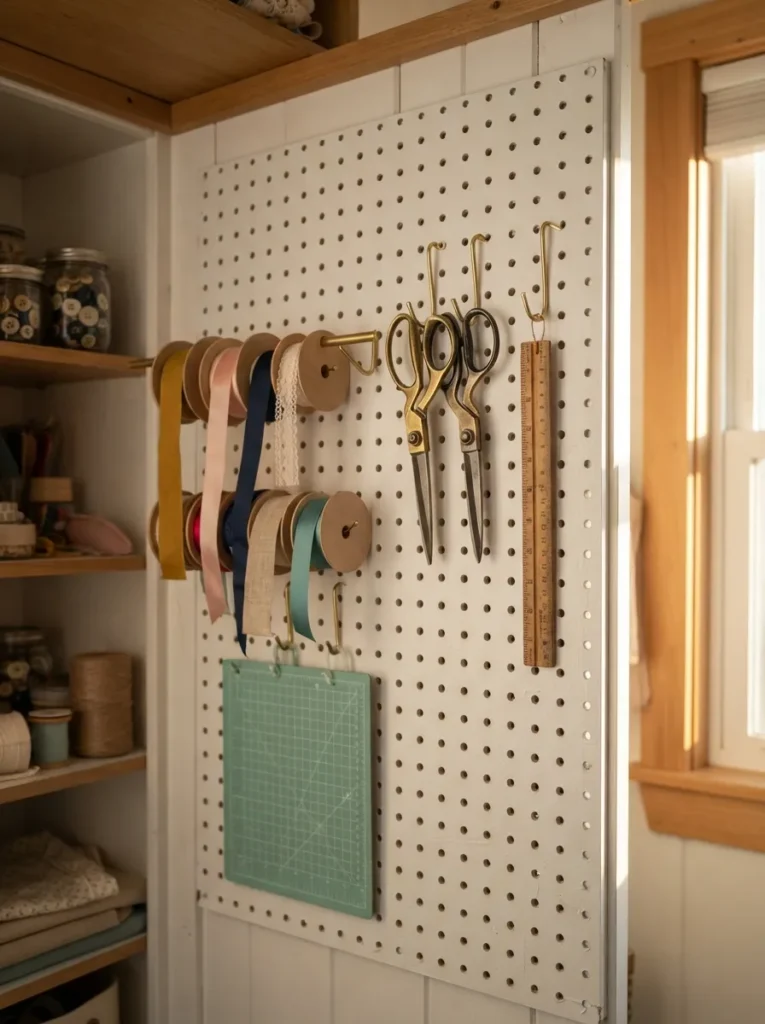
What it looks like: Tools hang mid-air instead of buried in a drawer the whole wall doubles as inventory you can see at a glance.
Why it works: Pegboard uses vertical wall space that most closets waste entirely, applying the principle of visual accessibility tools you can see, you actually put back.
How to copy it: Paint the pegboard to match your closet trim so it reads as built-in rather than garage-style, and space hooks based on your actual tools rather than filling every hole. Reserve the bottom third for a small shelf ledge to catch loose items.
Best for: Anyone who works standing at a craft table and needs tools within arm’s reach.
Quick Win: A $12 pegboard panel cut to fit inside a standard closet door adds usable storage without touching your shelving at all.
The next idea costs less than a coffee run and solves one of the most common small-supply headaches.
4. Clear Acrylic Drawer Organizers for Small Craft Closet Supplies
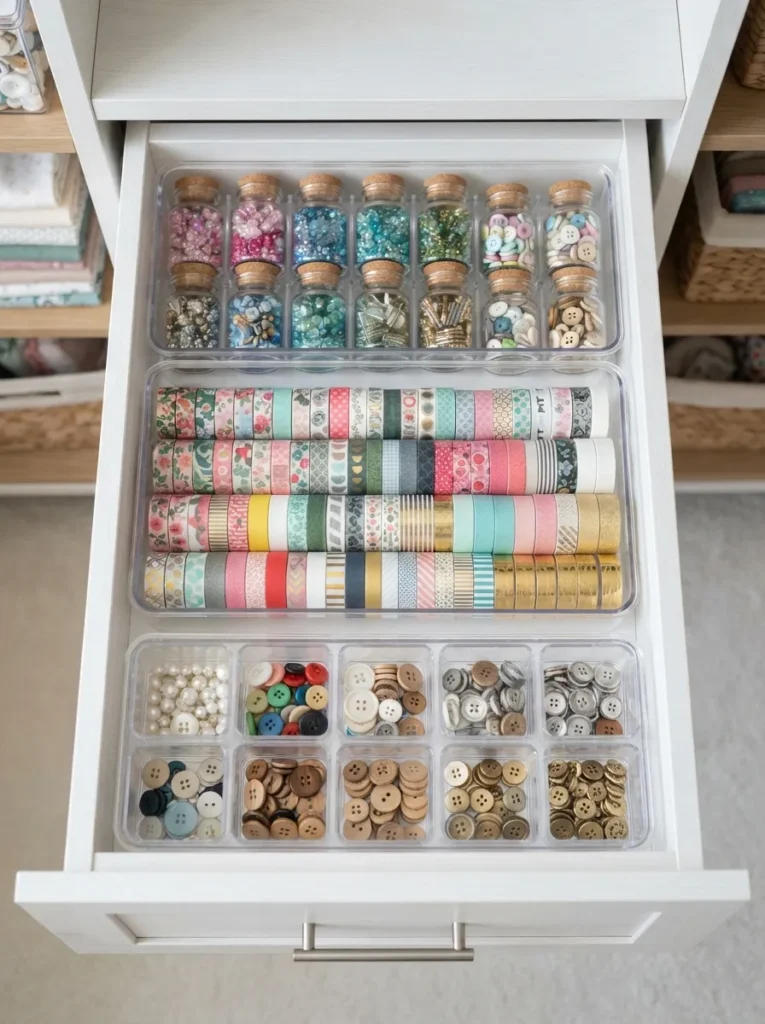
What it looks like: A drawer that looks curated rather than crammed every small item visible through the acrylic instead of piled underneath larger supplies.
Why it works: Small supplies get lost because they lack their own footprint. Dividers create fixed positions, basic spatial organization that gives each item exactly one home.
How to copy it: Measure your drawer before ordering most craft drawers run shallower than kitchen drawers, so a standard 2-inch divider height usually fits better than a 4-inch one. Group by function (adhesives, fasteners, embellishments) rather than by color.
Best for: Detail-oriented crafters with a lot of small, easily-lost supplies.
Warning: Buying dividers before measuring your drawer depth is the single most common mistake here a 4-inch acrylic tray in a 2.5-inch drawer won’t close, and you’ll be stuck returning the whole set.
What You’ll Need:
| Product |
|---|
| Clear acrylic drawer divider set, adjustable width |
| Small stackable bead organizer with lid |
| Upright washi tape dispenser rack |
| Shallow drawer liner, non-slip |
| Mini labeling stickers for compartments |
5. A Rolling Cart for Overflow and In-Progress Projects
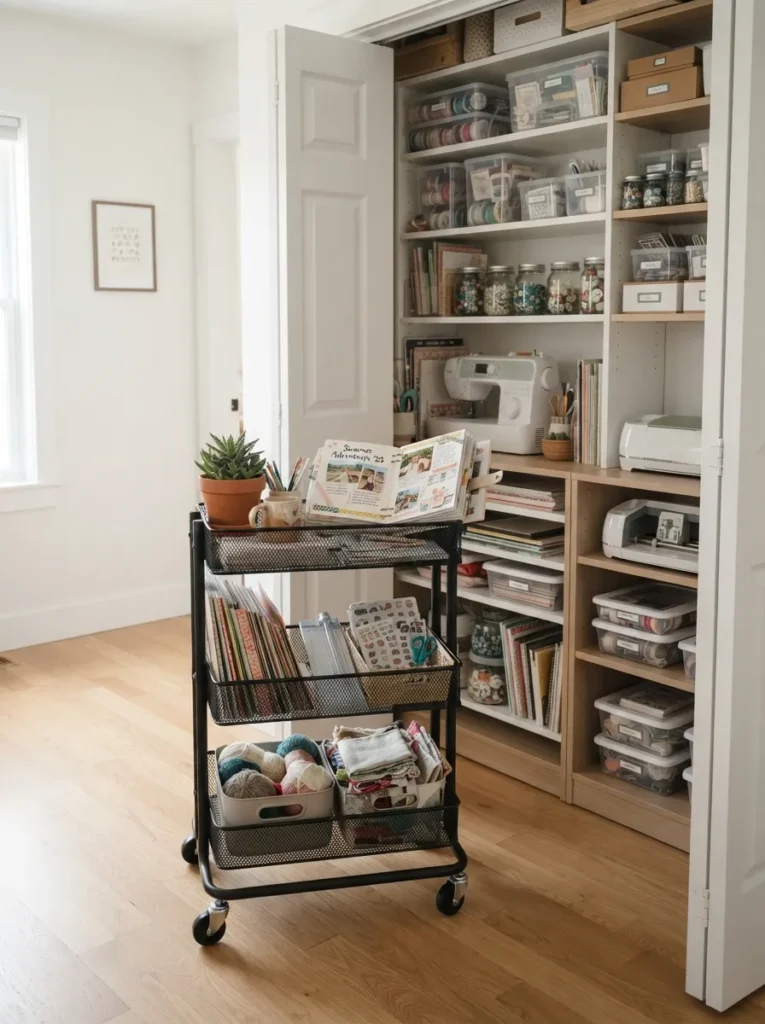
What it looks like: A cart that rolls out into the light when you’re working and tucks back into the closet when you’re done nothing left permanently on the floor.
Why it works: Overflow rarely fits neatly on a fixed shelf, so a mobile piece solves the mismatch between fixed storage and fluctuating project volume flexibility, not just extra square footage.
How to copy it: Choose a cart narrower than your closet opening so it slides in without scraping the door frame, and dedicate the top tier only to whatever project is currently active. Bottom tiers can hold true overflow.
Best for: People juggling multiple projects at once who need flexible, movable storage.
Small-Space Tip: A cart on wheels effectively adds a fourth shelf to a small closet without permanent installation measure the closet width, not just the depth, before buying.
6. Color-Coded Bins Sorted by Project Type
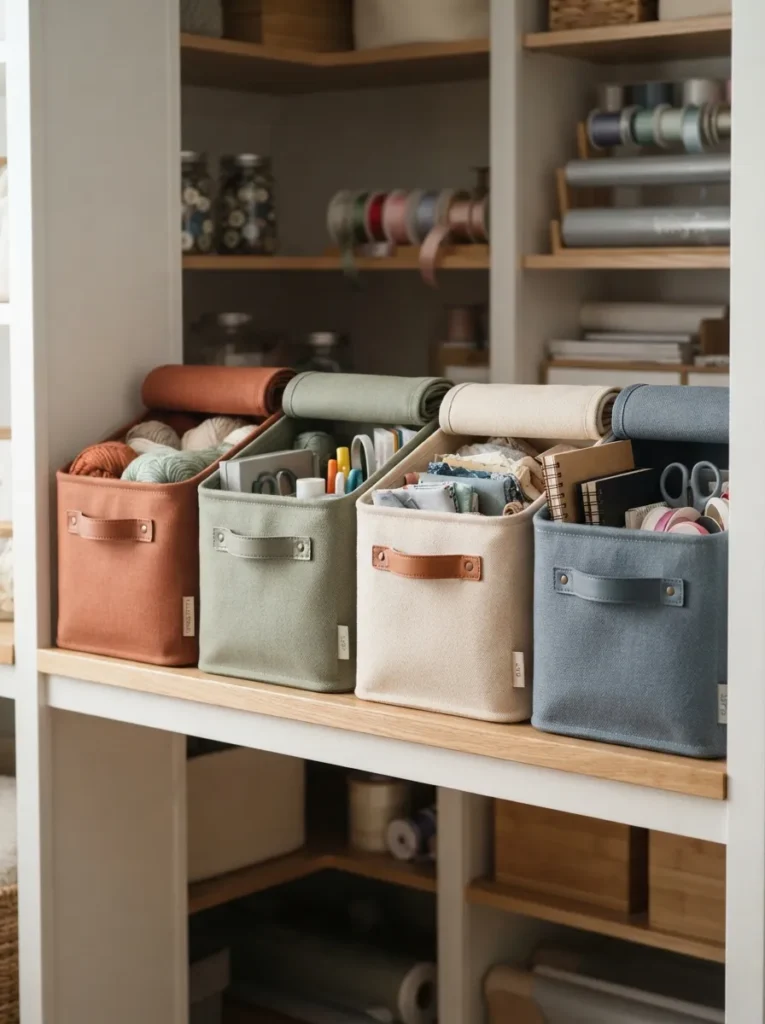
What it looks like: One glance tells you which bin holds what color does the sorting work before you even read a label.
Why it works: Color coding uses visual shorthand, a principle where color substitutes for text and processes faster than reading labels from across a room.
How to copy it: Assign one color per broad category terracotta for fabric, sage for paper and stick with it across every bin type you own, including smaller drawer organizers. Consistency matters more than the colors themselves.
Best for: Visual thinkers and households where more than one person uses the closet.
Budget Version: Canvas bins under $15 each from a big-box store work just as well as designer versions the color system is what does the heavy lifting, not the price tag.
Up next: the storage trick most people never think to use for flat paper.
7. A Vertical Rack for Cardstock and Patterned Paper
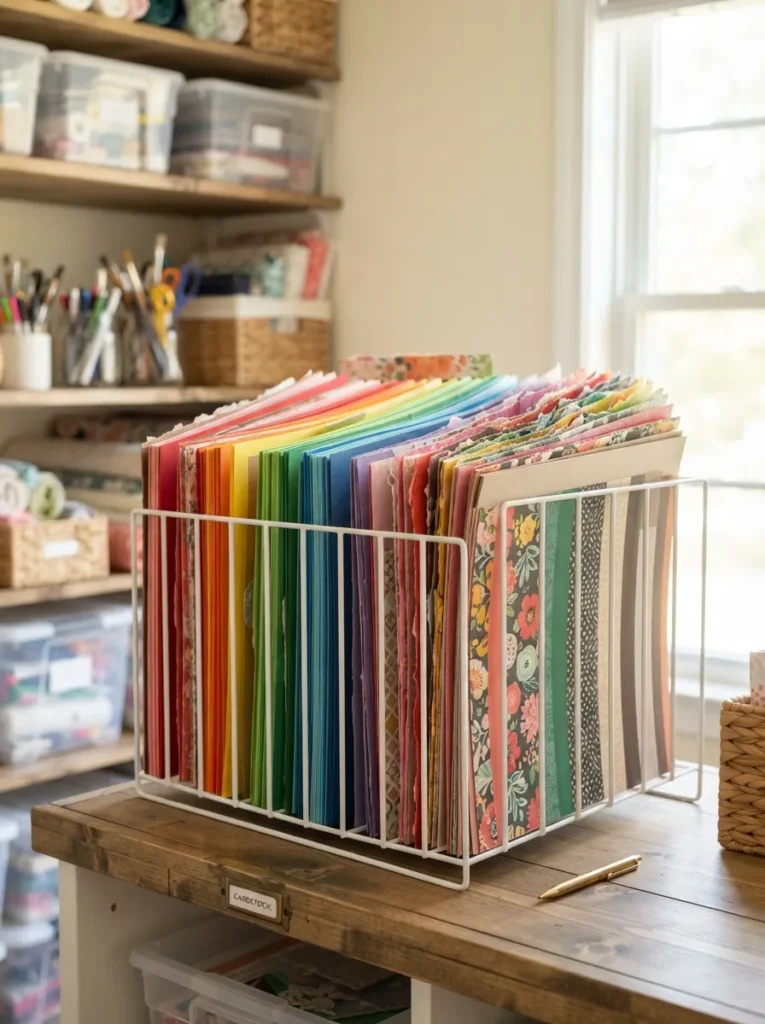
What it looks like: Paper stands upright like records in a crate instead of lying flat in a stack you have to lift through.
Why it works: Flat stacking hides everything below the top sheet. Vertical storage applies the same logic as a filing cabinet, giving every sheet its own visible edge.
How to copy it: Use a rack sized for 12×12 paper even if most of your stock is smaller it’s easier to add a divider for smaller sizes than to upgrade a rack later. Sort by color family, not by paper brand.
Best for: Scrapbookers and card-makers working with large paper stock.
Important: Most people assume vertical racks need a full shelf of clearance in practice, a rack this size fits in as little as 6 inches of depth, often the wasted gap beside a closet door.
8. Under-Shelf Baskets for Odd-Shaped Supplies
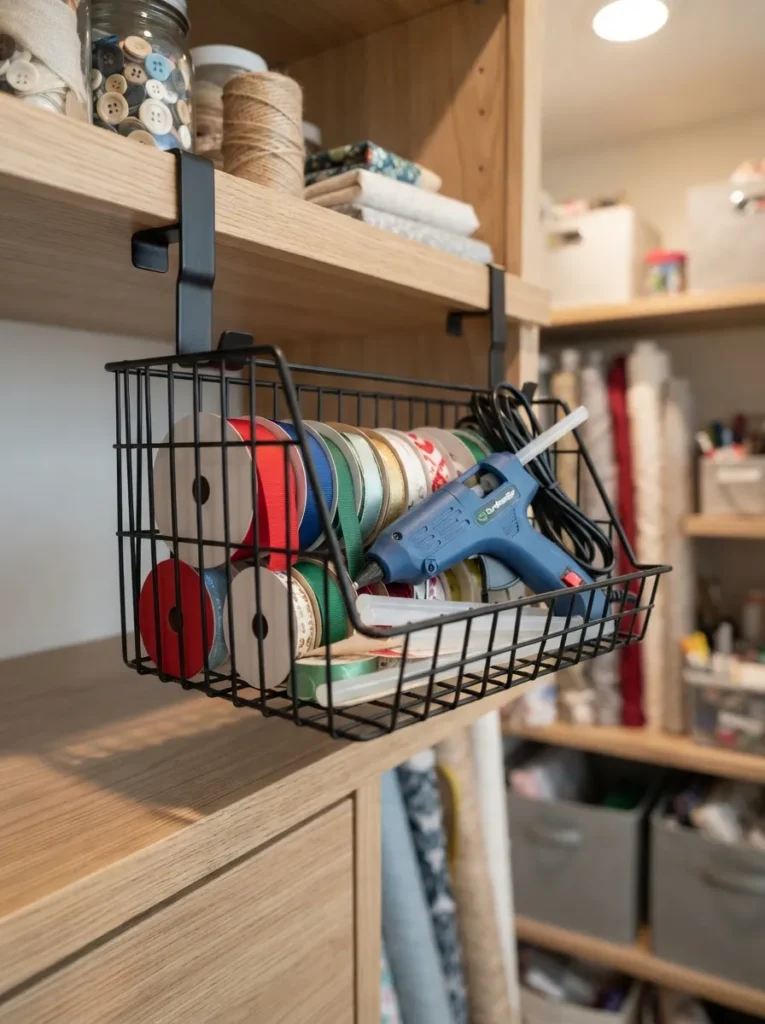
What it looks like: A basket floats in what used to be dead air beneath the shelf odd-shaped tools finally have a home instead of a junk pile.
Why it works: Under-shelf space almost always goes unused. Clipping in a basket reclaims that negative space, one of the easiest wins in small-closet organization.
How to copy it: Choose a basket depth that clears whatever sits on the shelf above it by at least an inch, and reserve this spot for items too awkward to stack glue guns, tape rolls, hole punches.
Best for: Small closets where every inch of dead space needs a job.
Styling Note: Matte black wire baskets read as intentional rather than makeshift a small detail that keeps this fix from looking like a garage hack.
9. Repurposed Mason Jars for Beads, Buttons, and Brads
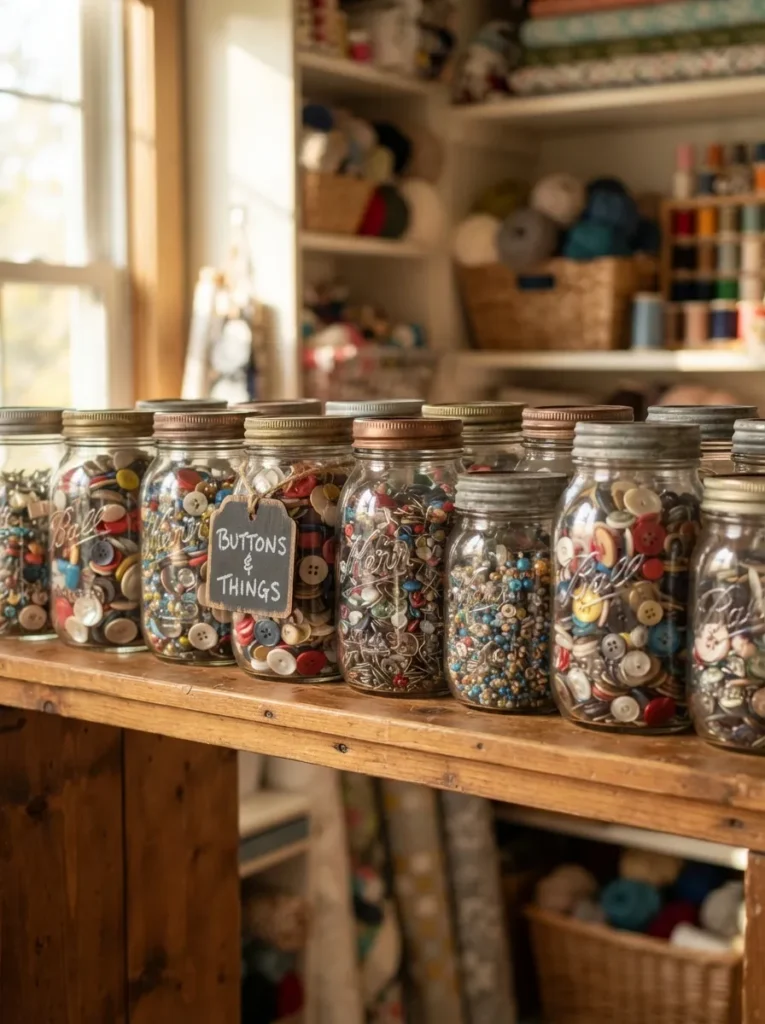
What it looks like: Contents glow through the glass like a mini pantry for embellishments nothing hidden, nothing lost at the bottom of a drawer.
Why it works: Glass solves the same visibility problem acrylic dividers do, just at a smaller scale transparent storage removes the need to open a container to identify what’s inside.
How to copy it: Reuse jars you already have rather than buying new ones pasta sauce and jam jars work fine once labels are soaked off. Screw the lids to the underside of a shelf for an even more compact version if shelf space is tight.
Best for: Budget-conscious crafters with small embellishments and a few empty jars on hand.
Quick Win: Hot glue a jar lid to the underside of a shelf, let it dry, then screw the jar in from below instant hanging storage with zero hardware cost.
What You’ll Need:
| Product |
|---|
| Wide-mouth glass mason jars, 16 oz |
| Small chalkboard label tags with string |
| Metal jar lid shelf-mount hardware |
| Mini funnel for pouring loose beads |
| Narrow floating shelf for jar display |
This next one changes how the whole closet feels once the sun goes down.
10. Battery-Powered LED Strips for a Dark Closet
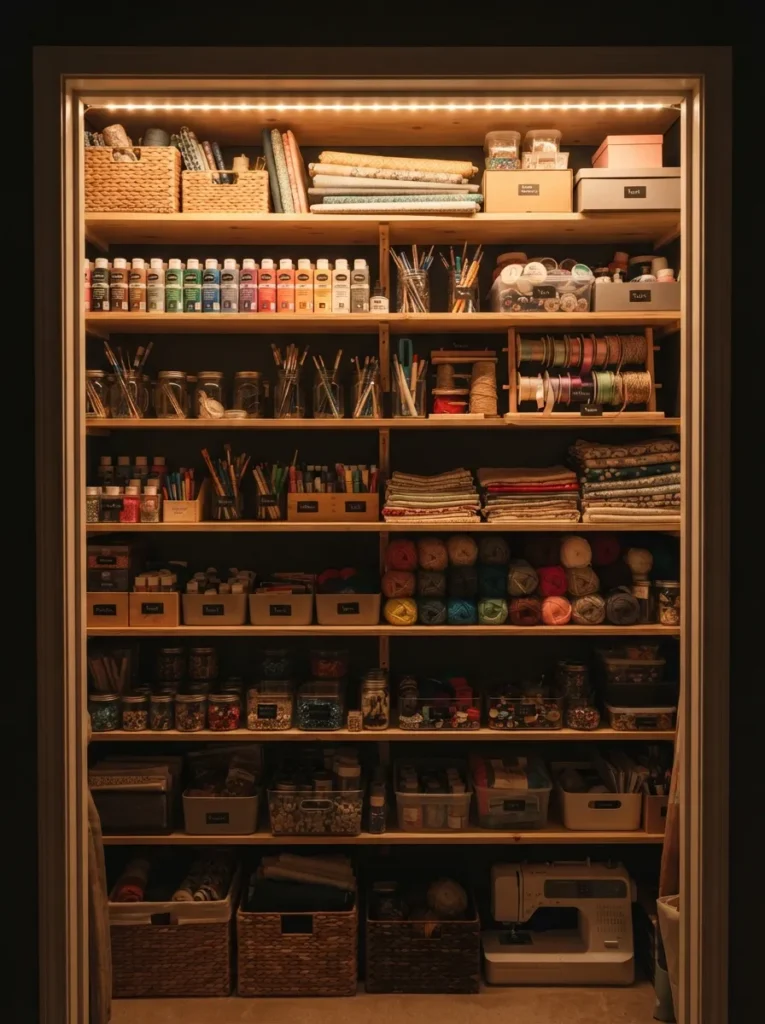
What it looks like: The back of the closet finally looks like part of the room instead of a shadowed gap you squint into.
Why it works: Most closets rely on a single ceiling bulb, leaving lower shelves in shadow. Layered lighting fixes uneven distribution, a basic principle of good task lighting.
How to copy it: Mount a battery-powered LED strip along the underside of the top shelf rather than the ceiling, angled down, so light reaches the shelves below instead of just the top. Choose warm white, around 2700K, not cool white, so colors read accurately.
Best for: Closets without a built-in light fixture or with poor overhead placement.
Pro Tip: Battery-powered strips with a motion sensor turn on automatically when you open the door, which matters more than brightness once you’re reaching in with both hands full.
What You’ll Need:
| Product |
|---|
| Battery-powered LED light strip, motion sensor |
| Warm white 2700K puck lights, adhesive-mount |
| Rechargeable AA batteries for light strips |
| Cordless under-shelf light bar |
| Dimmable closet light with remote |
11. Neutral Fabric Bins for a Calmer-Looking Closet
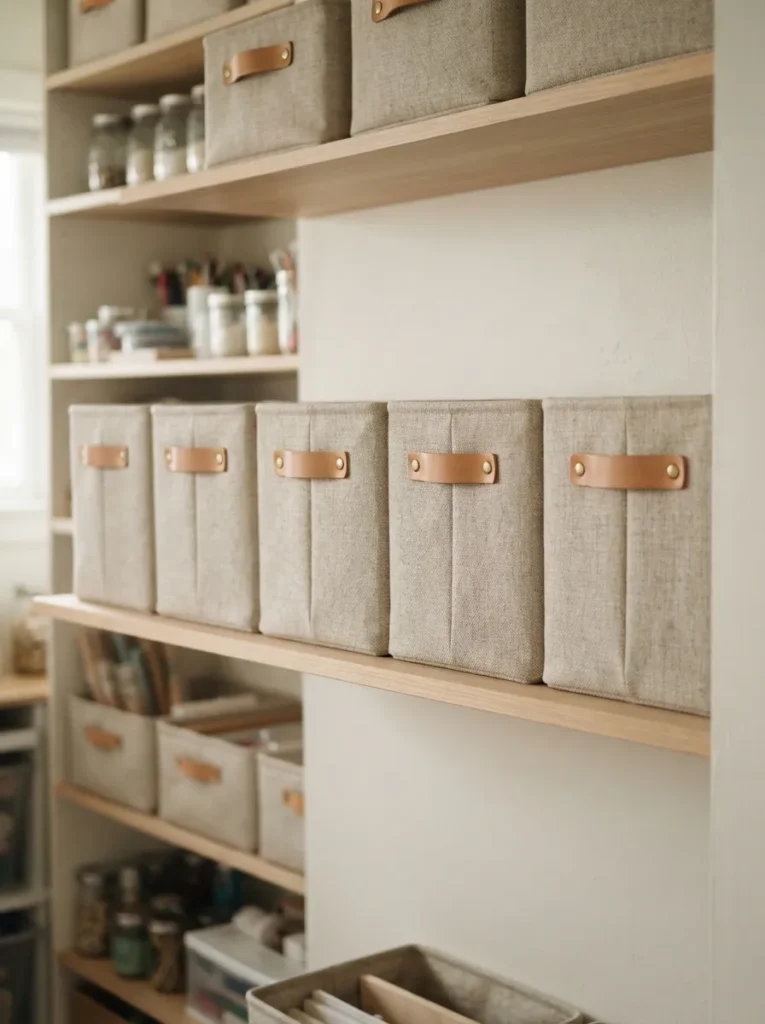
What it looks like: The shelf reads as one calm block of color instead of a patchwork of mismatched containers.
Why it works: Visual noise builds fast in a craft closet because supplies are naturally colorful. Neutral bins create a quiet backdrop contrast that lets the room feel settled even when it’s packed.
How to copy it: Choose one neutral oatmeal, warm white, or soft gray and buy every bin in that same tone, even if it means replacing mismatched ones you already own. Save color coding for the labels instead of the bins themselves.
Best for: Anyone who wants the closet to look tidy from the doorway, not just when the door’s open.
Mistake to Avoid: Mixing a “neutral” bin from one store with a slightly different “neutral” from another rarely matches once they’re side by side buy the full set from a single product line if consistency matters to you.
12. A Magnetic Board for Scissors and Small Metal Tools
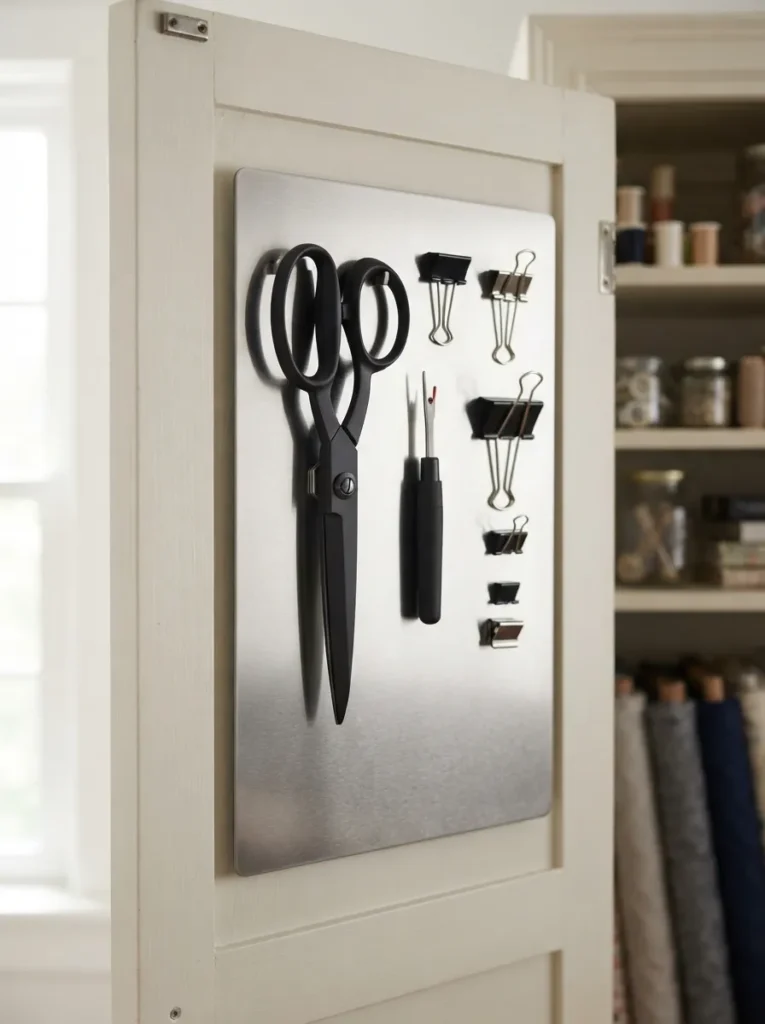
What it looks like: Tools hang flat against the door, visible and grabbable, instead of loose in a drawer where blades nick everything else.
Why it works: Magnetic storage solves a safety and visibility problem at once sharp tools stay contained without a case, and the flat door surface is otherwise wasted space.
How to copy it: Mount the board at a height where you can reach it without opening the closet fully, and stick to metal tools only magnets won’t hold plastic-handled scissors or wooden tools.
Best for: Anyone storing scissors, seam rippers, or metal punches loose in a drawer right now.
Budget Version: A $10 magnetic knife strip from the kitchen aisle works identically to a craft-branded version mount it vertically on the door for the same result at a fraction of the price.
The next idea is the one that finally gives bulk supplies a real home instead of a pile on the floor.
13. Stackable Clear Totes for Bulk Fabric in a Craft Closet
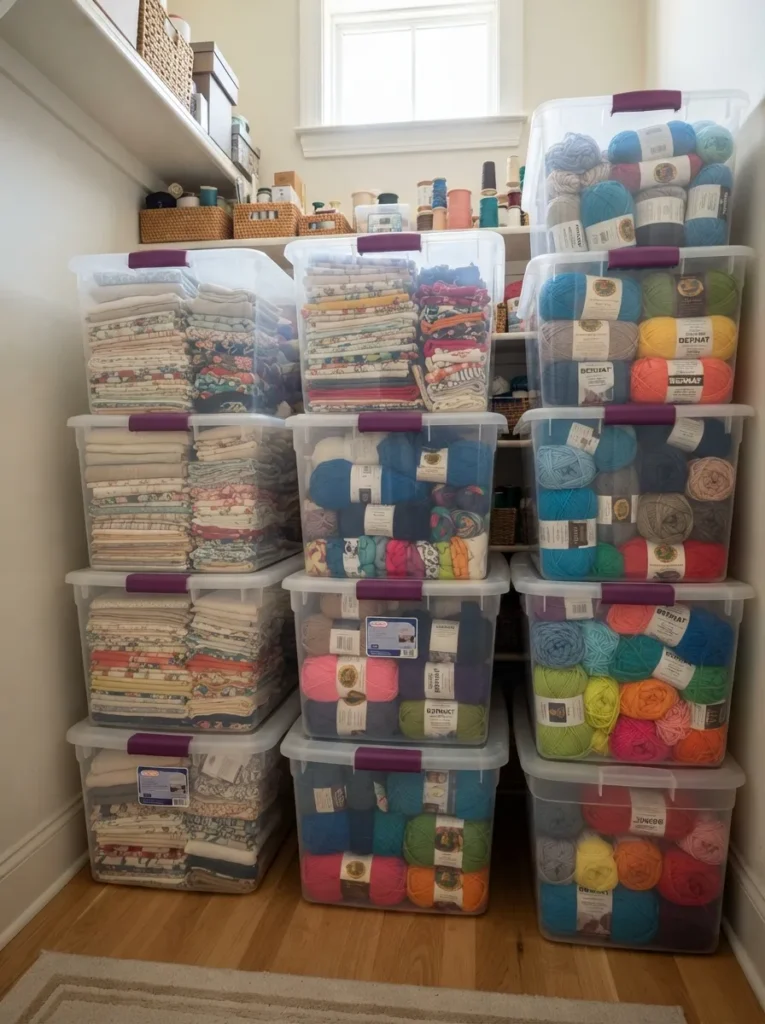
What it looks like: Bulk supplies stack into a clean column instead of spreading across the closet floor in loose piles.
Why it works: Stacking uses vertical volume instead of floor footprint, and clear plastic keeps the visibility principle intact even for bulk items you’d otherwise store in opaque bags.
How to copy it: Buy totes with locking lids, not just snap-on ones, if you’re stacking more than three high lighter totes shift and can topple. Keep the tote you access most often on top, not the bottom of the stack.
Best for: Crafters with quilting fabric, yarn stashes, or bulk seasonal supplies.
Warning: Stacking totes without locking lids past three high is a common cause of closet floor spills the top tote’s weight flexes non-locking lids just enough for them to pop open.
What You’ll Need:
| Product |
|---|
| Clear stackable storage tote with locking lid |
| Fabric bolt storage box, clear front |
| Yarn skein organizer bag, see-through |
| Heavy-duty tote wheels for floor stacks |
| Moisture-absorbing packets for fabric totes |
14. A Door-Mounted Organizer for Ribbon and Tape
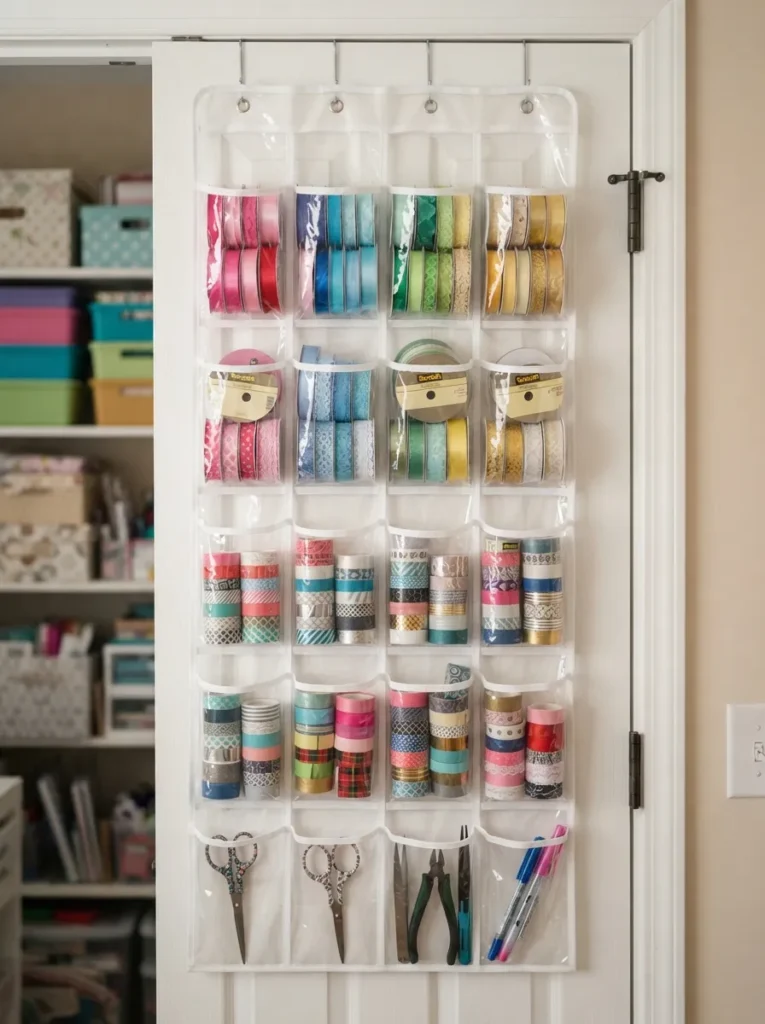
What it looks like: The back of the door turns into its own mini shelf system, holding small rolls that usually end up loose in a bin.
Why it works: Door space is almost always ignored in closet planning, even though it sits within arm’s reach every time the door opens this reclaims it using the same visibility principle as clear bins.
How to copy it: Measure your door’s swing clearance before installing anything deeper than 3 inches, since a too-deep organizer will catch on shelving when the door closes. Reserve the top pockets for what you reach for most.
Best for: Tight closets where shelf space ran out before the ribbon collection did.
Small-Space Tip: Over-door organizers add storage without touching a single shelf ideal once you’ve already maxed out interior space and don’t want to sacrifice floor room for a cart.
My Views:
Here’s something most guides won’t tell you: the closets that stay organized aren’t the ones with the most bins they’re the ones with one empty shelf. In actual projects, I’ve watched perfectly labeled systems collapse within two months because every inch got filled on day one. Leave roughly 15% of your shelf space empty on purpose; it’s where new supplies land until they earn a permanent spot, instead of getting shoved wherever they fit.
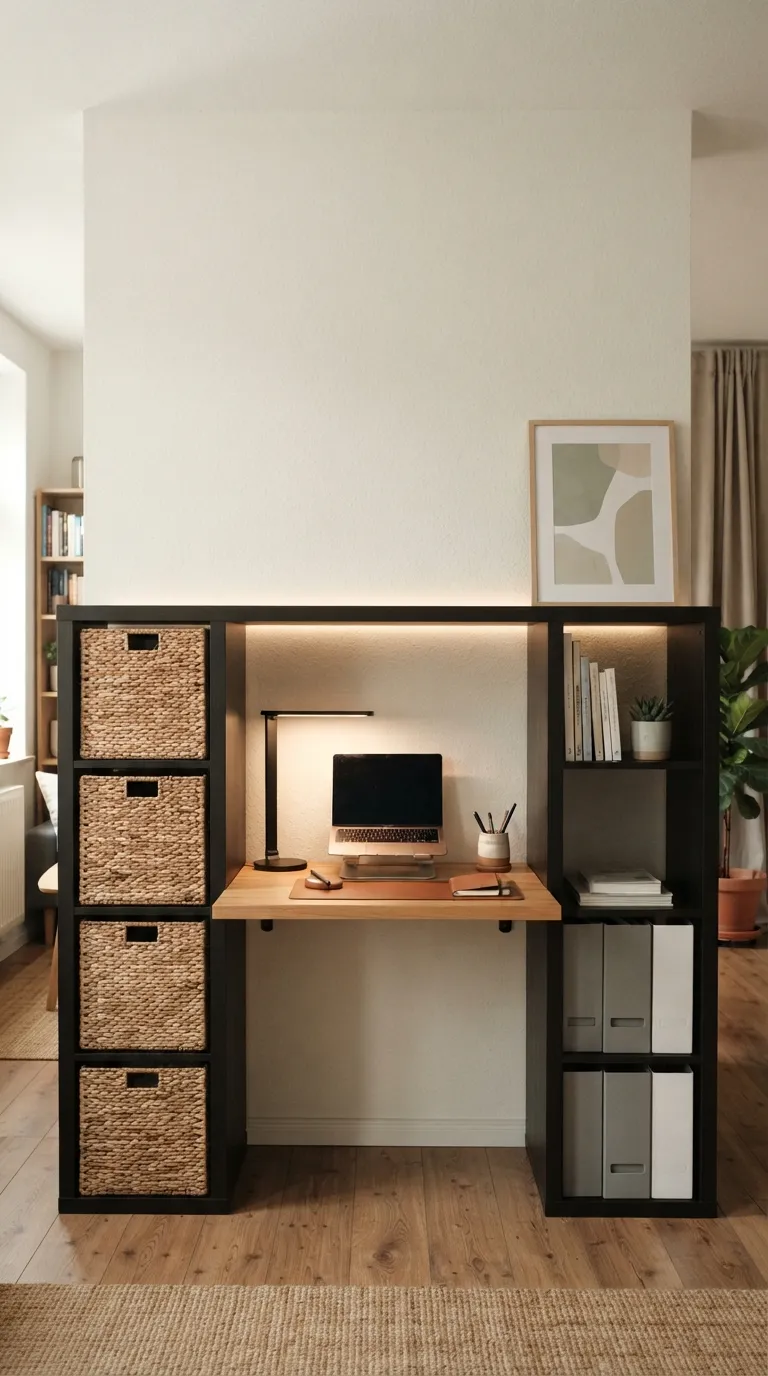
15. A Fold-Down Table for a Micro Workspace
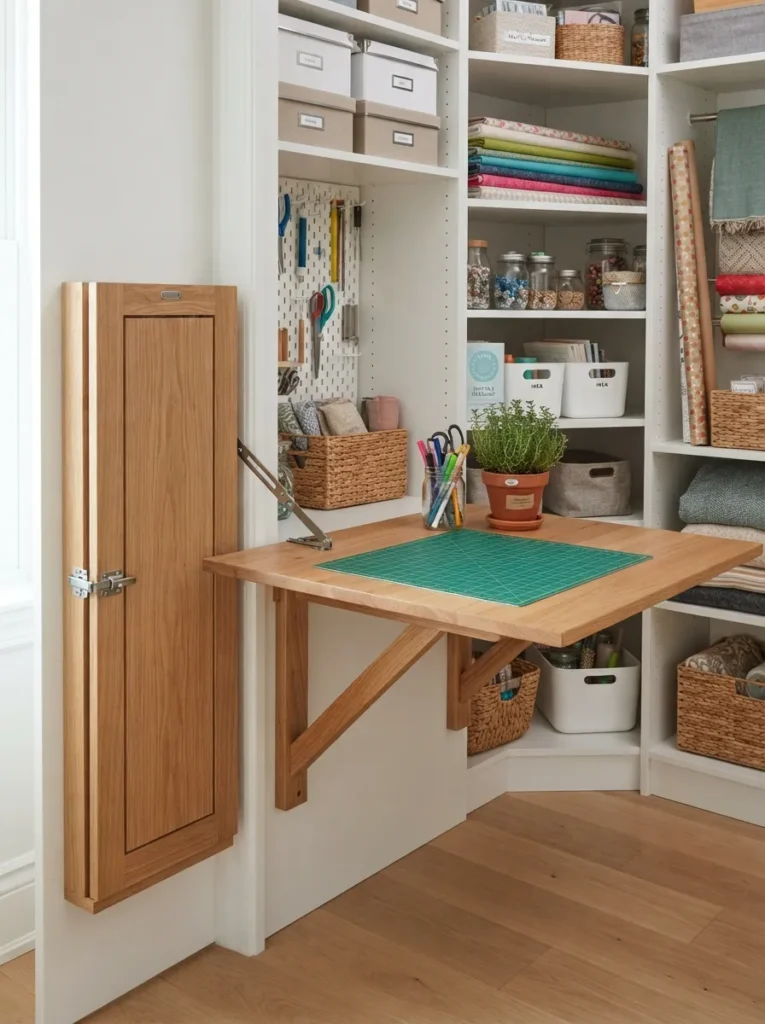
What it looks like: A worktop appears out of what used to be blank wall space, then folds flat again the moment you’re done.
Why it works: This solves the tension between wanting a workspace and not having a spare room a fold-down surface uses the same footprint twice, once for storage and once for work.
How to copy it: Mount the table at standard counter height, 36 inches, if you’ll stand to work, or 30 inches if you’ll sit. Choose a bracket rated for at least 25 pounds so it holds a cutting mat and supplies without sagging.
Best for: Anyone without a dedicated craft room who needs an occasional flat surface.
Styling Note: A tabletop in a warm wood tone reads as furniture rather than hardware store shelving worth the small upcharge if the closet door stays open often.
The last two ideas tie everything above together starting with the one detail most closets get wrong.
16. Task Lighting Aimed Directly at the Work Surface
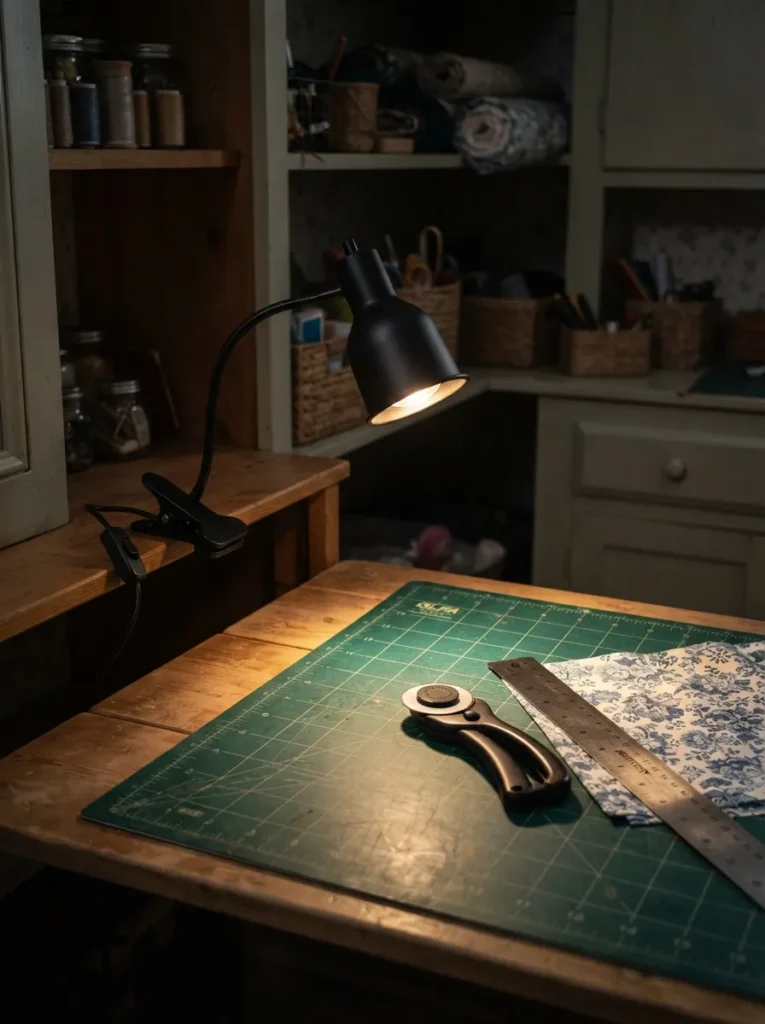
What it looks like: One bright, deliberate pool of light sits exactly where your hands are working everywhere else stays soft and dim.
Why it works: General closet lighting illuminates the whole space evenly, but detail work needs directional light without shadows from your own hands a task-lighting principle designers apply in kitchens too.
How to copy it: Clip the lamp to a shelf edge above and slightly behind your dominant hand, not directly overhead, so your hand doesn’t cast a shadow across your work. A 400–500 lumen bulb is usually enough for a closet-sized surface.
Best for: Anyone doing detail work cutting, stamping, small assembly inside the closet itself.
Important: Most people assume brighter is always better for task lighting, but a lamp placed directly overhead creates a shadow from your own hand position matters more than wattage here.
17. A Seasonal Rotation System to Control Volume
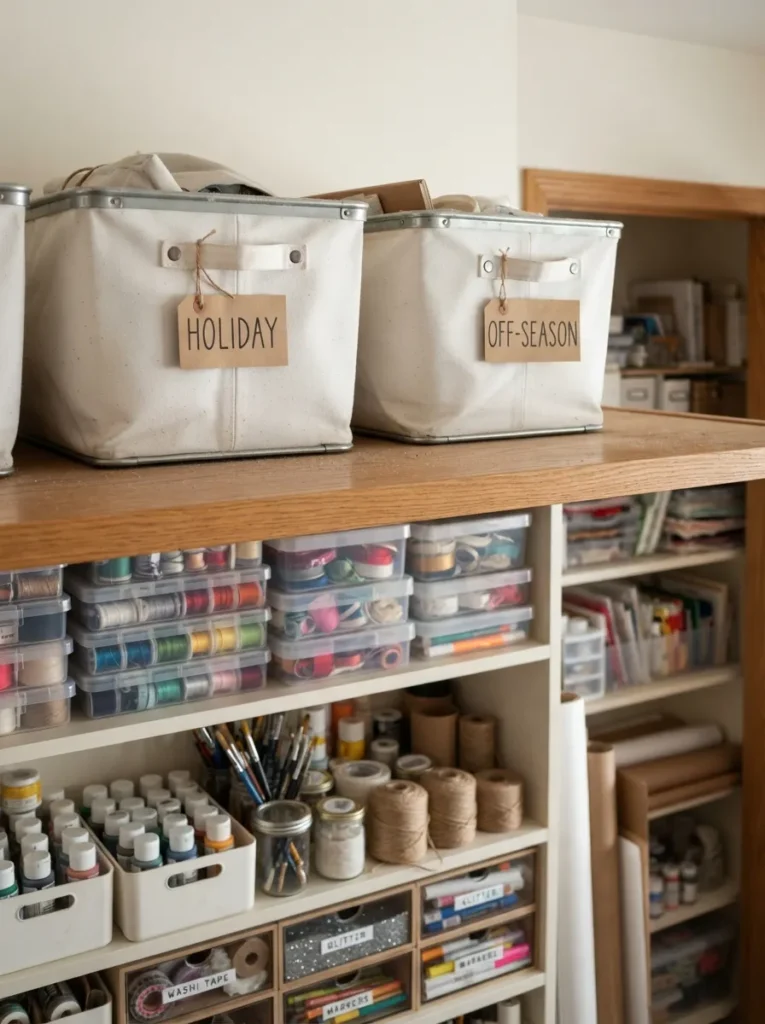
What it looks like: The everyday zones stay lean because everything seasonal gets pushed to the top, out of daily rotation entirely.
Why it works: Craft supplies grow faster than any closet can. Rotation isn’t storage, it’s volume control the same principle museums use when they swap exhibits instead of displaying everything at once.
How to copy it: Twice a year, pull down the top-shelf bins and swap in whatever’s currently seasonal, moving the rest to an attic or basement if you have one. Anything unused for two full rotations is a strong candidate to donate.
Best for: Anyone whose closet re-fills within weeks of organizing it.
Mistake to Avoid: Storing “maybe someday” supplies in the same zones as active projects is the fastest way back to overflow if it hasn’t been touched in a year, it belongs in the rotation bin, not the daily shelf.
How to Start Your Craft Closet Transformation
What I’ve found with real closets is that the shelving system has to come before the bins buy organizers first and you’ll end up reshaping your zones around whatever you already purchased. Start by emptying the closet completely and installing adjustable shelving or a pegboard panel, then sort supplies into zones before a single bin gets bought. That order keeps the system built around how you actually work, not around whatever was on sale.
The most common fixable mistake is buying matching bins before measuring the shelf depth, which is why so many organized closets stall out after one shopping trip. Undersized bins get crammed two-deep, quietly recreating the exact clutter you were trying to fix. Measure first, every time even when it feels like an unnecessary extra step.
Three items under $50 make an outsized difference here: a label maker with clear tape, around $30; a set of stackable clear bins in one size, under $25 for four; and a roll of adhesive-back LED strip lighting, around $18. None require tools or installation, and all three solve visibility problems rather than just adding more storage.
A full closet transformation shelving, bins, lighting, and labeling realistically takes one full weekend if you’re starting from scratch, or a single afternoon if you’re just adding bins and labels to existing shelves. Budget $150–$300 for a complete overhaul with new shelving, or under $75 if you’re working with what you already have installed.
Ready to Create Your Dream Craft Closet?
Between the zoning system, the color-coded bins, the pegboard wall, and the lighting fixes, these 17 craft closet ideas cover almost everything that turns a chaotic closet into one that actually works for you. None of this needs to happen at once pick the zone that bothers you most and start there, since even one afternoon of sorting makes the rest of the closet easier to tackle later. Today, the smallest useful step is simply emptying one shelf and grouping what’s on it by project type nothing needs to be purchased yet.
A closet like this isn’t really about looking polished on the outside; it’s about the quiet relief of opening the door and finding exactly what you need, every time. Save your favorite ideas here so you can come back to them shelf by shelf the pegboard wall and the color-coded bins tend to be the two people pin first.
More Ideas You’ll Love
- 12 Small Closet Organization Ideas That Actually Maximize Every Inch
- 9 Craft Room Layout Ideas for a Dedicated Creative Space
- 15 Budget-Friendly Storage Solutions for Every Room in Your Home