20 IKEA Kallax Dorm Room Ideas for College Students That Actually Work
A Kallax is IKEA’s square cube shelving unit the one with the open compartments you’ve seen in a thousand dorm-tour videos and in a shared room it stops being a bookcase and starts being your entire floor plan. Here are 20 IKEA Kallax dorm room ideas built around the real constraints of college housing: no drilling, no storage unit, and a roommate three feet away.
Most dorm rooms fight you before you’ve even unpacked. Twin XL bed frame eating half the square footage, one closet split two ways, cinder block walls that reject every Command hook you own. A Kallax fixes more of that than people expect not because it’s stylish, but because it’s modular enough to become a nightstand, a room divider, a headboard, or a closet, depending on which way you turn it. That’s the shift these ideas are built around.
Quick Navigation
- Why Kallax Storage Makes Such a Difference in a Dorm
- A Bedside Kallax Instead of a Nightstand
- Splitting the Room Down the Middle
- A Painted Frame for a Non-Beige Room
- Lifting It Off the Floor With Legs
- Fabric Bins for Grab-and-Go Storage
- LED Strips Inside a Few Cubbies
- A Cushioned Bench at the Foot of the Bed
- Mixing Insert Door Colors on Purpose
- A Removable Desk Extension on Top
- Stacking Single Cubes in a Narrow Gap
- A Labeled Bin Zone System
- Battery Puck Lights Behind Closed Doors
- Turning It Into a TV Stand
- Backing Open Cubbies With Removable Wallpaper
- Adding Doors for Actual Privacy
- Using It as a Headboard
- A Hanging Organizer on the Exposed Side
- A Clip Lamp Mounted to the Frame
- One Accent Color for Every Bin
- A Hanging Rod Insert for a Mini Closet
- How to Start Your Kallax Dorm Room Transformation
- Read Next
Why Kallax Storage Makes Such a Difference in a Dorm
A Kallax works in a dorm because it’s one of the few furniture pieces that changes shape with the room turned sideways it’s a room divider, upright it’s a closet, on its back it’s a bench. Go with the birch effect or white finish if you’re aiming for something that reads neutral on move-out day, since it holds resale value better than a dyed wood tone.
It’s genuinely one of the only pieces worth buying new instead of hunting secondhand, because flat-pack means it survives the elevator and the stairwell intact. In under 100 square feet, prioritize the 2×2 size first it does the most work for the least footprint.
| Best starting point | One 2×2 Kallax turned sideways as a room divider or bedside tower |
| Biggest impact area | The zone between the bed and the closet — usually dead space |
| Budget to start | $60–$90 for one unit and basic bins |
| Time to complete | Under an hour to assemble, one weekend to fully set up |
20 Kallax Dorm Room Ideas for Small Spaces
Two things trip up nearly every first-year Kallax owner before they’ve even finished assembling it this list solves both.
1. A Bedside Kallax Instead of a Nightstand
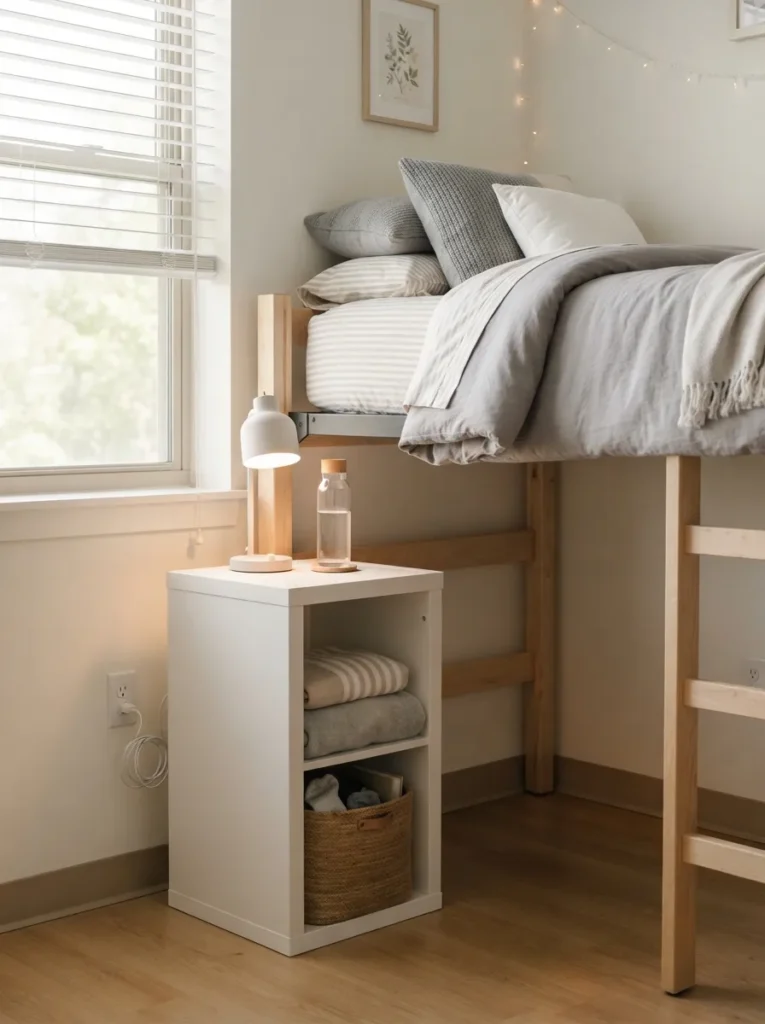
What it looks like: A single cube unit standing in for the nightstand your dorm didn’t give you low, square, and sturdy enough to hold a lamp.
Why it works: Dorm-issued nightstands are usually one shallow drawer, which isn’t enough for charging cables, books, and daily essentials. A Kallax cube gives you two or four full compartments instead of one drawer, and the flat top still works as a surface.
How to copy it: Use a single 1×2 or 2×2 unit, push it flush against the bed frame, and keep the top cubby empty as a landing zone for your phone and glasses.
Best for: Anyone whose dorm nightstand is smaller than a shoebox.
Pro Tip: Buy the unit with pre-drilled anti-tip hardware included most dorms require wall anchoring for any furniture over a certain height, and RAs check during move-in inspections.
Quick Win: No tools needed beyond the included hex key this is a same-day setup even if you’ve never assembled flat-pack furniture before.
The next idea solves the roommate problem nobody warns you about until week two.
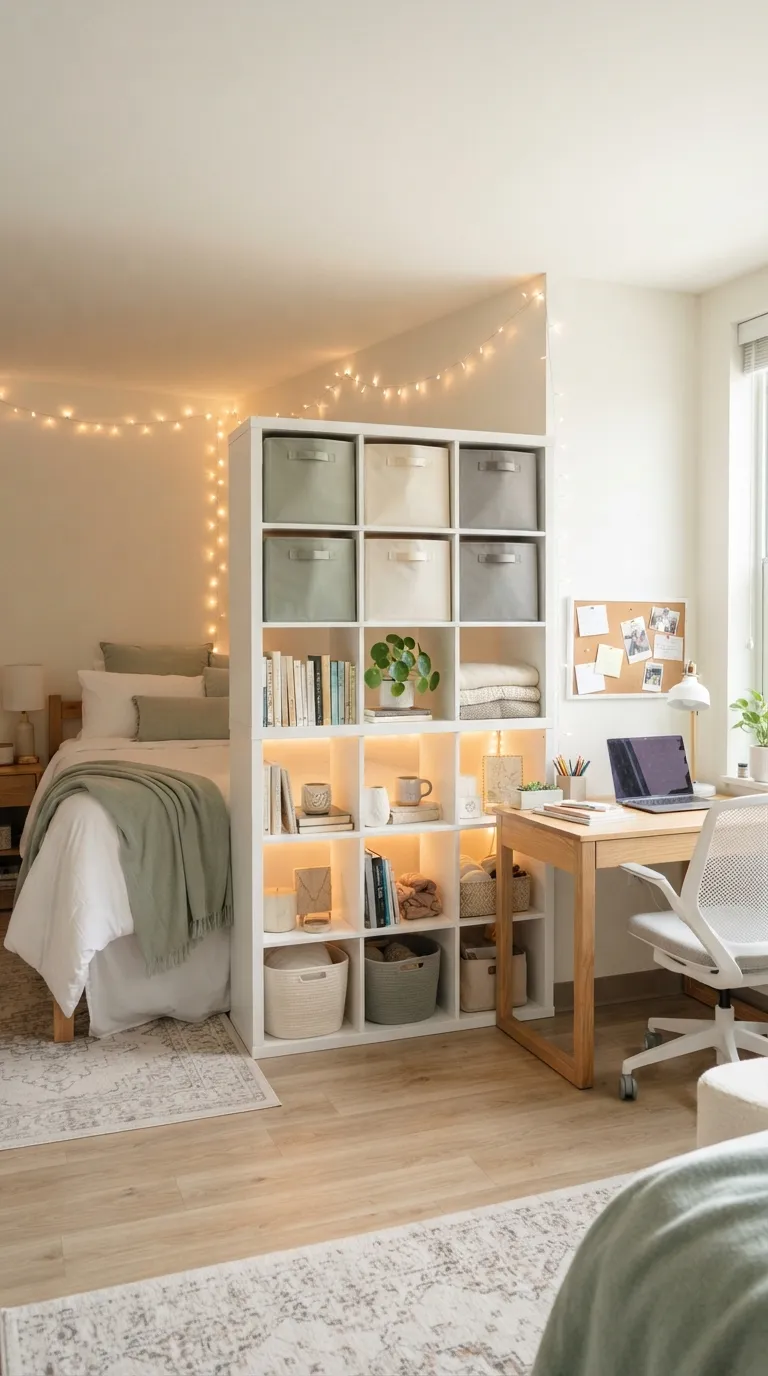
2. Splitting the Room Down the Middle
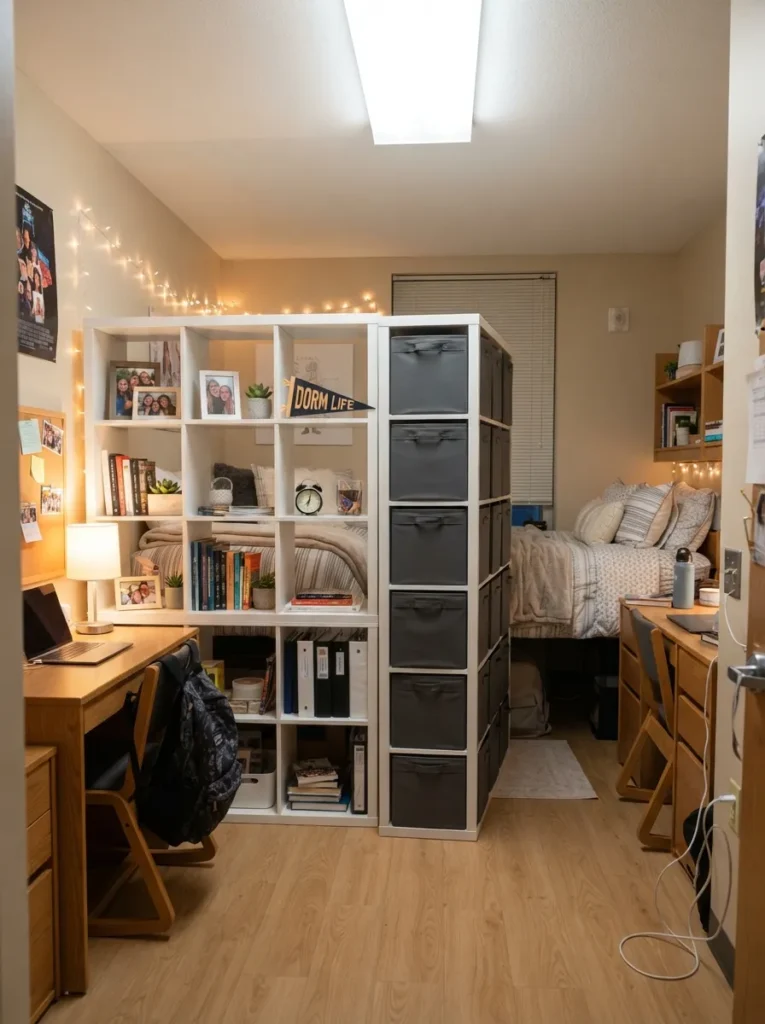
What it looks like: Two Kallax units set back-to-back, tall enough to break sightline without touching the ceiling a soft wall where your dorm didn’t build one.
Why it works: This uses visual weight instead of a physical wall to create privacy zones, which most dorm leases won’t let you build anyway. Facing each side’s open shelving toward its own owner keeps the split fair.
How to copy it: Two 4×4 units, positioned back-to-back perpendicular to the door, split the storage so each roommate owns one full face.
Best for: Roommate pairs who want a visual boundary without a formal conversation about it.
3. A Painted Frame for a Non-Beige Room
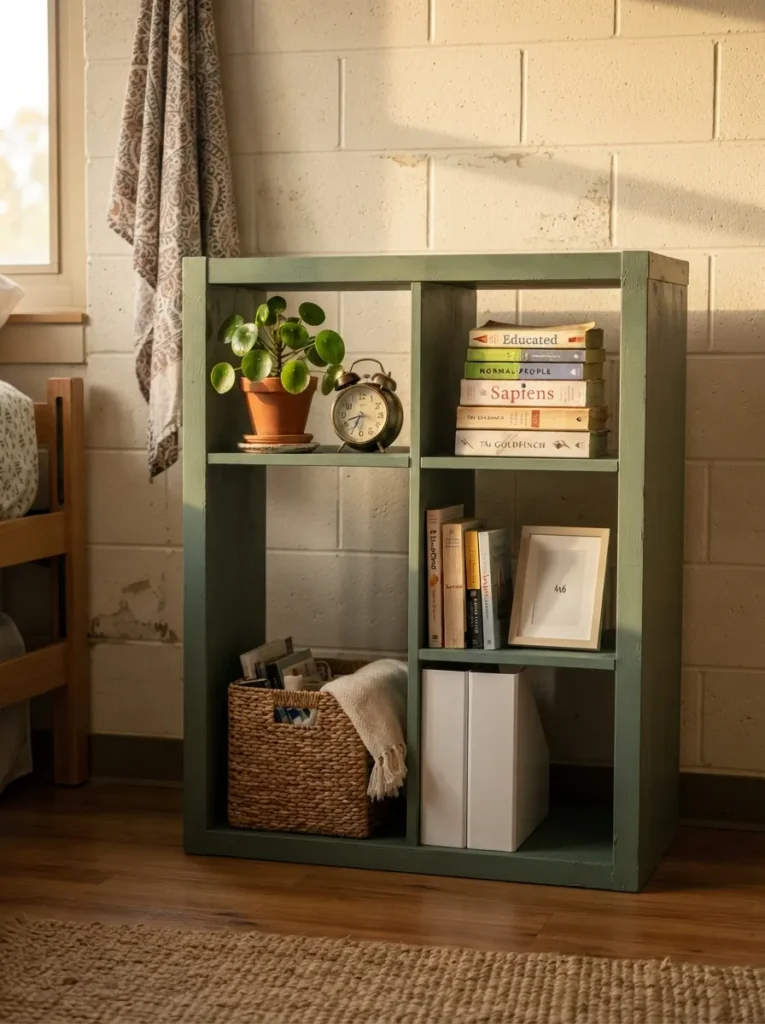
What it looks like: The same laminate frame, just no longer white or birch a flat, low-sheen color that reads intentional instead of dorm-issued.
Why it works: Laminate doesn’t take paint the way raw wood does, so most people skip this idea entirely that’s the mistake. A chalk-based or laminate-specific primer changes that, and it’s the single fastest way to make rental furniture feel chosen rather than assigned.
How to copy it: Sand lightly, apply a bonding primer made for laminate, then two thin coats of a furniture-safe paint leave the interior white to keep contents visible.
Best for: Anyone tired of every dorm surface being the same shade of beige. For palette pairing ideas beyond the frame itself, see our home color combinations for modern-style homes guide.
Important: Skip spray paint on laminate it beads and peels within weeks. A bonding primer is the part that actually determines whether this holds up through the semester.
4. Lifting It Off the Floor With Legs
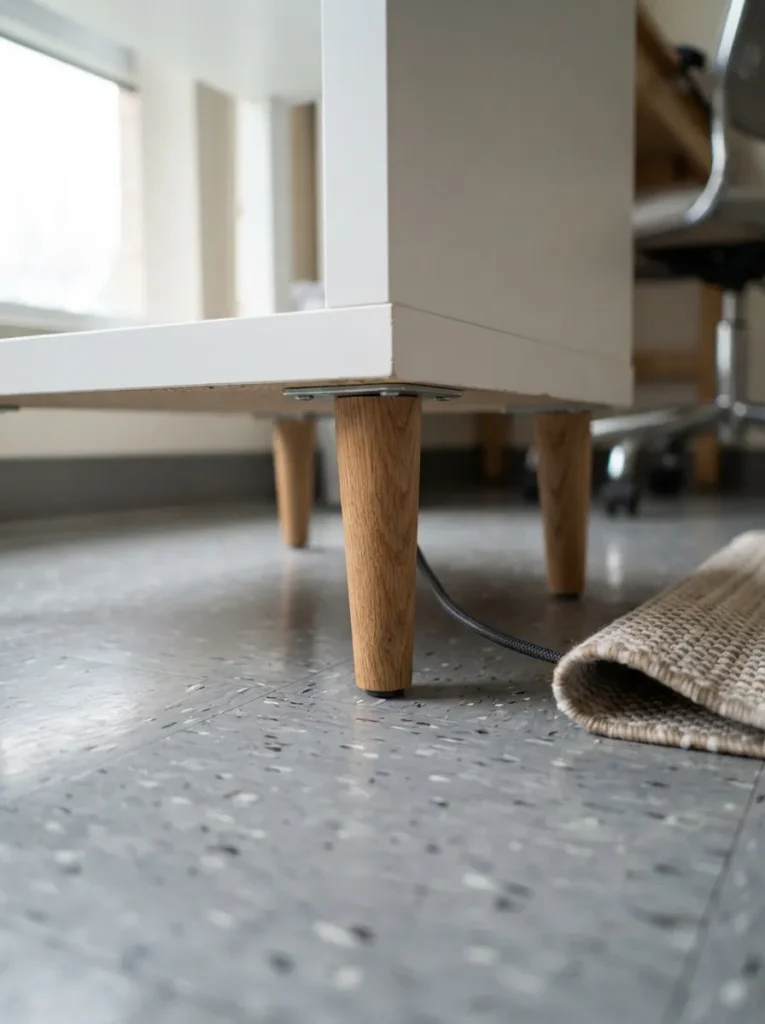
What it looks like: The same unit, raised two or three inches off the ground on short peg legs a visible strip of floor showing underneath.
Why it works: Flat-to-the-floor furniture makes a small room read smaller because there’s no negative space at eye level. Lifting it even slightly opens a sightline under the unit and gives you a hidden gap for a vacuum pass or a rolled-up rug.
How to copy it: Furniture legs sold separately thread directly into the existing base holes no drilling required, just a screwdriver.
Best for: Small or oddly shaped rooms where every inch of visual openness counts.
5. Fabric Bins for Grab-and-Go Storage
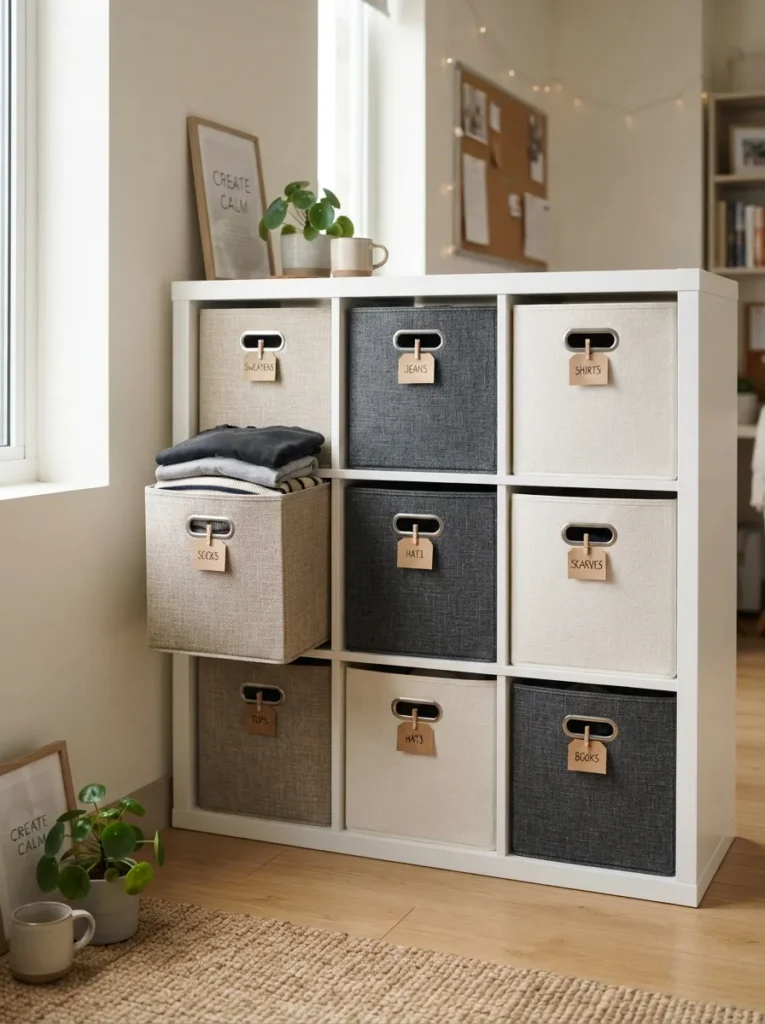
What it looks like: Every open cube filled with a soft-sided bin instead of loose items nothing visible, everything reachable in one pull.
Why it works: Open cubbies without bins collect visual clutter fast, since anything you set down is instantly on display. Fabric bins add a layer of closed storage without the cost or weight of solid doors.
How to copy it: Buy bins sized specifically for Kallax cubes off-size bins either won’t fit or leave gaps that let dust in.
Best for: Anyone sharing a room who wants storage without a labeling system.
Important: Generic “cube storage bins” sold elsewhere are usually half an inch too wide for Kallax always check the listing specifies Kallax compatibility before buying.
| Find It Online |
|---|
| Kallax-compatible woven fabric storage bin, 2-pack |
| Cutout-handle canvas storage bin, neutral tone |
| Collapsible fabric cube organizer with lid |
| Small drawer-style fabric bin for cube shelving |
| Set of 4 fabric bins in mixed neutral tones |
6. LED Strips Inside a Few Cubbies
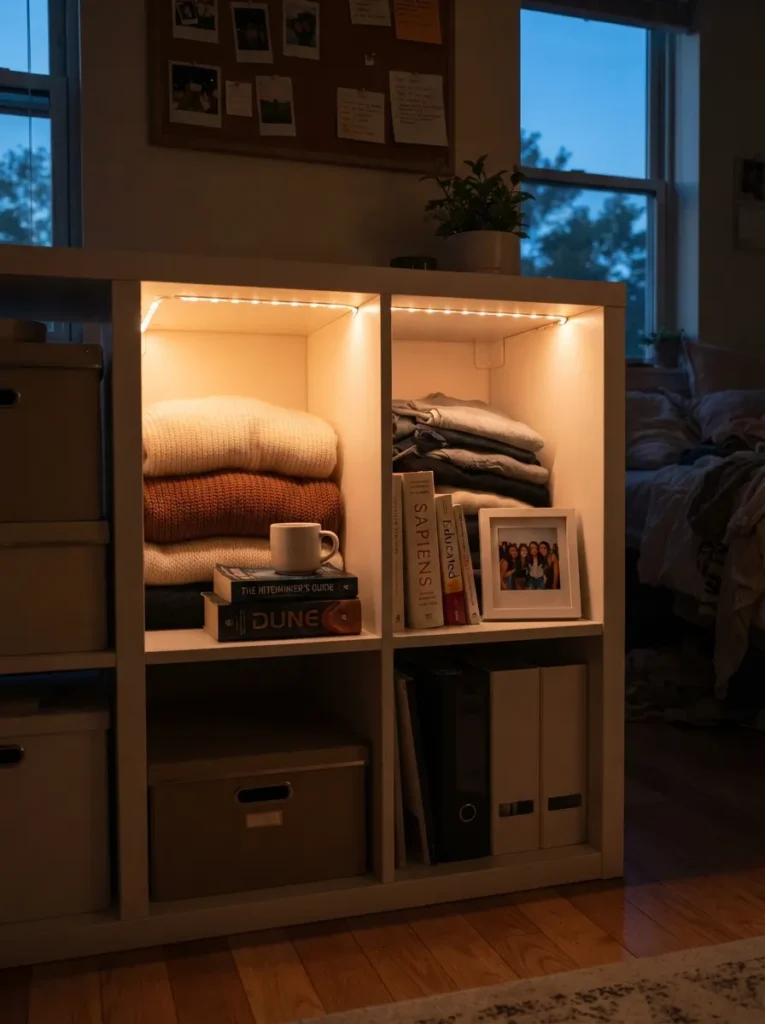
What it looks like: Two or three cubbies glowing softly from the inside while the rest of the unit stays dark a lit display case built into shelving you already own.
Why it works: Most dorms only have one overhead light and one desk lamp, so ambient light is scarce. Battery or USB LED strips add a second light source without touching the ceiling fixture or breaking the no-modification clause in most housing contracts.
How to copy it: Adhesive strip lights along the top interior edge of each cube, run on batteries or a USB pack tucked behind the unit.
Best for: Rooms with only one overhead light and a strict no-drilling policy.
Small-Space Tip: Light two cubbies max lighting the whole unit reads more like a display shelf than a room, and it eats your outlet count fast.
Coming up: the idea most people assume needs a real headboard budget and doesn’t.
7. A Cushioned Bench at the Foot of the Bed
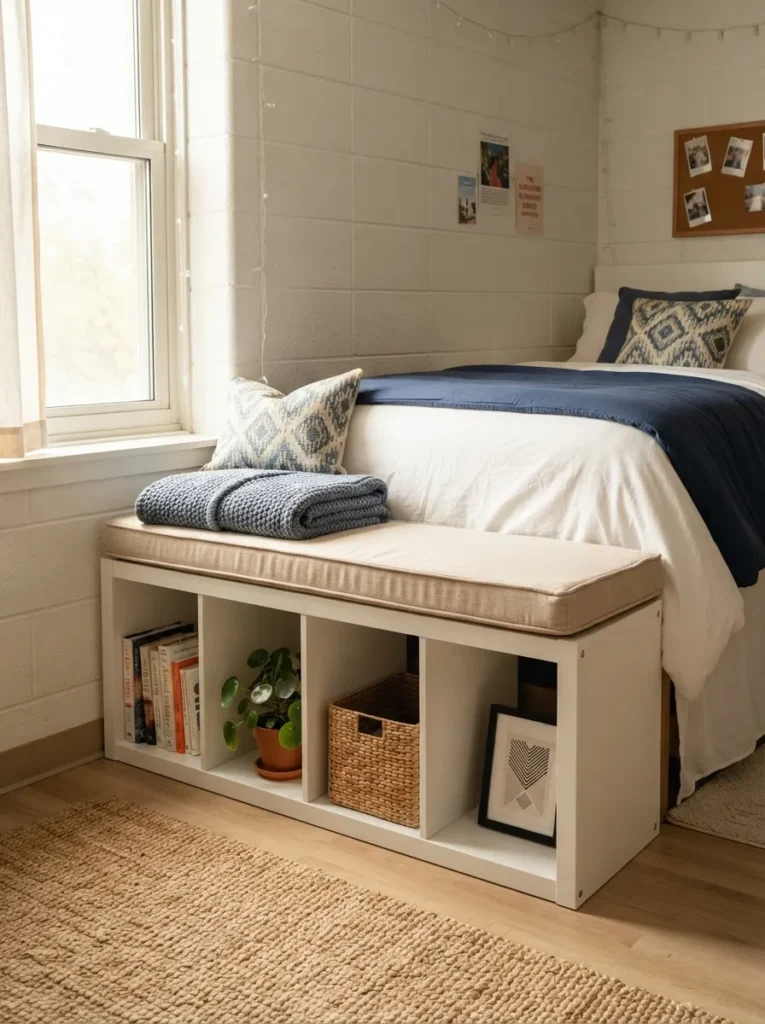
What it looks like: A Kallax turned on its long side, topped with a fitted foam cushion storage underneath, seating on top.
Why it works: Dorm rooms rarely have room for both storage and a second seat, so combining them into one footprint solves both without adding square footage. The cubbies still function fully as storage since the cushion just sits on top, unattached.
How to copy it: Lay a 2×4 unit on its side, cut a piece of high-density foam to the top dimensions, and cover it with a fitted or tied-on slipcover.
Best for: Rooms with no extra seating and a roommate who studies on your bed.
Pro Tip: Order the foam cut to size from an upholstery supplier rather than a home store pre-cut foam rarely matches Kallax’s exact top dimensions.
8. Mixing Insert Door Colors on Purpose
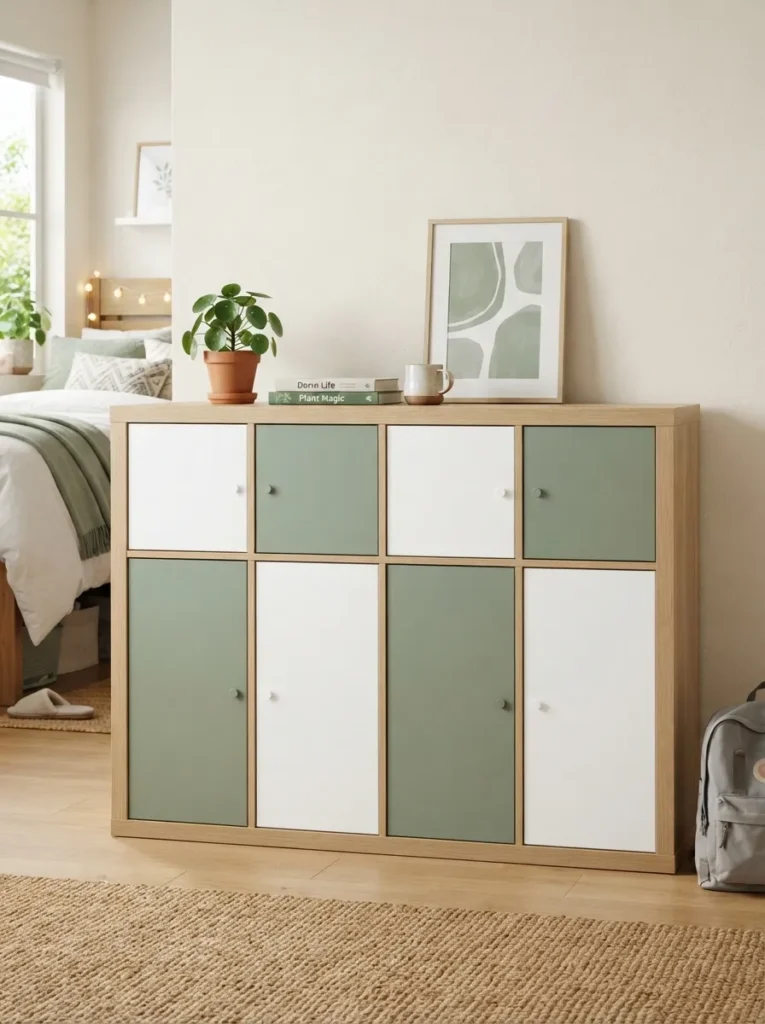
What it looks like: Alternating door colors across the grid instead of one uniform tone a checkerboard rhythm across an otherwise plain unit.
Why it works: Repetition without variation reads flat, especially on a piece this geometric. Alternating two door colors breaks that monotony using contrast instead of adding any new furniture.
How to copy it: Buy inserts in two finishes and alternate them in a diagonal or checkerboard pattern rather than randomly randomness reads as mismatched, patterns read as designed.
Best for: Anyone decorating on a strict no-paint, no-modification lease. For more ways to change up a Kallax without paint, our Kallax styling ideas roundup covers a few more.
9. A Removable Desk Extension on Top
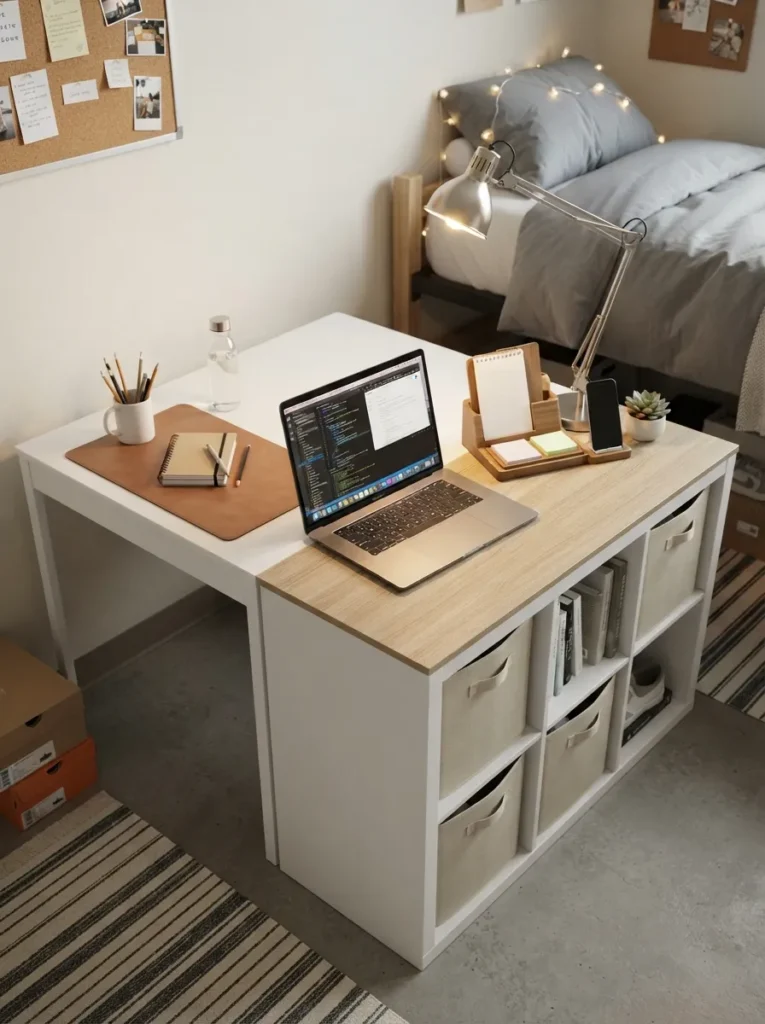
What it looks like: A low Kallax pushed flush against the desk, its top surface covered to match, functioning as one continuous work area.
Why it works: Most dorm desks are barely large enough for a laptop and a notebook side by side. Butting a same-height Kallax against it adds real surface area while the cubbies underneath absorb school supplies that would otherwise clutter the desktop.
How to copy it: Match a 1×4 unit’s height to your desk, apply removable contact paper across the top in a tone close to the desk finish, and push them flush.
Best for: Anyone whose desk is too small for a laptop and textbooks at the same time.
| Find It Online |
|---|
| Wood-grain removable contact paper roll |
| Desktop cable management tray |
| Slim desk organizer with pen slots |
| Under-desk cord clips, adhesive-backed |
| Laptop stand, compact folding |
10. Stacking Single Cubes in a Narrow Gap
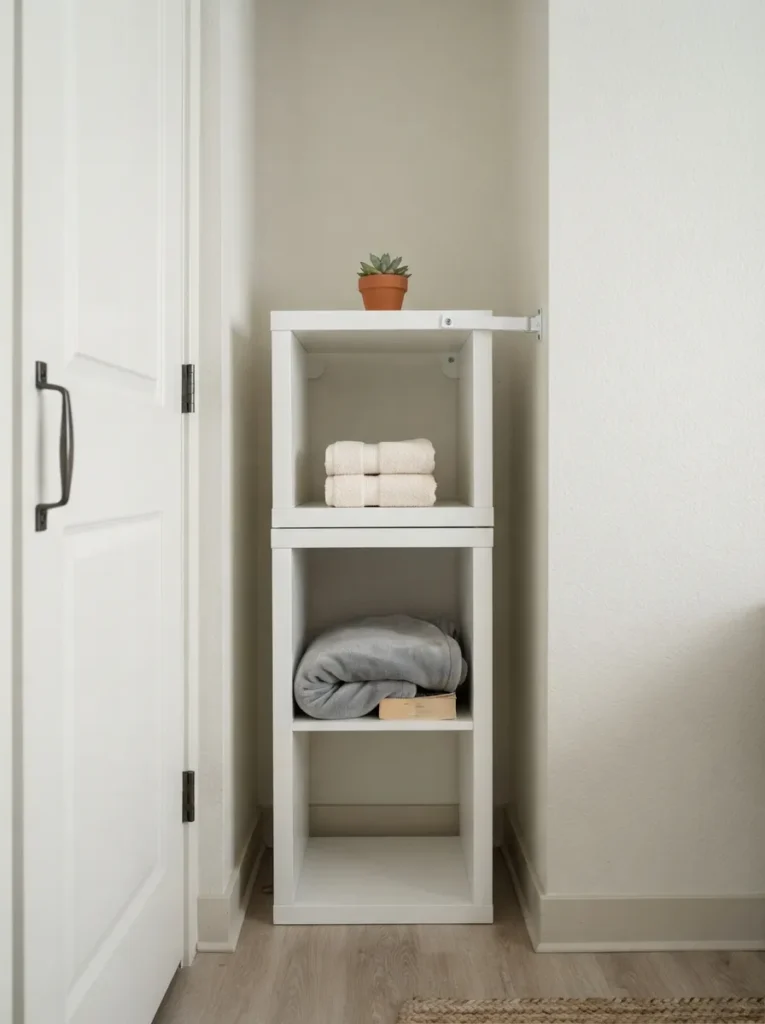
What it looks like: Two single cube units stacked directly on top of each other, filling a gap barely wider than the units themselves.
Why it works: Full-size Kallax units don’t fit every leftover gap, but the single-cube version does stacking two turns a dead 12-inch slot into four cubbies of usable storage.
How to copy it: Stack no more than two single units, and always secure the top one to the wall with an anti-tip strap even in a rental most housing offices provide these free.
Best for: Rooms with an awkward narrow gap that’s too small for standard furniture. For more ways to make a tight layout feel less cramped, check our dorm room ideas that make small rooms bigger.
Warning: Never stack single Kallax cubes without anchoring unsecured stacked furniture is one of the leading causes of tip-over injuries in shared housing, and most units aren’t weighted to stay upright past two feet on their own.
Up next: the storage system that ends the daily “whose sweater is this” argument.
11. A Labeled Bin Zone System
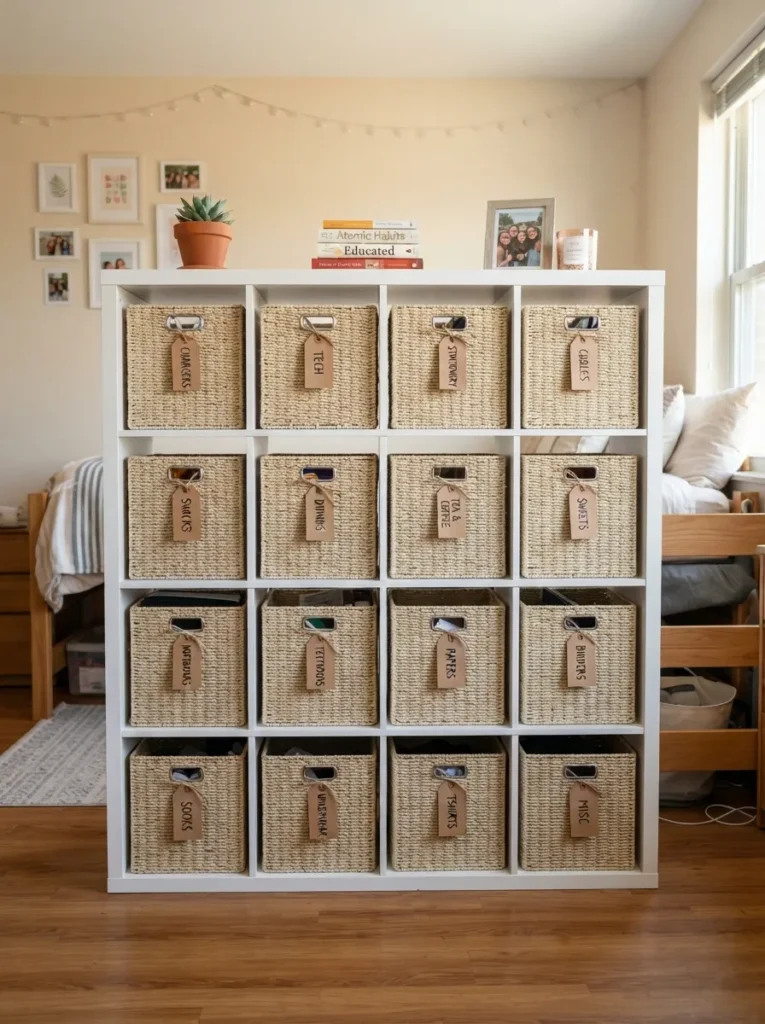
What it looks like: Every cube assigned a specific category, labeled with a small tag nothing left to guesswork about where anything lives.
Why it works: Shared storage fails when categories overlap, since two people naturally organize differently. Assigning and labeling each cube removes the ambiguity before it becomes friction.
How to copy it: Use string tags or a label maker rather than writing directly on bins, so categories can shift as your needs change through the semester.
Best for: Roommates sharing one Kallax unit for mixed belongings.
Pro Tip: Assign the two eye-level cubes to whatever you use daily chargers, meds, keys and push seasonal or rarely used items to the bottom row.
✅ Setup Checklist for a Labeled Bin System:
- [ ] Sort belongings into 4–8 broad categories before buying any bins
- [ ] Measure your Kallax cube openings before ordering bins
- [ ] Assign daily-use categories to eye-level cubes, rare-use to bottom cubes
- [ ] Label each bin before filling it, not after
- [ ] Revisit labels after the first two weeks and adjust categories that overlap
| Find It Online |
|---|
| Kraft paper string-tag label set |
| Compact handheld label maker |
| Mixed-size fabric bin bundle for cube shelving |
| Small drawer divider inserts |
12. Battery Puck Lights Behind Closed Doors
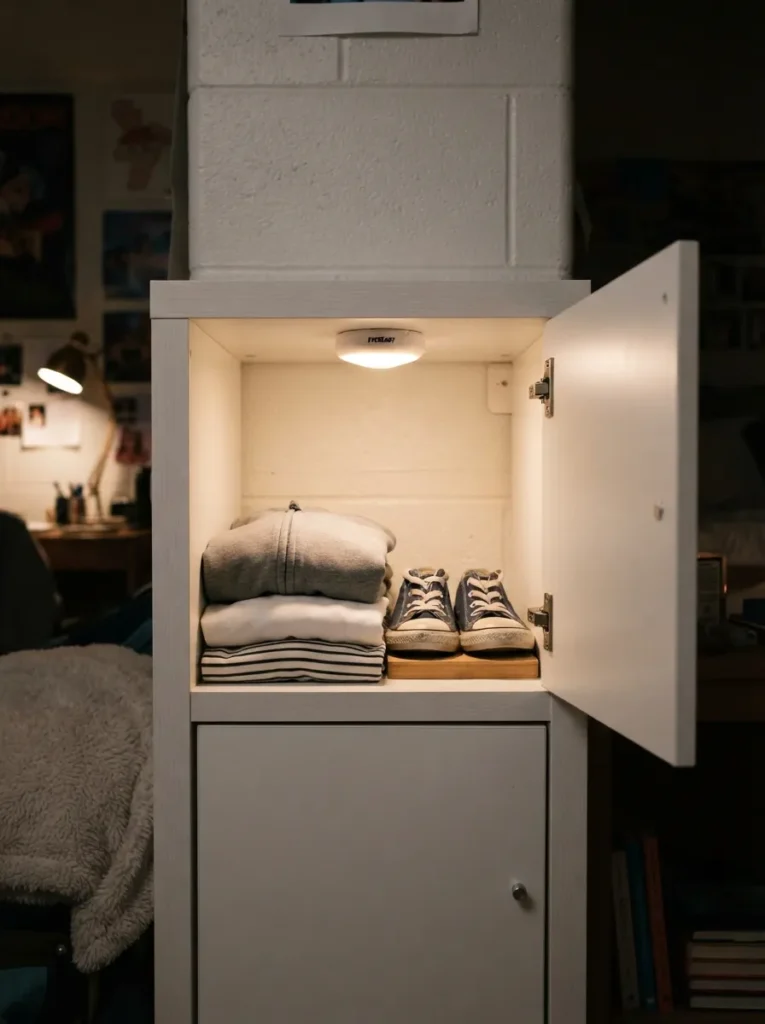
What it looks like: A closed-door cube that lights up automatically the moment you open it a tiny closet with its own motion sensor.
Why it works: Closed storage solves clutter but creates a new problem you can’t see what’s inside without pulling everything out. A motion-activated puck light fixes that without any wiring.
How to copy it: Mount a battery-powered, motion-sensor puck light to the interior top panel of any closed-door cube most stick with adhesive pads.
Best for: Anyone using closed Kallax doors for out-of-season or less-used items.
13. Turning It Into a TV Stand
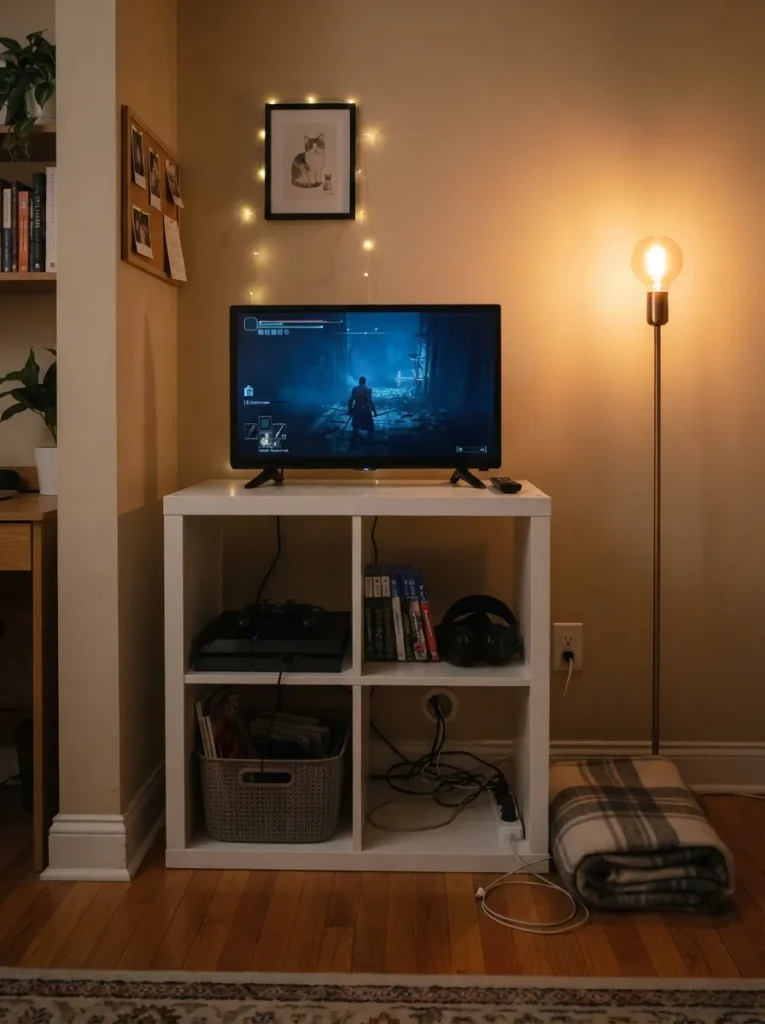
What it looks like: A low, wide unit holding a television on top, with consoles, cables, and controllers tucked into the cubbies beneath it.
Why it works: Dorm rooms rarely include real media furniture, so a TV usually ends up balanced on a dresser with cords everywhere. A Kallax’s open back cubes route cables cleanly, and its flat, wide top handles the weight of most dorm-size TVs without wobbling.
How to copy it: Use a 2×2 unit, route cables through the back of one cube, and keep that cube’s front open for easy access to plugs.
Best for: Anyone whose dorm-provided furniture has nowhere for a TV or gaming setup. For a deeper breakdown of this exact setup, see our Kallax TV unit guide.
Important: Check your Kallax’s weight rating against your TV’s base most 2×2 units handle up to 20-inch screens comfortably, but larger flatscreens need a wider 4×2 footprint for stability.
14. Backing Open Cubbies With Removable Wallpaper
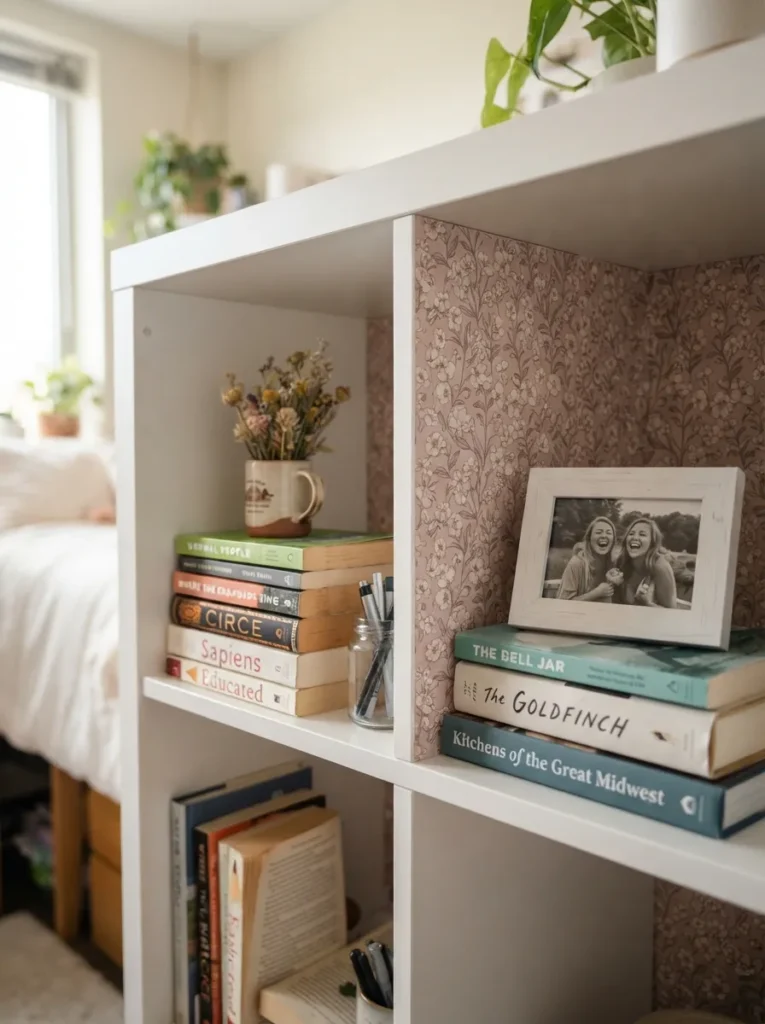
What it looks like: Two or three cube backs papered in a small pattern, visible only through whatever’s arranged in front of them.
Why it works: The back panel of a Kallax is the one surface almost nobody thinks to touch, which makes it the lowest-risk place to add color or pattern in a lease that bans wall changes.
How to copy it: Cut removable wallpaper to the exact interior dimensions of two or three cubes, and leave the rest of the unit untouched for contrast.
Best for: Renters who want personality without touching an actual wall.
Small-Space Tip: Papering every cube instead of just two or three overwhelms a small room fast treat it like an accent, not a full makeover.
One more thing before the last stretch of ideas the mistake almost every first-time Kallax owner makes.
My Views:
Here’s something most guides won’t tell you: people almost always buy the 4×4 Kallax first because it looks like the most storage for the money, and then spend the whole semester regretting it. A 4×4 is 57 inches wide in a room that’s already eating floor space with a Twin XL bed and a desk, that width turns a walking path into a squeeze. Two 2×2 units, split between two spots in the room, almost always fit better than one giant grid, even though the total cube count is the same.
15. Adding Doors for Actual Privacy
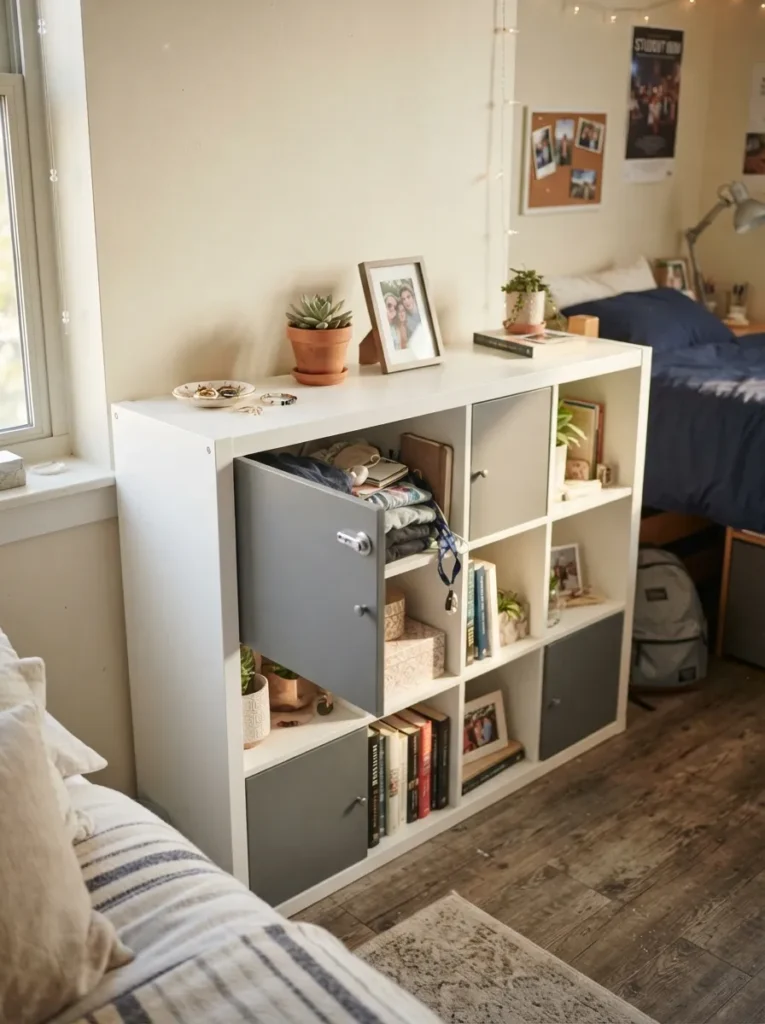
What it looks like: A mixed grid some cubes open, some behind solid doors so not everything you own is on display to a roommate or their guests.
Why it works: Open shelving works fine for books and folded clothes, but it turns anything personal into visible clutter. Doors on select cubes solve that without converting the whole unit into a closed cabinet.
How to copy it: Add doors to the two or three cubes closest to your bed, leaving the rest open that split keeps the unit from feeling like a solid block.
Best for: Anyone sharing a room who wants a few genuinely private spots.
| Find It Online |
|---|
| Kallax-compatible push-latch door insert, single |
| Small lockable storage box for valuables |
| Felt-lined jewelry tray |
| Interior drawer divider for a closed cube |
16. Using It as a Headboard
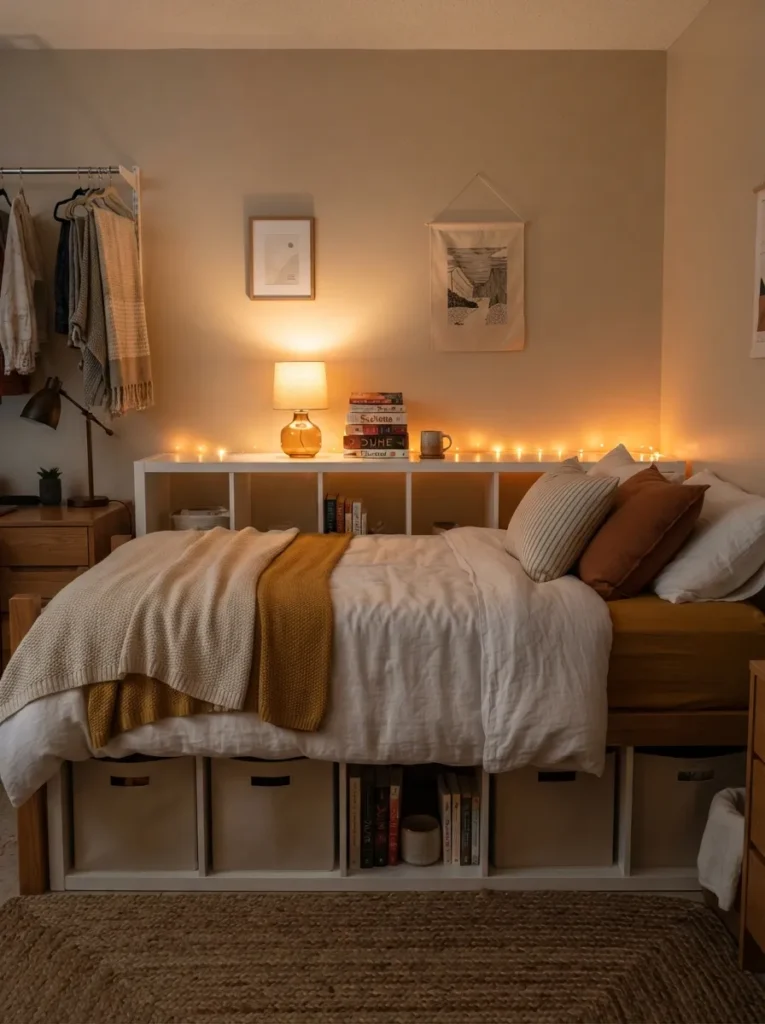
What it looks like: A Kallax lying flat behind the bed instead of upright anywhere else storage and a headboard in one low footprint.
Why it works: Dorm beds rarely come with a headboard, which leaves the wall behind them completely dead space. Turning a 1×4 unit sideways behind the mattress claims that space for storage while giving the bed a visual anchor it didn’t have.
How to copy it: Push the unit flush against the wall, then push the mattress against the unit no hardware, no wall contact required.
Best for: Anyone with a bare wall behind their bed and nowhere else to put a low unit.
Pro Tip: Keep the top row of cubes on this one shallow a stack of books or a small lamp works, but anything heavy is an awkward reach from a lying position.
17. A Hanging Organizer on the Exposed Side
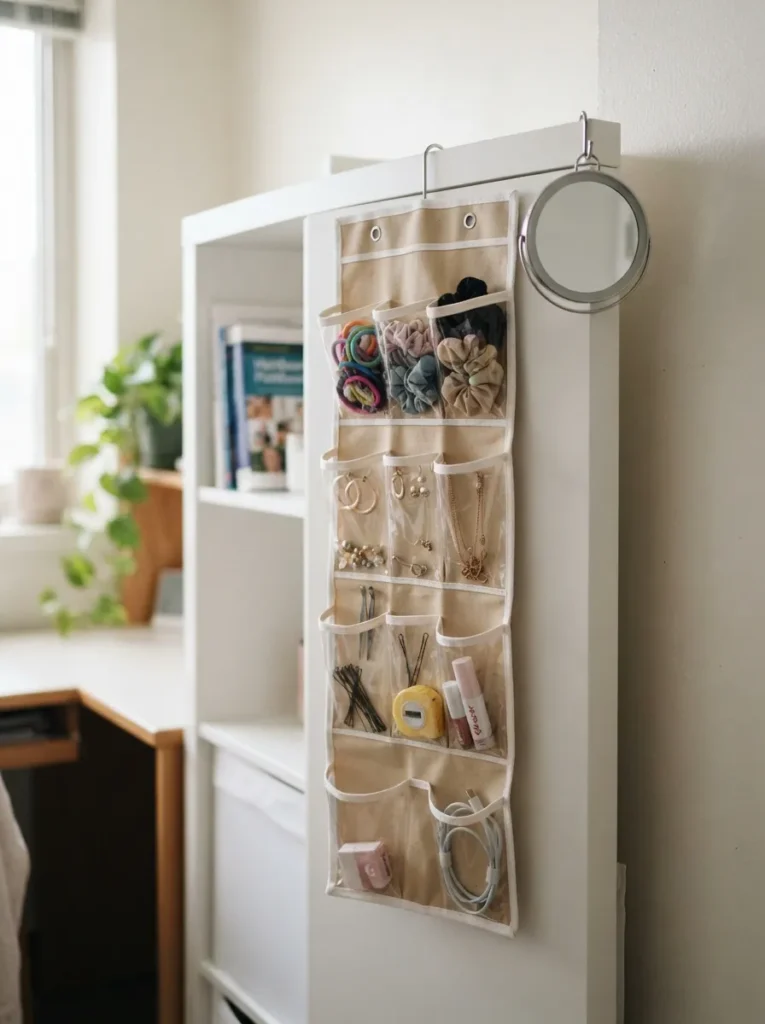
What it looks like: A pocketed fabric organizer draped over the top edge of the unit’s blank side small items sorted without using a single cube.
Why it works: The exposed side panel of a Kallax is flat, unused vertical space in most room layouts. An over-the-door style organizer hangs there with zero hardware, adding storage that doesn’t compete with the cubes at all.
How to copy it: Drape the organizer’s top bar over the unit’s top edge so it hangs flush against the side panel, weighted down by its own contents.
Best for: Small accessories hair ties, chargers, jewelry that clutter a cube fast.
18. A Clip Lamp Mounted to the Frame
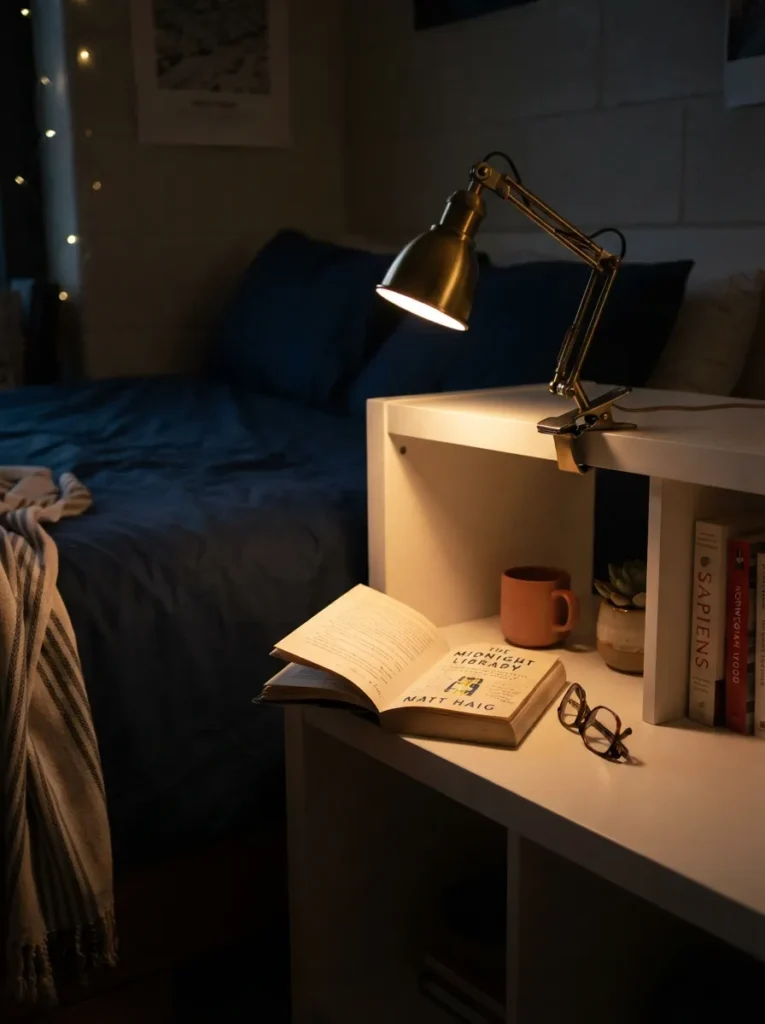
What it looks like: A small clip lamp gripping the top edge of the unit instead of sitting on a nightstand surface — reading light without using any cube space.
Why it works: A lamp placed on top of a Kallax eats into usable surface area, which is already limited. Clipping it to the edge frees that surface entirely while still putting light exactly where you need it for reading in bed.
How to copy it: Clip the lamp to the top panel directly above where your pillow sits, angled downward rather than outward.
Best for: Anyone who reads before bed and doesn’t want a lamp taking up cube-top space.
19. One Accent Color for Every Bin
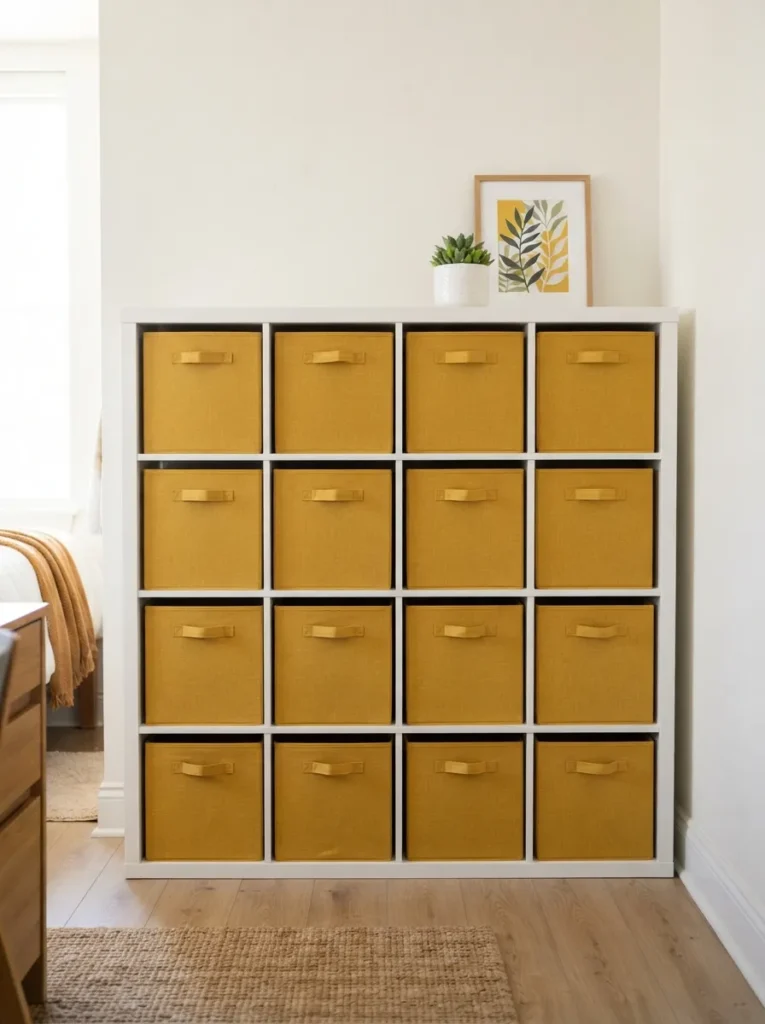
What it looks like: Every single bin in the same color, regardless of material or brand the whole unit reading as one cohesive block instead of a mismatched grid.
Why it works: Mismatched bin colors are the single fastest way to make a Kallax look chaotic, since the eye tracks color contrast before it tracks organization. One repeated tone reads as intentional even if the contents inside are completely mixed.
How to copy it: Pick one color not white, which shows dust fast and buy every bin in that exact shade, even across different retailers.
Best for: Anyone who wants the unit to look pulled-together with minimal effort.
Important: “Matching” bins from different brands often aren’t the same shade in person order one first and hold it against your existing decor before committing to a full set.
Last one and it’s the idea that gets the most messages asking “wait, you can do that with a Kallax?”
20. A Hanging Rod Insert for a Mini Closet
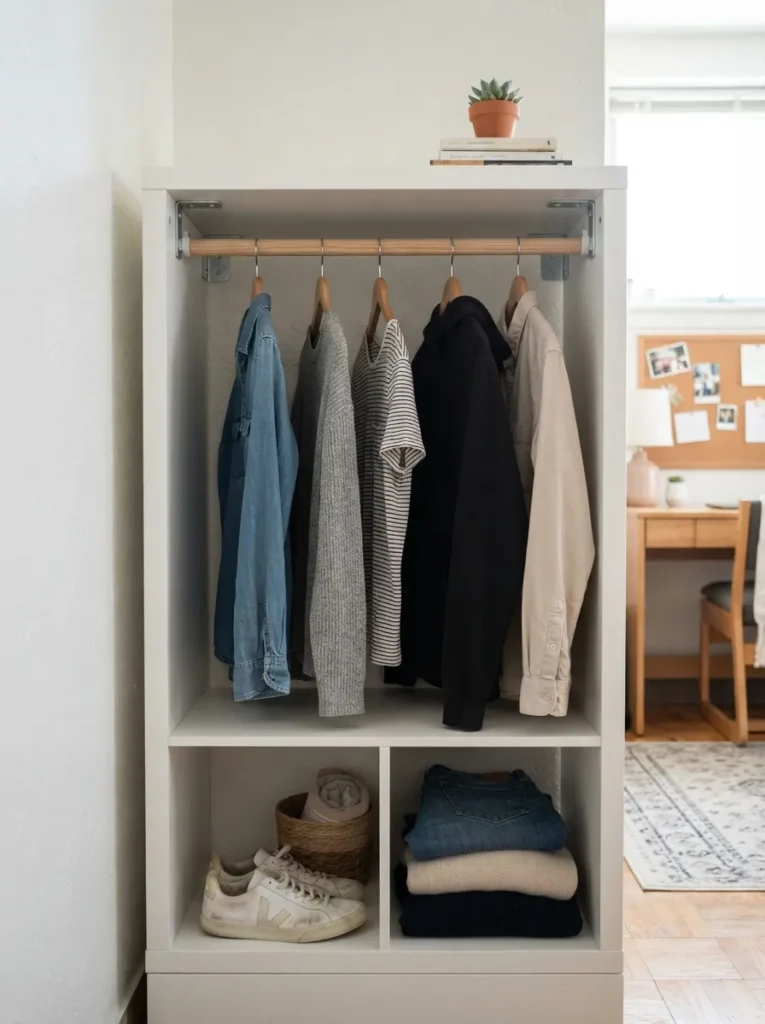
What it looks like: A short hanging rod bracketed across two side-by-side cubes, holding a handful of shirts or dresses on hangers a closet extension built entirely from shelving.
Why it works: Split dorm closets rarely give either roommate enough hanging space for more than a week’s worth of clothes. A rod insert across two cubes adds real hanging capacity without any construction, since it mounts using the existing frame holes.
How to copy it: Buy a rod insert sized for a 2-cube span, mount it using the pre-drilled holes, and reserve it only for items that wrinkle easily everything else stays folded elsewhere.
Best for: Anyone whose half of the dorm closet isn’t enough for actual hanging clothes. For more ways to stretch limited closet space, our closet organization ideas guide has additional systems worth trying.
✅ Before You Set It Up:
- [ ] Measure the interior width of two adjacent cubes before ordering a rod insert
- [ ] Confirm the rod insert is rated for the Kallax model size you own (2×2 vs 2×4 hardware differs)
- [ ] Mount the rod using the existing pre-drilled holes only — no new drilling
- [ ] Test the rod’s weight capacity with a few hangers before loading it fully
- [ ] Reserve the space for wrinkle-prone items only, to avoid overloading it
| Find It Online |
|---|
| Cube-shelf hanging rod insert, 2-cube span |
| Slim velvet hangers, set of 20 |
| Compact garment steamer |
| Small over-rod shoe rack |
How to Start Your Kallax Dorm Room Transformation
What I’ve found with real dorm setups: start with one unit sized to your single worst storage problem, not the biggest unit you can fit. Buy the 2×2 or 1×4 first, place it where the room actually struggles usually beside the bed or in the closet gap and get that one right before adding a second unit. Anchoring everything to one “starter” purchase keeps you from ending up with mismatched sizes crowding the room by October.
The most common fixable mistake is buying based on looks rather than measurements people order a 4×4 because it photographs well, then realize it blocks the path to the door. Measure the actual gap you’re filling, including furniture swing room, before buying anything.
Three items under $50 that make an immediate difference: a set of Kallax-sized fabric bins in one matching tone, a roll of removable wood-grain contact paper for the top surface, and a battery-powered motion-sensor puck light for any closed cube. All three solve a visible problem without needing tools beyond scissors.
A single unit takes under an hour to assemble and set up fully. A full two-unit room transformation divider, bench, and bin system realistically takes one weekend, spread across a Saturday for assembly and a Sunday for arranging. Budget $60–$90 for a starter unit and $120–$200 for a full two-unit setup with bins and accessories included.
Ready to Create Your Dorm Room Setup?
Twenty ideas in, and the range here matters color, lighting, hanging storage, and layout tricks all pulling double duty in a room that doesn’t have square footage to spare. None of this has to happen at once; picking one idea, getting it right, and building from there beats buying three units on move-in day and figuring it out later.
Start today by measuring your worst storage gap before you order anything. A dorm room that actually has a place for everything feels less like a room you’re passing through and more like one that’s yours for the year. Save this list now you’ll want idea #20 again the week you realize your half of the closet just isn’t enough.
Read Next
- 15 Small Dorm Room Storage Ideas That Don’t Need a Drill
- 12 IKEA Kallax Hacks for a Tiny Studio Apartment
- 10 Command Hook Ideas for Decorating Rental Walls Without Damage