11 Cat-Proof DIY Planters That Won’t Get Knocked Over
A planter stays upright when its base is wider than it is tall, its soil is fully covered, and nothing about it swings, sways, or holds standing water weight alone rarely does the job. Here are 11 cat-proof DIY planter ideas that fix the actual mechanics behind tipping, digging, and batting, not just the symptom.
Picture windowsills that stay put no matter how many mornings a cat spends patrolling them, soil that never ends up scattered across the floor, and greenery that finally gets to grow instead of getting knocked flat every other week. Some of these ideas take fifteen minutes with tools already in a drawer. Others are weekend projects that double as furniture. All of them solve the problem where it starts.
Jump To
- Why Cat-Proof Planters Make Such a Difference
- The Fixes That Actually Stop the Tipping
- How to Start Cat-Proofing Your Planters
- Ready to Stop Refereeing Your Cat and Your Plants?
Why Cat-Proof Planters Make Such a Difference
Cat-proofing a planter isn’t about picking a plant your cat dislikes or banishing greenery from the house it’s about addressing the two or three physical mechanisms that cause knockdowns: a high center of gravity, loose soil that invites digging, and hanging or open-water setups that trigger play behavior.
Most of these fixes cost under $20 and take under an hour, and they scale from a single windowsill succulent to a full plant wall. Start with whichever mechanism matches how your cat actually interacts with plants, rather than applying every solution to every pot.
| Best starting point | Widen the base or fix the hanging point — whichever matches how your cat interacts with the plant |
| Biggest impact area | Planters at nose-to-shoulder height, where paw contact is easiest |
| Budget to start | Under $20 per planter for most fixes, approximate |
| Time to complete | 15 minutes to a weekend, depending on the project |
The Fixes That Actually Stop the Tipping
1. The Wide, Shallow Ceramic Bowl That Beats a Heavy Narrow Pot
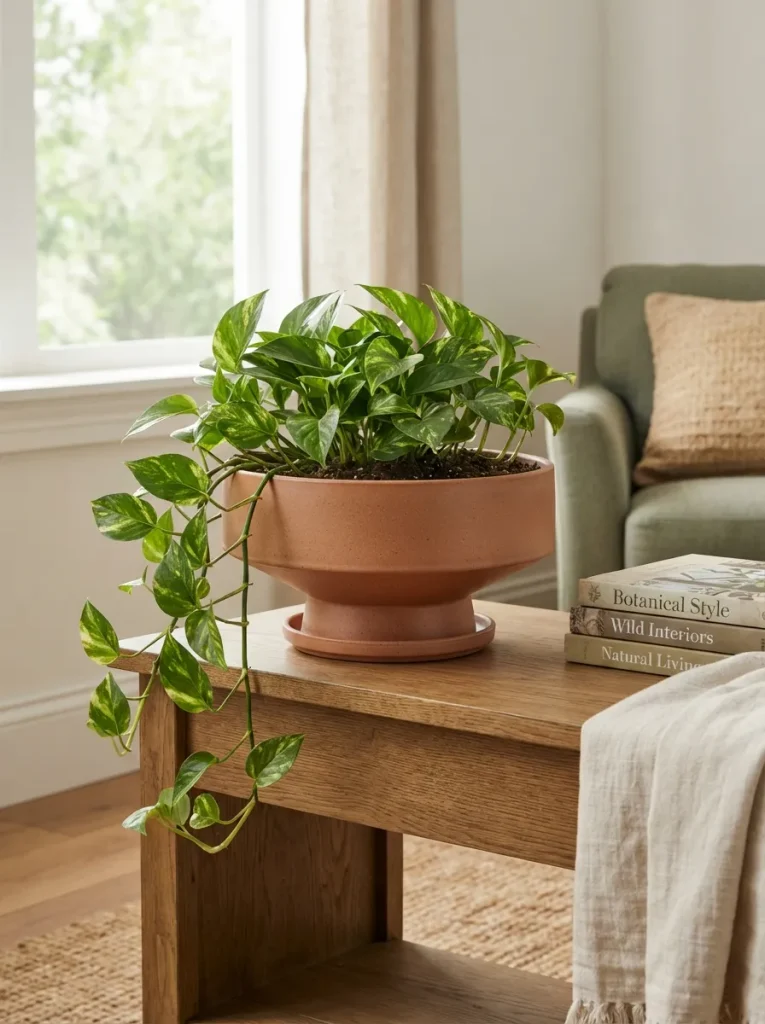
Most people assume a heavy pot solves a tipping problem, so they buy the biggest stoneware planter they can lift and call it cat-proof. Weight helps, but the real variable is the ratio between base width and pot height a tall glazed cylinder can weigh six pounds and still go over from one solid paw-swipe, because all that mass sits high above a narrow footprint.
A shallow ceramic bowl planter, wider at the base than the plant is tall, resists tipping the same way a wide-bottomed drinking glass resists spilling: there’s more surface holding it down relative to how far a nudge can lever it. Look for bowls where the base diameter equals or exceeds two-thirds of the total height.
Snake plants, pothos, and other trailing or low-mounding varieties fit this shape naturally, so you’re not fighting the plant’s own growth habit on top of the physics for more shapes that work this way, modern succulent planter ideas are worth a look.
Pro Tip: Measure before you buy a base-to-height ratio under roughly 2:3 is where tipping risk climbs fast, regardless of how heavy the glaze feels in the store.
Shop This Look
| Product |
|---|
| Wide ceramic bowl planter with drainage hole |
| Matching saucer or drip tray |
2. Swap the Swinging S-Hook for a Fixed Anchor
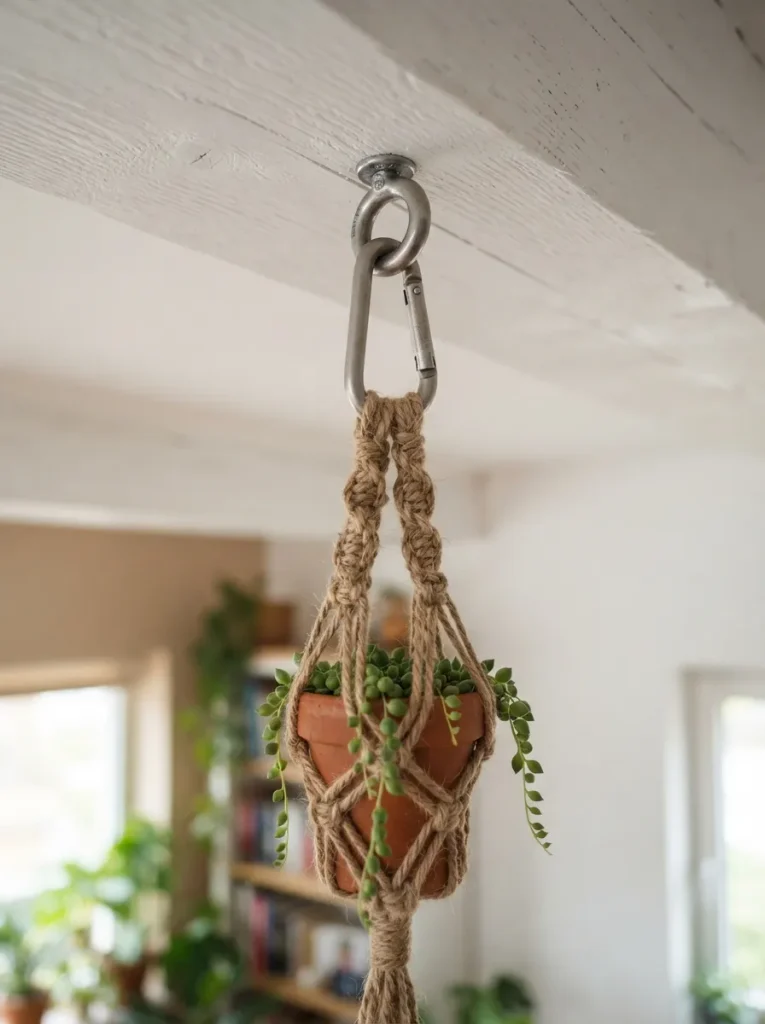
Screw a closed eyebolt directly into a ceiling joist or stud, then loop the macrame cord through it and secure it with a locking carabiner instead of the S-hook that shipped with the hanger. S-hooks let the whole planter swing and rotate, and a swinging object at nose height is exactly the kind of movement that triggers a cat’s prey drive one bat sends the pot spinning, and the second bat usually finishes it off.
A fixed anchor point removes the play entirely; the planter can still be lifted down for watering, but it won’t sway on its own or respond to a paw with more than a slight tremor. This works for any hanging planter, not just macrame, and it’s a fifteen-minute fix on something most people already own.
Quick Win: Renting and can’t drill into a joist? A heavy-duty adhesive hook rated for at least 20 pounds paired with a carabiner does most of the same job just skip anything rated under the hanger’s filled weight.
3. Pour a Concrete Base Layer for a Low Center of Gravity
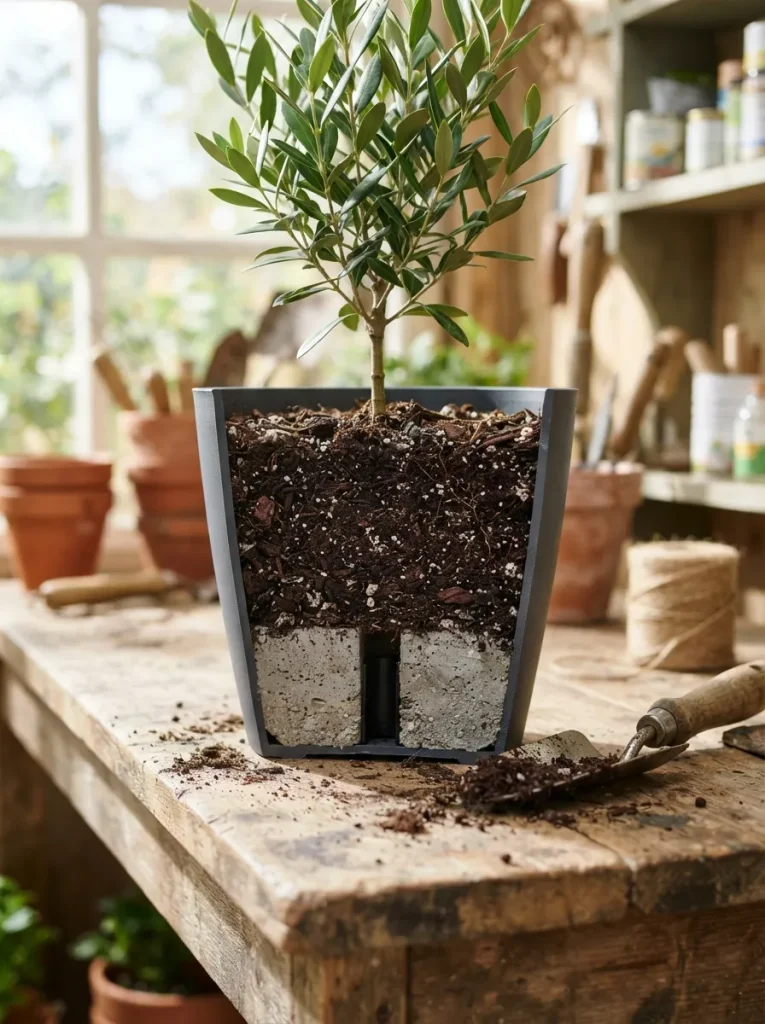
Center of gravity, not total weight, decides whether a planter survives a determined cat. A pot with its mass concentrated low and centered barely rocks no matter how hard it’s pushed, while the same weight distributed evenly through loose soil does almost nothing to stop a tip.
Pour a one-to-two-inch layer of quick-set concrete mix into the bottom of a plastic or resin planter before adding soil, leaving the drainage hole clear by setting a small plastic tube or straw upright in the wet concrete as a spacer.
Let it cure fully usually 24 to 48 hours before planting on top. The concrete sits below the root zone entirely, so it never touches the plant, and it turns a lightweight $10 planter into something with the stability of a much heavier ceramic piece.
Mistake to Avoid: Skipping the drainage spacer is the error that ruins this project without it, the concrete seals the hole and the planter waterlogs the first time it’s watered.
The next fix trades floor space for wall space entirely and it solves a problem heavier pots never touch.
4. Mount It to a Stud, Not Just Drywall
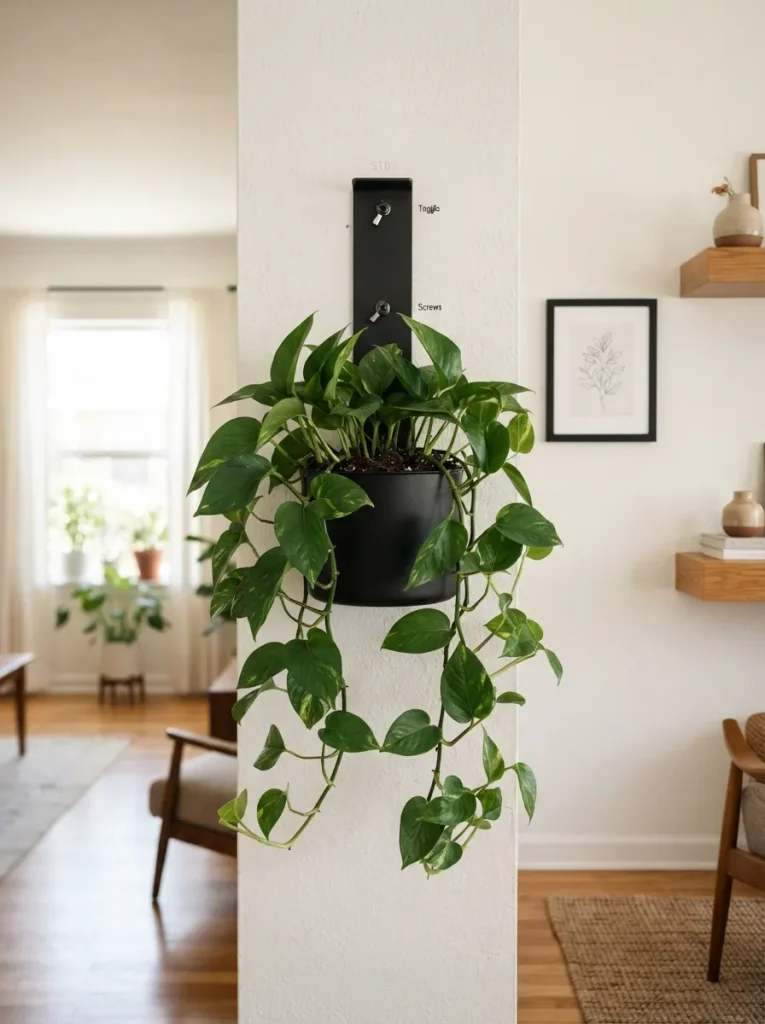
This one’s for households where the cat treats the floor as its own runway and any surface below chest height is fair game. Getting the planter onto a wall solves the floor problem, but only if the mounting hardware can carry the filled weight wet soil roughly doubles a planter’s dry weight, and standard plastic drywall anchors are rated for a fraction of that.
Find a stud with a stud finder, or use heavy-duty toggle bolts rated for at least 25 pounds if a stud isn’t available where you want the planter. Wall-mounted floating planters with a built-in bracket distribute the load more evenly than a single hook, which matters once a cat starts testing whether the thing on the wall moves. For more ways to work greenery onto walls and shelving, IKEA Kallax plant shelf styling ideas cover a few worth borrowing from.
Warning: Drywall anchors alone are the single most common failure point here a planter that pulls loose under wet-soil weight doesn’t just make a mess, it can come down on a cat sitting below it.
Shop This Look
| Product |
|---|
| Wall-mounted planter with built-in bracket |
| Heavy-duty toggle bolts (rated 25+ lbs) |
| Stud finder |
5. Choose a Self-Watering Planter With a Sealed Reservoir
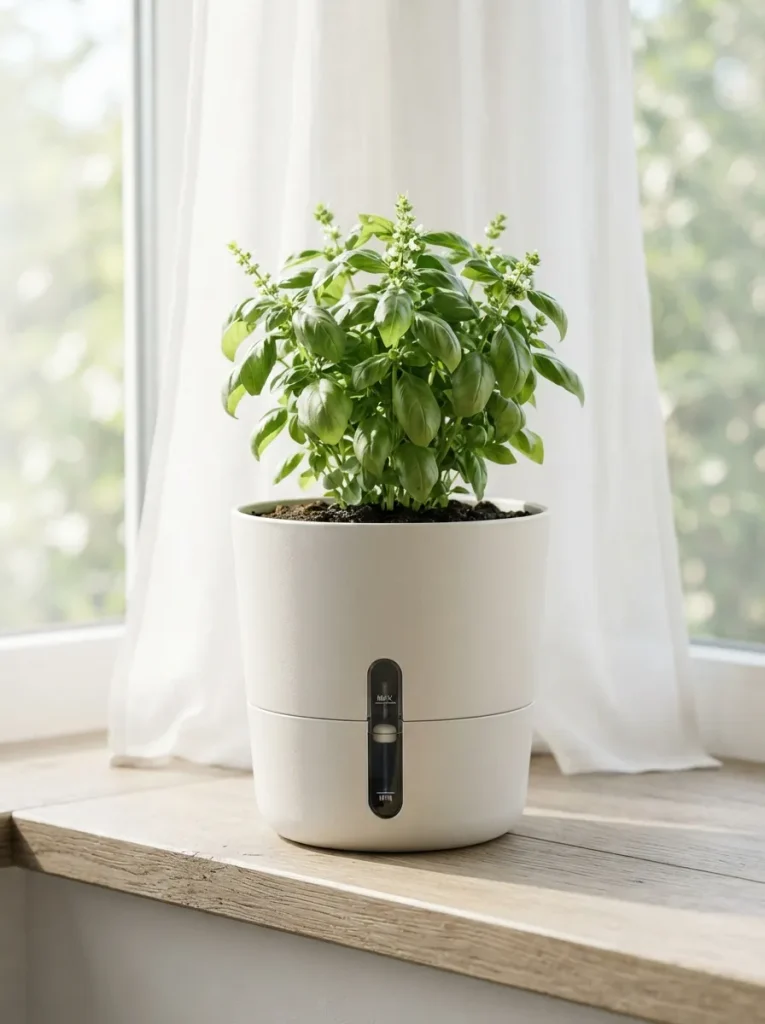
A self-watering planter with a covered reservoir looks like an ordinary pot from the top the water sits in a sealed chamber below the soil, wicked up through a cord or porous insert, with no open bowl of standing water for a cat to paw at, drink from, or step in.
That matters more than it sounds like it would: open saucers of water are a magnet for cats, especially in dry apartments, and a paw dipped in and shaken off soaks the surrounding floor and knocks lighter planters off balance in the process.
The sealed design also means less frequent watering, most holding a one-to-two-week reserve depending on the plant and pot size, so there’s less handling of the planter overall, which is its own form of cat-proofing. Look for one with a visible water-level gauge so you’re not guessing when to refill.
Small-Space Tip: These work especially well on narrow windowsills, where a separate water bowl or saucer isn’t an option and any spill has nowhere to go but the floor below.
Shop This Look
| Product |
|---|
| Self-watering planter with sealed reservoir |
| Water-level indicator gauge |
| Lightweight potting mix for self-watering systems |
6. Cover the Soil Surface Completely, Not Just Mostly
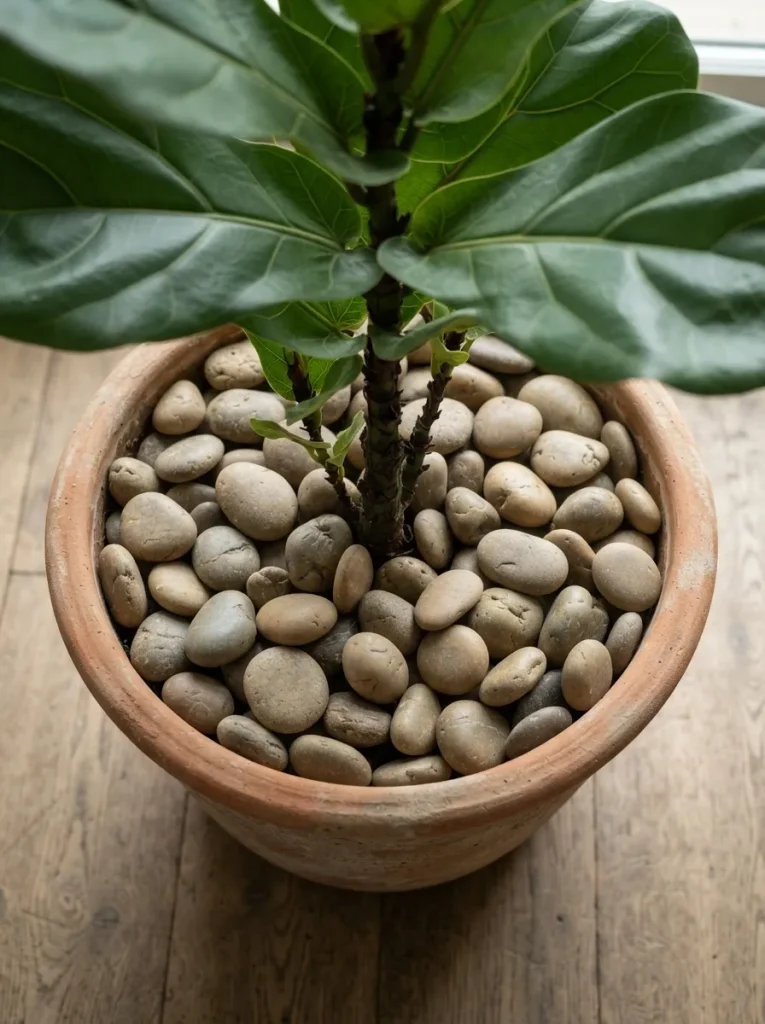
Digging in houseplant soil is a toileting instinct, not curiosity loose, exposed dirt reads to a cat as an invitation, and a partial covering doesn’t remove the invitation, it just relocates it to the one bare patch left.
A full layer of decorative stone, glass pebbles, or large pinecones at least an inch deep across the entire soil surface eliminates the texture cats are drawn to digging into. Smooth river stones work better than sharp decorative gravel, which can bruise paw pads and discourage the cat from the planter’s whole vicinity rather than just the soil not the outcome most people want if the plant sits somewhere they still walk through daily.
This is also one of the few fixes here that adds to the planter’s look instead of working around it.
Important: A thin scatter of decorative stone doesn’t work cats will dig around sparse coverage to reach exposed soil. The layer needs to be continuous and at least an inch deep.
7. Add a Wire Grid Underneath for Cats That Dig Through Decorative Stone
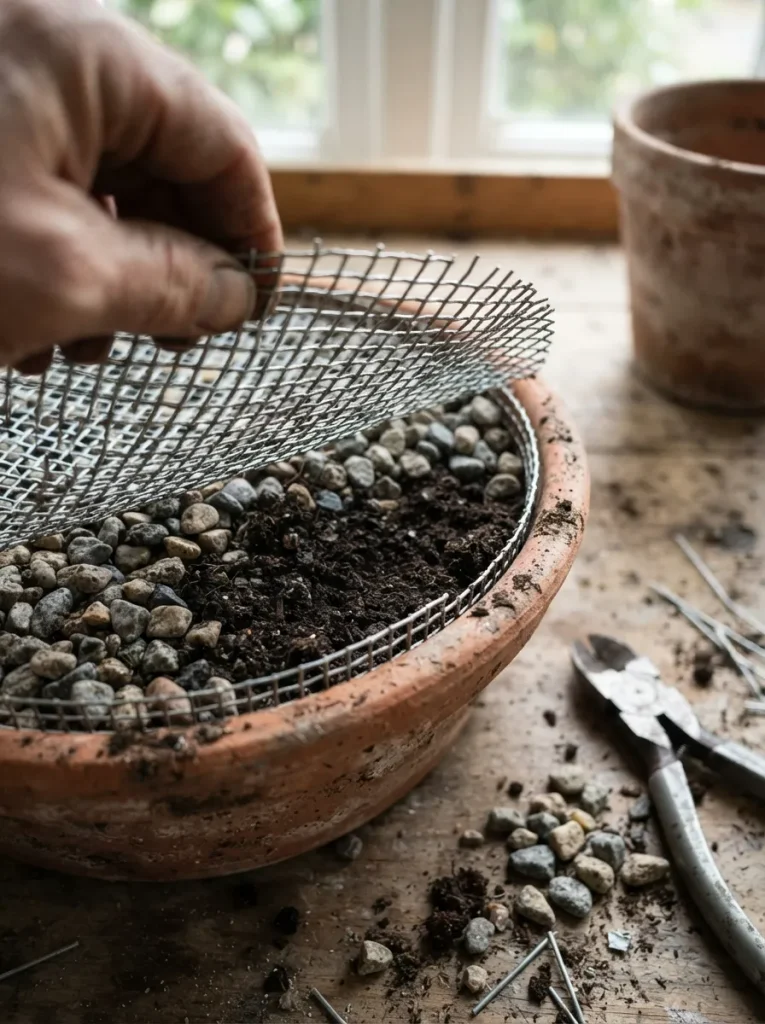
Decorative stone stops most cats, but a persistent digger will push straight through a loose layer of it to reach soil underneath, scattering stones across the floor in the process. Cut a piece of galvanized hardware cloth or chicken wire slightly larger than the pot’s diameter, bend the edges down along the inside rim, and set it directly on top of the soil before adding the decorative layer.
The grid is rigid enough that a paw can’t push through it the way it pushes through loose stone, but the openings are still large enough for water to pass through during watering. It’s an extra step, and it’s not necessary for every household save it for the planter your cat has already targeted twice, rather than building it into every pot preemptively.
Budget Version: A leftover roll of half-inch hardware cloth from a hardware store project costs under $10 and covers a dozen planters, so there’s no need to buy anything decorative-grade for a layer that sits hidden under stone.
Stone works for most cats. The next idea is for the ones a swinging hanger and a covered soil surface still won’t stop get them out of reach entirely.
8. Move the Planter Outside the Window Entirely
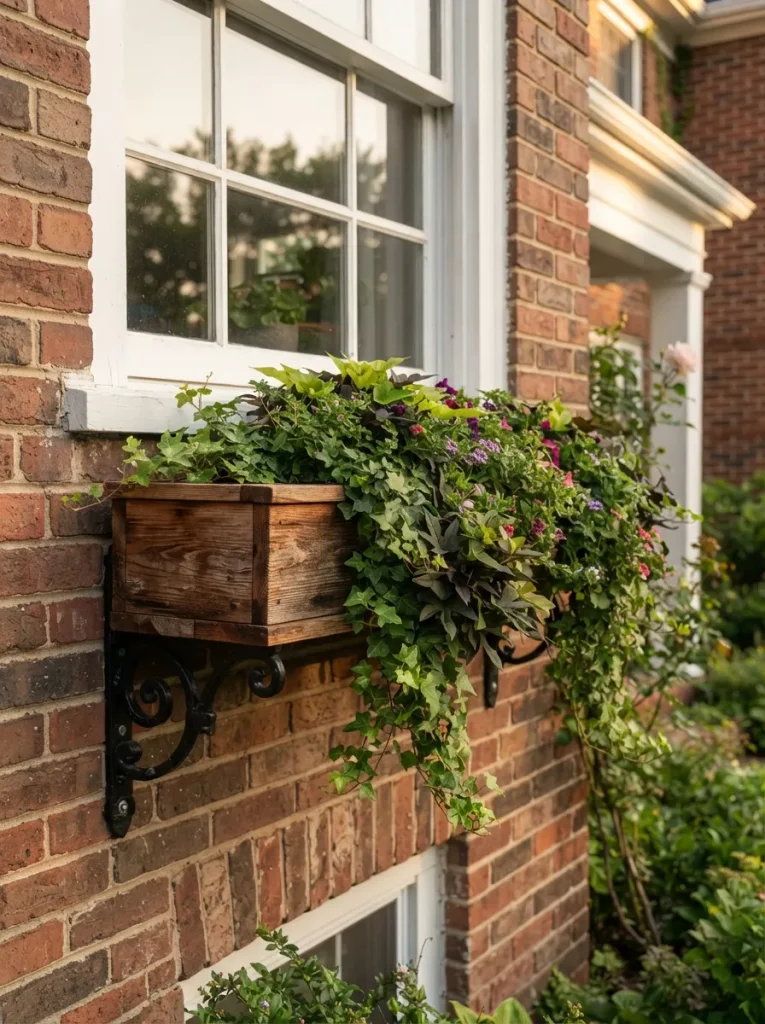
For a plant a cat has already claimed as a personal project chewed leaves, dug soil, repeated knockdowns despite every fix above the most reliable solution is removing it from the cat’s territory altogether.
A window box mounted on brackets outside the sill puts the plant in full view from indoors without putting it within paw’s reach, which solves the whole category of problem at once instead of patching around one behavior.
Weather-resistant resin or cedar boxes handle outdoor conditions better than the ceramic planters used indoors, and the mounting brackets need to carry the box’s full soaked weight, not its dry weight, the same consideration as the stud-mounted wall planter above. This only works for windows with safe, code-compliant mounting points and plants that tolerate outdoor temperature swings check both before falling in love with the layout.
Pro Tip: Size the brackets to the box’s soaked weight, not the empty weight printed on the box potting soil holds roughly its own volume in water once fully watered.
Shop This Look
| Product |
|---|
| Weather-resistant window box planter |
| Heavy-duty window box mounting brackets |
| Drainage liner insert |
9. Pick a Plant Stand With Wide-Splayed Legs, Not a Single Pole
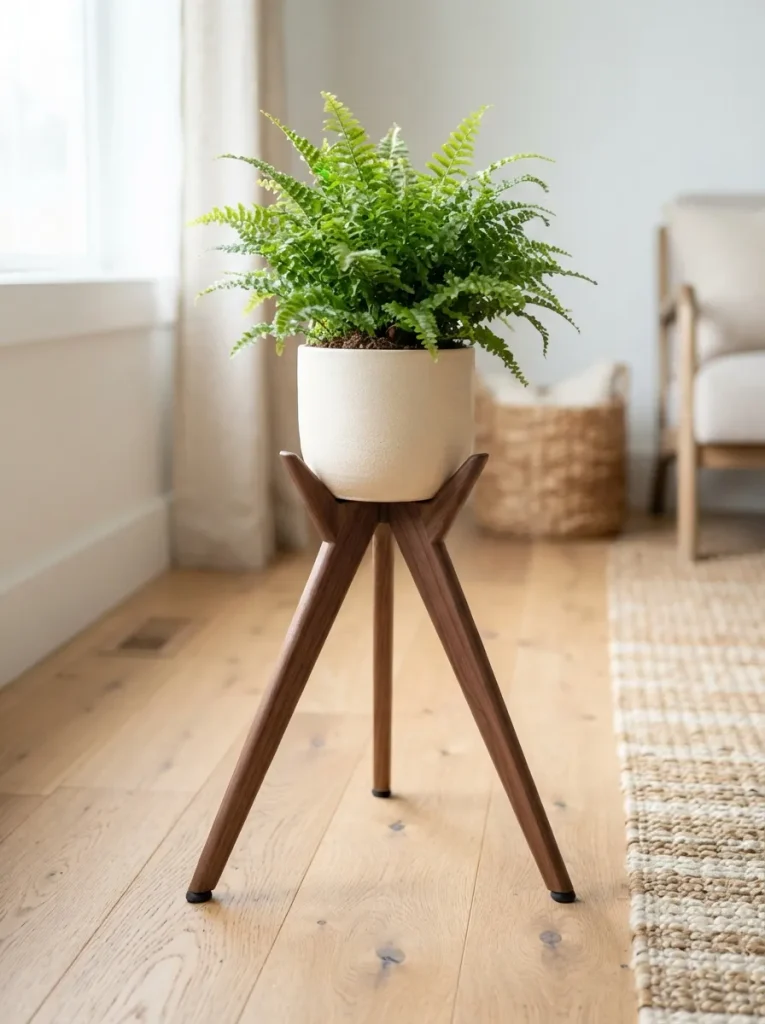
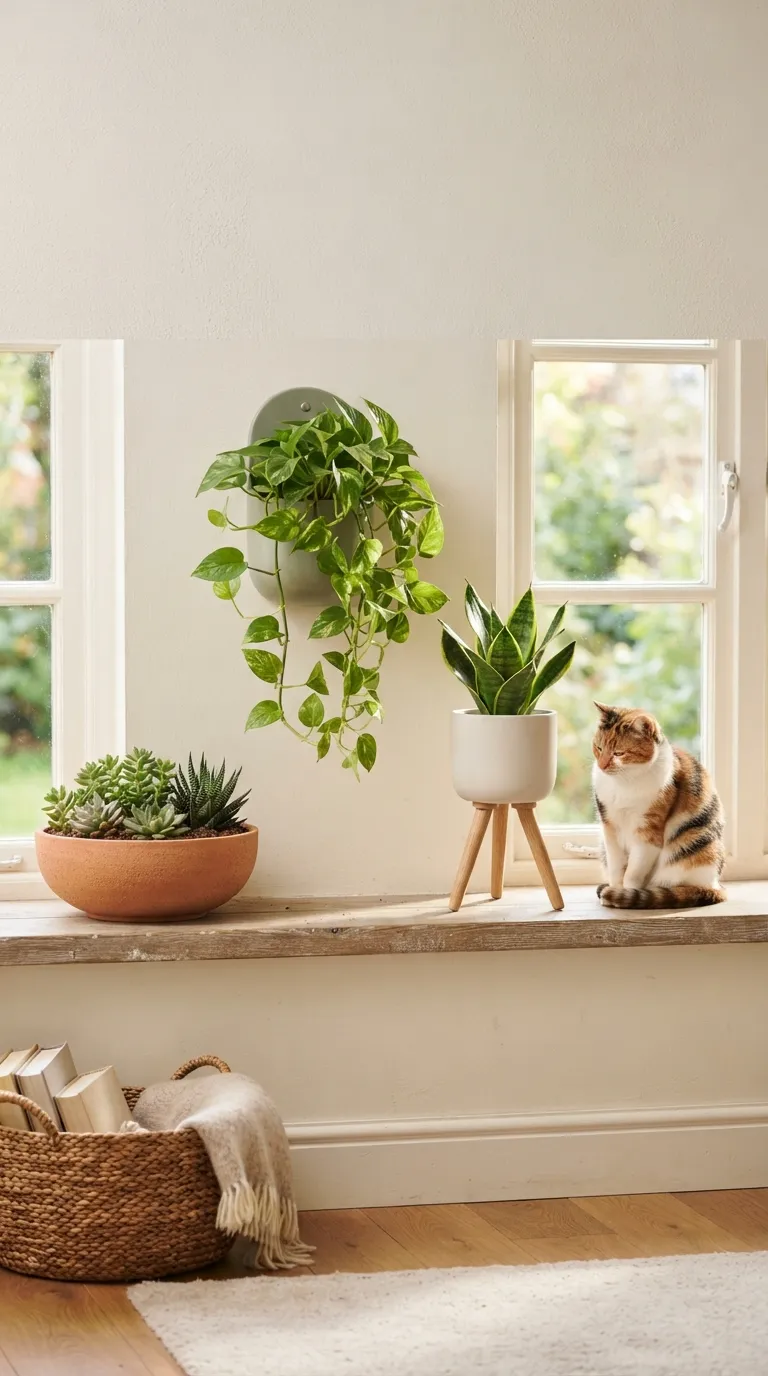
A tripod plant stand with legs splayed out at a real angle not tucked close together under the pot sits on a footprint several times wider than the planter itself, so a push from any direction has to overcome leverage the single-pole version simply doesn’t have.
Single-pole stands and narrow four-leg risers look sleeker in photos, but they’re the plant-stand equivalent of the tall narrow pot from earlier: minimal weight up high, minimal footprint below, maximum leverage for a determined paw.
Look for stands where the legs spread to roughly the same width as the pot’s height, ideally with rubber or felt feet that grip rather than slide on hardwood or tile. If the same cat is also a climber, pairing this with dedicated IKEA Kallax cat furniture hacks can redirect some of that energy away from the plants entirely.
Quick Win: Already own a narrow stand you like? Add furniture leg extenders angled outward at the base a $12 fix that widens the footprint without replacing the stand.
Shop This Look
| Product |
|---|
| Wide-splay tripod plant stand |
| Non-slip floor pads |
| Decorative pot ring or riser |
The next idea skips planter-specific fixes altogether and hides the whole solution inside a piece of furniture too heavy to argue with.
Observation
The counterintuitive part: putting a planter somewhere higher doesn’t reliably make it safer. Cats can clear four to five feet from a standing jump, so a shelf at typical bookcase height is often just as reachable as the floor the planters that stop getting knocked over are the ones secured or widened at the base, not simply relocated upward. Height only helps past the point a cat can comfortably jump and land, which for most indoor cats is higher than most people assume.
10. Build a Planter Into a Piece of Furniture That’s Too Big to Tip
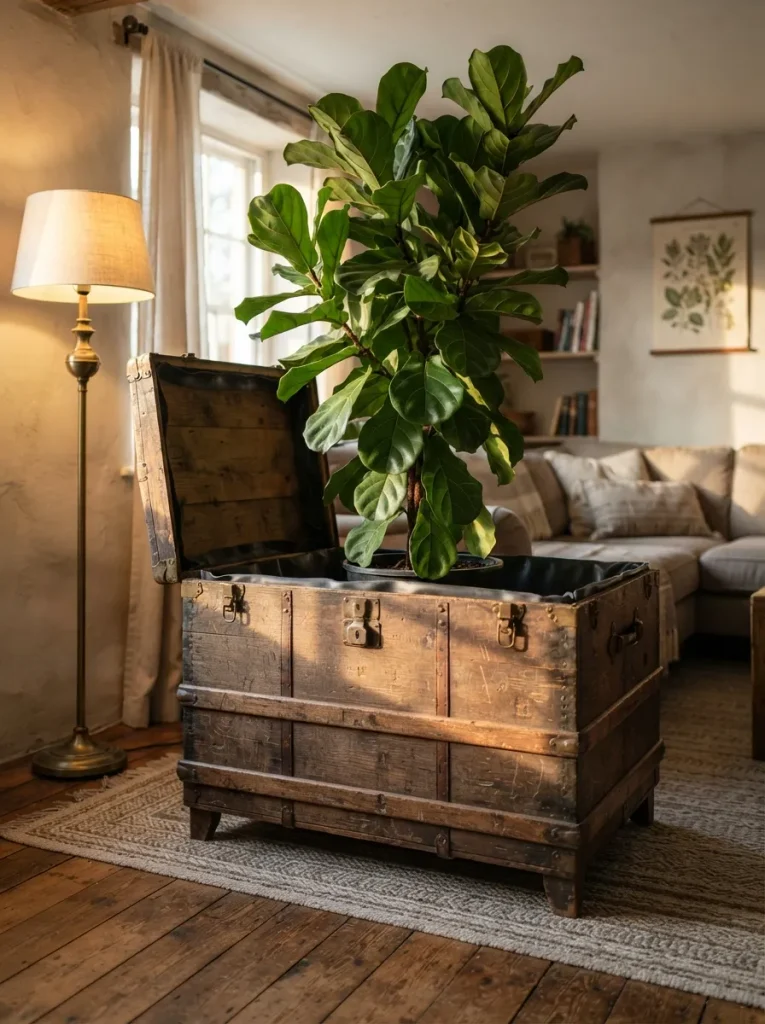
Line the bottom third of a small wooden crate, vintage trunk, or side table with pond liner or thick plastic sheeting, stapled and sealed at the seams, then set a plastic nursery pot with the plant inside rather than filling the furniture piece directly with soil the liner protects the wood, and the removable pot means repotting doesn’t mean rebuilding.
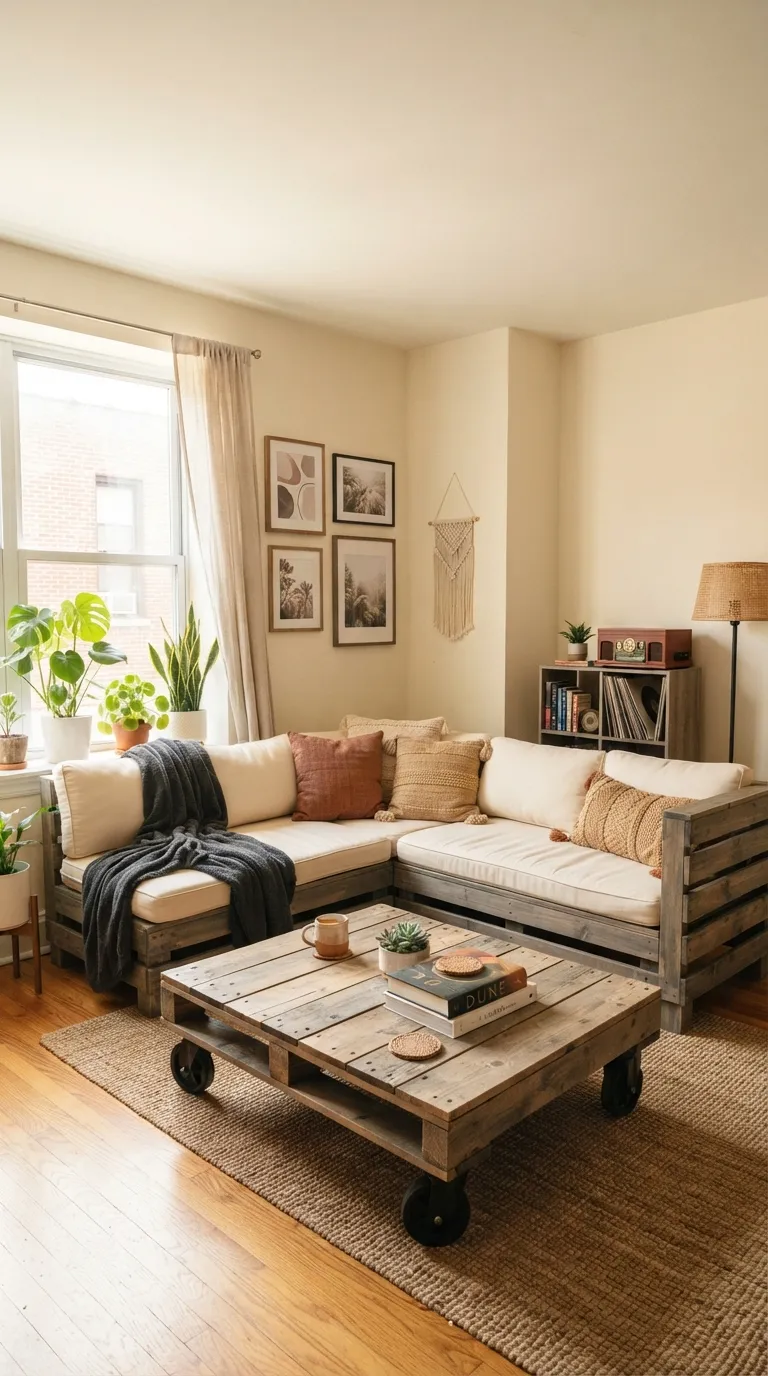
A piece of furniture large enough to hold a planter this way has a footprint and weight class no cat can meaningfully move, which sidesteps the tipping problem completely instead of engineering around it. This suits households with multiple cats or one especially large, persistent one, where every planter-specific fix eventually gets tested and beaten. Reclaimed crates and pallet-wood pieces work particularly well for this a few budget pallet furniture ideas show how cheaply the base structure comes together.
Styling Note: A weathered wooden crate or an old trunk with visible hardware reads intentional rather than repurposed, especially finished with a matte wax rather than a glossy sealant.
11. Epoxy a Terracotta Pot to a Heavy Ceramic Saucer for a Permanent Wide Foot
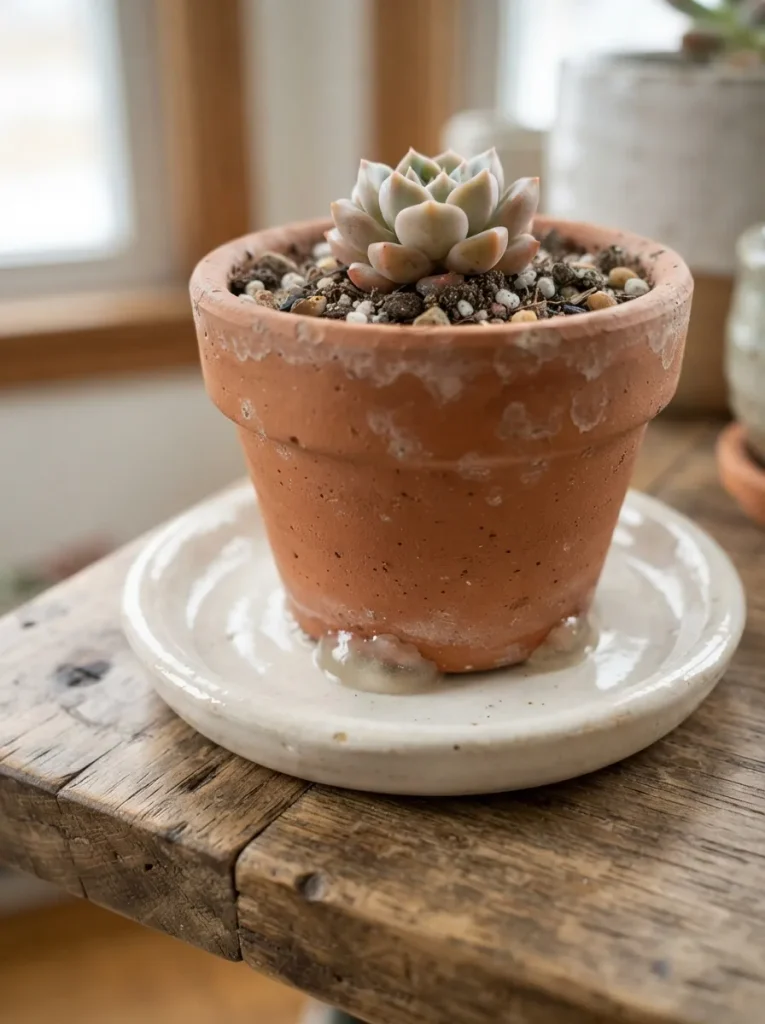
Store-bought cat-proof planters tend to run $40 to $80 for a wide, weighted base this gets the same result from a $6 terracotta pot and a heavy ceramic plate or saucer already sitting in most kitchen cabinets.
Clean both surfaces with rubbing alcohol, apply a two-part epoxy rated for both ceramic and terracotta around the pot’s base rim, then center the pot on the saucer and weight it down while it cures, usually 24 hours. The saucer becomes a permanent wide foot bonded to the pot rather than a separate piece that can slide out from underneath it, which is the failure point with an unglued saucer-and-pot combo.
Check that the pot’s drainage hole still clears the saucer’s rim before the epoxy sets, or drill a small drainage channel into the saucer edge first.
✅ Epoxy Pot-and-Saucer Base:
- [ ] Clean both surfaces with rubbing alcohol and let dry fully
- [ ] Apply two-part epoxy around the pot’s base rim
- [ ] Center the pot on the saucer and weight it down to cure (24 hours)
- [ ] Confirm the drainage hole clears the saucer before the epoxy sets
How to Start Cat-Proofing Your Planters
The right first move is almost always widening or securing the base of whatever planter gets knocked over most a rubber non-slip furniture pad under an existing pot, or a fixed eyebolt in place of a swinging S-hook, both fix the specific mechanism causing that planter’s problem without requiring a full replacement.
The most common beginner error is treating every planter the same way. Stacking decorative stone on a pot that’s a hanging-and-swinging problem does nothing, because the mechanisms are different. Watch which behavior precedes the knockdown a swat, a jump-up, digging before choosing a fix.
Three cheap starting points cover most households: a roll of hardware cloth for soil coverage, a pack of rubber furniture pads to widen an existing base, and a tube of museum wax or adhesive putty to anchor small pots to shelves without drilling anything.
A single fixed hanger or widened base takes fifteen minutes and costs under $10. A full room of planters wide bowls, wall mounts, and a concrete-bottomed statement piece runs a weekend and somewhere between $60 and $150, depending on how many pots need replacing versus retrofitting.
Ready to Stop Refereeing Your Cat and Your Plants?
Eleven different cat-proof mechanisms, one goal: plants that survive living with a cat instead of getting relocated to a closet. Some of these are fifteen-minute fixes for tonight, others are weekend projects worth saving for later starting with just the one planter your cat has already destroyed twice is a completely reasonable place to begin.
Widen a base, fix a hanging point, cover a soil surface, and most of the daily battle disappears. The plants get to actually grow, the floor stays clear of scattered soil and stone, and mornings stop starting with a cleanup. Pin whichever fix matches your worst offender first the concrete-bottomed planter and the epoxy saucer combo are the two worth saving for later if today’s only got fifteen minutes.
Keep Exploring
- 14 IKEA Kallax Plant Shelf Styling Ideas for Plant Parents
- 9 IKEA Kallax Cat Furniture Hacks for Pet Owners
- 15 Modern Succulent Planter Ideas for Small Spaces