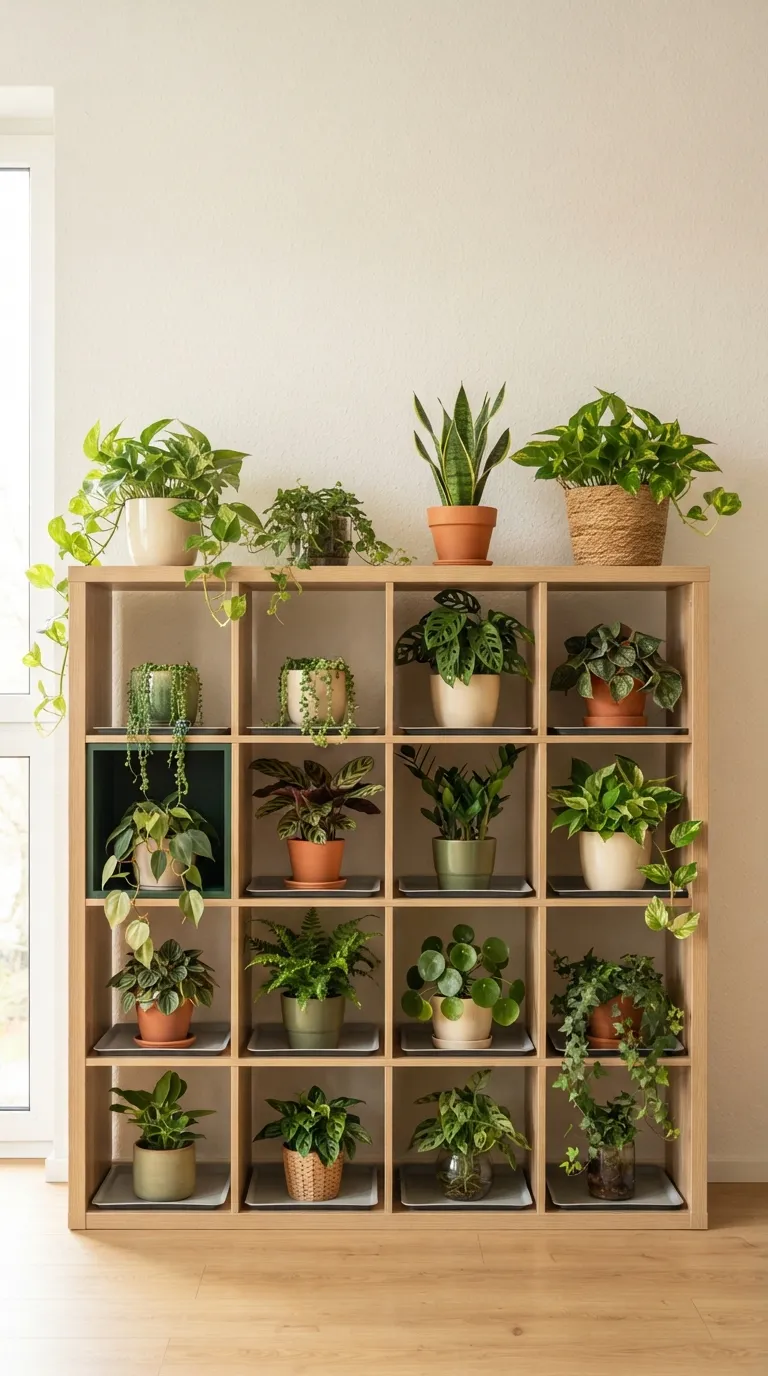
14 IKEA Kallax Plant Shelf Styling Ideas for Plant Parents
A Kallax turns into an actual plant shelf the moment you stop treating every cube the same way some hold pots, some hold light, one probably needs to hold nothing at all. Here are 14 ways plant parents are styling their Kallax units to keep leaves healthy, pots hidden, and the whole thing genuinely good to look at.
Green spilling over pale oak veneer. Morning light catching a trailing pothos mid-cube, a water droplet still sitting on a leaf from yesterday’s misting. There’s a quiet, slightly obsessive satisfaction in a shelf where every plant has room to actually grow no rootbound pots crammed behind cabinet doors, no guessing which corner gets sun. Your Kallax has more plant potential than you’re currently using.
Quick Navigation
- Why IKEA Kallax Plant Shelf Styling Makes Such a Difference
- 14 IKEA Kallax Plant Shelf Styling Ideas for Plant Parents
- How to Start Your Kallax Plant Shelf Transformation
- Ready to Style Your Own Kallax Plant Shelf?
Why IKEA Kallax Plant Shelf Styling Makes Such a Difference
A Kallax works as a plant shelf because each 13×13-inch cube behaves like its own microclimate angle one toward a window for a pothos, tuck a snake plant into a windowless cube, and stack ceramic pots against the unfinished oak veneer without one plant’s care ruining another’s.
Most people skip the step that actually matters: treat cubes as zones, not open storage, and line any cube holding soil with a waterproof tray first. It works in rentals and small apartments because the footprint you already own does double duty a shelf built for exactly this. Map your light before you buy plants.
| Best starting point | Map each cube’s light exposure before adding a single plant |
| Biggest impact area | The top row — trailing plants read first from across the room |
| Budget to start | $40–$120 for liners, saucers, and starter pots |
| Time to complete | About an hour per cube, a weekend for a full unit |
14 IKEA Kallax Plant Shelf Styling Ideas for Plant Parents
1. Fix the Placement Mistake That Kills Most Kallax Plants First
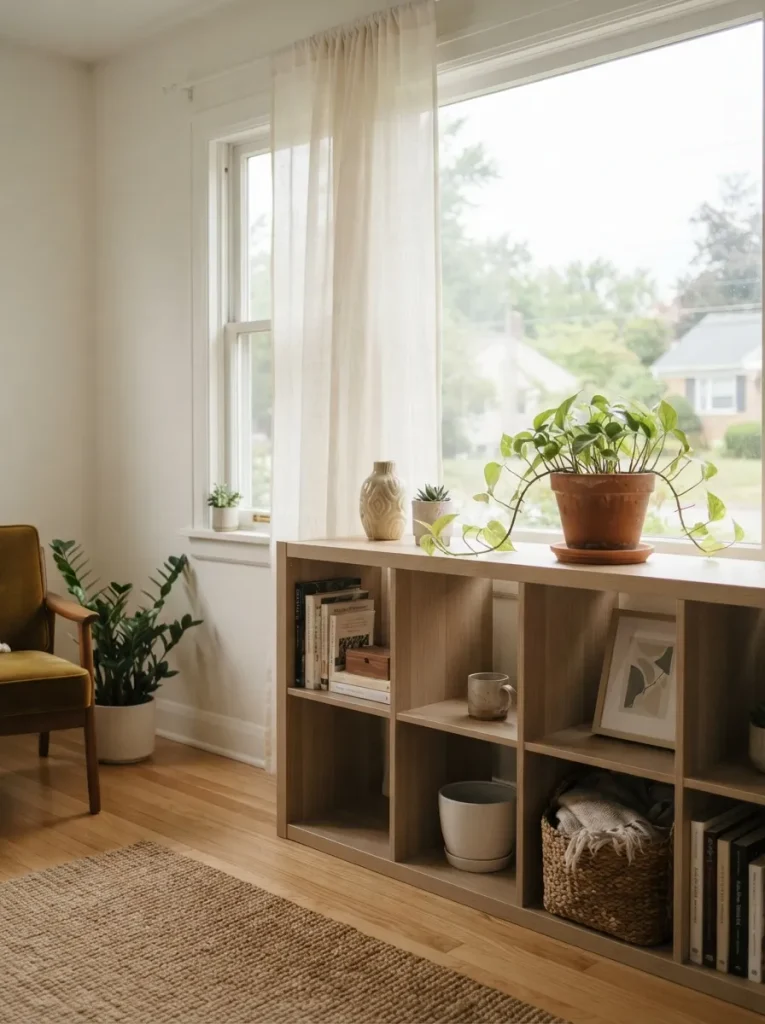
What it looks like: A Kallax pulled at least three feet from any wall that blocks afternoon light plain, but positioned like it means something.
Why it works: Cubes more than six feet from a window drop below the light levels most houseplants need to hold their shape, so leaf drop and legginess usually trace back to placement, not plant choice. Moving the whole unit not just one pot fixes the light math for every cube at once.
How to copy it: Walk your room at midday and note which wall gets at least four hours of indirect light; that’s where the Kallax goes, full stop. If no wall qualifies, reserve the top two cubes for plants and use the bottom two for books or baskets instead don’t force a shade-only zone to hold a pothos.
Best for: Anyone who’s already killed a plant on a Kallax and assumed it was the plant’s fault.
Warning: Pushing a Kallax flush against an interior wall near a window still blocks side light from reaching the lower two cubes measure clearance on all sides, not just the front.
2. Waterproof Every Kallax Cube Before a Single Pot Goes In
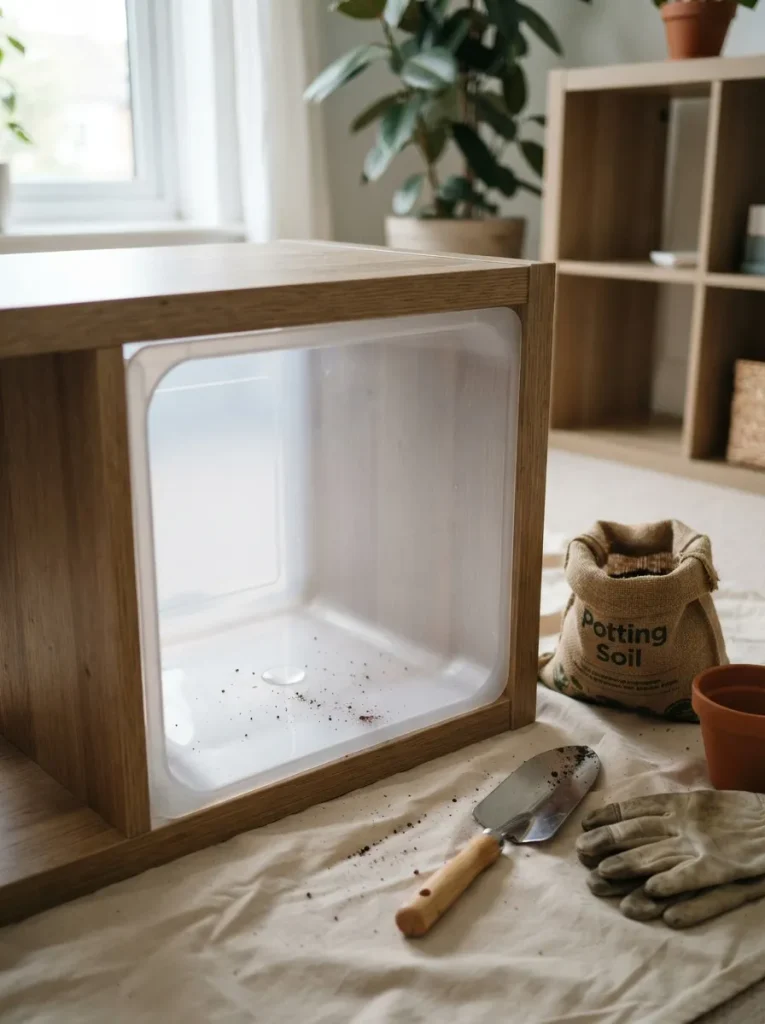
What it looks like: A cube lined edge-to-edge with a rigid plastic tray, invisible once a pot sits on top unglamorous, but the whole idea depends on it.
Why it works: Kallax cubes are particle board wrapped in veneer, and that board swells and delaminates the first time a saucer overflows a matter of when, not if, with regular watering. A tray catches runoff before it ever touches the shelf material, protecting the piece without changing how it looks from the front.
How to copy it: Measure the interior of one cube roughly 12.5 x 12.5 inches and buy a boot tray, drawer liner, or cut a shower pan liner to fit with an inch of clearance on each side. Set pots on the liner rather than directly on wood, and check it monthly for standing water the same renter-friendly thinking behind no-drill Kallax hacks applies here, since you’re protecting the piece without altering it.
Best for: Renters and anyone who waters on the enthusiastic side.
✅ Cube Waterproofing Checklist:
- [ ] Measure the interior cube opening (roughly 12.5 x 12.5 inches)
- [ ] Choose a rigid tray, boot mat, or cut liner sized with slight clearance
- [ ] Set the liner flat against the back and bottom seams before adding soil
- [ ] Test with a cup of water and wipe dry before placing the first pot
- [ ] Check monthly for pooling water and empty as needed
Shop This Look
| Product |
|---|
| Rigid plastic boot tray sized for a 13-inch cube |
| Cork drawer liner sheet, cut to fit |
| Clear plant saucers with raised lip |
| Rubber shelf liner roll |
| Small turkey baster for removing excess water |
3. Lay a Kallax on Its Side for a Low Plant Bench
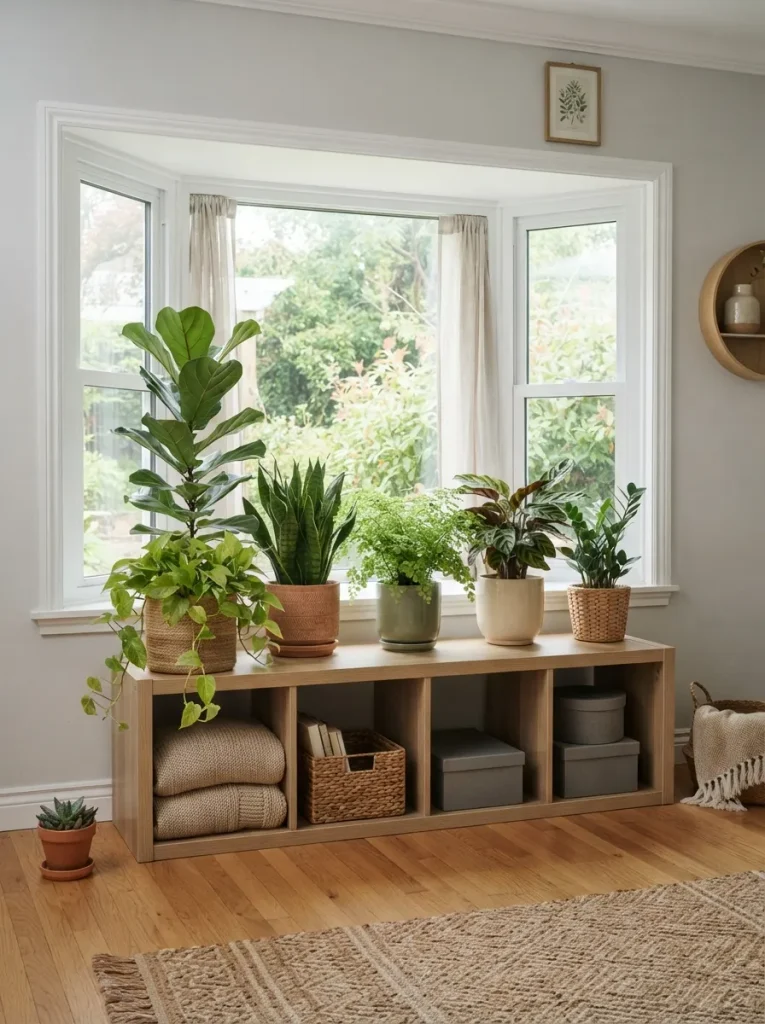
What it looks like: A Kallax turned on its long side, sitting low and wide under a window like it was built for that spot sturdy, not stacked.
Why it works: Horizontal orientation puts every cube at roughly the same eighteen inches off the floor, which reads as intentional furniture instead of leftover storage, and keeps taller plants from blocking window light for the ones behind them. The lower center of gravity also means it won’t tip the same stability logic behind horizontal Kallax room dividers.
How to copy it: Use a two- or four-cube-wide Kallax and anchor it to the wall with the included bracket even on its side top-heavy pots make this non-negotiable. Fill it as a plant bench rather than a bookshelf: mix pot heights so the tallest plant sits at the back, shortest at the front.
Best for: Bay windows, sunrooms, and anyone who wants plants to read as furniture, not clutter.
Budget Version: A single 2×2 Kallax laid on its side costs less than most plant stands and holds four pots start with one unit before committing to a full row.
Up next: the color trick that makes green look three shades brighter without adding a single new plant.
4. Let Trailing Vines Cascade From the Top Row Only
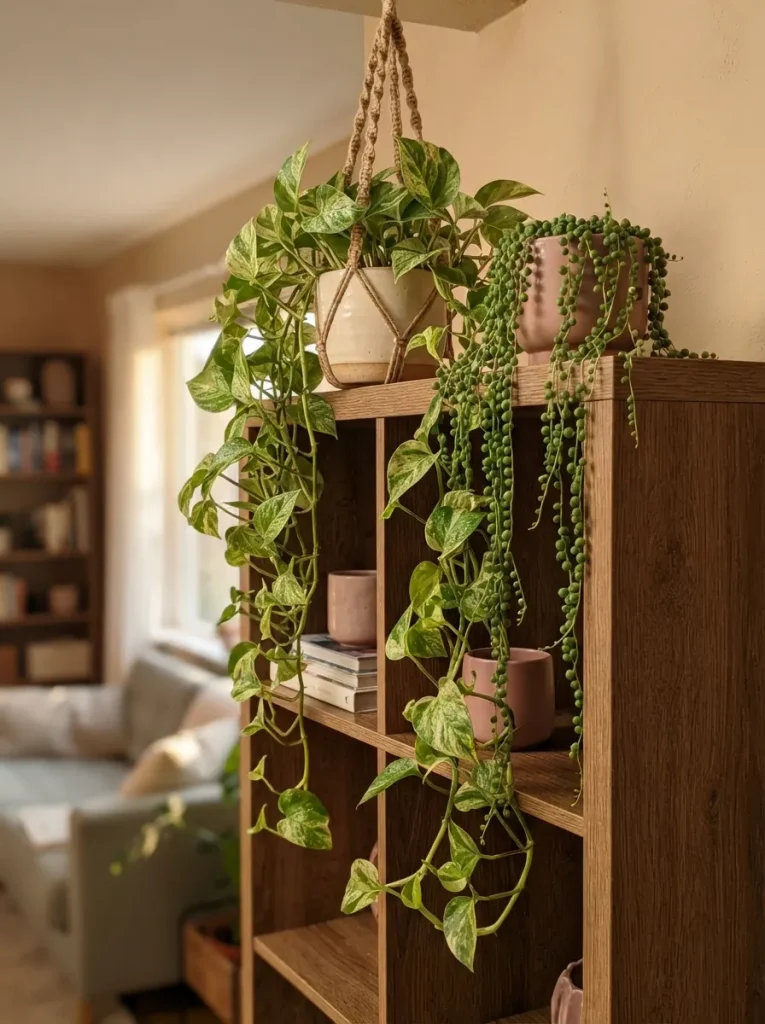
What it looks like: Vines spilling from the highest cubes only, long enough to brush the second row the rest of the shelf left calm underneath.
Why it works: Restricting trailing plants to the top row creates a clear visual hierarchy instead of green competing for attention at every level a basic negative-space principle that keeps a busy shelf from reading as cluttered. It also keeps lower cubes usable for books or baskets without vines tangling into them.
How to copy it: Pick two or three trailing varieties pothos, string of pearls, or heartleaf philodendron all tolerate the brighter top-shelf light and skip trailing plants everywhere else on the unit. Let one vine run noticeably longer than the others; the same intentional-imbalance idea shows up in modern succulent planter styling, where symmetry is avoided on purpose.
Best for: Tall Kallax units (4×4 or 5×5) where the top row gets the most light anyway.
Pro Tip: Rotate trailing pots a quarter turn every time you water vines left facing one direction for months grow lopsided toward the light and never fill back in evenly.
Shop This Look
| Product |
|---|
| Heartleaf philodendron in a 6-inch nursery pot |
| Macrame plant hanger with wood ring |
| Lightweight ceramic hanging planter |
| String of pearls starter plant |
| Small brass plant clip for training vines |
5. Paint the Back Panel of Two Cubes to Make Green Pop
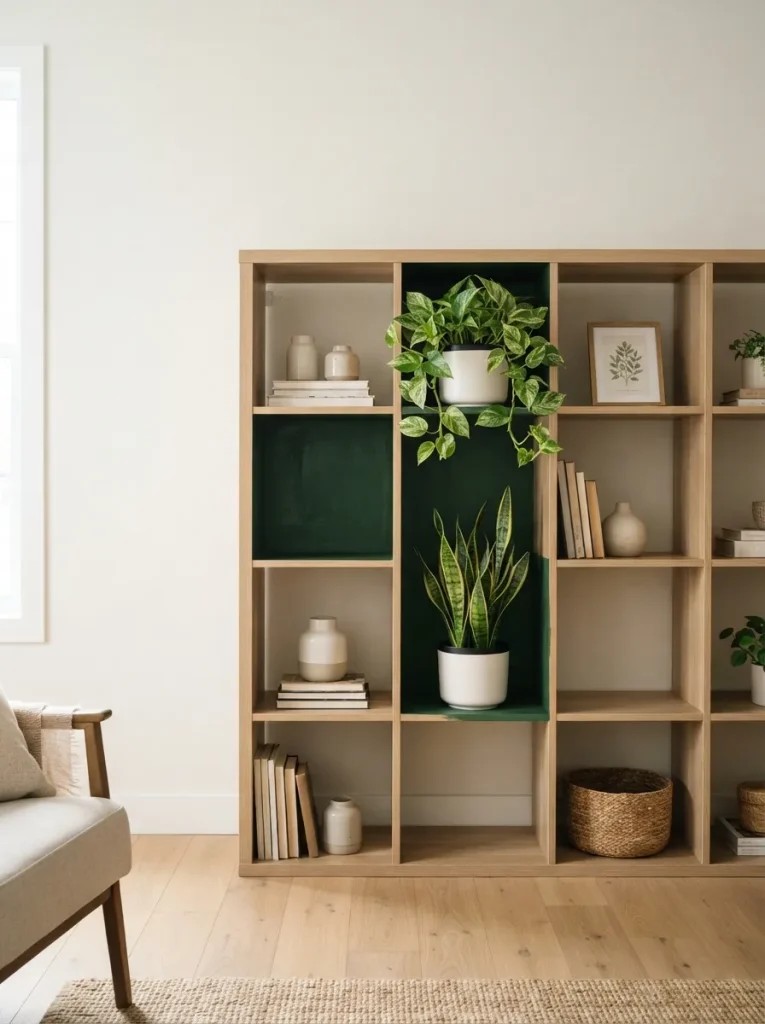
What it looks like: Two cube backs in a deep, matte forest green, the rest of the shelf left plain oak a small move that changes how the whole unit reads.
Why it works: Dark backgrounds increase contrast against green foliage the same way a gallery wall uses darker paint behind art, making leaf shapes more visible instead of blending into pale wood. Limiting the color to two cubes keeps the effect intentional instead of overwhelming the piece.
How to copy it: Remove the back panel if it’s removable, or mask off the cube opening and paint directly with a chalk or matte interior paint in a color like deep forest green or dusty terracotta. Choose non-toxic, low-VOC paint since the panel sits close to living plants the same restrained color approach shows up in Scandinavian Kallax styling, where one accent color carries the whole piece.
Best for: Anyone whose Kallax has started to look like plain storage instead of styled shelving.
Styling Note: Paint the two cubes diagonally across from each other rather than side by side it reads as a deliberate pattern instead of an accident.
6. Turn a Single 1×4 Kallax Insert Into a Slim Plant Tower
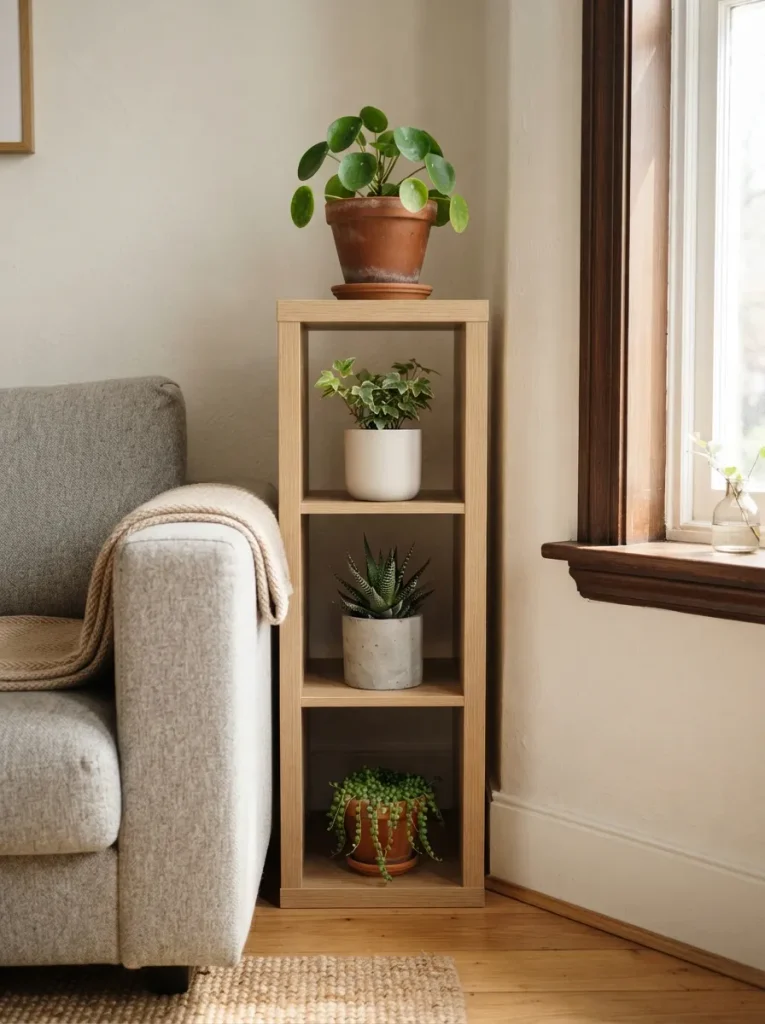
What it looks like: A single skinny column, four cubes stacked straight up, wedged into a gap most furniture couldn’t use narrow, upright, quietly efficient.
Why it works: The 1×4 Kallax insert takes up roughly 13 inches of floor width, narrower than most plant stands, and fits gaps beside sofas or doorways that would otherwise sit empty. Stacking vertically also means every plant gets its own light exposure instead of shading the one below it the usual problem with tiered plant stands.
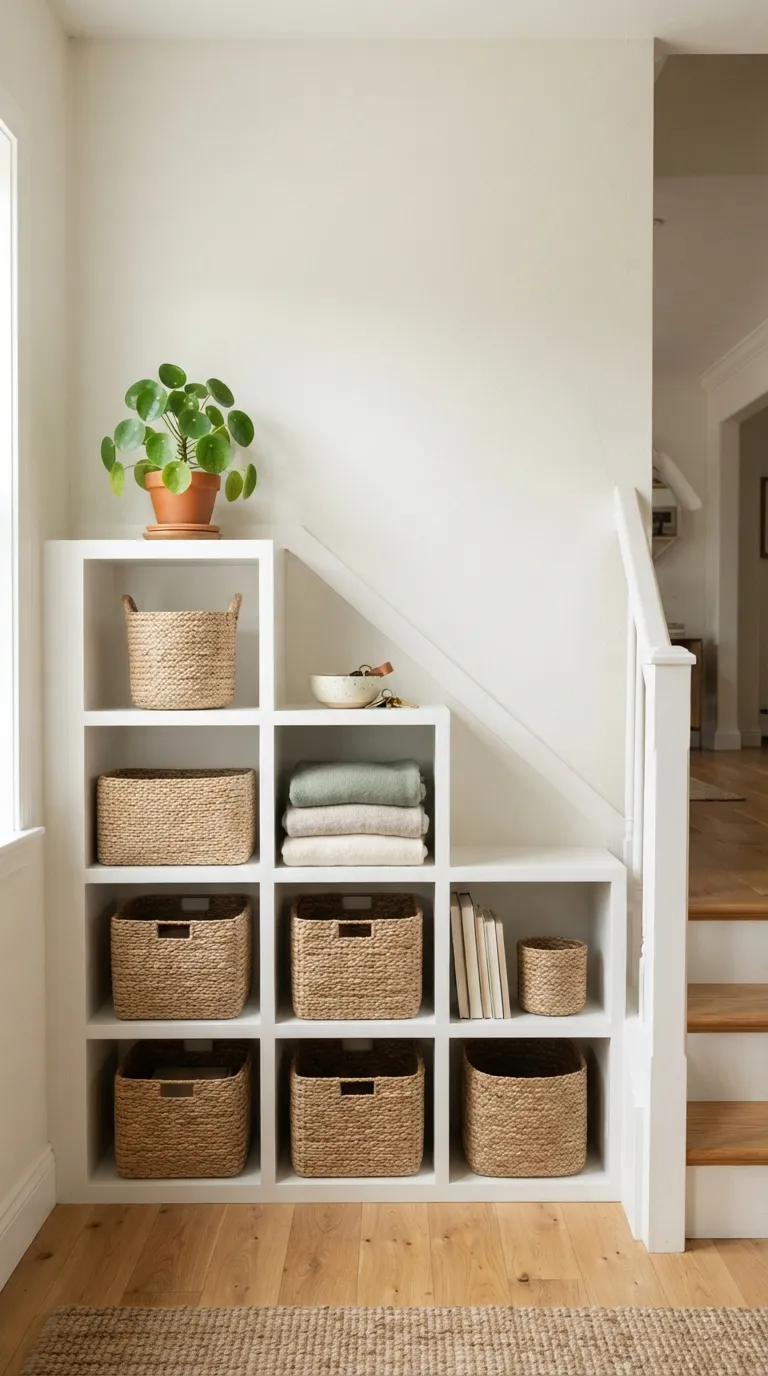
How to copy it: Anchor the unit to the wall since a tall, narrow piece is more tip-prone than a wide one, especially with top-heavy pots the same anchoring caution applies to under-stairs Kallax builds, where space is just as tight. Keep plant sizes graduated smallest at the top, where reach is hardest.
Best for: Studio apartments, narrow hallways, and anyone out of floor space entirely.
The next idea solves the problem most jungle-style shelves run into eventually: everything wanting the same window.
7. Zone the Shelf by Light Needs, Not by Plant Size
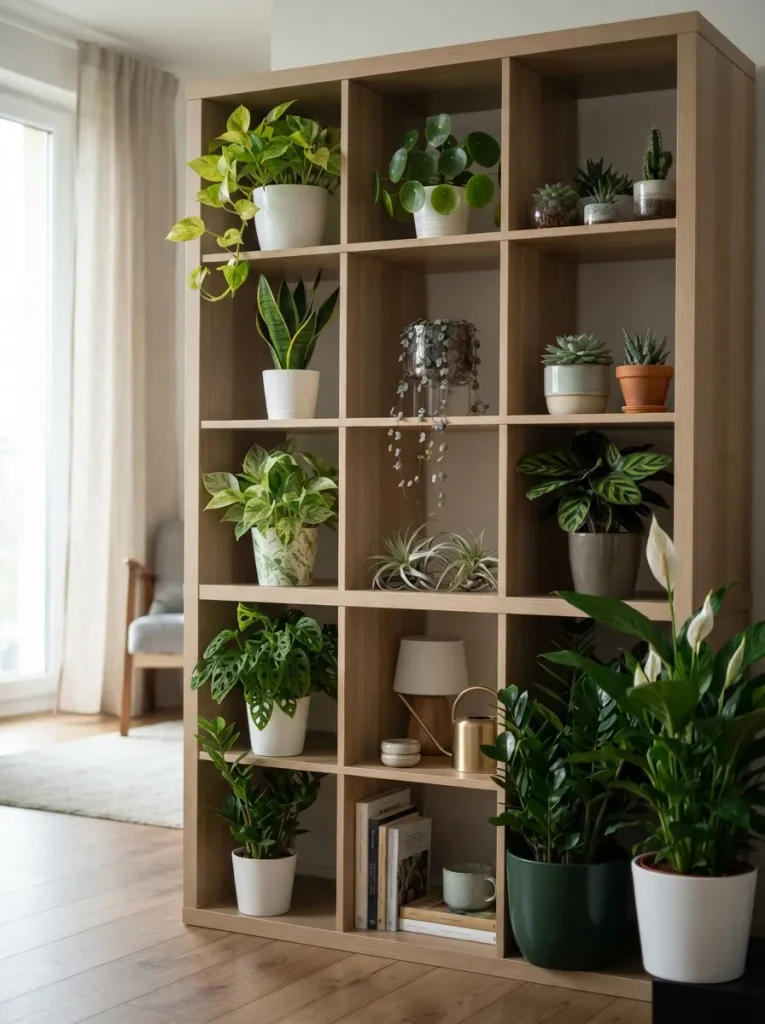
What it looks like: Bright-light plants clustered on the window-facing side, shade-tolerant ones held back in the dimmest corner grouped by what they need, not by how big they look together.
Why it works: Most people arrange a plant shelf visually first, matching pot colors or leaf shapes, then wonder why half the plants stall out within a season. Zoning by actual light exposure which can vary by two or three light levels from one side of the unit to the other keeps every plant somewhere it can actually survive.
How to copy it: Stand at the shelf at midday and note which cubes get direct light, which get bright indirect, and which sit in shade; sketch it on paper if the gradient isn’t obvious. Move plants only within their matching zone from then on, even if it means breaking up a color-coordinated grouping you liked.
Best for: Plant parents tired of replacing the same “impossible” plant every few months.
Important: Most houseplants sold as “low light” actually mean low light tolerant, not low light preferring they’ll survive in a dim cube but grow noticeably slower and rarely flower.
8. Add a Slim Grow Light Strip Under the Top Shelf
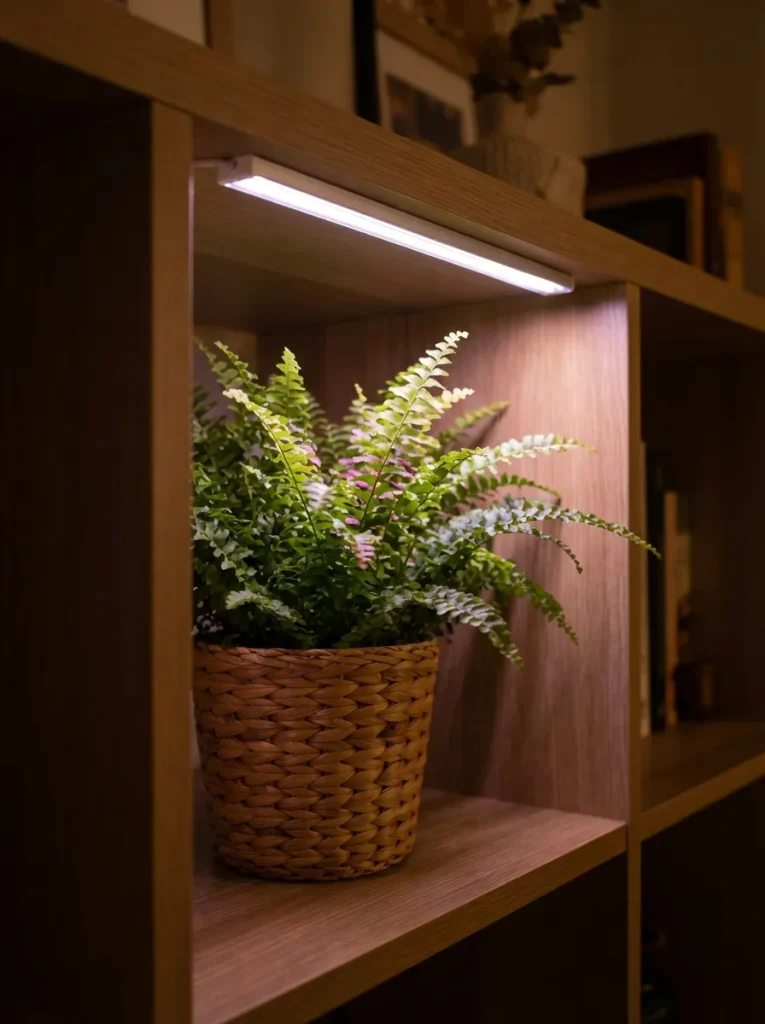
What it looks like: A slim LED strip tucked under the top shelf’s overhang, barely visible until it’s switched on and the cube below fills with soft light.
Why it works: North-facing rooms and interior cubes rarely hit the light levels most plants need no matter how they’re arranged, so a small full-spectrum grow light solves a problem rearranging can’t fix. Mounting it under the shelf above rather than clipped to a pot keeps the setup nearly invisible during the day.
How to copy it: Choose a slim, battery- or plug-powered LED strip rated for plant growth (full-spectrum, not just warm white) and mount it with adhesive clips to the underside of the cube above the plant it’s lighting. Run it on a cheap outlet timer for eight to ten hours daily rather than remembering to switch it manually.
Best for: North-facing apartments, windowless hallways, and any interior cube that never quite gets enough light on its own.
Quick Win: Battery-powered puck lights with a built-in timer skip the cord entirely stick one under any cube in under five minutes, no outlet required.
9. Line Plant Cubes With Rattan Instead of Plastic
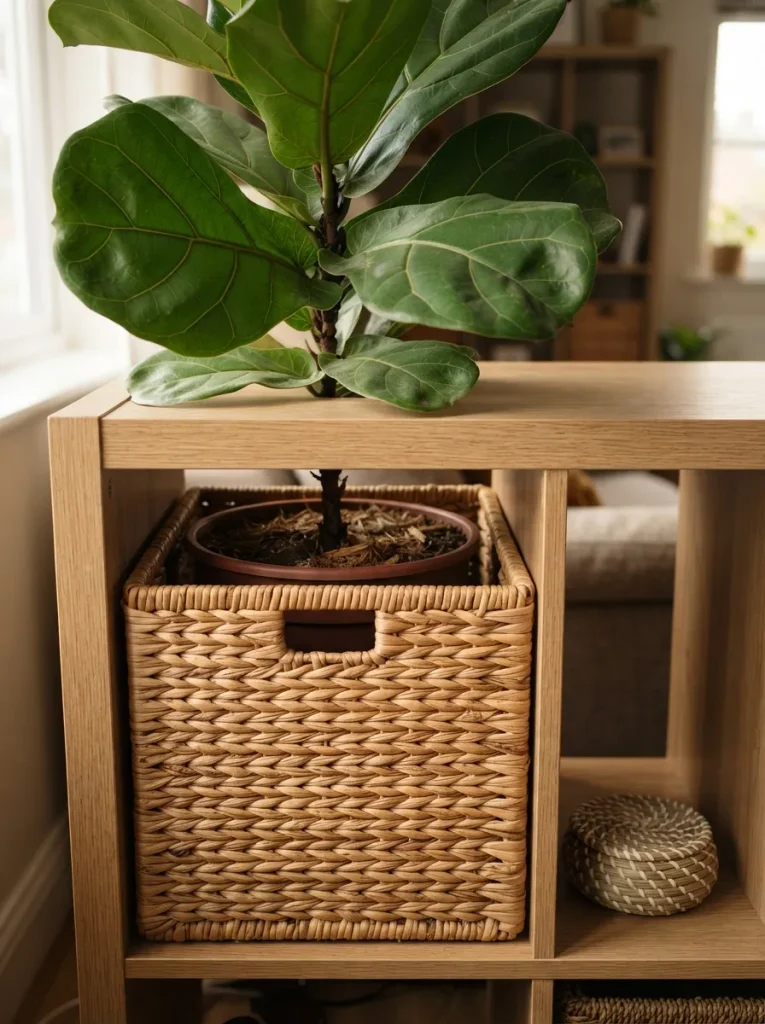
What it looks like: A woven rattan basket fitted snugly into the cube opening, holding the pot itself while the shelf underneath stays hidden and protected.
Why it works: Rattan adds visible texture and warmth that plastic liners can’t, layering a natural material against the plant the way a stylist layers linen and wood into a vignette texture layering, not just color, is what makes a shelf feel finished. It also disguises a plastic waterproof tray underneath without giving up the protection.
How to copy it: Buy a rattan basket sized slightly larger than the pot itself, fit a plastic liner or saucer inside it first, then set the potted plant on top the basket hides both the tray and the plastic pot. Choose a tightly woven rattan over an open-weave style if the plant tends to drip.
Best for: Anyone layering a boho Kallax look onto an otherwise plain unit.
Two more ideas left before the styling notes that actually make a plant shelf photograph well.
10. Mix Pot Materials Instead of Matching Them
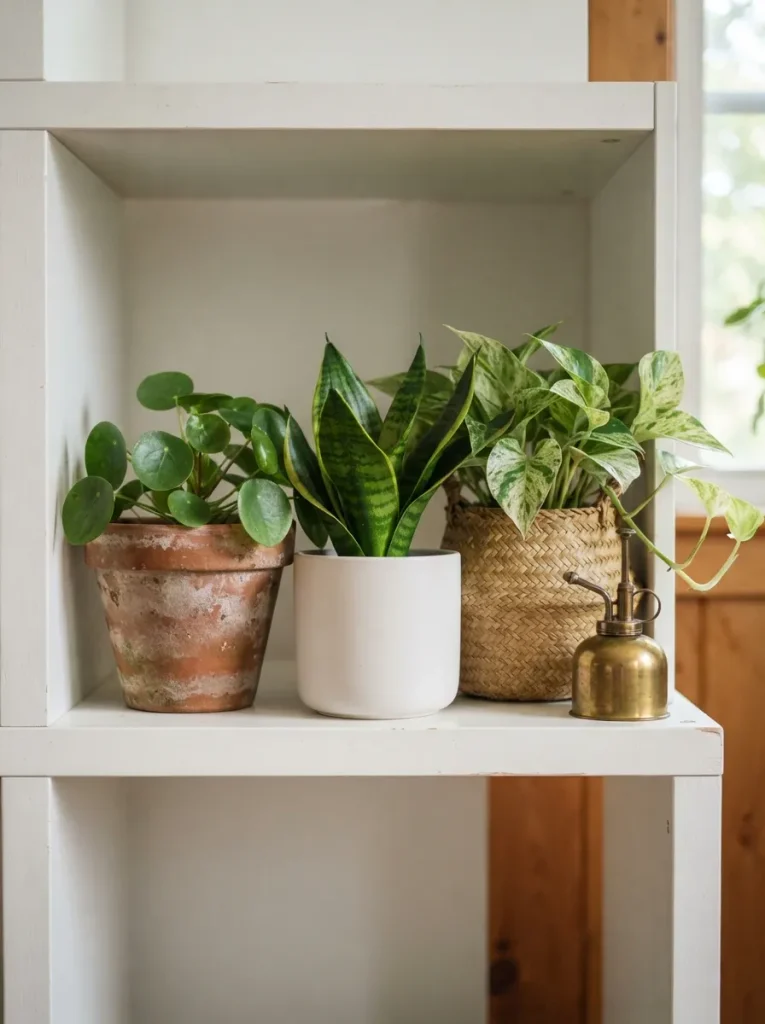
What it looks like: Three plants side by side, three different pot materials terracotta, ceramic, woven fiber none of them matching on purpose.
Why it works: A row of identical pots reads as a display case; mixed materials read as a collection built over time, which is closer to how most plant collections actually happen anyway. The contrast in texture does more visual work than color coordination, since the plants themselves already carry the green.
How to copy it: Keep one material per pot rather than mixing within a single grouping, and vary height slightly so the eye moves across the row instead of landing flat. Skip matching plant stands or trivets too inconsistency here is the point, not an oversight.
Best for: Plant collections that grew organically over a year or two rather than being bought as a set.
Pro Tip: Buy one “hero” pot in a material you love hand-thrown ceramic, aged terracotta and let cheaper plastic nursery pots hide inside the rest; nobody needs five expensive pots to make a row look curated.
Shop This Look
| Product |
|---|
| Hand-thrown ceramic planter with drainage hole |
| Aged terracotta pot, 6-inch |
| Woven seagrass basket planter |
| Small brass plant mister |
| Cork plant coaster set |
11. Color-Block Two Cubes to Frame the Plants Between Them
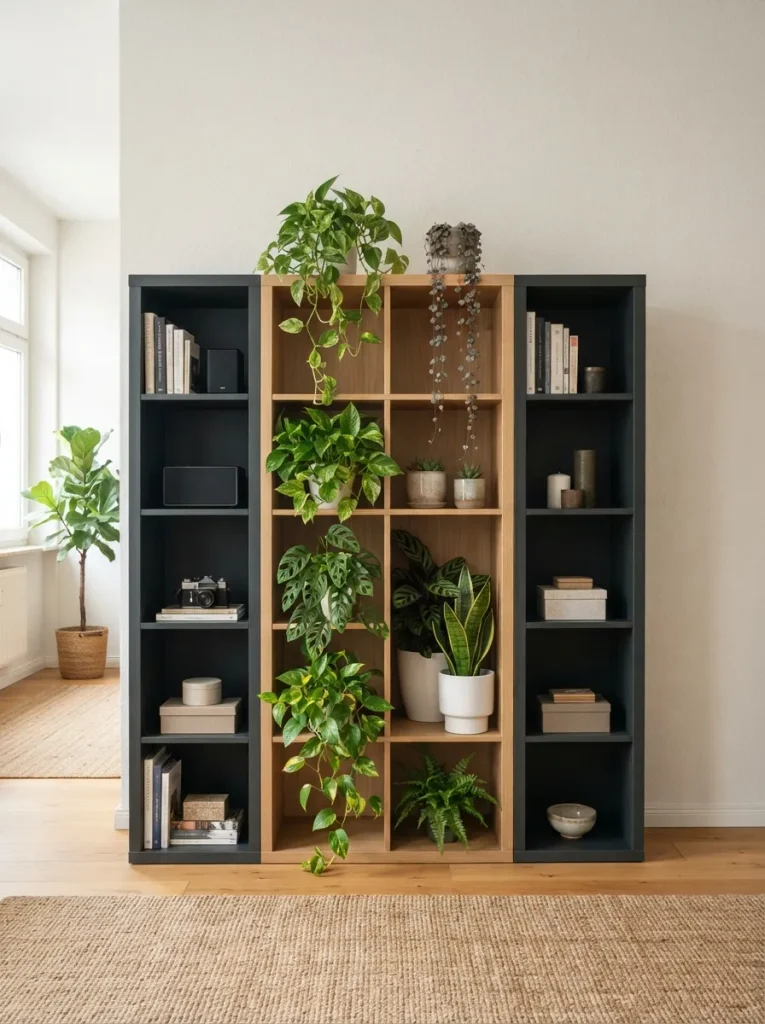
What it looks like: The two outer cubes painted charcoal, the middle left natural oak and full of plants dark bookends framing green instead of competing with it.
Why it works: Framing uses visual weight at the edges to pull the eye toward the center, a principle borrowed from gallery wall design, and it works because the dark color sits at the edges rather than behind the plants themselves. It’s a bolder move than painting a back panel the same high-contrast logic anchors black moody Kallax styling, just applied here in two cubes instead of the whole piece.
How to copy it: Paint only the two outermost cubes end to end, not just the back panel in a saturated dark color like charcoal or deep navy, leaving every cube in between untouched. Keep the plants in the framed middle section slightly taller or fuller than what would go in the dark end cubes.
Best for: Larger Kallax units (4×4 or wider) where a subtle painted back wouldn’t read from across the room.
Small-Space Tip: On a 2×2 unit, painting just one end cube instead of two still frames the plants without eating into your only two display cubes.
My Views:
What I’ve seen in actual apartments: people paint or style the top row first because it’s most visible, then forget the bottom two cubes get almost no light once a sofa or console table sits in front of the unit. Measure clearance from any furniture that’ll sit nearby six inches less than you think is normal, and it’s usually the bottom-corner plant that quietly dies first while everyone’s watching the top row.
12. Add Locking Casters So You Can Rotate the Whole Unit
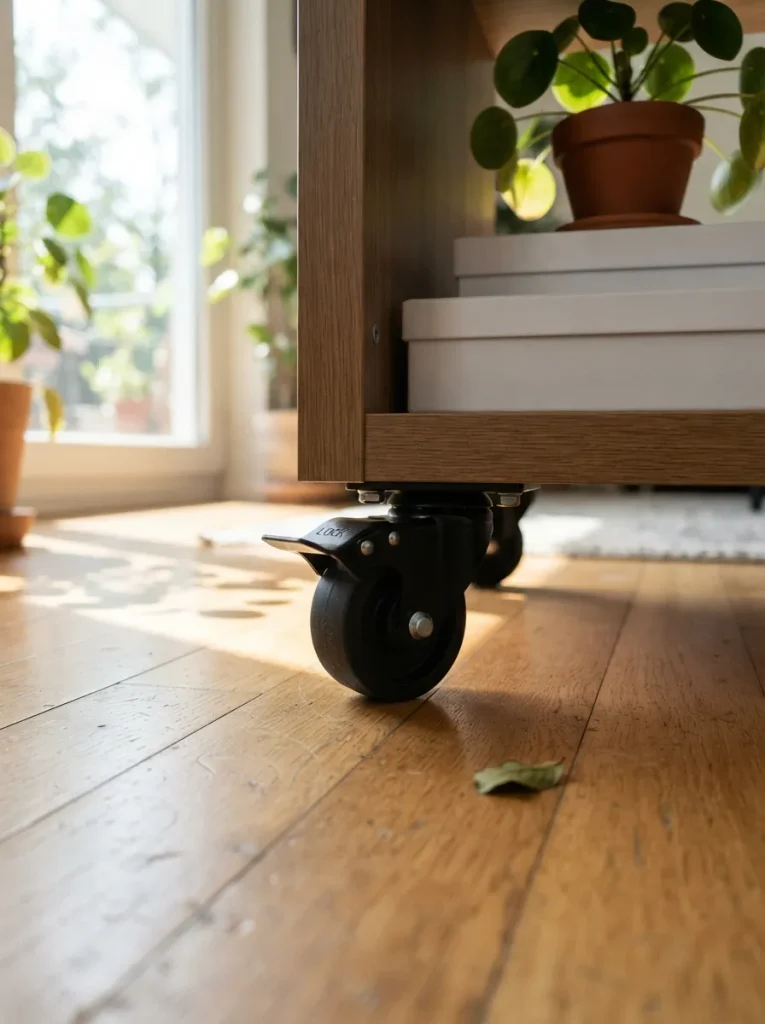
What it looks like: Small locking wheels tucked under the base, invisible from normal viewing height until the whole shelf needs to move six inches for cleaning or a quarter-turn for even light.
Why it works: Plants naturally grow toward their light source, so a stationary shelf produces one-sided growth over months even within a well-lit zone rotating the entire unit periodically keeps every plant’s growth even without individually turning a dozen pots. Casters also make it realistic to actually vacuum behind the unit once it’s loaded with plants.
How to copy it: Choose locking casters rated for at least 200 pounds combined weight, since a loaded Kallax with ceramic pots and soil gets heavy fast, and lock them once positioned so the unit doesn’t drift during normal use. Rotate the whole shelf a quarter turn every few weeks rather than trying to remember which individual pots need turning.
Best for: Plant parents who’ve noticed lopsided growth but assumed it was just how the plant grew.
Two ideas left, and the last one ties every plant on this shelf together visually.
13. Turn One Cube Into a Compact Kitchen Herb Garden
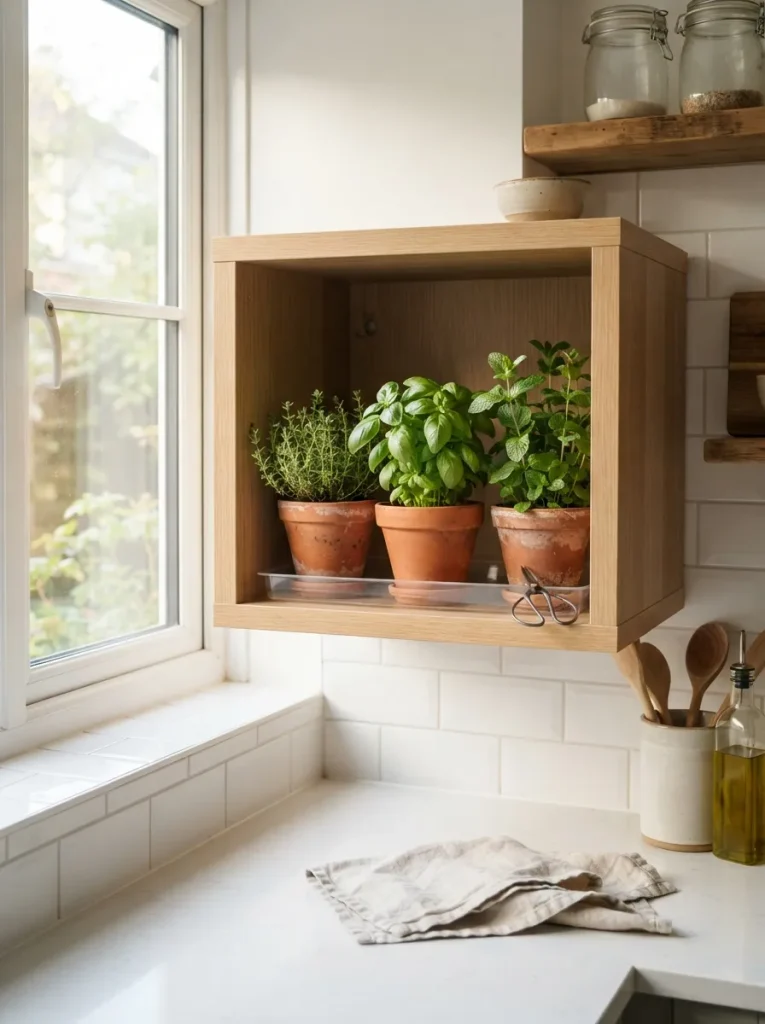
What it looks like: One cube near the kitchen, three small terracotta pots of basil, thyme, and mint lined up close enough to snip mid-recipe.
Why it works: Kitchens rarely have windowsill space for more than one or two pots, so dedicating a single Kallax cube solves the space problem without a separate herb stand. Grouping herbs together also means they share the same watering rhythm, unlike mixing them in with houseplants that need very different care.
How to copy it: Line the cube with a waterproof tray first, then use pots no larger than four to six inches so three or four herbs fit without crowding. Position the cube in whichever spot gets the most direct light in the kitchen, even if that means it’s not the most visually central cube.
Best for: Small kitchens without windowsill space, especially near a Kallax coffee bar setup already dividing the room.
Warning: Enclosed cubes near a stove trap heat and steam, which encourages mold on the tray liner faster than in open-air spots check this cube’s liner weekly if it’s within a few feet of cooking.
Shop This Look
| Product |
|---|
| Set of three 4-inch terracotta herb pots |
| Small waterproof drip tray |
| Compact kitchen scissors for herb trimming |
| Mini watering can with narrow spout |
| Adhesive plant labels for herb varieties |
14. Stagger Plant Heights Instead of Lining Them Up Flat
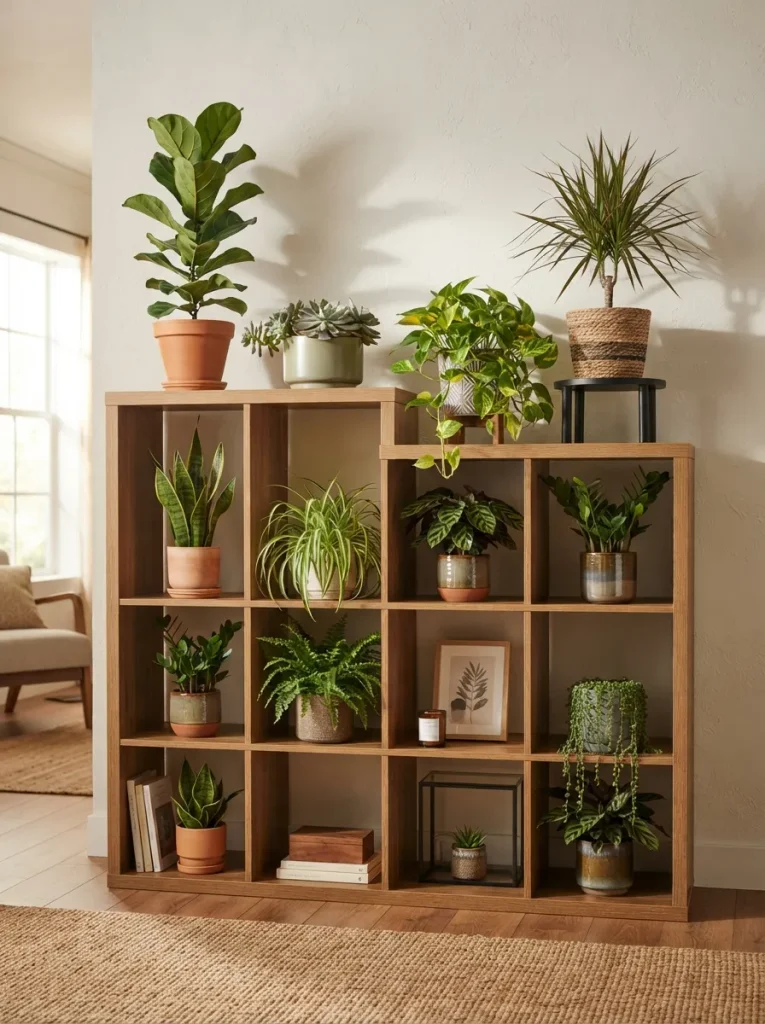
What it looks like: A tall plant, then a low one, then a mid-height one heights zigzagging across the shelf instead of sitting in a flat, even row.
Why it works: A flat row of same-height plants reads as a display shelf; varied heights create a silhouette that catches the eye the way a well-arranged bookshelf mixes vertical and horizontal stacks. It also solves a practical problem tall plants next to each other tend to shade one another, while staggered heights let more light reach each one.
How to copy it: Use a small plant stand, upturned bowl, or riser block inside any cube where you want extra height without buying a taller plant. Plan the sequence loosely tall, low, mid, low, tall rather than a strict pattern, since real plants rarely cooperate with exact repetition anyway.
Best for: The final visual pass once every other idea on this list has already been applied.
How to Start Your Kallax Plant Shelf Transformation
What I’ve found with real spaces: map your light before buying a single plant, then buy exactly one waterproof tray liner and test it in your sunniest cube. That one move protecting the shelf first determines whether the rest of this list is worth doing at all, since a swollen particle board cube undoes every styling idea layered on top of it.
The fixable mistake almost everyone makes: buying plants for how they’ll look in the photo, not for the light the cube actually gets. A fiddle leaf fig crammed into a windowless bottom cube will drop leaves within a month regardless of how good the pot looks match the plant to the light zone first, style second.
Three cheap places to start: a rigid plastic boot tray under $12 to waterproof your first cube, a single 6-inch terracotta pot around $8, and a $15 moisture meter that takes the guesswork out of watering schedules for the first few months.
A single cube can be set up liner, pot, plant in under an hour for around $30 to $40. A full 4×4 unit styled across every cube realistically takes a weekend spread over two or three sessions, plus another $150 or so if you’re buying six to eight plants at once instead of building up slowly.
Ready to Style Your Own Kallax Plant Shelf?
Between painted cube backs, staggered heights, grow lights, and fourteen different ways to keep water off particle board, there’s more than one path to a Kallax that actually works for plants instead of just holding them. None of this needs to happen at once one waterproofed cube and one well-placed trailing vine is a real start, not a half-measure.
Tonight, do the one thing that matters most: stand in front of your Kallax at midday and actually watch where the light falls. Once the light and the layout are honest instead of aspirational, the plants stop fighting the shelf and the whole thing starts to feel less like storage and more like a room that’s actually alive. Save this one before you forget which cube was supposed to get the grow light plant shelves have a way of becoming exactly what you originally planned, cube by cube.
You Might Also Like
- 12 IKEA Kallax Herb Garden Ideas for Small Kitchens
- 9 Boho Plant Shelf Styling Ideas Beyond the Kallax
- 15 Indoor Plant Placement Ideas for Low-Light Apartments