14 Tiny House Pallet Furniture Ideas That Save Space
Space in a tiny house gets saved by furniture that folds away, hangs off the wall or does two jobs at once, and pallet wood suits all three better than most materials. Below are 14 tiny house pallet furniture ideas built on that logic: slim shelving, a fold-down desk, storage stairs, a daybed that sleeps a guest and more.
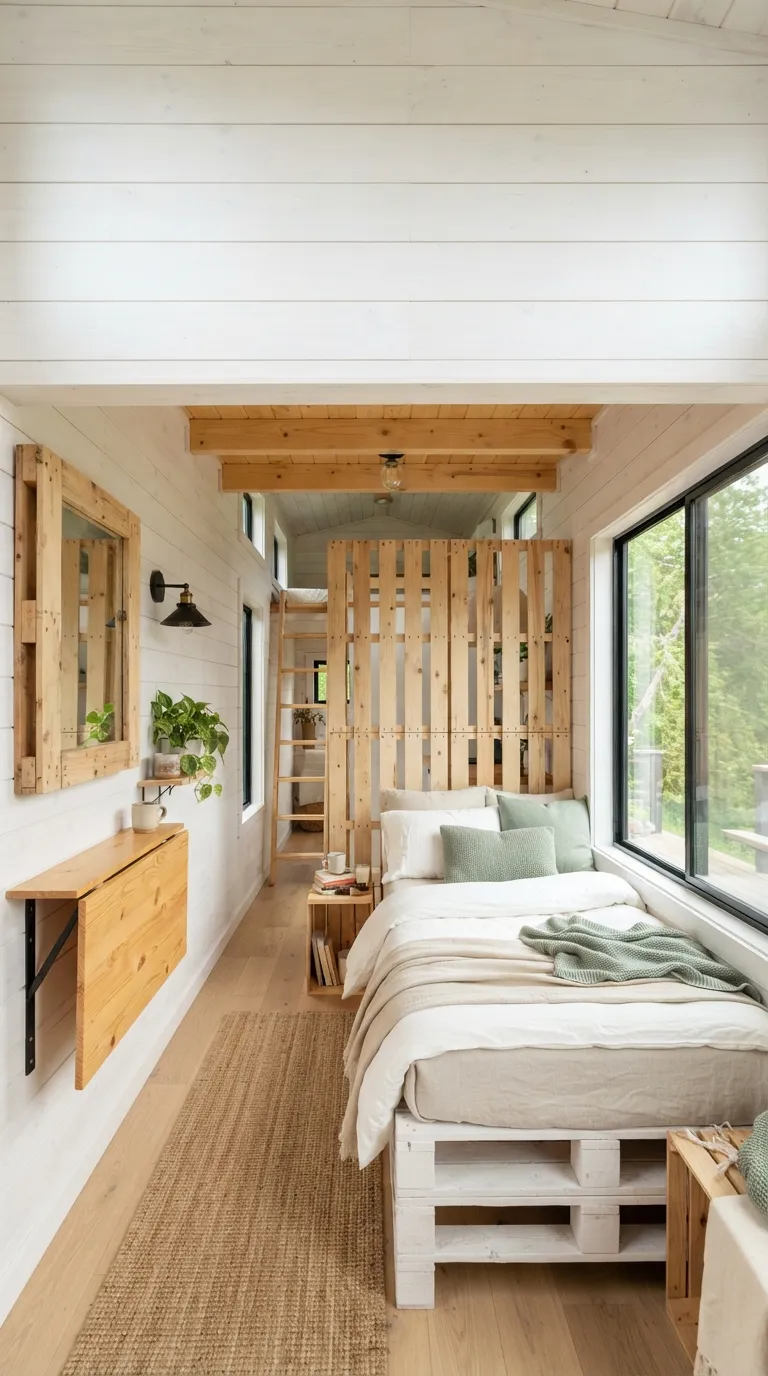
Picture pale, sanded boards catching low light from a single window. A desk that vanishes into the wall by evening. A warm glow behind the bed and a stretch of clear floor running from the door to the sink. Small, but never squeezed.
Jump To
- Why Tiny House Pallet Furniture Makes Such a Difference
- The Builds, Prep and Fit First
- How to Start Your Tiny House Pallet Furniture Transformation
- Ready to Create Your Dream Tiny House?
Why Tiny House Pallet Furniture Makes Such a Difference
Pallet boards come in pine, oak and mixed hardwood, in tones running from pale honey to weathered grey, and they cut down easily to fit the odd gaps tiny houses are full of. They also cost little to redo when a measurement is off.
Weight is the catch: a single pallet often runs somewhere around 30 to 50 pounds (it varies), and a house on wheels counts every pound. Start with wall-mounted and multi-use pieces, then add freestanding ones.
Quick Reference
| Best starting point | One HT-stamped pallet, taken apart for slim shelves |
| Biggest impact area | Multi-use pieces: stair storage, daybed, fold-down desk |
| Budget to start | Roughly $50 to $150 (approximate) |
| Time to complete | One weekend for a first piece; about 4 to 6 weekends for a full set |
The Builds, Prep and Fit First
1. Start With HT-Stamped Pallets and Sand in Three Passes
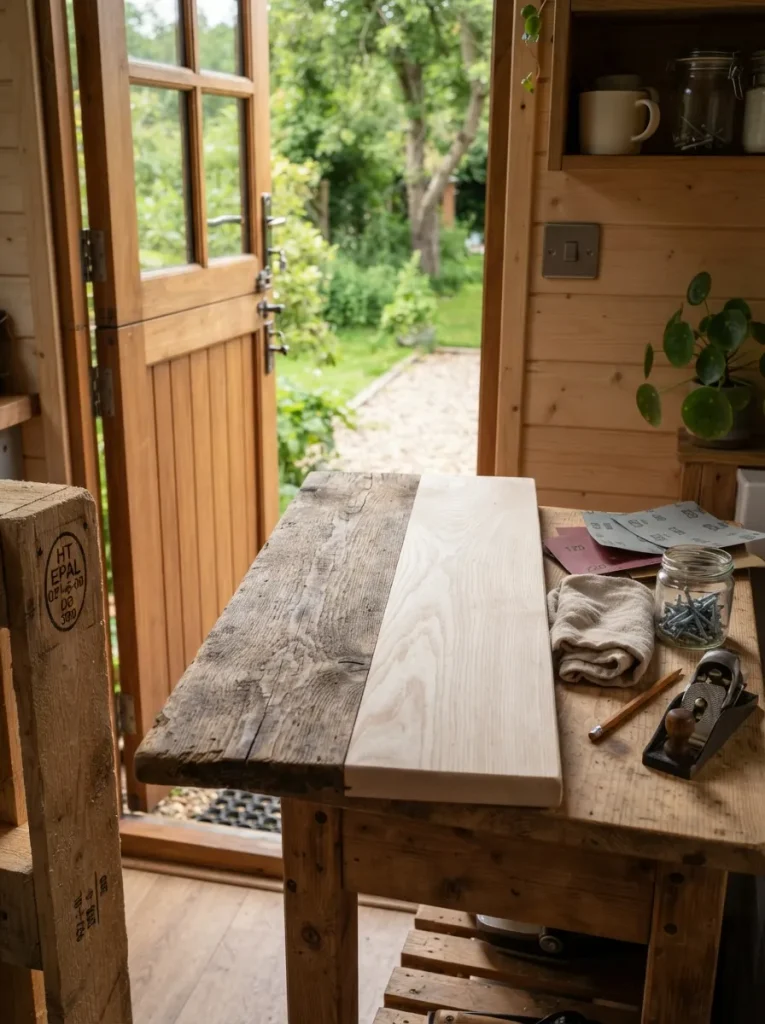
Hauling home whatever pallet is free behind the hardware store is the most common first move, and the riskiest. Check the IPPC stamp on a block or stringer: HT means heat-treated, while MB means methyl bromide fumigation, and those boards don’t belong in a room you sleep in.
Unstamped pallets have an unknown history, and oil stains, sticky residue or a chemical smell are reasons to leave a pallet where it is.
Prep matters more here than in a full-size house because a tiny house has so little air to dilute dust and fumes. Cut through the nails with a reciprocating saw rather than prying, which tends to split boards. Sand through 80, 120 and 180 grit, and finish outdoors. For more ways to stretch a budget on reclaimed wood, browse these budget pallet furniture ideas.
✅ Pallet Prep Checklist:
- [ ] Find the IPPC stamp and confirm it reads HT
- [ ] Reject boards with oil stains, mold or a chemical smell
- [ ] Cut or pull every nail before sanding
- [ ] Sand through 80, 120 and 180 grit
- [ ] Seal outdoors and let the finish cure before moving pieces inside
2. Build Slim Shelves From Loose Deck Boards
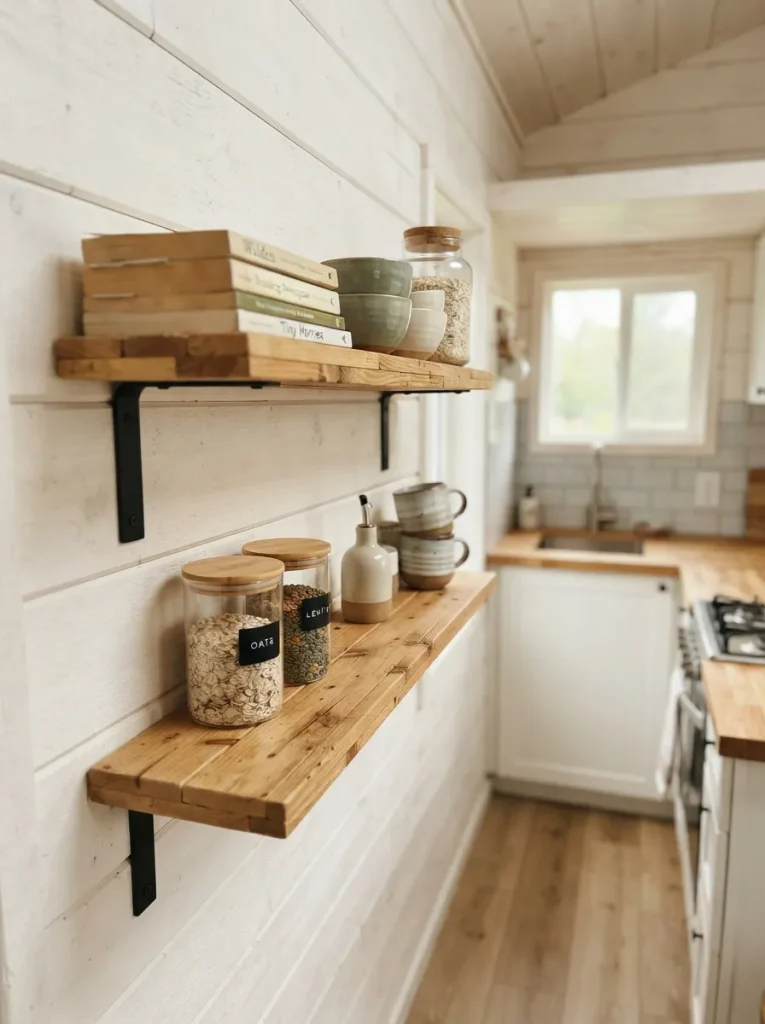
Galley kitchens and hallway walls are where a standard-depth shelf already juts into the aisle. Slim shelves solve that. Pry the deck boards off a pallet, lay two or three edge to edge, and join them with cleats underneath to reach roughly 8 to 10 inches of depth. Mount them on steel brackets screwed into the wall framing.
Full-size pallet furniture is the usual beginner mistake: a standard pallet measures 48 by 40 inches before it holds anything. Loose boards give you the wood without the footprint, and they weigh far less than a whole pallet.
One trade-off at this depth: dinner plates won’t sit flat, so shelve mugs, bowls, paperbacks and jars instead.
3. Mount a Fold-Down Desk That Folds Flat Against the Wall
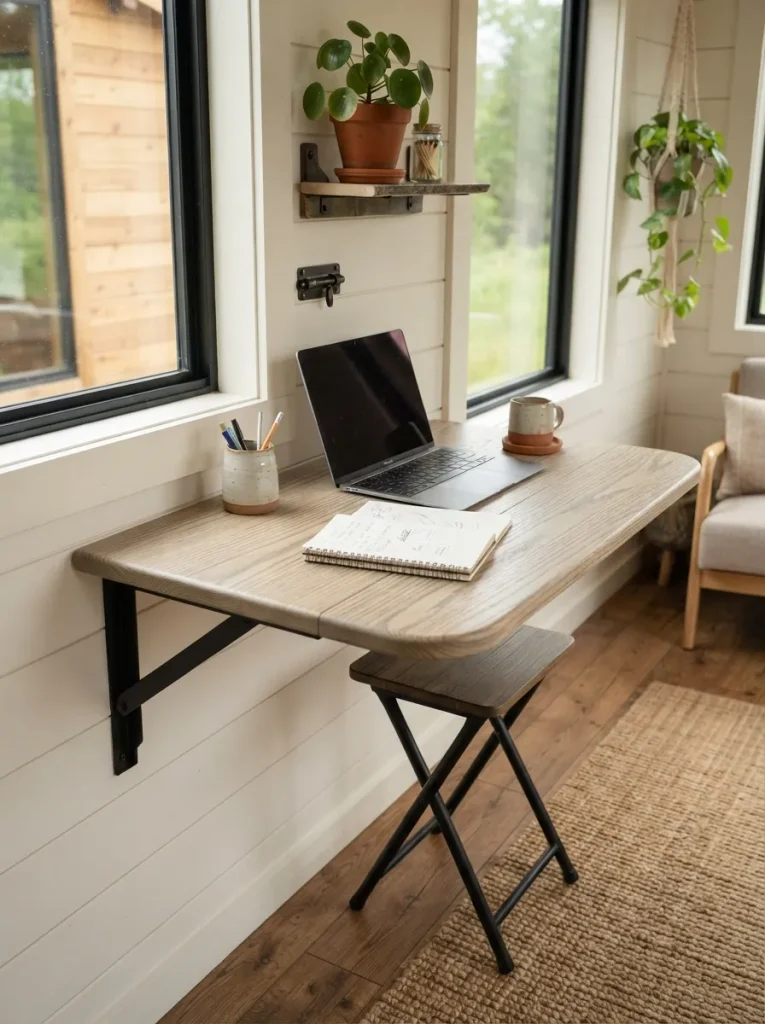
Screw a panel about 30 inches wide and 18 inches deep, built from pallet boards on two underside cleats, to locking fold-down table brackets fixed into the wall framing. Set the surface roughly 29 to 30 inches off the floor, close to standard desk height, and slide a folding stool underneath.
A slide-bolt latch on the panel’s edge holds it upright when folded. Skip it and the panel will swing open on the first bump in a house that gets towed. When raised, the underside faces the room, so sand and finish that side like a piece of wall art.
Best suited to anyone working from a laptop, since 18 inches is enough for one plus a mug. Need a full workspace instead of a fold-away one? These home office ideas show what fits in a compact footprint.
Pro Tip: Round every corner of the panel before finishing. A hip-height edge in a walkway gets bumped daily, and a sharp pallet corner leaves a bruise.
Shop This Look
| Product |
|---|
| Locking fold-down table brackets |
| Slide-bolt latch |
| Compact folding stool |
Next up: a wash of thinned white paint that makes a bulky pallet piece read lighter, and the oak-tannin surprise that can ruin it.
4. Whitewash the Biggest Piece First
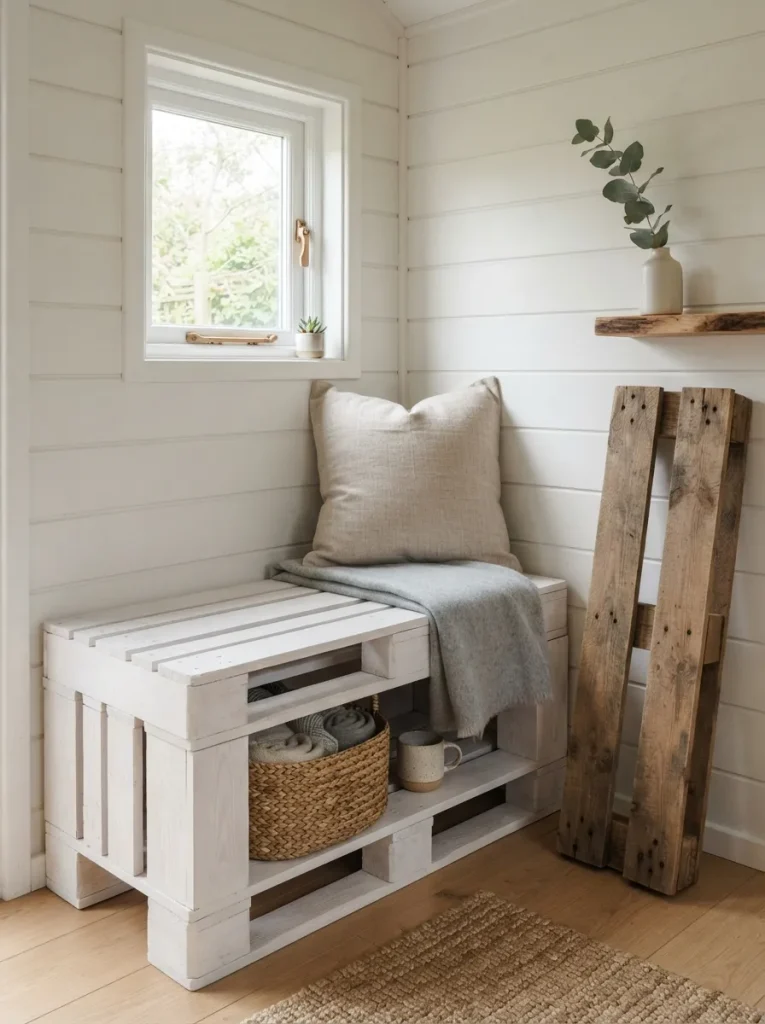
Pale surfaces reflect more light, so a bulky piece washed in white reads lighter than the same piece left raw. Mix roughly equal parts white paint and water, brush it on, and wipe back with a rag while it’s wet so the grain shows through. A solid coat flattens the wood and turns every seam into a dark line, which is the opposite of what a small room needs.
Washing also unifies boards pulled from different pallets in mismatched tones. Seal with a matte water-based clear coat; without it, the chalky finish rubs off on clothes. Water-based coats also stay clearer over white than oil-based ones, which can yellow. Start with the largest piece in the room, since bulk is what a light finish shrinks.
Important: White wash doesn’t cover tannin. Oak and other tannin-rich boards can bleed yellow-brown through pale paint, so spot-prime with a stain-blocking primer and test the wash on the back of one board first.
5. Backlight a Half-Height Pallet Headboard
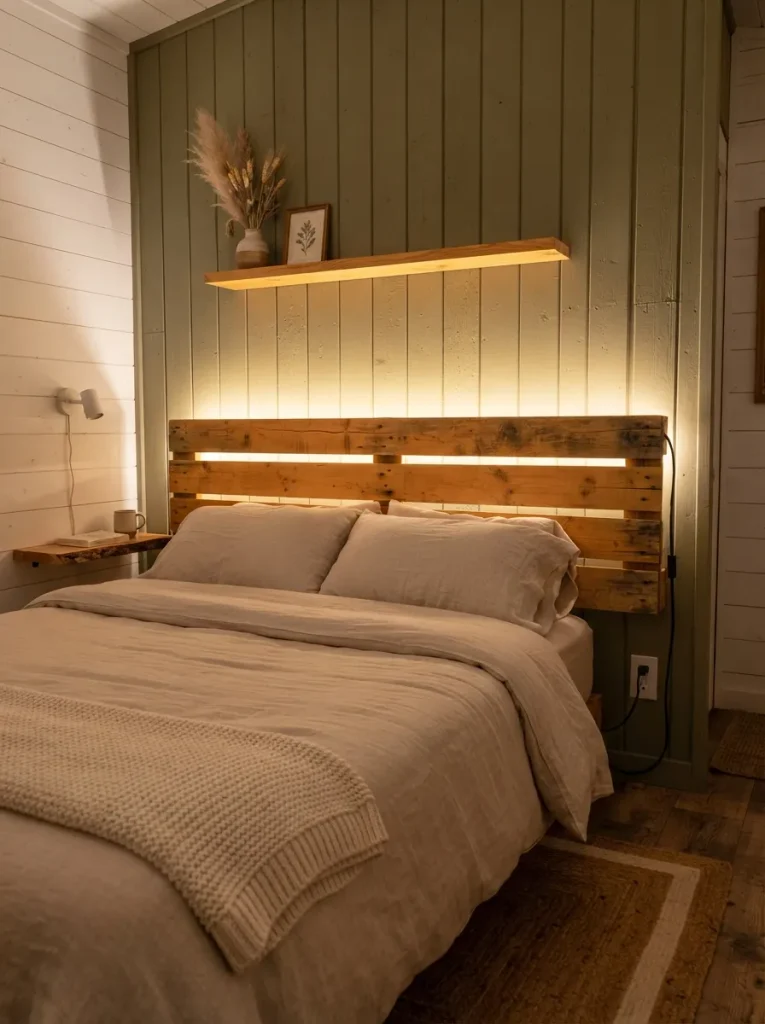
A thin line of warm light spills up the wall behind the bed, with pallet slats silhouetted against it. Cut a pallet down to about 48 by 20 inches, mount it 1½ to 2 inches off the wall on spacers, and tuck a plug-in LED strip along the back of the top rail so the glow washes upward.
Half height earns its keep in a loft or under a sloped ceiling, where a tall headboard eats headroom. Light at the back also replaces a bedside lamp, which frees the surface for a phone and a glass of water. LED strips draw little power, but they still need an outlet within cord reach, so mount the headboard low enough for the cable to drop straight down.
Fits anyone short on nightstand space.
Styling Note: Choose warm white in the 2700 to 3000K range. Cooler strips read harsh against honey-toned pine and make a bedroom feel like a workshop.
Shop This Look
| Product |
|---|
| Warm-white plug-in LED strip lights |
| Linen duvet cover |
| Chunky wool throw blanket |
6. Divide Sleeping and Living With an Open-Slat Screen
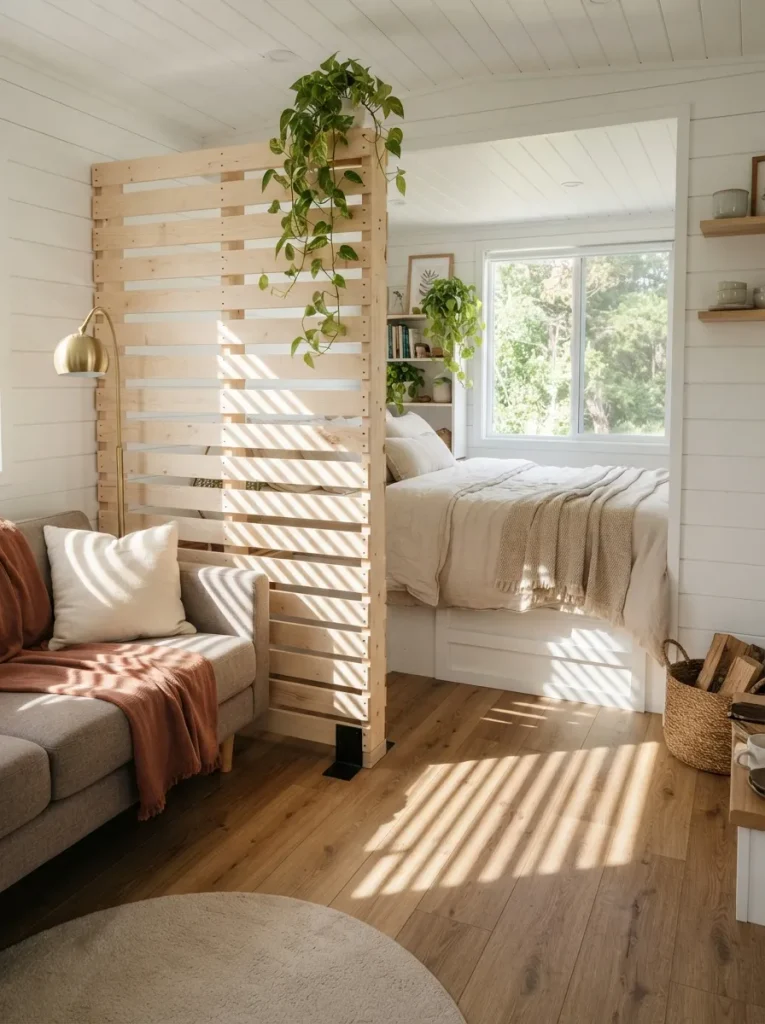
Studio-style tiny houses ask one room to do every job, and a solid partition would swallow half of it. Stand a pallet or two on their 40-inch edges and you get a screen about 4 feet tall: high enough to block the sightline from sofa to bed, low enough to leave window light alone. Slat gaps let light through, so both sides stay bright.
Hang hooks on the living side for bags and scarves, or leave the top rail bare and drape a linen throw over it. Sand the edges you’ll touch daily. Want closed storage in the divider instead? These room divider ideas show a cube-based version.
Warning: A freestanding pallet on its edge tips over, and in a house that moves it will tip sooner. Anchor the base to the floor with steel L-brackets and tie the top rail to wall framing before anything is hung on it.
Next up: five hooks, one board and a spacing rule that keeps coats from piling into a single lump by the door.
7. Turn One Board Into an Entry Wall
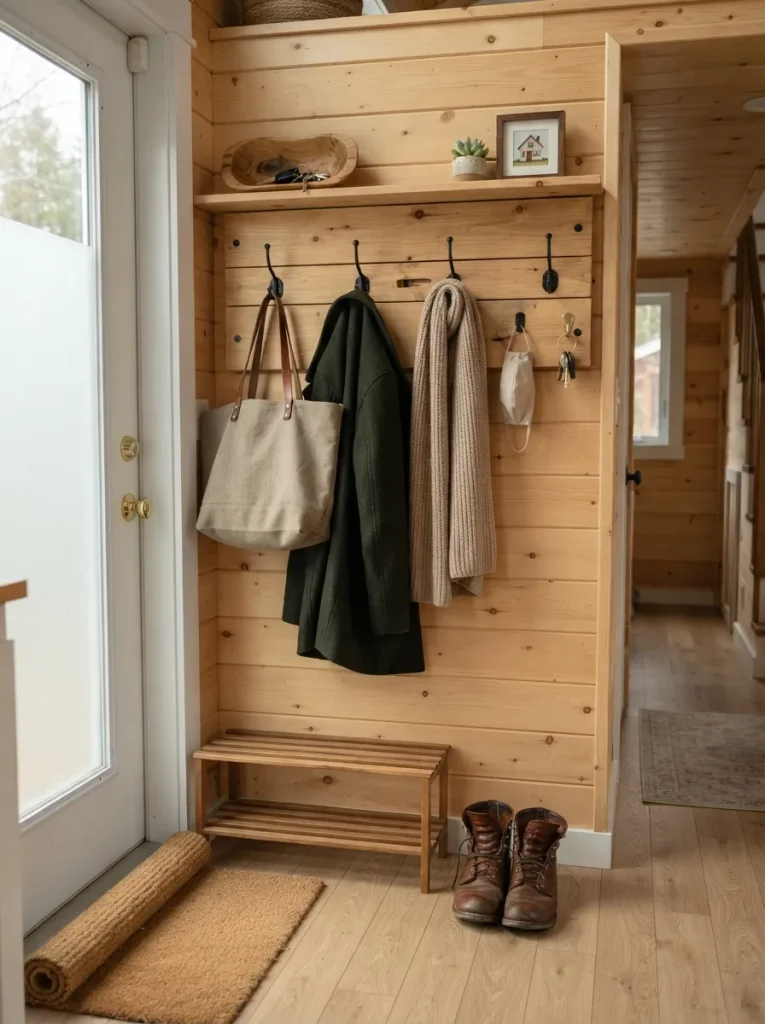
Screw a board about 36 inches long into the wall framing at hip height, then mount five heavy-duty hooks along it at two alternating heights, roughly 6 inches apart. Staggering lets a bag hang below a coat instead of crushing into it.
A low slat fixed 5 to 6 inches off the floor keeps boots tucked against the wall rather than fanned across the mat.
Many tiny house doors open straight into the main room, which puts wet coats in the same air you live and sleep in. Mount the board on ¼-inch spacers so air can move behind damp jackets. Hooks beat a closet here, because they cost no floor space and let everything dry faster.
Prefer closed storage by the door? These entryway ideas show a cube-based approach.
8. Lift Pallet Pieces Onto Slim Black Steel Legs
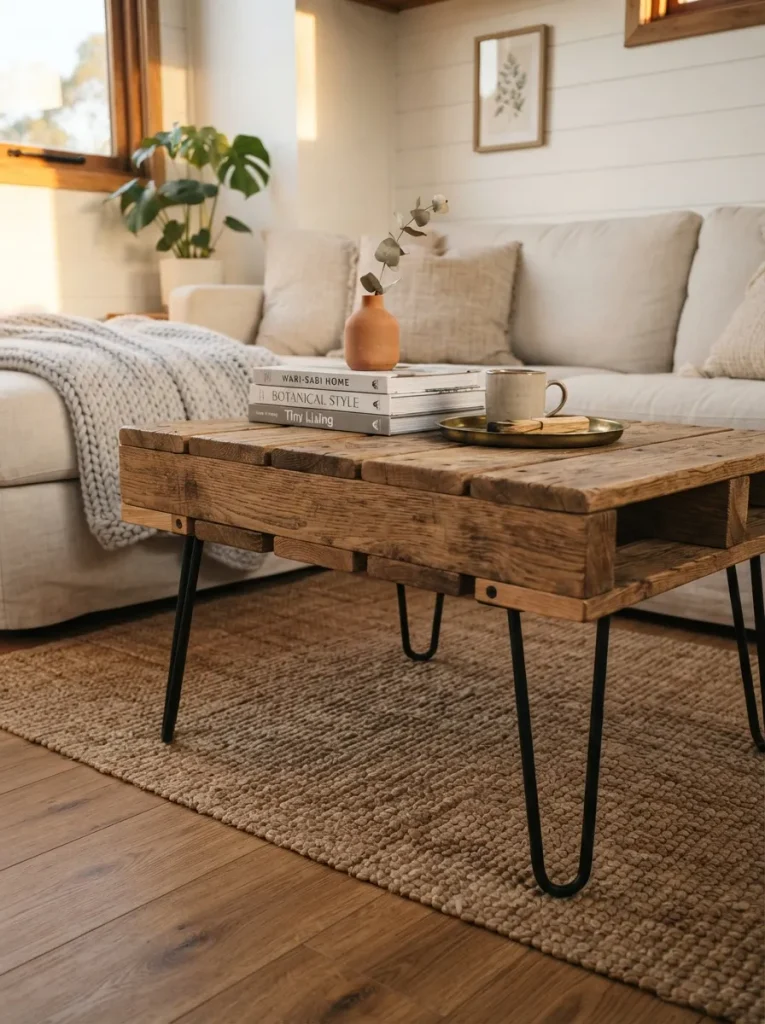
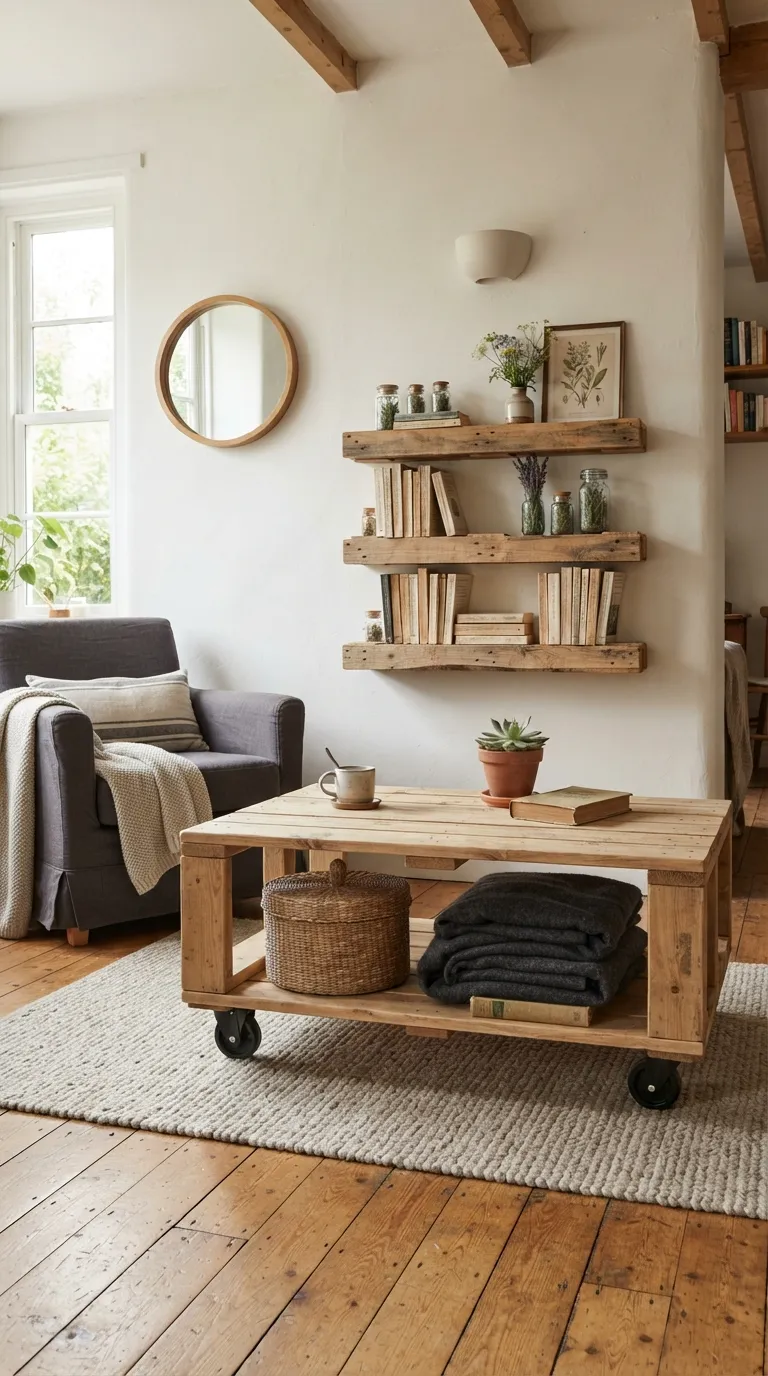
Visual weight is what makes a low pallet table feel like a block in a small room. Lift it onto slim matte black legs, around 6 to 8 inches tall, and a strip of floor shows underneath, so the eye reads the piece as lighter. Chunky wood on thin steel also looks deliberate rather than rustic by accident.
Pallet boards are thin, which creates the real technical problem: legs need something solid to bite into. Mount the leg plates to a cleat or stringer, not a single deck board, and keep the piece low. Steel legs add weight, and a coffee table is the right size to carry it.
Best for anyone whose pallet pieces currently sit flat on the floor and look heavy.
Pro Tip: Drill pilot holes and choose screws short enough not to poke through the surface. Pallet wood splits near edges, and a screw tip on a tabletop is hard to fix.
9. Roll a Narrow Prep Cart Out From the Counter
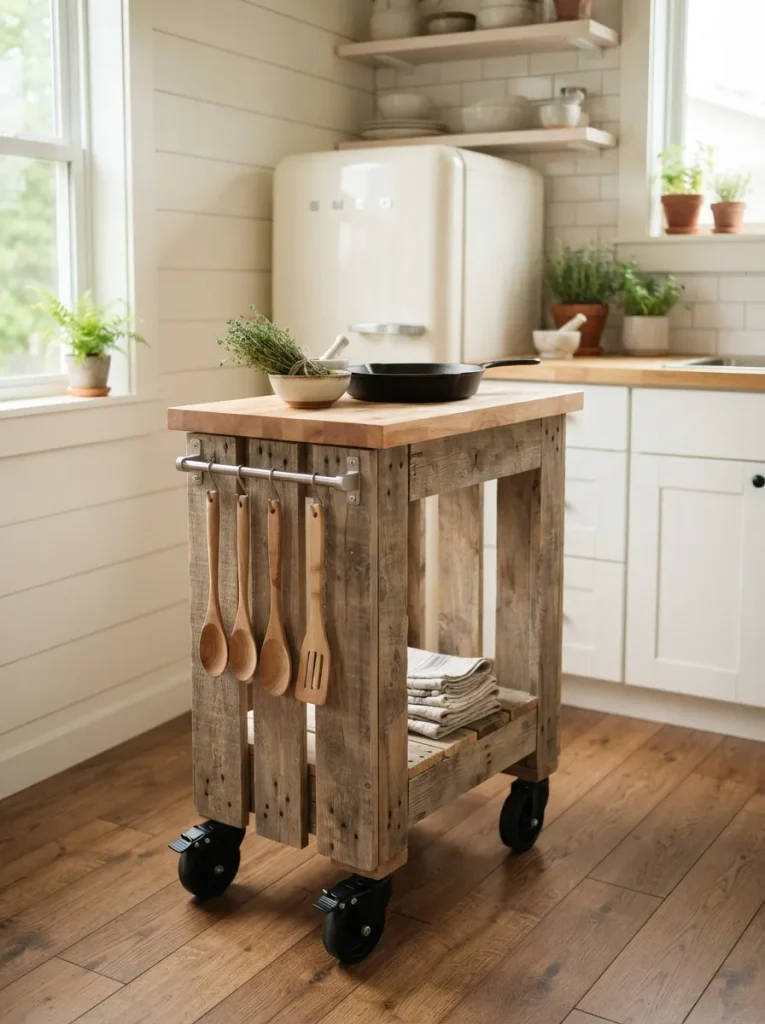
A slim cart of pallet boards sits flush against the counter, then rolls out to become an extra prep surface. Trim a pallet to fit the gap you have and fix four locking swivel casters underneath. Casters change the working height, so measure your counter first, subtract the caster’s full height, and build the frame to that number.
Pallet boards make a poor food-prep surface, so top the cart with a butcher-block slab or a thick cutting board rather than chopping on raw wood. Lock all four casters when parked, and strap the cart to the wall when the house travels. Sliding carts are how dishes end up on the floor. For fixed alternatives, see these small kitchen island ideas.
Shop This Look
| Product |
|---|
| Locking swivel casters (set of four) |
| Thick butcher-block cutting board |
| Stainless steel utensil rail with hooks |
Next up: why one dark piece makes a pale room feel bigger, while a second starts shrinking it.
10. Choose One Dark Anchor Piece
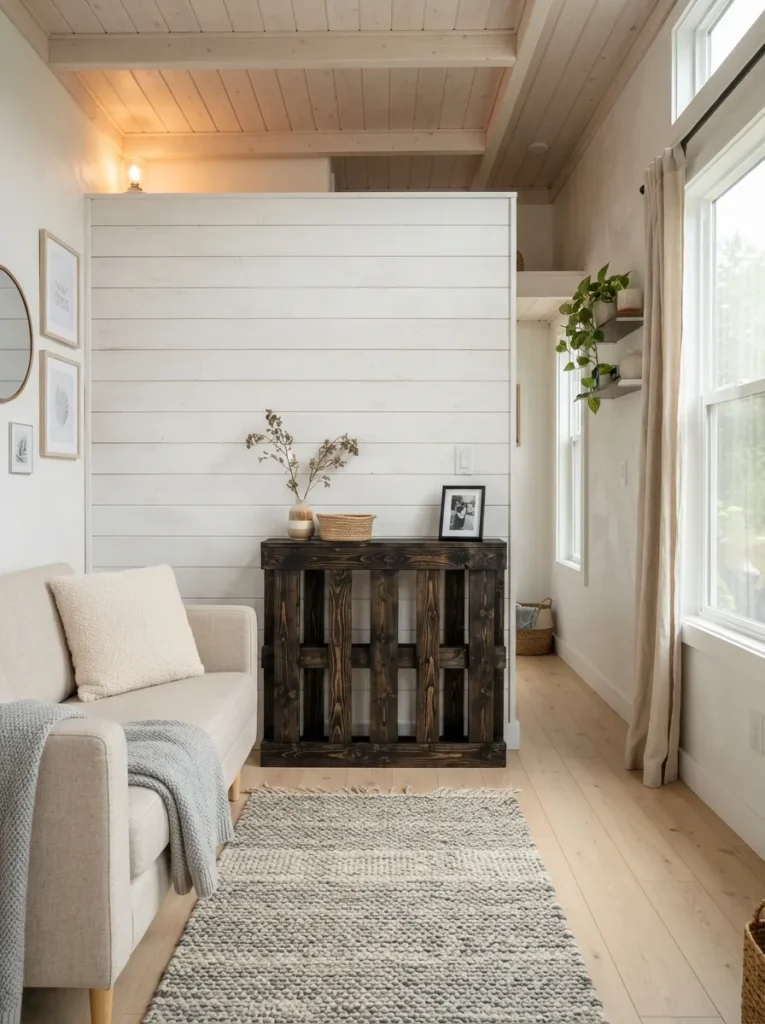
A pale tiny house needs one point of weight, or the whole room floats. Stain a single mid-sized piece, such as a low console, in espresso or ebony and keep everything else light. Dark finishes absorb light, so each extra dark piece shrinks the room; one per sightline is a practical limit rather than a fixed rule.
Pine pallet boards blotch under dark stain. Brush on a pre-stain conditioner first, test on a scrap, and wipe the stain back after a few minutes rather than letting it sit. Uneven dark wood looks like damage, not depth.
Suits anyone whose pale palette feels flat.
11. Mount a Plug-In Sconce on a Pallet Plank
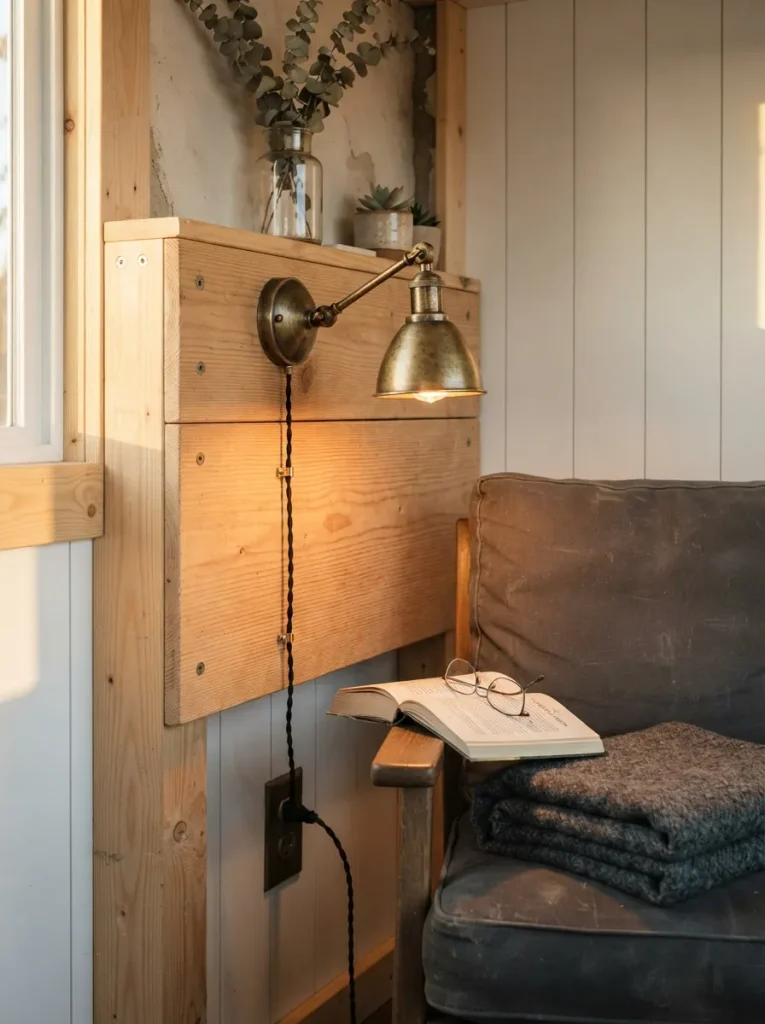
Tiny houses rarely have wired light exactly where you read or cook. Screw a pallet board about 30 inches long across two wall studs, then hang a plug-in sconce anywhere along it. Because the board spans the framing, the light can sit between studs and move later without fresh holes in the wall.
Choose a swing-arm model with its own switch, since a plug-in sconce without one turns every lights-out into a reach for the plug. Set the board so the lamp head lands just above shoulder level when you’re seated, and light falls on the page instead of into your eyes.
Important: Lamp cords aren’t meant for concealed runs inside a wall or behind a solid panel. Let the cord hang visibly down the board to the outlet, and add a cord cover if it bothers you.
12. Frame an Oversized Mirror in Pallet Slats
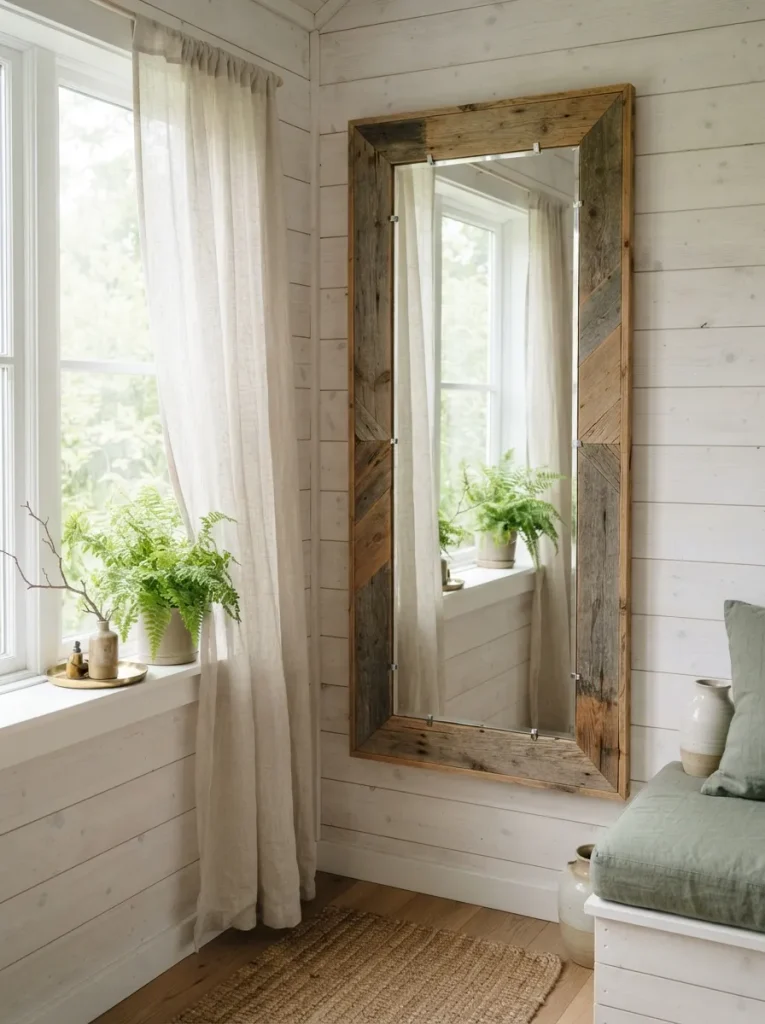
A wide mirror framed in mixed-tone pallet slats hangs across from the window and doubles the daylight. Miter four slat pieces into a frame, back it with thin plywood, and set a frameless mirror inside with mirror clips. Keep the frame narrow, around 2 to 3 inches, so the glass stays the focus, and hang it opposite or beside the window so the mirror catches the view rather than the clutter.
Houses on wheels are hard on mirrors. Use clips at the top and bottom edges and a cleat mount rather than picture wire, which swings in transit. More small-room illusions like this one live in these dorm room ideas that make small rooms bigger.
Shop This Look
| Product |
|---|
| Large frameless rectangular mirror |
| Mirror mounting clips |
| Sheer linen curtain panel |
Observation
A detail that changes the result more than it should: board width. Beginners chase a mix of weathered greys and honey tones, then wonder why a small room feels busy. Sort boards into piles by width before building, and keep each piece within about half an inch of a single width. In a room this small, matching lines read as calm, and the mix of shades can stay.
Next up: stairs that hide blanket storage in every step, and one structural limit on pallet wood you can’t build around.
13. Replace the Loft Ladder With Storage Steps
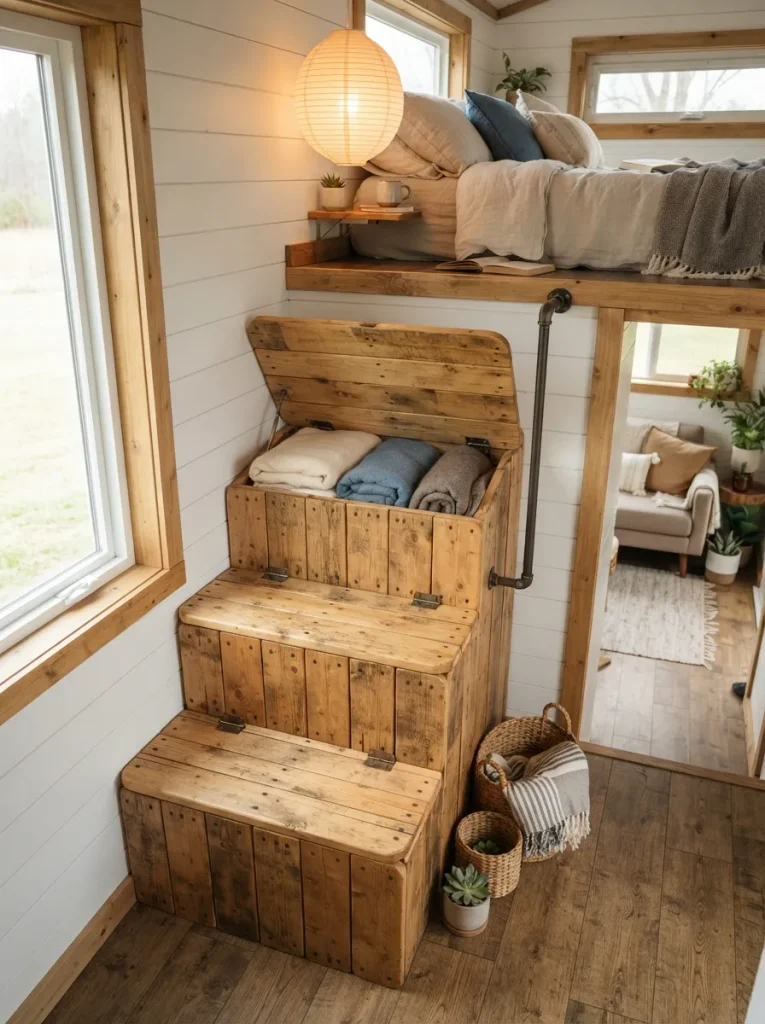
A loft ladder takes floor space and gives nothing back. Stacked boxes with hinged lids climb just as well and swallow blankets, shoes or off-season clothes. Build each box from a new 2×4 frame, clad the sides in pallet boards, and hinge a lid faced with pallet boards over a plywood base so every step lifts.
Keep every riser the same height, since uneven steps are what trip people in the dark. Fasten the bottom box to the floor, each box to the one above it, and the top box to the loft frame. For more ways to use the space beneath, browse these under-stairs storage ideas.
Warning: Pallet boards aren’t graded structural lumber, and strength varies from board to board. Build the frame from new 2×4s and back every lid with plywood, because a person will stand on it.
14. Turn Two Pallets Into a Daybed That Sleeps a Guest
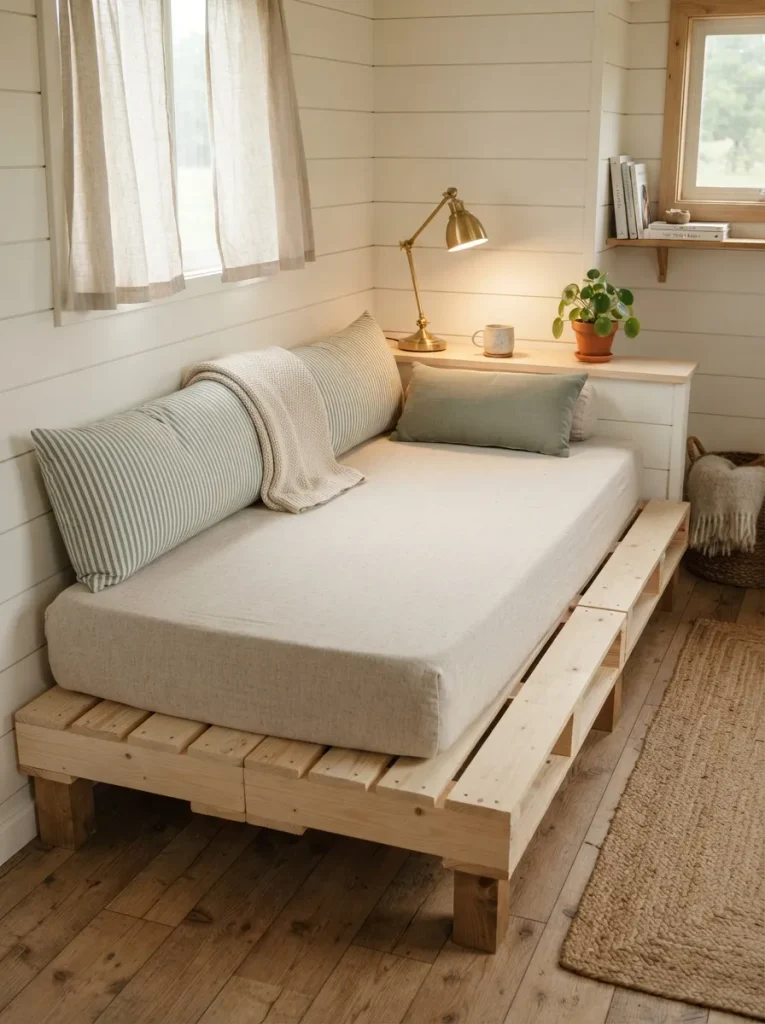
Tiny houses with no guest room need a daybed that doubles as the sofa. Set two standard pallets side by side, joined along their 48-inch edges, for a base about 48 by 80 inches. A twin XL mattress, at 38 by 80 inches, fits with room to spare, and the leftover 10-inch strip along the wall becomes a shelf for a lamp and a phone charger.
Two pallets run roughly 60 to 100 pounds by the earlier estimate, before a mattress, so count that against your trailer’s limit. Add long bolsters against the wall to turn the mattress into a backrest by day, and short legs if the seat sits lower than you’d like.
Shop This Look
| Product |
|---|
| Twin XL mattress |
| Long bolster pillows |
| Short tapered furniture legs (set of four) |
How to Start Your Tiny House Pallet Furniture Transformation
Start here: one HT-stamped pallet, taken apart and sanded into shelf boards. Slim shelves teach the whole prep routine (stamp check, nail removal, sanding, sealing) on a piece light enough to hang from a wall, and every later build reuses the same skills.
Assembling before sanding is the beginner error that shows up most. Once boards are screwed together, the inside edges and the gaps between them can’t be reached, so rough spots stay rough. Sand every board first, build second, and finish the joints by hand at the end.
Three items that typically sit well under $50: a flat pry bar (or pallet buster) for taking pallets apart, a pack of 80-, 120- and 180-grit sanding sheets, and a quart of matte water-based polyurethane. Buy the sandpaper first; skimping on it is the false economy most people regret.
Shelves, hooks and the headboard are weekend jobs. The desk, cart and sconce board run a little longer, while the stair storage and daybed take a couple of weekends apiece. A full set realistically spreads across four to six weekends. Budget roughly $50 to $150 for the first piece and somewhere around $400 to $900 for a full set, depending on mattress, mirror and hardware (approximate).
Ready to Create Your Dream Tiny House?
These 14 tiny house pallet furniture ideas cover materials, color, lighting, layout and storage, and no single one asks for the whole set. Small steps count: a shelf this weekend, a desk next month, stairs when the time is right. Today, measure one wall for a slim 8-to-10-inch shelf.
Picture the finished space: clear floor, warm light, a bed with a glow behind it, a desk that folds into the wall. Pin the ideas that fit your floor plan and come back to the rest when the first build is done.
Keep Exploring
- 12 Tiny House Storage Ideas That Use Vertical Space
- 10 Pallet Nursery Furniture Ideas for Small Rooms
- 13 Small Kitchen Island Ideas for Tight Floor Plans