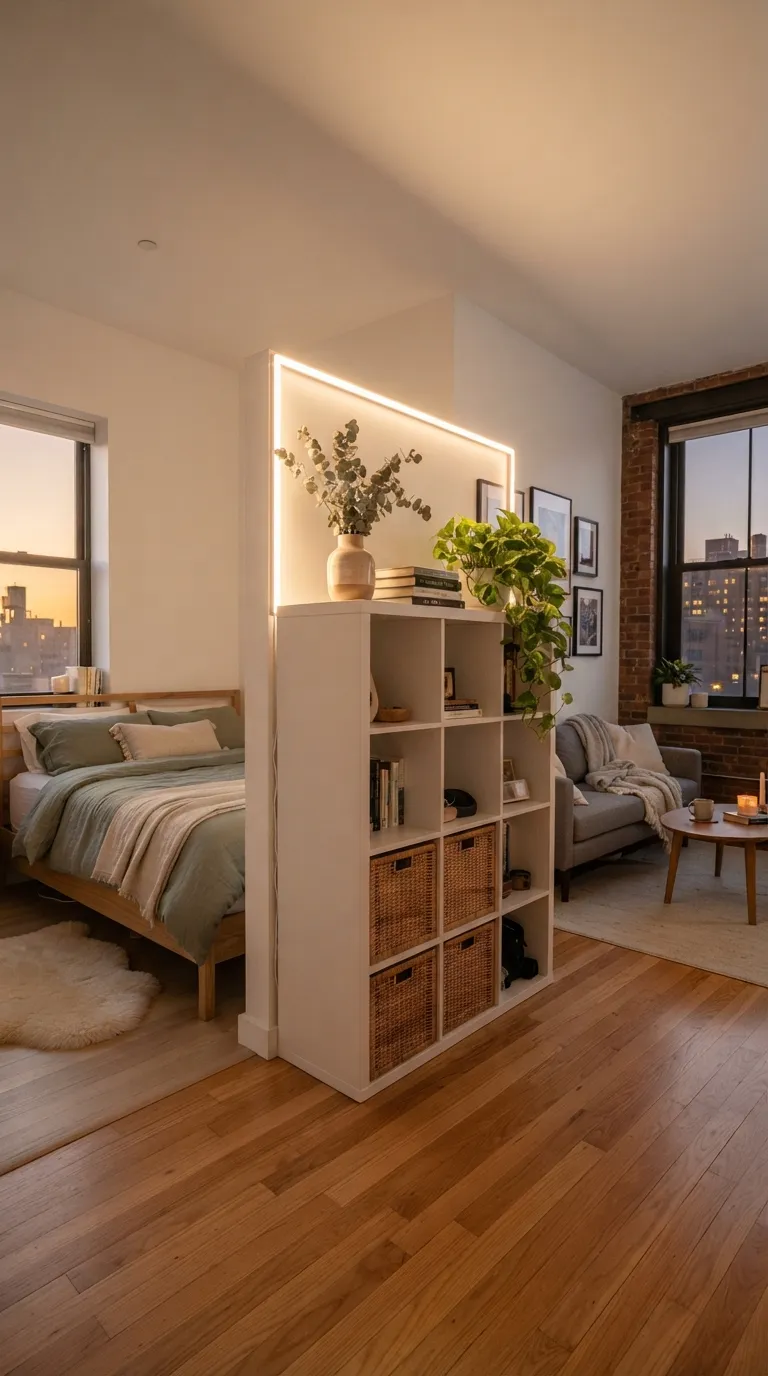
12 IKEA Kallax Room Divider Ideas for Studio Apartments
A Kallax room divider is just IKEA’s cube-grid shelf turned sideways and given a second job: splitting one room into two without touching a wall. This article walks through 12 real, buildable ways to do it from anchoring the unit safely to lighting it so both sides feel like their own space.
Studio living asks a lot of a single room sleep here, work there, eat somewhere in the middle. A Kallax gives each zone an edge to lean against, a line the eye reads instantly instead of guessing where one function ends and the next begins. It’s rentable, reversible, and one of the only flat-pack pieces that earns its keep on two faces at once. No drilling into drywall, no landlord sign-off, no regret if you move in a year. Twelve ways to make it work, below.
Quick Navigation
- Why Kallax Room Dividers Make Such a Difference
- 12 Kallax Room Divider Ideas for Studio Apartments
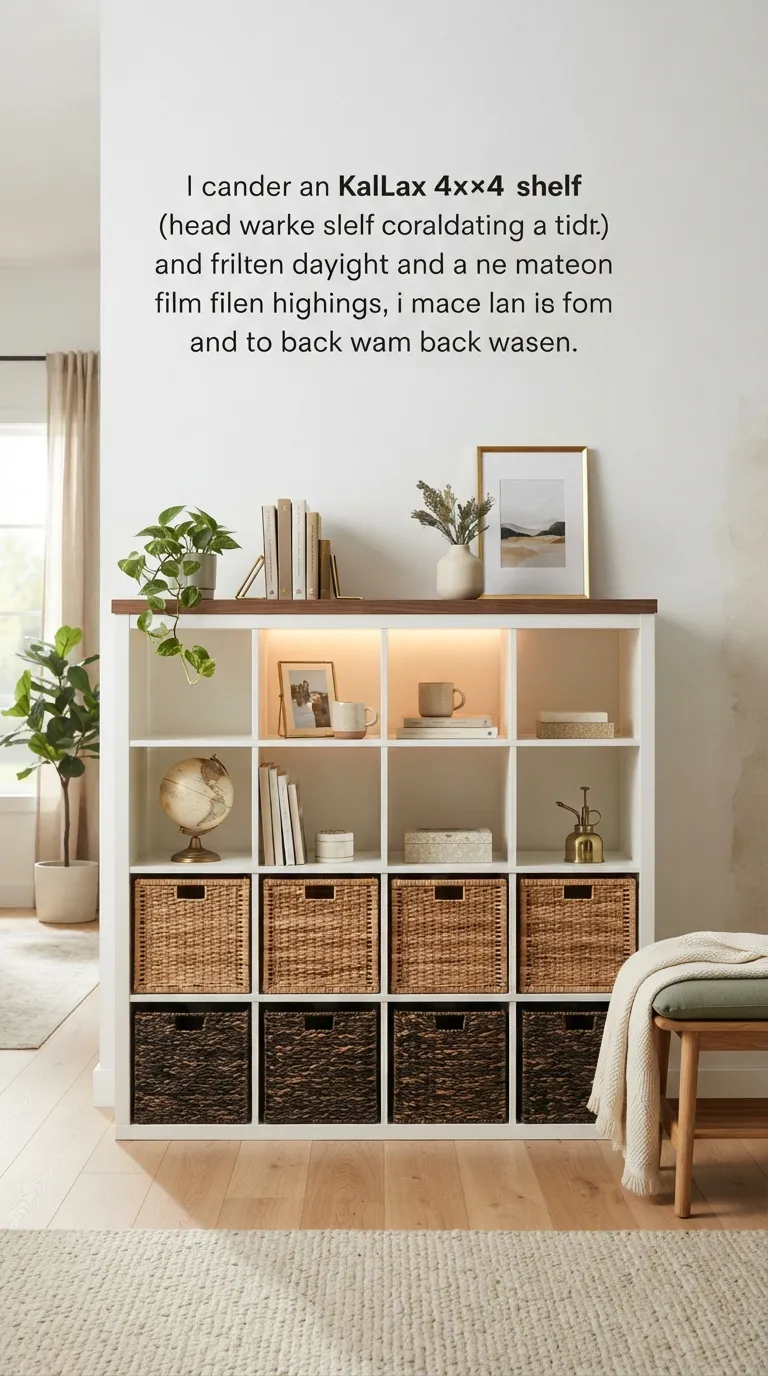
- How to Start Your Kallax Room Divider Transformation
- Ready to Divide Your Studio the Smart Way?
Why Kallax Room Dividers Make Such a Difference
A Kallax room divider is simply IKEA’s cube-grid shelf most often the 30-inch-deep 2×4 or the shoulder-height 4×4, in white, black-brown, or white stained oak effect turned perpendicular to a wall to split a studio into distinct zones.
It’s become the default for renters because it requires no permits and no permanent changes, just a stud finder and an anti-tip kit. In under 400 square feet, every inch works twice, so prioritize wall anchoring and cube depth before paint colors or styling.
| Best starting point | Anchor a 2×4 or 4×4 Kallax to the wall before styling anything |
| Biggest impact area | The sightline where the sleeping zone meets the living zone |
| Budget to start | $150–$300 for one anchored unit plus hardware |
| Time to complete | A weekend to place and anchor; a few weeks to fully style |
12 Kallax Room Divider Ideas for Studio Apartments
The order below starts with the two things that trip up almost everyone attempting this stability and light before moving into styling.
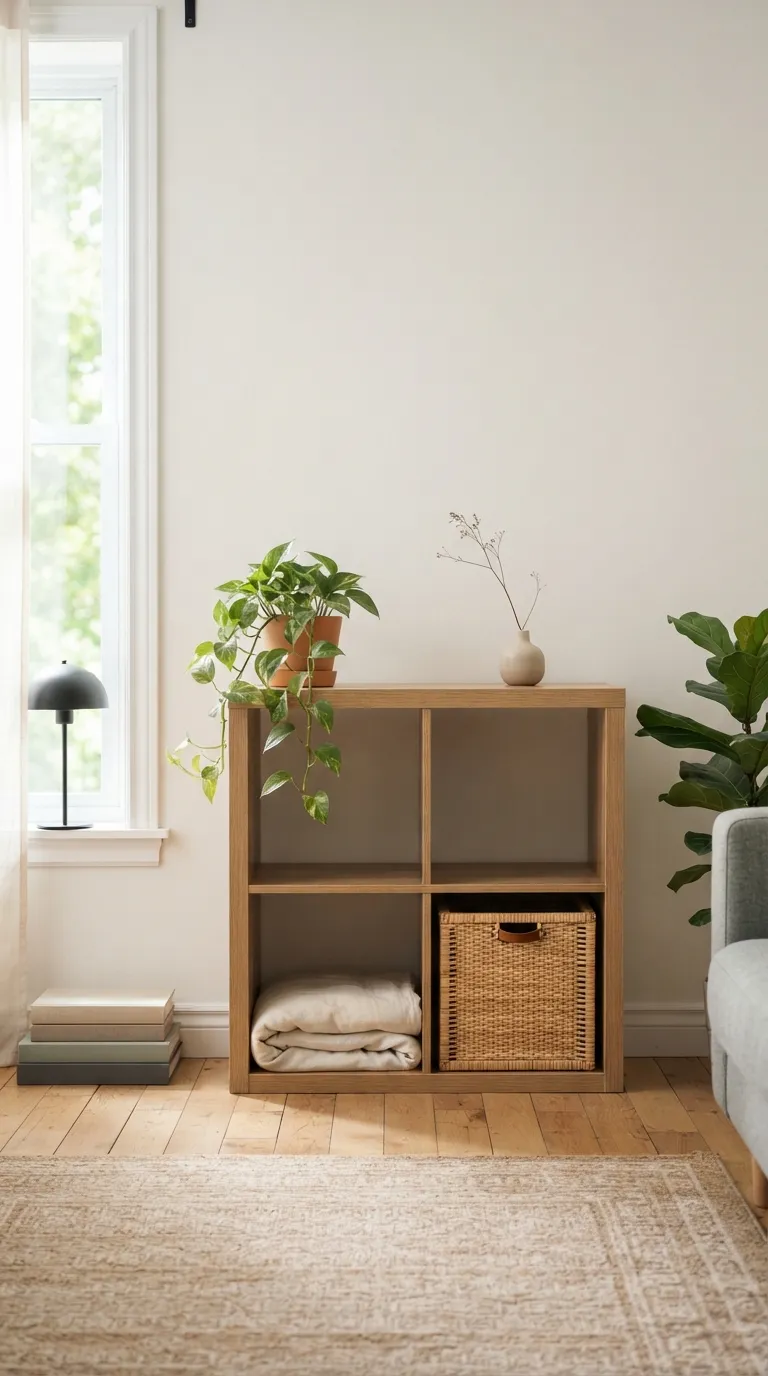
1. Anchor a Low 2×4 as Your Zone Boundary
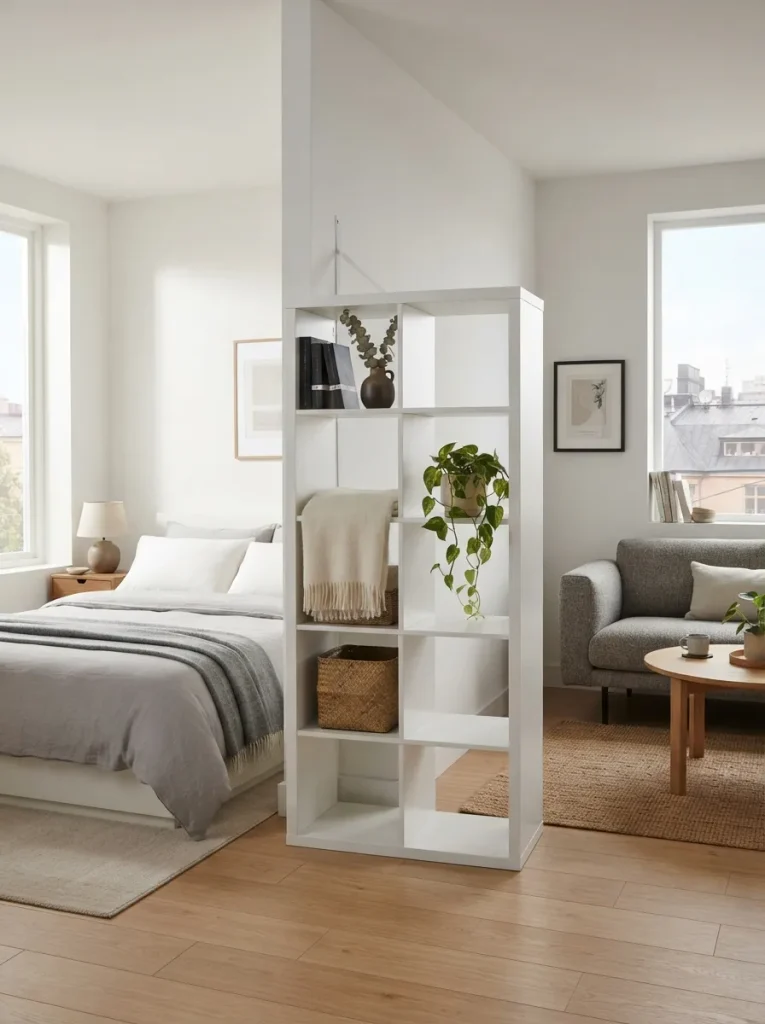
What it looks like: A hip-height wall of cubbies running the width of the room, low enough that light still clears the top and reaches both sides.
Why it works: At roughly 30 inches tall, the 2×4 configuration sits below eye level for most adults, so it reads as furniture rather than a wall it defines the zone without shrinking the ceiling visually. That low profile is the single biggest reason this size outperforms taller units in a true studio.
How to copy it: Place the unit perpendicular to the longest wall, roughly a third of the way into the room, and secure it to a stud using the included anti-tip bracket before you load a single cube.
Best for: Renters and anyone nervous about committing to a permanent-feeling divide if drilling into a stud still feels like too much commitment, our no-drill Kallax hacks cover anchor-free alternatives.
Warning: A freestanding Kallax used as a divider is exactly the tip-over scenario furniture-anchoring laws exist for it’s unsupported on both sides and gets bumped, climbed on, or leaned against constantly. Anchor every configuration 30 inches or taller to a wall stud with the hardware IKEA includes; if you can’t hit a stud, use toggle bolts rated for the unit’s weight instead of skipping the step.
Shop This Look
| Product |
|---|
| Furniture anti-tip wall anchor strap kit |
| Stud finder with AC wire detection |
| Toggle bolt anchor kit for hollow walls |
| Felt furniture pads for the base |
| Low-profile cable channel for hidden power runs |
2. Use an Open-Back 2×4 to Keep Light Moving
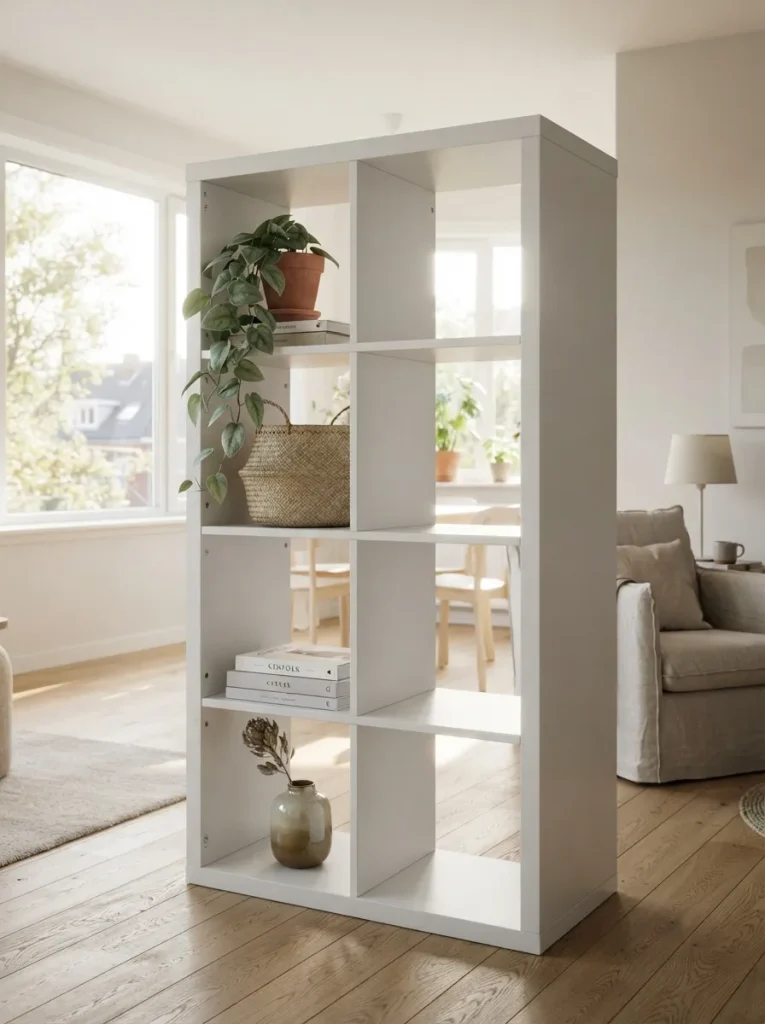
What it looks like: The same shelf grid, but see-through in places light and sightlines pass straight through instead of stopping at a solid back.
Why it works: Kallax units ship with removable back panels. Leaving a third to half of the cubbies open turns a solid divider into a permeable one you get the zone separation without cutting the only window’s light in half, which matters enormously in a studio with one exposure.
How to copy it: Pop the backs off every other cube in a checkerboard pattern and leave those specific slots empty or fill them with something translucent, like glass jars or a pale ceramic bowl.
Best for: Studios with a single window or a divider placed close to the main light source.
Small-Space Tip: Keep the open cubes concentrated on the upper two rows, not scattered randomly light travels better at eye level and above, and it keeps the lower half usable for closed, private storage on the bedroom side.
3. Split the Palette by Zone, Not by Idea
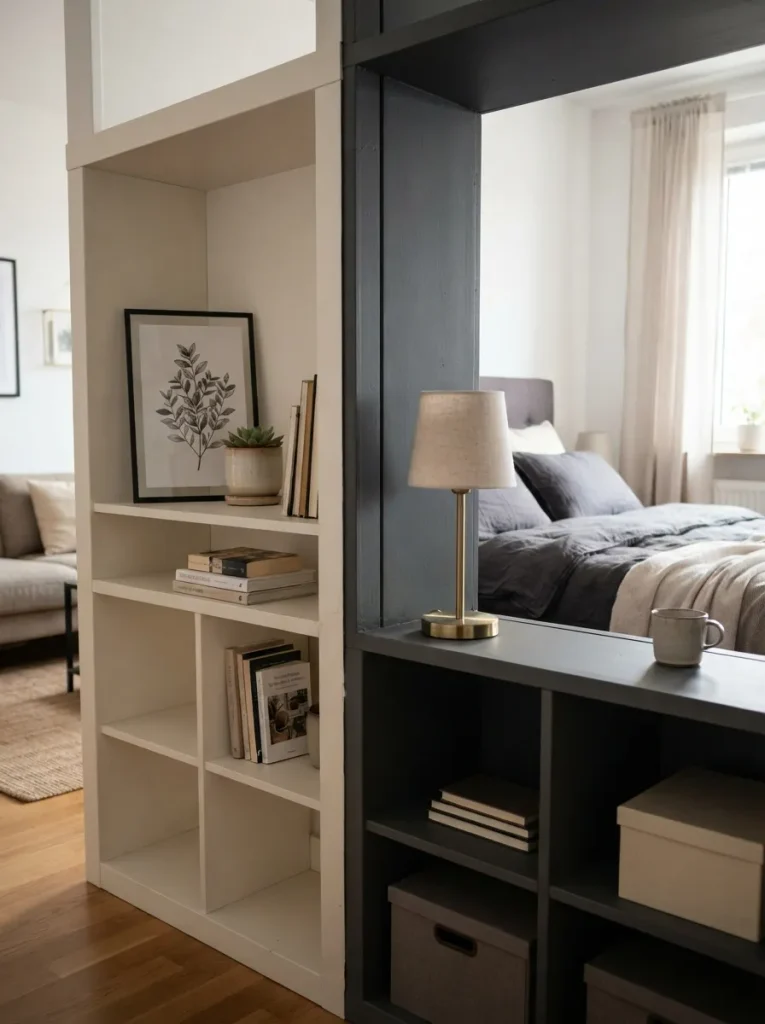
What it looks like: One shelf, two faces a brighter tone on the side that gets more use during the day, a deeper tone on the side meant for winding down.
Why it works: Color is the fastest cue a brain reads for “this is a different room.” Painting the two exposed back-panel faces in contrasting tones rather than leaving the whole unit one flat color signals the zone shift the moment someone glances across the space, without adding a single extra piece of furniture.
How to copy it: Prime and paint only the back panels facing each zone in two coordinating tones our guide to home color combinations for modern-style homes is a good place to pull matching pairs from; leave the frame itself in its factory finish so the paint job stays reversible.
Best for: Renters who want a visual boundary but can’t hang a curtain track or build a wall.
Pro Tip: Painted Kallax back panels are thin MDF-laminate, not raw wood a light sanding with 220-grit paper and a coat of shellac-based primer keeps latex paint from peeling off the factory finish within a few months.
Up next: the material swap that quietly makes the whole divider feel less like a shelf.
4. Add Rattan or Cane Webbing to a Few Cubbies
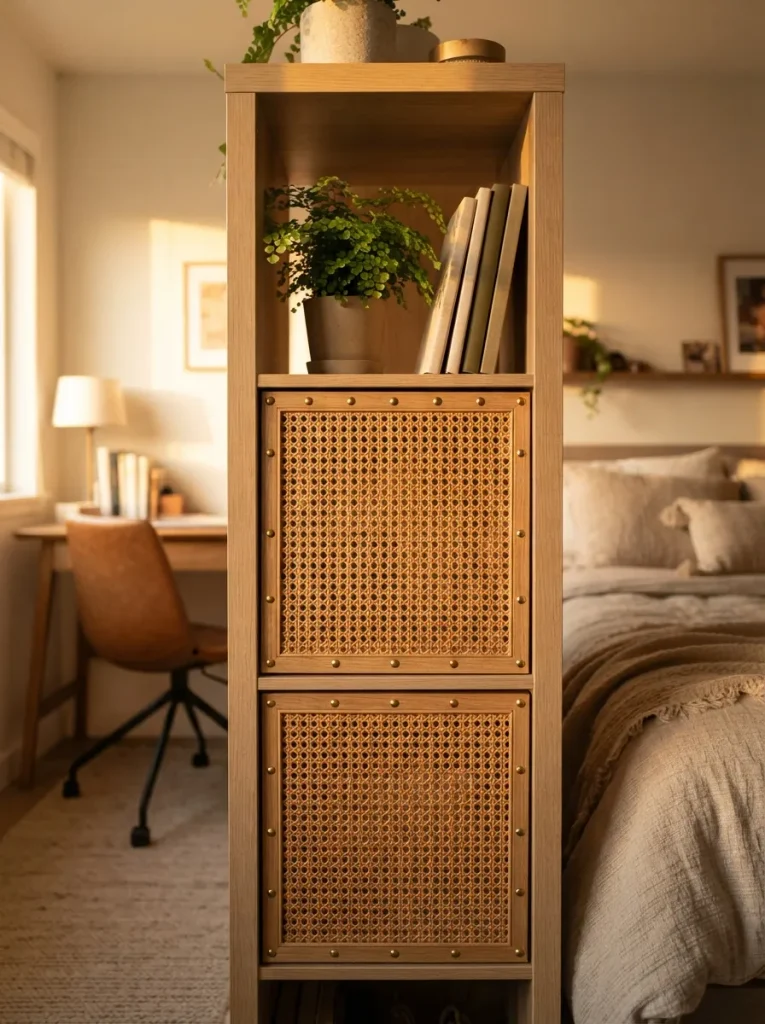
What it looks like: A few cube fronts swapped for woven cane instead of open shelving or solid doors texture without full opacity.
Why it works: Solid doors block sound and sight completely; open cubbies hide nothing. Rattan cane splits the difference it screens the contents just enough for privacy while still letting air and soft light filter through, which keeps a divider from feeling like a wall in a room that can’t afford to feel smaller.
How to copy it: Buy pre-cut cane webbing sheets sized to the Kallax door frame (roughly 13×13 inches), stretch and staple them to a thin wood frame, and mount using the existing door hinge holes.
Best for: People who want privacy for clutter without losing the airy feel a solid door creates it pairs naturally with the woven textures in our Kallax boho styling ideas if you want to lean further into the look.
Budget Version: Skip the framed cane insert entirely and staple a single sheet of natural cane webbing across the open cube opening no frame, no hinges, closer to $12 a cube than $40.
Shop This Look
| Product |
|---|
| Pre-cut rattan cane webbing sheet |
| Staple gun for upholstery-weight fabric |
| Thin poplar wood frame stock |
| Cube door replacement hinges |
| Wood glue rated for furniture-grade MDF |
5. Backlight the Divider with LED Strips
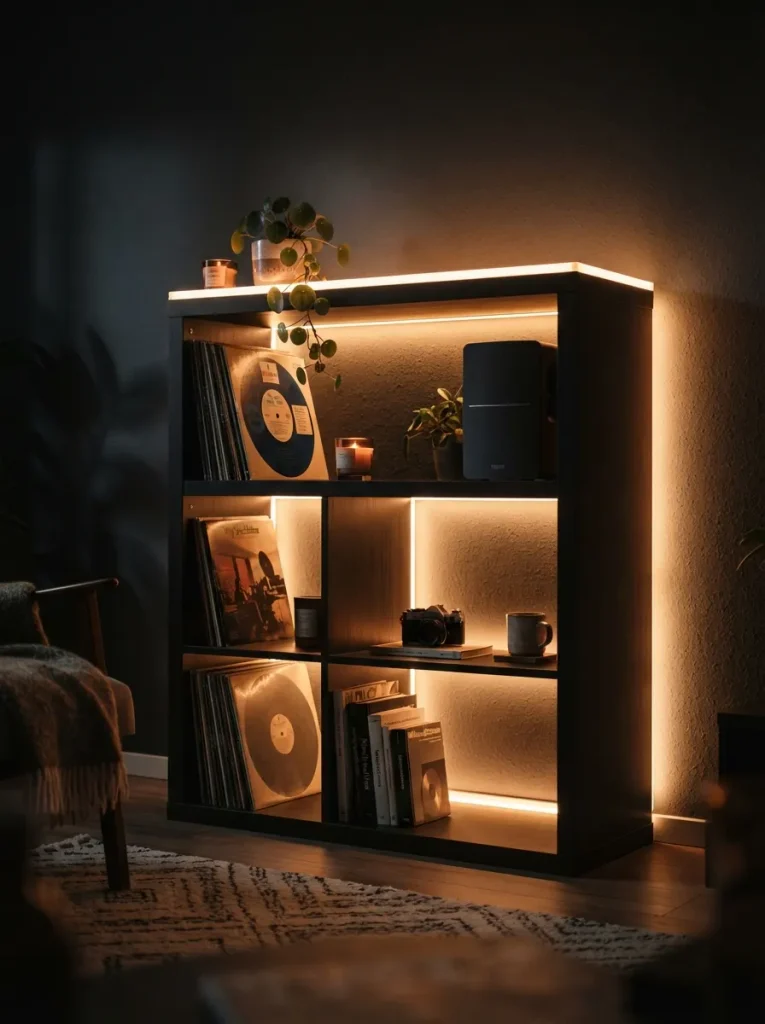
What it looks like: A soft wash of warm light spilling from behind or beneath the shelf, doing double duty as the room’s evening lighting.
Why it works: A divider blocks a straight sightline, which can also block a lamp’s reach across the room. Running LED strips along the top or back edge turns the obstruction into a light source itself, so neither side ends up in shadow once the sun goes down.
How to copy it: Run a warm-white (2700K) LED strip along the top back edge, angled to bounce light off the ceiling and wall rather than shining directly into either zone.
Best for: Studios where the divider blocks the room’s only overhead fixture from reaching one side. If a deeper, warmer wash of light is the goal, our Kallax black and moody styling ideas show how far that glow can be pushed.
Important: Battery-powered LED strips run out mid-evening more often than people expect if there’s an outlet within a few feet, use a plug-in strip with a dimmer instead of committing to battery packs you’ll be swapping weekly.
Shop This Look
| Product |
|---|
| Warm-white 2700K LED strip light kit with dimmer |
| Adhesive cable clips for strip routing |
| Plug-in USB power adapter for LED strips |
| Diffuser channel for LED strip lighting |
6. Match Every Bin to Calm the Whole Wall Down
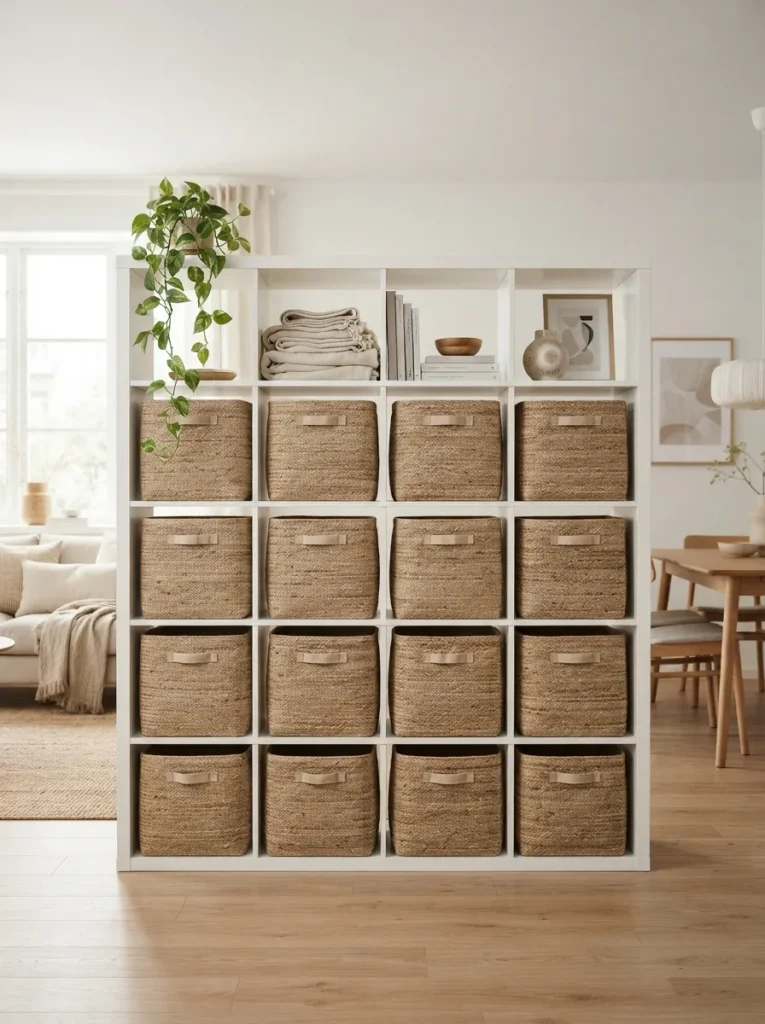
What it looks like: Every cube holding the same style of bin in the same tone, so the whole grid reads as one calm block instead of a dozen mismatched compartments.
Why it works: A Kallax used for real storage tends to fill with visually loud contents mismatched boxes, exposed clutter, random colors. Matching the bins reduces the number of distinct visual elements the eye has to process, which is what actually makes a busy storage wall feel restful rather than chaotic.
How to copy it: Pick one bin style in one neutral tone and buy enough to fill every cube you’re using for closed storage, leaving one or two open for display.
Best for: Anyone using the divider primarily for storage rather than styling for more on keeping bins and zones this calm elsewhere in the apartment, see our closet organization ideas.
Quick Win: Buy bins in multiples of four from a single supplier run dye lots vary between batches, and matched bins from two different orders rarely match as closely as they look online.
Next up: a layout trick most people never consider because it feels like it wastes space it doesn’t.
7. Angle the Divider Instead of Squaring It to the Wall
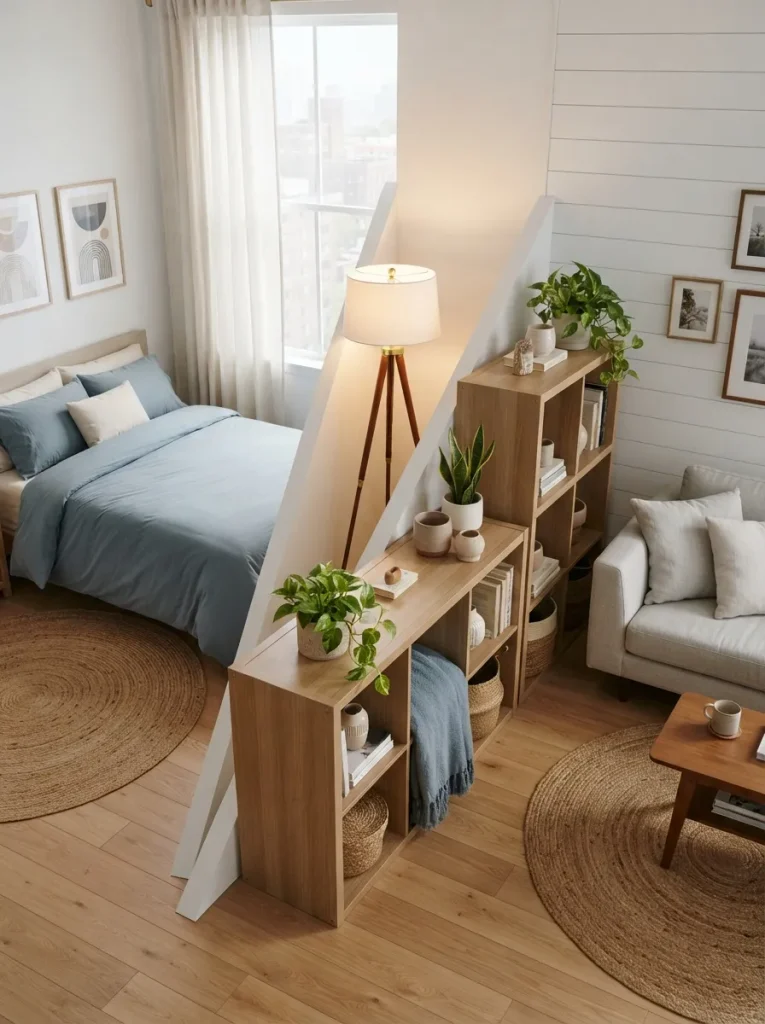
What it looks like: The shelf set at roughly 30 to 45 degrees off the wall instead of dead square, leaving a small triangular pocket of floor behind it.
Why it works: A studio that’s long and narrow the classic “railroad” layout reads even narrower when every piece of furniture squares off with the walls. Angling the divider breaks that rigid grid, and the leftover triangular space becomes a spot for a lamp, a plant, or a reading chair that wouldn’t have fit in a straight layout.
How to copy it: Pull the far end of the unit off the wall until it sits at a shallow diagonal, then anchor it to the floor with furniture straps since it won’t have a wall stud to lock into at that angle.
Best for: Long, narrow studios where a straight divider makes the room feel like a hallway the same logic shows up in our dorm room ideas that make small rooms bigger.
Styling Note: Fill that leftover triangle with something low and soft a floor cushion or a short plant stand rather than another hard-edged piece; two angled rectangles in one corner start to look like a mistake instead of a choice.
8. Stack Two Units for a Floor-to-Ceiling Divide
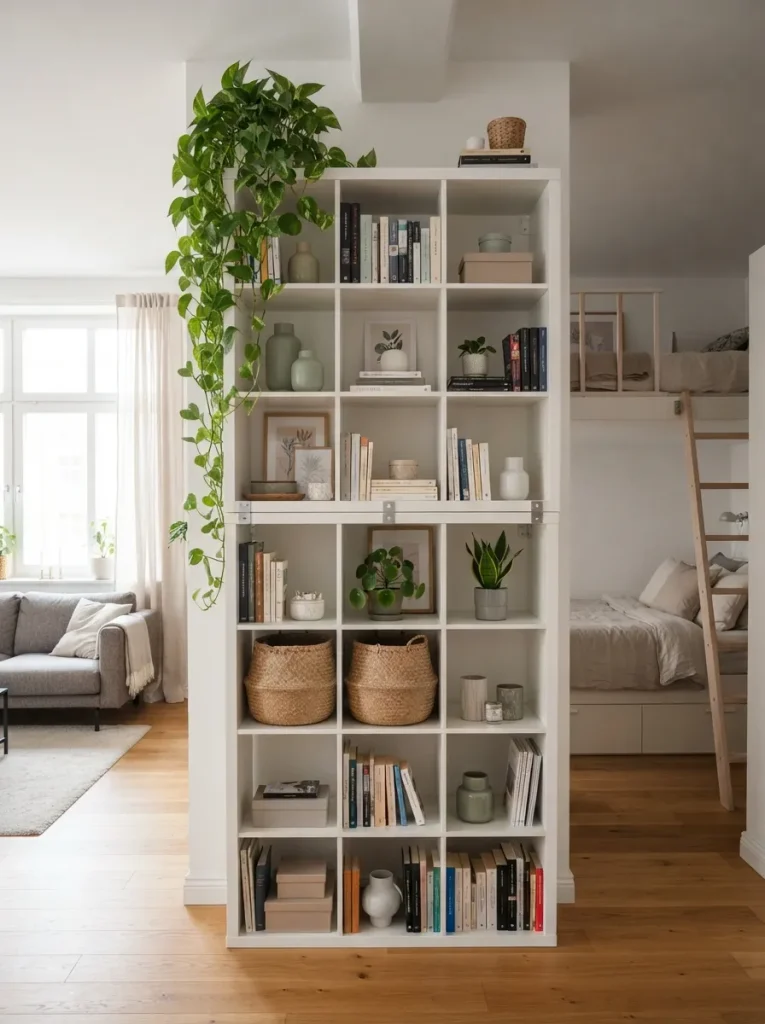
What it looks like: A true wall-height divider, roughly shoulder-height and taller, built from two units joined at the seam.
Why it works: A single low unit divides the floor plan but leaves the upper half of the room visually open. Stacking a 2×2 or 2×4 on top of a base 4×4 or 2×4 pushes the boundary up toward the ceiling, which gives real acoustic and visual privacy useful for anyone sharing the space with a roommate rather than just zoning solo.
How to copy it: Buy official Kallax stacking brackets for your exact two models they aren’t interchangeable across sizes and never skip anchoring the base unit before adding height on top. For another full-height build using the same stacking principle, see our Kallax closet conversion ideas.
Best for: Studios with a roommate, or anyone who wants real visual privacy rather than a soft suggestion of it.
✅ Before You Stack:
- [ ] Level and anchor the base unit to a wall stud first
- [ ] Confirm the stacking bracket model matches both unit sizes exactly
- [ ] Attach the top unit to the base with the included stacking hardware
- [ ] Re-anchor the combined stack to the wall at the new top height
- [ ] Load the top rows last, and only after confirming the stack doesn’t shift
Best for: Studios with a roommate, or anyone who wants real visual privacy rather than a soft suggestion of it.
One more idea before the designer notes below this one turns the divider into a second desk.
In my experience, most people center the divider exactly between the two zones and call it finished but pulling it 8 to 12 inches off-center toward the sleeping side makes the living zone read as noticeably bigger on the side you’re actually awake and moving through most of the day. A perfectly centered divider feels static; an asymmetrical one feels like a decision someone made on purpose.
9. Top a Section with a Butcher Block for a Built-In Desk
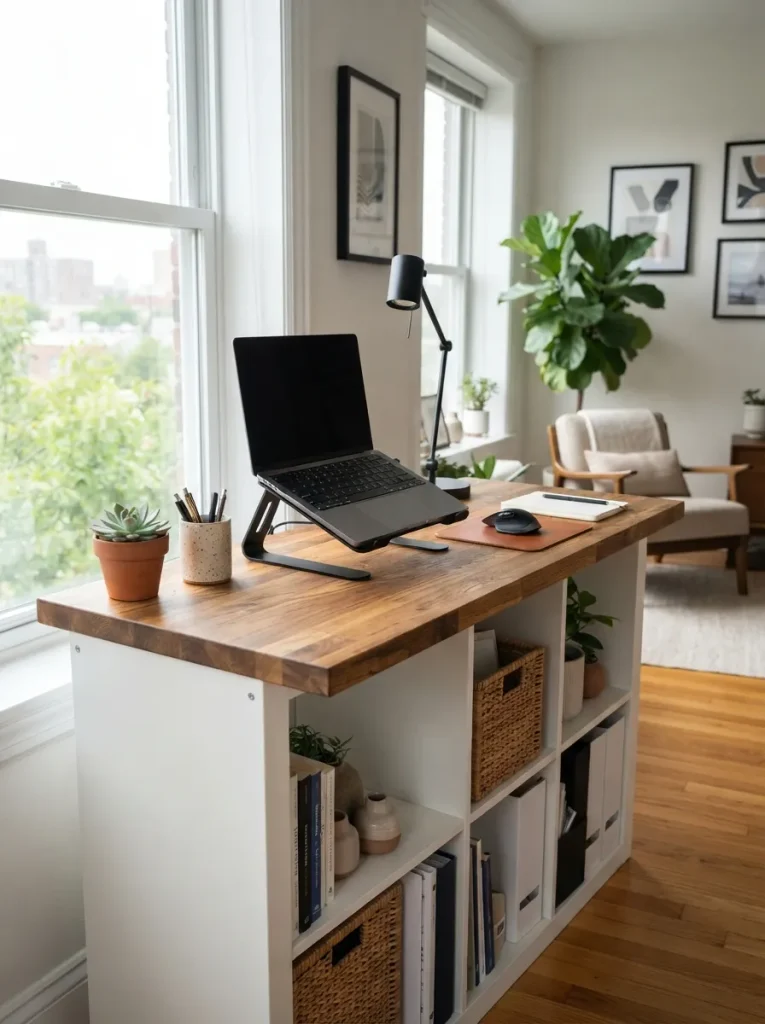
What it looks like: The top of a low 2×4 unit fitted with a solid wood or butcher block slab, turning a few inches of shelf top into an actual work surface.
Why it works: A studio rarely has room for both a divider and a separate desk. Mounting a 24 to 30-inch-deep butcher block across the top of a low unit uses surface area that would otherwise sit empty, and the shelf storage underneath doubles as desk storage without adding a single extra footprint to the room.
How to copy it: Choose a butcher block cut a few inches longer than the unit on each side so it overhangs slightly, and secure it to the top with L-brackets driven into the frame rather than adhesive alone.
Best for: Anyone working from home in a studio with no separate office nook our Kallax home office ideas cover more ways to build a workspace into the unit itself.
Mistake to Avoid: Mounting the slab flush with the shelf’s edges instead of overhanging it means every cable and cup gets pushed to sit awkwardly close to the shelf face leave at least a 2-inch overhang on the working side for elbow room.
Shop This Look
| Product |
|---|
| Solid butcher block countertop slab |
| L-bracket furniture mounting hardware |
| Under-desk cable management tray |
| Adjustable laptop stand |
10. Two-Tone the Cube Interiors for Depth
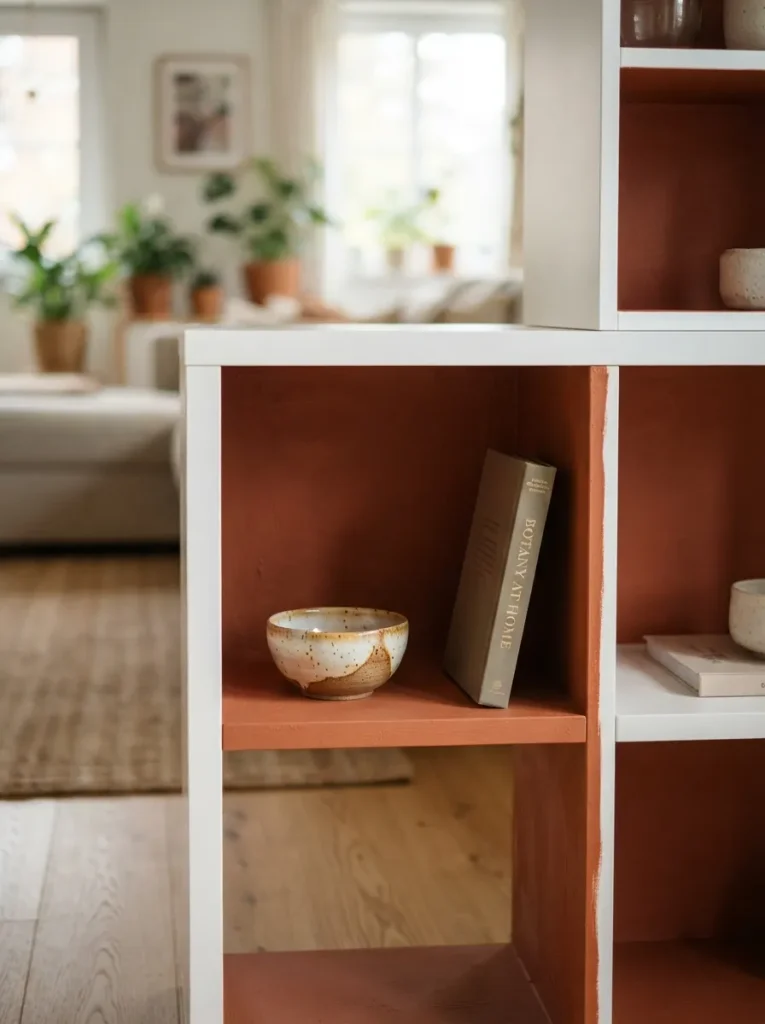
What it looks like: A white or oak frame on the outside, with the inside back walls of each cube painted a deeper contrasting tone depth instead of one flat block of color.
Why it works: A single-color shelf reads as flat from across the room, especially at divider distance where people see it mostly in profile. Painting only the interior backs a few shades darker than the frame creates the illusion of shadow and depth in every cube, so the piece reads as more architectural than a plain storage unit.
How to copy it: Mask off the frame edges with painter’s tape and paint only the recessed back panel of each cube, leaving the visible frame in its factory finish.
Best for: Anyone who wants the divider to look custom-built without any actual carpentry it’s a close cousin to the restraint in our Kallax Scandinavian styling ideas.
Pro Tip: Two coats of paint minimum on the interior backs one coat shows brush strokes and roller texture under direct light in a way a second coat evens out completely.
Last stretch two ideas left, both about how each side of the divider gets its own personality.
11. Style Each Face for Its Own Room
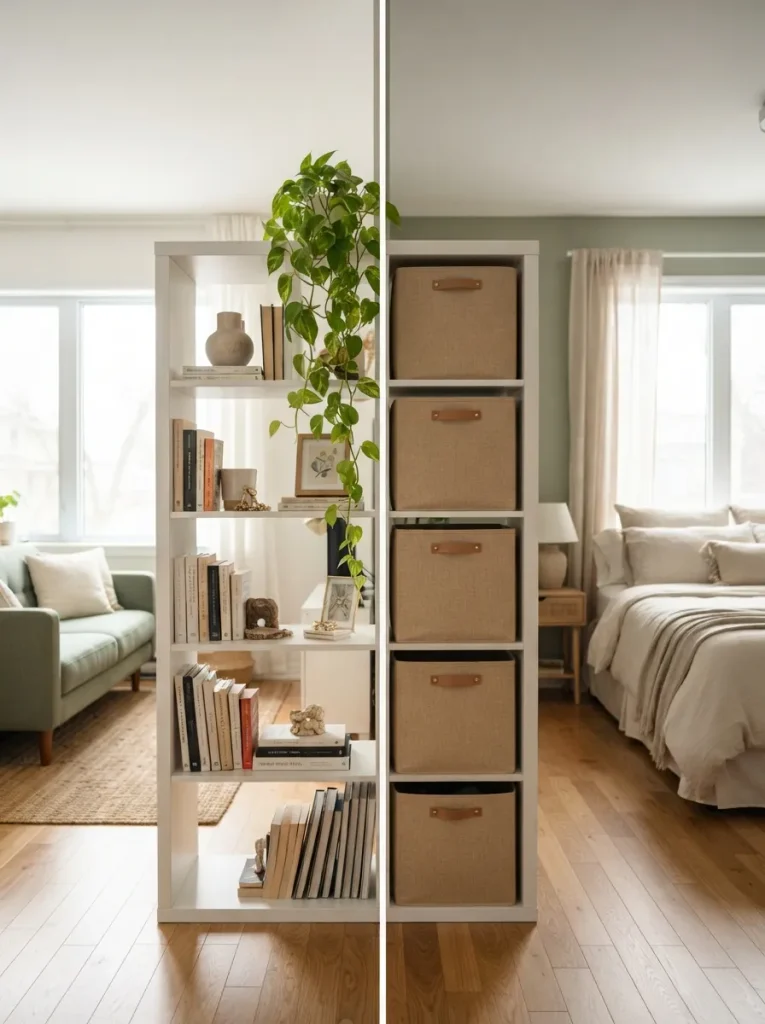
What it looks like: The living-room face open and displayed books, a plant, a small stack of ceramics while the bedroom face stays closed and private with matched bins or doors.
Why it works: A divider only has to look like furniture on one side. Treating each face according to what that zone actually needs display on the social side, closed storage on the private side makes the same physical object read as two completely different pieces depending on which room someone’s standing in.
How to copy it: Decide which face is “public” before you buy inserts, and keep that side’s cubes at roughly half display, half closed storage a fully open face on the living-room side starts to look like clutter instead of styling.
Best for: Studios where guests spend time in the living zone but rarely see the sleeping side for the display half specifically, our Kallax bookshelf styling ideas go deeper on arranging that open face.
Quick Win: Use the exact same neutral tone on both faces’ hardware and trim, even though the contents differ it keeps the piece reading as one intentional object rather than two mismatched shelves pushed back to back.
12. Add a Plug-In Sconce to the Bedroom Face
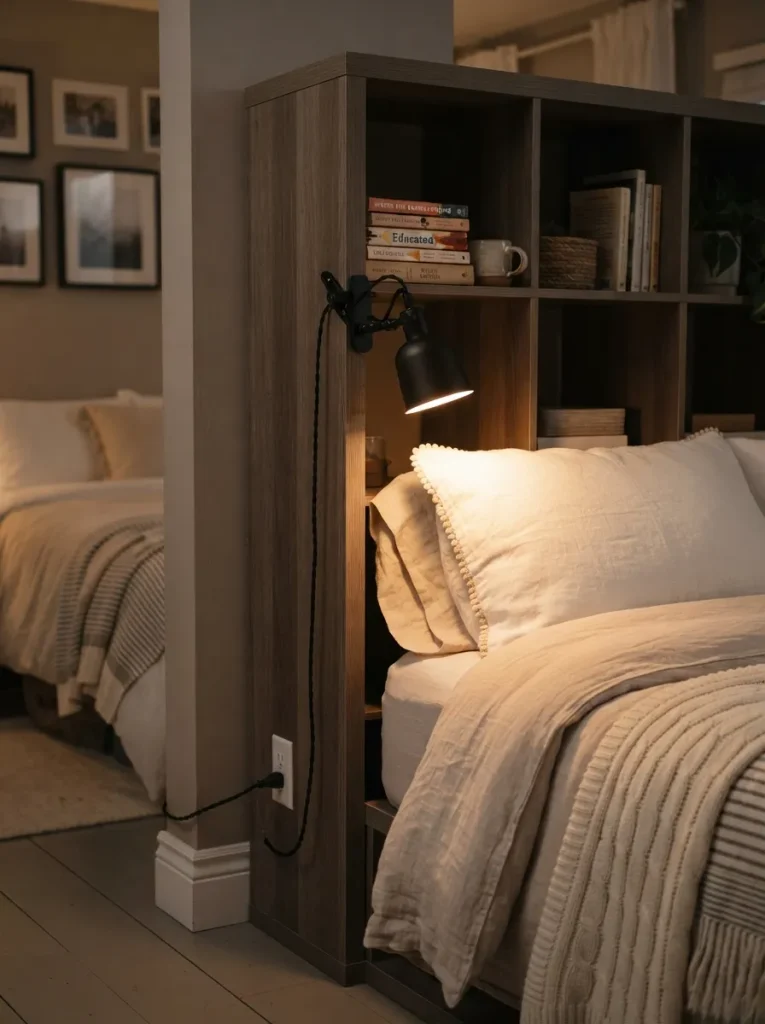
What it looks like: A small clip-on or plug-in sconce mounted to the top edge of the unit on the bedroom side, standing in for a nightstand lamp the shelf itself replaced.
Why it works: Using a Kallax as a headboard-adjacent divider often removes the nightstand that used to hold a lamp. A plug-in sconce clipped to the shelf’s top edge restores that bedside light without needing a nightstand or an extra outlet run, since most plug-in sconces work off a standard cord and a nearby wall outlet.
How to copy it: Choose a plug-in (not hardwired) sconce with a swing arm, clip or mount it to the top edge nearest the pillow, and route the cord down the back of the unit where it won’t show.
Best for: Anyone who lost their nightstand real estate to the divider itself the same fix shows up often in our Kallax dorm room ideas, where nightstand space is just as tight.
Important: Hardwired sconces need an electrician and usually a landlord’s sign-off plug-in versions with a visible cord are the only version that stays fully renter-friendly and reversible.
Shop This Look
| Product |
|---|
| Plug-in wall sconce with swing arm |
| Cord cover channel for wall-mounted cords |
| Warm-dim smart bulb for bedside sconces |
| Adhesive cord clips |
How to Start Your Kallax Room Divider Transformation
What I’ve found with real studios: the first move isn’t paint or bins it’s the anti-tip anchor kit and a stud finder. Anchoring a 2×4 or 4×4 unit to a wall stud before it’s loaded with a single item is the one step that determines whether the rest of this project is safe to build on, so it comes before any styling decision.
The most common fixable mistake is skipping the weight math. Each Kallax cube shelf holds roughly 29 pounds evenly distributed loading one side with a stack of hardcover books and leaving the rest empty causes visible sagging within months. Spread weight across the full grid instead of clustering it, and add a thin plywood backer behind heavily loaded cubes if you’re storing books or records.
Three items under $50 that move the needle fast: a furniture anti-tip strap kit (around $15), a set of four matched woven storage bins in one neutral tone (around $30–$40), and a battery-powered warm-white LED puck light set for instant zone lighting (around $20).
A basic anchored unit with hardware runs $150 to $300 depending on size and finish, and installation itself takes an afternoon. A fully styled version paint, inserts, lighting, a butcher block top stretches into a full weekend of work and closer to $400 to $600 total, spread out over a few weeks as pieces arrive.
Ready to Divide Your Studio the Smart Way?
These 12 ideas cover color, texture, lighting, and layout not just one shelf styled twelve different ways. None of this has to happen at once; anchoring the unit and adding one matched set of bins is a complete first weekend on its own. Start today by measuring your wall for a stud and ordering the anti-tip kit before the shelf itself arrives.
Get the zoning right and the studio stops feeling like one room pretending to be two it starts feeling like two rooms that happen to share a floor. Save the ideas that fit your layout now, since the angled placement and the stacked version solve very different problems.
You Might Also Like
- 9 Renter-Friendly Ways to Section Off a Studio Apartment Without a Wall
- 15 IKEA Kallax Hacks for Small-Space Storage
- 7 Multi-Functional Furniture Pieces Every Studio Apartment Needs