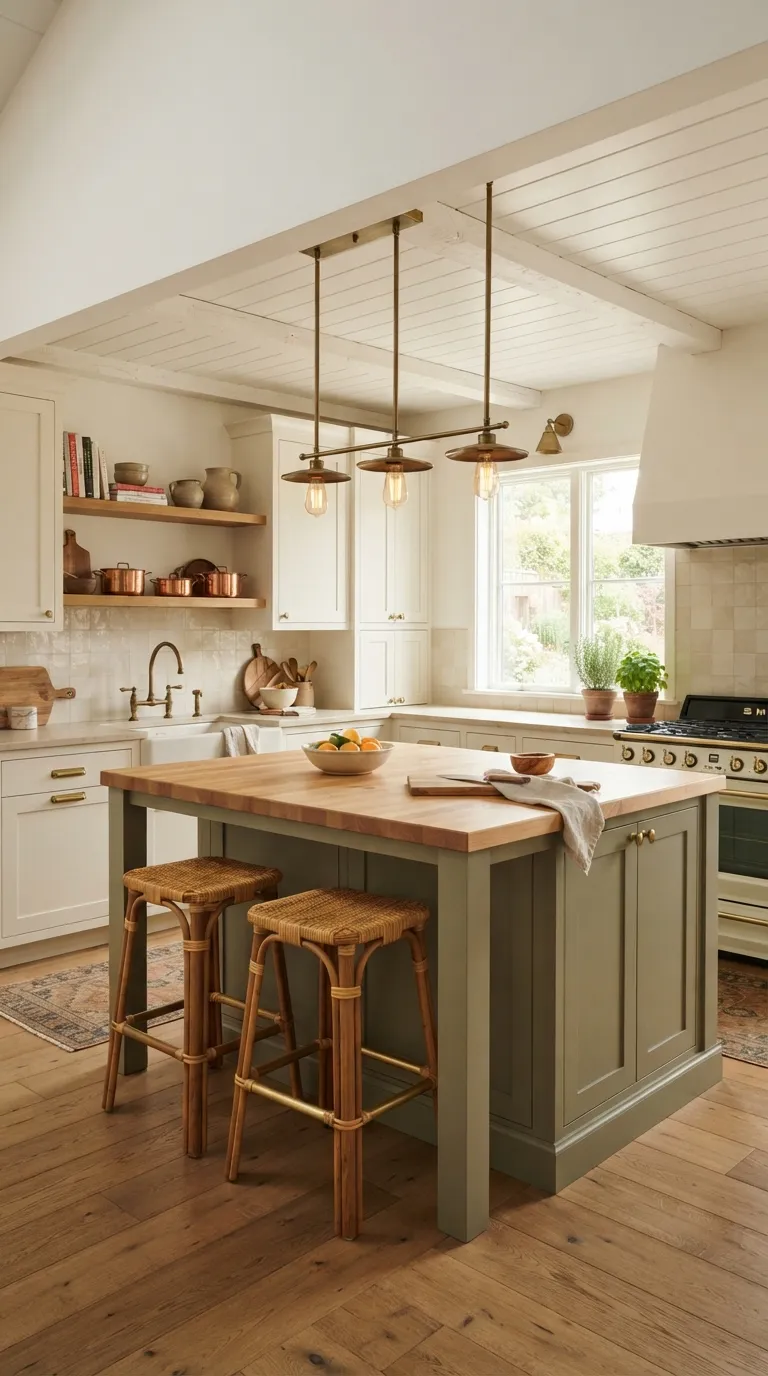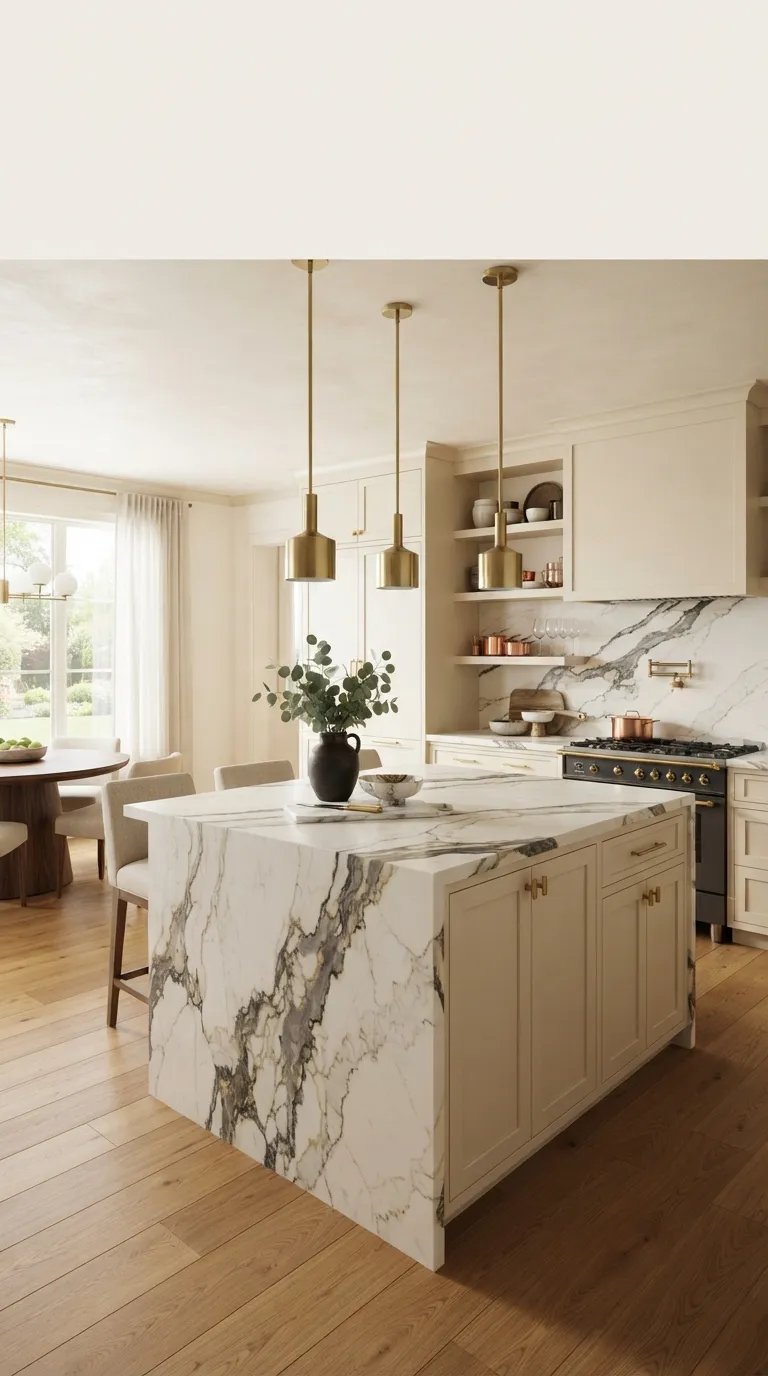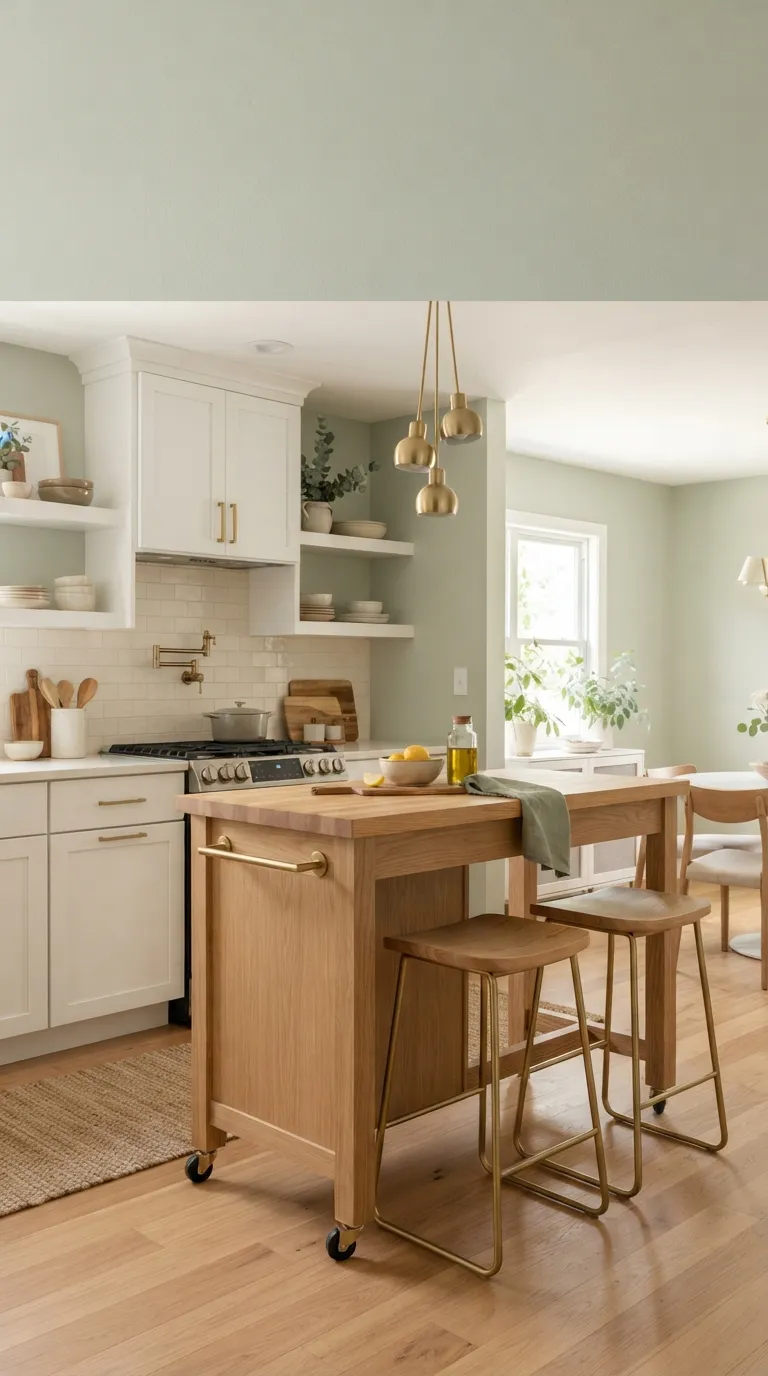
17 Small Kitchen Island Ideas That Don’t Sacrifice Counter Space
A small kitchen island earns its keep only when it gives more than it takes extra prep space, hidden storage, somewhere to set a coffee cup without eating into the counter room you already fought hard to clear. This roundup walks through 17 small kitchen island ideas built around that trade-off, from mobile carts that roll out of the way to built-in extensions that disappear when you don’t need them.
Picture a kitchen that still feels open enough to move through with a stockpot in both hands, where the island pulls double duty instead of just sitting there. Warm wood tops, slim steel frames, a cluster of pendant light overhead none of it works if the island blocks the one path between your stove and your sink. Get the scale right first. Everything else follows.
Jump To
- Why Small Kitchen Islands Make Such a Difference
- The Ideas, Starting With What Most Kitchens Get Wrong
- How to Start Your Small Kitchen Island Upgrade
- Ready to Make Your Small Kitchen Work Harder?
Why Small Kitchen Islands Make Such a Difference
A kitchen island in a small footprint isn’t a scaled-down version of a big one it’s a different design problem. The goal shifts from showpiece to workhorse: extra landing space for a cutting board, a spot to stash small appliances, seating that doesn’t block the path to the fridge.
Slim profiles, mobile bases, and multi-purpose surfaces do more with less square footage than a fixed, oversized block ever could. Start with how you move through the room, not with what looks good in a photo.
Quick Reference
| Best starting point | Measure your kitchen’s walkway clearance before shopping for any island |
| Biggest impact area | A mobile or slim-profile island that adds storage without blocking traffic flow |
| Budget to start | $80–$500, depending on whether it’s a rolling cart or a custom built-in |
| Time to complete | A single afternoon for a freestanding island; a weekend for built-in options |
The Ideas, Starting With What Most Kitchens Get Wrong
1. A Rolling Bar Cart Instead of a Fixed Island
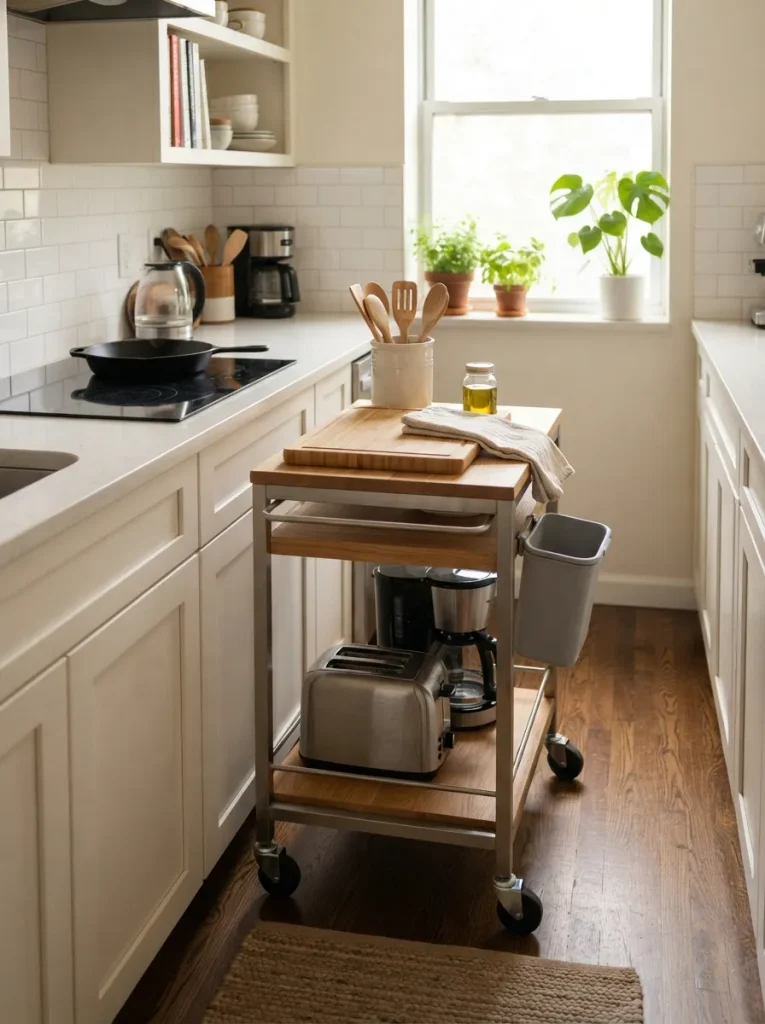
Most small-kitchen renovations start with a fixed island bolted to the floor, and that’s usually the first thing that goes wrong.
A stationary block eats the same 30 to 36 inches of clearance whether you’re cooking solo or hosting six people, and once it’s in, it’s in.
A rolling bar cart with locking casters solves the same storage-and-prep problem without the commitment wheel it flush against the counter during dinner prep, then push it into a corner or hallway nook when you need the floor space back.
Look for a cart with at least one lower shelf for pots or small appliances, and casters rated to lock individually rather than one master brake, so it stays put on tile or hardwood. It’s the right call for renters, for kitchens under 100 square feet, or anyone who entertains rarely enough that a permanent fixture feels wasteful.
Warning: Skip carts with a single center-mounted brake on uneven flooring, one unlocked wheel is enough for the cart to drift mid-chop. Confirm each caster locks independently before you buy.
Shop This Look
| Product |
|---|
| Rolling kitchen island cart with lower shelf |
| Bamboo cutting board sized to fit the cart top |
| Removable trash bin with hanging bracket |
2. A Drop-Leaf Console That Expands Only When You Need It
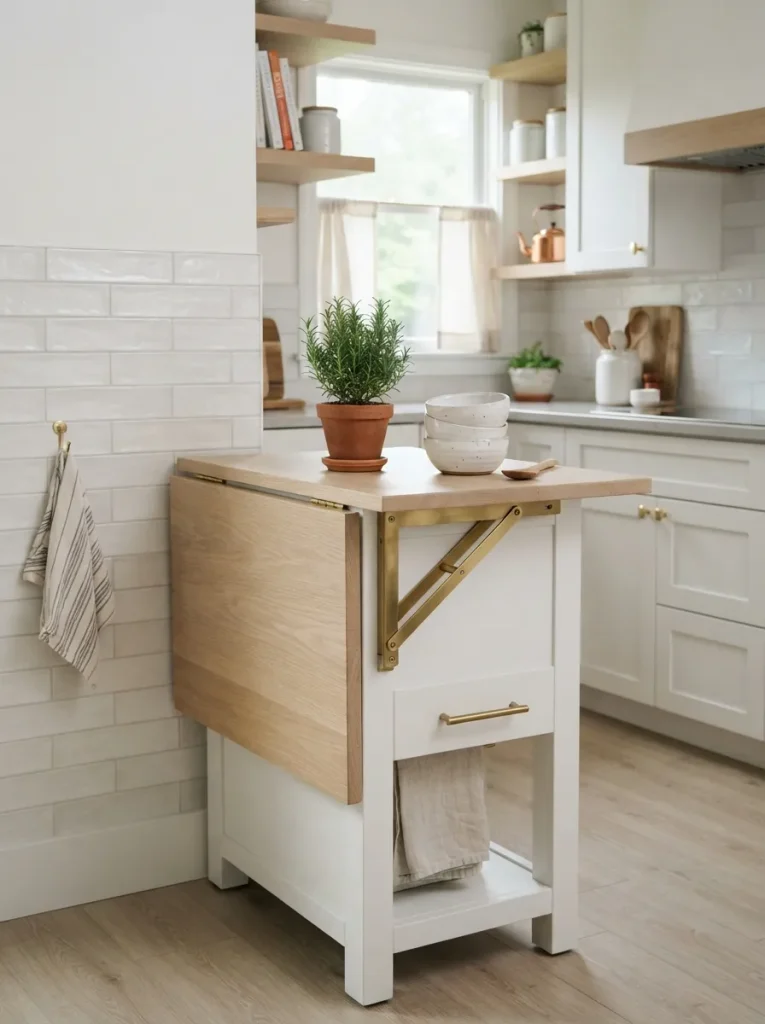
Measure your kitchen’s main walkway before you shop for anything that number decides everything else.
A drop-leaf or fold-out console island solves the second most common small-kitchen mistake: buying one fixed size that’s either too cramped for daily cooking or too small to be useful when company comes.
Fold the leaf down and the console reads as a slim 14 to 16 inch table against the wall; raise it and you gain a full 24 to 30 inches of prep or serving surface. The hinge mechanism matters more than the finish look for a piano hinge or folding brackets rated to hold at least 40 pounds so the extended leaf doesn’t sag under a stand mixer or a stack of plates.
✅ Measure Before You Shop:
- [ ] Measure the walkway width with the island’s widest leg extended
- [ ] Leave at least 36 inches of clearance on the narrowest side (42+ inches if two people cook at once)
- [ ] Check that door and appliance swings still clear the folded-down leaf
- [ ] Confirm the extended leaf height matches your counters, typically 36 inches
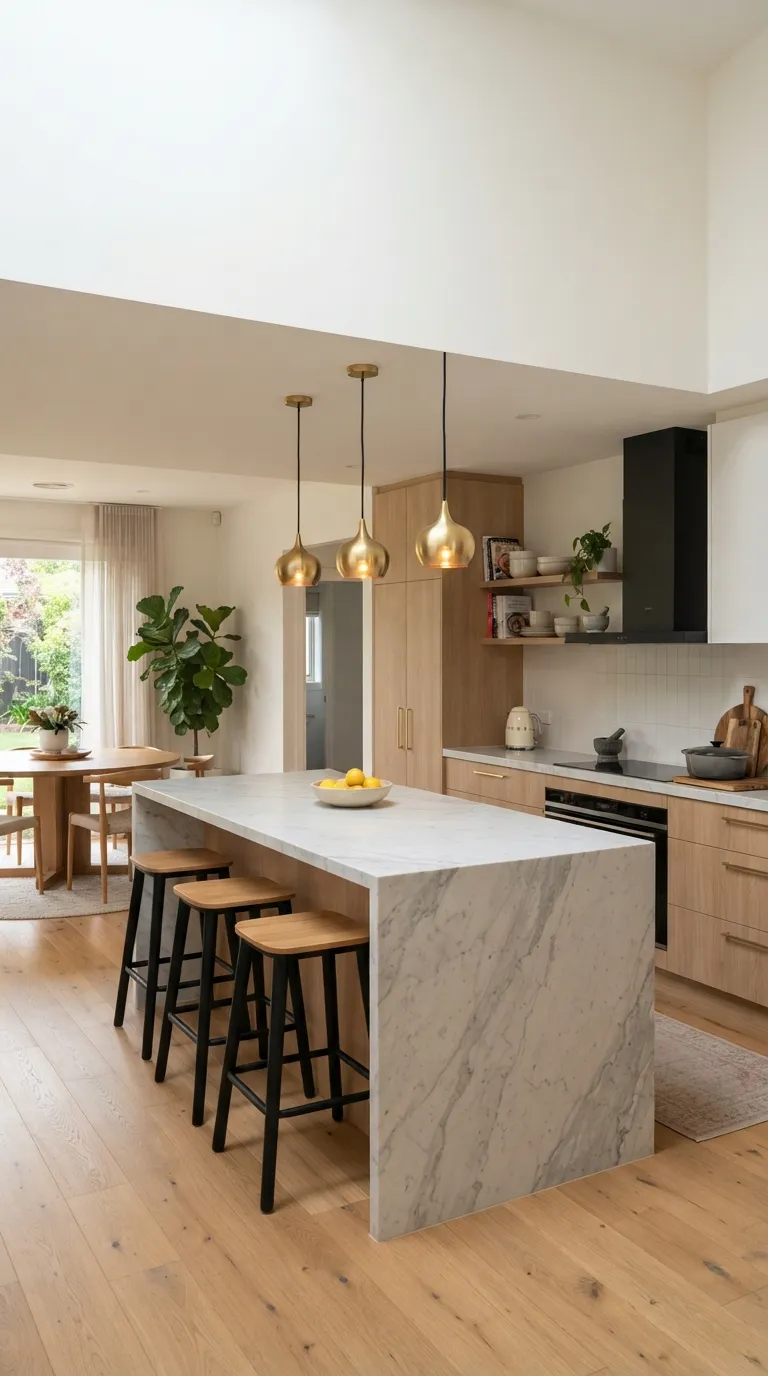
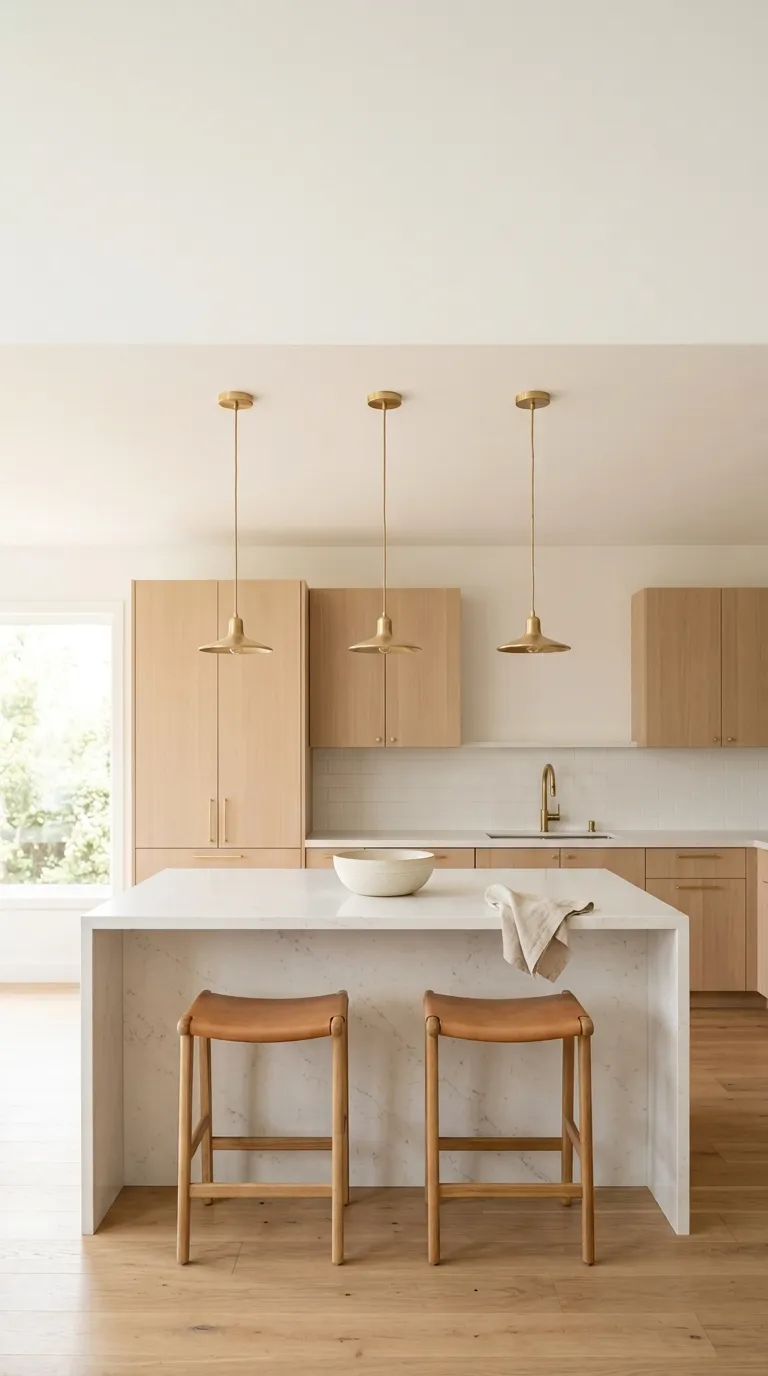
3. A Waterfall-Edge Slab for a Slimmer Visual Footprint
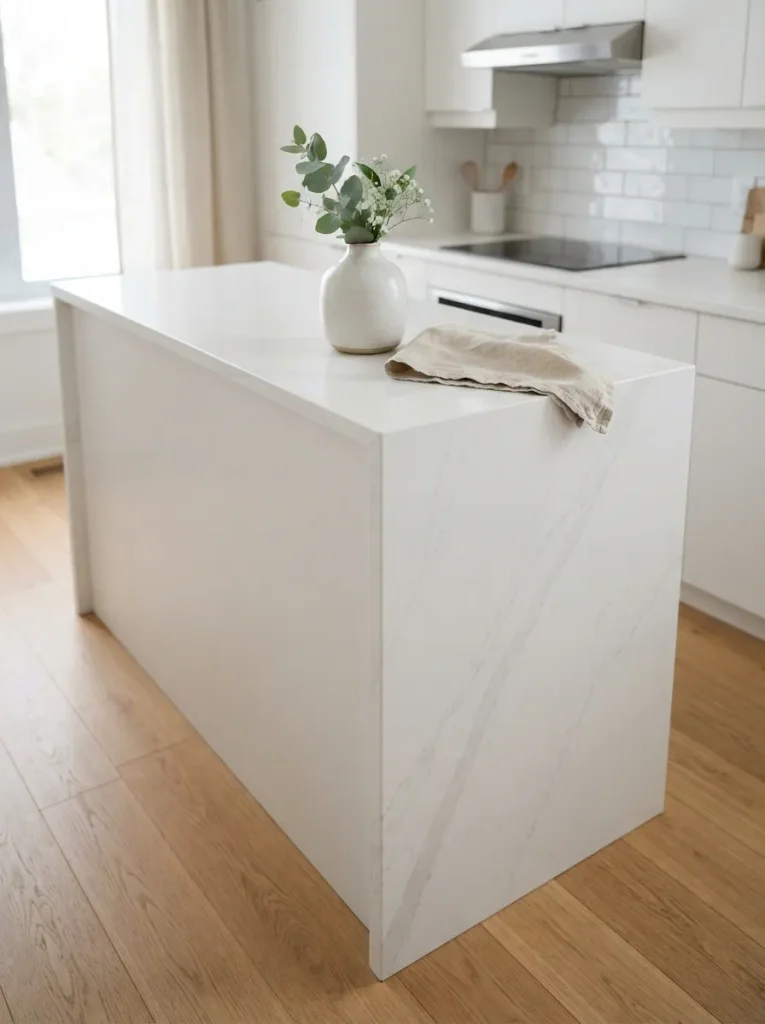
A waterfall edge where the countertop material wraps straight down the sides instead of stopping at a wood or laminate base reads as one continuous slab rather than a boxy cabinet with a top. That single unbroken line makes even a narrow island look intentional instead of undersized.
Quartz is the material of choice here because it’s engineered to be cut and polished as a continuous piece without visible seams at the corners; natural stone can do it too, but the slab has to be cut from one piece to avoid a seam breaking the illusion. Keep the island under 24 inches deep if you’re going this route anything wider starts to look like a full-size peninsula, which defeats the point of a small-space solution.
Budget Version: A waterfall edge in quartz runs well above laminate pricing. Peel-and-stick or painted MDF waterfall panels can mimic the look on a fixed budget, though they won’t hold up to daily knife work the way stone does.
Next up: the shelving trick that makes an island look lighter without removing a single cabinet.
4. Open Shelving Instead of a Closed Cabinet Base
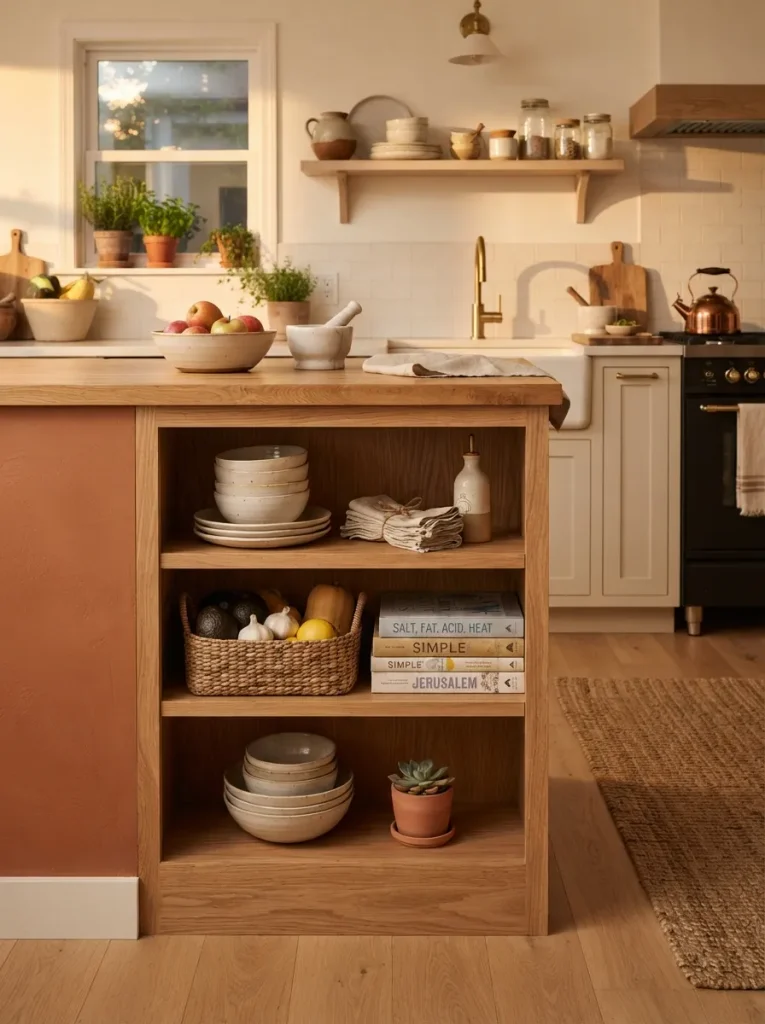
Visual weight, not actual square footage, is what makes a small island feel like it’s crowding the room.
A solid cabinet base reads as a heavy block; open shelving lets light and sightlines pass through underneath, so the eye registers less mass even at the same physical dimensions.
It works because negative space does real visual work you’re not adding storage capacity so much as trading a hidden cabinet for visible, styled shelves that feel lighter. Keep what’s on display intentional: stacked bowls, a few cookbooks, a woven basket for produce. Cluttered open shelving cancels out the effect it’s meant to create.
Pro Tip: Line the back of open shelving with a contrasting paint color or peel-and-stick wallpaper it gives the display a finished backdrop instead of a view straight through to the wall.
5. A Cluster of Mini Pendants Instead of One Statement Fixture
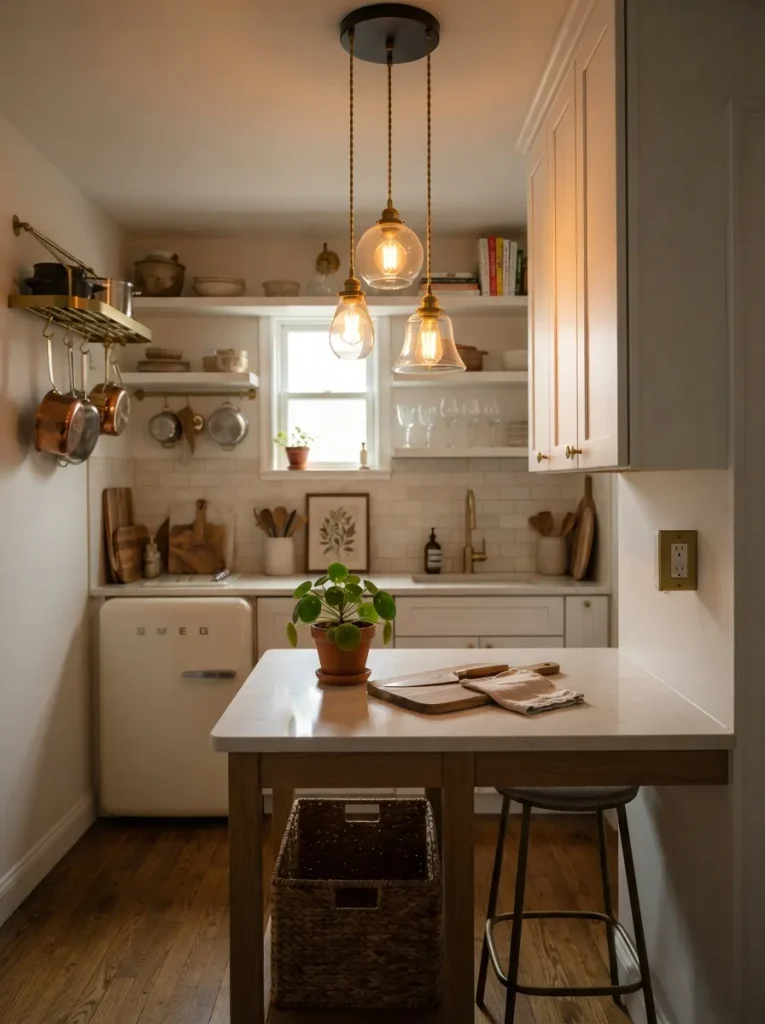
This one’s for kitchens where a single oversized pendant would visually swallow the island underneath it.
Three small pendant lights, grouped and hung at slightly staggered heights, give the same presence as one large fixture without the bulk and because each one is compact, they don’t compete with the island for visual real estate the way a single 20-inch drum shade would.
Hang them 28 to 32 inches above the counter surface, spaced roughly 8 to 10 inches apart in a row that follows the island’s length. It’s the move for narrow islands under 48 inches long, where a wide fixture would overhang the counter on both ends and look mismatched.
Small-Space Tip: On an island shorter than 36 inches, two pendants read cleaner than three three can feel crowded once you factor in the stools underneath.
Shop This Look
| Product |
|---|
| Set of 3 mini glass pendant lights |
| In-line dimmer switch |
| Warm white Edison-style bulbs |
6. A Two-Tone Island That Reads as Its Own Zone
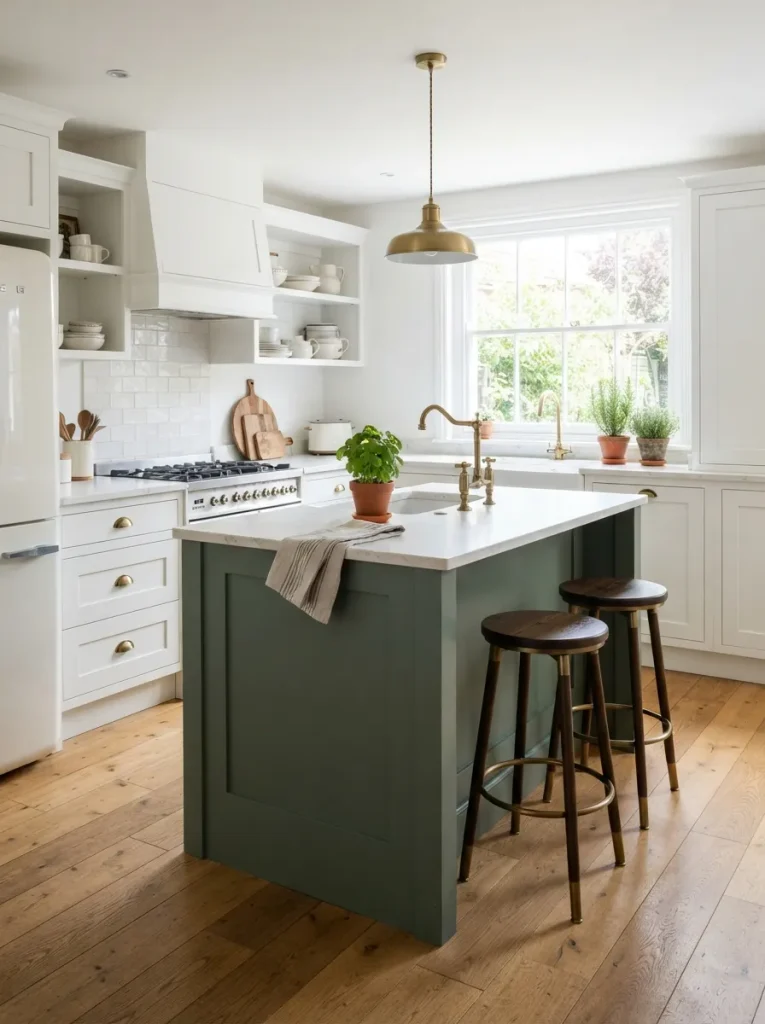
Painting the island a different color than the surrounding cabinetry does something a same-color island can’t: it draws a visual boundary around the workspace without adding a single inch of actual separation.
A deep sage or navy base against white perimeter cabinets tells the eye exactly where the island starts and stops, which makes a small kitchen feel more organized rather than more crowded. The contrast works best when the two tones share an undertone a cool navy against a cool white, or a warm terracotta against a warm cream otherwise the mismatch reads as accidental rather than styled.
If you’re still narrowing down a combination, a broader look at home color pairing principles can help you land on two tones that were designed to sit together.
Up next the storage space most small kitchens have had for years and never used.
7. Toe-Kick Drawers for Storage You’re Currently Wasting
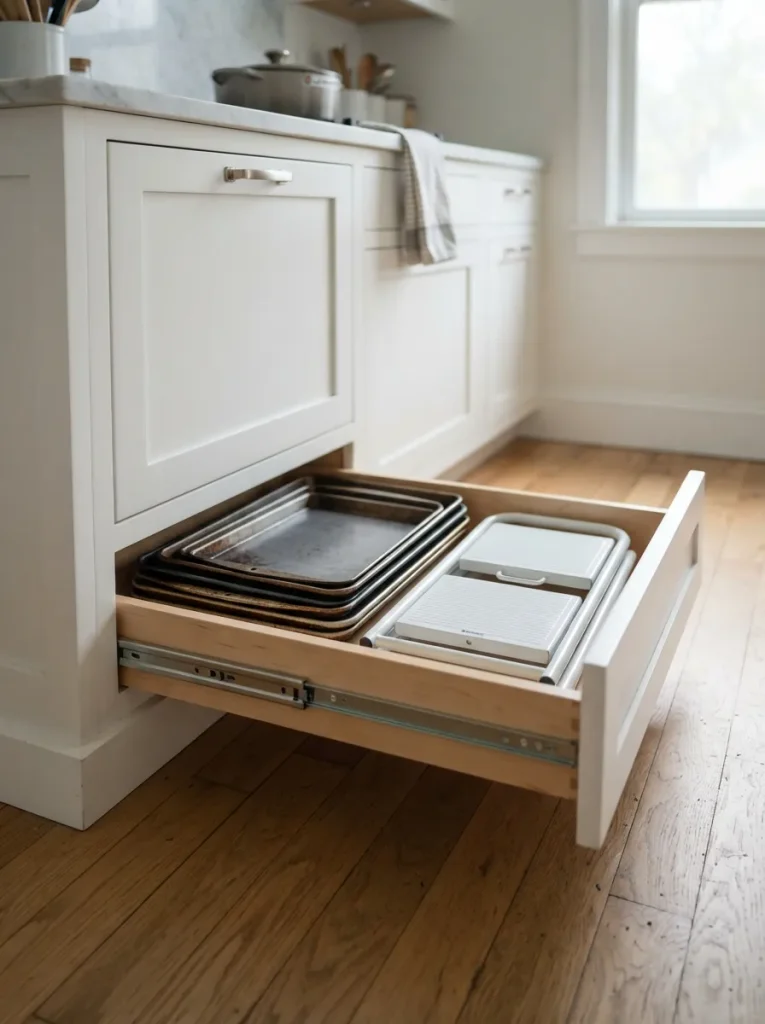
Have a cabinet installer add a shallow drawer into the toe-kick space that 3 to 4 inch gap at the very bottom of your island, usually just empty air behind a wood panel.
It’s one of the few storage additions that costs nothing in usable floor or counter space, since the drawer lives in a void that was never doing anything else. Baking sheets, a stepstool, or flat serving trays fit well here; the drawer depth is too shallow for anything bulky.
If your island is pre-built rather than custom, some retrofit toe-kick drawer kits install without removing the existing cabinet base worth checking before you assume this only works with new construction. For more ways to squeeze storage out of overlooked corners, this storage organization guide covers the same underused-space principle applied to closets.
Important: Toe-kick drawers typically max out around 3 inches of internal depth once you account for the slide hardware don’t plan on storing anything taller than a cookie sheet standing on edge.
8. Task Lighting Tucked Under the Counter Overhang
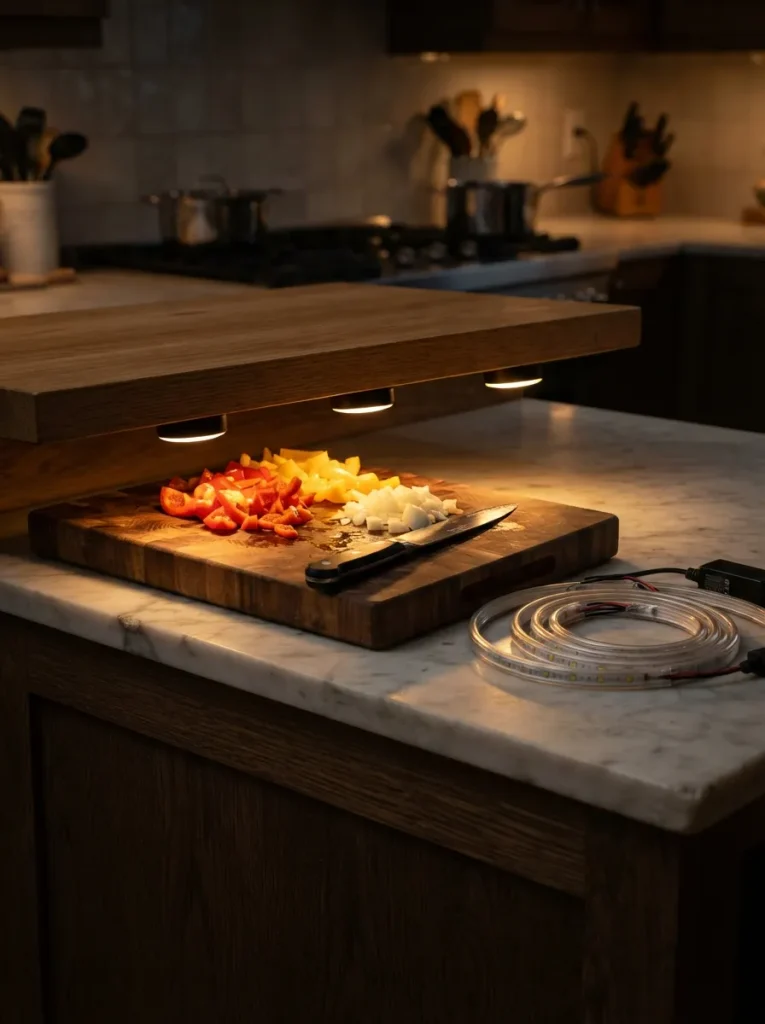
Ambient light from a ceiling fixture rarely reaches the actual cutting surface at the angle you need it, especially with your own body casting a shadow while you’re working.
Small puck lights or a slim LED strip mounted to the underside of a counter overhang solves that by putting the light source directly above the work, not across the room from it.
This matters more on a small island than a large one, because tight kitchens usually have fewer, more crowded ceiling fixtures competing for the same beam of light.
Battery-powered, stick-on puck lights need no wiring and work for renters; hardwired strips look cleaner but require an outlet nearby or a small cutout for the cord.
Shop This Look
| Product |
|---|
| Battery-powered LED puck light kit (set of 3) |
| Warm white LED strip light for under-cabinet mounting |
9. Backless Stools That Disappear Fully Under the Counter
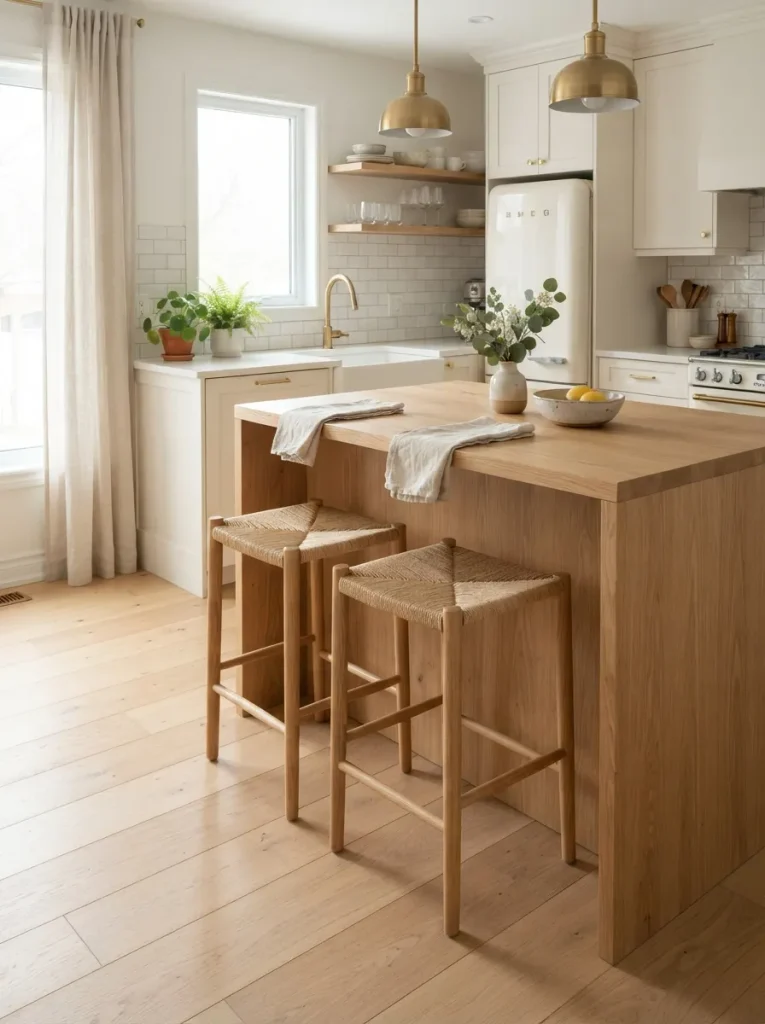
This is for anyone who wants seating at the island without permanently losing the floor space stools normally occupy. A backless stool with a seat depth under 13 inches slides completely under a standard 12-inch counter overhang when not in use, so the walkway around the island stays clear between meals.
Stools with a backrest almost never tuck all the way in the backrest itself needs its own clearance, which defeats the purpose here. Stick to stackable or lightweight versions if more than two people will use the island, so moving them in and out doesn’t turn into a two-hand production every time.
Shop This Look
| Product |
|---|
| Backless counter-height bar stools (set of 2) |
| Slim stackable stool alternative |
The next idea flips the usual advice on its head: sometimes the goal isn’t to stand out at all.
10. An Island That Blends Instead of Standing Out
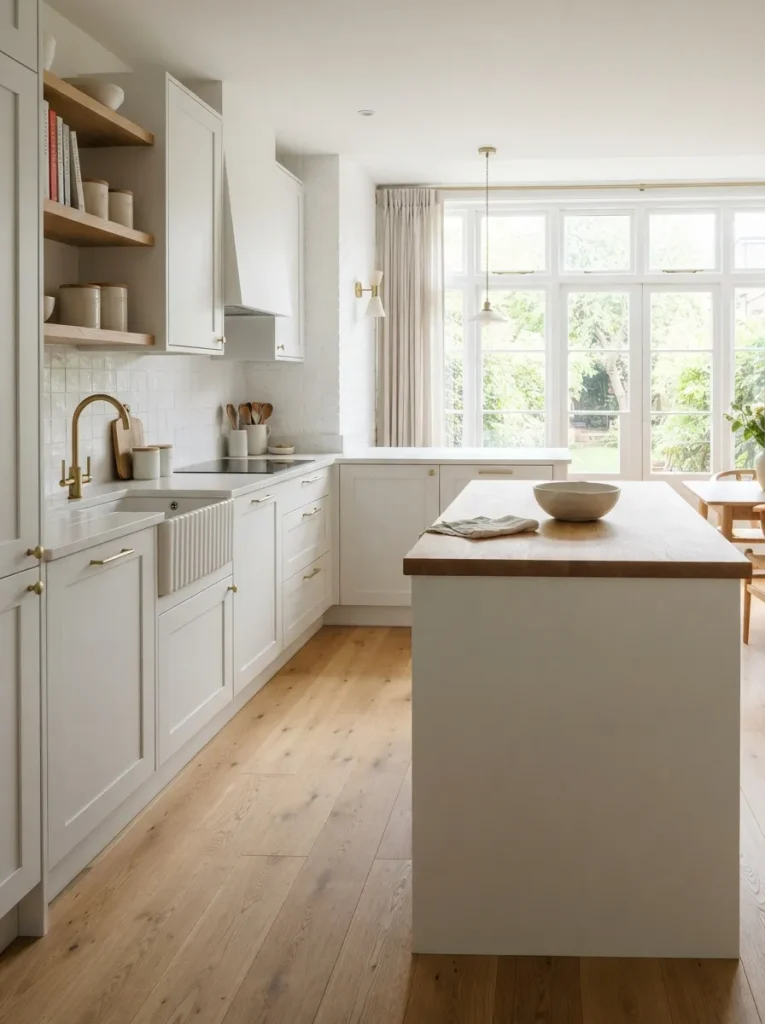
Most small-island advice pushes contrast a dark base, a bold color, something that draws the eye. The opposite move works just as well in a tight kitchen: paint or finish the island in the same tone as the surrounding cabinetry so it visually recedes instead of announcing itself as a separate object taking up floor space.
It’s the technique behind a lot of minimalist kitchen layouts, where a slimmer island profile is paired with cabinetry in matching tones so the whole run reads as one continuous surface. It only works if the material finish matches too, not just the color a matte island against glossy perimeter cabinets will still stand apart even in the same shade.
Pro Tip: If an exact cabinetry match isn’t possible, go one shade lighter or darker rather than a different color family entirely a tonal shift blends; a hue shift contrasts.
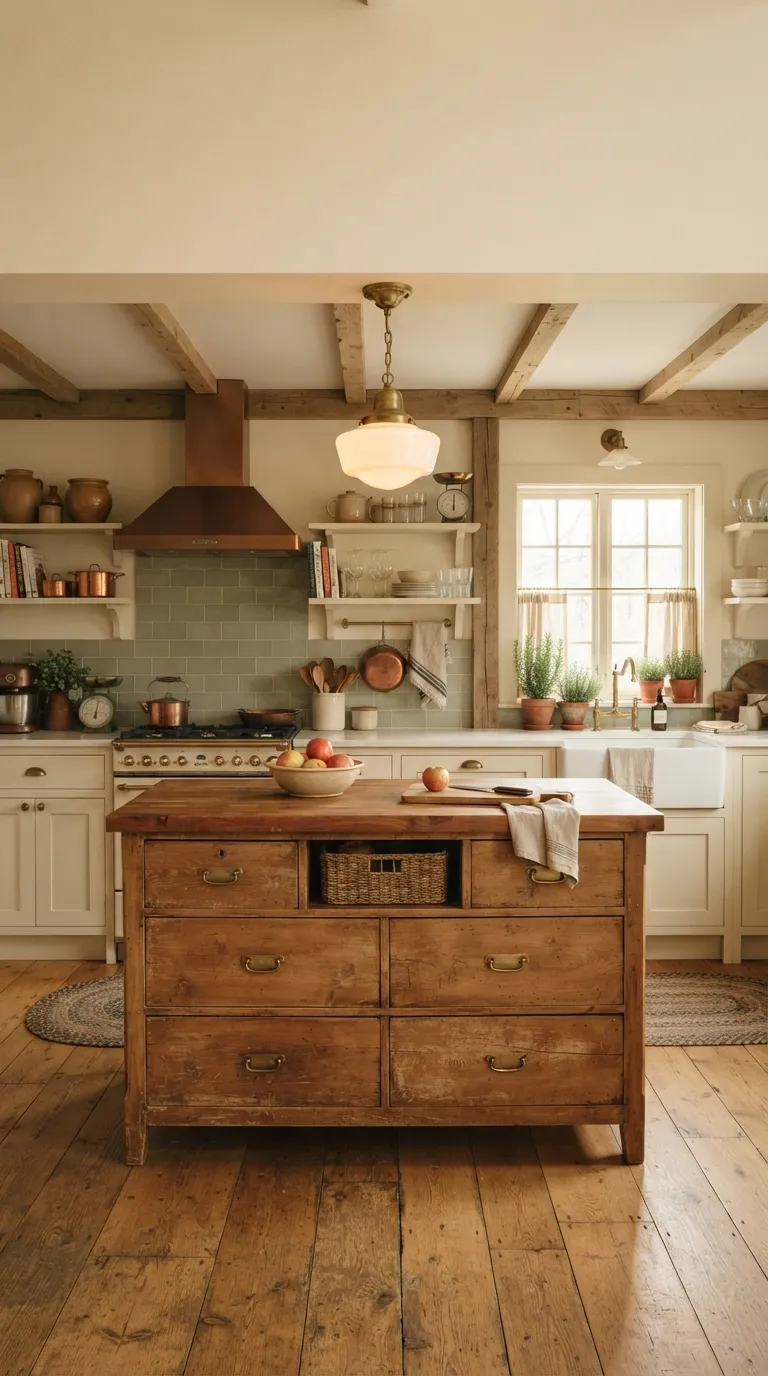
11. A Butcher Block Top That Pulls Double Duty
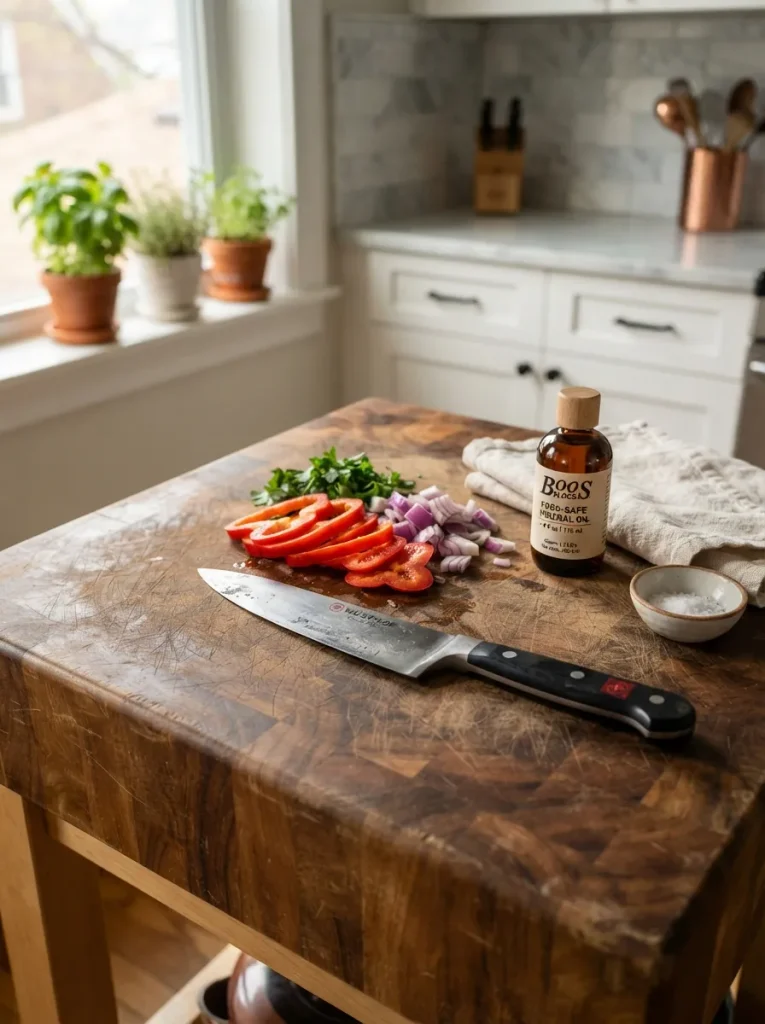
Choose an end-grain butcher block over a flat-grain board if the island top will double as an actual cutting surface rather than just a serving spot end-grain wood is cut so the fibers stand upright, which lets a knife blade slip between them instead of slicing across the grain, so it dulls blades slower and self-heals small cuts over time.
Oil it monthly with food-safe mineral oil to keep the wood from drying and cracking, more often in the first few weeks after installation. Skip butcher block near a sink or if the island sits close to a range without a heat-resistant trivet zone standing water and direct heat are the two things that shorten its life fastest.
Mistake to Avoid: Sealing butcher block with polyurethane makes it waterproof but no longer food-safe to cut directly on. If you want a cutting surface, use food-grade mineral oil only, not a hard sealant.
Next: splitting one island into two heights solves a problem paint and shelving can’t touch.
12. A Wall-Mounted Pot Rail Above the Island
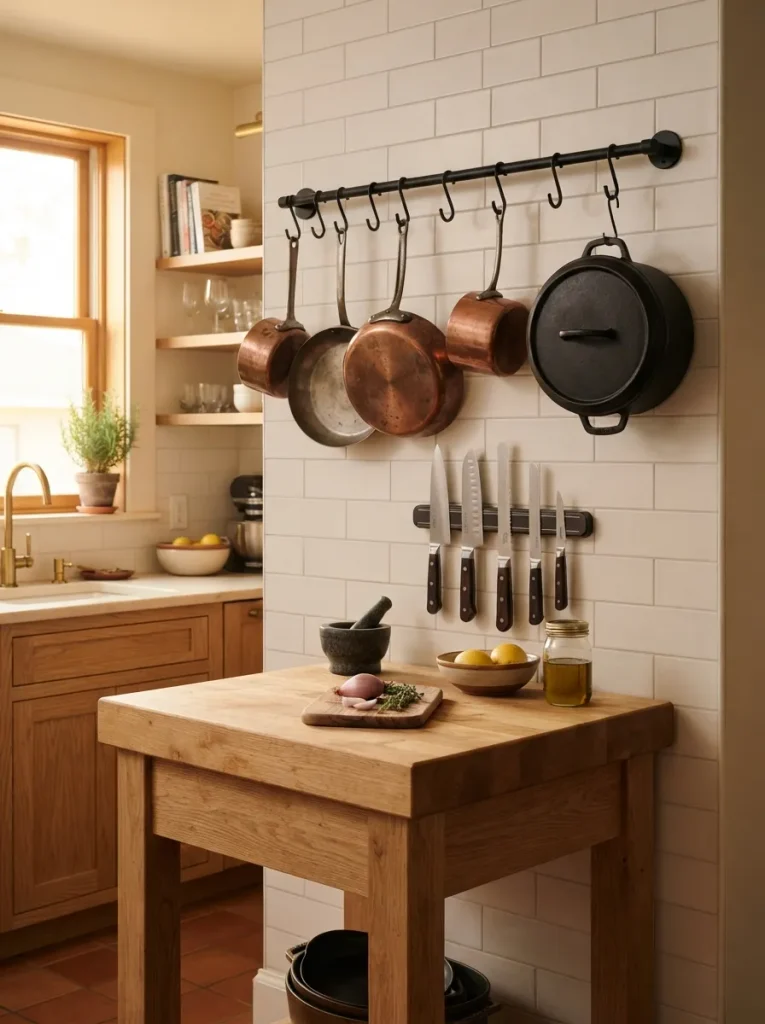
A rail mounted on the wall or ceiling above the island, hung with S-hooks for pots, lids, and utensils, moves everyday cookware out of cabinets and into open, vertical storage freeing up the drawers and lower shelves the island would otherwise need for the same items.
It reads as intentional rather than cluttered because everything hangs at a consistent height along one line, rather than scattered across hooks at different levels. This works best directly above a prep-focused island rather than one used mainly for seating, since you want the most-used pots within arm’s reach of where you’re actually cooking.
Important: Mount into a stud or use toggle anchors rated for at least 20 pounds a fully loaded pot rail with cast iron on it is heavier than most standard wall anchors can hold.
Shop This Look
| Product |
|---|
| Wall-mounted pot rack rail |
| S-hooks for hanging cookware |
| Magnetic knife strip |
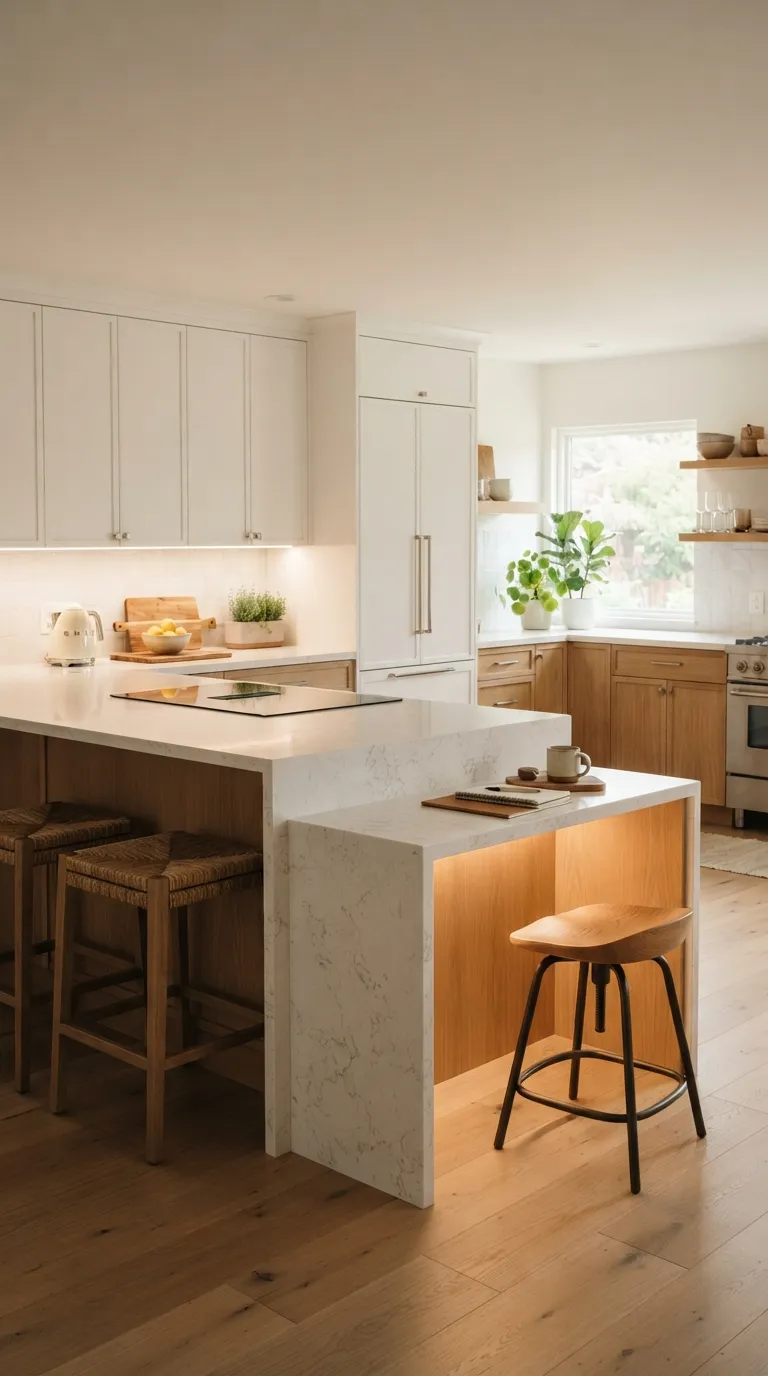
13. A Two-Tier Island That Separates Mess From Seating
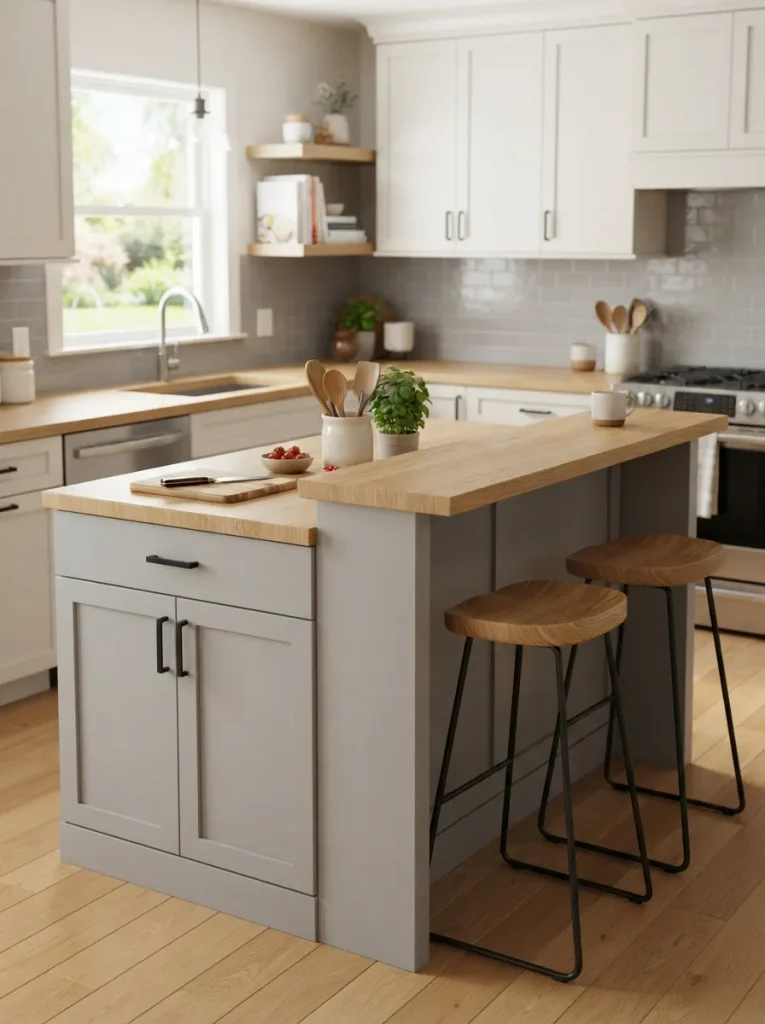
Splitting the island into two counter heights a standard 36-inch prep level and a raised 42-inch bar ledge creates a visual and physical buffer between whoever’s cooking and whoever’s sitting down to eat or scroll their phone.
The principle is the same one restaurants use at open kitchen counters: the raised lip blocks sightlines to cutting boards and dirty dishes without needing a wall. It adds real function in a small kitchen specifically because it lets two activities happen in the same footprint that would otherwise need separate zones you’re not adding square footage, you’re stacking use within the one island you already have room for.
Quick Win: No renovation budget for a built-in two-tier island? A tall bar-height shelf unit pushed against one end of a single-level island creates a similar visual break for under $100.
14. A Dark Island as the Room’s Anchor Point
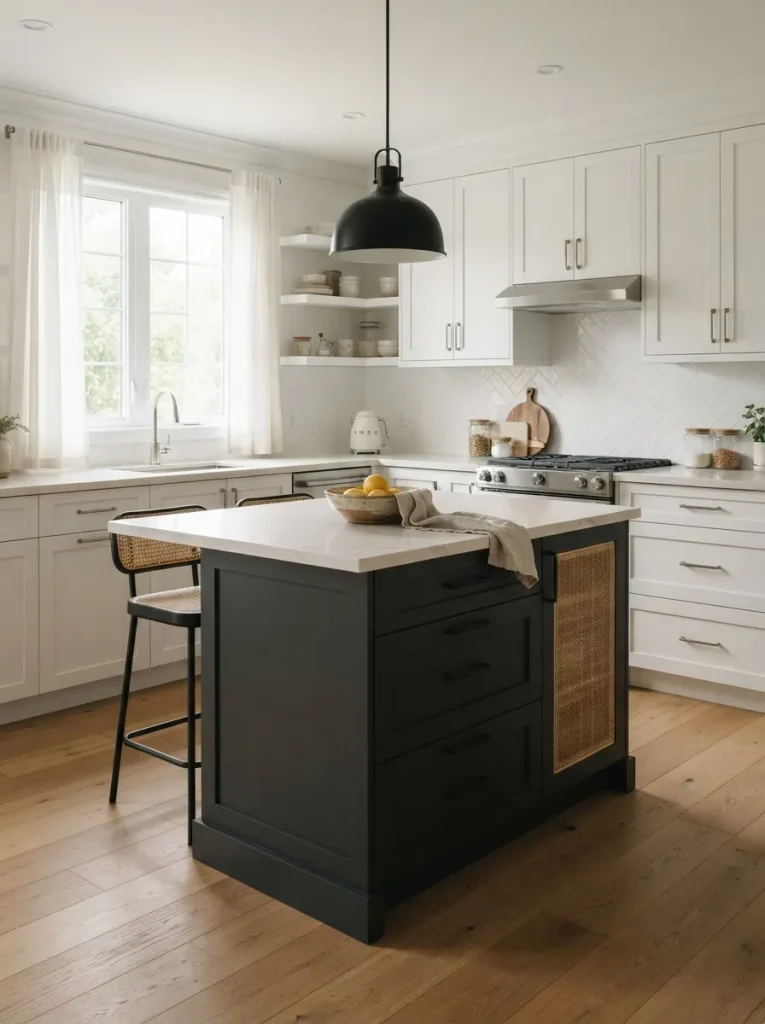
This suits kitchens with mostly white or light cabinetry that’s starting to feel flat or shadowless a small island finished in charcoal, deep green, or black gives the eye a place to land instead of scanning a room with no clear focal point.
Counterintuitively, a dark object in a small room doesn’t automatically shrink the space the way people assume; busy patterns and multiple competing colors are what make a room feel cramped, not a single grounded dark tone. Pair it with lighter countertops on top, though an all-dark island with a dark top loses its edges in dim lighting and can look smaller than it is.
15. Glossy or Mirrored Cabinet Fronts to Bounce Light
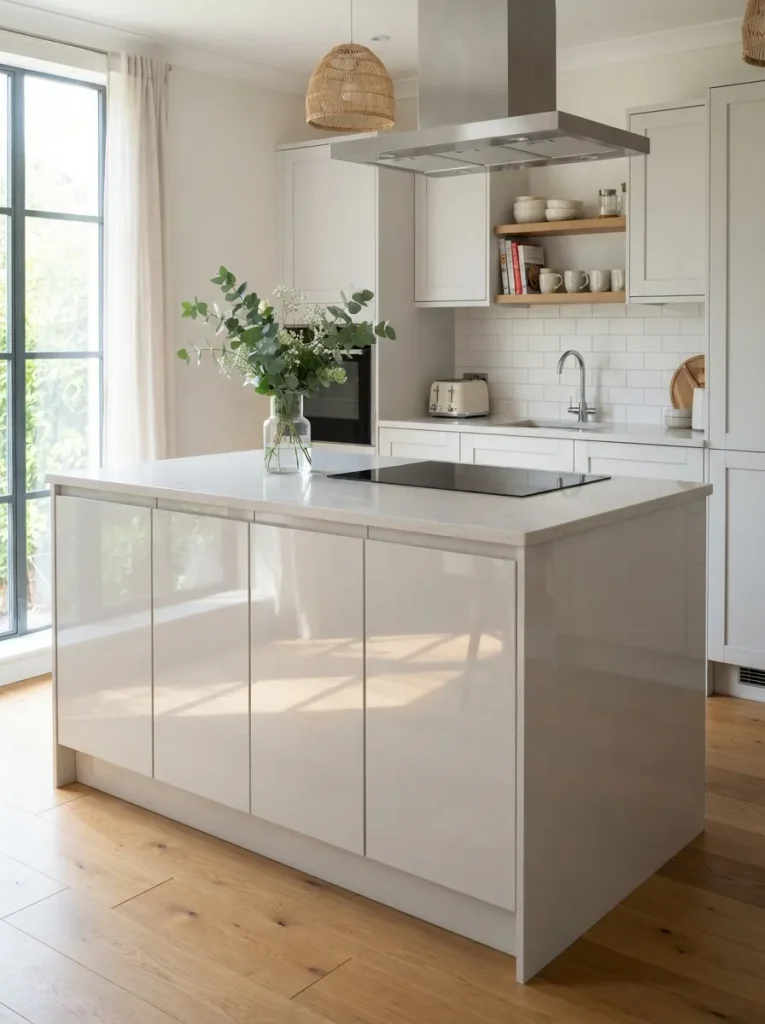
Matte finishes get recommended constantly for a calm, grounded look, but a small kitchen with limited natural light benefits more from the opposite: a high-gloss lacquer or mirrored cabinet front on the island reflects whatever light is already in the room instead of absorbing it.
The effect is subtle rather than dramatic you’re not turning the island into a mirror ball, just adding enough sheen that it catches and bounces ambient light across the room rather than sitting there as a flat, light-eating surface. Glossy finishes show fingerprints and water spots more readily than matte, so this works best on an island that isn’t handling heavy daily prep work.
Pro Tip: A glossy finish only on the island while the perimeter cabinets stay matte keeps fingerprint maintenance limited to one surface instead of the whole kitchen.
One idea left for the kitchens where even a rolling cart doesn’t have anywhere to go.
Insider Observation
The counterintuitive part: a dark or glossy island in a small kitchen photographs the same as a light one in most listing photos, but perimeter clearance is what determines whether a space feels tight in person not color, not finish, not island size on its own. A 30-inch light-colored island with 30 inches of clearance on every side reads as cramped the moment you’re standing in it, while a 36-inch dark island with 42 inches of clearance doesn’t. If you only have budget or time for one measurement before buying anything on this list, measure the clearance, not the island.
16. A Fold-Down Ledge for Kitchens With No Floor Space At All
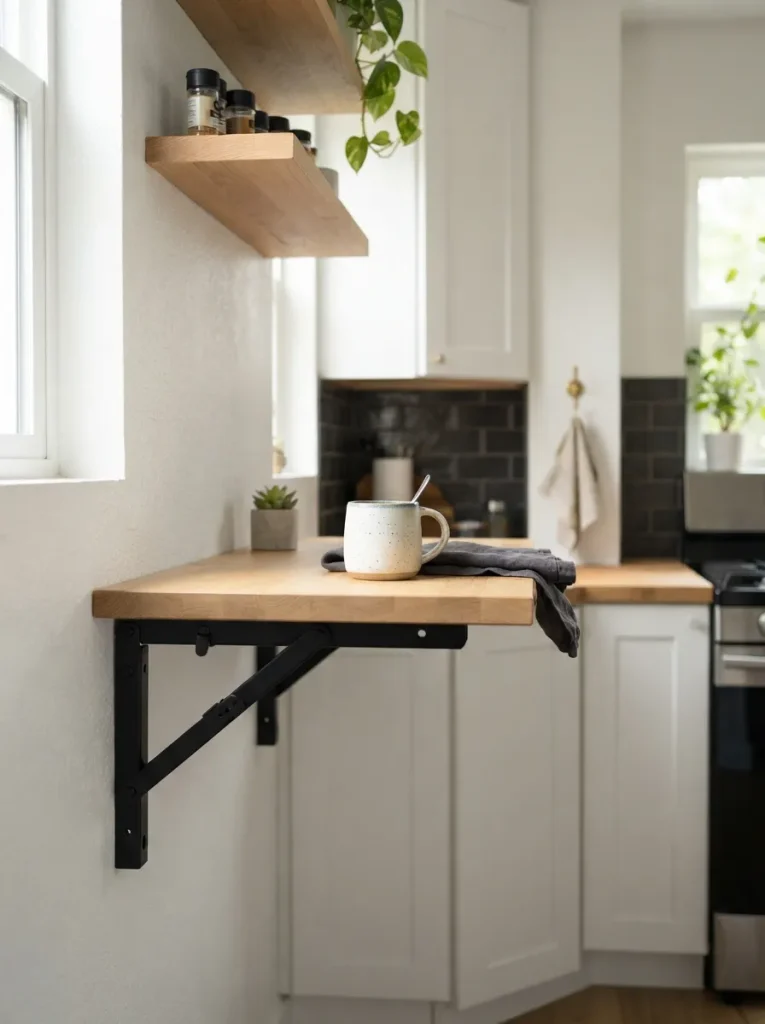
Mount a hinged shelf bracket to an open wall or the end of a cabinet run, and attach a slab of butcher block or laminate cut to fit fold it up against the wall when it’s not in use, and drop it down to counter height for quick prep or a stand-up breakfast.
This is the option for galley kitchens and studio layouts where there isn’t floor space for any freestanding island, mobile cart included. Rated folding brackets typically hold 25 to 50 pounds when extended, which covers prep work and casual dining but won’t support a stand mixer or heavy cast iron left sitting on it long-term. The same fold-down logic that makes tiny apartments livable applies directly here small-footprint furniture tricks used to make cramped rooms feel bigger translate well to a galley kitchen with the same square-footage problem.
Small-Space Tip: Paint the fold-down ledge the same color as the wall behind it folded up, it disappears almost completely instead of reading as an obvious appliance bolted to the wall.
17. A Pull-Out Counter Extension Hidden Inside a Cabinet
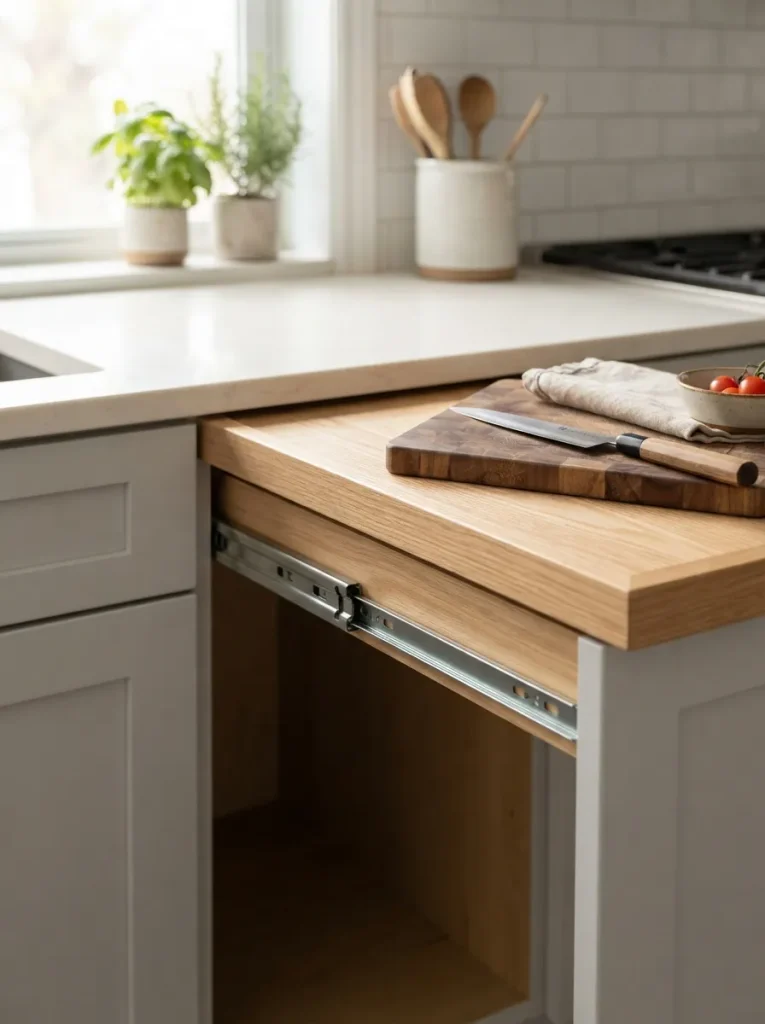
A slab of counter material mounted on drawer slides and hidden inside a base cabinet pulls out flush with the existing countertop height, then pushes back in and disappears when you’re done. From across the room it just looks like a normal cabinet front nothing suggests there’s 18 to 24 inches of extra prep surface folded away inside.
This is the option for kitchens too tight for even a mobile cart to have a parking spot; the extension lives entirely within the footprint of cabinetry you already have. Heavy-duty, full-extension drawer slides rated for at least 100 pounds are worth the upgrade over standard slides a sagging pull-out won’t sit flush with the counter above it.
How to Start Your Small Kitchen Island Upgrade
The right first move is almost always a tape measure, not a showroom visit. Walk your kitchen’s main path stove to sink, sink to fridge and note the narrowest point before you consider any island on this list. A general guideline used by kitchen designers puts comfortable single-cook clearance at around 42 inches and closer to 48 inches if two people regularly cook side by side; anything under that, and even the smallest rolling cart will feel like an obstacle rather than a helper.
The most common fixable mistake is buying an island sized to the room on paper instead of the room in use accounting for the island itself but not for open drawers, a pulled-out stool, or a person standing at the stove with the oven door down. Before committing to a size, tape the island’s footprint onto the floor with painter’s tape and move through the space for a day or two.
Three items under $50 make almost any small-island idea work better without a bigger renovation: a slim drawer organizer tray sized for a toe-kick drawer or open shelf, a jar of food-grade mineral oil to condition a butcher block top, and an over-the-sink cutting board that adds temporary prep space on nights the island’s already full.
A rolling cart or console-style island is a single-afternoon project from delivery to first use most of the time goes to assembly, not installation. A built-in option like a toe-kick drawer, a fold-down wall ledge, or a pull-out counter extension runs closer to a full weekend once you factor in measuring, cutting, and mounting hardware properly. Budget-wise, a solid rolling cart starts around $80 to $150, while custom built-in extensions with hardware and materials tend to land between $200 and $500 depending on the finish.
Ready to Make Your Small Kitchen Work Harder?
Seventeen small kitchen island ideas, and not one of them requires knocking down a wall from a $90 rolling cart to a mirrored cabinet front to a pull-out counter hidden in a drawer, the common thread is picking the trick that matches how you actually move through your kitchen. Start small: measure your clearance this week, even if you don’t buy anything for months. A single change swapping in task lighting, or finally using that toe-kick gap adds up faster than waiting for the budget for all seventeen at once.
The right island, at the right scale, should make the kitchen feel calmer to stand in, not more crowded. Pin the ideas that fit your layout now, so they’re easy to find again when you’re ready to start.
Keep Exploring
- 14 Small Kitchen Storage Ideas That Don’t Require a Renovation
- 11 Small Bathroom Storage Ideas for Tight Spaces
- 9 Kitchen Cart Styling Ideas to Make a Small Kitchen Feel Finished