20 Button Crafts for Adults That Actually Use Up Your Button Stash
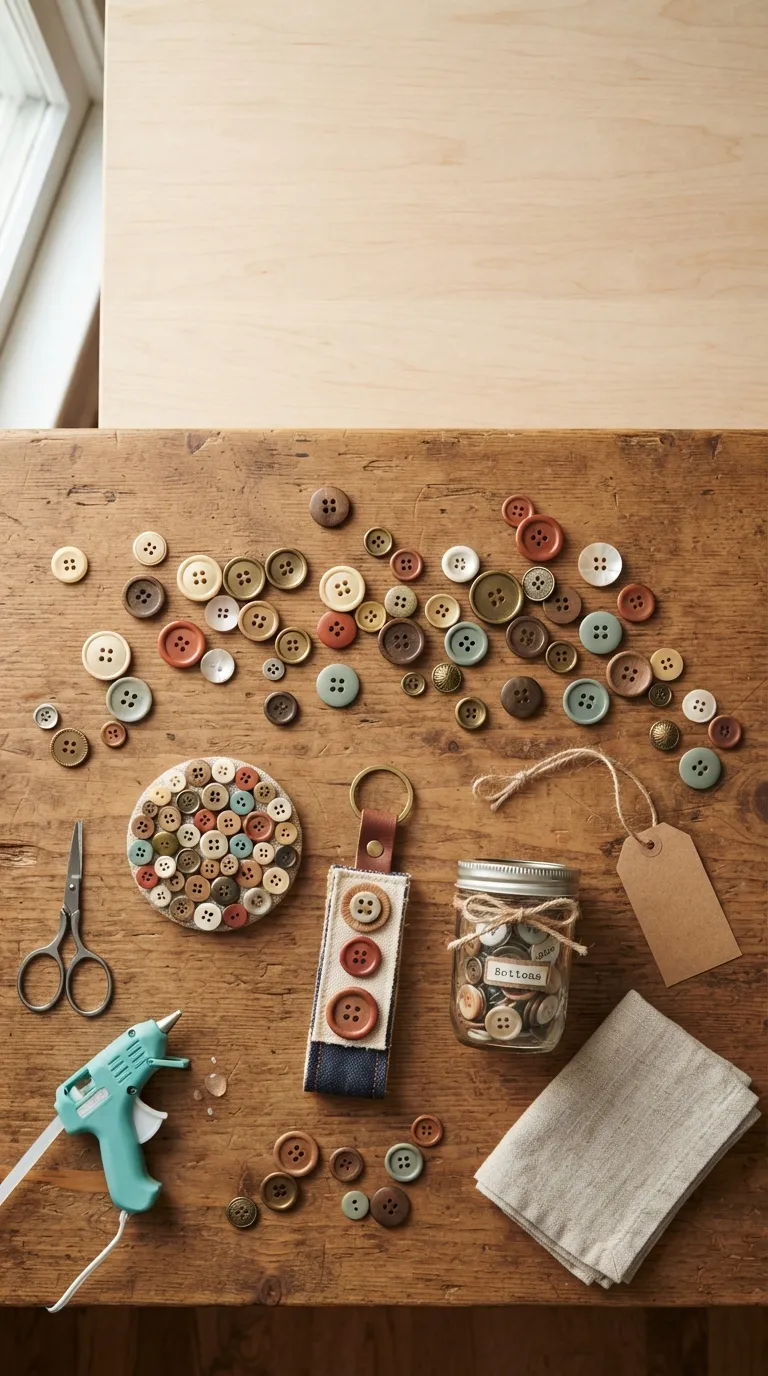
Button crafts are small-scale, no-power-tool projects that turn a jar of spare buttons into something you’d actually display. This guide walks through 20 button crafts for adults quick wins, wearable pieces, and slower weekend projects organized so you can jump to whatever fits your afternoon.
There’s a particular kind of satisfaction in sorting buttons by size before you even pick a project it’s fidgety, quiet work, and it turns a junk drawer into raw material. Buttons are forgiving, too: mismatched colors read as intentional once they’re grouped with a little logic, and a slightly crooked glue job hides under the next button over. Grab whatever’s rattling around in that tin. You’re about to use most of it.
Jump To
- Why Button Crafts Make Such a Difference
- 20 Button Craft Ideas Worth Making
- How to Start Your Button Crafting
- Ready to Put That Button Jar to Work?
Why Button Crafts for Adults Make Such a Difference
Button crafting is having a real resurgence as people clean out inherited sewing kits and thrifted jars loose buttons show up cheap or free at estate sales and thrift stores, making this one of the most affordable craft categories going.
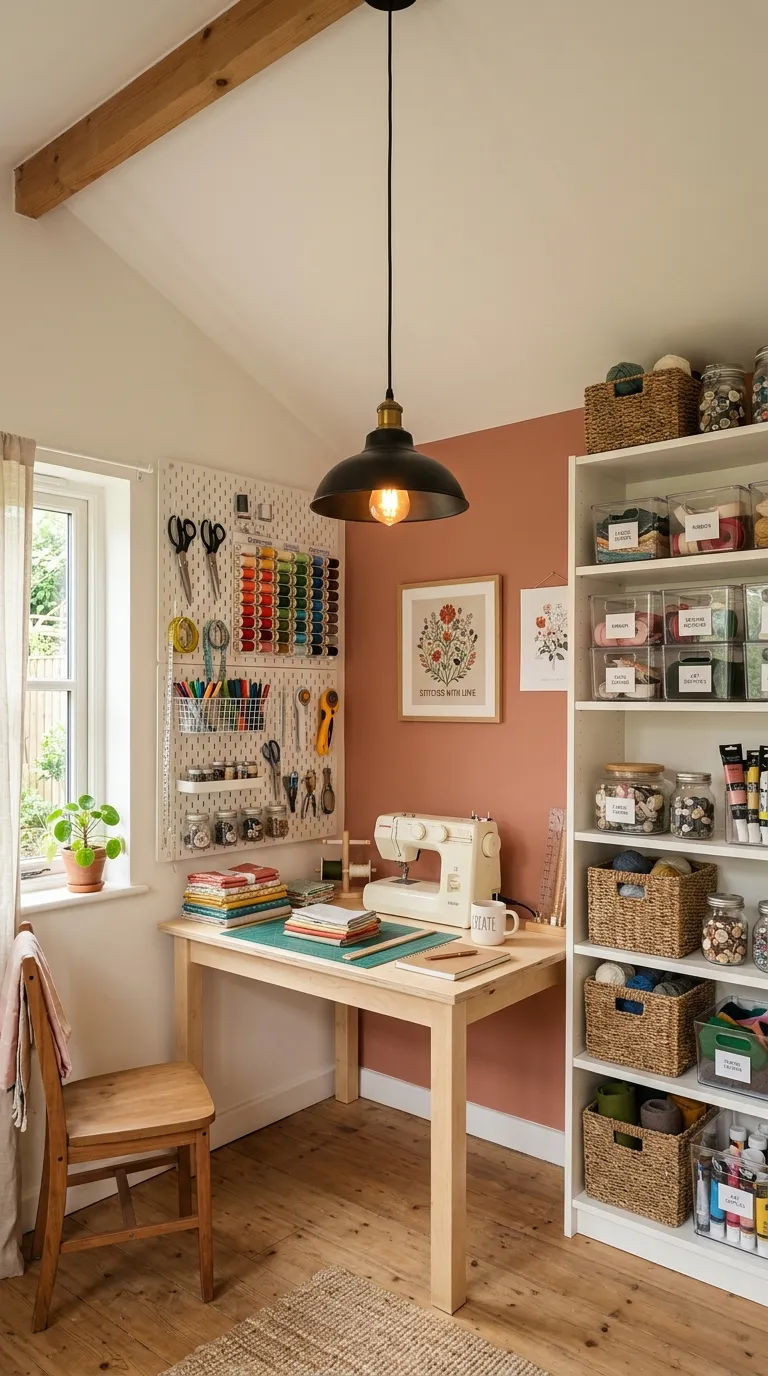
Wood, glass, horn, and resin buttons each behave differently under glue: mixed materials hold up best for handled pieces like keychains, while resin works fine for flat, low-handling art. It scales down easily most projects need nothing more than a kitchen table.
| Best starting point | Sorting your button stash by color and size |
| Biggest impact area | Small wearables and no-sew home accents |
| Budget to start | $15–$30 for a mixed button lot and glue |
| Time to complete | 20 minutes for a quick project, a full day for a wreath or mosaic |
20 Button Craft Ideas Worth Making
1. No-Sew Button Coasters That Protect Every Surface
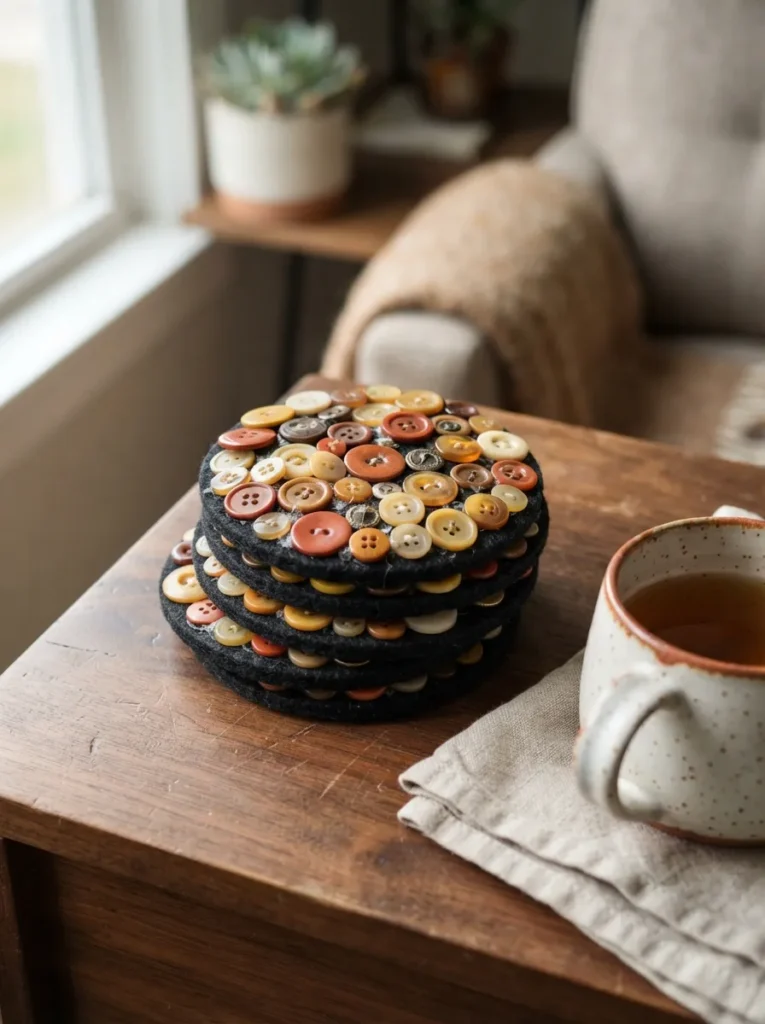
What it looks like: Clustered, slightly uneven like the buttons decided their own spacing.
Why it works: Felt gives the buttons a matte base that keeps them from sliding around a glass table, and grouping buttons within one or two color families reads as designed instead of random. Size variation adds texture without needing a pattern.
How to copy it: Cut 4-inch felt circles, then hot-glue buttons from the outer edge inward so the last button sits dead center. Mix flat and slightly domed buttons for texture, and stick to buttons under an inch so the coaster stays flat enough to hold a mug.
Best for: Beginners who want a finished project in under 30 minutes.
Pro Tip: Seal the finished coaster with a thin coat of Mod Podge and let it cure for 24 hours it keeps hot mugs from softening the glue underneath.
What You’ll Need
| Product |
|---|
| Assorted vintage-style button mix, 300+ pieces |
| 4-inch round felt sheets in neutral tones |
| Mini hot glue gun with fine-tip nozzle |
| Matte spray sealant for craft surfaces |
2. Wrapped Button Bangle Bracelet
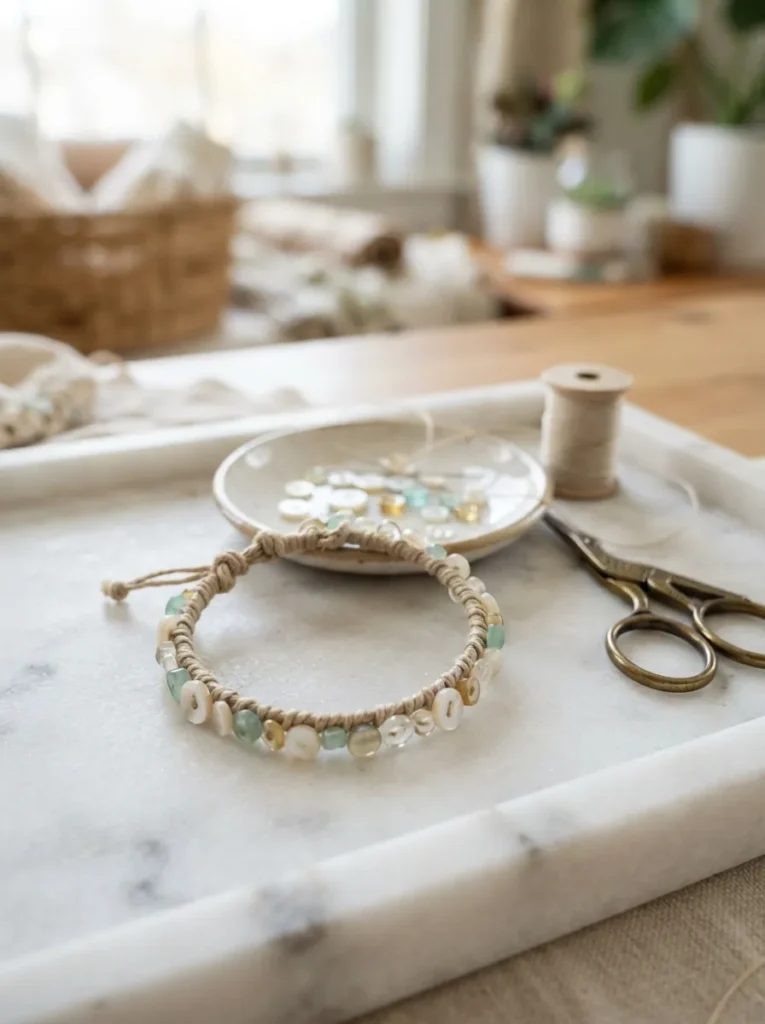
What it looks like: Delicate and a little imperfect no two buttons sit at quite the same angle.
Why it works: Threading buttons on cord instead of gluing them keeps the bracelet flexible enough to actually wear, and mixing two button finishes matte and glossy adds depth without adding more colors. The asymmetry reads as handmade, not sloppy.
How to copy it: Thread 2-hole buttons onto 1mm waxed cord, alternating sizes, then knot every third button so the piece doesn’t shift to one side over time. Finish with a sliding knot closure instead of a clasp easier to tie one-handed.
Best for: Anyone who wants a wearable project they can finish while watching TV.
Quick Win: No cord on hand? Elastic jewelry cord works too just double it up so the knots don’t slip loose after a few wears.
3. Layered Button Keychain Fob (One of the Easiest Button Crafts for Adults)
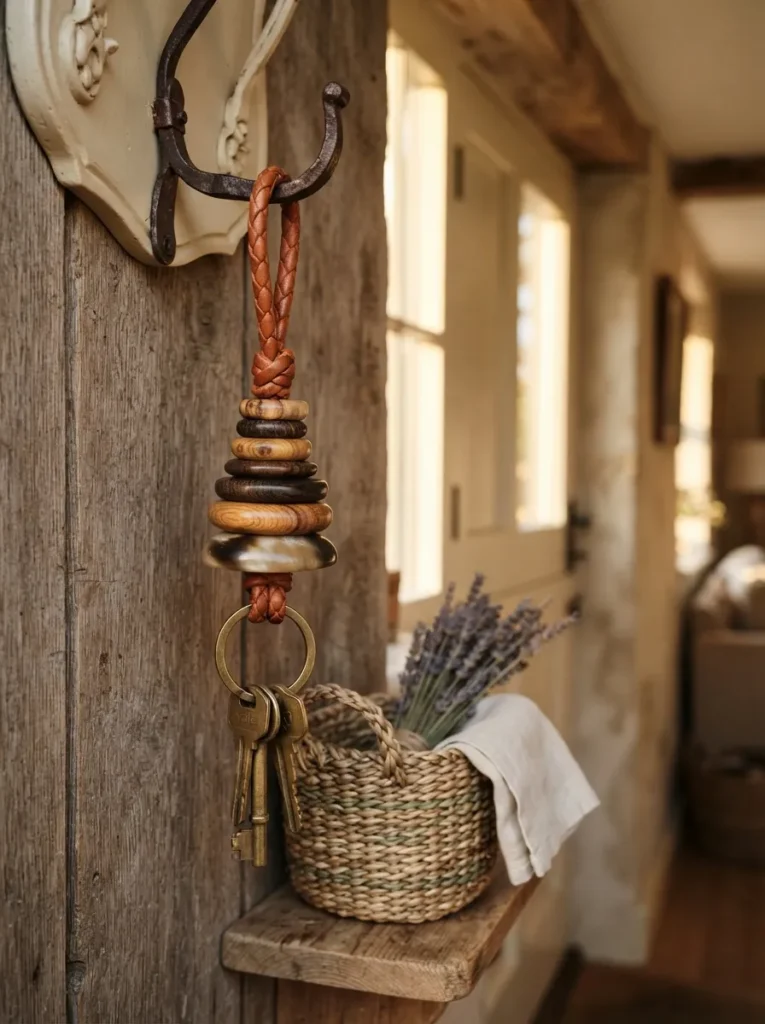
What it looks like: Stacked and substantial it has real weight in your hand.
Why it works: Layering buttons by descending size creates a natural taper, so the fob avoids looking like a random pile, and leather cord holds up to daily key-ring wear better than thread. Wood and horn buttons age well with handling.
How to copy it: Stack four to six buttons largest to smallest on doubled leather cord, securing each layer with an overhand knot before adding the next. Finish with a jump ring and keyring rather than tying directly to the keys easier to swap later.
Best for: People who want a low-cost, high-use gift for someone else.
Small-Space Tip: This is a genuinely good stash-user for buttons too small or oddly shaped for bigger projects keep a little jar of “leftover” buttons just for fobs.
Up next: the wall art idea that uses your loudest, most mismatched buttons on purpose.
4. Rainbow Ombré Button Art on Canvas
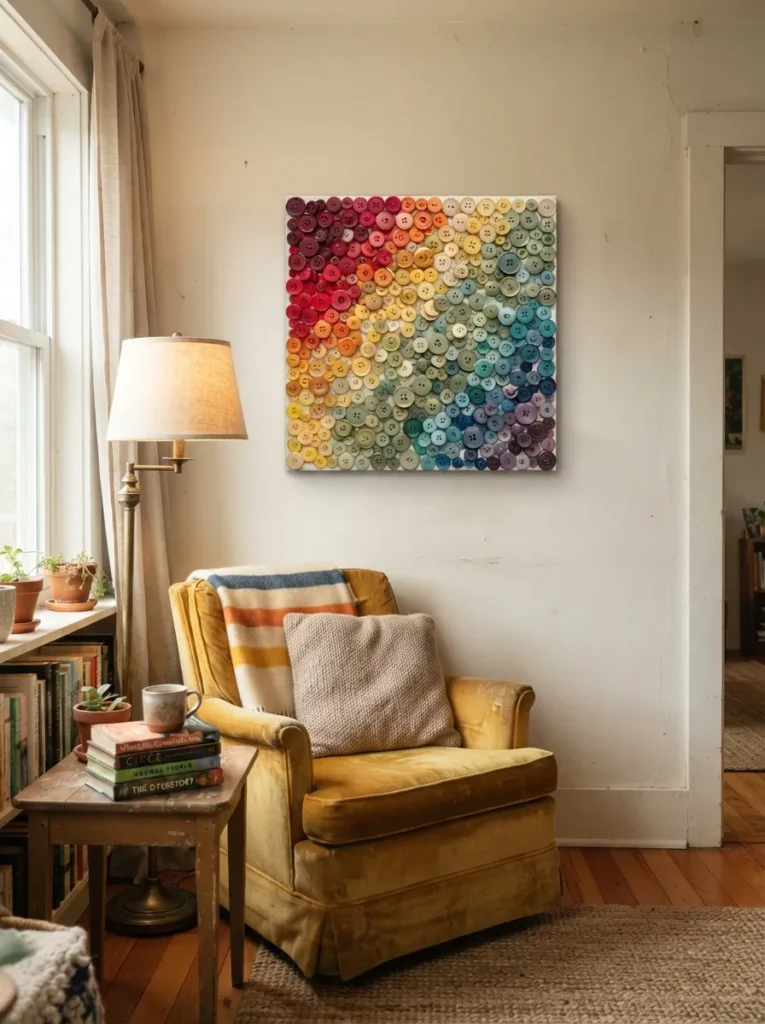
What it looks like: Bold and a little loud, in the best way it reads as art, not a craft project.
Why it works: A gradient gives even completely mismatched buttons a built-in organizing principle, so color becomes the design instead of something to hide. Working in rows also means you never have to plan the whole canvas at once.
How to copy it: Sort buttons into six to eight color groups, then glue them in horizontal rows on an 8×10 canvas, blending two colors together at each row’s edge instead of switching cleanly. Overlap buttons slightly so no canvas shows through.
Best for: People with a genuinely chaotic button collection and nothing to lose.
Warning: Craft glue alone won’t hold a fully covered canvas upright on a wall use E6000 or a hot glue gun, and let heavier canvases cure flat for 48 hours before hanging.
What You’ll Need
| Product |
|---|
| 8×10 inch stretched canvas, blank |
| E6000 craft adhesive |
| Rainbow-sorted button variety pack |
| Canvas wall-hanging hardware kit |
5. Geometric Button Wall Mosaic
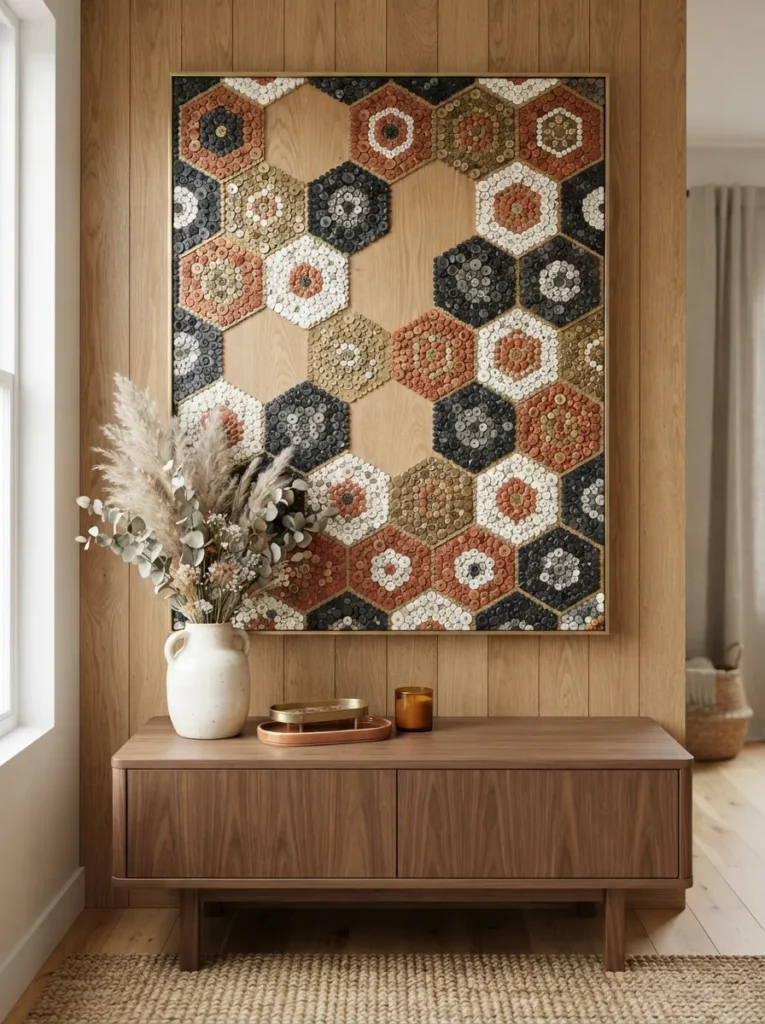
What it looks like: Structured and calm the pattern does the work, not the color.
Why it works: Repeating a single geometric shape across a large surface gives buttons a sense of order even when colors vary widely, and leaving negative space between clusters keeps a big piece from feeling heavy on the wall. Scale matters more than button variety here.
How to copy it: Sketch a light pencil grid of hexagons or diamonds directly on a wood panel, then fill each shape with buttons in a single tone before moving to the next. Keep at least half an inch of bare panel between shapes so the pattern stays legible from across the room.
Best for: Confident crafters tackling a statement piece for a larger wall.
Styling Note: Stain the exposed wood panel a shade darker than your darkest button before you start raw wood reads unfinished next to buttons this saturated.
6. Button-Tufted Ottoman Accent
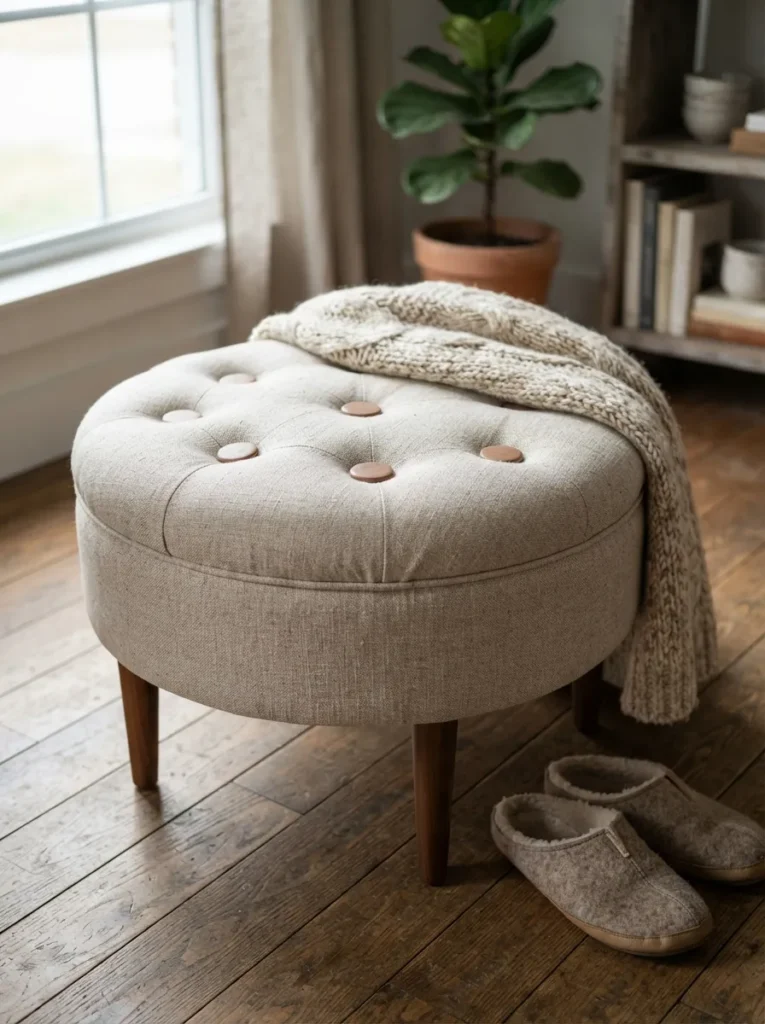
What it looks like: Substantial and tactile you notice the texture before the color.
Why it works: Swapping standard upholstery buttons for larger, flatter craft buttons changes the whole scale of a tufted piece, making it feel custom instead of catalog. A button with a drilled second hole stays secure under the pull of upholstery thread.
How to copy it: Drill a small center hole through a sturdy 1.5-inch button, then use it in place of a standard tufting button with heavy-duty upholstery thread and a long needle. Pull each tuft to matching depth before knotting off underneath.
Best for: Intermediate crafters comfortable with basic upholstery tools.
Important: Most flat craft buttons aren’t rated for the tension upholstery tufting puts on them test-pull a spare button on scrap fabric before committing to the whole ottoman.
The next idea takes less time than boiling a kettle and it fixes a problem every lamp has.
7. Button-Trimmed Lampshade Border
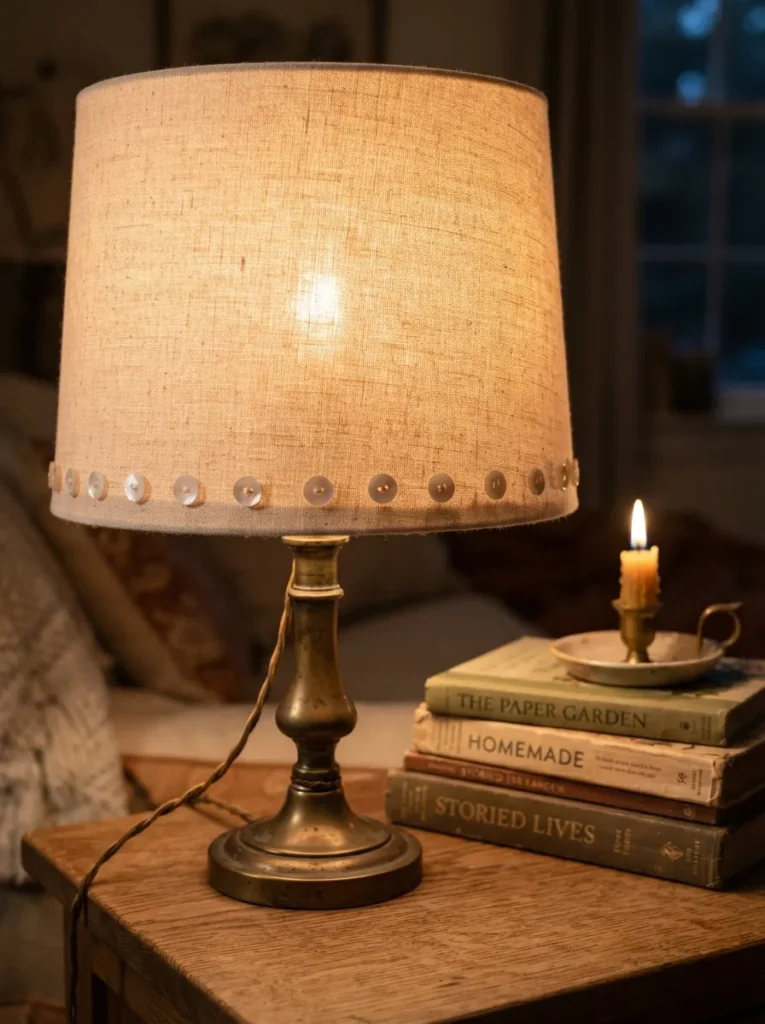
What it looks like: Warm and quietly finished the kind of detail people notice on their second visit, not their first.
Why it works: A single evenly spaced row along the hem reads as intentional trim rather than decoration, and small flat buttons won’t cast odd shadows once the lamp is lit. Consistent spacing matters more than button choice here.
How to copy it: Measure your shade’s circumference and divide by your button width to find even spacing, marking dots lightly in pencil first. Glue buttons flat-side down with fabric glue, not hot glue, since hot glue can warp thin shade material.
Best for: Renters looking for a low-commitment lamp update.
Budget Version: Skip buying a new shade entirely this works on any existing lampshade you already own, and a full row typically uses fewer than 30 buttons.
8. Button-Covered Monogram Letter A Statement Button Craft for Adults
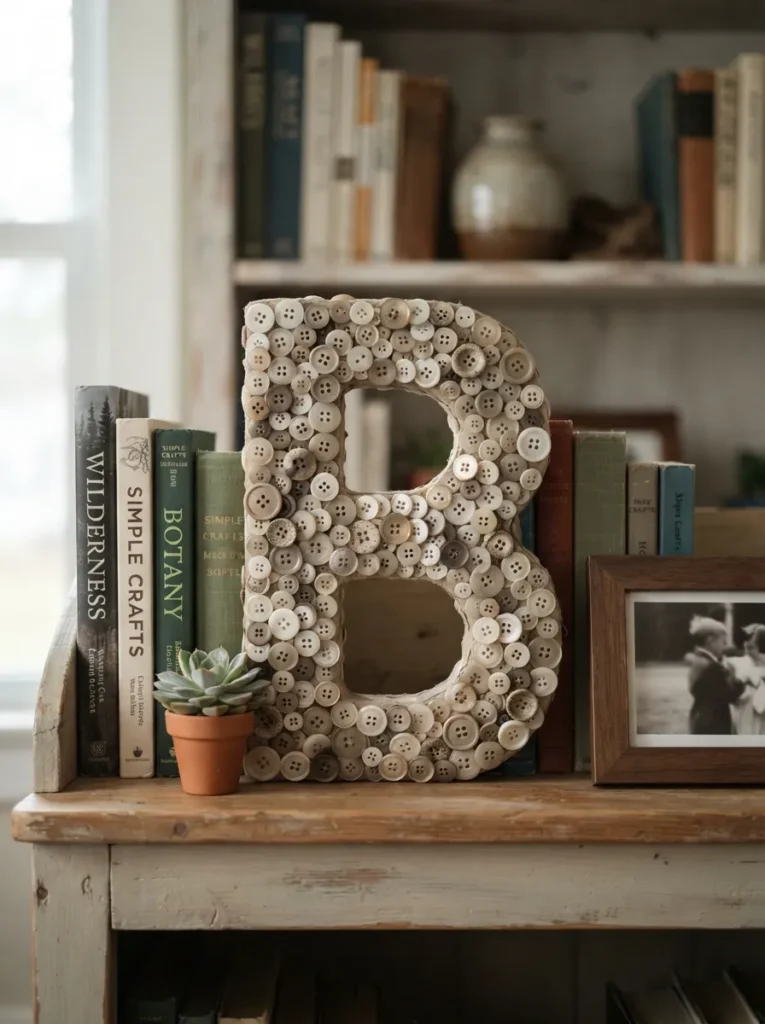
What it looks like: Dense and layered the letter’s shape almost disappears under texture.
Why it works: Covering a dimensional letter completely, edge to edge, avoids the half-finished look that happens when buttons are scattered sparsely across a flat surface. Sticking to one or two neutral tones keeps a busy technique from competing with everything else on a shelf.
How to copy it: Start at the outer edge of the letter and work inward in tight rows, gluing the largest buttons first and filling gaps with smaller ones last. Buy roughly 150 buttons for a 12-inch letter you’ll use more than you expect.
Best for: Anyone decorating a nursery, gallery wall, or bookshelf styling project.
✅ Before You Glue:
- [ ] Sort buttons by size into three piles: large, medium, small
- [ ] Dry-lay the largest buttons around the letter’s outer edge first, without gluing
- [ ] Glue the outer edge layer and let it set for 10 minutes
- [ ] Fill inward with medium buttons, then finish gaps with the smallest pieces
What You’ll Need
| Product |
|---|
| 12-inch papier-mâché letter, unfinished |
| Neutral-toned button bulk mix, 150+ pieces |
| Precision-tip craft glue |
| Small sawtooth hanger for the back |
9. Mismatched Button Drop Earrings
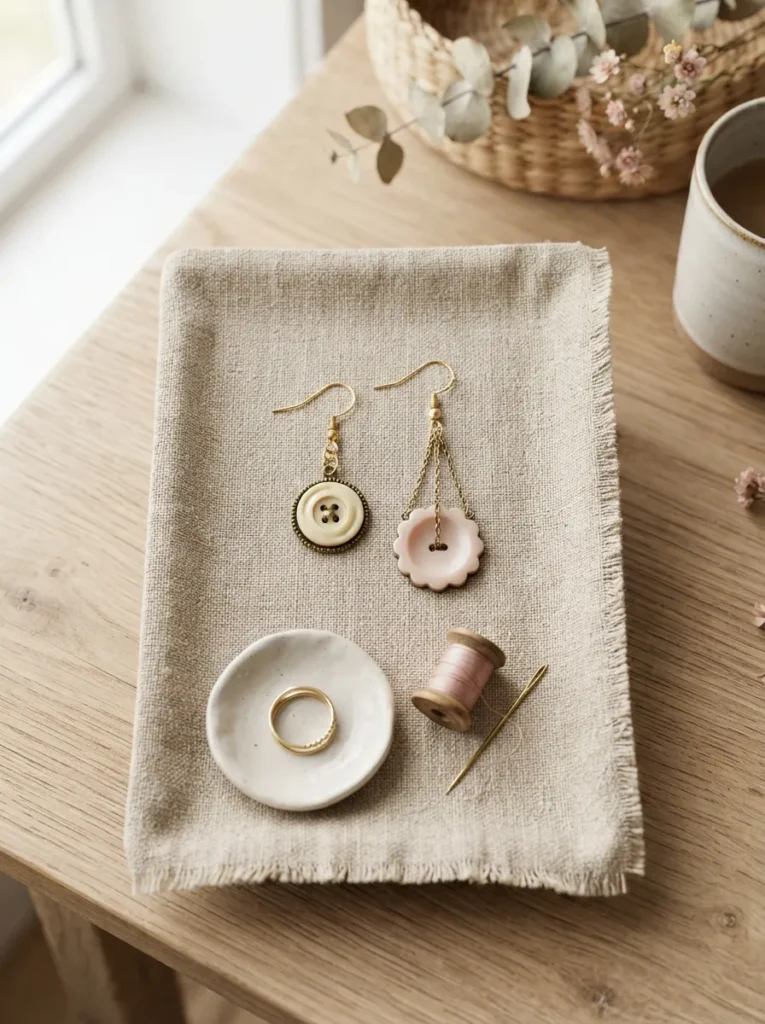
What it looks like: Playfully uneven the mismatch is clearly on purpose.
Why it works: Pairing two different button shapes in the same color family reads as a styling choice rather than a mistake, which means you don’t need matching buttons at all just a consistent palette. That’s the whole trick to using up odd, single leftover buttons.
How to copy it: Attach a jump ring through each button’s shank or drilled hole, then add an earring hook. Keep both buttons within one shade family, even if the shapes differ completely, so the pair still reads as intentional.
Best for: Crafters with a jar full of “just one” leftover buttons.
Mistake to Avoid: Buttons with only sew-through holes need a tiny drilled hole for the jump ring trying to loop wire through the existing holes usually snaps thin buttons in half.
This next one is the display idea most people don’t think to try until they’ve already made everything else.
10. Color-Sorted Button Jar Display
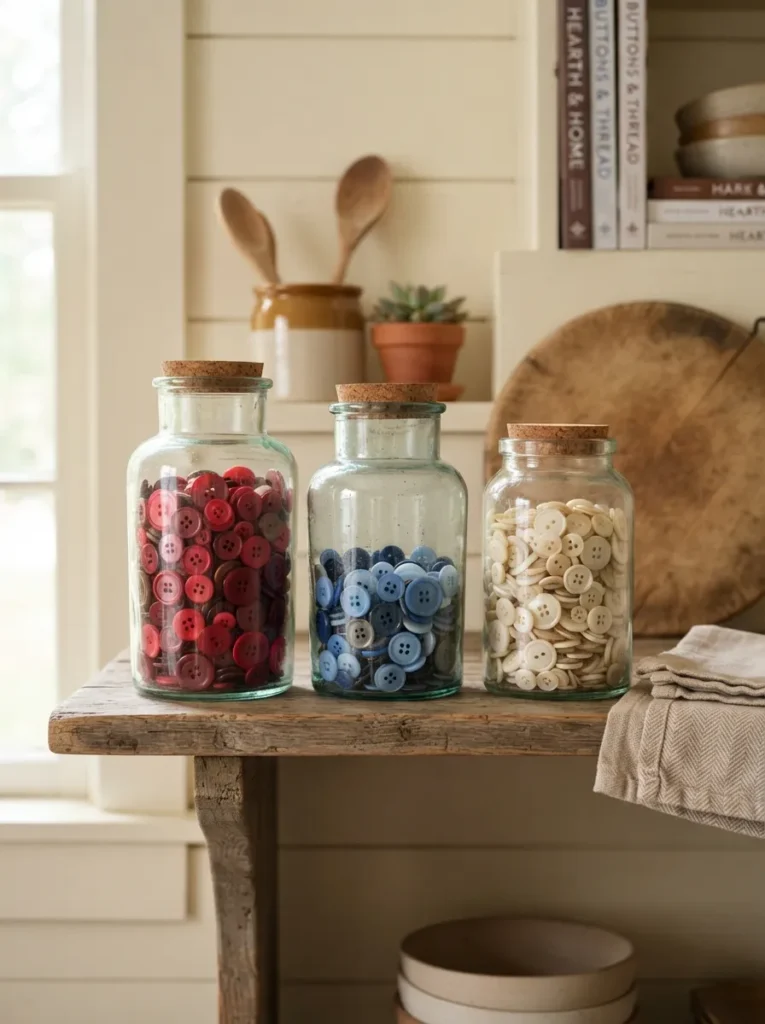
What it looks like: Simple and satisfying, the way sorted things always are.
Why it works: This isn’t really a craft so much as functional display grouping buttons by color turns storage into decor and makes your stash genuinely usable for future projects, since you can see what you have at a glance. Uniform jars matter more than the buttons themselves.
How to copy it: Sort your full button collection into three to five color families, then fill matching mason jars about two-thirds full packing them completely hides the color and defeats the point. Cork or glass lids read better on open shelving than plastic ones.
Best for: Anyone with more loose buttons than active projects.
Pro Tip: Save your true oddballs mismatched singles, damaged buttons in a separate jar labeled “scraps.” That’s your bin for keychains and earrings, so nothing gets wasted.
11. Button-Stacked Curtain Tiebacks
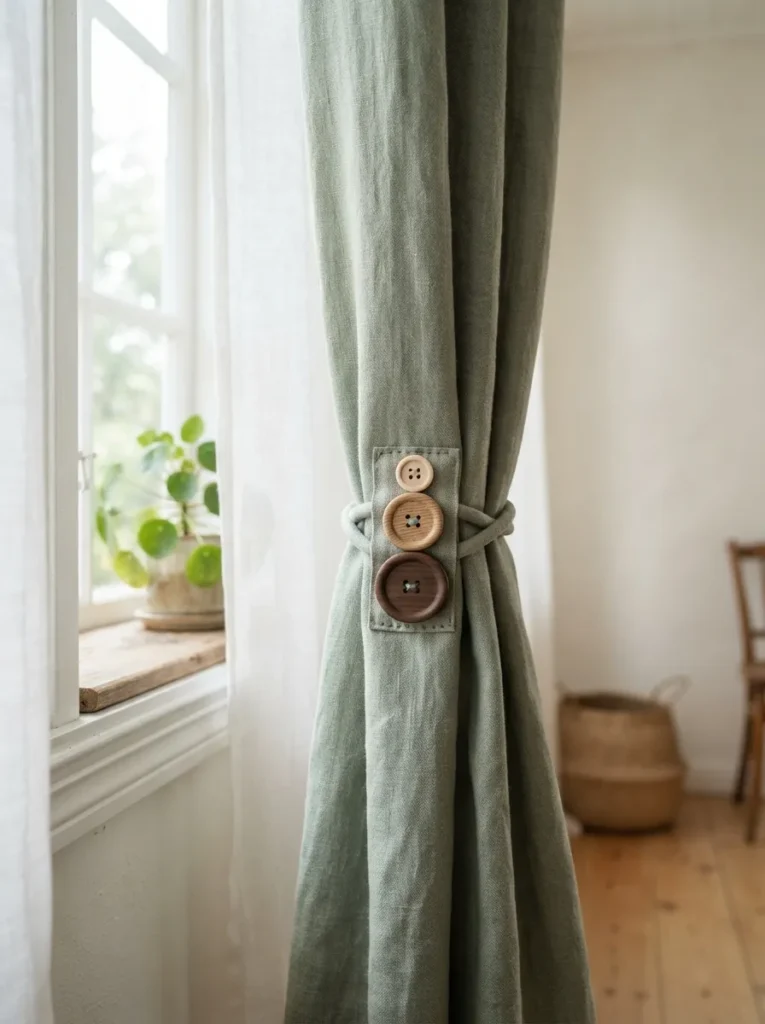
What it looks like: Understated you’d assume it came with the curtains.
Why it works: Stacking three graduated buttons at the tieback’s focal point gives it a finished, purchased look, while fabric-covered cord keeps the piece from looking obviously handmade. This is one of the few button projects where restraint outperforms more buttons.
How to copy it: Sew or glue three buttons large, medium, small stacked at the center of a fabric-covered cord or ribbon tieback. Match the button tones to your hardware finish, not your curtain color, for a more cohesive look.
Best for: People styling a whole room who want small matching details throughout.
Quick Win: Already own plain tiebacks? Skip sewing entirely and hot-glue the button stack directly onto the existing hardware.
12. Button Push Pins for a No-Holes Bulletin Board
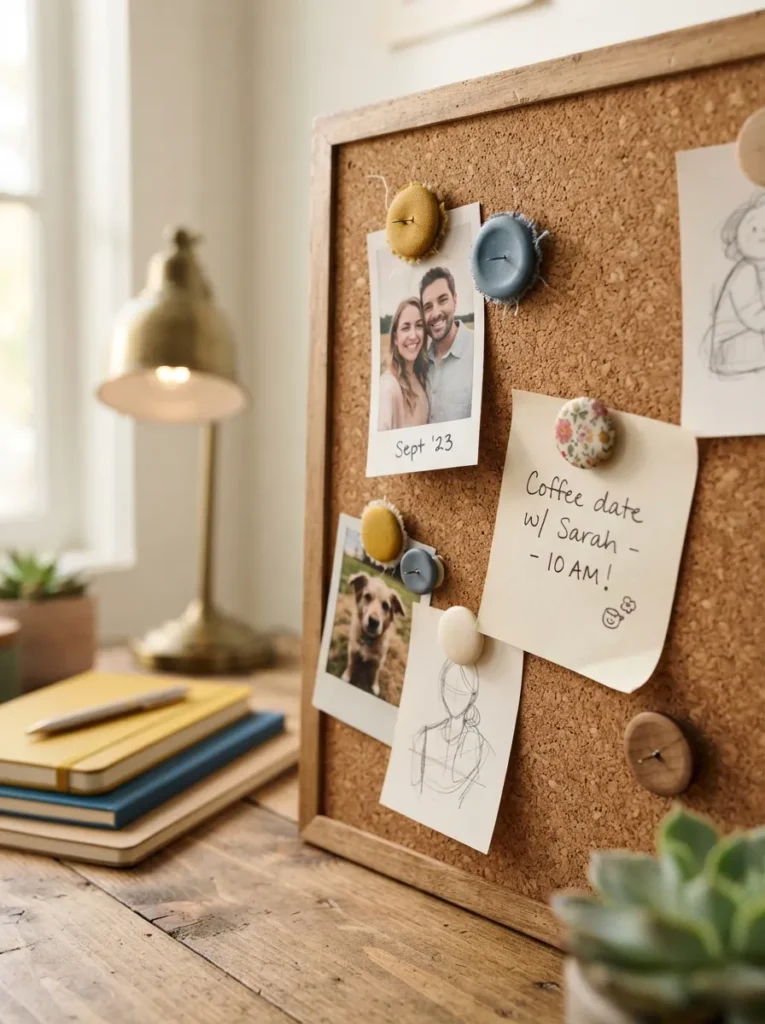
What it looks like: Small and useful a craft project that also does a job.
Why it works: This is one of the only genuinely functional ideas on this list rather than purely decorative, and small flat buttons hide the metal pin entirely so the finished piece looks intentional, not repurposed. It’s also a great way to use up tiny buttons too small for anything else.
How to copy it: Hot-glue a flat-headed thumbtack directly to the back of a small button, holding it in place for 15 seconds while the glue sets fully. Make six to eight at once they’re fast, and you’ll use more than you think.
Best for: Anyone who wants a genuinely useful button project, not just a decorative one.
Small-Space Tip: These double as a compact way to display a rotating photo collection on a small wall no frames, no nail holes.
Next up: a small button detail that makes any journal look gift-ready.
13. Button-Embellished Journal Cover
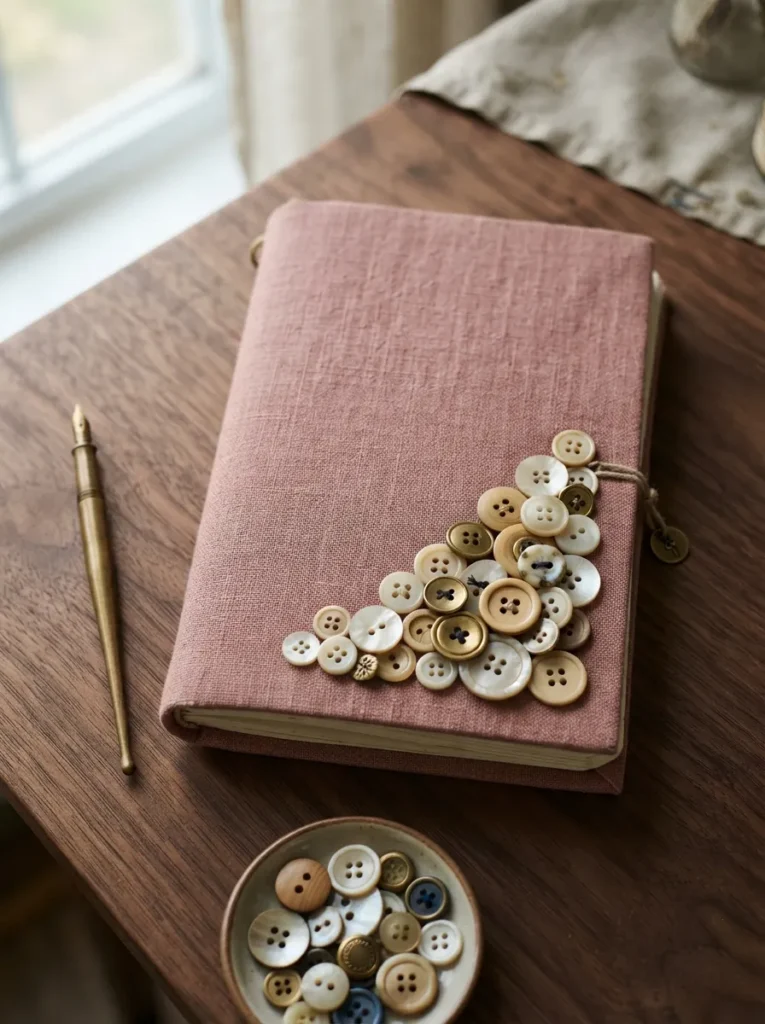
What it looks like: Personal and a little precious the kind of thing you’d keep.
Why it works: Clustering buttons in one corner rather than spreading them across the whole cover keeps the journal usable a fully covered cover is uncomfortable to write on when it’s open flat. Restraint is the design principle here, not coverage.
How to copy it: Sew two or three buttons on with embroidery floss, then fill in around them with hot-glued buttons of similar tone. Keep the cluster within the bottom two inches of the cover so it doesn’t interfere with the spine when the journal closes.
Best for: Gift-givers looking for a personalized, low-cost handmade gift.
Important: Hot glue alone won’t survive a journal that gets tossed in a bag daily sew at least the anchor buttons on with heavy-duty thread, then glue the rest around them.
What You’ll Need
| Product |
|---|
| Fabric-covered blank journal |
| Embroidery floss, neutral tones |
| Mixed dusty rose and brass button set |
| Curved craft needle |
14. Button-Bordered Photo Frame
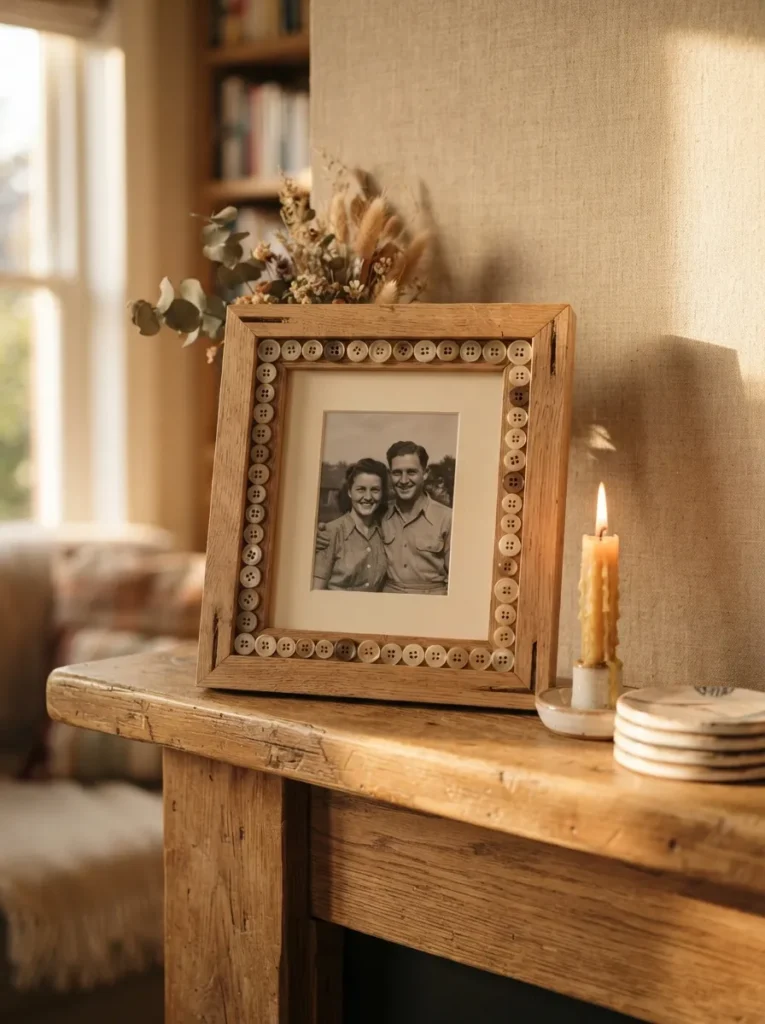
What it looks like: Framed, quite literally the buttons act like a second mat around the photo.
Why it works: Lining only the inner border, rather than covering the whole frame, keeps the photo as the focal point while still adding texture, and it uses far fewer buttons than a fully covered frame. Consistent button size along the border matters more than exact color matching.
How to copy it: Choose buttons all within a quarter-inch of the same size, then glue them in a single tight row around the frame’s inner opening, working corner to corner. Leave the frame’s outer wood or matting untouched for contrast.
Best for: Beginners who want a subtle, gift-ready project.
Styling Note: Group two or three of these frames together in slightly different button colors it reads as a matched set even though every frame is different.
15. Button Confetti Night-Light Jar
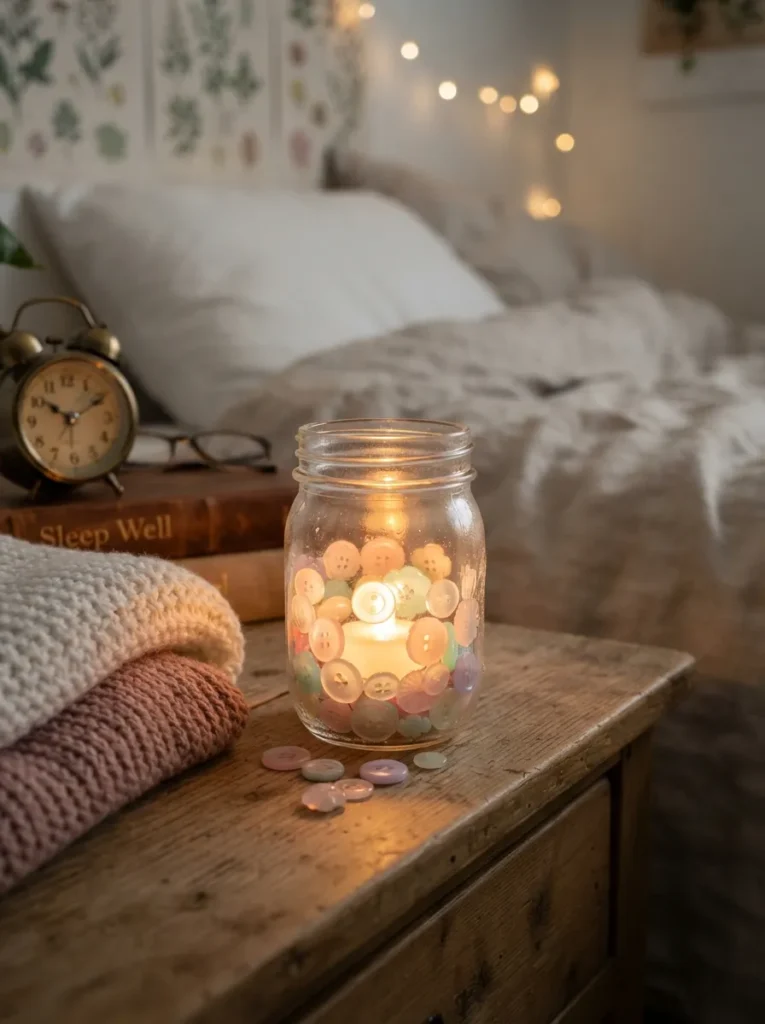
What it looks like: Soft and glowing a small, quiet detail for a nightstand.
Why it works: Loose buttons at the base of a jar catch and scatter light in a way that glued or stacked arrangements can’t, so this is one project where less structure actually looks better. Translucent or pearlized buttons amplify the effect most.
How to copy it: Fill a small mason jar about a third full with mixed pastel and translucent buttons, then nestle a flameless battery tea light down into them. Avoid overfilling the light needs room to diffuse rather than sitting buried.
Best for: Low-effort gifts and anyone wanting a soft bedside light.
Pro Tip: Battery tea lights only real flame near a jar full of plastic buttons is a genuine fire hazard, not just a design choice.
Up next: something to wear, not display and it uses more buttons than you’d expect.
16. Layered Button Statement Necklace
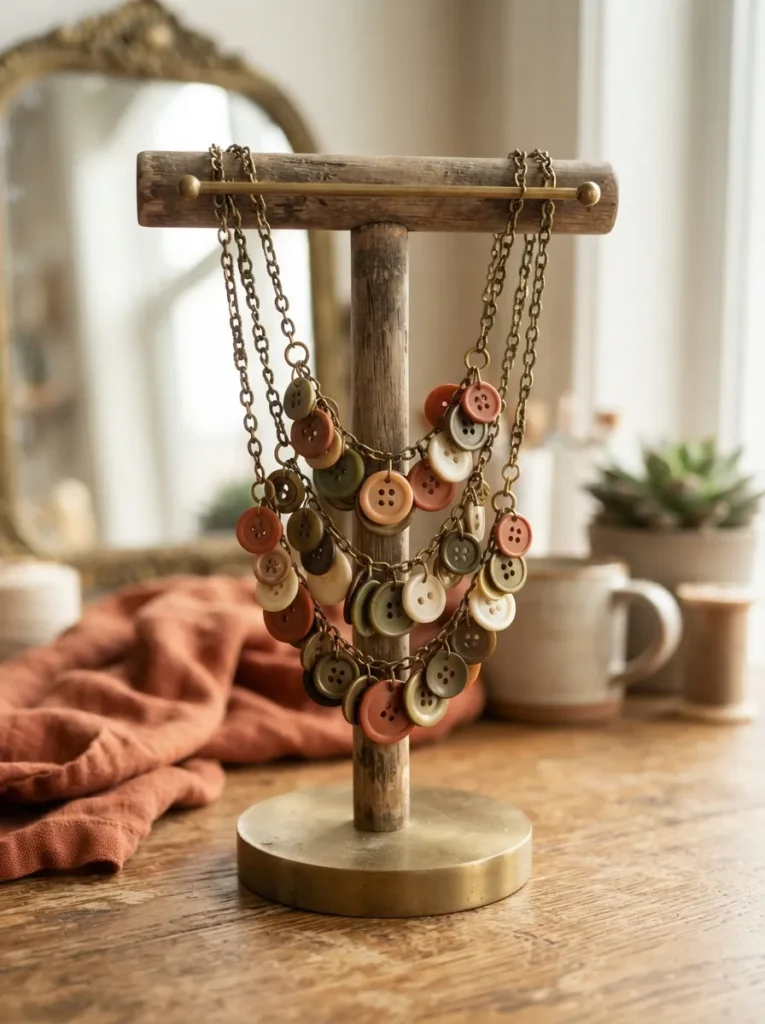
What it looks like: Layered and a little heavy-looking, in a good way it reads as jewelry, not a craft.
Why it works: Clustering buttons at the front of each chain strand, rather than spacing them evenly, mimics how real statement necklaces are weighted, and using three different chain lengths keeps the layers from tangling into one flat mass. Weight and placement do more here than button choice.
How to copy it: Attach five to seven buttons to jump rings, then distribute them unevenly across three chains of different lengths, clustering more toward the front center. Finish with a lobster clasp rather than tying it holds the weight better long-term.
Best for: Anyone comfortable with basic jewelry pliers and jump rings.
Budget Version: Old craft-store chain from a broken necklace works fine here this project is really about the buttons, and the chain rarely shows once it’s layered.
In my experience, the necklaces and bracelets are the projects people underestimate a full layered piece can eat through 15 to 20 buttons once you count every strand, more than most of the wall art ideas on this list. Buy more buttons than the project seems to need before you start; running out mid-cluster is the single most common reason these pieces get abandoned half-finished.
17. Ombré Button Wreath, the Boldest Button Craft for Adults on This List
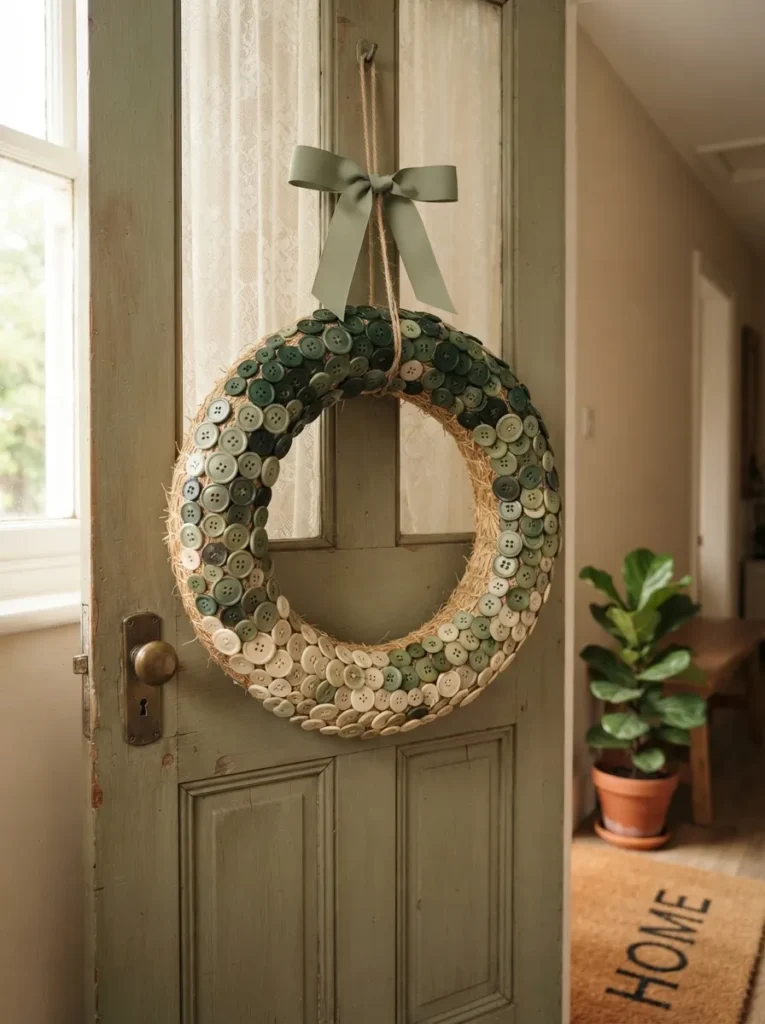
What it looks like: Full and a little wild at the edges it doesn’t look store-bought, and that’s the appeal.
Why it works: Working in a gradient from one end of the wreath to the other gives an otherwise chaotic mix of buttons a clear direction, and shingling buttons each row overlapping the last hides the wreath form completely without needing a single solid color. This is the most button-intensive project on the list.
How to copy it: Hot-glue buttons in overlapping rows around a straw wreath form, starting with your darkest color at one point and gradually lightening as you work around. Plan on 200 to 300 buttons for a 12-inch wreath this is not a small-stash project.
Best for: Experienced crafters ready for a full-day project with visible payoff this one earns its keep on a fall porch refresh.
Important: A fully button-covered wreath is heavy use a wire hanger rated for at least two pounds, not the thin ribbon loop that comes with most straw forms.
Two more to go starting with a five-minute furniture update.
18. Button-Topped Drawer Pull Accents
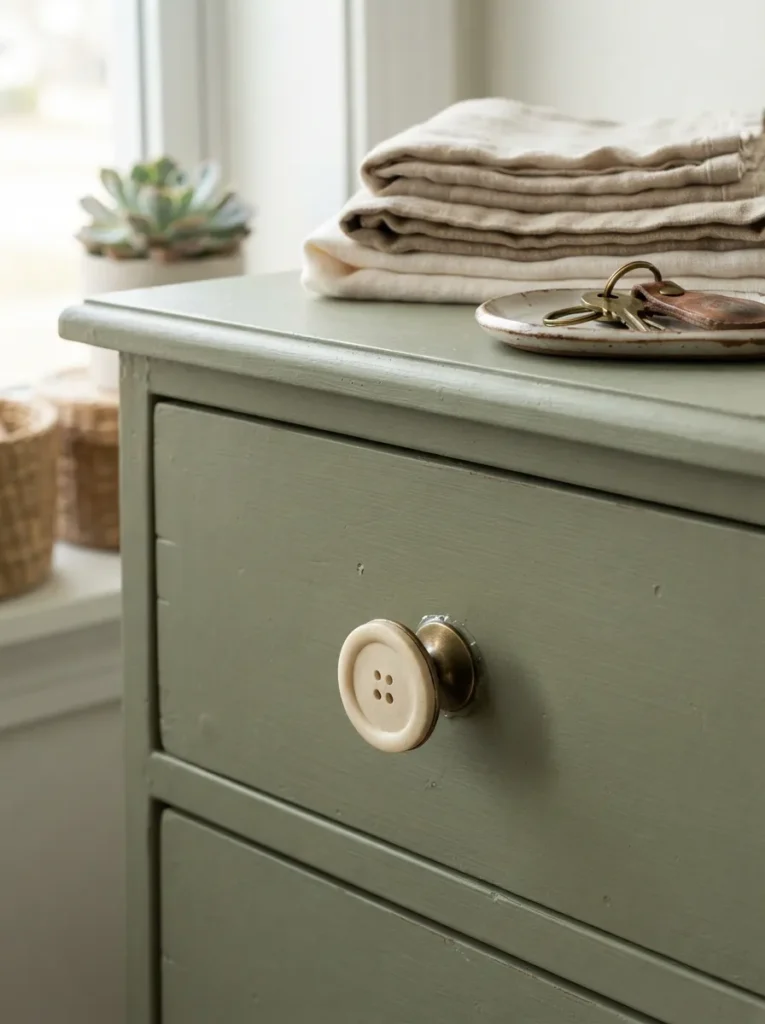
What it looks like: Small but noticeable the kind of update that makes people ask what changed.
Why it works: Gluing a large flat button directly onto an existing plain knob changes the entire visual scale of a dresser front without any tools or hardware removal, and it’s fully reversible since nothing is drilled or unscrewed. Consistent button size across all drawers matters more than the button design itself.
How to copy it: Choose one button style and size, then hot-glue it flush to the face of each existing knob or pull across the whole piece. Let each one cure for at least an hour before opening the drawer, or the button can shift under the pull of your fingers.
Best for: Renters and anyone updating furniture without committing to new hardware.
Mistake to Avoid: Skipping even coverage is the most common slip here do all the drawers in one sitting so button size and placement stay consistent across the whole piece.
19. Button-Framed Round Mirror
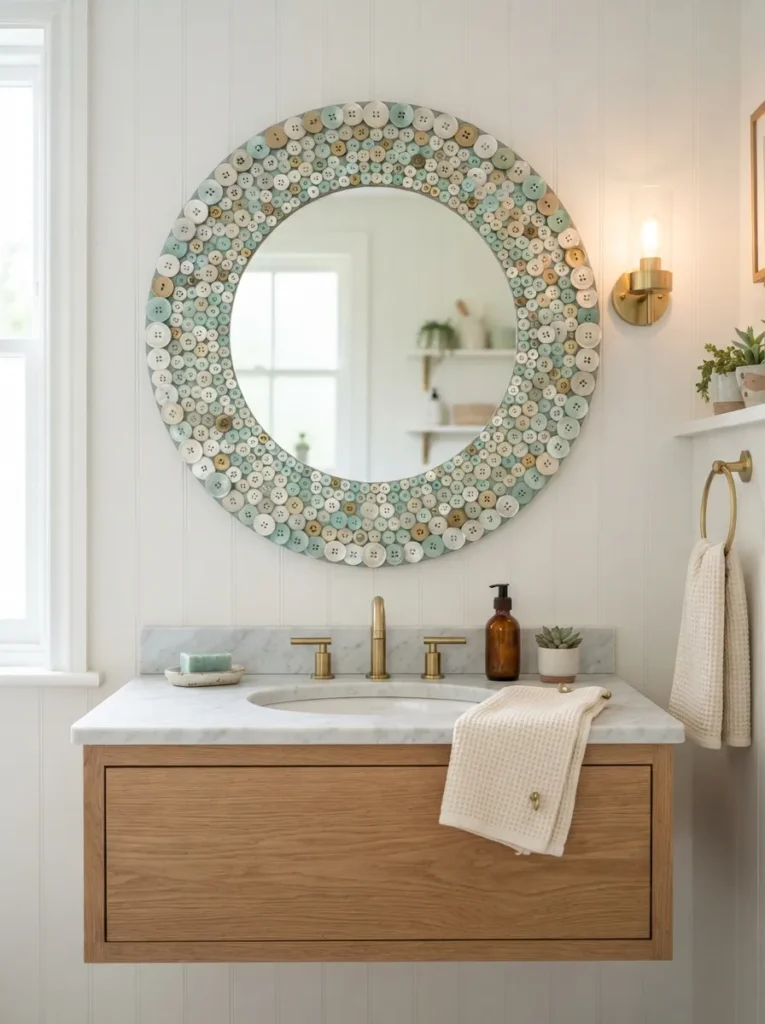
What it looks like: Substantial and a little glamorous the buttons do the work a carved wood frame usually does.
Why it works: Grading button size from large at the outer edge to small near the glass creates a natural taper that mimics a traditional beveled frame, and it works on any plain round mirror blank without needing woodworking skills. The gradient in size matters more than the gradient in color here.
How to copy it: Start with the largest buttons glued flush against the mirror’s outer edge, then work inward in concentric rings using progressively smaller buttons until you reach the glass. Leave a consistent quarter-inch gap from the mirror surface so glue doesn’t touch the reflective coating.
Best for: Confident crafters wanting a genuinely custom bathroom mirror or entryway piece.
Pro Tip: Buy a plain round mirror with a wide flat wood or MDF border, not a frameless one you need real surface area to glue onto.
What You’ll Need
| Product |
|---|
| Round mirror with flat wood border, unfinished |
| Graduated button set, small to extra-large |
| Heavy-duty craft adhesive |
| Mirror-rated wall hanging hardware |
20. Button Tree Wall Art (No Ornaments Needed)
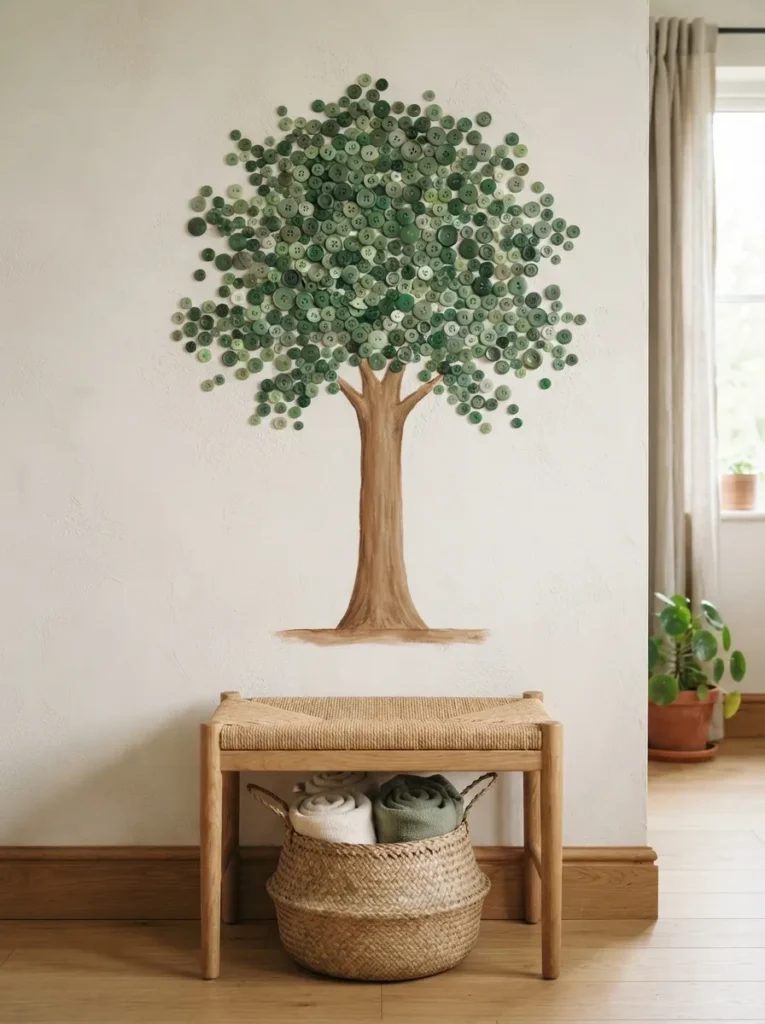
What it looks like: Graphic and a little sparse near the trunk the negative space is doing half the work.
Why it works: Clustering density at the canopy and thinning it out lower down mimics how a real tree actually reads visually, and gluing directly to a painted wall skips the cost and weight of a canvas or panel entirely. This is the most scalable project on the list as small or large as your wall allows.
How to copy it: Paint a simple trunk and branch outline directly on the wall, then glue buttons densely at the canopy area, spacing them further apart as you move outward toward the branch tips. Stick to two or three green tones so the shape stays legible from across the room.
Best for: Anyone who wants a big visual impact without buying a frame or canvas.
Quick Win: No painting required paint sample cards taped in a rough trunk shape work as a placement guide, then peel them off once the buttons are glued.
How to Start Your Button Crafting
What I’ve found with real button stashes is that sorting always comes before buying dump everything into one shallow tray, group by color first, then size, before deciding what to make, the same logic that makes a craft closet actually functional. A tin of unsorted buttons feels like fifty dollars of material; sorted, it’s usually closer to what you actually have, and that changes which projects are realistic this weekend.
The most common fixable mistake is grabbing regular craft glue for anything that gets handled worn as jewelry, tossed in a bag, sat on as an ottoman accent. Craft glue dries brittle and lets go under repeated flexing. Hot glue or E6000 holds through actual use; save craft glue for flat, static pieces like framed art that never moves.
Three items under $50 that make almost every project on this list easier: a mini hot glue gun with a fine-tip nozzle (around $12), a mixed vintage-style button lot of 300-plus pieces (around $18), and a pack of jump rings with basic jewelry pliers (around $15) for anything wearable.
A single coaster or keychain takes 20 to 30 minutes start to finish. A monogram letter or mirror frame is closer to a weekend project once drying time is factored in. A full wreath or wall mosaic is genuinely a multi-session project budget one evening for sorting and planning, then a second full day for assembly.
Ready to Put That Button Jar to Work?
Between the wearable pieces, the wall art, and the small functional projects like coasters and push pins, these 20 button crafts for adults cover pretty much every way a spare button collection can actually get used. None of this has to happen at once pick whichever project matches how much time you actually have this week, not the one that looks most impressive.
If you’re starting today, sort your buttons by color first it’s the one step that makes every project after it faster. There’s a genuine satisfaction in turning a drawer of loose buttons into something you’d actually choose to keep out, rather than something you keep meaning to deal with. Pin the ones that caught your eye, and go dig that button tin out of the closet it’s been waiting for a project like this.
Keep Exploring