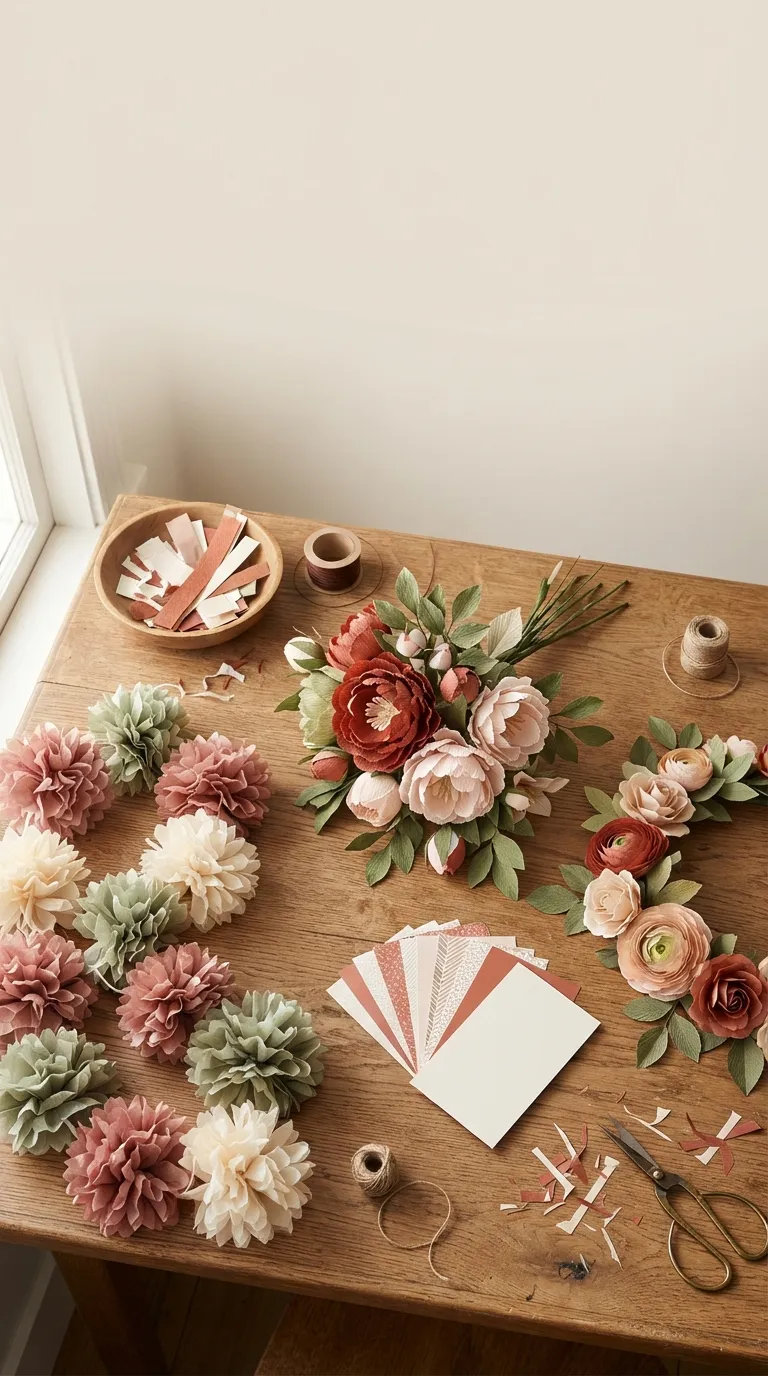
22 Easy Paper Craft Ideas That Turn Scrap Paper Into Real Decor
Paper craft is just this: folding, cutting, layering, or shaping ordinary paper until it becomes something you’d actually want on a wall. This article walks through 22 easy paper craft ideas, sorted so the fastest, cheapest wins come first.
There’s something almost stubborn about paper decor it refuses to look expensive even when it looks incredible. Light passes through tissue and vellum in a way fabric never manages. A single garland can turn a blank hallway warm in under an hour. That’s the whole appeal: low stakes, high payoff, and a finished piece by dinner.
Jump To
- Why Paper Crafting Makes Such a Difference
- 22 Easy Paper Craft Ideas Anyone Can Make
- How to Start Your Paper Craft Collection
- Ready to Fill Your Home with Handmade Paper Art?
Why Paper Crafting Makes Such a Difference
Paper crafting took off again as a decor category because it solves a real problem: wanting a home that feels finished without a renovation budget. Tissue paper, crepe paper, cardstock, kraft paper, and vellum each behave differently under light and glue, which is why the best projects mix two or three types rather than sticking to one.
It works in a studio apartment exactly as well as a house actually better, since paper decor weighs nothing and commits to nothing. Start with something disposable in nature, like a garland, before moving into anything you’ll want to display for years.
| Best starting point | tissue paper pom-pom garland — just tissue, scissors, and floral wire |
| Biggest impact area | a bare mantel or entry wall, where color reads instantly |
| Budget to start | $10–$25 for a first project |
| Time to complete | most single projects take 20–45 minutes |
22 Easy Paper Craft Ideas Anyone Can Make
1. Tissue Paper Pom-Pom Garland
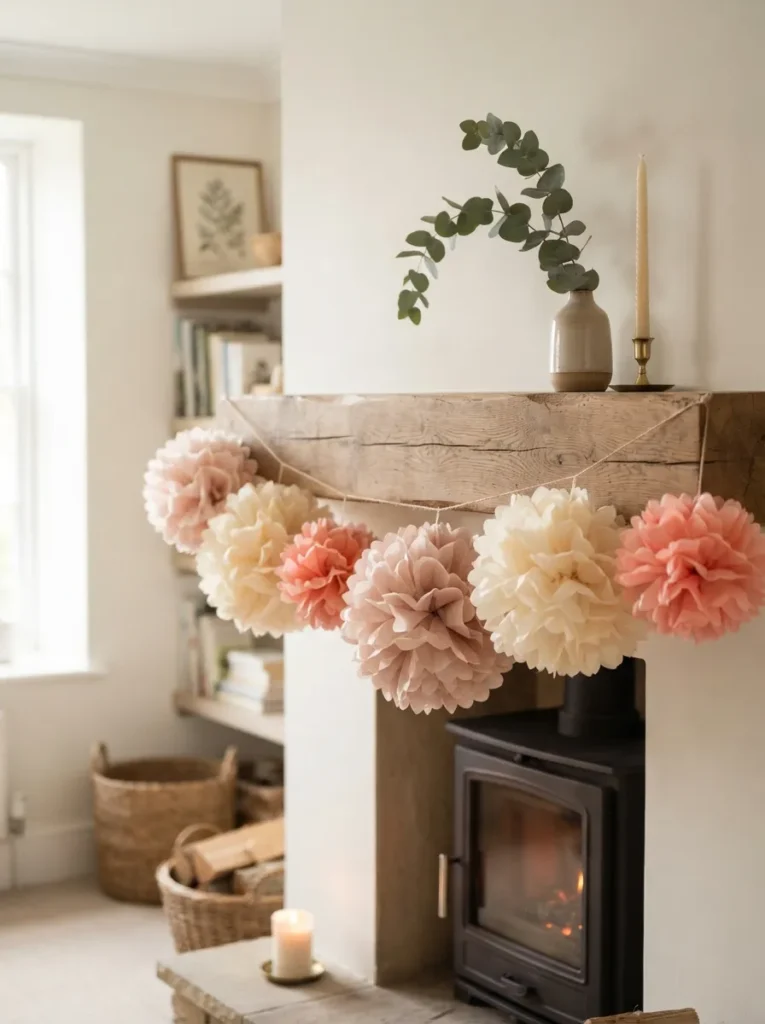
What it looks like: Round paper spheres puff out along a mantel like a row of soft clouds a little imperfect, undeniably cheerful.
Why it works: Repetition does the work. One pom-pom reads as a craft project; a dozen reads as an installation, because scale and rhythm signal intention rather than decoration left over from a party.
How to copy it: Stack eight sheets of tissue paper, accordion-fold in 1.5-inch pleats, tie the center tight with floral wire, then round each layer out by pulling sheets toward the center one at a time. Mix two or three colors per garland so it doesn’t read flat.
Best for: Total beginners who want a big visual payoff for under $10 an easy first move if you’re refreshing a tan sofa living room and want color without new furniture.
Quick Win: Buy pre-cut tissue squares instead of trimming your own sheets it cuts the project down to about 15 minutes.
2. Washi Tape Geometric Wall Art

What it looks like: Thin strips of colored tape radiate out from a center point, turning a blank wall into a graphic, sun-shaped mural.
Why it works: Negative space around the pattern matters as much as the tape itself too much wall coverage and the shape disappears into busyness instead of standing out as a focal point.
How to copy it: Mark a center point with a pencil dot, then lay strips outward using a yardstick as your angle guide, spacing each strip roughly two finger-widths apart. Stick to one tape width throughout for a cleaner sunburst.
Best for: Renters who need something removable and commitment-free.
PRO TIP:
Pro Tip: Press each strip down with a credit card edge, not your finger it prevents the tiny air bubbles that show up under raking light.
3. Crepe Paper Peony Bouquet
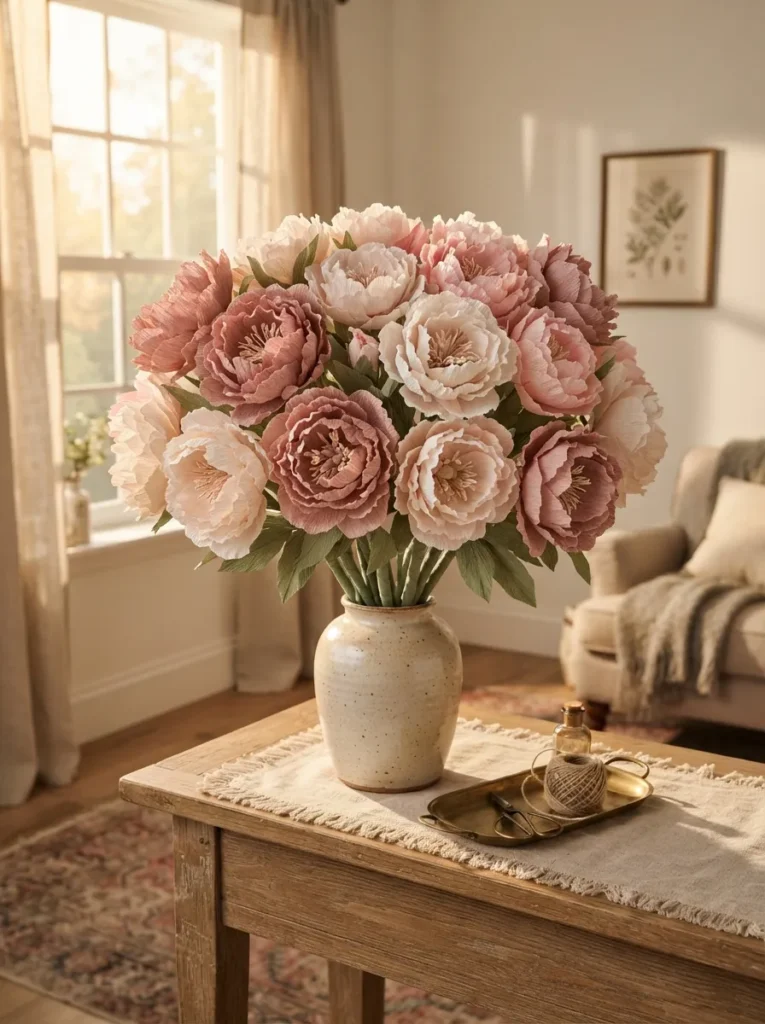
What it looks like: Ruffled paper petals stack into blooms nearly the size of a fist heavier and more sculptural than any real flower.
Why it works: Crepe paper stretches in one direction only, which is exactly what lets you cup and curl individual petals into realistic peony shapes instead of flat cutouts.
How to copy it: Cut petal templates from crepe, stretch each one gently at the center with your thumbs to create a cupped shape, then layer six to eight petals around a wire stem, securing with floral tape as you go. Curl the outer petals backward for a fully bloomed look.
Best for: Anyone who wants florals that never wilt or need water these also make a lovely stand-in among handmade gift ideas when a real bouquet won’t survive shipping.
Get the Look
| Product |
|---|
| Fine crepe paper roll, extra-fine weight |
| Floral stem wire, 18-gauge |
| Green floral tape |
| Small ceramic bud vase |
| Wire cutters for crafting |
The next idea takes almost no supplies at all and it might be the most-repinned fold on this list.
4. Folded Paper Fan Wall Hanging
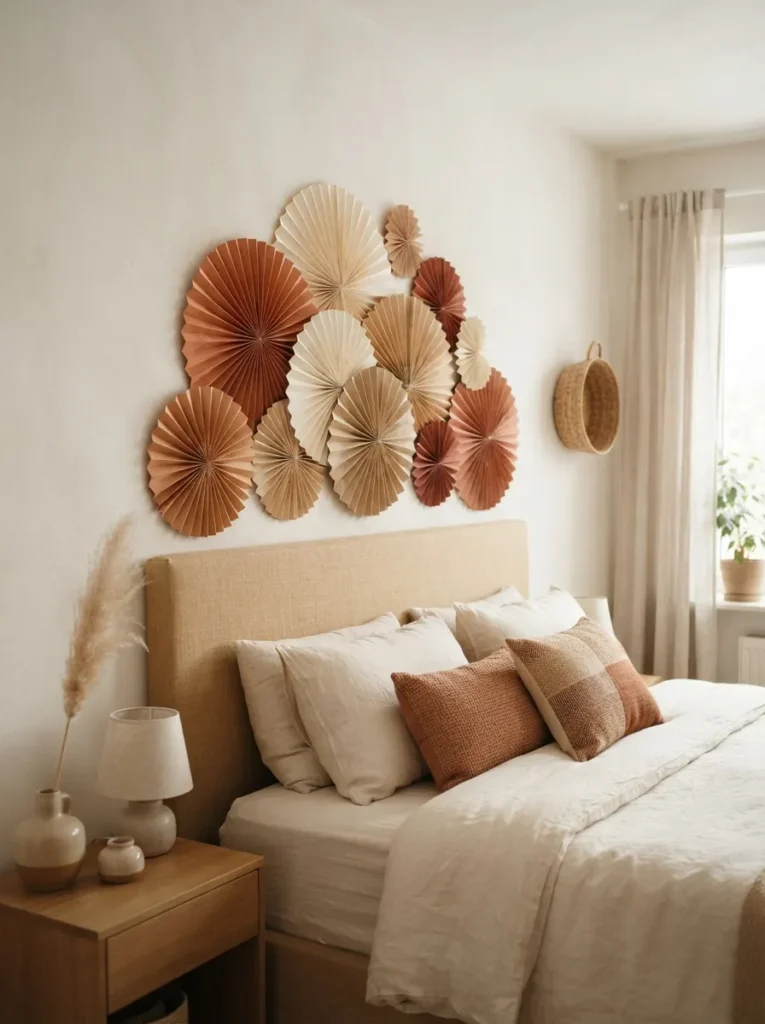
What it looks like: Pleated paper half-circles fan out above a bed like an oversized sunrise, each one slightly different in width.
Why it works: Varying the fan sizes creates visual weight without symmetry a design principle that keeps a wall arrangement from feeling stiff or store-bought.
How to copy it: Fold cardstock into even 1-inch accordion pleats, cinch the bottom with a stapler or glue, then flatten into a half-fan shape. Mount with removable adhesive strips in a loose arc rather than a straight line.
Best for: People decorating above a bed or sofa who want height without hardware holes.
Small-Space Tip: Three small fans read just as well as one large one in a narrow hallway, and they’re far easier to carry through a doorway.
5. Origami Paper Star Garland
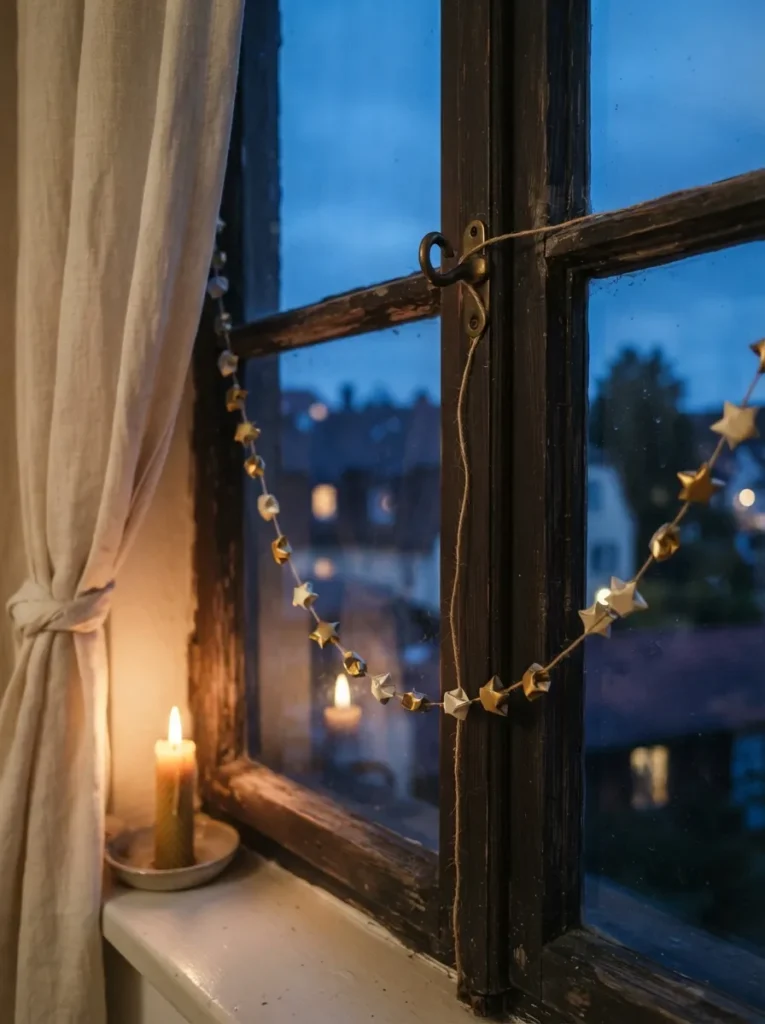
What it looks like: Small five-pointed paper stars hang in an uneven line against a window, catching light along their folded edges.
Why it works: Metallic or vellum paper picks up ambient light the way flat cardstock can’t, so the same fold reads completely differently depending on what’s behind it.
How to copy it: Fold 3-inch paper squares using a standard modular star pattern five identical folded strips woven together — then string each finished star on thread at a different height. Mix matte and metallic paper in the same garland for contrast.
Best for: Anyone decorating a window that gets strong afternoon or evening light.
Warning: Thin origami paper tears at the fold lines faster than people expect use a bone folder to crease instead of your fingernail, or switch to a slightly heavier 70lb paper.
Up next: the material choice that quietly makes every garland on this list look twice as full.
6. Honeycomb Paper Ball Garland
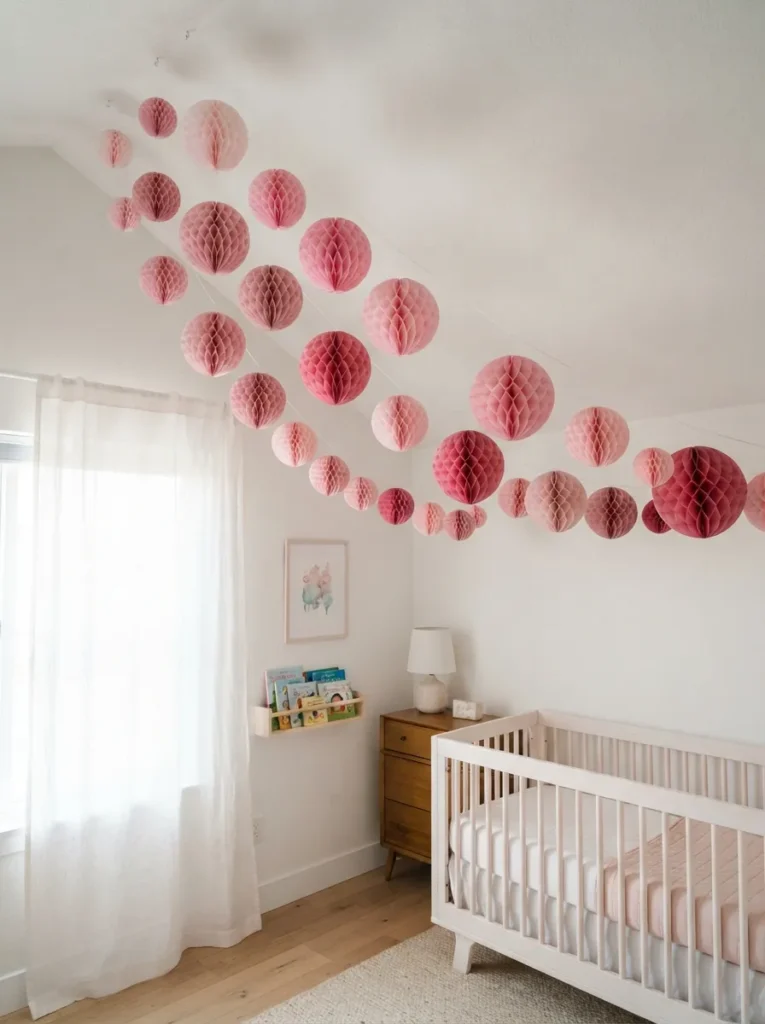
What it looks like: Round tissue balls with a honeycomb structure hang in a graduated size line, largest to smallest, like paper planets.
Why it works: The honeycomb fold gives real three-dimensional volume that flat tissue can’t match, so a single ball fills far more visual space than the paper used to make it.
How to copy it: Buy pre-scored honeycomb tissue sheets, or score your own accordion folds every half-inch, glue the fold edges together, and pop the sheet open into a sphere. Hang in a size gradient from largest to smallest for a sense of movement.
Best for: Nurseries, playrooms, or anywhere that benefits from soft dimensional color.
Budget Version: Pre-made honeycomb kits run under $12 for five balls in graduated sizes often cheaper than buying individual tissue sheets to fold yourself.
7. Paper Cut Silhouette Art
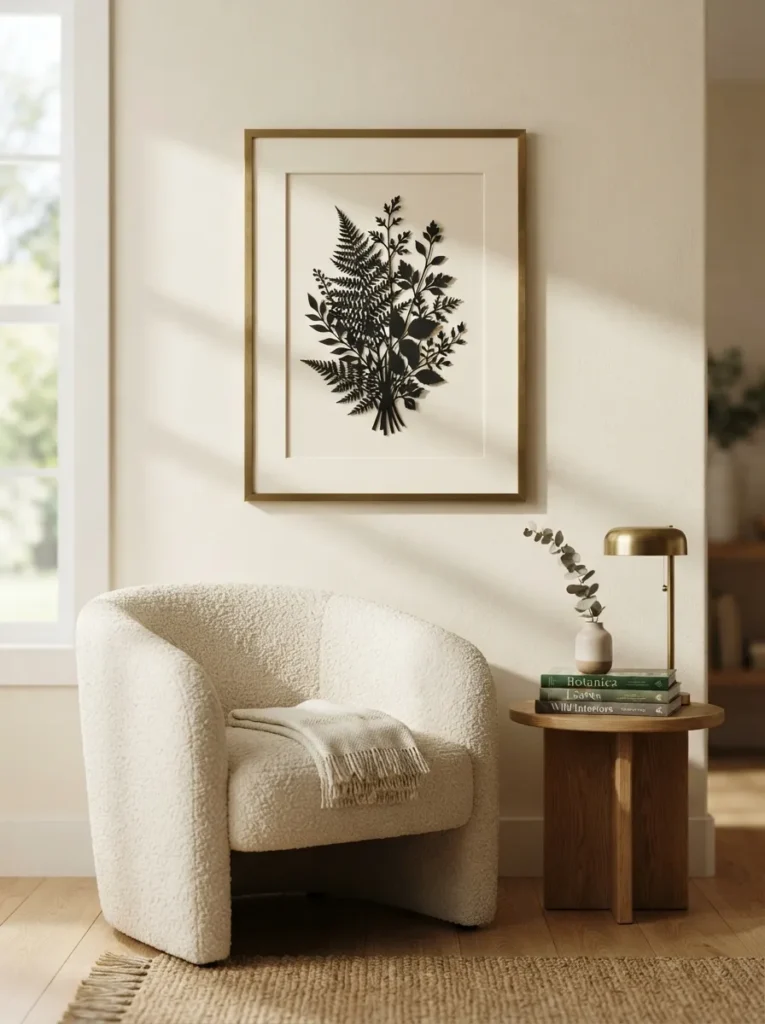
What it looks like: A single sheet of black paper, cut into a detailed botanical outline, floats slightly off a cream mat board and casts a soft shadow.
Why it works: Negative space carries the entire piece the cut-out gaps are doing more visual work than the paper that remains, which is why silhouette art reads as fine art rather than a kids’ craft.
How to copy it: Sketch or print a simple leaf or branch outline onto black cardstock, cut along the lines with a craft knife on a self-healing mat, then mount it on a slightly raised foam spacer so it casts a shadow. Start with a design that has fewer than ten cut lines.
Best for: People who want something gallery-worthy without buying actual art.
Important: Most people assume any craft knife works, but a dull blade tears fine paper details instead of cutting them cleanly swap blades every two or three projects.
8. Kraft Paper Botanical Prints
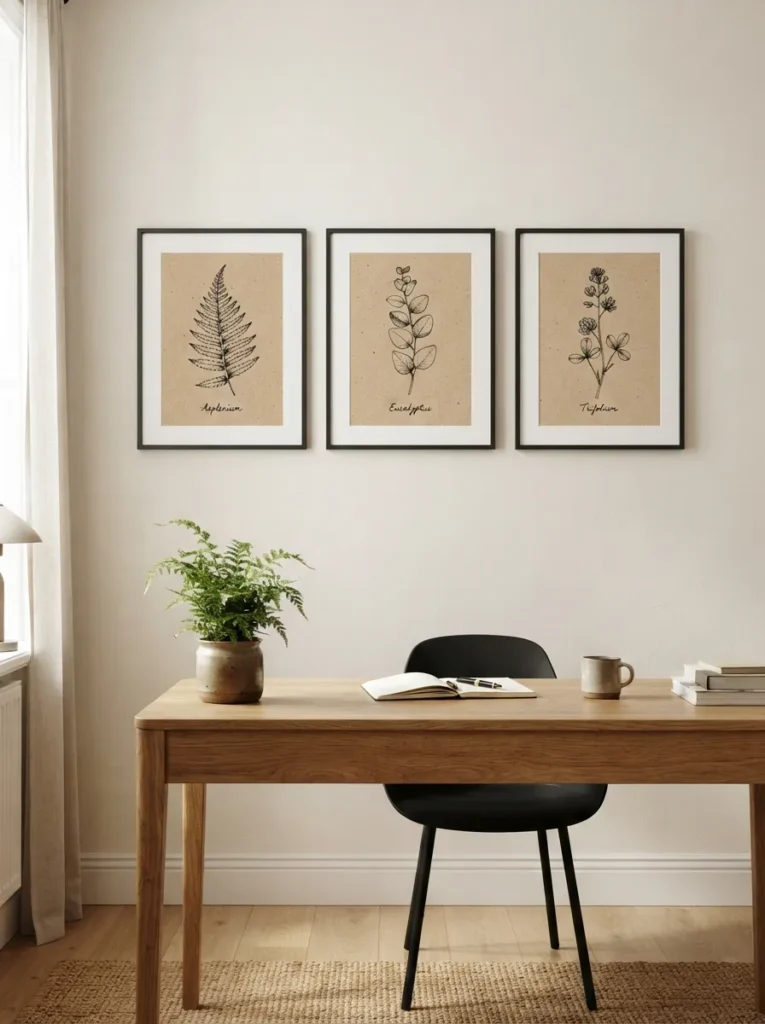
What it looks like: Simple botanical line drawings sit on warm brown kraft paper instead of white, giving the whole grouping an earthy, worn-in quality.
Why it works: Swapping white paper for kraft changes the entire color story of a print without changing the artwork itself the brown undertone reads as intentional rather than unfinished.
How to copy it: Print or hand-draw simple single-line botanical sketches directly onto kraft paper sheets, then frame in matching thin black frames for a cohesive set. Group in odd numbers three or five for a gallery feel.
Best for: Home offices and study nooks that need warmth without color.
This next one surprised even experienced crafters the first time they tried it.
9. Confetti Paper Table Runner
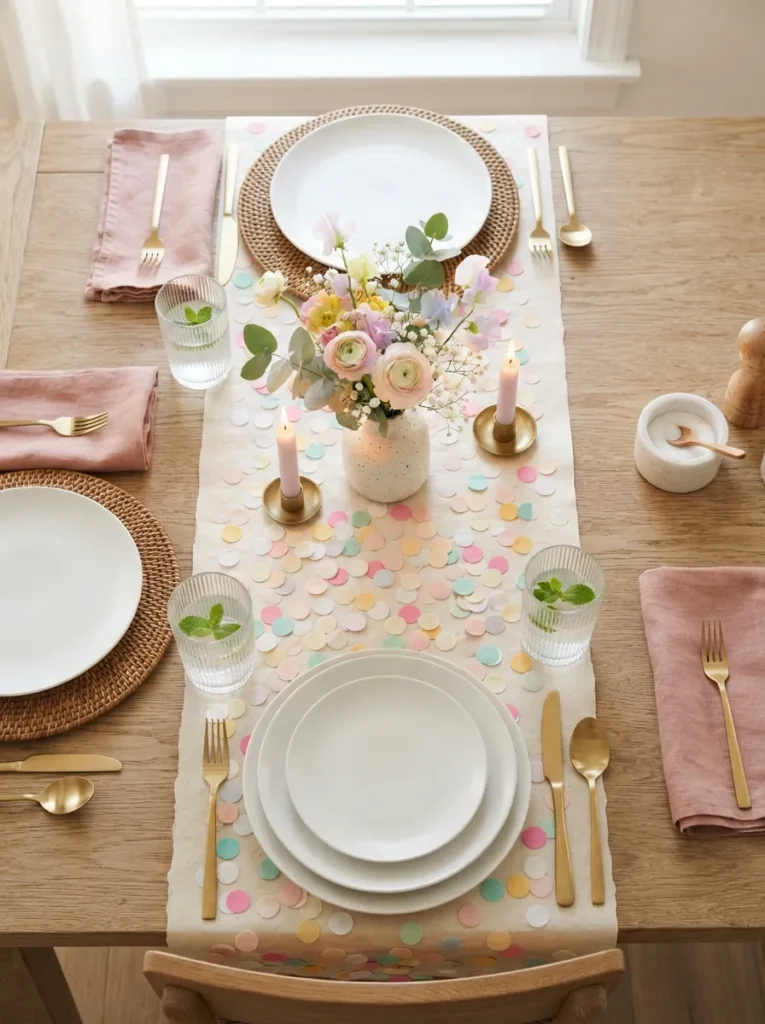
What it looks like: Dozens of small paper circles scatter across a plain kraft runner like confetti mid-fall, denser at the center and thinning toward the ends.
Why it works: Density variation is the trick clustering the circles toward the middle and letting them thin out at the edges creates a sense of motion instead of a static grid.
How to copy it: Punch circles in three to four sizes using a paper punch set, then glue them onto a plain kraft paper strip in a loosely scattered pattern, heavier in the center. Seal lightly with a paper-safe adhesive spray if it’ll be reused.
Best for: Birthday tablescapes and one-off dinner parties.
Quick Win: Use a standard hole punch for the smallest confetti circles instead of buying a specialty punch it’s nearly free and just as effective.
10. Paper Doily Wall Medallions
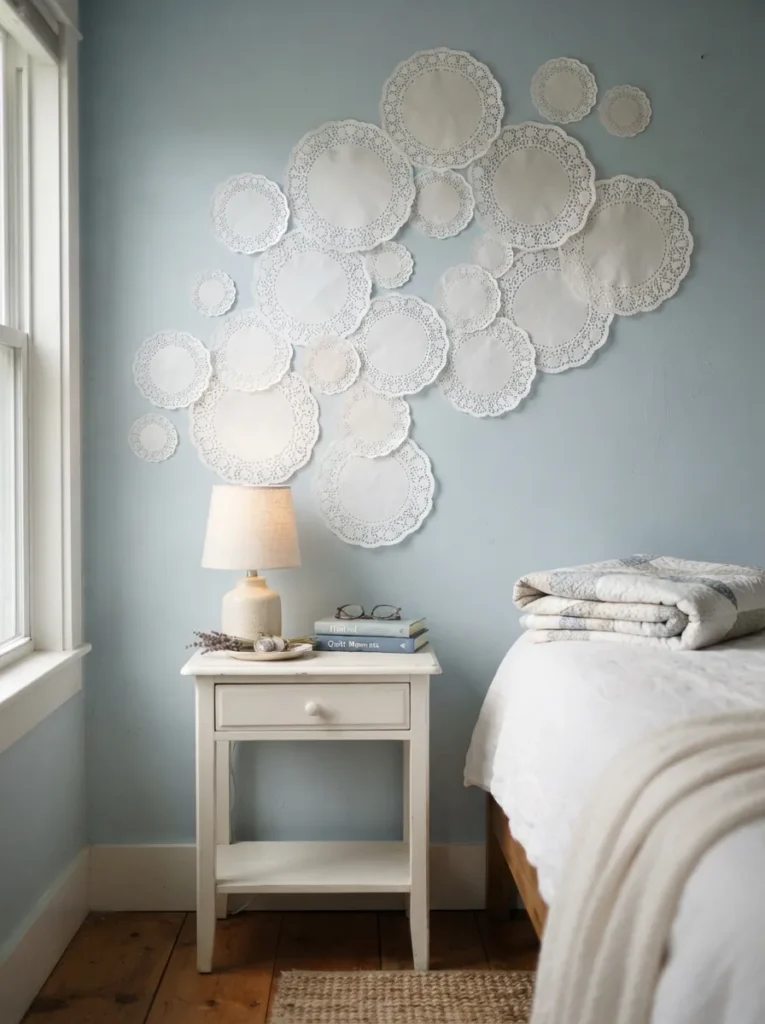
What it looks like: Lace-patterned paper circles cluster unevenly across a wall, their cut patterns casting fine shadow lines depending on the light.
Why it works: Doily patterns already have built-in negative space, so mounting them slightly off the wall on foam dots lets that cutwork actually cast shadows instead of lying flat and disappearing.
How to copy it: Buy paper doilies in three sizes, mount each on removable foam adhesive dots for slight dimension, and cluster them in an asymmetrical grouping rather than a grid. Leave uneven gaps between pieces.
Best for: Bedrooms or nurseries that want texture without color.
Budget Version: A pack of 100 paper doilies costs under $8 and covers several wall clusters, with plenty left for gift wrapping.
Up next: a technique that plays with light instead of just shape.
11. Layered Paper Ombré Wall Art
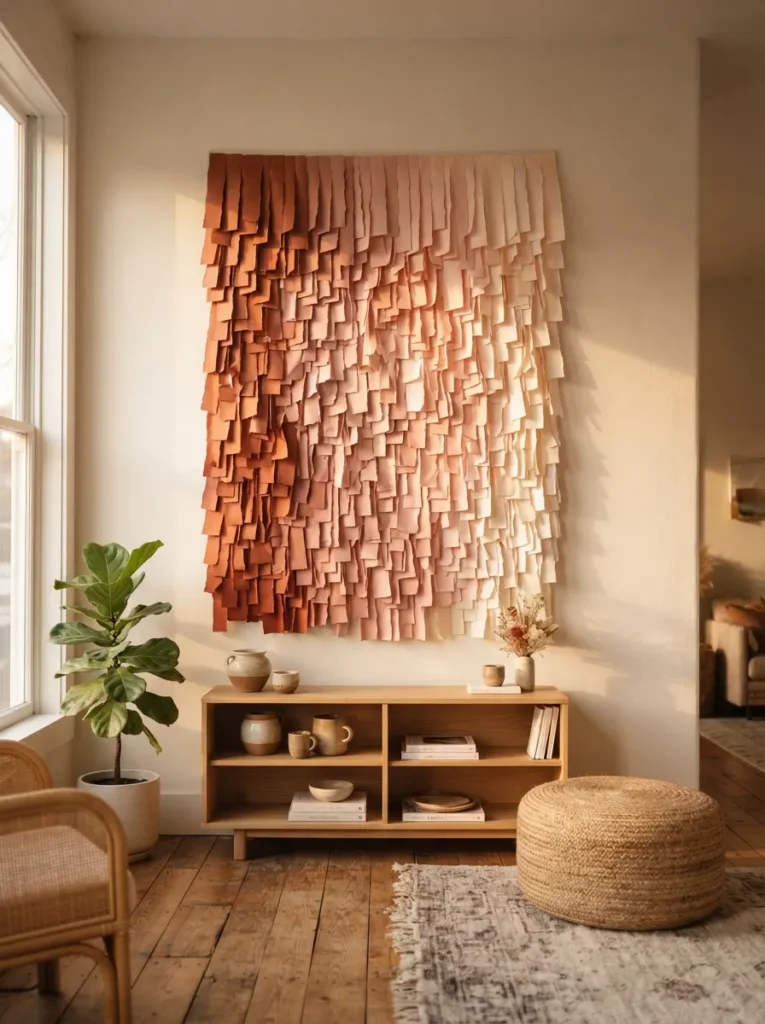
What it looks like: Strips of paper in graduated shades overlap top to bottom, blending from deep rust at the top to pale blush near the base.
Why it works: Overlapping the strips by about a third of their width blurs the transition between colors, so the eye reads a smooth gradient instead of distinct stripes.
How to copy it: Cut cardstock strips in five to seven shades of one color family, arrange darkest at the top, and glue each strip so it overlaps the one below by roughly a third. Mount the finished panel on a foam board backing before hanging.
Best for: People who want a statement piece without buying actual art.
PRO TIP:
Pro Tip: Buy your paper strips in one trip using a single manufacturer’s color family mixing brands almost always creates an undertone mismatch that shows up under daylight.
12. Accordion Paper Fan Backdrop
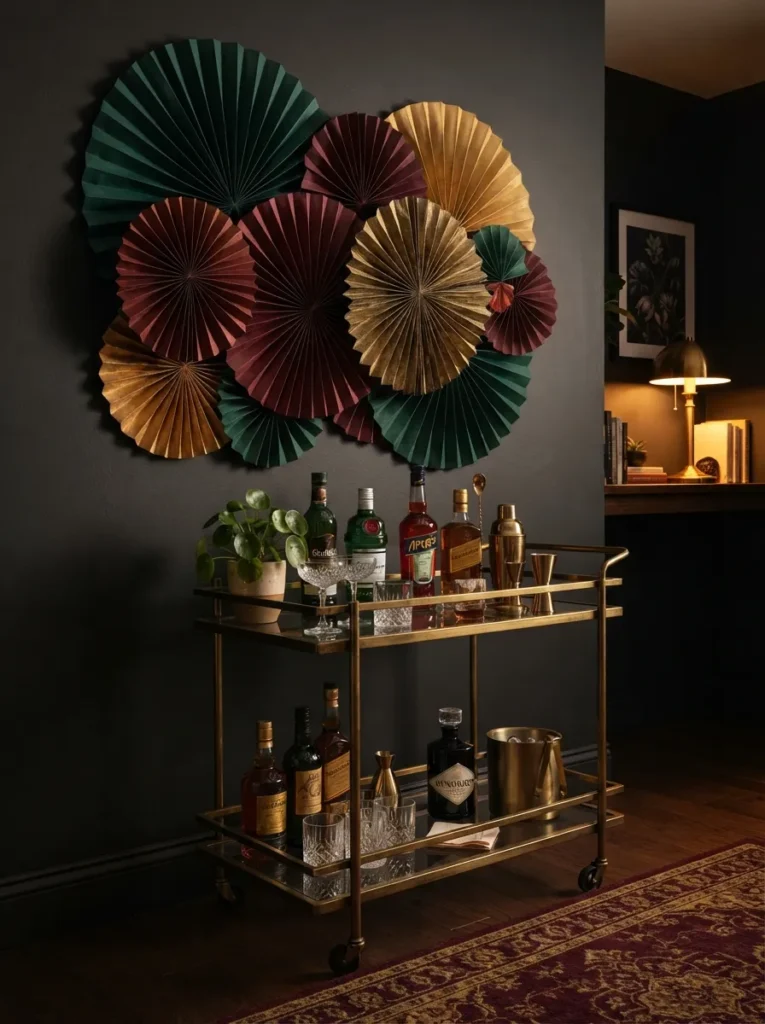
What it looks like: A full-height pleated paper fan spreads behind a bar cart like an oversized peacock tail, deep pleats throwing shadow across its surface.
Why it works: Deep, wide pleats catch and hold shadow far more dramatically than shallow ones, which is why scale matters more than color choice for this particular fold.
How to copy it: Fold poster-board-weight paper into 3-inch accordion pleats, cinch the bottom tightly with wire, and mount flat against the wall with the pleats facing outward. Use paper at least 24 inches wide for real visual impact.
Best for: Bar carts, entryways, or any spot that needs a quick photo backdrop.
This next fold takes patience, but it’s the one people ask about most.
13. Paper Quilling Monogram Art
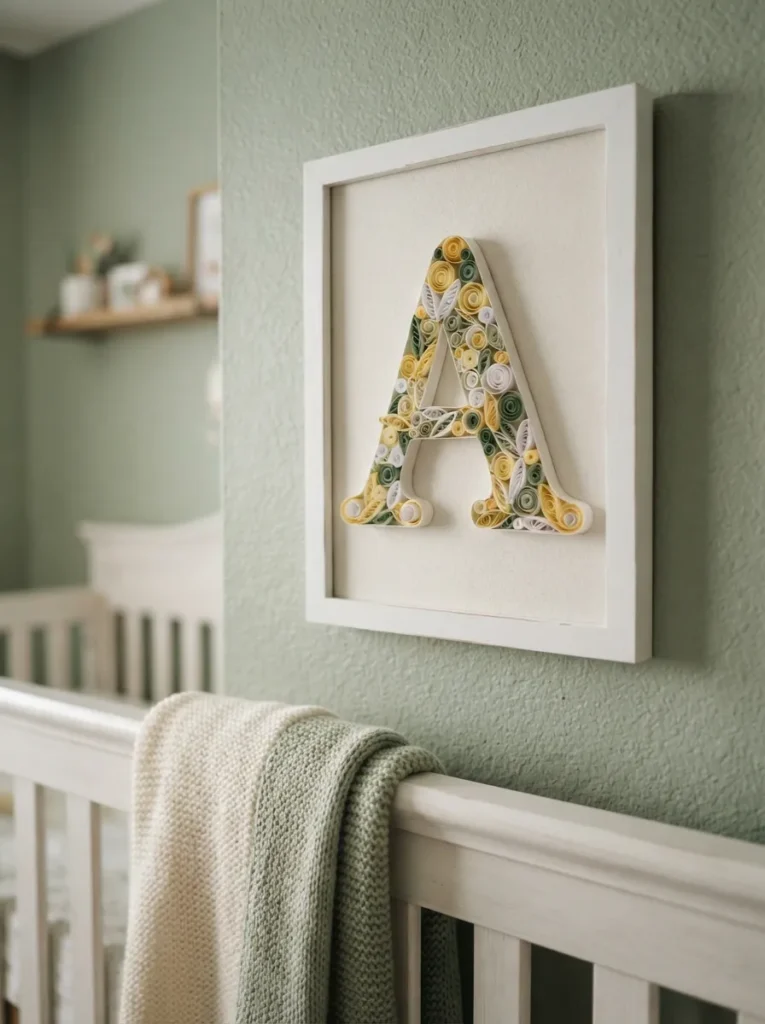
What it looks like: Dozens of tightly coiled paper strips pack together inside a letter outline, each coil catching light at a slightly different angle.
Why it works: Coil size variation gives the letter internal texture packing in coils of the exact same size flattens the piece, while mixing tight and loose coils creates real depth.
How to copy it: Roll thin paper strips around a quilling tool or toothpick, let each coil relax slightly before gluing, then arrange the coils inside a printed letter outline, gluing them down one at a time. Fill gaps with smaller coils rather than stretching larger ones.
Best for: Nursery decor and personalized gifts it pairs naturally with a nursery corner that’s already leaning into ladybug DIY ideas or other playful motifs.
Small-Space Tip: A single initial fits nicely in tight hallway nooks where a full word or phrase would feel cramped.
14. Paper Lantern String Lights
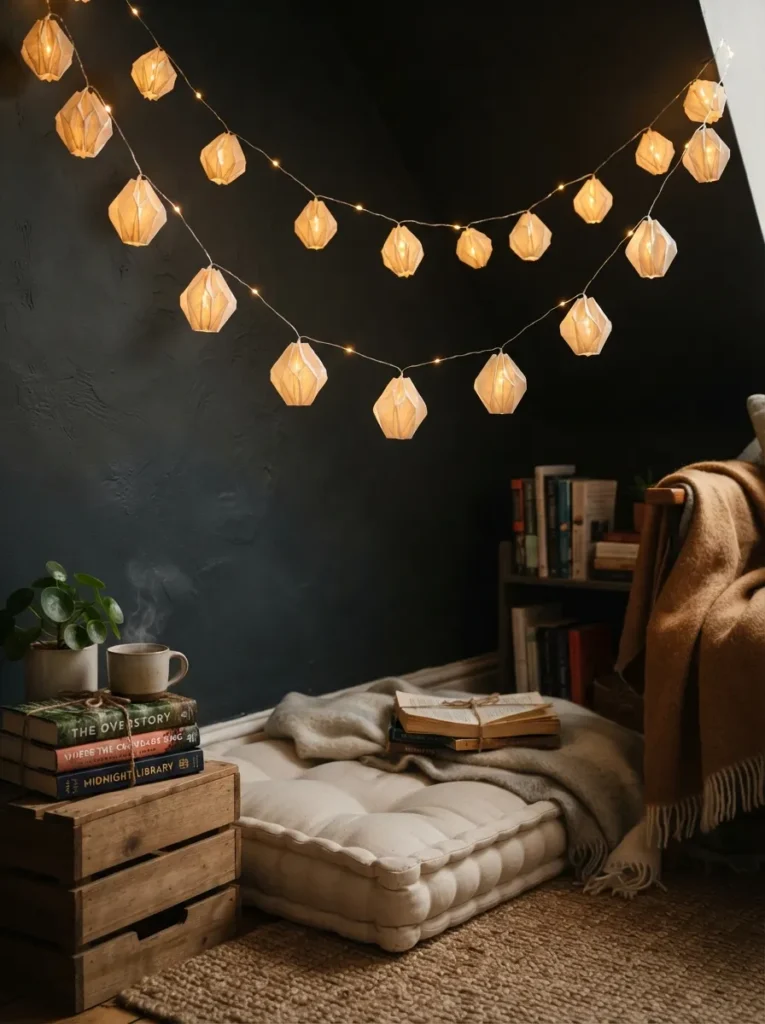
What it looks like: Small folded paper cubes glow from within, strung along a light strand like a string of warm paper lanterns.
Why it works: Thin, uncoated paper is what makes this idea work anything glossy or laminated blocks the light instead of diffusing it into that soft amber glow.
How to copy it: Fold squares of translucent vellum or thin origami paper into simple box lanterns, leaving one seam open to slide over an LED fairy light strand. Space the lanterns evenly, about four inches apart, so the glow reads as a continuous line.
Best for: Reading nooks, kids’ rooms, or covered patios.
Shop This Look
| Product |
|---|
| Battery-operated LED fairy light strand |
| Translucent vellum paper pack |
| Origami folding paper, assorted warm tones |
| Small craft glue dots |
| Fabric-covered extension cord for outdoor use |
15. Mini Paper Terrarium Art
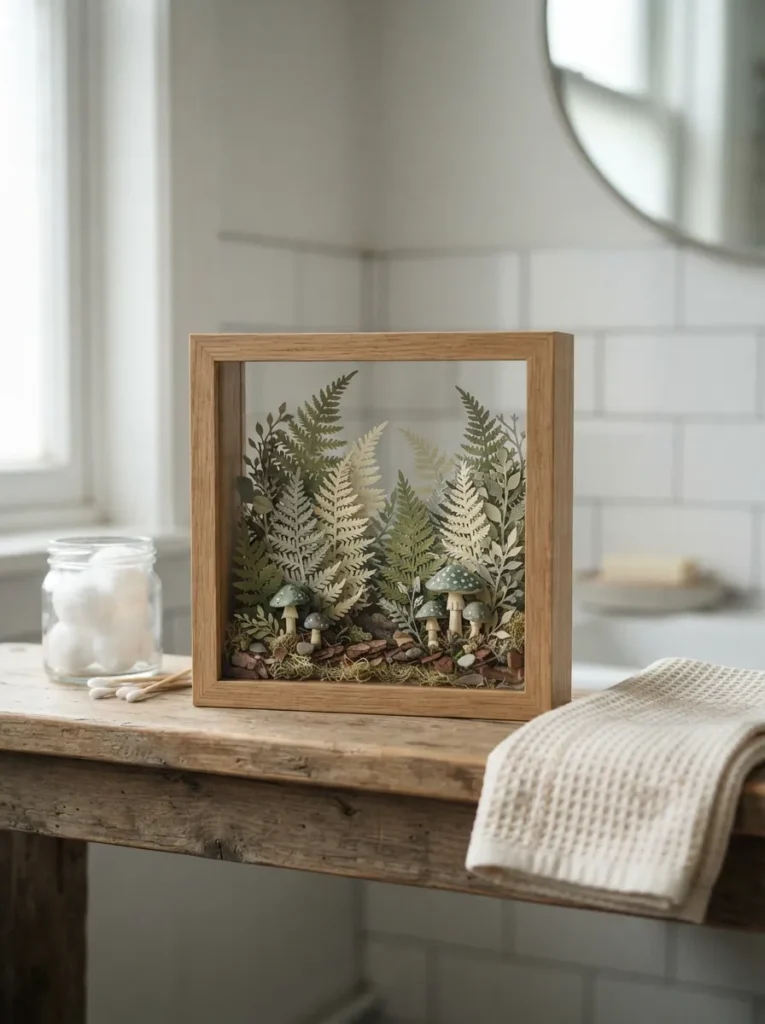
What it looks like: A shallow glass box holds tiny layered paper ferns and mushroom shapes, arranged to mimic a real woodland terrarium at miniature scale.
Why it works: Layering three or four depths of paper inside a shadow box tricks the eye into reading real depth, which is what separates this from a flat paper cutout taped to glass.
How to copy it: Cut small fern and mushroom shapes from cardstock in graduated sizes, glue them onto foam spacers at different depths inside a small shadow box, and arrange from tallest at the back to shortest at the front. Keep the palette to two or three greens for realism.
Best for: Bathroom shelves and other tight spots too small for a full plant think of it as a paper companion to your modern succulent planters elsewhere in the room.
Mistake to Avoid: Skipping the foam spacers is the most common shortcut without them, every piece sits on one flat plane and the “terrarium” effect disappears entirely.
One more quick fold before the projects get a little more involved.
16. Paper Bead Curtain
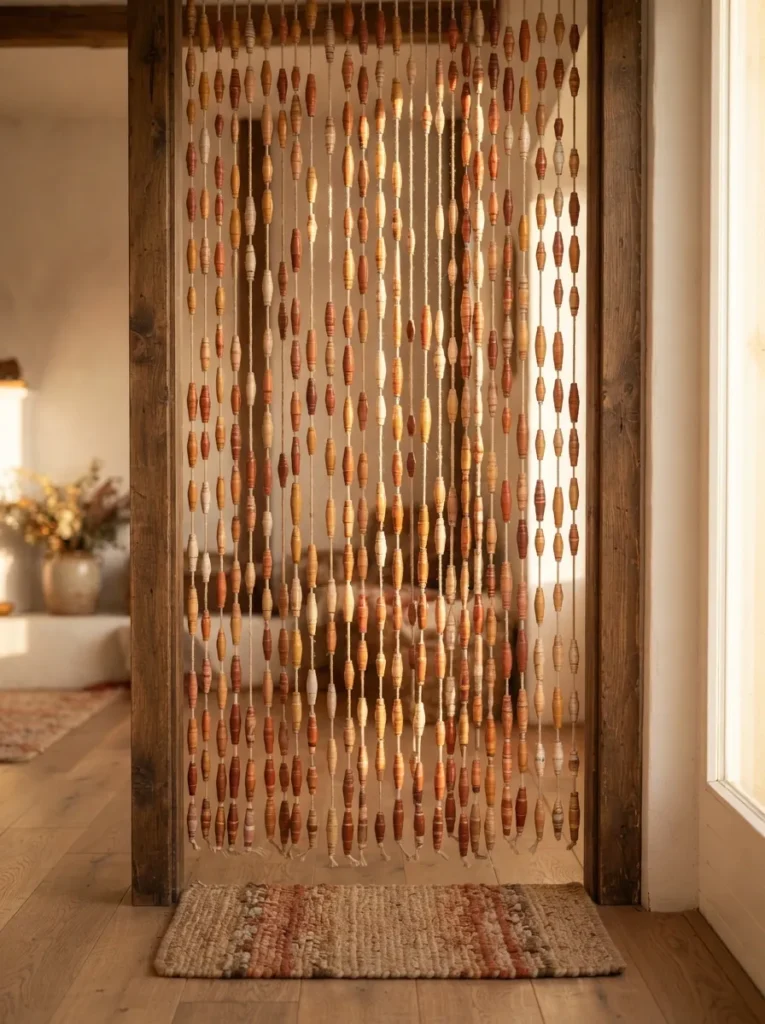
What it looks like: Rows of hand-rolled paper beads hang in strands across a doorway, each one slightly different in shade and shape.
Why it works: Hand-rolling introduces natural variation that machine-made beads never have, and that inconsistency is exactly what reads as handmade rather than cheap.
How to copy it: Cut long triangular strips of colored paper, roll each one tightly starting from the wide end around a skewer, and glue the tip down. String finished beads on waxed cord, alternating shades for a woven look.
Best for: Boho-leaning spaces and closet or pantry doorways instead of a hard door.
Quick Win: Cut all your triangle strips at once using a paper cutter and a triangle template rolling goes much faster once the cutting is done in a batch.
17. Woven Paper Placemat
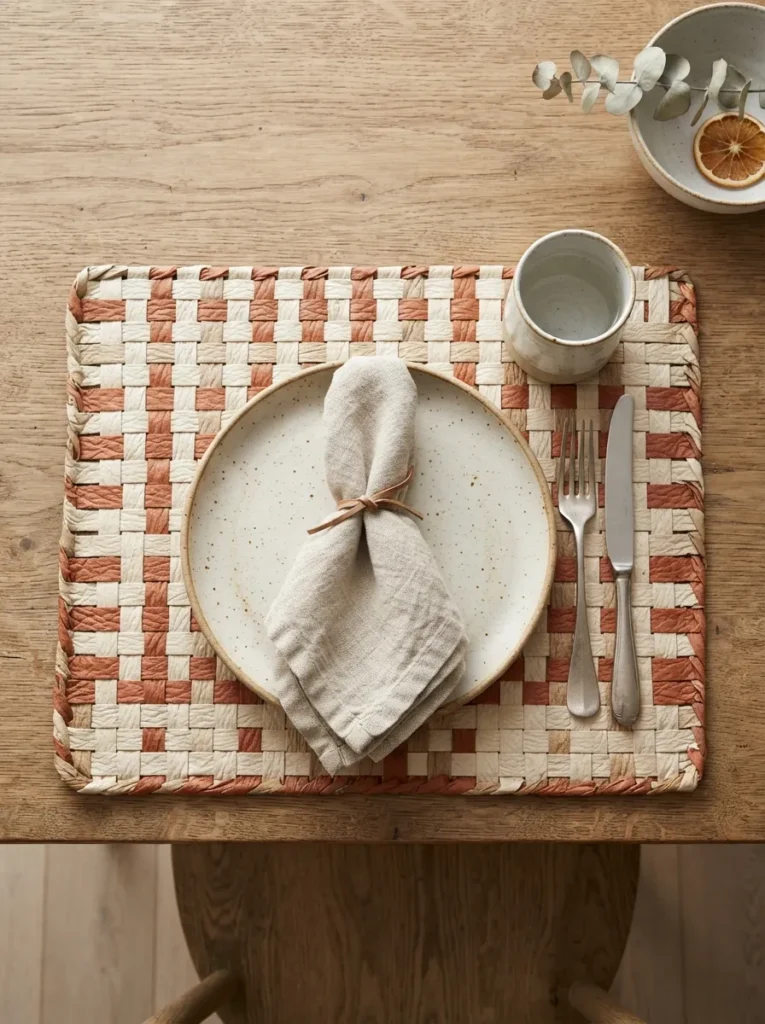
What it looks like: Strips of paper interlock in an over-under weave, forming a placemat that looks closer to woven rattan than paper.
Why it works: The over-under weave pattern is what gives paper usually a flat material real structural texture, borrowing a technique straight from basket weaving.
How to copy it: Cut two sets of heavy cardstock strips in contrasting colors, lay one set vertically, then weave the second set horizontally over-under, over-under, tightening as you go. Trim and tape the edges flat once the weave is complete.
Best for: Anyone who wants table styling that photographs well but costs almost nothing.
Important: These placemats aren’t meant to hold hot dishes directly most people assume paper handles heat fine, but a warm plate will warp the weave within minutes.
18. Cardstock Shadow Box Frame
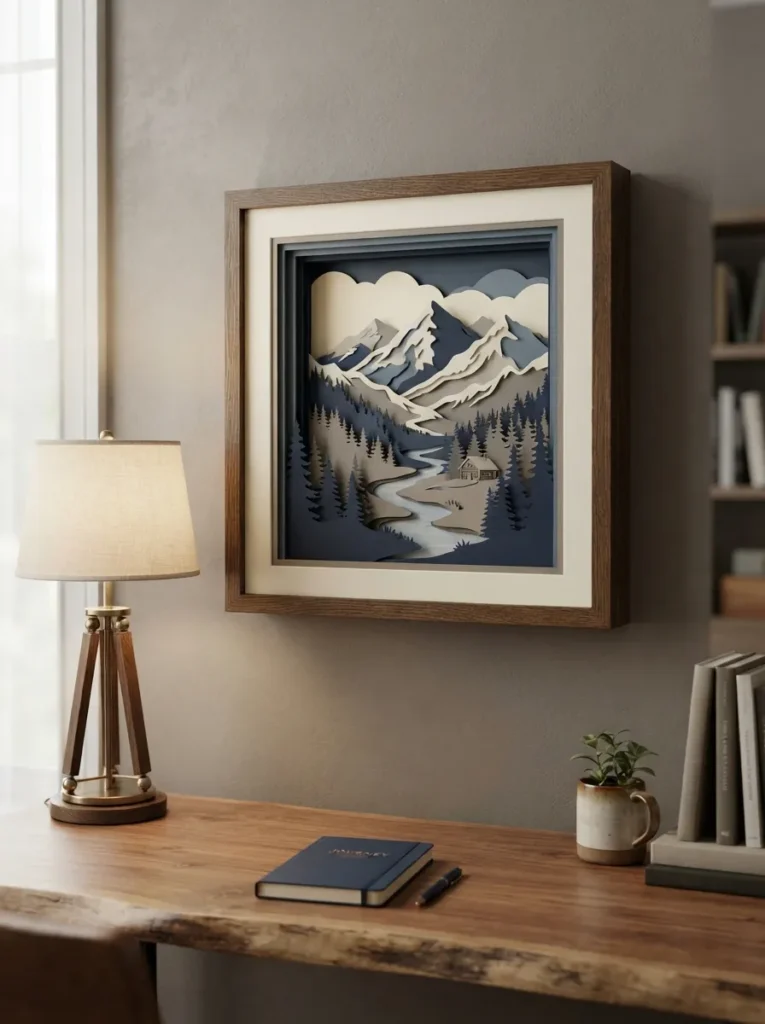
What it looks like: A layered paper scene sits inside a deep frame, each cut-paper layer set slightly farther back than the last to build real depth.
Why it works: Spacing each layer with foam tape rather than gluing them flush is what creates the shadow lines between layers remove the spacing and the whole scene collapses visually into one flat sheet.
How to copy it: Design or trace a simple layered scene mountains, trees, a moon cut each element from cardstock, then mount them front to back using foam adhesive squares of increasing thickness. Leave the background layer flat against the frame’s back panel.
Best for: Home offices and reading nooks that need one focused art piece.
Budget Version: A pre-cut shadow box layer kit runs under $15 and skips the design step entirely, leaving just the assembly.
Last stretch these final ideas lean more sculptural than flat.
19. Paper Mâché Storage Bowls
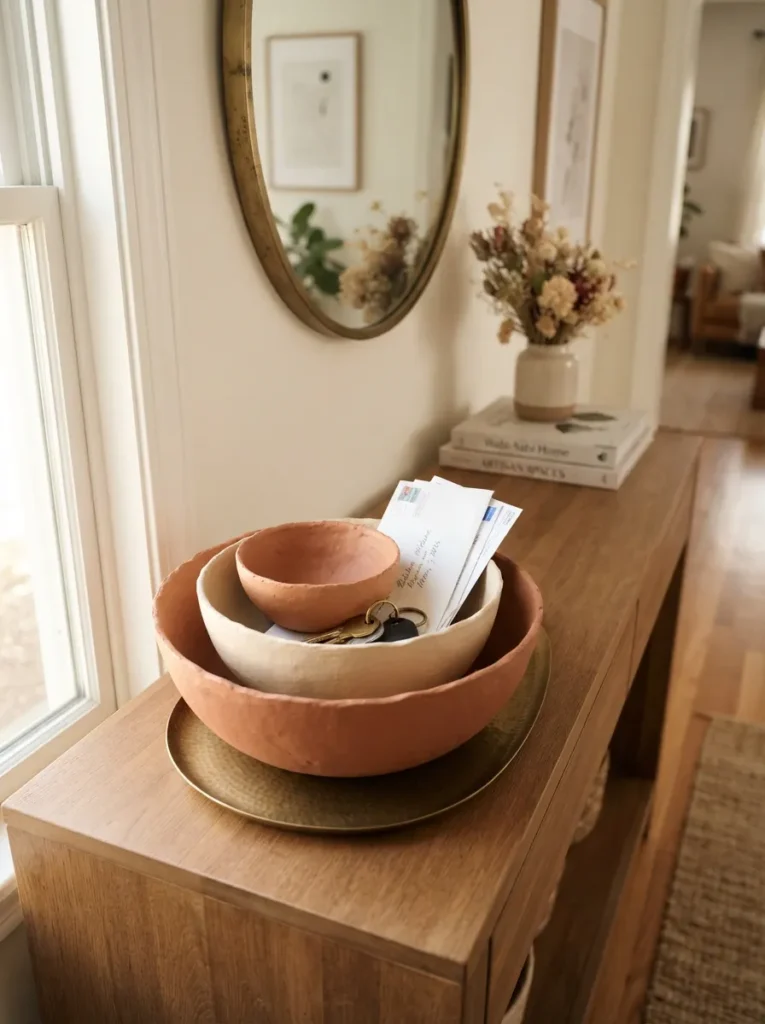
What it looks like: Smooth, rounded bowls in matte cream and terracotta nest together on a console closer to ceramic than the newspaper they started as.
Why it works: Papier-mâché gains real structural strength once it’s built up in three or four layers, which is what lets these hold keys and mail instead of collapsing like a craft-fair novelty.
How to copy it: Tear newspaper into strips, dip in a flour-water paste, and layer over an upside-down bowl mold in three to four coats, letting each coat dry fully before the next. Once dry, pop the shape off the mold, trim the rim, and paint.
Best for: Entryway catch-alls and anyone who wants function, not just wall decor handy for corralling loose supplies if your craft closet tends to run messy.
✅ CHECKLIST
Papier-Mâché Bowl Checklist:
- [ ] Tear newspaper into 1-inch strips (no scissors — torn edges blend better)
- [ ] Mix a flour-water paste to a pancake-batter consistency
- [ ] Layer strips over the mold, 3–4 coats, drying fully between each
- [ ] Trim the rim once fully dry and pop the bowl off the mold
- [ ] Seal with a coat of matte paint or mod podge before use
20. Paper Mâché Vase
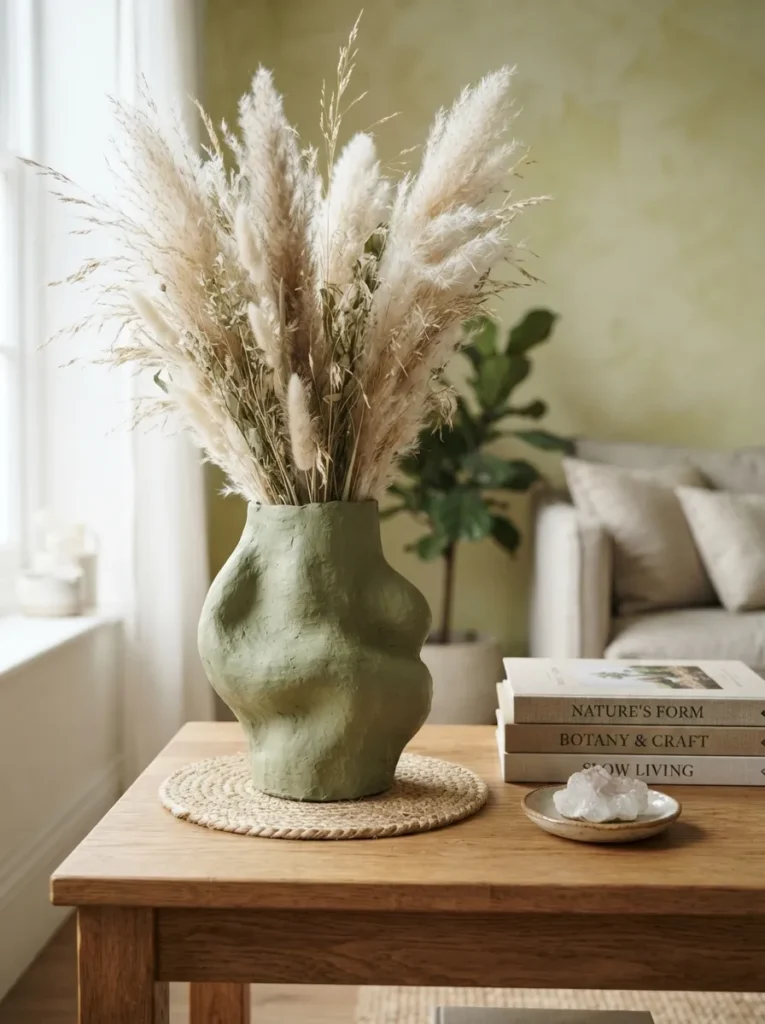
What it looks like: A rounded, slightly uneven vase holds dried grasses, its hand-built surface visibly different from anything made on a wheel.
Why it works: The imperfection is the point a papier-mâché vase’s slightly uneven walls read as handmade character rather than a flaw, especially once painted in a single matte tone.
How to copy it: Build the vase shape over a balloon or plastic bottle base using the same flour-paste-and-newspaper method as papier-mâché bowls, leaving the neck opening narrower than the body. Once dry, pop or cut away the base form and paint in a single matte color for cohesion.
Best for: Dried florals only this isn’t a water-safe vase, so keep mason jar crafts in rotation for anything that needs real water.
PRO TIP:
Pro Tip: Line the inside with a plastic cup or small jar before adding dried stems it keeps the paper interior from crumbling every time you rearrange the arrangement.
21. Paper Craft Advent Calendar Boxes
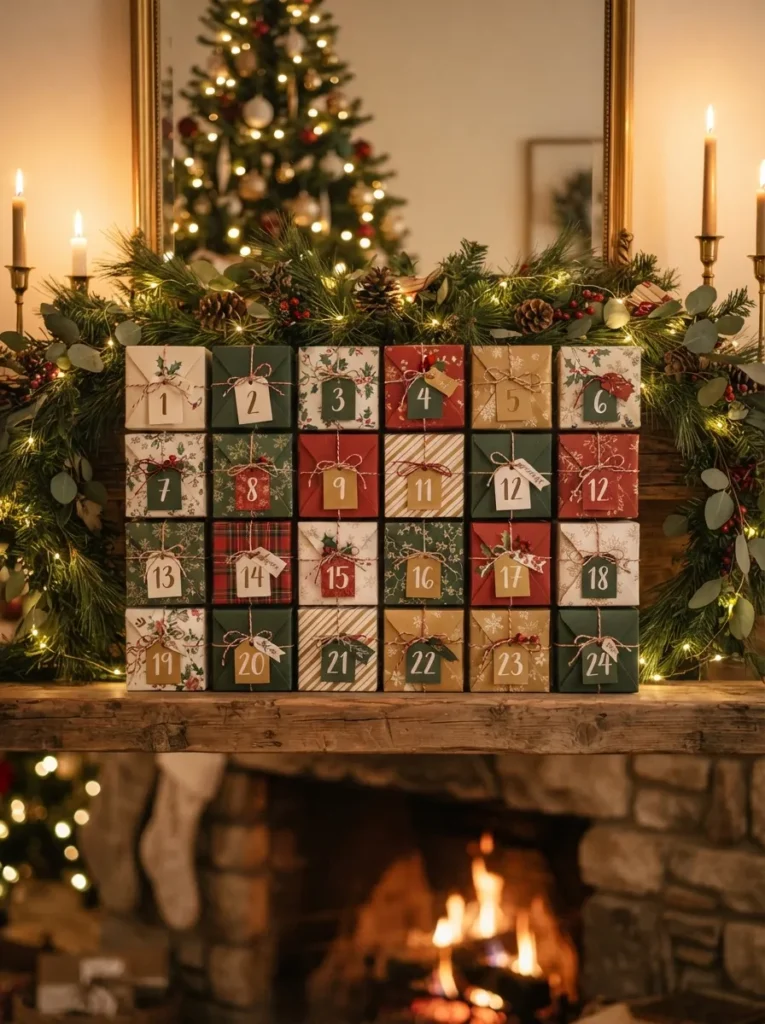
What it looks like: Two dozen small folded paper boxes line a mantel in a loose grid, each one numbered and wrapped in a slightly different coordinating pattern.
Why it works: Coordinating patterns instead of matching ones keeps 24 identical-sized boxes from feeling monotonous, while the shared color family holds the whole grouping together.
How to copy it: Fold small origami boxes from 6-inch squares of coordinating patterned paper, number each lid with a paint pen or printed sticker, and arrange in rows of six. Fill with small treats or notes before sealing.
Best for: Small-space holiday decor that packs flat the rest of the year.
Small-Space Tip: Stack the finished boxes in a shallow drawer organizer for storage they take up almost no room compared to a store-bought calendar.
22. Layered Paper Flower Wreath
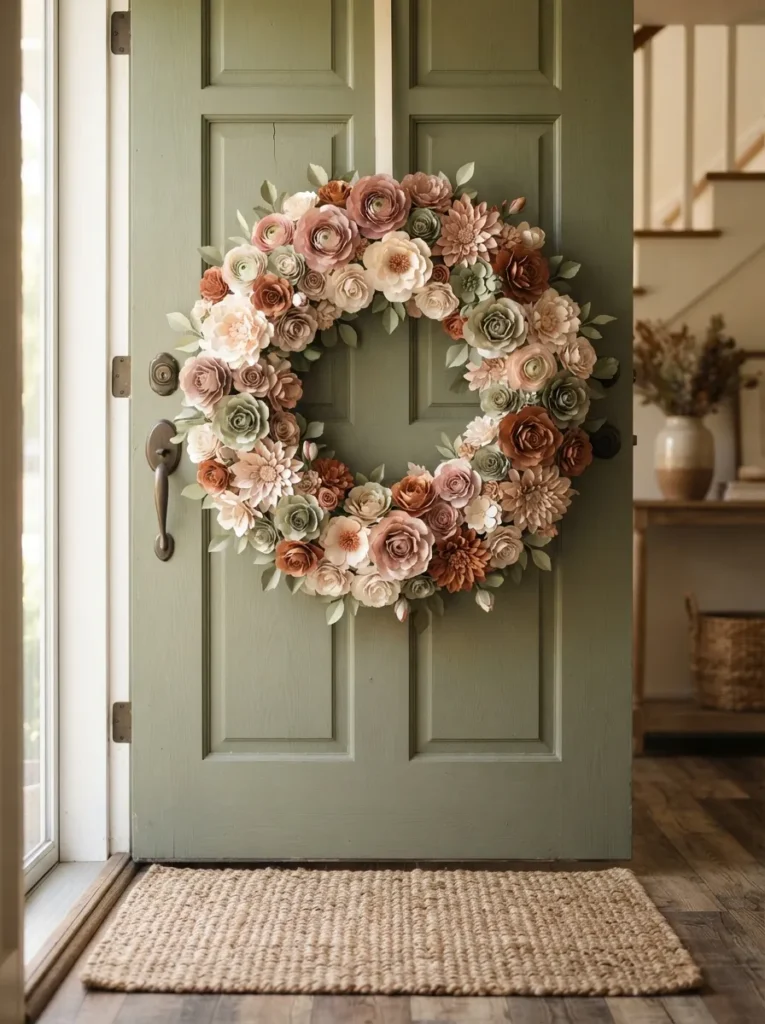
What it looks like: Dozens of layered paper flowers in varied sizes cover a full wreath form, with no bare base visible through the blooms.
Why it works: Density and size variation are what separate a full statement wreath from a sparse one clustering three flower sizes tightly together reads as abundant rather than assembled.
How to copy it: Make paper flowers in three sizes using the same petal-cupping technique from the crepe paper peony, then hot-glue them onto a foam wreath form starting with the largest blooms and filling gaps with smaller ones. Cover the entire base any visible foam breaks the effect.
Best for: A front-door statement piece that outlasts a real flower wreath by months.
What You’ll Need
| Product |
|---|
| 14-inch foam wreath form |
| Assorted crepe and cardstock paper in coordinating tones |
| Low-temp hot glue gun and refill sticks |
| Floral wire for hanging loop |
| Clear matte sealant spray for outdoor durability |
Warning: A standard hot glue gun runs hotter than most paper can handle for long use a low-temperature model, or the heat will scorch thin crepe paper on contact.
How to Start Your Paper Craft Collection
What I’ve found with real projects: start with a garland, not a wreath. A tissue pom-pom garland takes fifteen minutes and uses one skill folding and fluffing so it builds confidence fast before anything involving glue timing or structural layers.
The most common beginner mistake is buying paper that’s too thin for the project. Tissue works for pom-poms and honeycomb, but the same weight collapses instantly in a wreath or shadow box check the project’s structural needs before matching paper weight to it, not the other way around.
Three items under $50 that make an immediate difference: a roll of extra-fine crepe paper in a warm rose tone, a 12-inch clear acrylic ruler for clean accordion folds, and a small tub of craft-safe mod podge for sealing finished pieces. All three show up across nearly every idea on this list.
A single garland or wall piece takes 20 to 45 minutes and costs under $15 in materials. A full wreath or shadow box runs closer to two hours and $25 to $40, mostly in glue and paper volume. Either way, a full mantel refresh three or four pieces together is a single weekend project, not a months-long undertaking.
Ready to Fill Your Home with Handmade Paper Art?
Twenty-two ideas, and barely two of them use the same technique folding, coiling, weaving, layering, and building up papier-mâché all show up somewhere on this list. Start small. One garland on a mantel is enough to prove the whole category is worth the drawer space for extra tissue paper.
Pick the tissue paper pom-pom garland tonight it’s the fastest path to a finished piece before you second-guess the bigger projects. There’s a quiet satisfaction to décor built entirely from a material this ordinary, the kind that makes a room feel handled rather than purchased. Pin your favorites now, especially the ones that use supplies already sitting in a junk drawer somewhere.
More Ideas You’ll Love
- 15 Budget-Friendly Wall Art Ideas Anyone Can DIY This Weekend
- 12 Cozy Mantel Styling Ideas for Every Season
- 10 No-Sew Fabric and Paper Projects for a Handmade Home