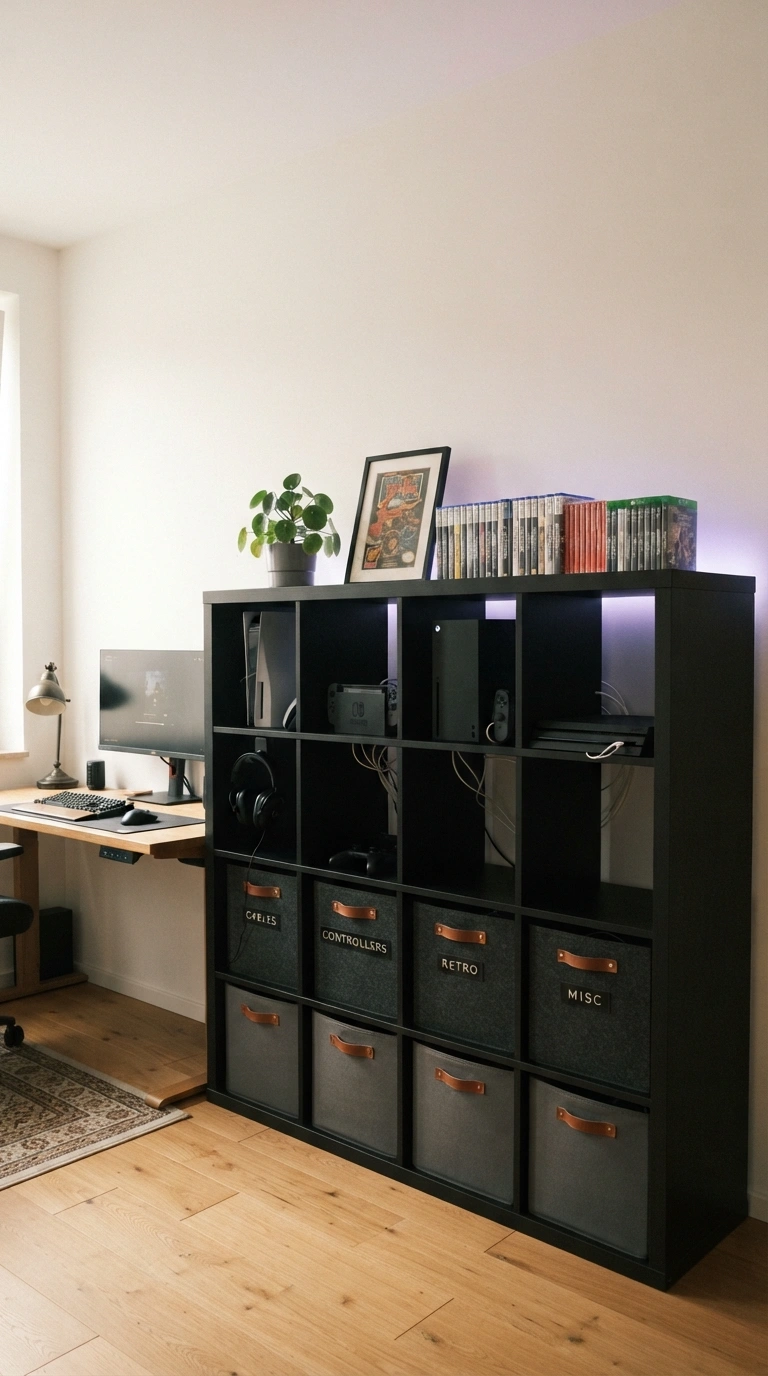
12 IKEA Kallax Gaming Room Setup Ideas That Actually Work
An IKEA Kallax gaming room setup starts with one cube unit and a plan for where the cords go everything else is decoration. This guide covers 12 ways to build a real gaming corner around it, from cable routing to lighting to the exact insert bins that keep controllers findable.
Right now your setup is probably three consoles stacked on a media stand built for a flatscreen and nothing else. Wires pool on the floor. The Switch dock lives under a couch cushion somewhere. None of that requires a new room or a carpenter it requires a Kallax, a few insert bins, and about ninety minutes on a Saturday. Here’s where to start.
Quick Navigation
- Why an IKEA Kallax Gaming Room Setup Makes Such a Difference
- 12 Kallax Gaming Room Setup Ideas You Can Actually Build
- How to Start Your Kallax Gaming Room Transformation
- Ready to Build Your Kallax Gaming Setup?
Why an IKEA Kallax Gaming Room Setup Makes Such a Difference
A Kallax gaming room setup earns its keep in three ways: the open-back cubes route cords out of sight, the frame stacks storage vertically instead of eating floor space, and matte black or white finishes stay neutral under RGB light instead of fighting it.
It scales down fine, too a single 2×4 unit beside a desk handles most of a small room’s clutter. Start with insert bins before anything else.
| Best starting point | Insert bins in the two bottom cubes |
| Biggest impact area | Cable routing behind the monitor and console shelf |
| Budget to start | $70–150 for bins, clips, and one LED kit |
| Time to complete | One afternoon for a single unit, a weekend for a full wall |
12 Kallax Gaming Room Setup Ideas You Can Actually Build
1. Cable Chaos, Solved: Kallax Insert Bins for Every Cord in Your Gaming Room
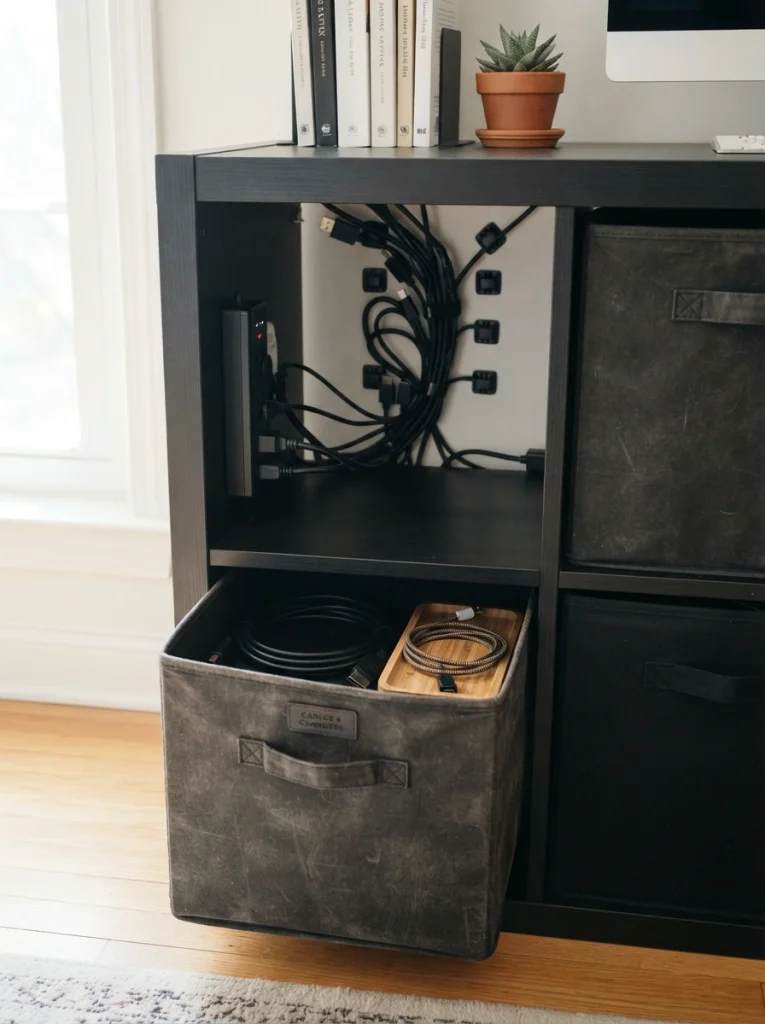
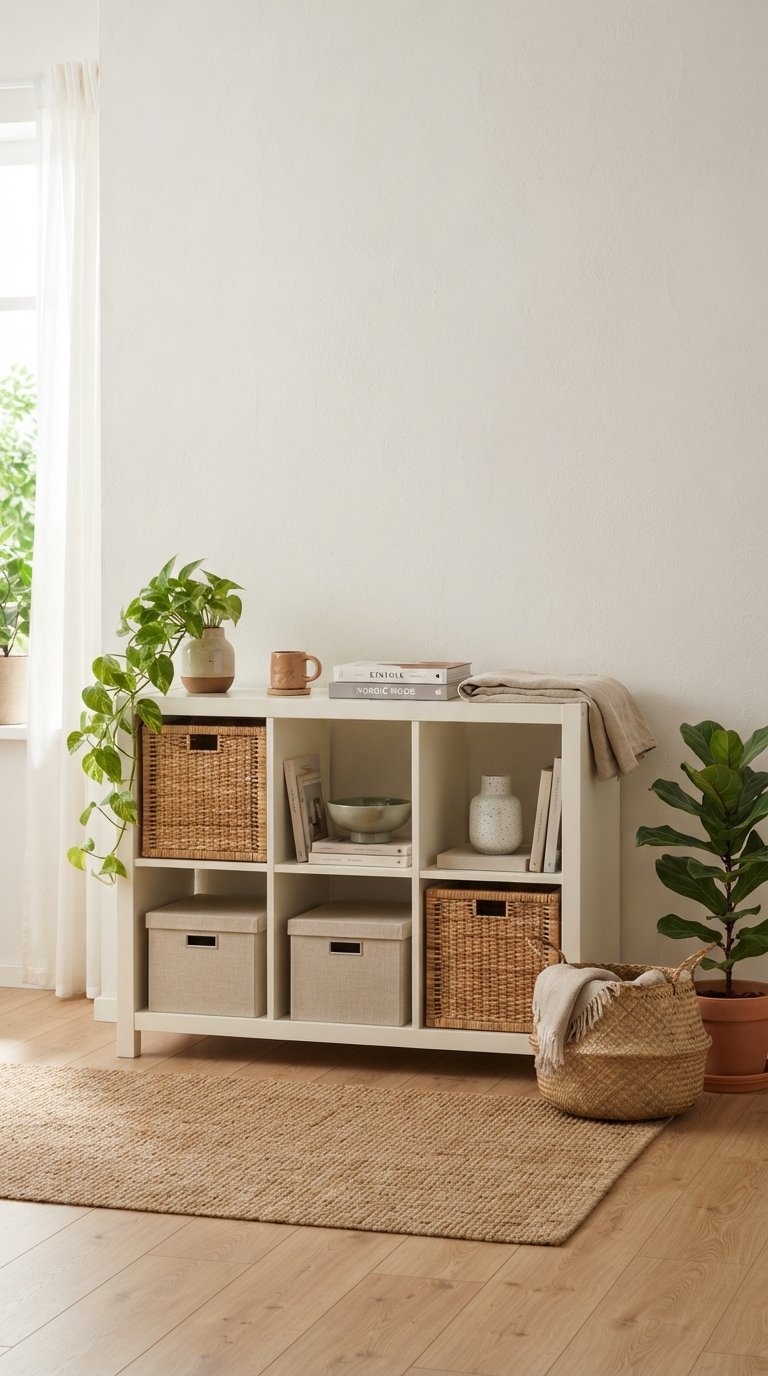
What it looks like: Fabric bins sit flush in two bottom cubes, cords disappearing behind them instead of pooling on the floor.
Why it works: Kallax cubes are open on the back, so running cords through the rear gap instead of the front opening keeps every bin pullable without unplugging anything a detail most buyers miss until year two.
How to copy it: Cut a small routing hole in the back panel of two bottom cubes, run power strips and console cables through it, then drop in fabric bins with front cutouts for airflow.
Best for: Anyone with three or more consoles and a floor currently covered in charger cords.
Cable Management Setup Checklist:
- [ ] Unplug everything and label each cable with tape before removing it
- [ ] Cut a routing hole in the back panel of two bottom cubes
- [ ] Mount a power strip to the inside cube wall with adhesive clips
- [ ] Route cables through the back hole and plug everything back in
- [ ] Slide fabric bins in front, cords hidden behind them
Shop This Look
| Product |
|---|
| Fabric cube storage bins with front cutout handles |
| Adhesive cable management clips, black |
| Under-shelf mountable power strip |
| Reusable Velcro cable ties, multi-pack |
| Paintable cord raceway channel |
2. Turn One Cube Into a Console Docking Station
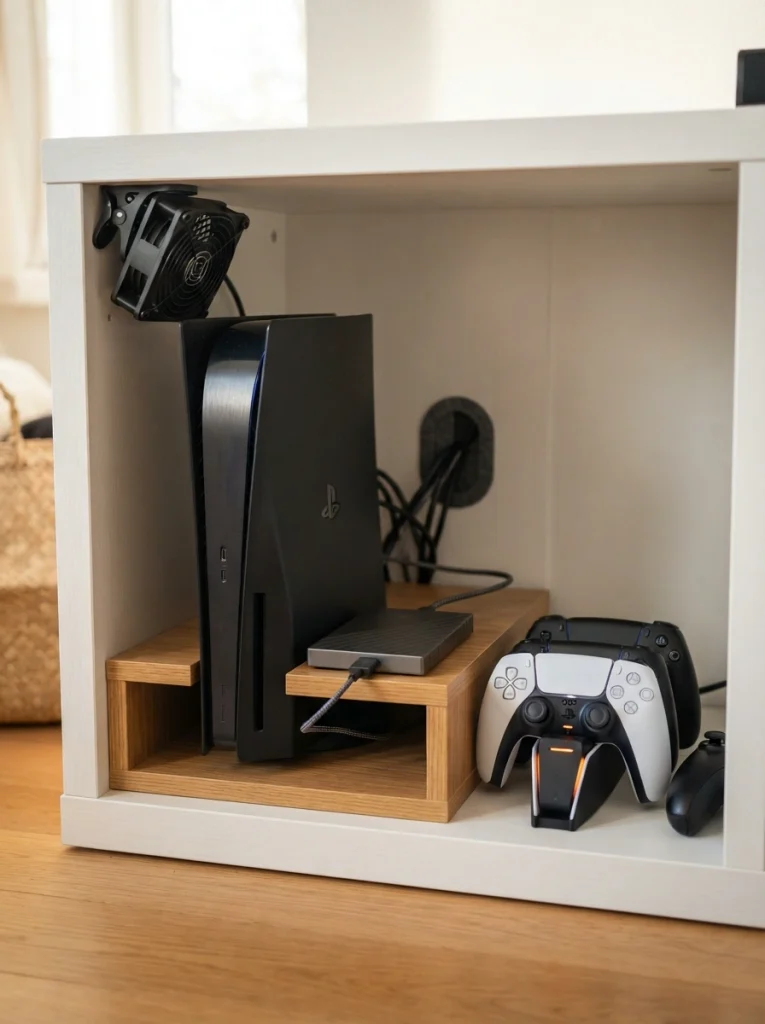
What it looks like: One open cube holds the console at a slight raise, cables dropping straight down instead of trailing sideways.
Why it works: Raising the console off the cube floor on a slim shelf insert improves airflow underneath it, which matters more for heat-sensitive hardware than most gamers realize consoles crammed into a closed cabinet run hotter and louder.
How to copy it: Cut a thin plywood shelf to sit an inch above the cube floor on small blocks, leaving a gap for airflow, and set the console on top facing the open side. The same raised-shelf trick shows up in our Kallax TV console styling ideas for media-focused builds.
Best for: Anyone with a single main console who wants it visible and dust-free without a dedicated TV stand.
Quick Win: Stand the console upright using a $10 vertical stand instead of laying it flat it cuts the footprint in the cube by half and improves airflow at the same time.
3. Backlit Kallax: RGB Strip Lighting That Won’t Wash Out Your Screen
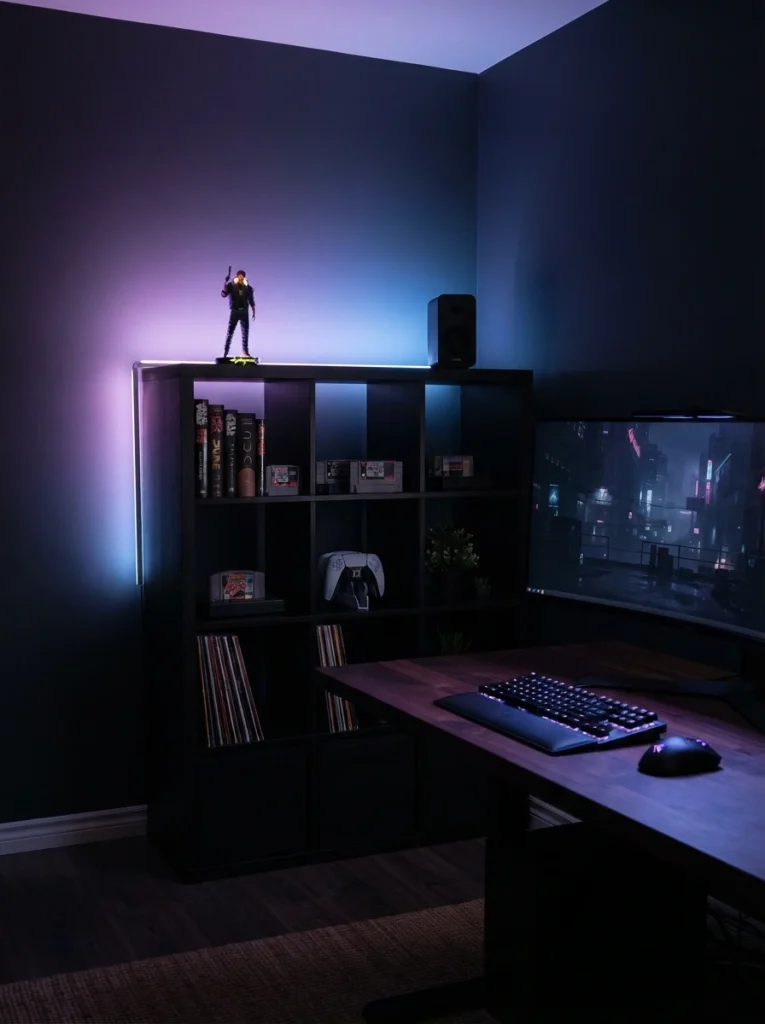
What it looks like: A thin strip of light traces the top back edge of the unit, glowing onto the wall instead of into the room.
Why it works: Pointing the strip backward toward the wall creates bias lighting ambient light that reduces eye strain from a bright screen in a dark room without the glare across the monitor that front-facing strips cause.
How to copy it: Mount a USB-powered RGB strip along the top back lip of the unit facing the wall, not the room, and set brightness to roughly 10% of screen brightness for the least eye fatigue.
Best for: Night gamers and anyone who’s noticed eye strain after long sessions in a dark room.
Styling Note: Match the LED color to whatever’s on screen most often cool blue for competitive shooters, warm amber for cozy or narrative games. It sounds small but changes how the whole room feels.
Shop This Look
| Product |
|---|
| USB-powered RGB LED strip lighting kit |
| Smart remote LED controller |
| Adhesive-backed cable clips for strip routing |
| Diffuser channel cover for LED strips |
| Smart plug for one-touch on/off |
Up next: the color choice that quietly changes how big or small the whole setup feels.
4. Black-and-White Color Blocking to Zone Your Kallax Gaming Room
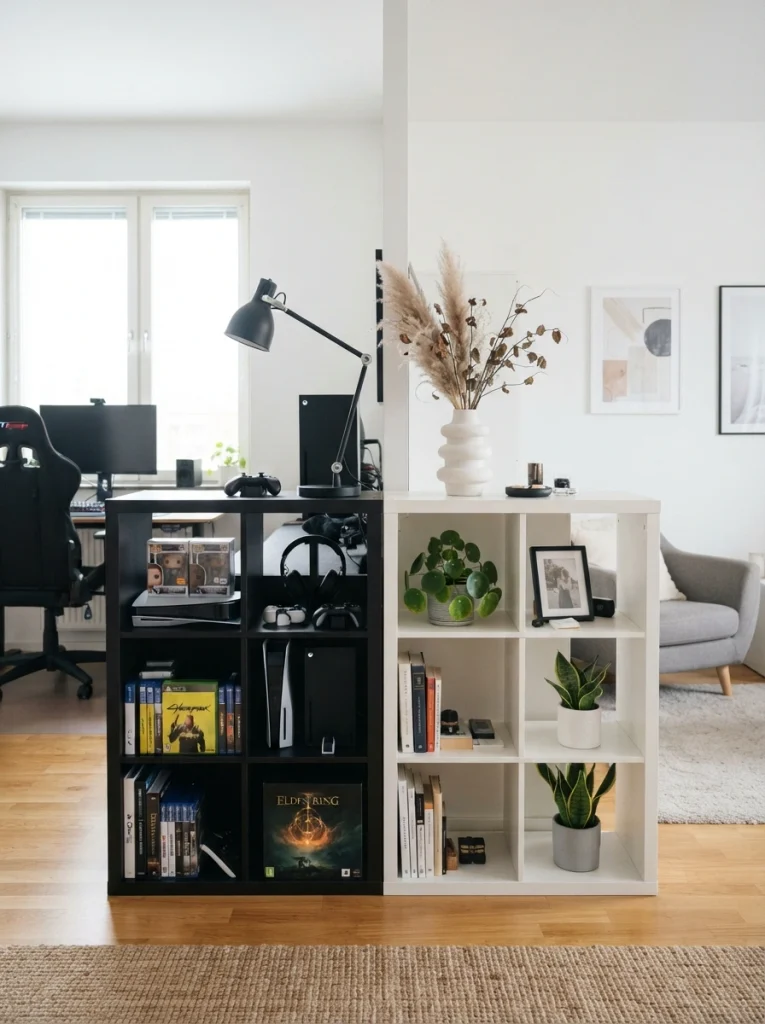
What it looks like: A hard color line runs down the middle of the room where the black unit ends and the white one starts.
Why it works: Color blocking uses contrast instead of a physical wall to define zones. The eye reads the black side as “gaming” and the white side as “everything else” without needing a divider or extra furniture.
How to copy it: Buy two Kallax units in different finishes rather than matching colors, then push their backs together lengthwise to form one continuous run that visually splits the room. The broader Kallax styling ideas roundup covers more color combinations if two-tone finishes interest you generally.
Best for: Shared bedrooms or studio apartments where the gaming setup needs to feel separate from the sleeping area.
Budget Version: Skip the second unit entirely paint the back panel of a single Kallax half black and half white to fake the same zoning effect for under $15 in paint.
5. Warm Up the Tech With Walnut-Stained Insert Panels
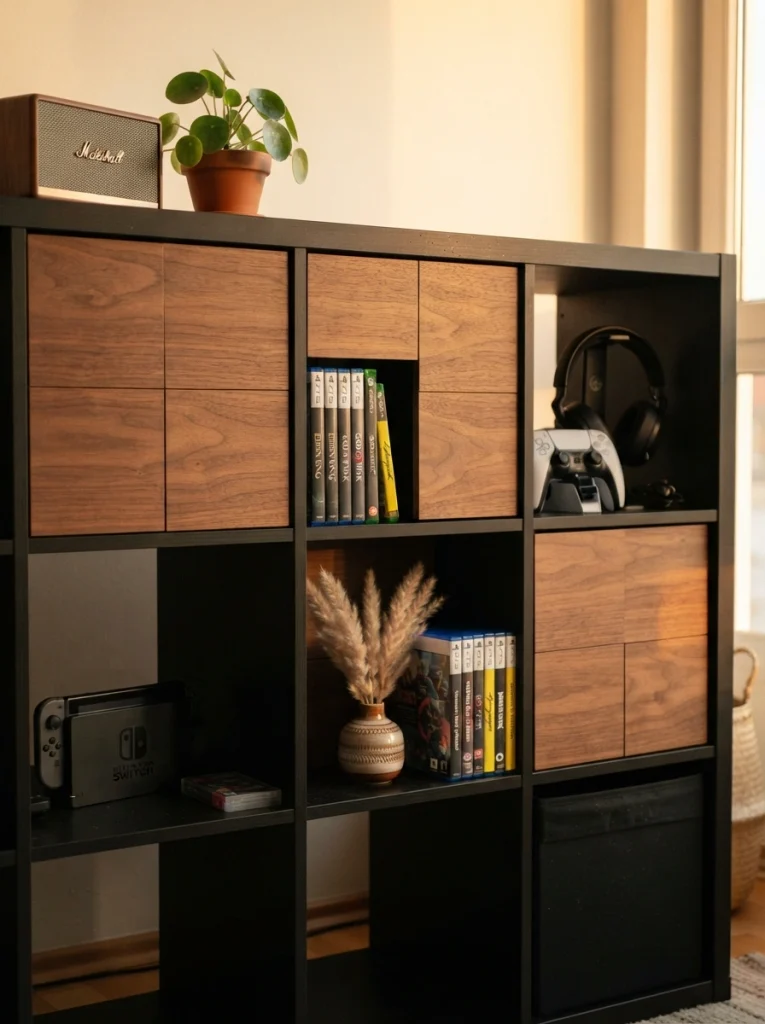
What it looks like: A few cubes get a thin wood-toned back panel while the rest stay open, breaking up an otherwise all-black wall of tech.
Why it works: An all-black or all-white Kallax wall reads flat under LED lighting. Dropping in two or three walnut-stained panels adds warmth through material contrast the same principle that keeps an all-white kitchen from feeling sterile.
How to copy it: Cut thin plywood to the cube’s interior back dimensions, stain with a walnut gel stain, and adhesive-mount it inside two or three cubes only not the whole unit. The same panel-swap trick is a staple in Kallax bookshelf styling for anyone mixing textures elsewhere in the house.
Best for: Anyone whose all-black or all-white setup feels flat or cold under screen light.
Warning: Don’t stain the panels after mounting them gel stain drips into cube seams and is nearly impossible to clean off matte laminate. Stain flat pieces first, let them cure 24 hours, then mount.
6. Use a Kallax as a Room Divider Between Gaming and Sleeping Space
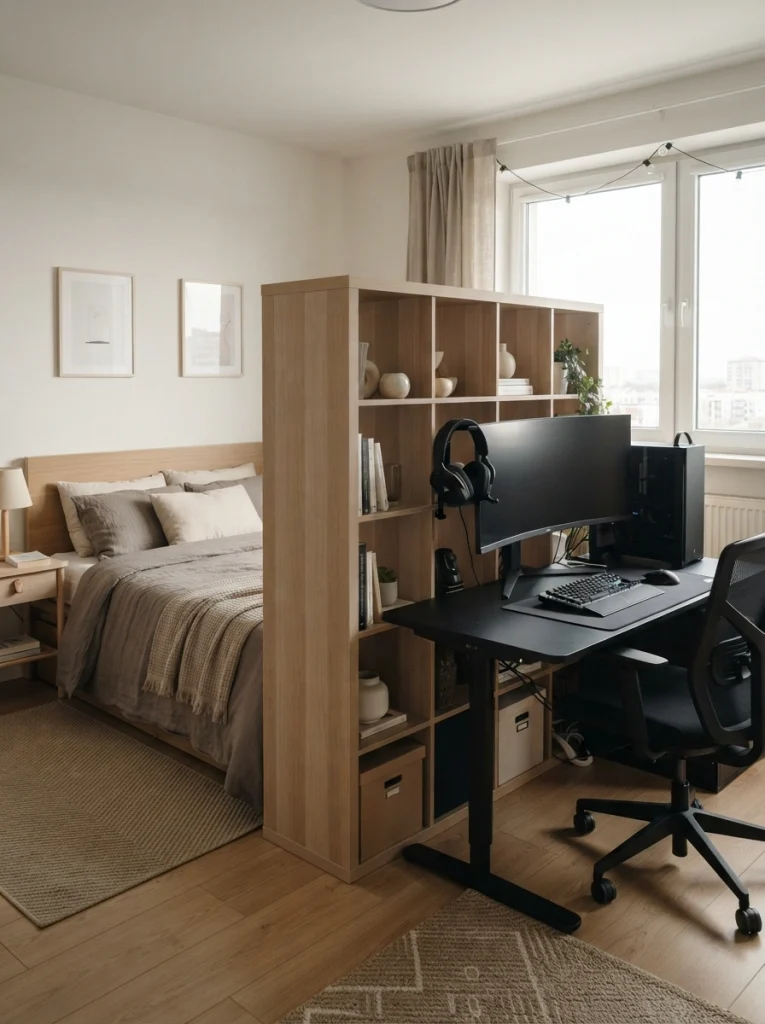
What it looks like: The unit sits perpendicular to the wall instead of flush against it, splitting one room into two functional halves.
Why it works: Because Kallax cubes are open on both sides, the divider doesn’t block light or airflow the way a solid partition would. Each side keeps storage access, and the room still feels like one space instead of two boxed-off ones.
How to copy it: Anchor the unit to the floor or an adjacent wall stud with an anti-tip bracket, then position it so its long side runs perpendicular to the room’s main wall, leaving at least 30 inches of walking space on both sides. For more layouts along these lines, Kallax room divider ideas has several built for even tighter footprints.
Best for: Shared bedrooms, studio apartments, or anyone turning part of a guest room into a gaming corner.
Small-Space Tip: Use a 2×2 Kallax instead of the 4×4 for dividing it still breaks the sightline between zones but leaves enough floor space in rooms under 120 square feet.
The next idea solves a problem most gaming setups have and nobody talks about: glare.
7. Bias Lighting Behind the Monitor, Placed the Right Way
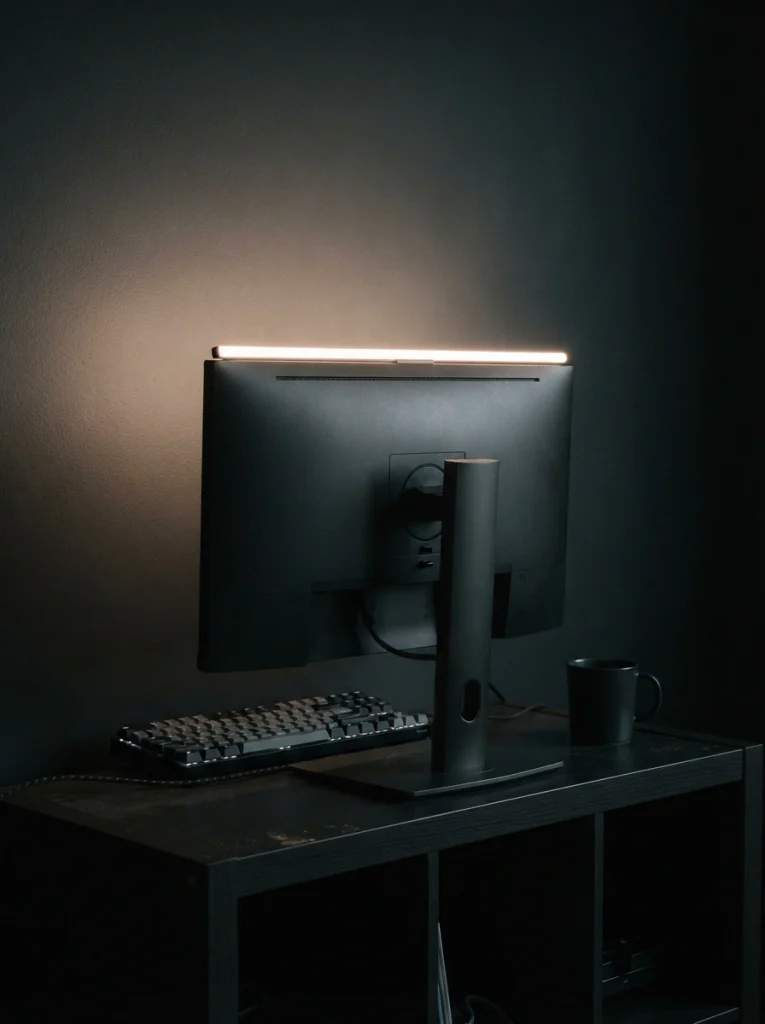
What it looks like: A slim strip of light sits directly behind the monitor itself, not the furniture underneath it.
Why it works: Light placed behind the monitor rather than under the whole unit reduces contrast between the bright screen and the dark wall behind it that contrast is the actual cause of eye strain. Furniture-wide lighting looks good but does less for fatigue.
How to copy it: Mount a short LED strip to the back of the monitor stand or VESA mount itself, angled at the wall, and keep the unit’s own shelf lighting separate and dimmer.
Best for: Anyone doing long sessions who’s already tried RGB lighting and still gets tired eyes.
Mistake to Avoid: Mounting the strip along the Kallax shelf edge instead of the monitor itself puts the light source too far from the screen to reduce contrast it looks similar but does almost nothing for eye strain.
8. The Vertical Kallax Gaming Room Tower Built for Tiny Rooms
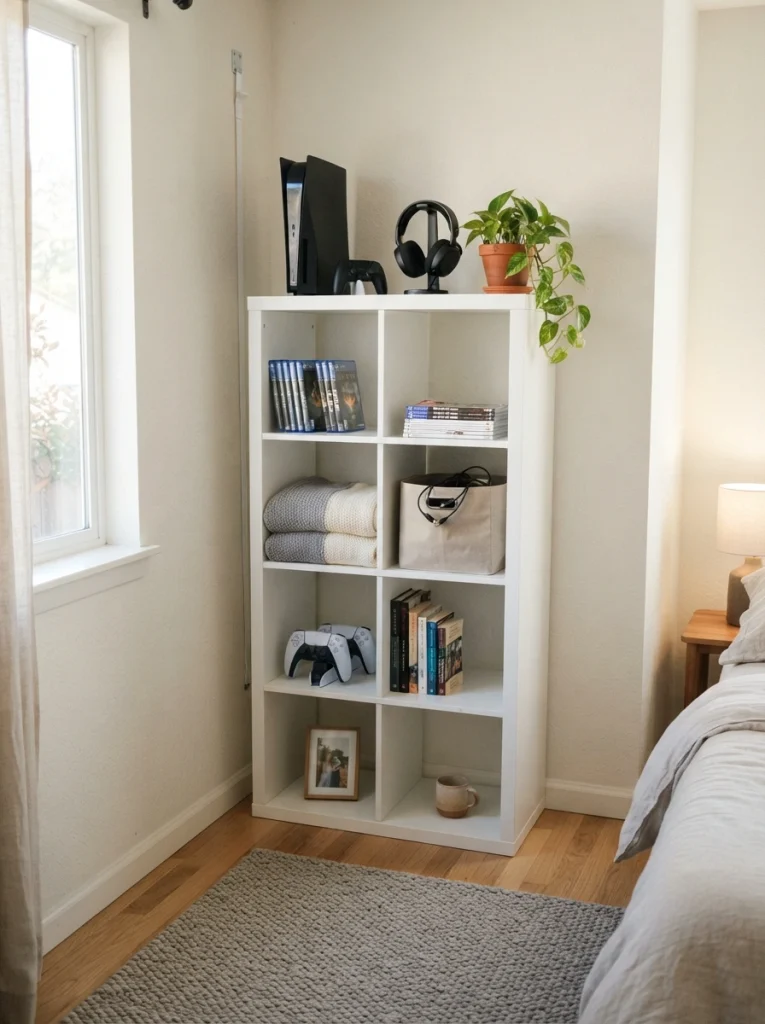
What it looks like: A narrow column of cubes climbs the wall instead of spreading across the floor, tucked into an unused corner.
Why it works: Going vertical uses square footage a wide unit never could in a small room. Stacking two 2×4 units instead of buying one wide 4×4 keeps the footprint under two feet while holding the same storage volume.
How to copy it: Stack two 2×4 Kallax units and bolt them together at the seam, then anchor the top unit to a wall stud with a furniture strap non-negotiable at this height. If the room’s even tighter than a corner, Kallax under-stairs storage ideas has a few layouts built for awkward leftover space.
Best for: Small bedrooms, dorm rooms, or anyone working with under 100 square feet total.
Important: A stacked tower this tall needs a stud-anchored strap, not just the adhesive furniture anchors sold for single units the extra height changes the tip-over math enough that adhesive alone isn’t rated for it.
Shop This Look
| Product |
|---|
| Wall-mounted anti-tip furniture anchor strap kit |
| Cube-to-cube connector brackets |
| Stud finder |
| Narrow corner shelf insert |
| Slim felt furniture pads |
9. A Row of Deep Purple Cubes as Your Streaming Backdrop
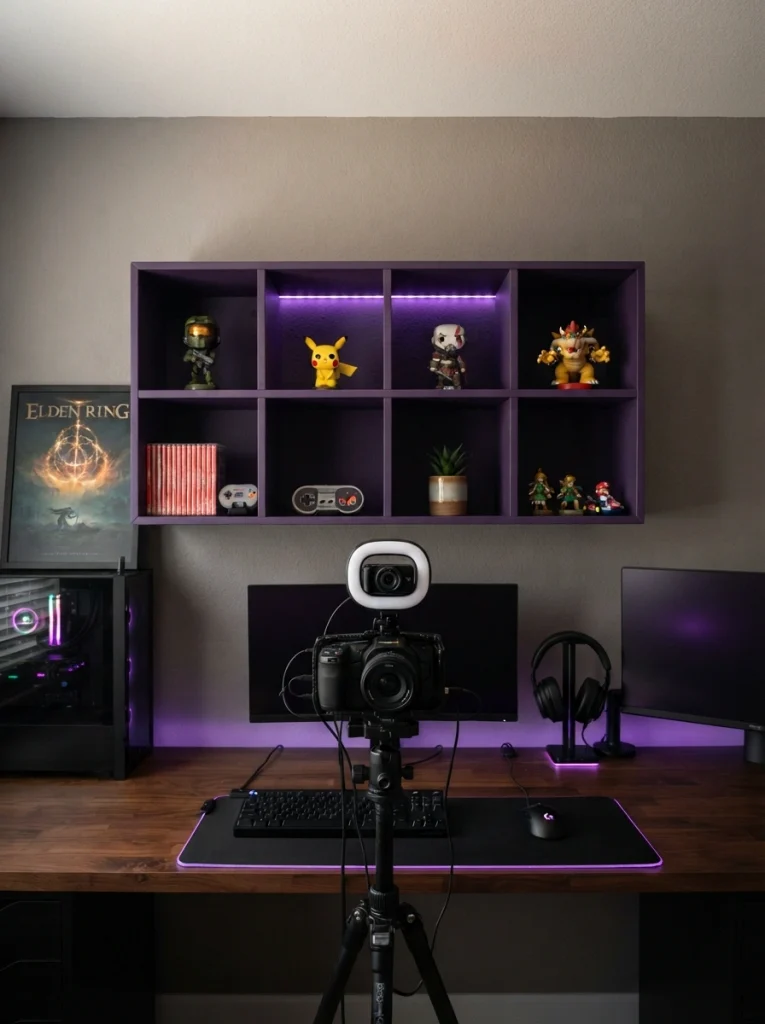
What it looks like: One full row of cubes in a single saturated color sits directly in the webcam’s frame, everything else in the room staying neutral.
Why it works: A single strong color reads clearly on camera in a way busy shelves full of different-colored items don’t. Streaming and video calls compress detail, so one deliberate color block behind a person shows up better than a “nicer” mixed display.
How to copy it: Paint just the front-facing edges of one row with matte latex paint in a saturated color, keep everything behind camera range neutral, and light the row separately from your face light so it doesn’t blow out on camera.
Best for: Streamers, anyone on frequent video calls, or people who want their setup visible in the background of clips.
💡 Quick Win: Test the color on camera before committing some saturated purples and reds read as muddy brown on cheap webcams. Film a 10-second test clip first.
The last few ideas get more specific starting with a trick most people wouldn’t think to try with a bookshelf.
My Views:
Here’s something most guides won’t tell you: a fully loaded 4×4 Kallax with consoles, games, and a subwoofer easily clears 150 pounds, and on hardwood or laminate floors with no rug underneath, that’s enough weight shifted forward for the unit to walk itself an inch or two every time someone slams a controller down on top. I’ve seen it happen with units nowhere near a bed or high-traffic path. Anchor it to the wall even when it “isn’t going anywhere.”
10. Frosted Acrylic Insert Doors That Hide the Mess
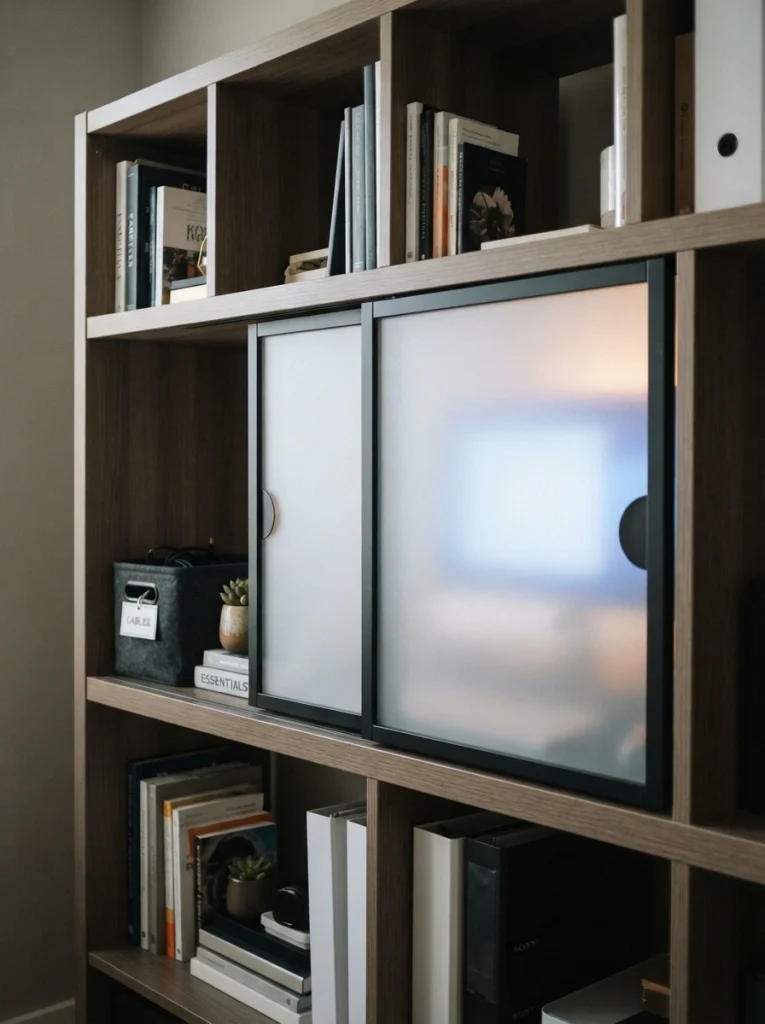
What it looks like: A few cubes get a translucent sliding panel instead of staying fully open, blurring what’s inside without hiding it completely.
Why it works: Frosted acrylic hides visual clutter cables, chargers, loose accessories while still letting light and a faint glow through, so the unit doesn’t read as a closed cabinet the way solid doors would in an otherwise open shelving system.
How to copy it: Buy pre-cut frosted acrylic sheets sized to the cube opening, mount a thin track at the top and bottom of the cube, and slide the panel in no drilling into the Kallax frame required. For a more complete hidden-storage approach, Kallax closet conversion ideas covers full door conversions rather than a few insert panels.
Best for: Anyone who wants some cubes hidden without the whole unit losing its open, shelf-like feel.
Budget Version: Frosted contact paper applied directly to a piece of clear acrylic gets the same blurred effect for a fraction of the cost of pre-frosted sheets.
11. Kallax as a Standing-Desk Riser
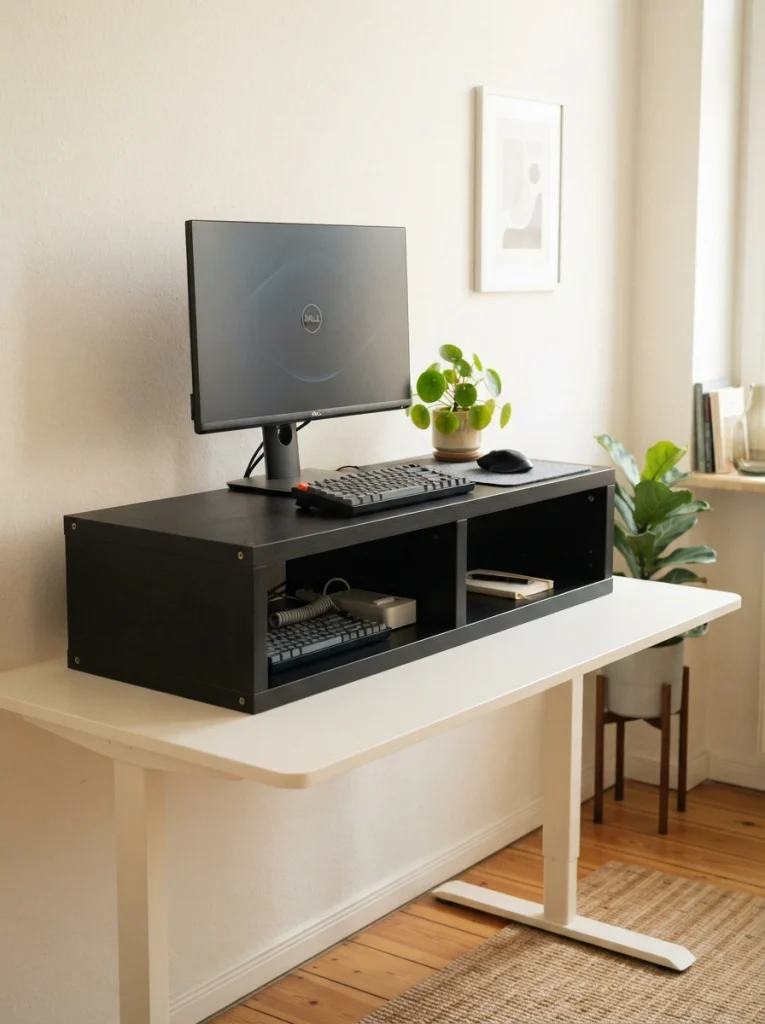
What it looks like: A cube unit laid on its side becomes the desk’s base, its open compartments doubling as under-desk storage at standing height.
Why it works: A 2×2 Kallax laid flat sits at nearly standing-desk height for an average adult, so it does double duty as both a riser and storage without buying a separate desk converter furniture repurposing most people don’t think to try.
How to copy it: Lay a 2×2 unit on its side, add a flat top board cut to size if the top isn’t flush enough for typing comfort, and use the open cubes underneath for keyboard, mouse, and cable storage. For more desk-adjacent Kallax builds, Kallax home office ideas has several standing and seated layouts.
Best for: Anyone who wants to try standing gaming sessions without buying a dedicated standing desk.
Pro Tip: Measure your actual elbow height before committing a standard Kallax cube runs close to comfortable standing-desk height for someone 5’6″–5’10”, but shorter or taller gamers may need a thin platform underneath to adjust it.
Shop This Look
| Product |
|---|
| Adjustable monitor riser shelf |
| Anti-slip rubber shelf liner |
| Under-desk cable management tray |
| Clamp-mount keyboard tray |
| Flat MDF top board, cut to size |
12. A Floating Kallax Ledge for Figures and Collectibles
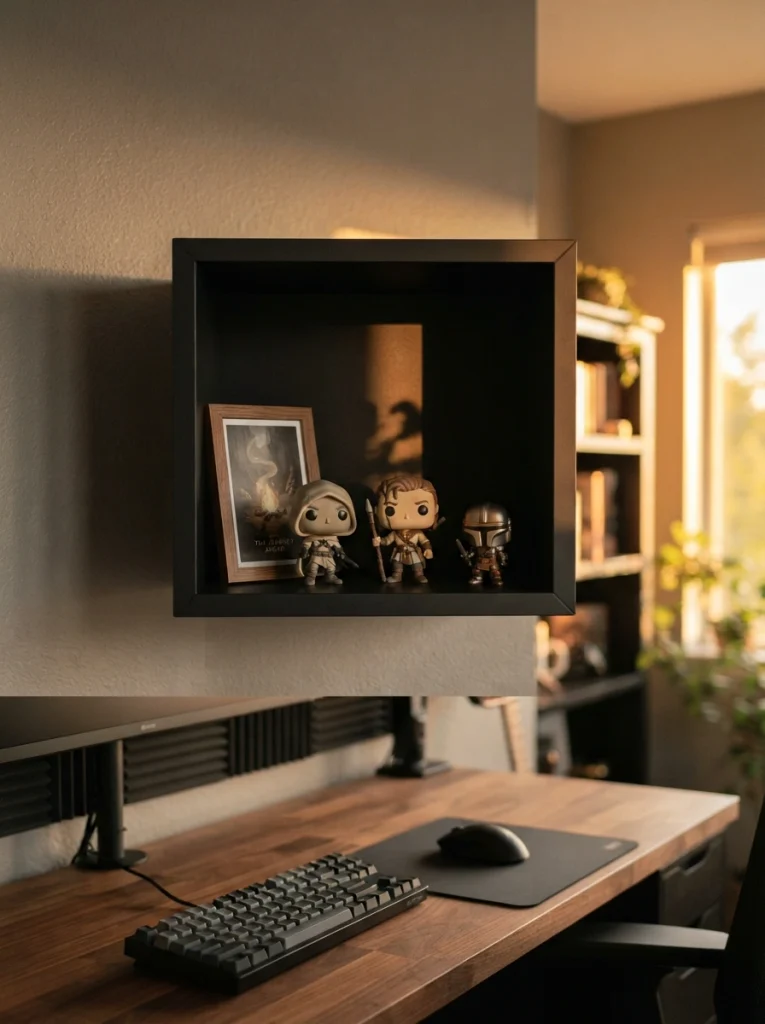
What it looks like: A single cube floats above the desk at eye level, holding a few carefully spaced figures instead of a crowded shelf.
Why it works: Negative space between displayed items reads as intentional curation rather than clutter three figures with visible gaps between them look more considered than ten crammed into the same cube.
How to copy it: Mount a single Kallax cube using a French cleat or floating shelf bracket rated for at least 30 pounds, then style it with no more than three or four items, leaving visible space between each. The same spacing principle carries over to Kallax plant shelf styling ideas for anyone mixing greenery into open shelving.
Best for: Anyone with a small collectible or figure collection who wants it displayed instead of stored.
Styling Note: Group items in odd numbers three items spaced unevenly reads more intentional than four spaced perfectly evenly, a small trick most styling guides skip over.
Common mistake to avoid: Loading gaming gear onto the shelf without checking weight and airflow. Check the load limits for your unit, and leave space around consoles and PCs so they can ventilate.
Frequently Asked Questions
Can a Kallax shelf hold a gaming console?
Consoles are usually light enough, but check the load limit for your unit, leave space around the console for airflow and avoid stacking heat-producing devices.
How do I manage gaming cables?
Group cables with ties or sleeves, route them down the back of the unit and label the plugs so setups are easy to change later.
How do I reduce glare on a gaming screen?
Place the screen away from windows, use dimmable lighting behind it and avoid shiny surfaces that reflect the display.
How to Start Your Kallax Gaming Room Transformation
In practice, cable management is always the first move, not lighting or color. Mount the insert bins and route cords through the back panel before touching paint or LED strips, since every other idea here assumes the cords are already handled. Skipping straight to RGB lighting on top of a tangled cube just makes the mess more visible.
The most common fixable mistake is buying LED strips before measuring the cube depth. Standard strips often run too long for a single cube and end up bunched at the back, blocking airflow behind consoles. Measure the interior cube dimensions first, then buy a strip a few inches shorter than needed rather than longer.
Three things make an immediate difference for well under $50 combined: a set of fabric insert bins with front cutout handles (around $25 for a two-pack), a roll of black adhesive cable clips (about $8), and a single USB-powered LED strip kit with a remote (around $15). All three install without tools.
A single-unit cable and lighting upgrade takes about two hours and runs $50–100 total. A full room build divider placement, color blocking, insert panels, and a vertical tower realistically takes a full weekend and lands between $250 and $450 depending on how many units are involved. Most people do it in stages: cables one weekend, lighting the next.
Ready to Build Your Kallax Gaming Setup?
Between the color blocking, the walnut panel inserts, and the cable routing covered here, a Kallax gaming room setup really comes down to layering a handful of small, specific changes rather than one big overhaul. Nobody needs to tackle all 12 ideas in a weekend picking two or three that solve your actual problem gets most of the way there.
If nothing else, start today: unplug everything, route the cords through the back panel, and drop in two insert bins. The whole point of building it around Kallax is that the room ends up feeling controlled instead of chaotic, even with three consoles running. Save this one before your next trip to IKEA the insert panel and lighting ideas especially are easy to forget once you’re standing in the aisle.
You Might Also Like
- 9 Cable Management Ideas for Any Media Console
- 7 IKEA Kallax Home Office Layouts for Small Rooms
- 12 IKEA Kallax Streaming Setup Ideas for Content Creators