9 IKEA Kallax Cat Furniture Hacks for Pet Owners Who Still Want Nice Furniture
A cat tree doesn’t have to look like it hijacked your living room and the IKEA Kallax, that boxy modular shelf already sitting in half the apartments in America, turns out to be surprisingly good raw material for pet furniture. This guide walks through nine specific Kallax hacks for pet owners, covering everything from built-in scratching posts to a litter box that disappears behind a cabinet door.
Done right, it feels less like “accommodating the cat” and more like the room was designed with both of you in mind. There’s warmth in a cubby lined with faux fur, structure in a sisal-wrapped post that finally gives claws somewhere better to go, and a quiet kind of relief when the litter box stops being the first thing guests notice. None of this requires carpentry skills just a Kallax, a free weekend, and a willingness to drill a few holes in furniture you already own. Let’s get into it.
Quick Navigation
- Why IKEA Kallax Cat Furniture Hacks Make Such a Difference
- Paint the Kallax to Match — Not Just to Cover Scratches
- Wrap a Corner Post in Sisal Rope
- Turn One Kallax Cube Into a Cozy Cat Den
- Add Warm LED Strips Inside the Cubby
- Stack the Kallax Vertically for a Climbing Tower
- The One-Cube Version for Tiny Apartments
- Line Cubbies in Removable, Washable Fabric
- Hide the Litter Box Behind a Kallax Cabinet Door
- Color-Match Storage Bins for Toys and Grooming Gear
- How to Start Your IKEA Kallax Cat Furniture Transformation
- Ready to Create a Cat-Friendly Space You Still Love
Why IKEA Kallax Cat Furniture Hacks Make Such a Difference
Kallax hacks for cat furniture start with a basic observation: cats want height, enclosure, and a scratching surface with real resistance, and a $20 IKEA shelf already covers two of the three. What’s missing is texture (sisal, not laminate) and warmth (fabric, not bare particleboard) both cheap, weekend-scale additions.
The approach works especially well in rentals and small living rooms, since one Kallax unit can replace a cat tree, a litter cabinet, and a toy bin without adding floor space. Start with whichever cube the cat already claims most that’s the one worth converting first.
| Best starting point | The cube your cat already sits in most |
| Biggest impact area | A sisal-wrapped scratching post — it saves the most furniture |
| Budget to start | $35–$60 for one converted cube |
| Time to complete | A single weekend afternoon, 2–4 hours |
1. Paint the Kallax to Match Not Just to Cover Scratches
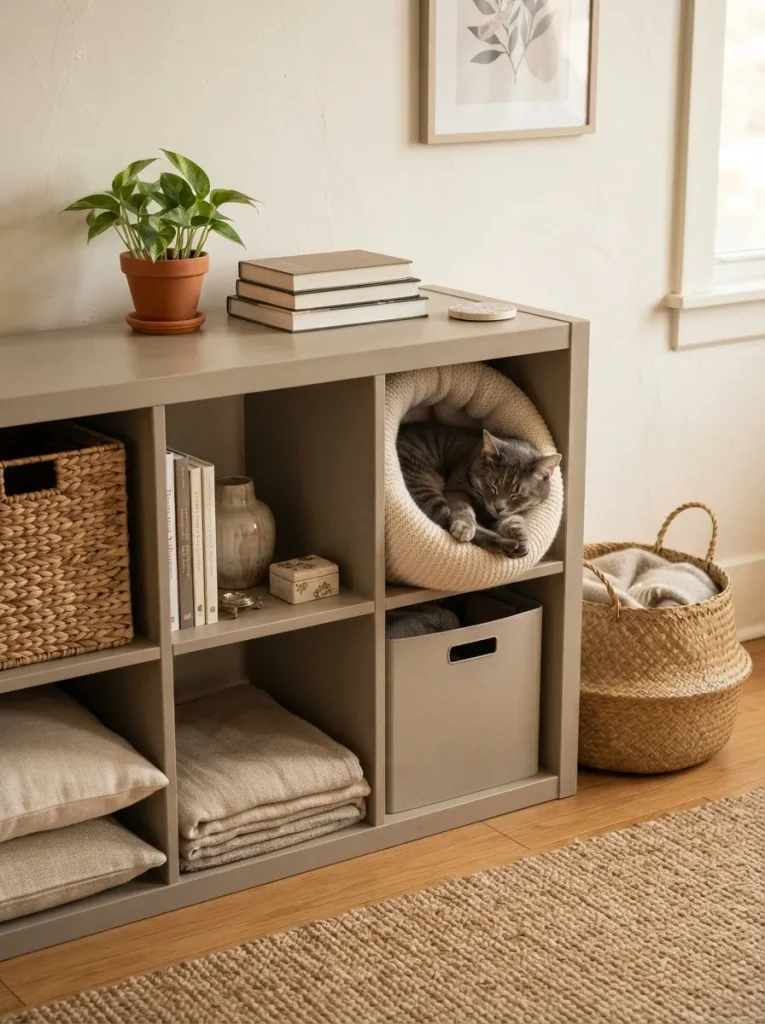
What it looks like: A Kallax repainted in a soft, chalky greige stops reading as “the cat’s shelf” and starts reading as furniture flat, matte, a little worn at the edges.
Why it works: Laminate particleboard has almost no visual weight of its own; paint gives it one. A muted, low-saturation color warm greige, dusty clay, soft sage reads as intentional in a way glossy white laminate never does, and it hides scuff marks better than anyone expects. The same restrained palette shows up across other Kallax styling ideas that lean quiet instead of glossy.
How to copy it: Sand the laminate lightly with 220-grit paper first so primer actually grips it, then use a bonding primer made for laminate (not standard latex primer) before two coats of matte furniture paint. Skip the roller on the routed edges a small foam brush gets into the grooves without leaving lines.
Best for: Renters and anyone tired of a Kallax that visually competes with the rest of the room.
Budget Version: A quart of laminate-safe primer plus a sample-size pot of matte paint covers a two-cube section for well under $40 enough to test the color before committing to the whole unit.
Shop This Look
| Product |
|---|
| Bonding primer for laminate furniture |
| Matte finish furniture and cabinet paint |
| Angled foam paint brush set |
| Fine-grit sanding sponge |
| Painter’s tape for clean edges |
2. Wrap a Corner Post in Sisal Rope
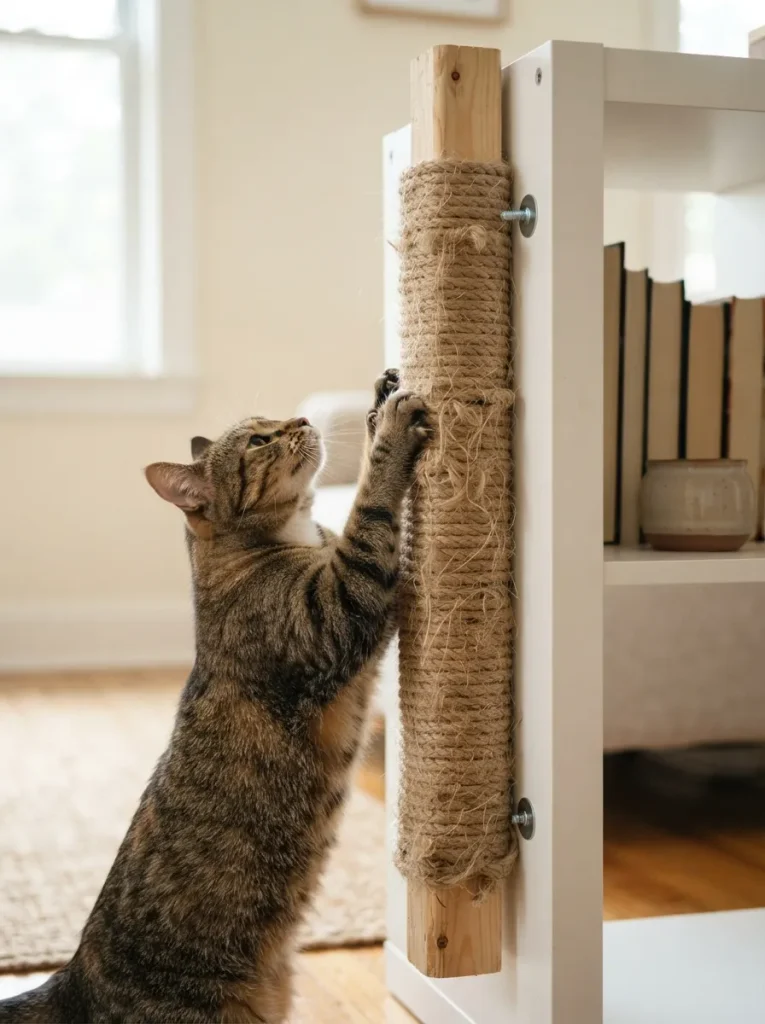
What it looks like: A length of 4×4 pine, wrapped edge to edge in coarse sisal rope and bolted to the side panel of the Kallax, looks less like a cat accessory and more like a deliberate structural detail.
Why it works: Cats scratch to shed claw sheaths and mark territory, and they prefer a vertical surface with resistance sisal’s rough weave gives claws something to catch and pull against, which loose carpet or smooth wood never quite delivers. Mounting it at full cat-stretch height (usually 28–32 inches) matters more than the material itself.
How to copy it: Use a 4-foot length of 4×4 lumber, wrap it in 5/16-inch sisal rope working bottom to top, stapling every few wraps on the underside where it won’t show, then lag-bolt it directly through the Kallax side panel into the post.
Best for: Households with a couch or chair arm that’s already taken damage this gives claws a better option nearby.
Warning: Skip contact cement to hold the rope in place the fumes and adhesive residue aren’t safe near a surface your cat will chew and lick constantly. Staples on the underside of each wrap hold just as well without the risk.
Shop This Look
| Product |
|---|
| Natural sisal rope, 5/16-inch diameter |
| 4×4 unfinished pine post |
| Heavy-duty staple gun |
| Lag bolts and washers |
| Cat-safe wood sealant |
3. Turn One Kallax Cube Into a Cozy Cat Den
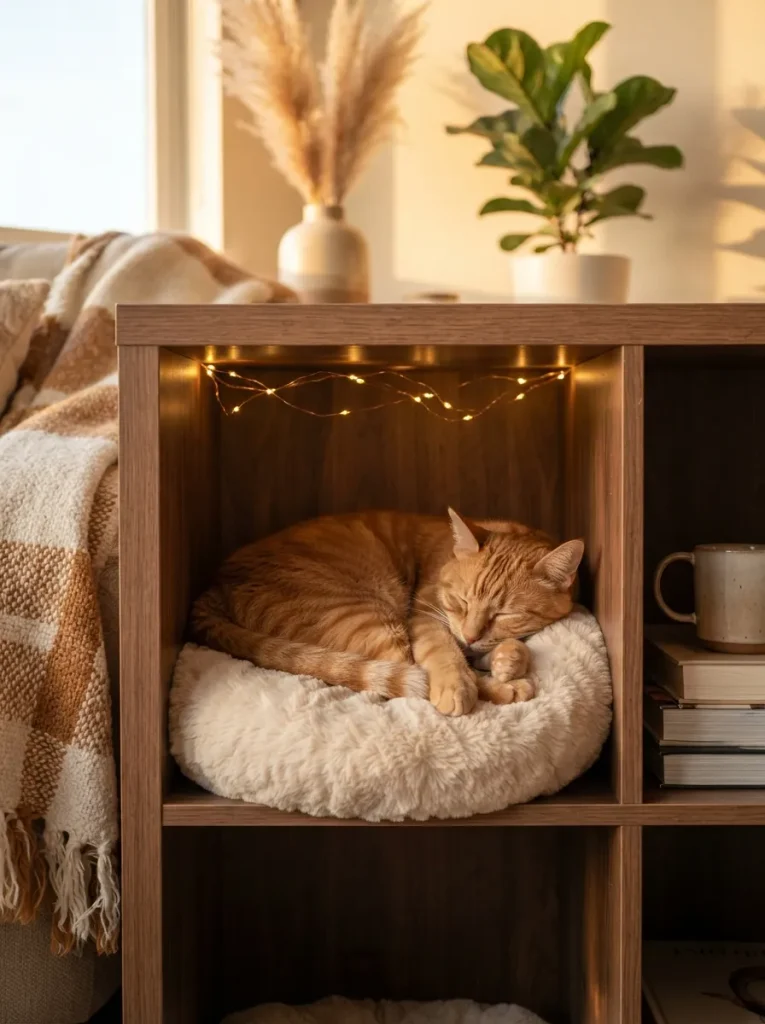
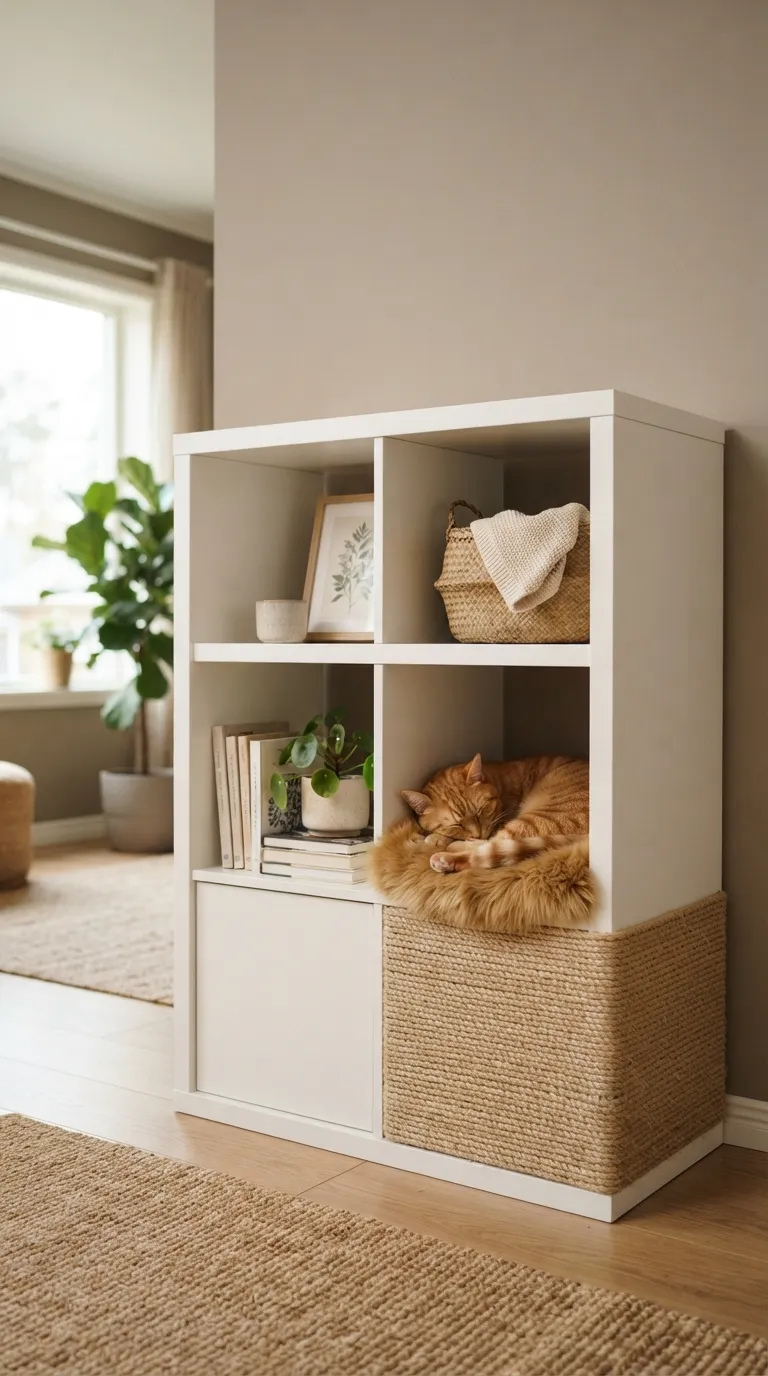
What it looks like: One cube, filled almost exactly with a round faux fur cushion, turns into a den enclosed on three sides, open on one, which is the shape most cats gravitate toward on their own.
Why it works: Enclosure reduces a cat’s exposure on multiple sides at once, which lowers stress in multi-pet or high-traffic households basic feline behavior, not decor theory. A cube-sized cushion (roughly 13×13 inches) fills the space fully enough that it feels den-like instead of “a shelf with a blanket on it.”
How to copy it: Measure the interior cube standard Kallax cubes run about 13x13x15 inches and order or cut a cushion sized just slightly smaller so it sits snugly without bunching at the corners.
Best for: Multi-cat homes where each cat needs its own claimed spot, not a shared bed it’s the same cube-lining trick used in soft-sided Kallax nursery ideas, just scaled for a cat instead of a baby.
Styling Note: Run a thin strip of removable felt tape along the cube’s inner edges before placing the cushion it stops fabric from snagging on the raw particleboard lip over time.
Up next: the fix for a cube that already looks cozy but feels cold once the room goes dark.
4. Add Warm LED Strips Inside the Cubby
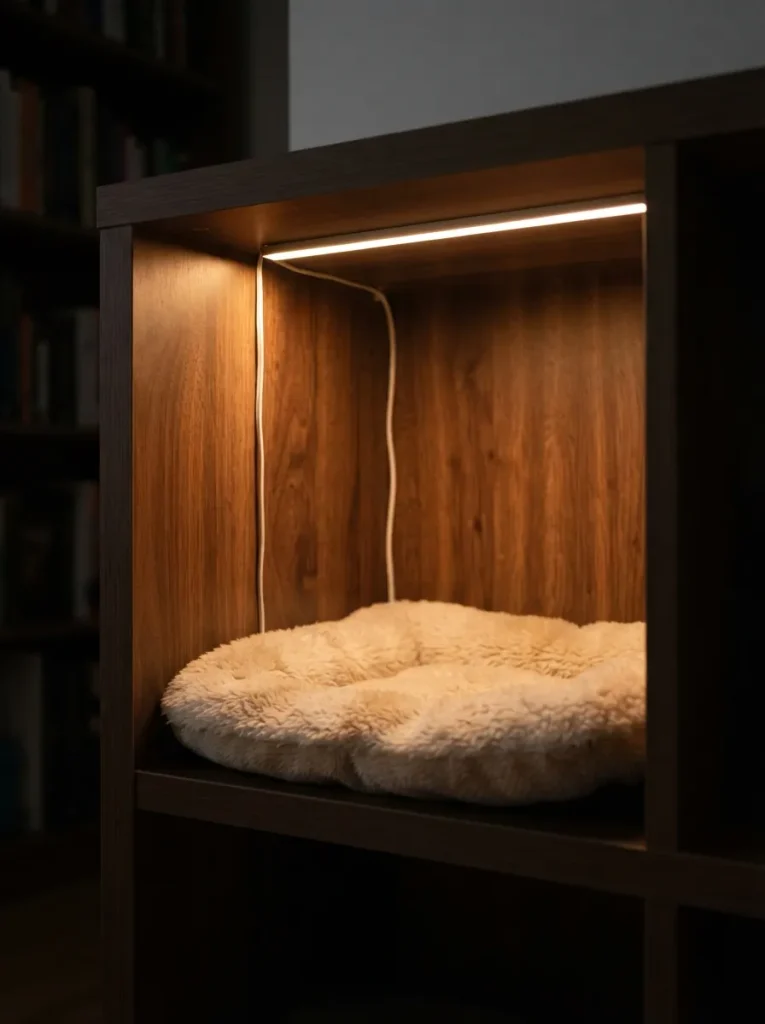
What it looks like: A slim LED strip tucked along the top interior edge of the cube casts a low amber glow downward barely noticeable in daylight, warm and den-like once the room dims.
Why it works: Cats aren’t drawn to bright light in a sleeping spot, but a low warm glow (aim for 2700K, not cool white) reads as inviting to humans walking past without disturbing a cat already curled up inside. It’s a small detail that makes the nook look designed rather than improvised.
How to copy it: Run a battery-powered or USB LED strip along the top back corner of the cube, angled to bounce light off the back panel instead of shining directly into the space, and set it on a timer so it’s not left running all night.
Best for: Living rooms where the Kallax sits in a main sightline and needs to look finished after dark, not just during the day the same glow technique turns up in several Kallax bookshelf styling ideas for highlighting objects on open shelves.
Important: Most peel-and-stick LED strips marketed for shelving aren’t rated for constant pet contact choose a low-voltage (5V or 12V) battery or USB strip with no exposed wiring, since a curious cat will eventually chew on anything reachable.
5. Stack the Kallax Vertically for a Climbing Tower
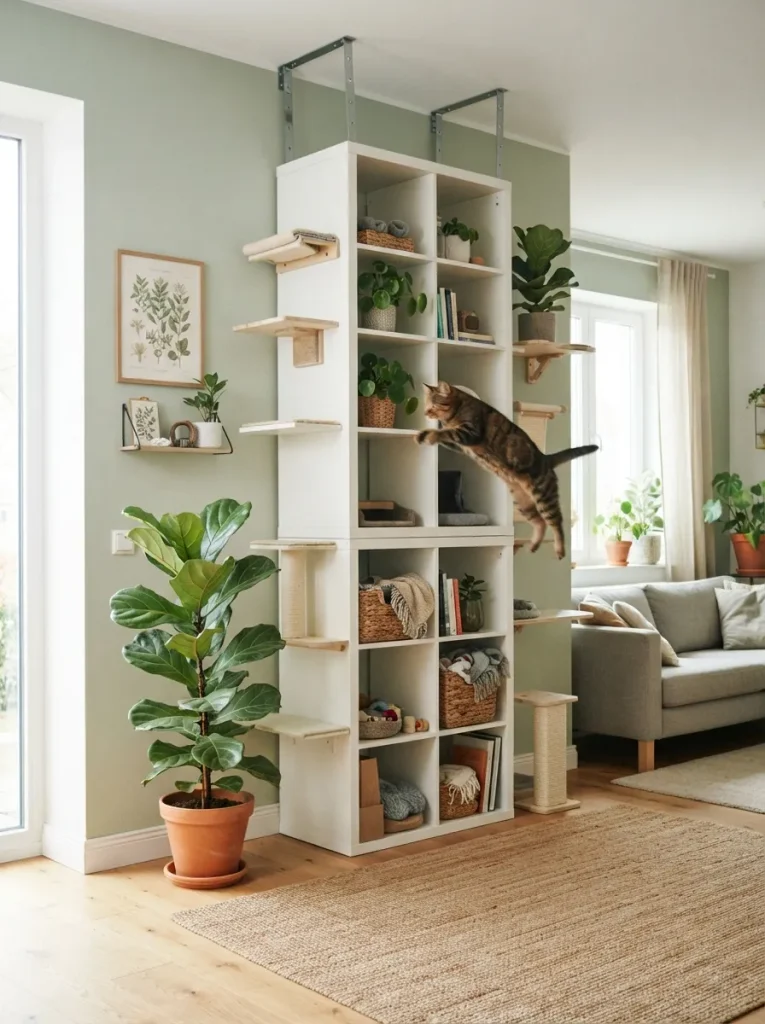
What it looks like: Two Kallax units, stacked and anchored one on top of the other, turn a wall of storage into six feet of vertical cat territory each cube functions as a landing platform on the way up.
Why it works: Cats default to claiming height as safe territory, and a stacked Kallax gives them a route upward with a resting spot at every level, rather than one single high perch. Staggering which cubes are left open versus used for books or bins creates a natural staircase effect without extra carpentry.
How to copy it: Stack a second Kallax directly on top of the first, securing both to the wall with furniture anchor straps at two points, then leave alternating cubes empty going up open, closed, open, closed so the cat has a visible path.
Best for: Multi-cat households or anyone with floor-space constraints who wants vertical square footage instead of horizontal.
Pro Tip: Anchor both units to the wall studs before adding a single cube to the climb a stacked, unanchored Kallax is a tip-over risk the moment 10+ pounds of cat commits to a jump partway up.
6. The One-Cube Version for Tiny Apartments
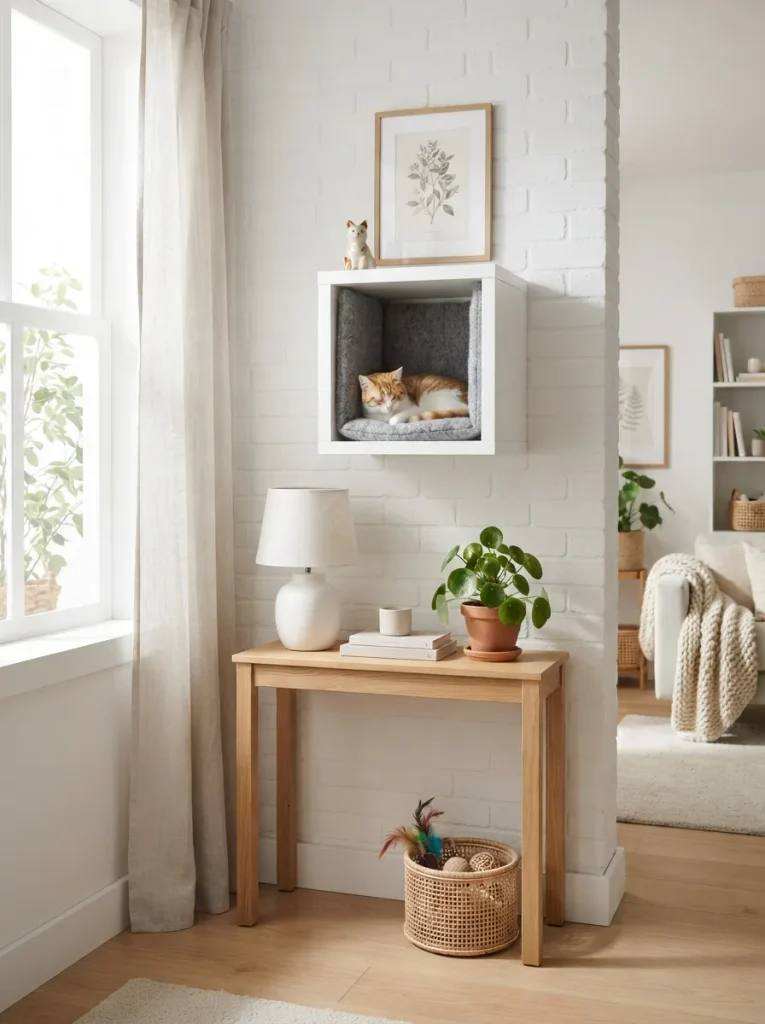
What it looks like: A single 1×1 Kallax cube, mounted at counter height in a corner that would otherwise sit empty, does the job of a full cat tree in about two square feet of wall space.
Why it works: Studio apartments rarely have room for a floor-standing cat tower, but wall-mounted vertical space is almost always available and underused. One cube, fitted with a cushion and mounted 18–24 inches off the floor, gives a cat a claimed spot without eating into walkable square footage small, but it’s enough. It’s the same space-math behind most compact Kallax dorm room ideas: claim vertical inches instead of floor footage.
How to copy it: Buy the single-cube Kallax insert (IKEA sells it separately from the full unit), mount it to a wall stud with an L-bracket, and size the cushion to the interior dimensions so it doesn’t shift when the cat jumps in.
Best for: Studio and one-bedroom apartments where floor space is the actual constraint, not budget.
Quick Win: No wall stud in the right spot? A toggle bolt rated for at least 25 pounds holds a single empty cube fine just skip this shortcut if you’re planning to stack a second unit later.
The next hack solves a problem nobody wants to talk about the litter box everyone can see.
7. Line Cubbies in Removable, Washable Fabric
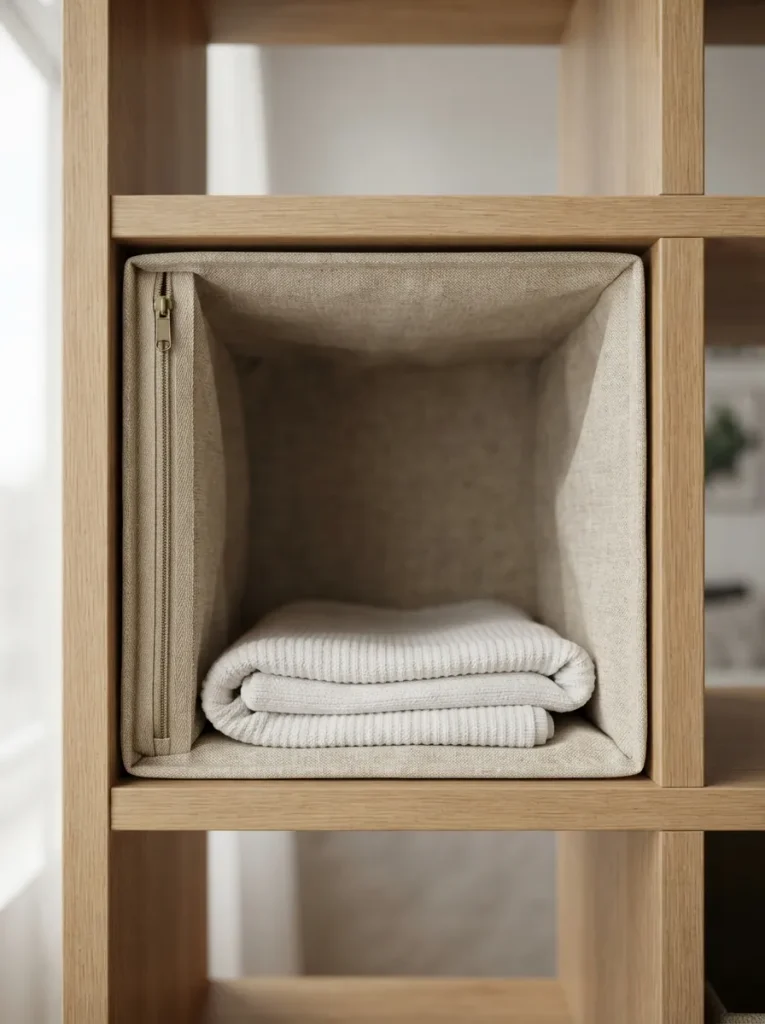
What it looks like: A fitted canvas liner with a hidden zipper along the back edge slips in and out of the cube in seconds, so the cushion inside can go straight into the wash instead of the whole cube getting scrubbed by hand.
Why it works: Cat hair and dander build up fast in enclosed fabric spaces, and a liner that’s actually removable not just a loose cushion cover means the cleaning routine takes minutes instead of becoming a monthly chore that gets skipped. Canvas holds up better than fleece against regular washing without pilling.
How to copy it: Cut a liner from mid-weight canvas sized to the cube’s interior plus a half-inch seam allowance, sew a zipper along one back seam, and wash it on a cold cycle every one to two weeks depending on shedding.
Best for: Heavy shedders, multi-cat homes, or anyone who’d rather not hand-vacuum a cube every weekend the same washable-liner logic shows up in a few closet organization ideas built around high-touch fabric bins.
Mistake to Avoid: Skip fleece as the outer liner fabric it traps loose hair on the surface instead of letting it wash away, and static from the dryer makes the buildup worse over time.
8. Hide the Litter Box Behind a Kallax Cabinet Door
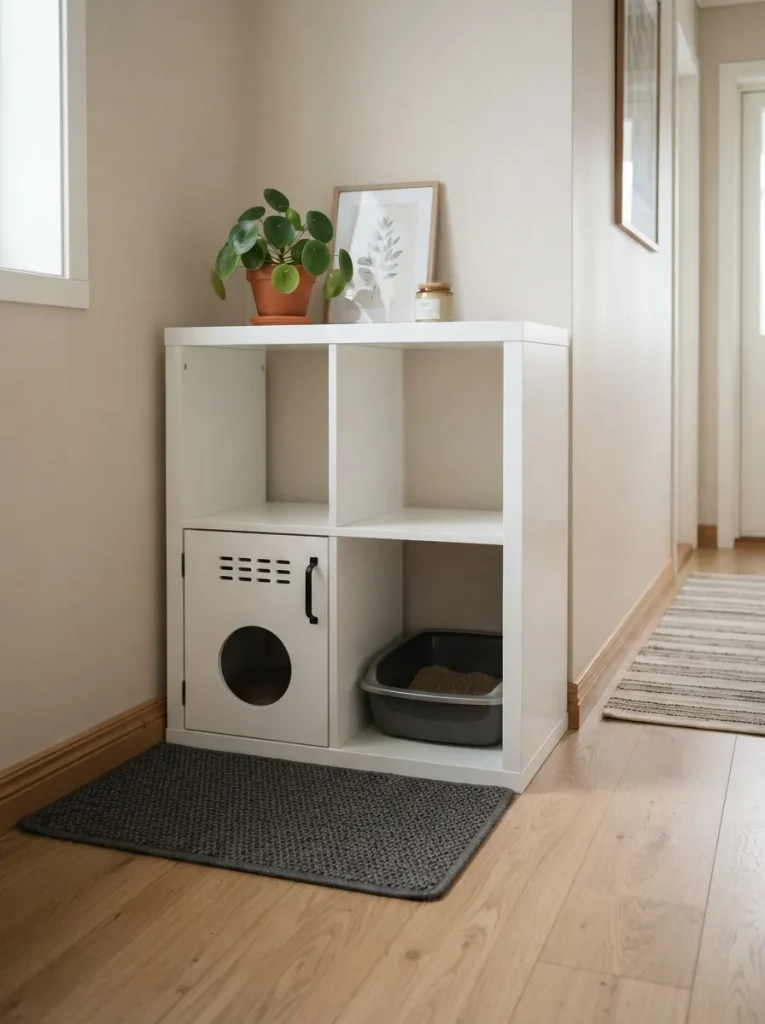
What it looks like: A cabinet door with a round cutout on one side, hinged onto an otherwise ordinary Kallax cube, hides a full litter box behind what looks like closed storage from across the room.
Why it works: Litter boxes are the one piece of cat furniture almost no one wants visible, and a Kallax cube is exactly deep enough (about 15 inches) to fit a standard-size box with a few inches of clearance for the cat to turn around. Ventilation slats cut into the door matter as much as the entry hole without airflow, the smell just concentrates inside a closed box.
How to copy it: Cut a 6-inch circular entry hole low on a hinged cabinet door sized to the cube opening, add a row of small vent slats near the top of the same door, and set a washable litter mat just inside the entry to catch tracked litter.
Best for: Anyone using the Kallax in a living room, hallway, or entryway where guests will actually see it.
✅ Before You Build the Litter Cabinet:
- [ ] Confirm the litter box fits with at least 2 inches of clearance on all sides
- [ ] Cut the entry hole low enough for an older or smaller cat to step over easily
- [ ] Add ventilation slats before hanging the door, not after
- [ ] Test the hinge swing clears the litter box lid before final mounting
Shop This Look
| Product |
|---|
| Small cabinet door hinges |
| Jigsaw with fine-tooth blade for cutouts |
| Washable litter-trapping mat |
| Low-profile enclosed litter box |
| Cabinet door pull or knob |
MY Views: The thing no one mentions about hidden litter cabinets: airflow beats fragrance every time. I’ve watched people spend $40 on scented crystals for a box that just needed a two-inch gap under the door instead cut the vent slats a little bigger than feels necessary, closer to 3 inches total across the door, and skip the air freshener entirely.
9. Color-Match Storage Bins for Toys and Grooming Gear
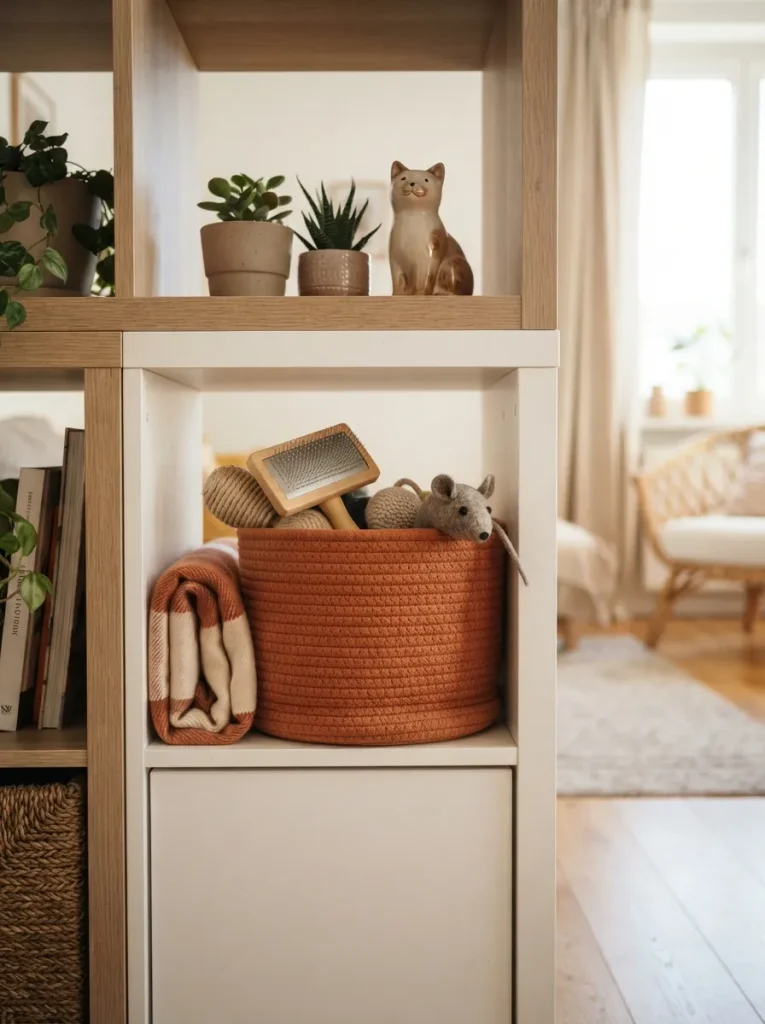
What it looks like: A woven bin in terracotta or clay picked to match whatever accent color already exists in the room sits in one cube and holds toys, brushes, and spare collars without looking like a plastic pet-store tote, closer to the color-matched bins in these Kallax toy storage ideas.
Why it works: Matching the bin to an existing color in the room (a throw pillow, a rug accent) makes it read as intentional storage instead of pet clutter dropped into the nearest open space. Woven natural fiber also holds its shape better than fabric bins, so it doesn’t collapse when half-empty.
How to copy it: Pull one accent color already in the room and search for a bin in that exact family rust, sage, or navy all work well against a Kallax’s natural or white finish sized to the cube’s interior with an inch of clearance on each side.
Best for: Anyone tired of toys scattered across the floor who wants one designated, visible-but-tidy spot.
Small-Space Tip: In tighter apartments, skip a second bin for grooming supplies a small interior pocket or a second, smaller basket nested inside the main bin keeps everything in one cube instead of claiming two.
How to Start Your IKEA Kallax Cat Furniture Transformation
What I’ve found with real Kallax conversions is that the scratching post is the one piece worth doing first, before paint or cushions or anything else. It’s the single element that actually protects the rest of your furniture, and every other hack in this list is optional polish by comparison the sisal post is the one with a job to do.
The most common mistake is skipping the primer step when painting laminate, or using contact cement anywhere near a surface a cat will chew. Both come from the same instinct rushing to the fun part and both mean redoing the work within a few months once paint peels or rope pulls loose.
Three items under $50 that make an immediate difference: a $12 length of 5/16-inch sisal rope, an $18 washable litter-trapping mat, and a $9 roll of removable felt edging tape for cushion-lined cubes. None require tools beyond scissors.
A single-cube hack paint or a sisal post is a weekend afternoon project, two to four hours including drying time. A full conversion covering multiple hacks across one Kallax unit runs closer to a full weekend and $150–$250 depending on how many cubes get converted. The litter cabinet is the one hack worth budgeting extra time for, since the cutout work is less forgiving than everything else on this list.
Ready to Create a Cat-Friendly Space You Still Love
Nine IKEA Kallax hacks, and none of them require the same skill twice paint, rope, fabric, a jigsaw cut, a few LED strips, and suddenly a $90 shelf is doing the work of a cat tree, a litter cabinet, and a toy bin combined. Start with one cube, not all nine at once; a converted scratching post this weekend is worth more than a half-finished vision of the whole unit.
Today, that means measuring the cube your cat already claims and ordering the sisal rope everything else can wait a week. Done well, this kind of furniture stops feeling like a compromise between your taste and your cat’s needs and starts feeling like neither one had to lose. Save this one before you forget which cube was supposed to get the scratching post first.
Read Next
- 10 IKEA Kallax No-Drill Hacks for Renters
- 8 IKEA Kallax Dog Furniture Hacks for Small Apartments
- 6 Small-Space Litter Box Solutions That Don’t Look Like Litter Boxes