16 IKEA Christmas Hacks Kids Can Help Make on a Rainy Day
A grey, wet afternoon is the best Christmas crafting window you’ll get, as long as the supplies are cheap and sturdy. Here are 16 IKEA Christmas hacks kids can help make on a rainy day, ordered so the quickest, cheapest projects come first. Glue dries on a paper-covered table.
A jar of glitter snow gets shaken by someone very proud of it. Lantern light spills across a wall that was blank at lunchtime. By dinner the house looks like Christmas, and every piece has a small maker who will point at it. Hand-made wins.
Jump To
- Why IKEA Christmas Hacks Kids Can Help Make on a Rainy Day Work So Well
- The Projects, Cheapest First
- How to Start Your IKEA Christmas Hack Afternoon
- Ready to Turn a Rainy Afternoon Into Christmas Decor?
Why IKEA Christmas Hacks Kids Can Help Make on a Rainy Day Work So Well
Kid-made decor looks best when the base pieces are plain, sturdy, and cheap enough to ruin. IKEA’s paper, glass, frames, and shelves fit that description. Stick to white, red, green, and natural wood so mismatched handiwork still reads as a set.
Small homes gain the most, since jars, frames, and garlands take almost no floor space. Start with paper and glass, then move to furniture.
Quick Reference
| Best starting point | Wrapping paper drawn on a paper roll (idea 1) |
| Biggest impact area | A table for crafting and a shelf for display |
| Budget to start | Roughly $10–$30 (approximate) |
| Time to complete | 20–60 minutes per project; gingerbread needs longer |
The Projects, Cheapest First
1. Wrapping Paper Drawn on a MÅLA Paper Roll
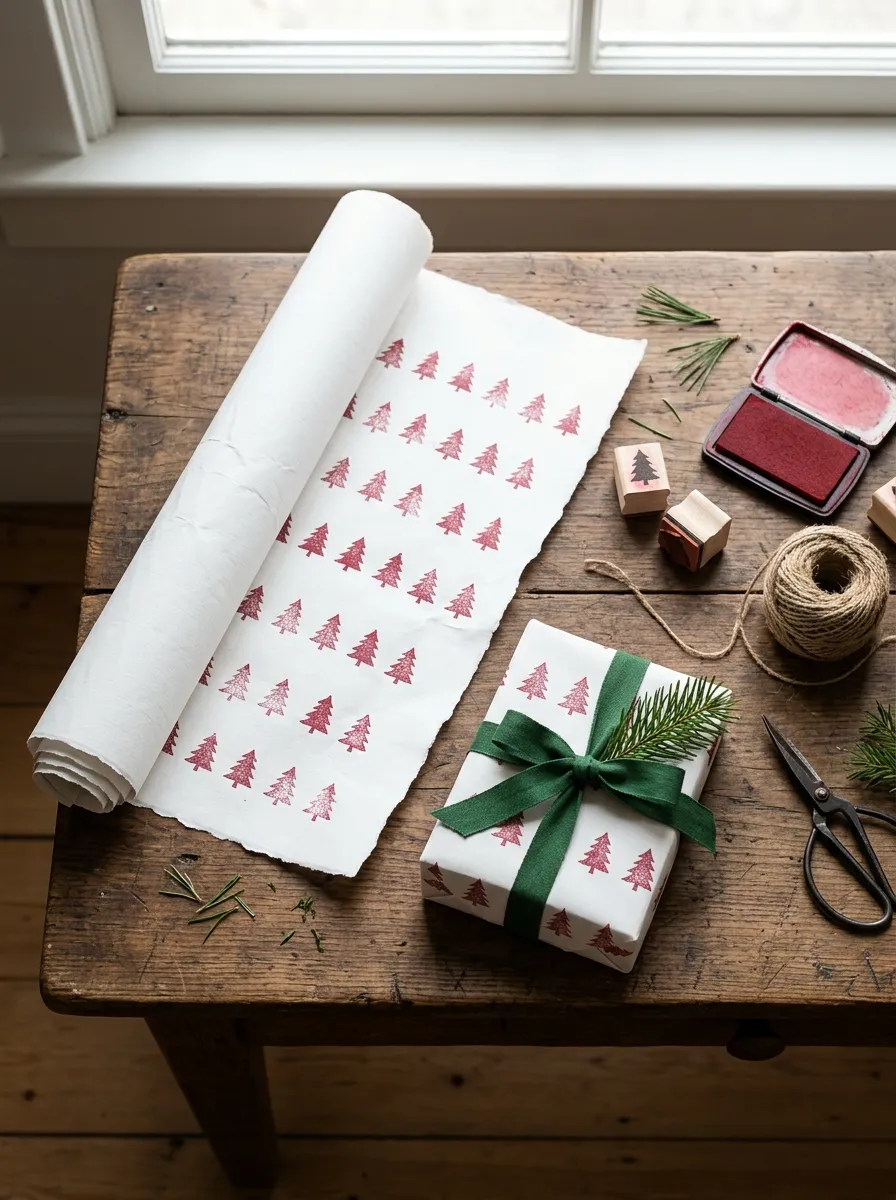
Sheets of white paper covered in one-color trees and stripes look like designer wrapping, even when a six-year-old drew every line. Limit each sheet to one marker or paint color, red on one, green on another, and the wobble reads as pattern instead of scribble.
MÅLA’s drawing paper roll (any plain roll works) gives kids a long, cheap surface, and you tear off exactly what each gift needs. Stamped shapes larger than a coin read from across a room; tiny doodles vanish under a bow. Let paint dry fully before wrapping, since damp paint tears thin paper at the folds. Best for light, boxy gifts. Pair it with a few handmade gift ideas and the whole pile under the tree comes from one afternoon.
Pro Tip: Decorate the paper before cutting it to size. Kids move faster on one big flat sheet, and you can trim around the best-looking section for each gift.
2. Snow Globe Jars Kids Can Shake and Keep
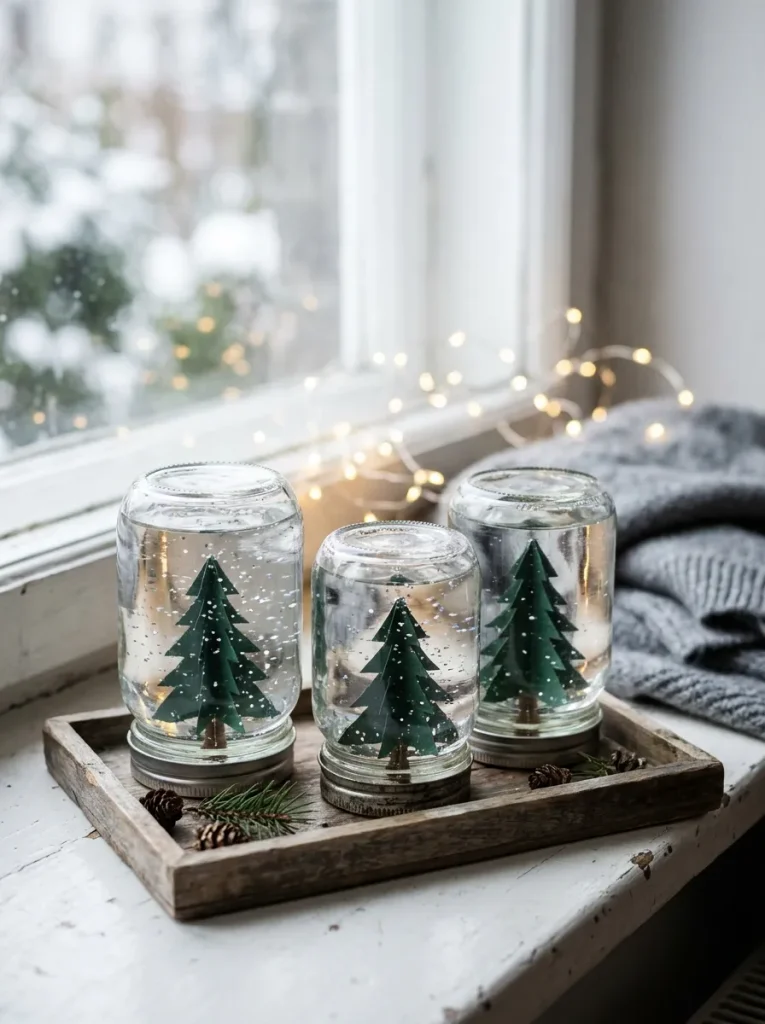
Start with the lid: an adult glues a small plastic figure or paper tree to the inside of a screw-top glass jar lid, using waterproof glue, because ordinary white glue softens in water. Once it cures, kids fill the jar nearly to the top with water, sprinkle in glitter or fine white confetti, and twist the lid on tight.
A few drops of glycerin, sold in baking and pharmacy aisles, slow the fall so the glitter drifts. Run a line of glue around the lid rim if small siblings are near; jars get shaken hard. Best for kids old enough to pour without flooding the table. More jar projects live in these mason jar crafts.
3. Paper Napkin Fan Garland
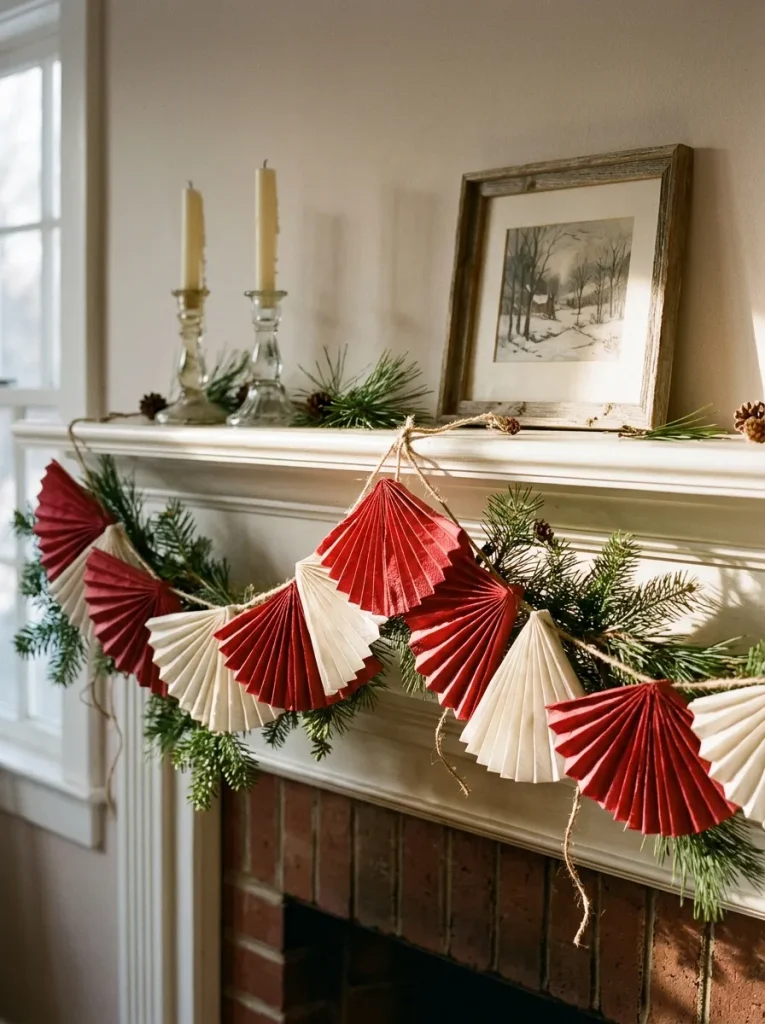
Best for anyone with a mantel, stair rail, or bookshelf that needs dressing and only a spare half hour to do it. Pleat a paper napkin back and forth like a fan, pinch the middle, and let it open; two fans joined edge to edge make a full circle. Fold each napkin in half before pleating, because single-layer fans flop.
Kids take the folding, adults handle the stringing. Pick napkins from one color family so the garland reads as a set. Plenty of paper ideas like this sit in these easy paper craft ideas.
Styling Note: Hang the garland in a loose swag, not pulled straight. Slack twine lets neighboring fans overlap, which makes a short garland look fuller.
Next comes the low table that keeps glitter off the dining room, and it works because of what covers it.
4. A Rainy-Day Craft Station on a Children’s Table
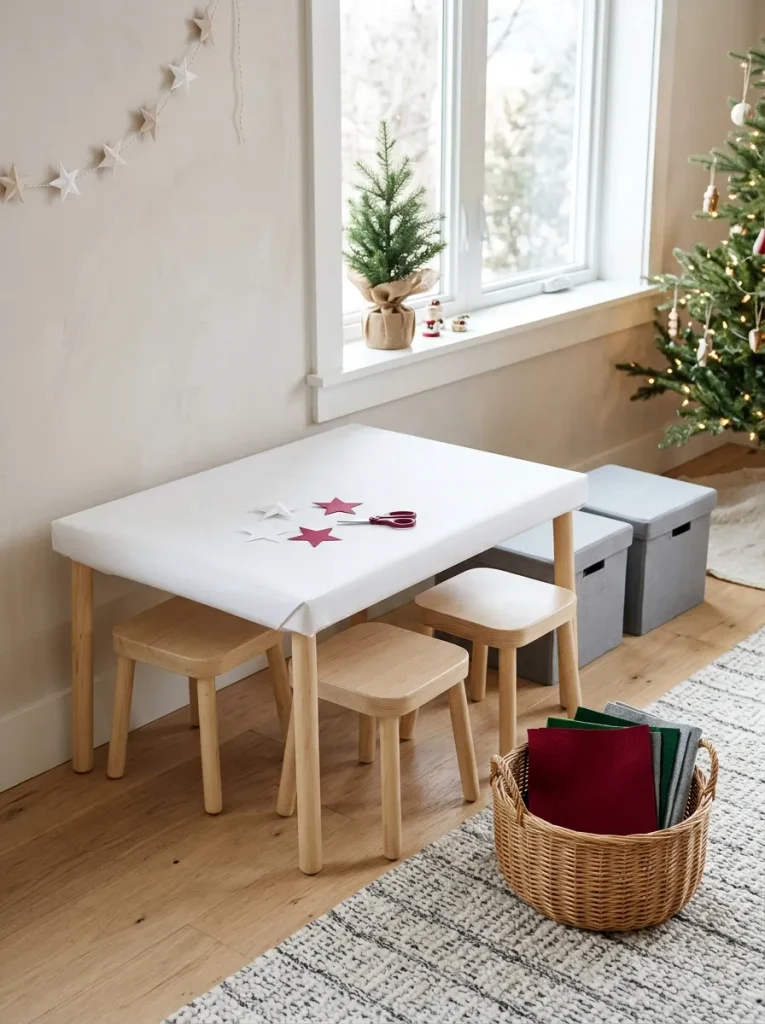
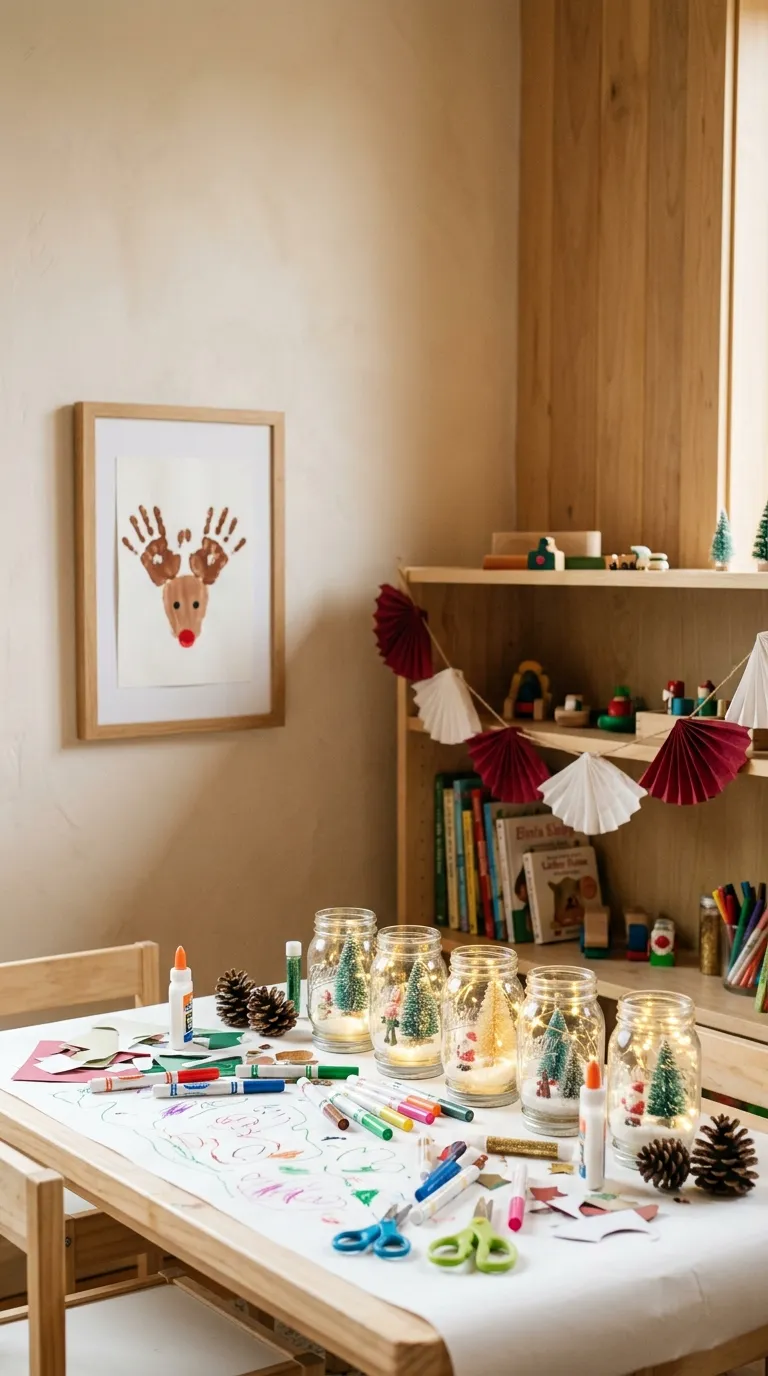
Most families craft at the dining table and spend the second half of the afternoon defending it. A low children’s table, such as IKEA’s FLISAT, gives glue and glitter a home of their own. Cover the top with a length of MÅLA paper, fold it under the edges, and roll the whole thing up when the afternoon ends.
Set out only what one project needs; a table crowded with every marker invites six half-finished pieces. Best for households with a spare corner and kids small enough that a standard table sits too high. Afterward, these craft room storage ideas keep supplies findable.
Pro Tip: Tape the paper cover under the table edge, not on top. Top tape gets scraped up by elbows and sticks to sleeves.
What You’ll Need
| Product |
|---|
| Low children’s craft table |
| Two child-size stools or chairs |
| Lidded storage bins for craft supplies |
5. Paper Lantern Snowman Glow

Paper spreads light. A small LED behind a paper shade stops being a hard point and becomes a soft, even glow, which is why a plain round paper lantern (IKEA’s REGOLIT is one) makes a good snowman body.
Kids cut eyes, buttons, and a mouth from black paper and glue them on the outside; dark shapes stay legible when lit, and pale ones vanish. Add a paper-cone carrot nose and a felt strip for a scarf, then drop a battery LED light inside. Best for kids who like cutting and gluing, and for dark corners that need something friendlier than a lamp.
Warning: Never put a real candle or a hot incandescent bulb inside a paper shade. Paper burns. Use a battery-operated LED light only, and check that the pack says LED before it goes in.
6. Handprint Reindeer in a Deep Frame

Brown handprint antlers on a cream mount, a red dot for a nose, and a white frame around it all: it reads as art, not refrigerator clutter. RIBBA’s deep frame and included mount do most of the styling, and the child supplies the hand.
Paint the palm and fingers thinly, since thick paint smears and can stick to the glass. Let it dry before closing the frame. Cut the paper to fit the mount opening, then trim only after painting so the reindeer sits centered. Best for parents who want a keepsake rather than a craft. Write the child’s name and the year in pencil on the back.
What You’ll Need
| Product |
|---|
| Deep picture frame with a wide mount |
| Second frame in a different size |
| Picture ledge shelf |
Next, a project that starts with a bare wooden kitchen tool and a coat of white paint you’ll be glad you didn’t skip.
7. Wooden Spoon Snowmen and Reindeer
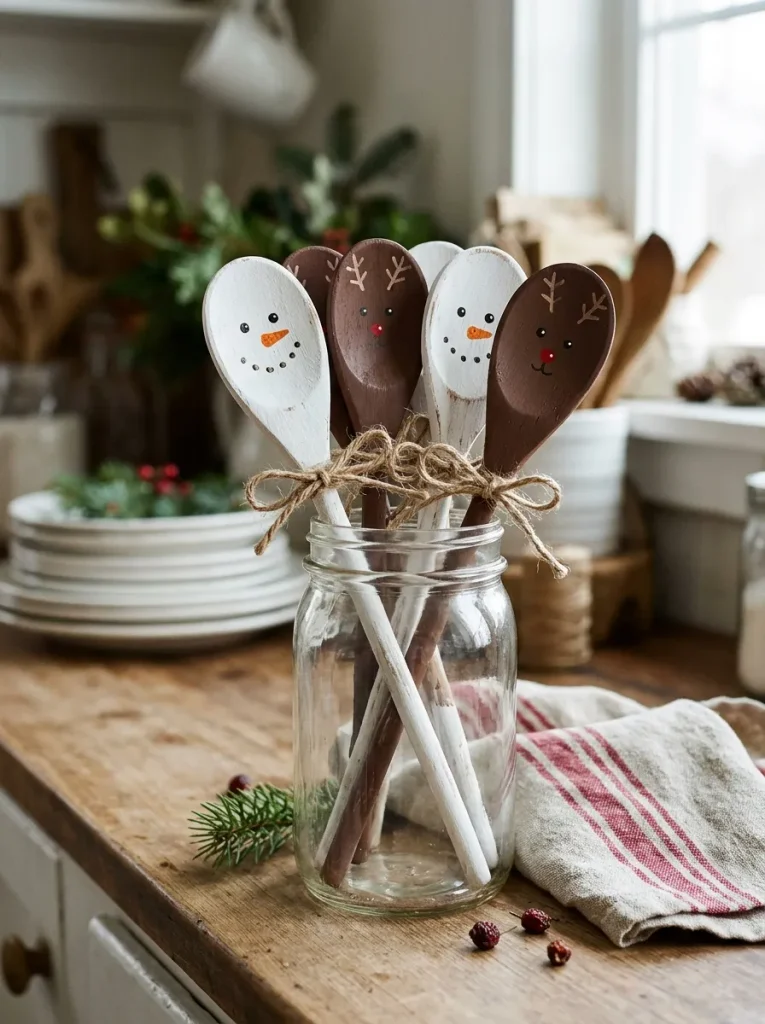
Best for kids who would rather paint than fold, and for anyone with an empty jar, mug, or vase to fill. A bundle of plain wooden spoons from the IKEA kitchen section turns into a row of snowmen or reindeer: the bowl is the face, the handle is the body.
Twine tied under the head makes a scarf. Line several up in a jar as a bouquet, or loop twine around a neck for a tree ornament. Buying a set means every spoon is the same size, which makes mismatched painting look like a family. Keep them decorative, not for cooking.
Mistake to Avoid: Painting straight onto raw wood. Colors soak in and turn dull and blotchy. Brush on a thin coat of white first, let it dry, then paint the faces.
8. Felt-Trimmed Stocking Baskets

Start with a plain DRÖNA fabric box and a sheet of felt. Kids cut a wide cuff in red or white, plus stars, hearts, or a first initial, and an adult glues everything on with fabric glue. Give each child a different cuff color so treats stay sorted.
Keep the finished basket away from a working fireplace, since felt and fabric burn. Afterward the box slots into a KALLAX cube for wrapping supplies or toys; ideas for that are in these Kallax Christmas storage and display ideas. Best for families with more than one child.
9. Tissue-Paper Stained-Glass Votives
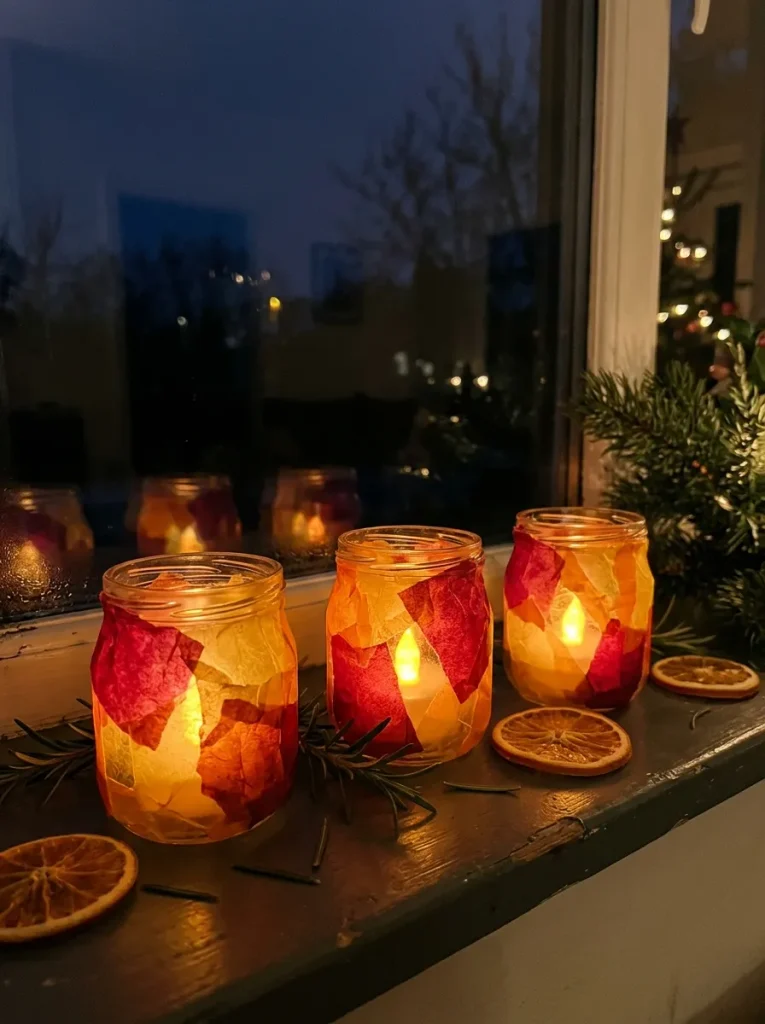
Overlapping translucent color mixes as it layers: red tissue over yellow reads as orange with no extra paint. Kids tear tissue into pieces smaller than a coin, brush thinned white glue (roughly equal parts glue and water is a common starting mix) over a clear glass tealight holder, press the pieces on, overlap them, and seal with a last coat.
Torn edges blend better than cut ones. Use flameless tealights inside. Warm white light pushes yellows and reds forward and mutes blues, so plan the palette around it. Best for younger kids: no scissors, no paint, very forgiving. A whole evening of similar projects fits in these cozy winter craft night themes.
Pro Tip: Press each piece flat with a fingertip and dab glue over the top. Brushing drags the tissue and leaves wrinkles.
Coming up: a pegboard that gives Christmas cards a proper wall, and needs no tape.
10. A Christmas Card Wall on a Pegboard
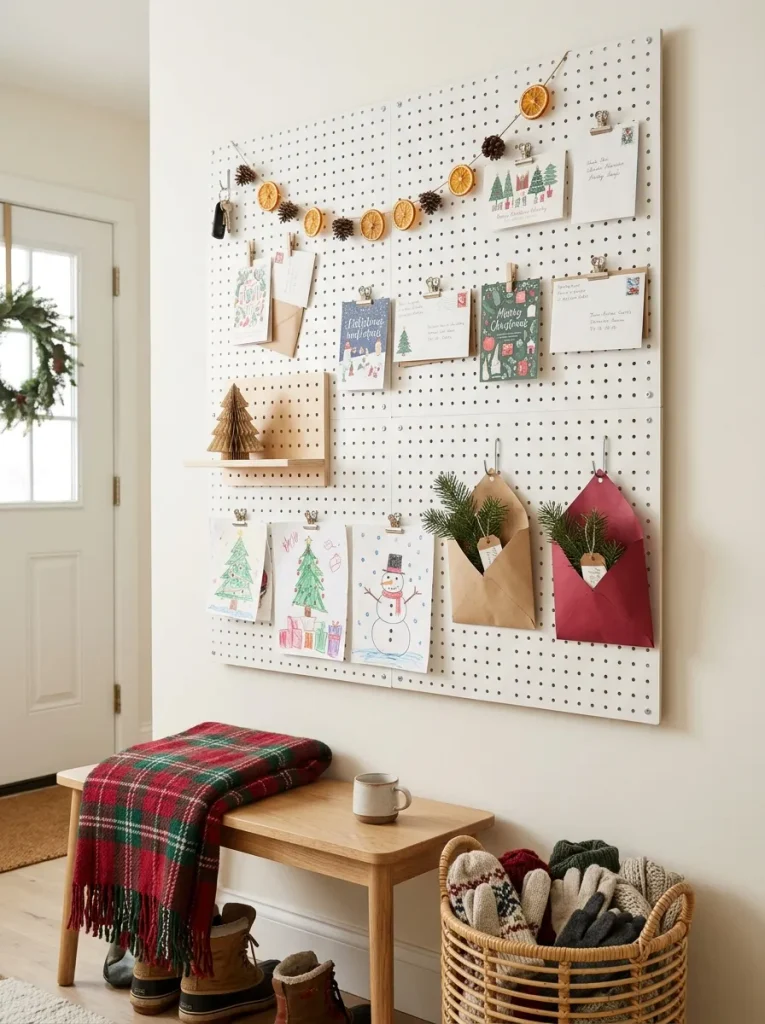
Cards taped to a wall curl, fall, and can lift paint when peeled off. A SKÅDIS pegboard with small hooks and clips holds them flat, and kids decorate the paper pockets and shapes that hang alongside.
Clip cards at adult eye level and kid drawings lower, at child height, so the wall belongs to everyone. Fold construction paper into little pockets with a glued base for treats or notes. Best for entryways and hallways that need something festive without a floor footprint.
Small-Space Tip: Renting, or no drilling allowed? Lean the pegboard on a console table or dresser and hang lighter items only. For more options, try these no-drill Kallax hacks.
What You’ll Need
| Product |
|---|
| Perforated pegboard panel |
| Assorted small hooks and clips |
| Small pegboard shelf |
11. A Tabletop Tree from a Faux Plant and a Painted Pot
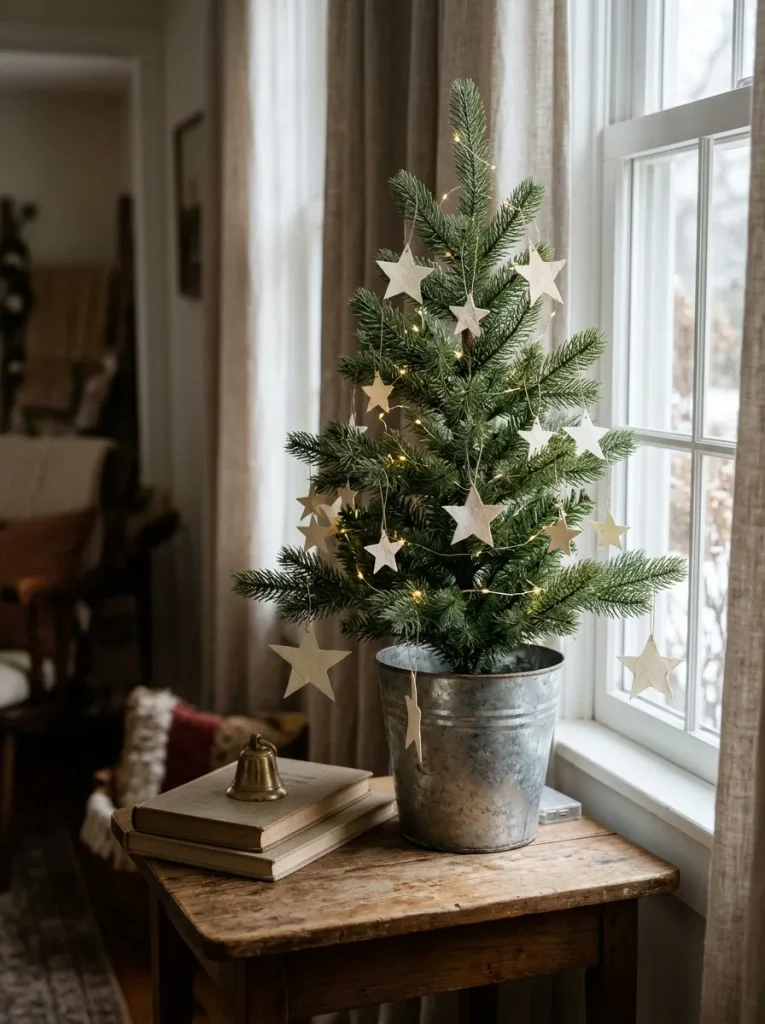
A leafy artificial plant wrapped in warm-white LED lights and hung with paper ornaments becomes a tabletop tree in one sitting. IKEA’s FEJKA range supplies the greenery, and a galvanized SOCKER pot holds it steady.
Kids cut and color paper stars and circles for the branches. Adults spiral the lights loosely from bottom to top and tuck the battery pack behind the pot. Paint on galvanized metal peels unless the surface is lightly sanded or primed first, so plan for that if the pot gets colored. Best for side tables, windowsills, and small apartments where a full tree isn’t happening. More ways to dress it up appear in these surprisingly luxe IKEA Christmas hacks.
What You’ll Need
| Product |
|---|
| Artificial potted plant with dense leaves |
| Galvanized plant pot |
| Battery-operated micro LED string light |
12. Star-Punched Paper Cups over String Lights
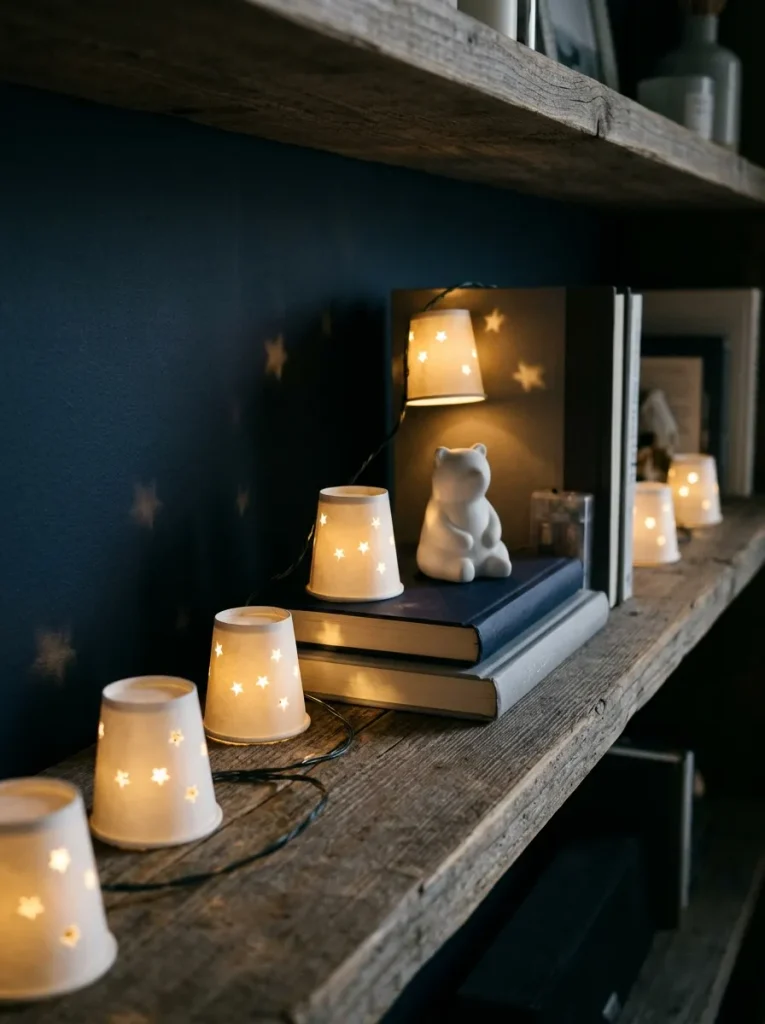
Light is easier to shape than to add. Punch star holes into paper cups, turn them upside down over the bulbs of a battery LED string, and each cup throws small bright stars across the wall. Kids draw the star outlines and punch the holes; larger stars survive better than tiny ones, which crumple.
Keep the pattern loose: a cup with five or six stars glows with more contrast than one riddled with holes. Best for kids’ bedrooms and dim corners, and a battery string keeps it renter-friendly. Star crafts like these sit well beside these starry night themed crafts.
Important: Older incandescent mini bulbs get hot enough to scorch paper, while LEDs run far cooler. Check that the packaging says LED before any paper touches a bulb.
Next up: a gingerbread kit, and the one habit that decides whether the roof stays on.
13. A Village Diorama in a Single Shelf Cube
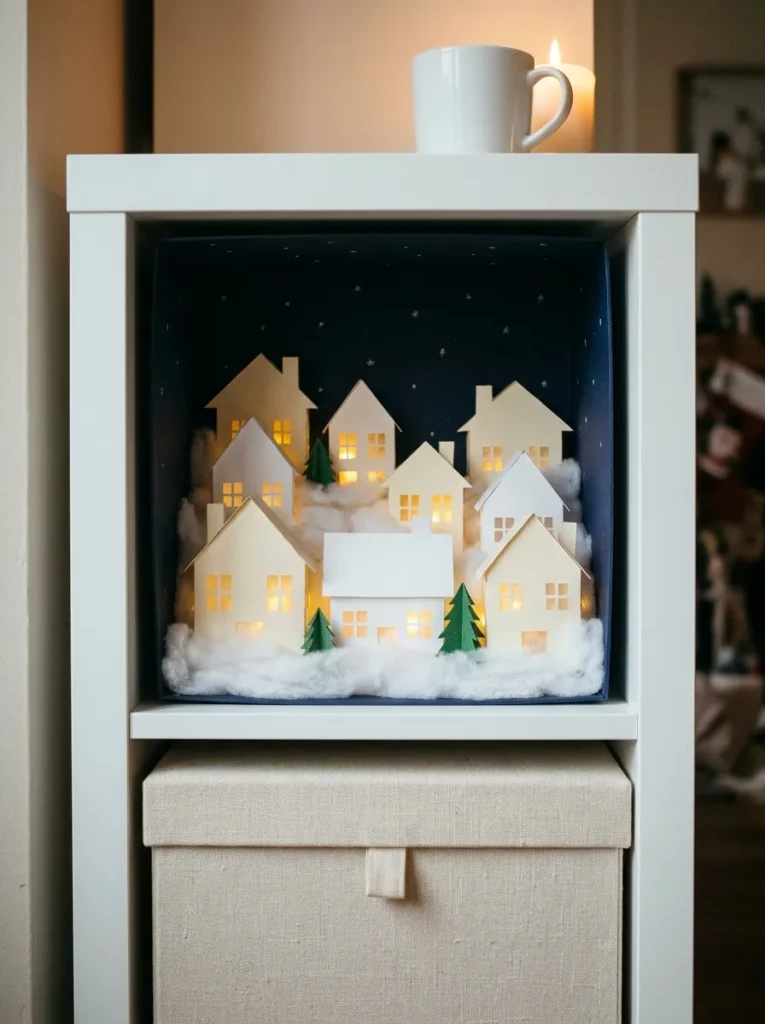
Best for kids who love building tiny worlds, and for families with one spare shelf cube. A single KALLAX cube becomes a shadow-box village: line the back and sides with dark blue paper, stand paper houses at different depths, and scatter cotton batting for snow.
Hide flameless tealights behind the houses so the windows glow. Staggering the houses front to back makes the scene feel deeper than the cube. Kids cut windows and glue roofs; adults place the lights. More ways to style the other cubes are in these Kallax styling ideas.
Pro Tip: Cut the windows out of the paper houses, then tape thin yellow tissue behind them. Light behind tissue reads as warm glass.
What You’ll Need
| Product |
|---|
| Cube shelf unit |
| Set of flameless LED tealights |
| Cube-sized lidded box for storing the village |
14. Gingerbread House Decorating, Done in Order

Set up the candy before anyone touches the walls: a muffin tin, one type per cup, keeps small hands from grabbing everything at once. IKEA’s seasonal food range often carries a flat-pack gingerbread house kit, though availability varies by store and year.
Build on a tray with a lip so crumbs and rolling candy stay put. Adults handle the icing glue; kids hold walls in place, then decorate. Assemble first and decorate later, because a roof loaded with candy before the icing hardens slides. Best for kids old enough to wait, and for an afternoon with hours to fill.
✅ Gingerbread House Order of Operations:
- [ ] Sort candy into the muffin-tin cups
- [ ] Ice the base and hold each wall for a slow count of thirty
- [ ] Let the walls harden for at least an hour before adding the roof
- [ ] Add the roof, wait for it to set, then decorate from the top down
My Observation
A detail that changes the result more than it should: kid-made pieces look intentional when grouped, not scattered. Three snow-globe jars on one tray read as a display; the same three jars spread across three rooms read as leftovers. Grouping gives the eye a single focal point, and odd numbers are a widely used styling habit because they feel less rigid than pairs. Build a small cluster on one surface first, then repeat it once elsewhere if the house needs more.
15. A Christmas Eve Box from a Paper Storage Box
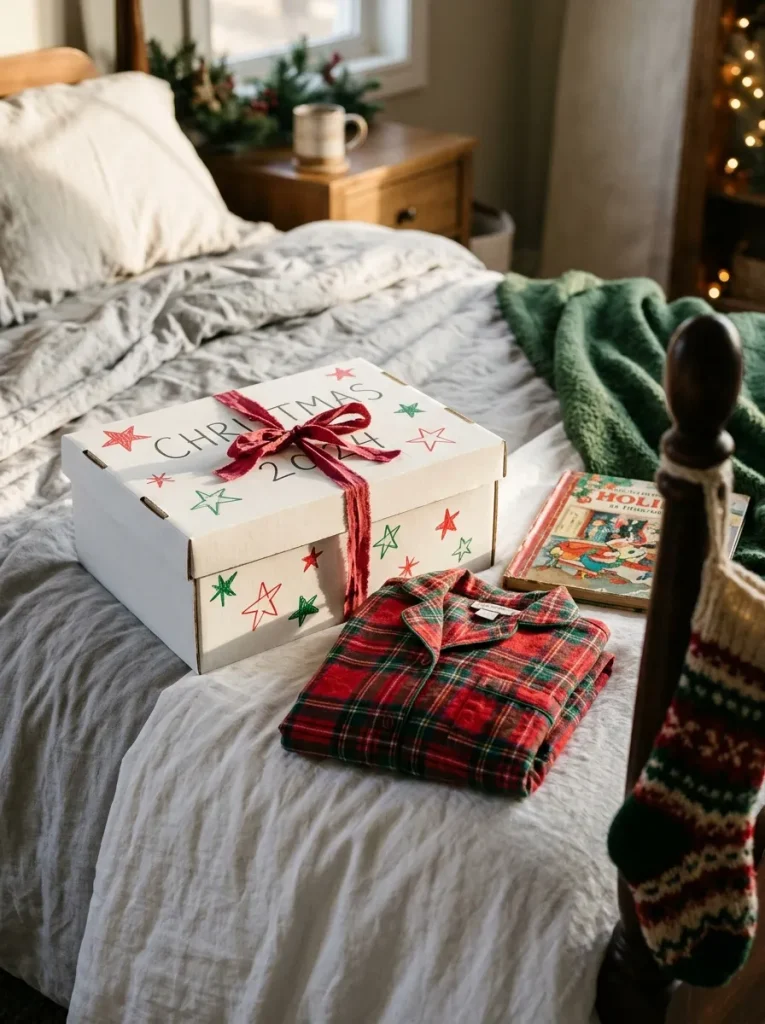
A white lidded box, ribbon-tied, with kid-drawn stars across the lid and the year written on top: that’s a Christmas Eve box, and the tradition needs nothing more than a box. IKEA’s TJENA paper boxes come with lids, so kids can decorate the lid flat before it goes on.
Fill it with pajamas, a new book, and a mug for cocoa. Paper boxes hold light items well, so keep heavy things like the mug beside it rather than inside, where corners sag. Best for families who want a small ritual with a low price tag.
Quick Win: Write the year in pencil on the lid first and let kids trace over it in marker. Next December’s box gets a matching number, and the stack turns into a keepsake.
Last up: a countdown that costs a strip of paper per day and lets a child decide who does the tearing.
16. Paper-Chain Countdown on a Wooden Hanger
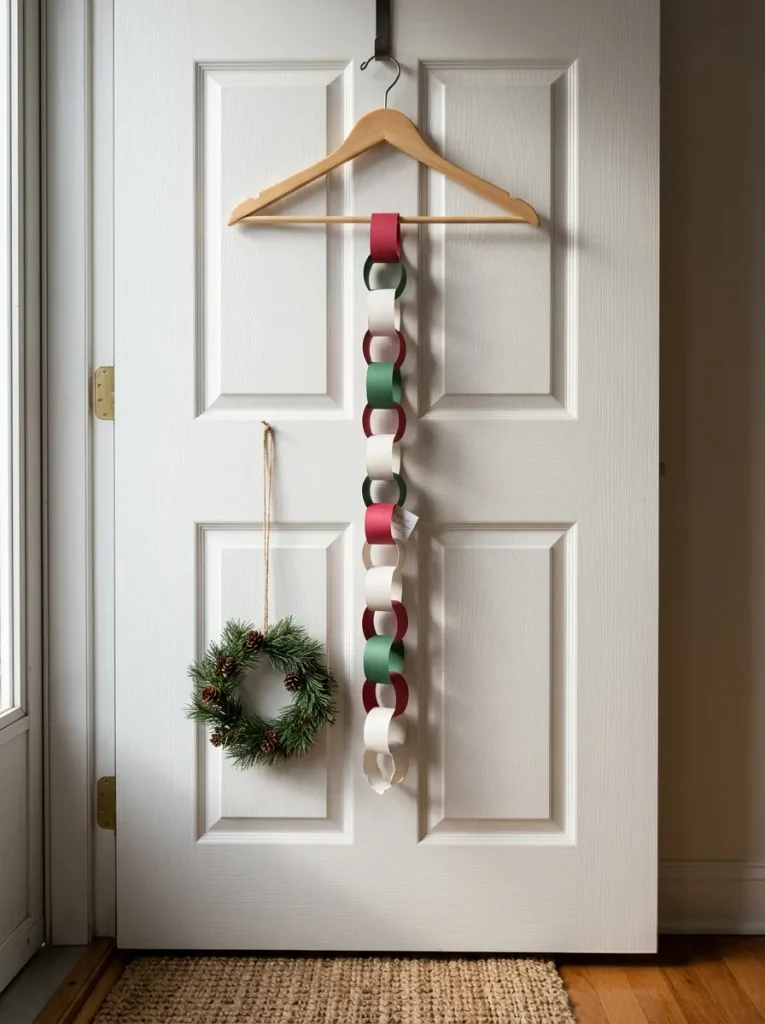
Most advent calendars cost more than they should and end on the 25th with nothing to show. A paper chain costs a strip of paper per day and shrinks as the countdown moves. Cut 24 strips of the same width, roughly finger-wide, so the chain hangs straight.
Write a small activity inside each link before closing it, and hang the chain from a wooden hanger on a door hook. Each day a child tears off one link and reads it. Best for small spaces: it needs no floor, and children like being in charge of the tearing.
How to Start Your IKEA Christmas Hack Afternoon
Start here: one roll of MÅLA paper laid across the table. Everything else on this list lands on paper, whether it’s stamped, torn, folded, or painted, and a paper-covered surface turns cleanup into a roll-and-bin job. Cover first, then choose projects.
One mistake worth fixing early: mixing wet and dry projects in the wrong order. Painted spoons and glued votives need drying time, and dry paper projects set on top get stuck. Run the wet projects first, then move to napkin garlands and paper chains while the paint sets.
Three finds that together should land under $50, though prices vary by store: rounded-tip craft scissors, a low-temperature mini glue gun that only an adult uses, and a pack of wipe-clean kids’ aprons. None repeat anything above. Treat that total as a guideline, not a quote.
A full afternoon fits three or four projects at 20–60 minutes each. Starter costs run roughly $10–$30 for paper, jars, and napkins (approximate), while adding the table, frames, pegboard, or shelf pushes a full set-up nearer $60–$150. Paper and jar projects are afternoon jobs. The table, pegboard, and shelf village stretch across a weekend.
Ready to Turn a Rainy Afternoon Into Christmas Decor?
These 16 IKEA Christmas hacks kids can help make on a rainy day cover paper, glass, fabric, wood, light, frames, and shelves, so there’s a project for every age and every corner of the house. Doing one counts. Doing several across a season counts more.
Today, roll out a sheet of drawing paper and let a child draw one tree; that’s the first gift wrapped. By the end of the afternoon the house should feel warmer, a little messier, and full of small proof that everyone was here. Save your favorites to a Pinterest board so the next wet weekend starts with a plan.
Keep Exploring
- 14 Christmas Crafts Kids Can Make With a Single Roll of Paper
- 12 Cozy Rainy-Day Christmas Craft Night Ideas for the Whole Family
- 10 Kid-Made Christmas Gift Ideas Grandparents Actually Keep