15 IKEA Christmas Hacks Under $20 for a Festive Home on a Tight Budget
A tight-budget Christmas looks festive when you repurpose what IKEA already sells cheaply: a paper lamp shade becomes a glowing snowball, a seagrass basket becomes a tree skirt, a tea towel becomes gift wrap. Below are 15 IKEA Christmas hacks under $20, each a different technique with the exact detail that makes it work.
Picture one warm glow across the room instead of six competing ones. Woven texture at the base of the tree. A mantel that looks arranged rather than crowded. Nothing shouts, everything looks chosen, and nobody needs to see the receipt.
Quick Navigation
- Why IKEA Christmas Hacks Under $20 Make Such a Difference
- Fifteen Swaps, Starting With the Mistakes That Make Cheap Look Cheap
- How to Start Your Budget IKEA Christmas Transformation
- Ready to Create Your Dream IKEA Christmas Home?
- Keep Exploring
Why IKEA Christmas Hacks Under $20 Make Such a Difference
IKEA sells the raw materials of a festive room all year: paper shades, seagrass baskets, glass jars, deep frames, cotton tea towels. None of them is stamped “Christmas,” so they come out of storage in January as useful as they went in.
The palette that works is warm white, natural fiber, pine green and one metal. In a small room, fix the light first and add one focal point; everything else is optional.
Quick Reference
| Best starting point | One warm-white set of LED string lights |
| Biggest impact area | The tree base and the light source nearest the seating |
| Budget to start | Roughly $20–$60 (approximate; IKEA prices vary by region and season) |
| Time to complete | One weekend, plus two to three hours of oven time for dried citrus |
Fifteen Swaps, Starting With the Mistakes That Make Cheap Look Cheap
1. Trade Ten Small Ornaments for One Oversized Paper Lantern
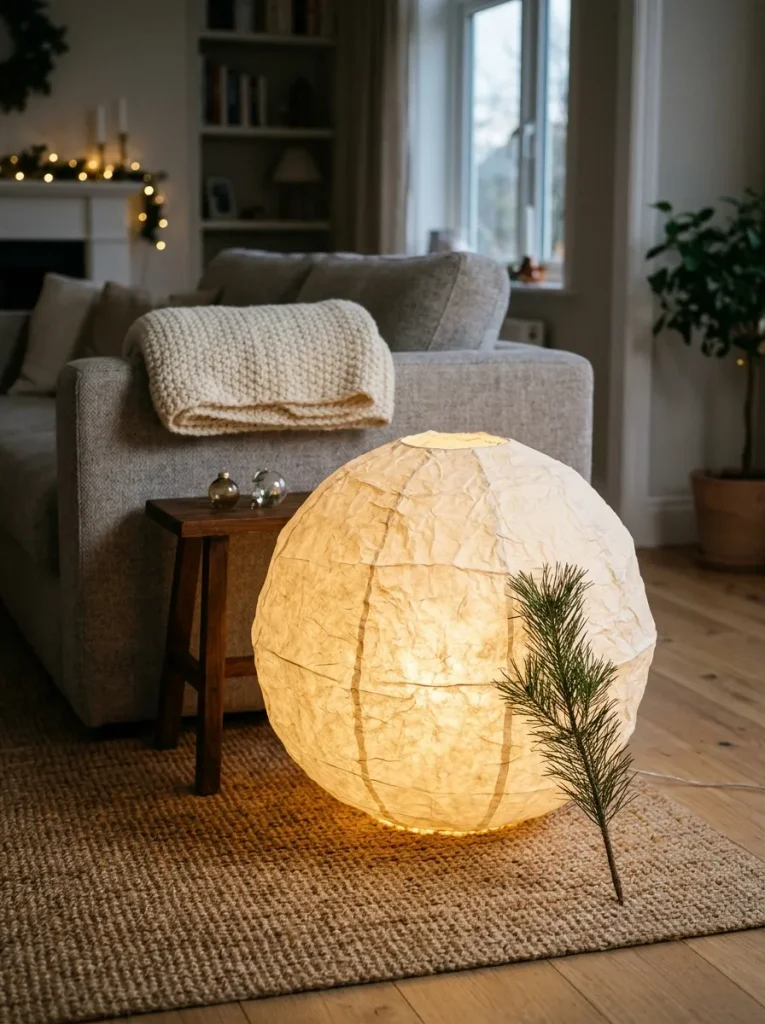
Cheap Christmas corners usually fail the same way: a dozen small trinkets, each too tiny to register across the room, add up to clutter rather than atmosphere. One oversized object does the opposite.
Hang an IKEA paper lamp shade (the REGOLIT style is one option) from a hook, or set it on the floor, and drop a battery LED light inside so it glows like a snowball. Aim for a shade at least a third of the tree’s height.
Off-white beats bright white here; against warm walls, stark white looks flat. Paper also takes cut-out snowflakes well, and these easy paper craft ideas show how to make them hold their shape.
Warning: Never put an incandescent or halogen bulb inside a paper shade for this. Paper against a hot bulb is a fire risk. Use a battery LED light and keep the shade well away from any candle or heater.
2. Keep Every Light Strand in One Warm-White Band
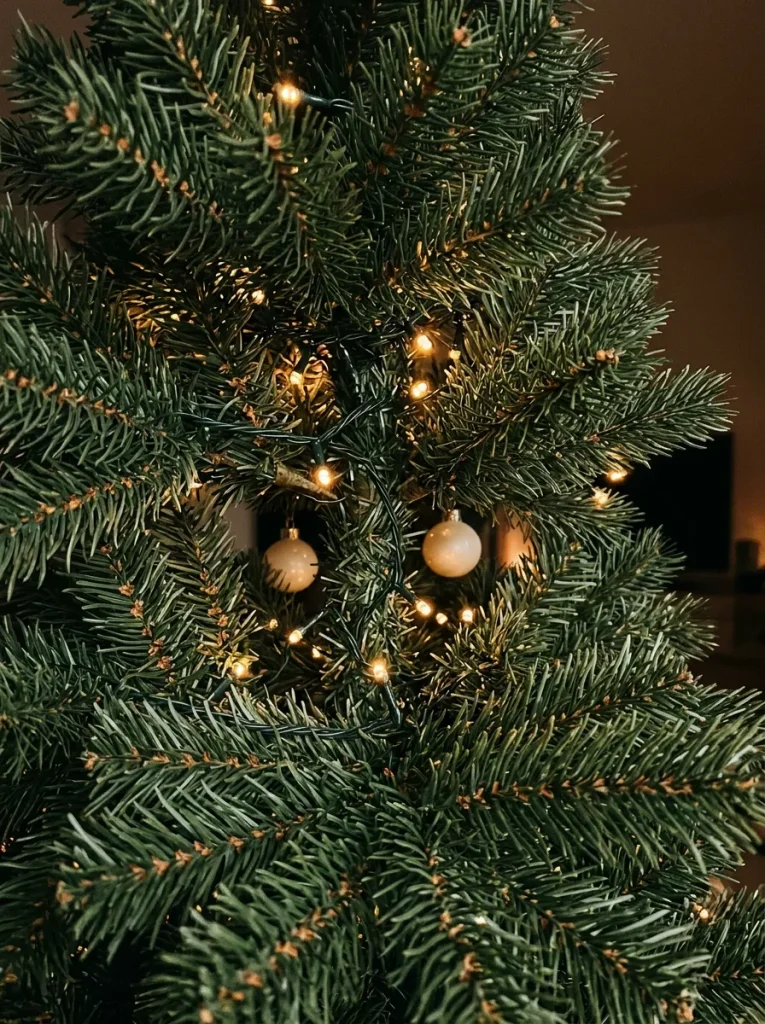
Light color is the quiet reason some trees look expensive and others look like a hardware aisle. Warm white sits roughly between 2700K and 3000K, and anything near 4000K or higher reads blue beside it.
Mix the two and the tree looks patchy even in a dark room. Check the packaging on every strand you own, including the ones from the attic, before hanging any. Buy new IKEA LED string lights only to fill gaps.
Match wire color to whatever it sits on: green wire on the tree, white wire on white shelving. Ideal if your old lights come from three different years and glow in three different tones.
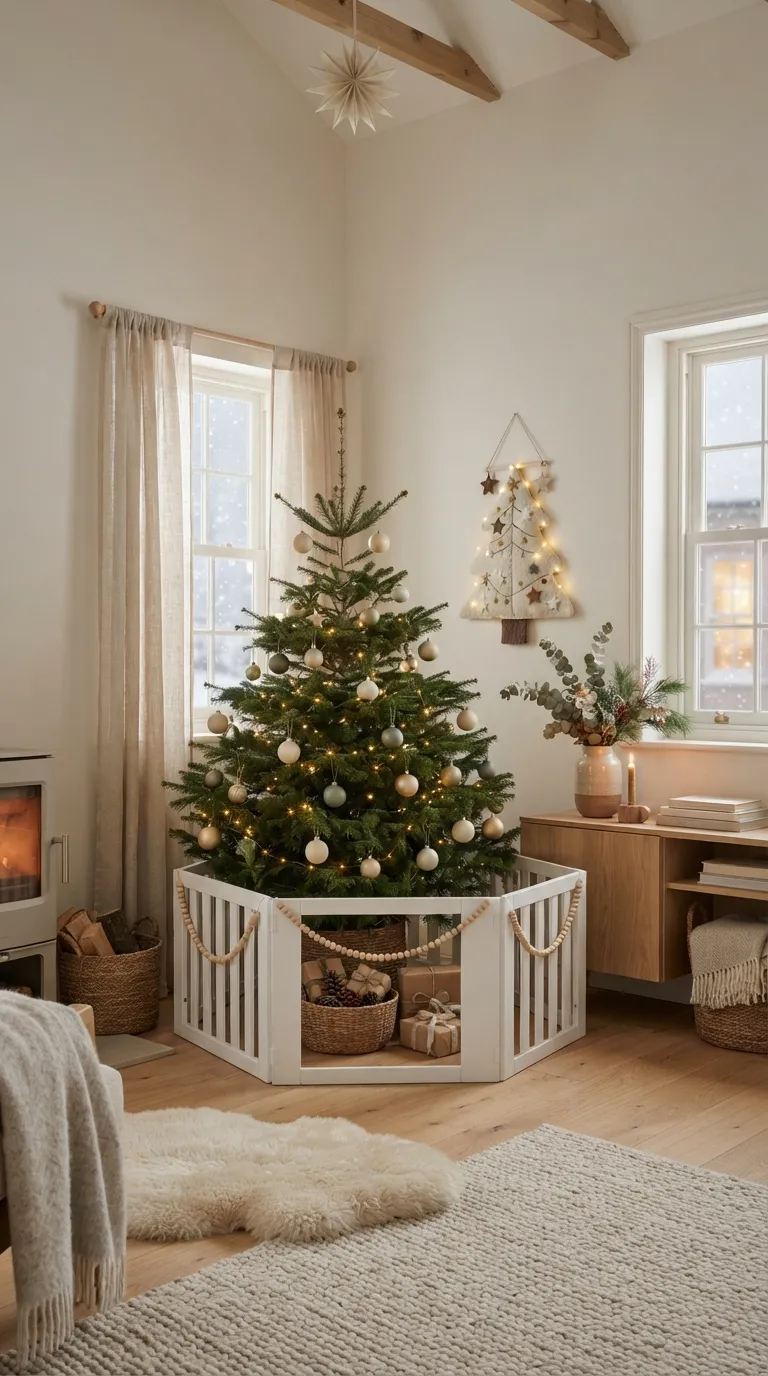
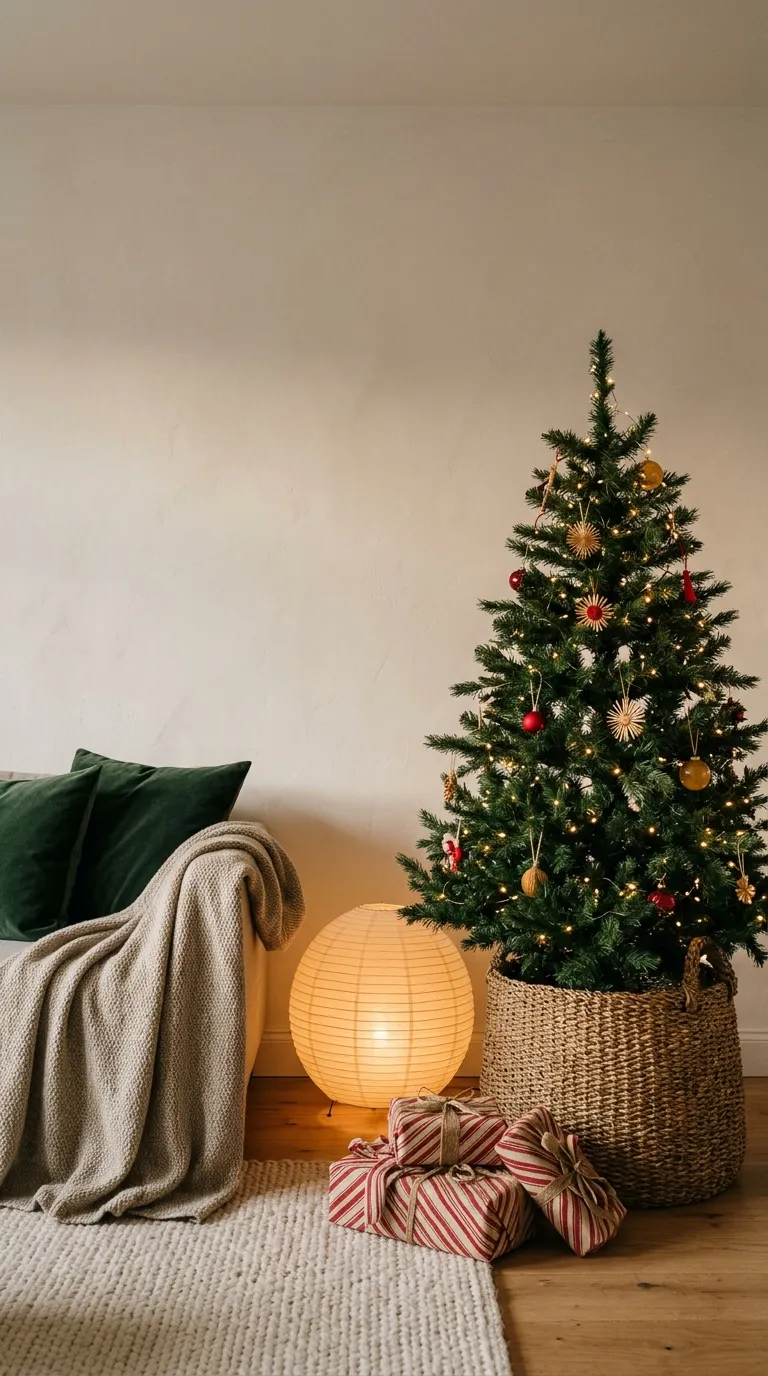
3. Hide the Tree Stand in a Woven Seagrass Basket
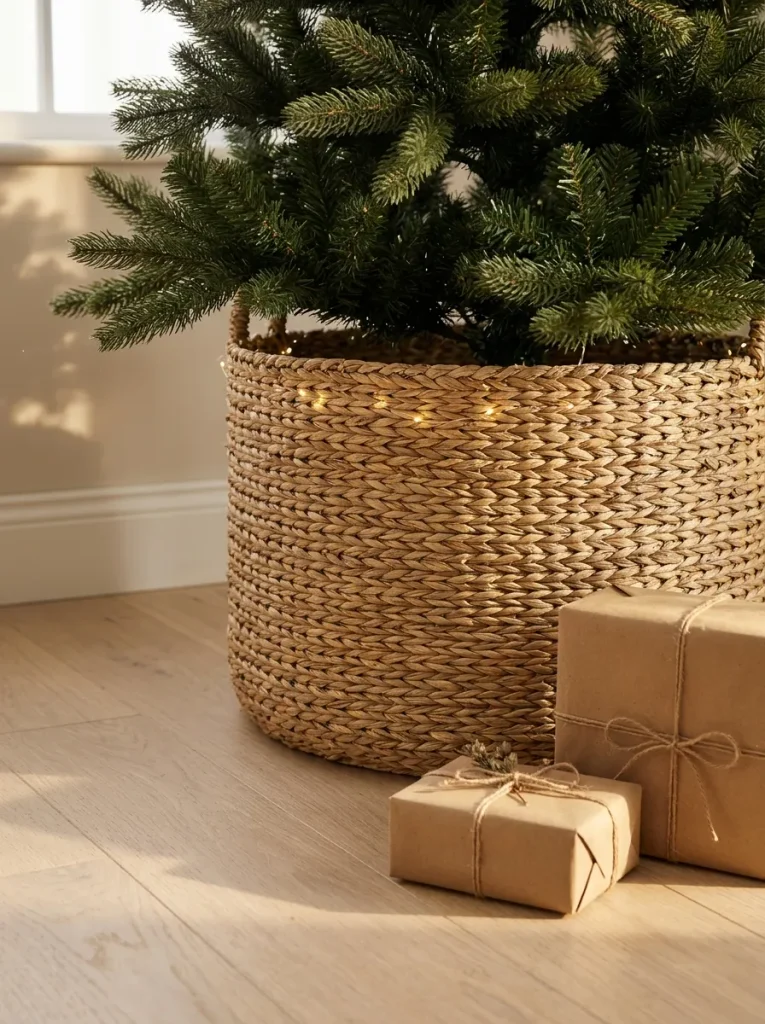
Anyone with an artificial tree and a bare metal stand can fix the base for the price of one basket. A large woven seagrass basket does a tree skirt’s job and adds texture that fabric can’t.
Measure the stand at its widest point and add about 5 cm (2 in); a basket that squeezes on will tilt the tree. Pick one tall enough to hide the stand’s legs entirely, since a short basket shows the hardware and defeats the point.
IKEA’s KNIPSA line is one seagrass option. With a real tree, skip the basket unless it holds a waterproof tray inside. Wicker and standing water don’t mix.
Styling Note: Run a short strand of the same warm-white lights around the basket’s rim, wire tucked into the weave, so the base glows instead of sinking into shadow.
The next hack swaps gift wrap for something you can wash, reuse, and eventually dry dishes with.
4. Wrap Gifts in Striped Tea Towels
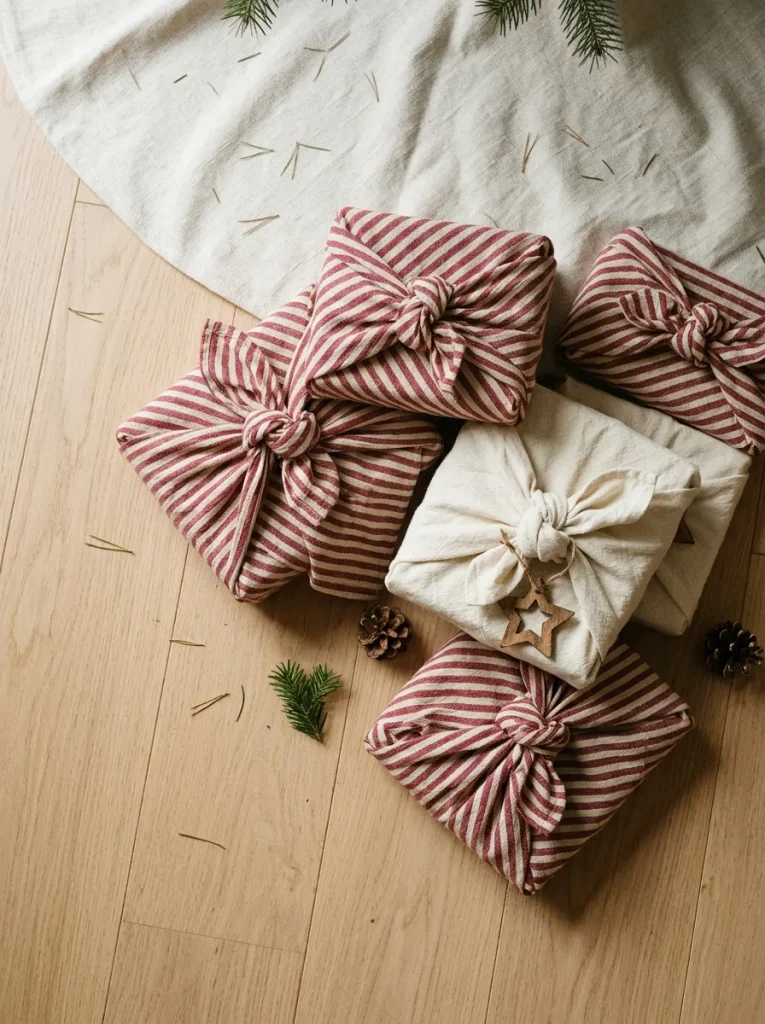
Lay a tea towel flat, set the gift on the diagonal, and pull two opposite corners up into a knot on top, then knot the other two over them. That’s furoshiki, the Japanese fabric-wrapping tradition, using a dish towel instead of silk.
Keep the palette to two colors so a pile of gifts looks planned: red-and-cream stripes plus one plain cream towel, say, with anything busy left on the shelf. Bottles and books wrap best; for a box, choose a cloth roughly three times the box’s width.
Recipients keep the fabric, which is the gift inside the gift. More ideas in this vein live among these handmade gift ideas.
Pro Tip: Press the towels flat before wrapping. Packet creases show at the knot and undercut the polished look.
5. Lift a Small Tree onto a LACK Side Table
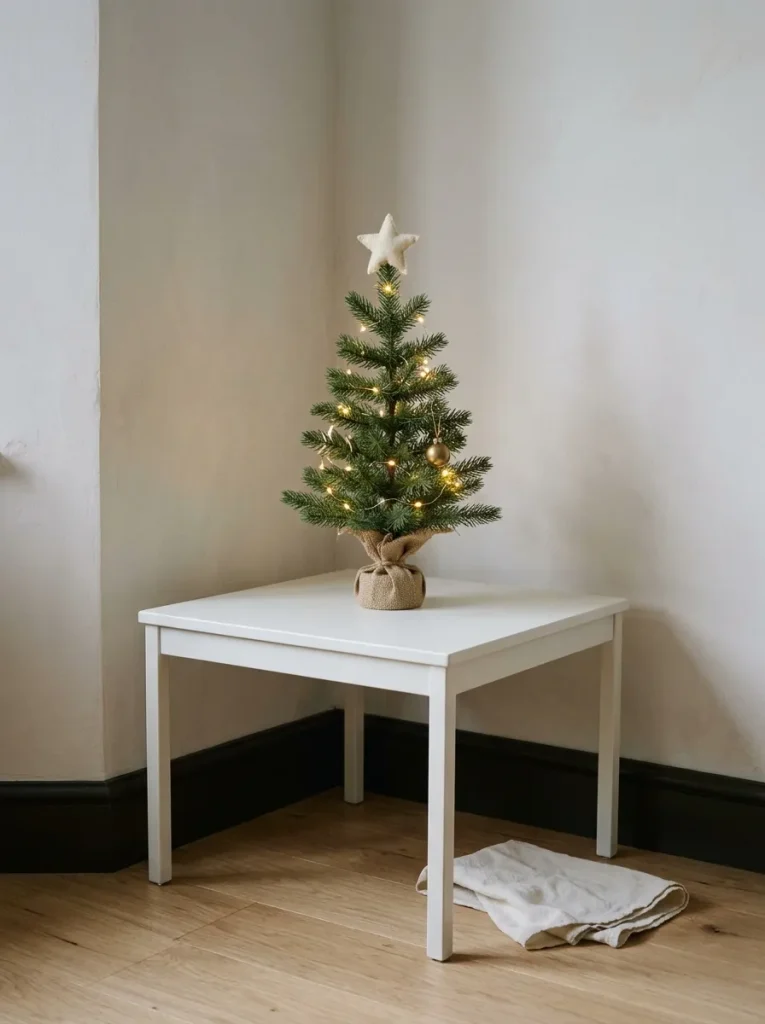
Set a slim tabletop tree straight onto a console and it can look stranded, too low to anchor a corner and too high to be a centerpiece.
A low IKEA LACK side table, among the store’s cheapest tables, raises it to the height where a tree feels intentional. Pick white or black so the table recedes; visible wood grain competes with the branches.
Leave at least 8 cm (3 in) of tabletop showing around the tree’s base, because a tree that fills the surface edge to edge looks ready to tip. Ideal for studios, hallways, and any corner too small for a full-size tree.
Shop This Look
| Product |
|---|
| Small square side table in white or black |
| Slim artificial tabletop tree |
| Felt star tree topper |
6. Turn Glass Storage Jars into Glowing Lanterns

A jar stuffed with lights glares; a jar loosely coiled with lights glows. Take a lidded IKEA glass jar (KORKEN is a common pick), coil about a meter of battery fairy lights inside without packing them, and tuck the battery pack behind the jar.
Set the jar on a pale tray so the light bounces upward. Three jars at three heights make a mantel or windowsill display in about ten minutes. Anyone who has been meaning to try mason jar crafts will find this an easy first project.
Important: A lid does not make a jar safe for real flames. Trapped heat can crack thin glass. Keep the lights electric here and save candles for open votives.
Idea 7 costs nothing, and it fixes the shelf that always ends up either bare or crowded.
7. Arrange Three Heights in a Triangle on the Console
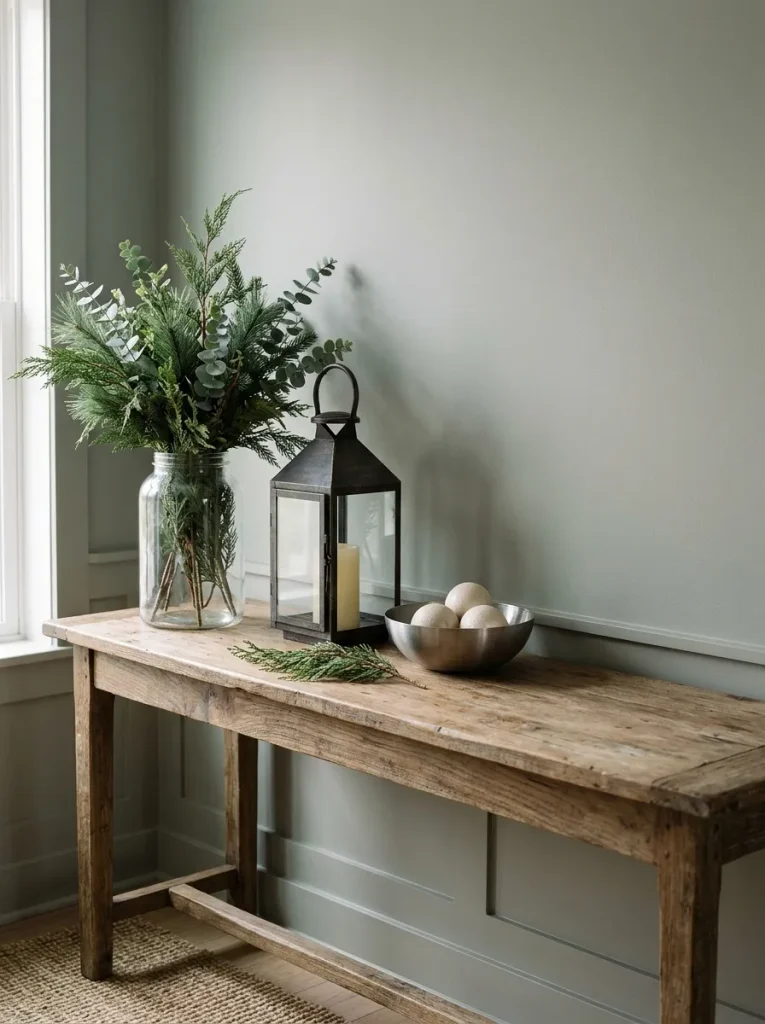
Objects step down in height and the eye travels; scatter them evenly and it stalls. Build one triangle per surface: something tall at one end (a bottle with greenery, or a tall jar), a mid-height lantern or candle, and something low, like a shallow IKEA serving bowl of ornaments.
Leave about a fifth of the surface empty so the arrangement breathes. Most people space ornaments evenly across a console and regret it; the surface reads as inventory instead of styling. For shelf styling that goes further, see these bookshelf styling ideas.
Pro Tip: Odd counts group better than even ones. Cluster three or five objects, never four.
8. Turn a Picture Ledge into a Christmas Card Gallery
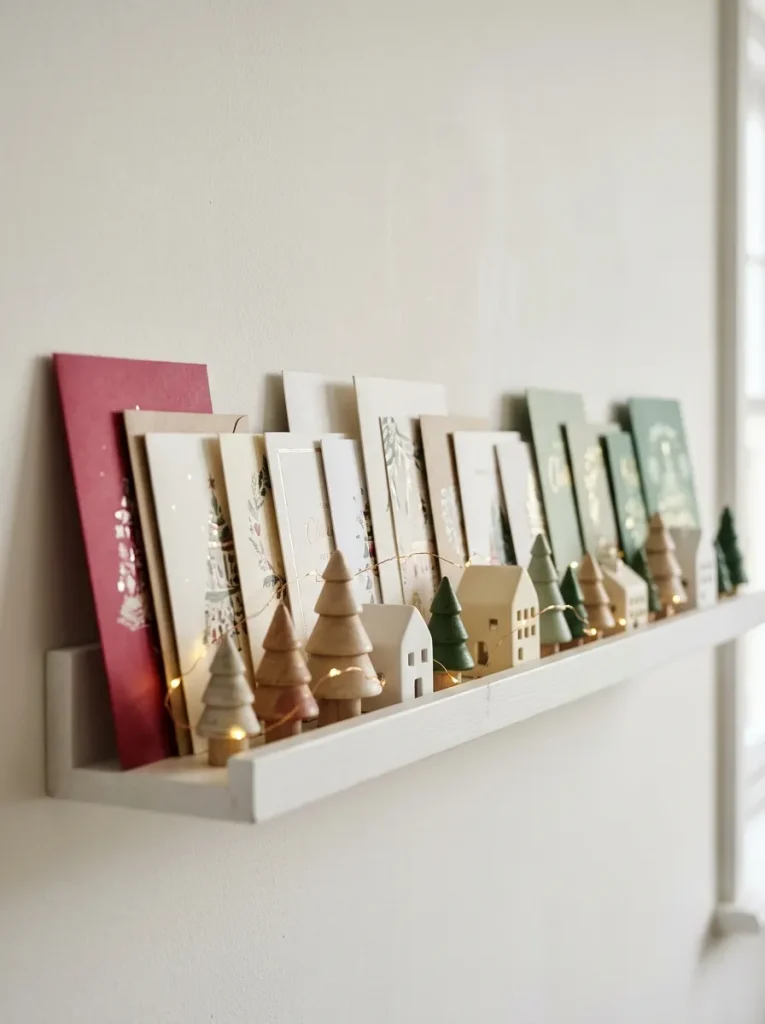
Screw a 55 cm picture ledge, such as IKEA’s MOSSLANDA, to the wall at about eye level, then lean cards along it rather than clipping them, largest at the back and small wooden trees in front. Leaning lets you add cards all December.
A ledge gives a room with no mantel a display surface and takes no floor space. Rentals: skip the drilling and lean the same lineup along a windowsill or the back of a desk. For more display setups, check these Christmas display ideas.
Quick Win: Sort the cards by color before you lean them. A run of red, then cream, then green reads as a garland.
Shop This Look
| Product |
|---|
| Wall picture ledge, about 55 cm |
| Set of mini wooden Christmas trees |
| Tiny ceramic Christmas houses |
9. Frame Dried Orange Slices in Deep Box Frames
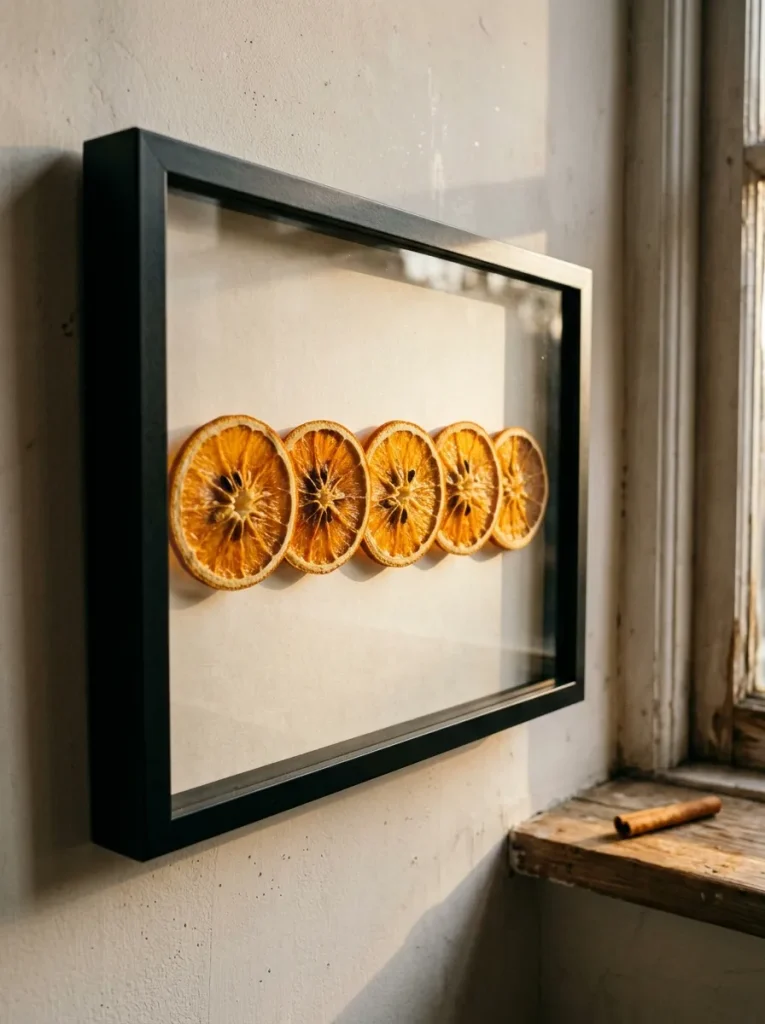
Backlit by a window, dried orange slices glow amber like stained glass. Slice oranges to about 6 mm (¼ in), blot both sides, and dry them in a low oven, around 95–110°C (200–225°F), for two to three hours, flipping once.
Mount three to five slices in a deeper photo frame such as RIBBA, which has room to hold them off the glass so trapped moisture doesn’t fog it. Hang the frame where window light hits it; a dark hallway wastes the effect. If you’re crafting with friends, this suits a Christmas craft night well.
✅ Dried Orange Frame Checklist:
- [ ] Slice oranges to about 6 mm (¼ in) and blot both sides dry
- [ ] Bake at 95–110°C (200–225°F) for two to three hours, flipping once
- [ ] Cool the slices fully on a rack before handling
- [ ] Set three to five slices in the frame, off the glass
The next idea explains why some budget trees look boutique: a three-color rule that costs nothing.
10. Limit the Palette to Cream, Forest Green, and One Metal
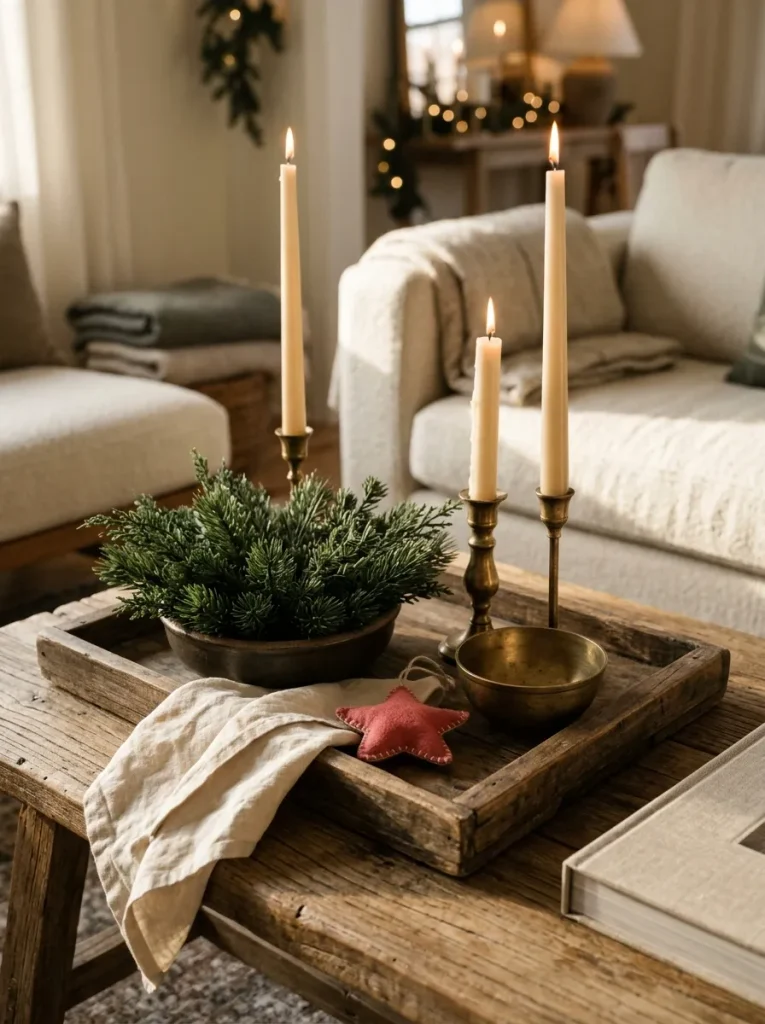
A cheap Christmas usually mixes six unrelated colors from six impulse buys. Limit it to cream, forest green and one metal, brass or silver but never both, and whatever you already own falls into line.
Undertones do the rest: a stark white napkin beside warm cream looks dingy, so pick one white family and hold it everywhere. Judge colors under your evening room light, not the store’s.
Anything off-palette gets a single “wild card” spot, such as the children’s handmade ornaments on one branch section. For pairings beyond this one, browse these home color combinations.
11. Drape Faux Greenery Stems as a Mantel Garland
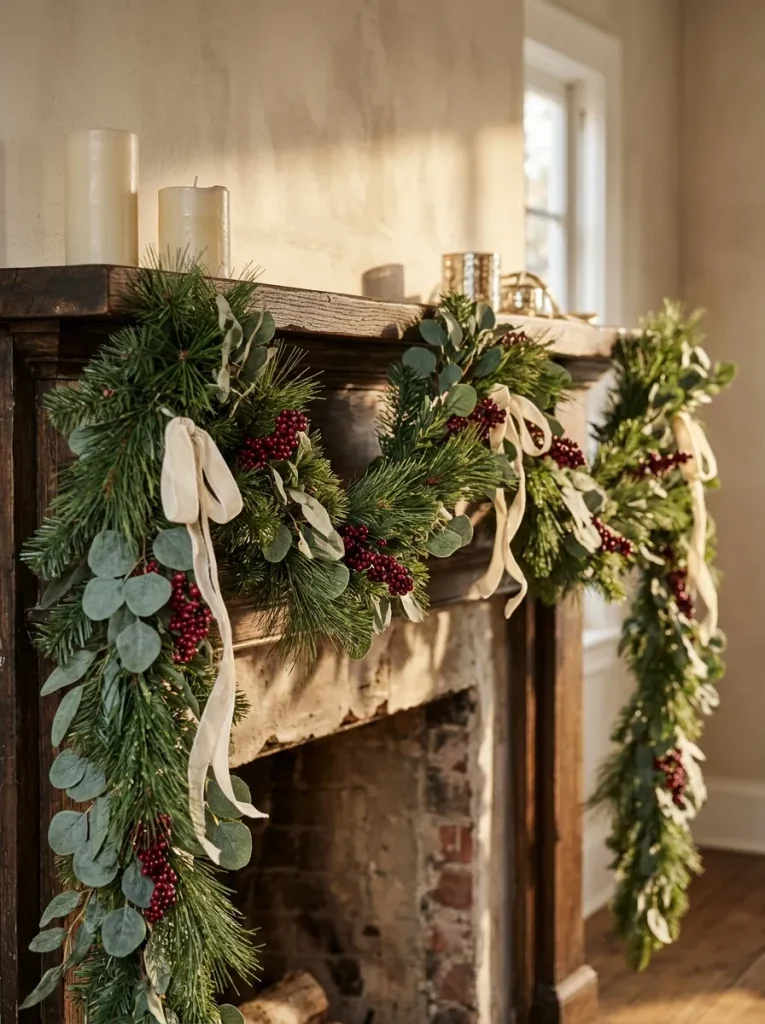
Anyone with a bare mantel or shelf and no budget for a full pine garland can twist five or six faux greenery stems together into one. IKEA sells single stems in eucalyptus and pine styles, and overlapping the tips hides the joins.
Bend each stem into a gentle arc before twisting; straight stems look like a bundle of pipe cleaners. Drape the garland over the shelf edge rather than laying it flat on top, and let each drop hang at least 15 cm (6 in) so it looks generous.
Pro Tip: Loop wired velvet ribbon at the low points of the drape, not at even intervals, so the garland looks hand-arranged.
Shop This Look
| Product |
|---|
| Faux pine or eucalyptus garland |
| Faux red berry stems |
| Wired velvet ribbon in cream |
12. Double a Candle’s Light with a Mirror Behind It
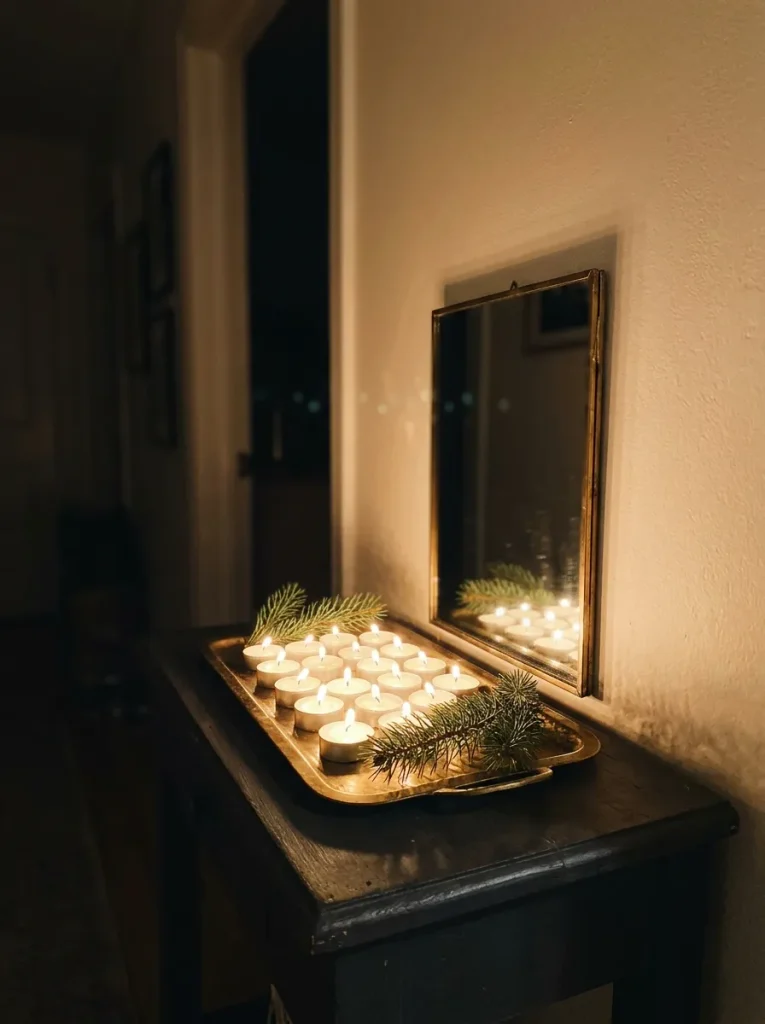
A mirror behind a group of candles doubles the flames without doubling the cost, and the reflected glow on the wall adds depth. Stand a small IKEA mirror behind a tray of tealights on a hallway or dining console, angled slightly so it catches the flames but not the ceiling light.
Best for rooms where one overhead light is the only other source. Use flameless LED tealights if kids or pets share the space. The effect only works after dark, which is when Christmas lighting counts anyway.
Mistake to Avoid: Placing the mirror across from a window. Daylight washes out the candle reflection, so the effect disappears until evening. Set it on a wall that gets no direct sun.
Idea 13 is a two-minute swap that transforms the sofa, and it hinges on choosing the right pile.
13. Swap Sofa Cushion Covers, Not the Cushions
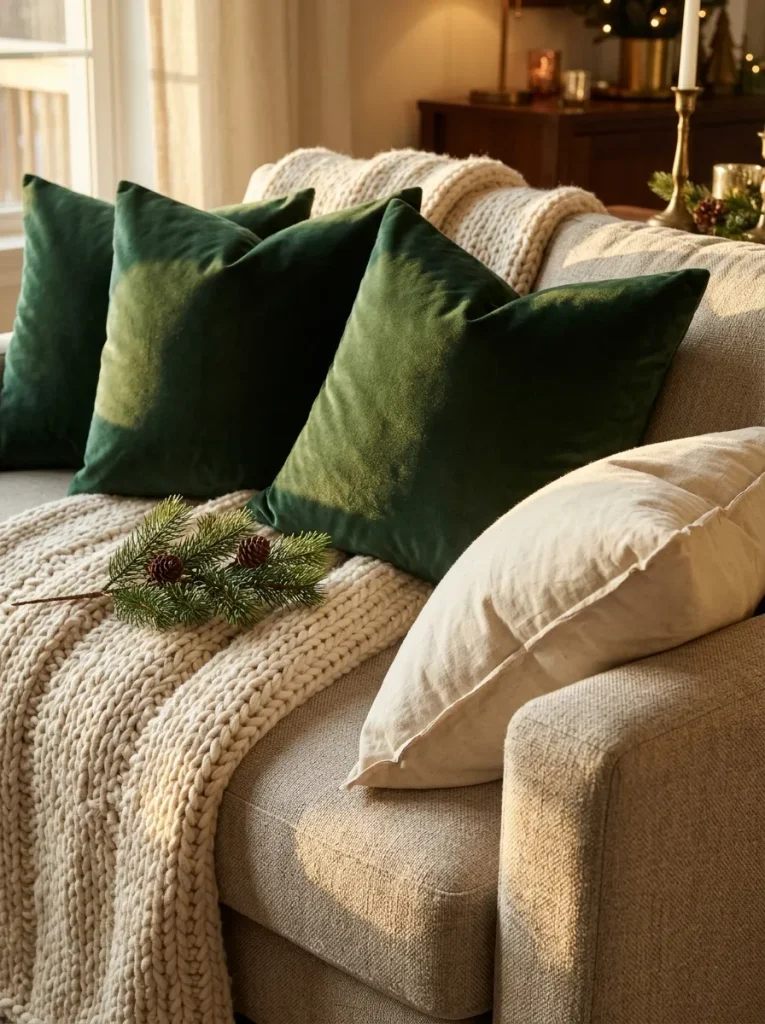
Buy covers, keep the inserts. IKEA sells solid velvet and chunky knit cushion covers for a fraction of what new cushions cost, and a cover 2 to 3 cm (about 1 in) smaller than its insert looks plump instead of slack.
Stick to two textures, velvet and knit, in two colors from your palette. Store the covers folded flat in January; they take drawer space, not closet space. Anyone chasing more that photograph as expensive can start with these IKEA Christmas hacks that look surprisingly luxe.
Shop This Look
| Product |
|---|
| Velvet cushion covers |
| Chunky knit throw blanket |
| Cushion inserts |
My Observation
A detail that changes the result more than it should: hang the lights deep, near the trunk, before anything else. Wrapping only the outer tips flattens the tree into a wall of dots. Run each strand from trunk to branch tip and back in vertical sections so the glow comes from inside the branches, then hang the largest ornaments deepest in. Depth, not brightness, separates a full tree from a thin one.
14. Set the Table with Plain White Plates and One Sprig
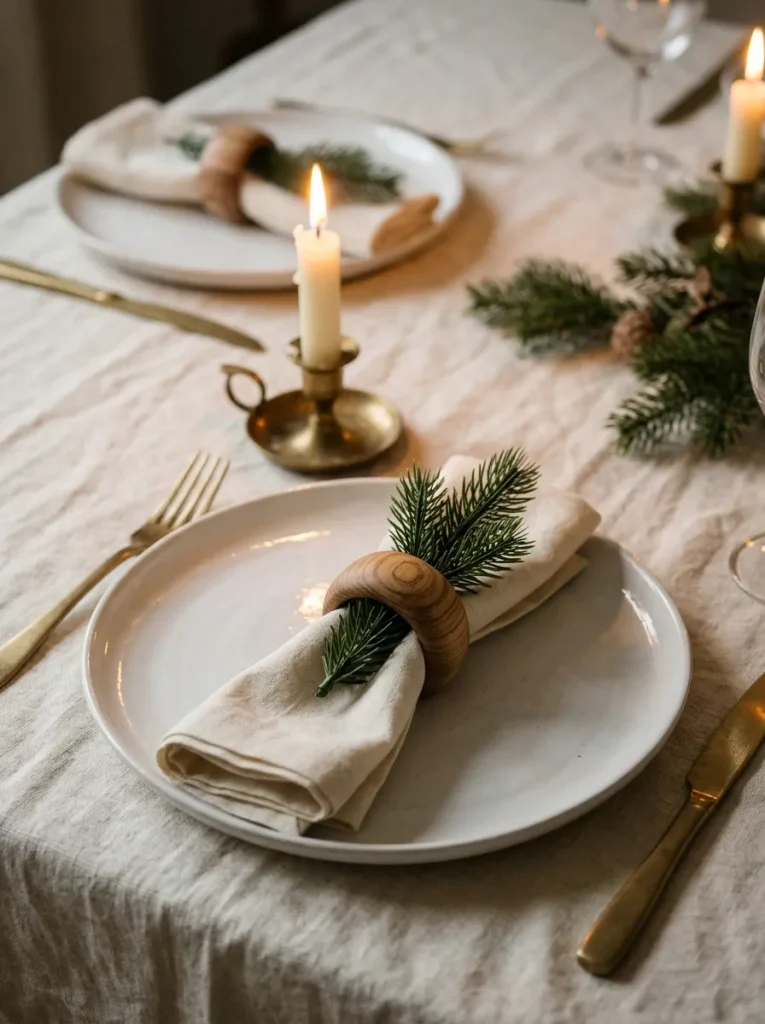
Plain white plates, a napkin folded in thirds through a wooden ring, one sprig tucked beneath it and a single taper: that’s a restaurant-grade place setting with four items. Keep each setting to those layers; adding a charger, a second napkin and a name card looks fussy at a small dinner.
Buy plates in one batch, since whites vary between lines and show under candlelight. Napkins in the palette’s cream or green carry the color. For a full dining-room reference, see this elegant dining room guide.
Important: Fresh greenery beside a taper flame dries and curls quickly. Use faux sprigs within a hand’s width of any flame.
Shop This Look
| Product |
|---|
| White dinner plates |
| Linen-look napkins in cream or green |
| Wooden napkin rings |
| Brass-tone taper candle holders |
15. Build a Branch Tree in a Metal Pot
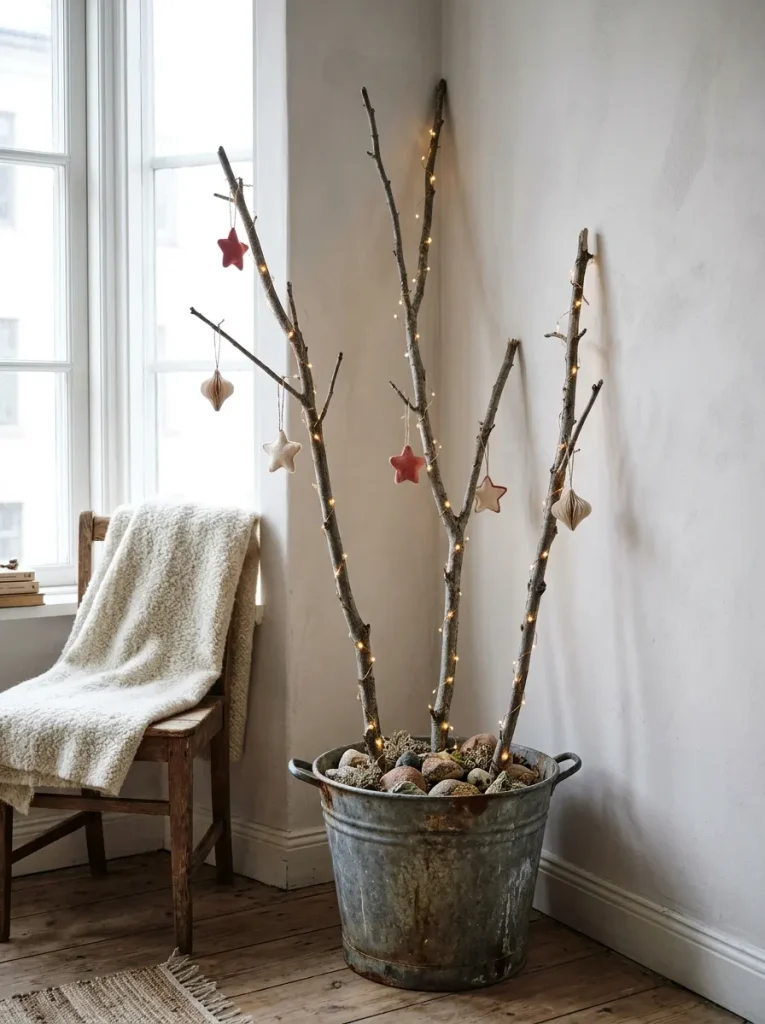
In a studio or dorm where a real tree would eat a third of the floor, three to five bare branches in a heavy galvanized IKEA pot, the SOCKER style, stand on a fraction of the space.
Weight the pot with stones or sand so the branches don’t tip. Choose branches of different heights and hang only light ornaments, felt and paper, since glass and metal bend twigs. Let the branches dry indoors for a day before decorating, then wind a strand of warm lights through them in a loose spiral.
Budget Version: Skip the pot. Any heavy jar or clean flowerpot filled with stones holds the branches just as well, and foraged branches cost nothing.
How to Start Your Budget IKEA Christmas Transformation
Start here: one warm-white set of LED string lights. Light is the first thing anyone notices and the cheapest thing to fix, and every other hack on this list sits inside its glow, so it anchors the room.
The mistake that breaks the look most often is impulse-buying Christmas-only pieces in colors you don’t own. Each one pulls the palette off course. Shop your own cupboards for jars, frames and towels first, then buy only what fills a gap in the cream, green and one-metal palette.
Three items that stretch furthest, together usually well under $50 (approximate): a large woven basket for the tree base, a few cotton tea towels in red-and-cream stripes, and a lidded glass storage jar.
A weekend covers most of the list. Lights, basket, towels, jars, cushions and table settings take a few hours. The orange frames need two to three hours of oven time, and the picture ledge needs a drill. A starter round costs roughly $20–$60, and all 15 hacks land around $100–$250. Both are approximate and depend on local IKEA prices.
Ready to Create Your Dream IKEA Christmas Home?
Fifteen IKEA Christmas hacks under $20 cover a lot of ground: a palette rule, texture from seagrass and velvet, light that glows rather than glares, and layouts that make a shelf look styled. Transformation is incremental, and one change is a valid start.
Today, sort every light strand you own by color temperature and set aside the mismatched ones. By December the room should feel warm and deliberate, like a house that planned its holiday instead of scrambling for it. Pin the ideas you’d try first, and come back to the rest once the tree is standing.
Keep Exploring
- 10 Budget Christmas Mantel Ideas Using Only Cheap IKEA Finds
- 12 IKEA Christmas Hacks for a Small Apartment Living Room
- 9 Christmas Table Settings That Look Expensive on a Budget