13 Fall Theme Girls Night Craft Ideas Your Friends Will Actually Want to Make
A fall theme girls’ night craft is really just an excuse cider, candles, and a project simple enough that nobody’s still gluing at 10 PM. This guide walks through 13 low-mess, high-payoff craft ideas built for exactly that kind of evening, no craft room required.
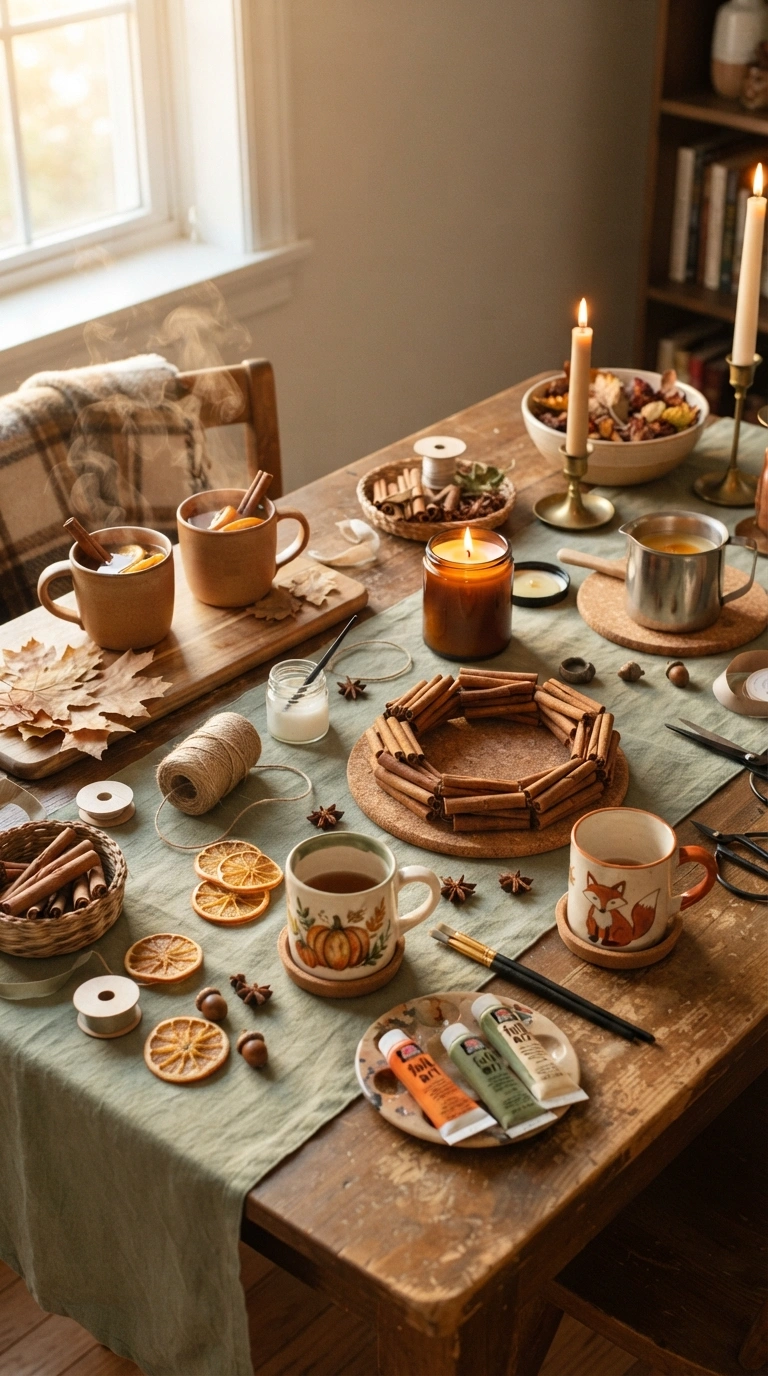
There’s something about a table covered in twine, dried orange slices, and half-finished mugs that makes a Tuesday feel like an event. The room smells like cinnamon and hot glue. Conversation gets easier once everyone’s hands are busy. Grab the cider, clear the table this one’s more fun than it looks on paper.
Jump To
- Why a Fall Craft Night Makes Such a Difference
- 13 Fall Theme Girls Night Craft Ideas
- How to Start Your Fall Craft Night
- Ready to Host Your Fall Girls’ Night?
Why a Fall Craft Night Makes Such a Difference
A fall theme girls’ night craft works because it gives friends one shared task instead of forced small talk something to do with their hands while the cider’s still warm. The format borrows from old church craft circles and college dorm nights, and it holds up fine in a rented apartment with a card table.
What matters for a good autumn craft party isn’t Pinterest-perfect execution; it’s picking forgiving materials air-dry clay, canvas totes, thrifted mugs so nobody’s left watching. Even a one-bedroom hosts six comfortably with one craft station instead of three. Start with whatever needs the least setup, then build from there.
| Best starting point | One pre-kitted craft station, not three |
| Biggest impact area | Scent and lighting — cider and candles do the heavy lifting |
| Budget to start | $40–$80 for six guests |
| Time to complete | 2.5–3 hours, setup included |
13 Fall Theme Girls Night Craft Ideas
1. Paint-Your-Own Mug Bar for Cider Night
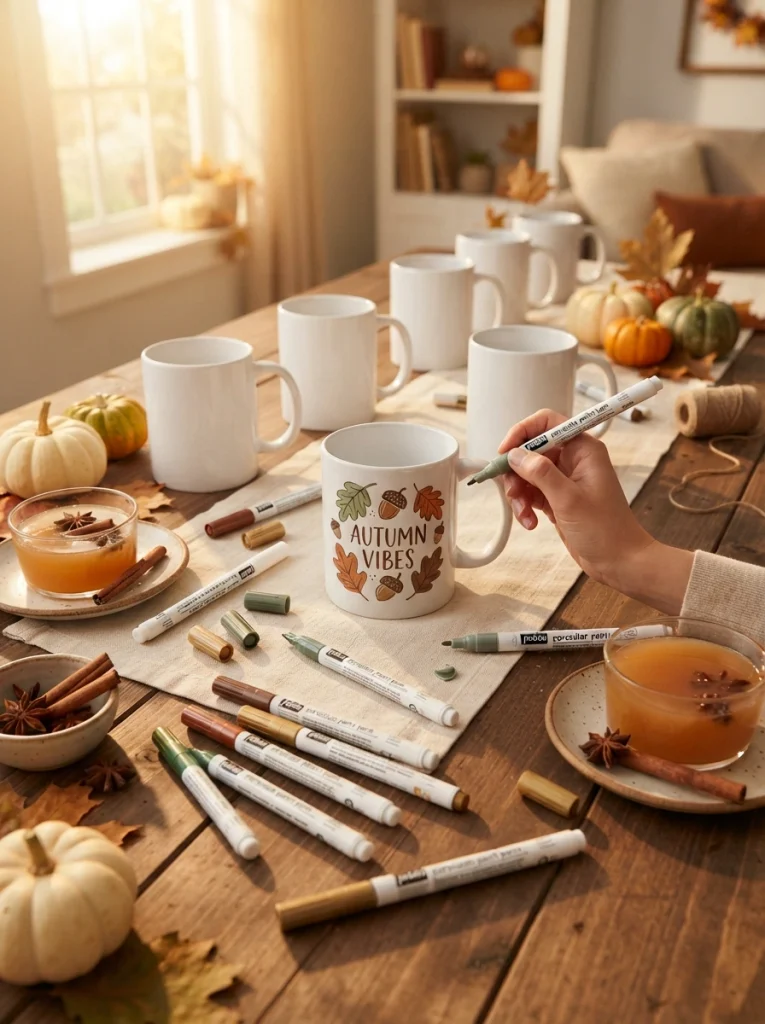
What it looks like: Plain mugs turn into keepsakes in under twenty minutes, rough hand-lettering and all.
Why it works: Oil-based porcelain paint pens bond permanently once baked, so the finished mug survives the dishwasher something acrylic paint can’t do, and most beginners don’t learn the difference until it’s already peeling off.
How to copy it: Buy plain white mugs for around $1.50 each, set out paint pens in three or four colors, and bake finished mugs at 325°F for 30 minutes to cure. Skip stencils wobbly hand-drawn leaves look intentional.
Best for: Hosts who want a take-home favor built into the activity itself, and groups that lean sentimental over polished.
For guests who want their mug to double as a real gift, stylish mug gift ideas has more pairing inspiration.
Quick Win: Buy mugs in bulk 12-packs run under $20 online so there’s no scramble over who gets which one. Extras become thank-you gifts.
What You’ll Need
| Product |
|---|
| Plain white ceramic mugs, 11-ounce |
| Oil-based porcelain paint pens, assorted colors |
| Small saucers for paint testing |
| Painter’s tape for clean rim lines |
| Oven-safe wire rack for curing |
2. Wine Cork Pumpkin Ornaments
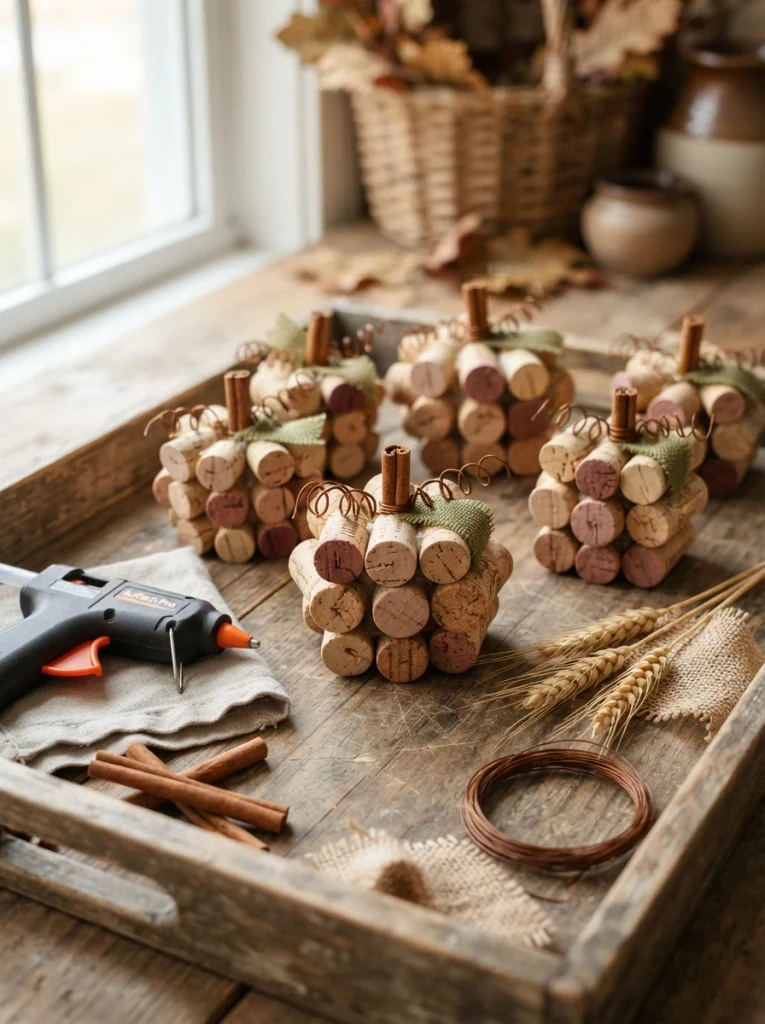
What it looks like: Six or seven wine corks glued in a ring, topped with a cinnamon-stick stem raw and a little uneven, in a good way.
Why it works: Cork’s natural color variation does the shading work for you, so the pumpkins read as handmade rather than sloppy a texture-layering trick that saves beginners from painting anything.
How to copy it: Hot-glue five to seven corks in a circle standing upright, wrap 22-gauge brown floral wire around the middle, and glue a broken cinnamon stick on top as a stem.
Best for: Groups who already have a cork collection lying around, and hosts on a near-zero supply budget.
Pro Tip: Score each cork lightly with a craft knife before gluing it roughens the surface just enough for hot glue to actually grip, instead of popping off an hour later.
These make sturdy stand-ins if you’re browsing handmade gift ideas for the rest of the group.
3. Stenciled Canvas Tote Bags
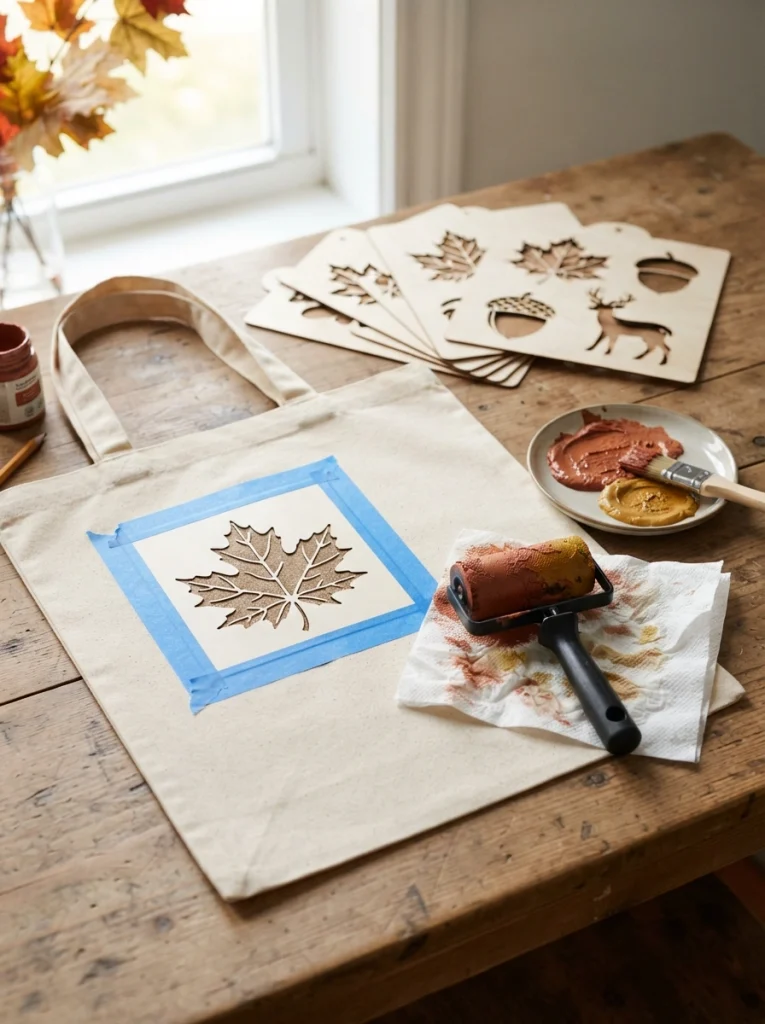
What it looks like: A plain canvas tote with a single crisp leaf or acorn motif stenciled dead-center restrained, not covered edge to edge.
Why it works: Negative space is the real design principle here one clean motif reads as intentional, while a tote covered in five overlapping stamps reads as a kids’ project.
How to copy it: Slide cardboard inside the tote to stop bleed-through, tape the stencil flat, and dab (never brush) fabric paint with a foam pouncer for a crisp edge. Heat-set with an iron once dry.
Best for: Practical guests who want something they’ll actually use grocery shopping, not just display.
Budget Version: A four-pack of blank canvas totes runs under $15, and one $6 bottle of fabric paint covers the whole group the cheapest project on this list by a wide margin.
More group-friendly options like this are rounded up in craft night ideas for ladies.
The next one costs about four dollars a pumpkin and looks like it came from a farm stand.
4. Painted Terracotta Pot Pumpkins
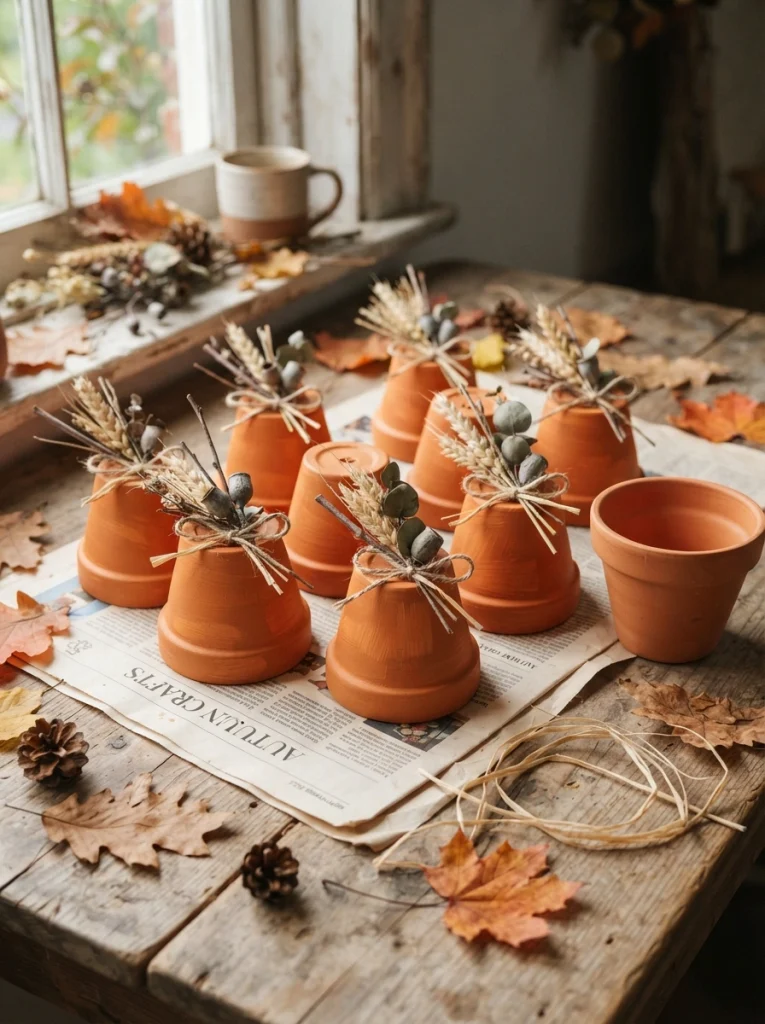
What it looks like: A flipped terracotta pot with a curved wooden stem on top a pumpkin silhouette without carving a single seed.
Why it works: Terracotta’s rough, porous surface holds matte paint without the streaking you’d get on smooth ceramic, and the pot’s existing dome shape does most of the sculptural work for free.
How to copy it: Prime with matte spray paint in pumpkin orange, let it cure two hours, then hot-glue a curved branch or wine cork as a stem. Skip clear coat the matte finish is the point.
Best for: Renters who want fall decor with zero long-term commitment; these store flat in a shoebox come November.
Important: Regular craft acrylic beads up on unsealed terracotta instead of soaking in evenly spray paint or a terracotta-specific sealer first, or the color goes on blotchy no matter how careful the brushwork is.
For the porch display afterward, fall porch ideas has staging inspiration for the finished pumpkins.
What You’ll Need
| Product |
|---|
| 4-inch terracotta pots, unglazed |
| Matte spray paint in pumpkin orange |
| Curved twigs or wine corks for stems |
| Raffia or jute twine |
| Drop cloth or newspaper for overspray |
5. Cinnamon Stick and Dried Orange Wreaths
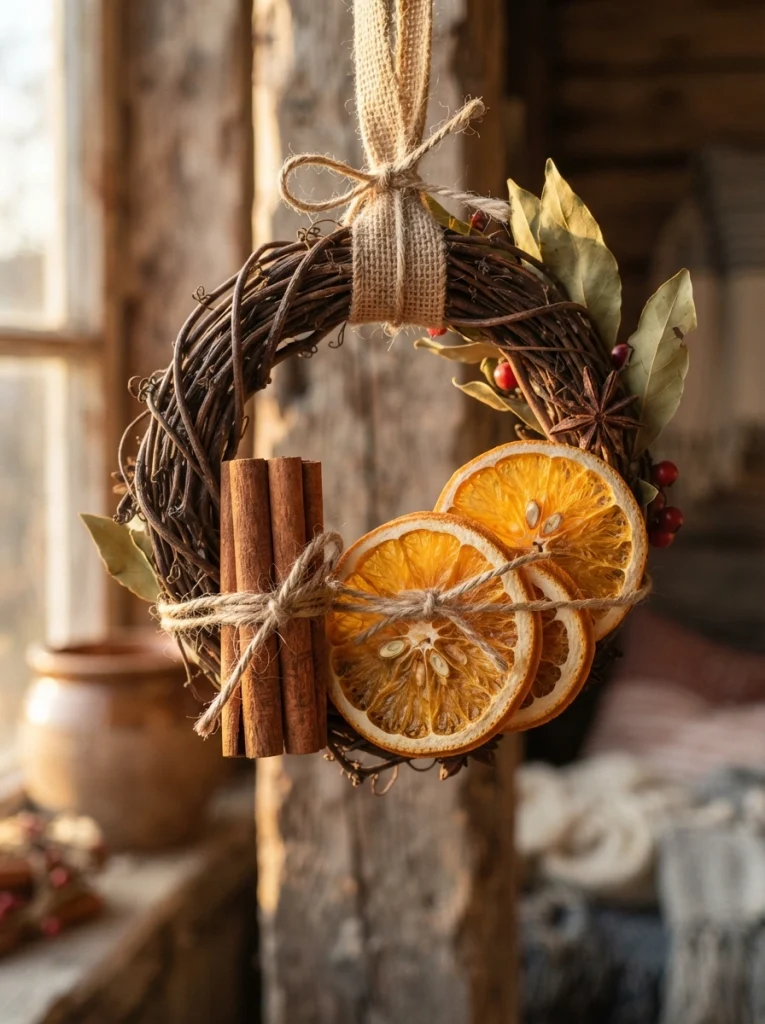
What it looks like: A fist-sized wreath, dense with texture bark, dried citrus, a little frayed twine that smells better than it looks.
Why it works: Layering three materials at different heights flush cinnamon bundles, raised orange slices, trailing twine creates the visual depth a single-material wreath never quite gets.
How to copy it: Wire five or six cinnamon sticks into bundles, hot-glue them around a 6-inch grapevine base, then tuck dehydrated orange slices between bundles at varying angles so none sit flush.
Best for: Anyone hosting again in December this base technique carries straight into holiday wreath-making.
Styling Note: Hang it somewhere with airflow, not a closed cabinet. The cinnamon scent fades fast in still air but stays noticeable for weeks near a doorway.
6. Autumn Leaf Paper Garland
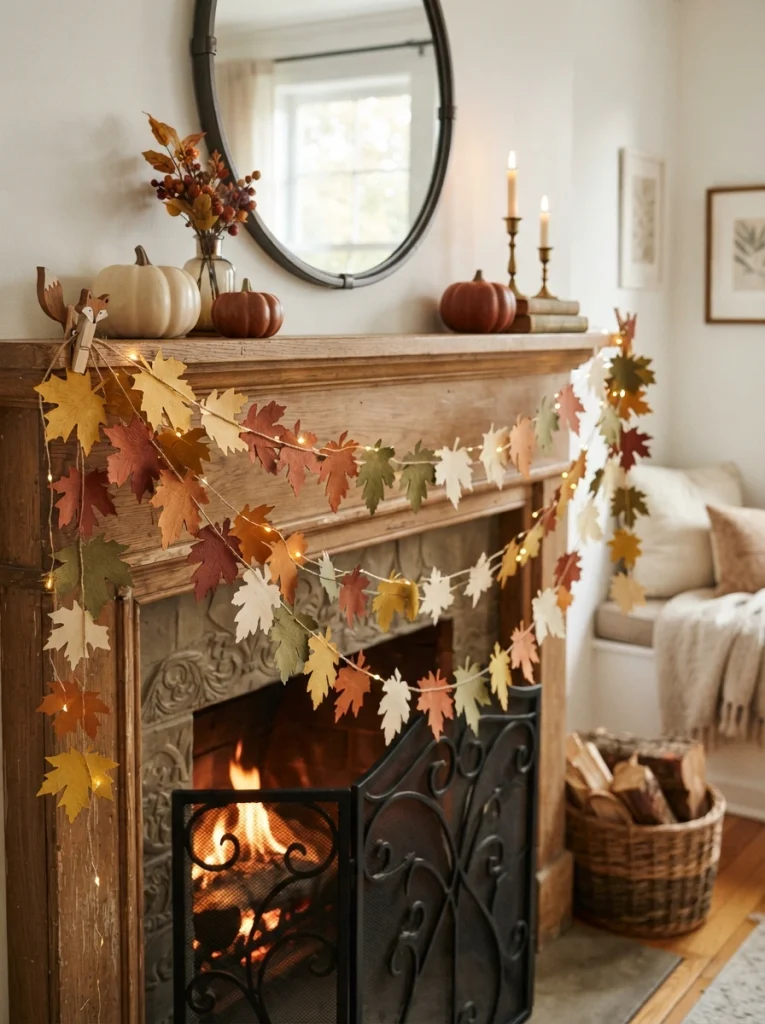
What it looks like: A loose string of paper leaves in graduating shades, strung a few inches apart rather than packed tight.
Why it works: Uneven spacing mimics how real leaves actually fall evenly spaced leaves read as artificial the second you look closely, so the gaps are doing real design work, not laziness.
How to copy it: Trace leaf shapes onto cardstock in four fall shades, cut freehand rather than with a die-cutter for natural edge variation, and string with a needle through the stem end onto twine.
Best for: Groups with a mix of skill levels cutting is forgiving, and mismatched leaves still read as intentional.
More freehand projects like this live in easy paper craft ideas.
Next up is the one project every guest fights over taking home.
7. Fall Tablescape Napkin Ring Craft
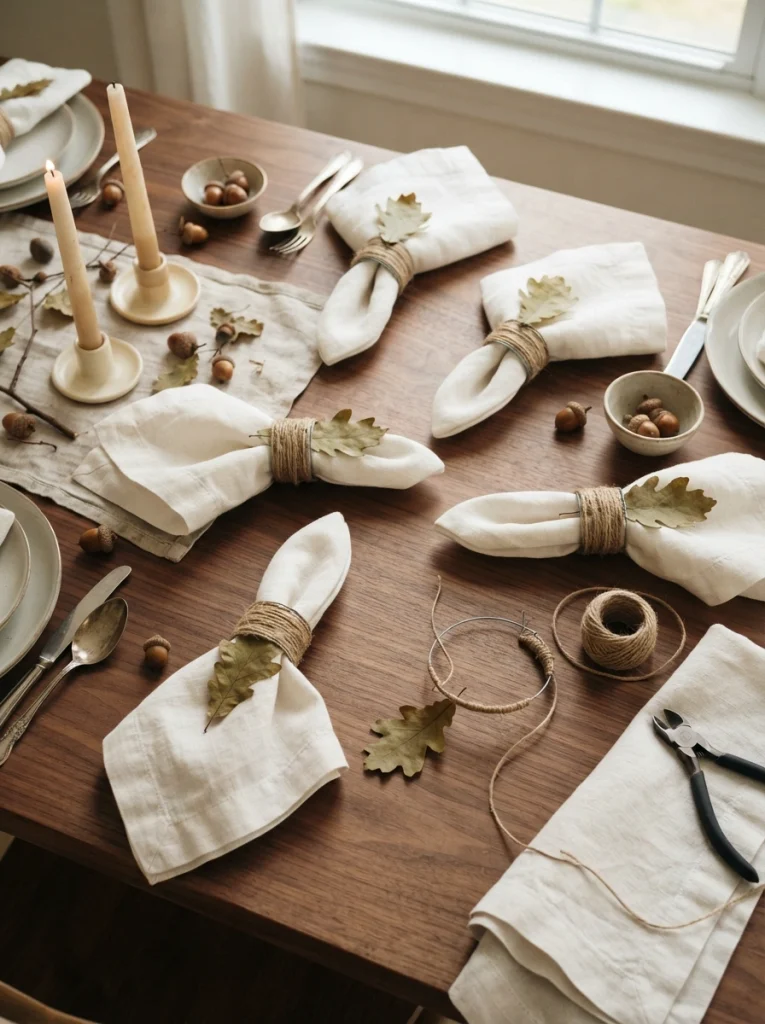
What it looks like: A simple wire ring wrapped in jute twine with one dried leaf or a sprig of dried wheat tucked under the wrap.
Why it works: The napkin ring is the one decor object every guest actually touches up close, so small material choices real twine over ribbon, a real leaf over faux read as more thoughtful there than almost anywhere else on the table.
How to copy it: Wrap 18-gauge wire into a 1.5-inch ring, cover completely with jute twine using hot glue every few wraps, then tuck a single dried leaf stem under the last wrap.
Best for: Hosts already planning a sit-down dinner as part of the night, not just a craft table.
✅ Mistake to Avoid: Skipping the hot glue between wraps. Twine alone unravels within a week of use a few dots of glue every three or four wraps keeps it intact through a whole season of dinners.
8. Spiced Sugar Scrub Favor Jars
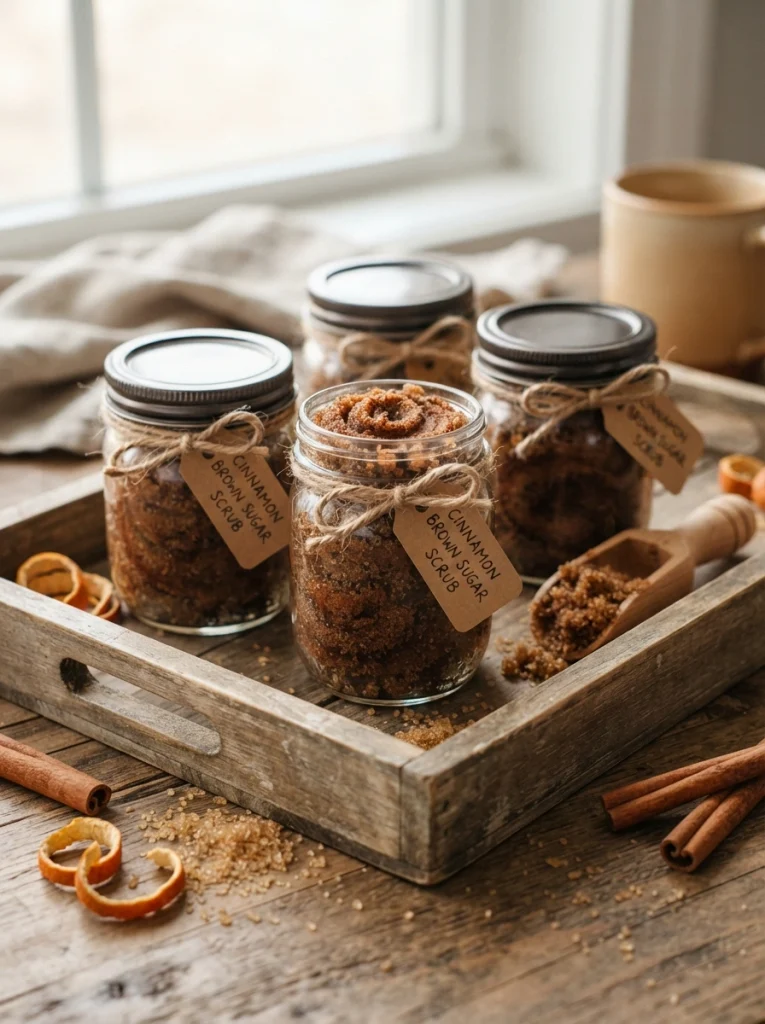
What it looks like: A 4-ounce jar packed with coarse brown sugar and visible flecks of cinnamon, capped and labeled by hand.
Why it works: Coarse, not fine, brown sugar keeps its texture in oil without dissolving into mush the exact detail that separates a scrub that still exfoliates a month later from one that turns to syrup.
How to copy it: Mix 1 cup packed brown sugar with a half cup melted coconut oil and a tablespoon of ground cinnamon, spoon into 4-ounce jars, and top with a fabric circle secured by twine.
Best for: Guests who want a takeaway with actual use beyond decor this doubles as a genuine hostess gift.
For more favor-style projects, handmade gift basket ideas pairs well with these jars as a bundled gift.
What You’ll Need
| Product |
|---|
| 4-ounce glass jars with lids |
| Coarse brown sugar |
| Refined coconut oil |
| Ground cinnamon |
| Kraft paper gift tags |
9. Pressed Fall Leaf Resin Coasters
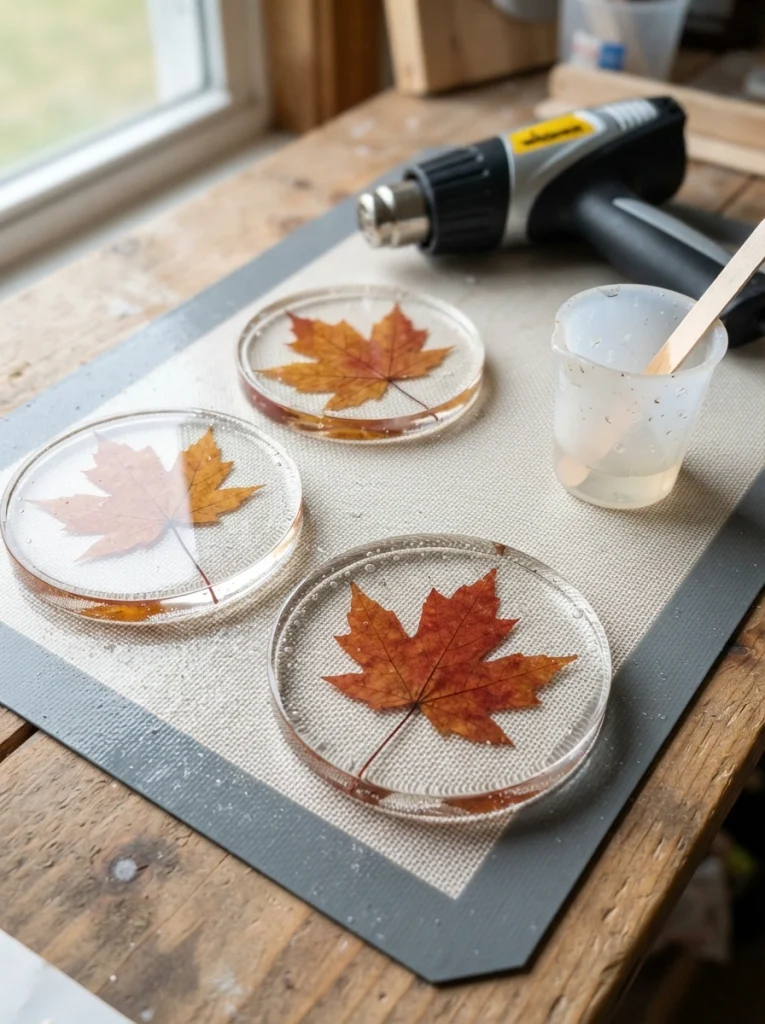
What it looks like: A clear coaster with a single flattened leaf frozen mid-fall inside glossy, a little jewel-like.
Why it works: Pressing leaves flat for at least 48 hours beforehand is the unglamorous step that determines everything unpressed leaves trap air pockets and curl inside the resin, ruining the clarity everyone’s actually going for.
How to copy it: Press leaves between heavy books for two days minimum, pour a thin resin base layer into silicone coaster molds, place the leaf once tacky, then flood with a final layer and pop bubbles with a heat gun.
Best for: The one friend in the group who actually finishes projects this needs patience across two separate pours.
Last two ideas lean bigger one’s a wall piece, the other needs an evening of drying time.
10. Felt Leaf Embroidery Hoop Wreaths
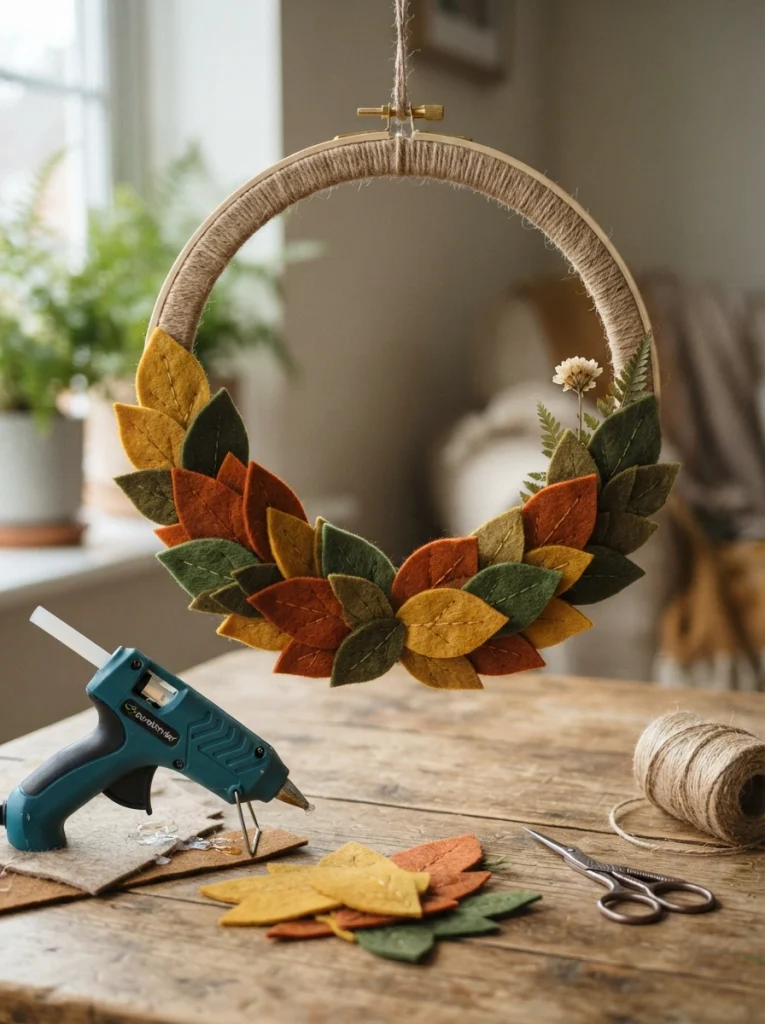
What it looks like: A plain wooden hoop with felt leaves clustered along one bottom arc, leaving most of the circle open.
Why it works: Leaving two-thirds of the hoop bare is the actual design choice a wreath packed edge to edge with leaves loses the visual weight that makes a crescent arrangement feel deliberate.
How to copy it: Wrap the hoop in jute cord first to hide the wood, cut five to seven felt leaves from a template, layer two sizes per cluster, and hot-glue in a loose crescent along the bottom third only.
Best for: Beginners who want something wall-worthy without any painting or drying time involved.
For more fiber-based wall pieces, crochet wall hangings covers a similar hoop-and-texture approach.
11. Metallic Pumpkin Painting Bar
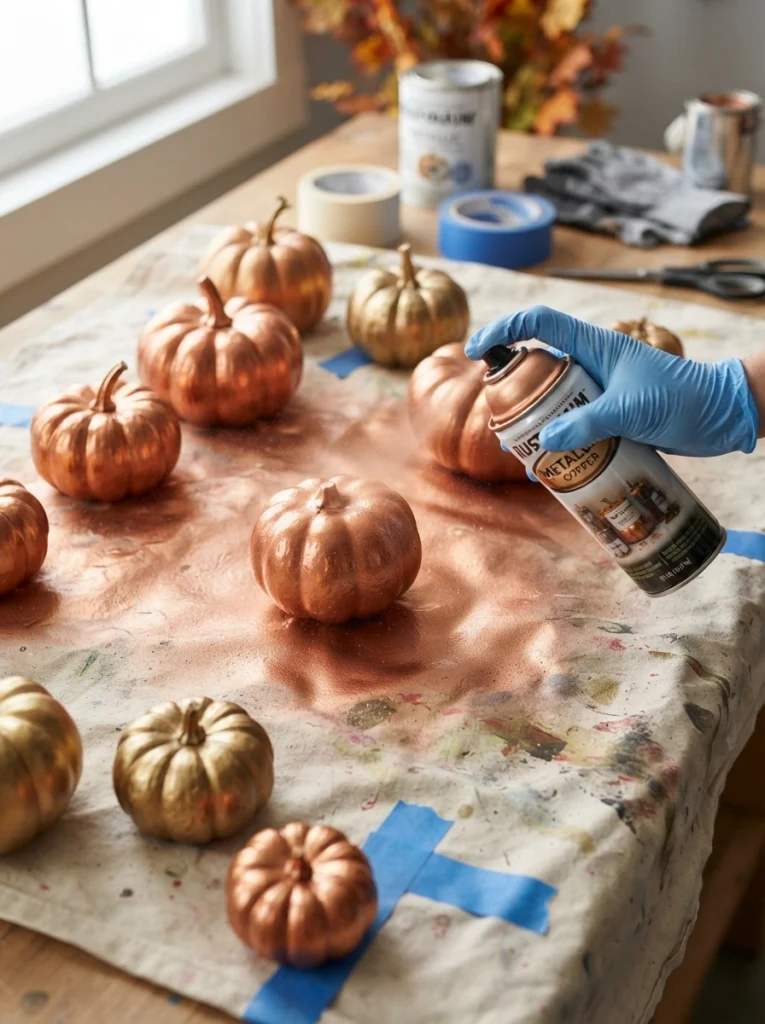
What it looks like: A cluster of faux pumpkins in mismatched sizes, all sprayed the same metallic finish so they read as a set.
Why it works: Painting an odd number three or five in one uniform finish creates a collection instead of a pile, a basic visual-grouping trick most people skip when they just grab whatever’s on the shelf.
How to copy it: Buy faux foam pumpkins in three sizes, spray in a well-ventilated area with metallic spray paint in one finish per group, and let cure a full 24 hours before stacking or nesting them.
Best for: Guests who want a bigger visual payoff without any overnight drying at home these look finished the same night.
For styling them afterward, Halloween decor ideas has placement inspiration once they’ve cured.
My Views: Here’s something most guides won’t tell you: metallic spray paint needs two thin coats, never one heavy one. I’ve watched people dump a full 10-second blast on a single pumpkin trying to get even coverage in one pass, and it drips into the ridges every time the same can looks completely different applied in two 3-second passes with 20 minutes of dry time between them.
12. Amber Glass Jar Lanterns
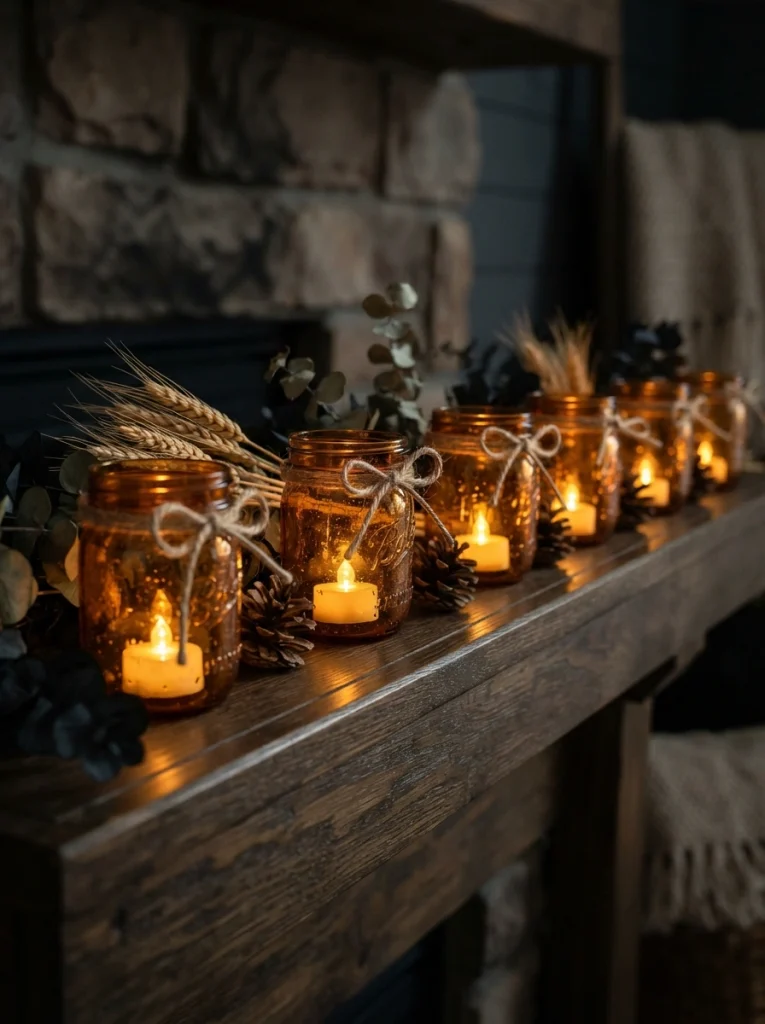
What it looks like: A row of small jars glowing amber at dusk, twine-wrapped rims catching just enough light to look intentional.
Why it works: Amber glass filters light into a warmer, lower color temperature than clear glass the same reason old apothecary jars always look cozier lit from inside than clear ones do.
How to copy it: Wrap the top third of each jar in jute twine secured with hot glue, drop in a flameless battery tea light, and cluster three to five jars at varying heights using upturned bowls or books underneath.
Best for: Hosts who want ambiance without any actual fire in a room full of paper garlands and dry felt.
For more jar-based projects, mason jar crafts has a wider range of finishes to try.
Last one’s the messiest project on this list and also the one everyone asks to take home.
13. Fall-Scented Soy Candle Pouring Station
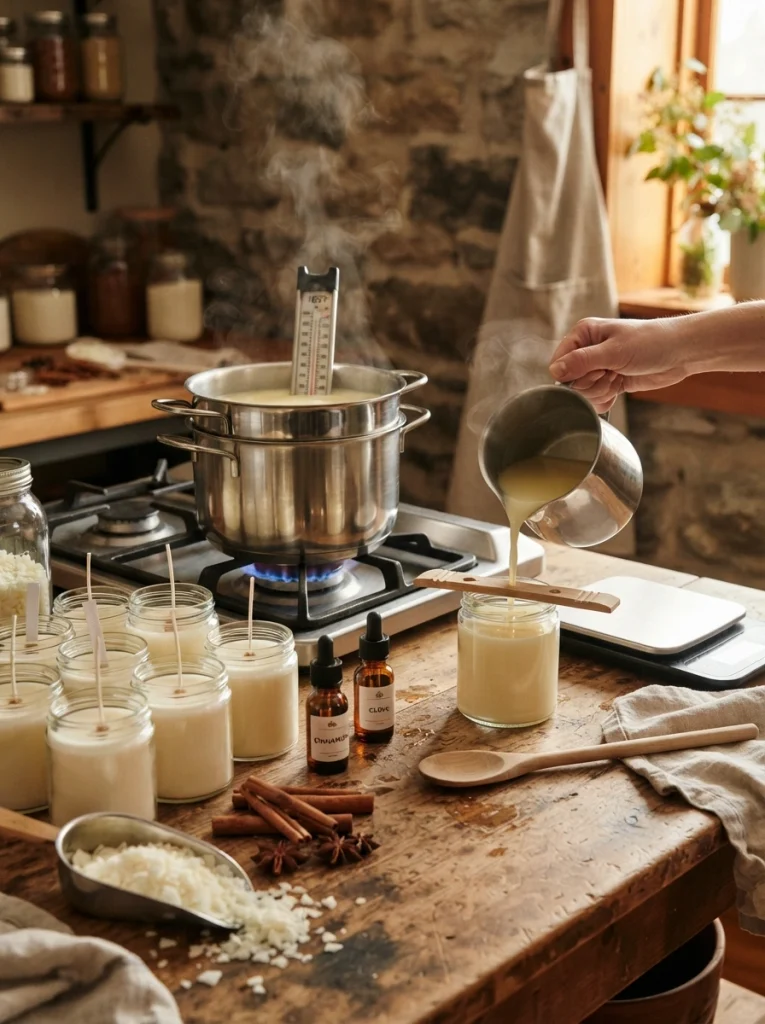
What it looks like: A row of glass jars filled partway with pale wax, wicks held centered by wooden clothespins balanced across the rim.
Why it works: Pouring wax at the wrong temperature is the single biggest cause of a sunken, cracked top hitting 135–145°F before pouring, not straight off the heat, is the difference between a smooth finish and a candle nobody wants to gift.
How to copy it: Melt soy wax flakes in a double boiler to 185°F, remove from heat, stir in fragrance oil once the wax drops to about 165°F, let cool to 135–145°F, then pour into jars with pre-centered wicks.
Best for: Save this one for the group that’s willing to wait candles need four hours minimum to fully set before anyone can take theirs home.
✅ Before You Pour Checklist:
- [ ] Weigh wax and fragrance oil separately (1 ounce fragrance per pound of wax)
- [ ] Center and secure the wick in each jar before melting anything
- [ ] Clip a thermometer to the pot — don’t estimate temperature by eye
- [ ] Let wax cool to 135–145°F before pouring, not straight off the heat
- [ ] Wait a full 24 hours before trimming the wick or lighting
How to Start Your Fall Craft Night
What I’ve found with real craft nights: the first move isn’t buying supplies, it’s picking one project as the anchor and building the rest of the night around it. A single terracotta pumpkin bar or mug-painting station keeps everyone in one spot instead of splitting attention across three half-finished activities pick the craft with the shortest dry time as your anchor, since it’s the one people will actually finish before leaving.
The most common mistake is buying enough supplies for every guest to make their own version of every craft instead of one shared project per activity. It quietly triples the budget and the cleanup, and half the extra materials go home unused. Fix it by capping supplies at exactly enough for one project per guest, no backups.
Three items under $50 that do real work: a $12 four-pack of blank canvas totes, an $8 bag of dehydrated orange slices for wreaths and garnish both, and a $9 multipack of oil-based paint pens that covers the mug station with color to spare.
A full night setup, two crafts, and cider runs about three hours and $60 to $90 for six guests across three projects. A single-craft version comes together in under an hour of prep and closer to $30.
Ready to Host Your Fall Girls’ Night?
Between the mug painting, the resin coasters, and the candle pours, there’s enough range here to fit almost any group some hands-off, some genuinely messy. Nobody needs to nail all thirteen in one evening; picking two or three that fit your space is plenty for a first try. Tonight, that might just mean ordering a pack of plain mugs and a set of porcelain paint pens before the week gets away from you.
A good fall craft night isn’t really about the finished project it’s the smell of cinnamon and the mess on the table that people remember. Save this one now, because half these ideas double as holiday gifts once November hits.
Keep Exploring
- 15 Halloween Themed Craft Night Ideas for a Spooky Girls’ Night
- 10 Cozy Mason Jar Crafts to Make on Repeat
- 12 Handmade Gift Basket Ideas Your Friends Will Actually Use