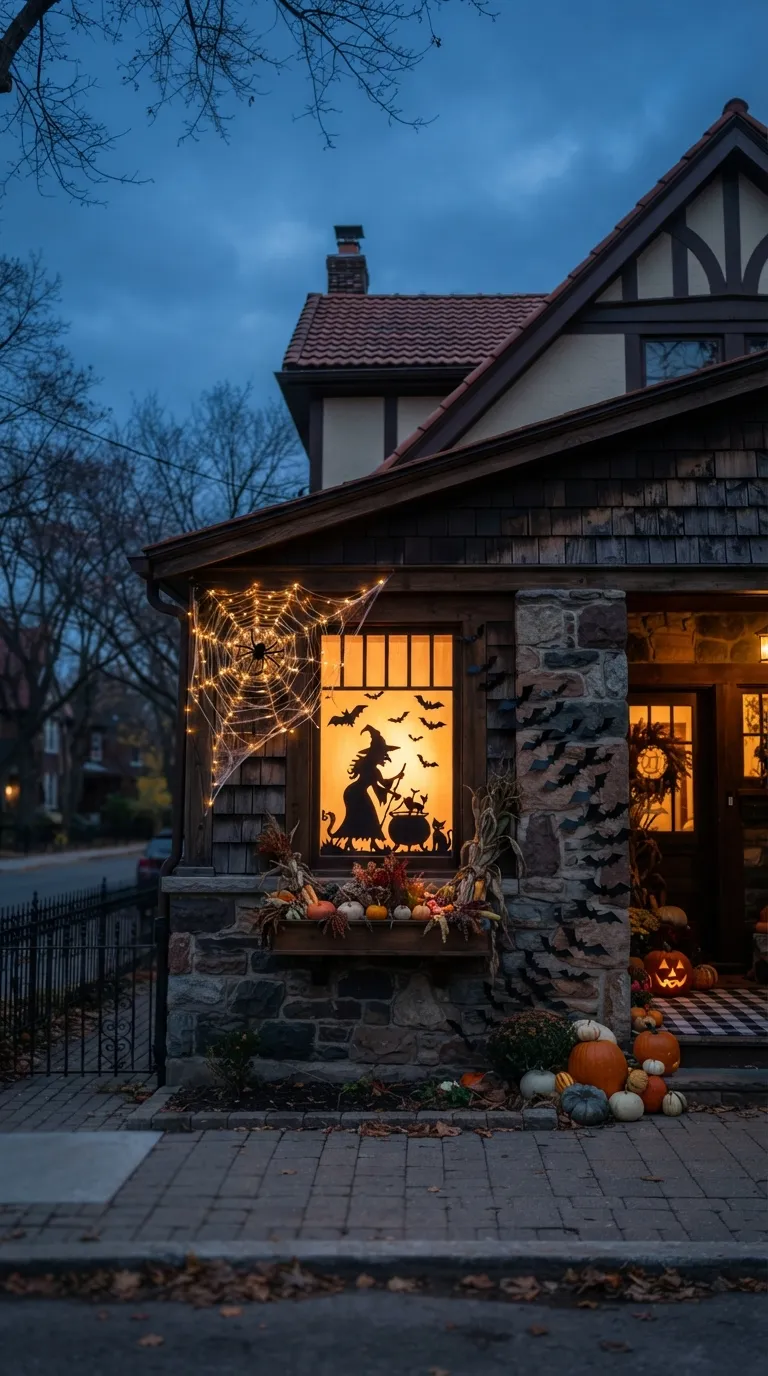
9 Halloween Window Decor Ideas That Look Great From the Street
Most Halloween window displays look great from your couch and disappear the second you step onto the sidewalk. These nine window ideas are built backward from that problem designed to read as crisp, glowing shapes the moment dusk hits, not just pretty vignettes meant for indoor eyes.
Think warm amber light spilling through black silhouettes. Bats caught mid-flight against the glass. A ghost that seems to float a few inches off the pane instead of sitting flat against it. Curb appeal, after dark.
Quick Navigation
- Why Halloween Window Decor Makes Such a Difference
- The Ideas, Cheapest and Boldest First
- How to Start Your Halloween Window Decor Transformation
- Ready to Create Your Dream Halloween Window Display?
Why Halloween Window Decor Makes Such a Difference
Windows do more curb-appeal work than most people budget for. They’re lit from behind at night, visible from the street in a way a porch-table decoration isn’t, and already framed by the house’s own architecture.
A good window display works day and night silhouettes and clings hold their own in daylight, then the light source takes over once the sun drops. None of it requires paint or a drill, which makes windows one of the few Halloween projects that’s fully renter-safe.
Quick Reference
| Best starting point | One statement window — usually the one facing the street |
| Biggest impact area | Backlighting and silhouette contrast, not prop count |
| Budget to start | Roughly $15–$40 per window, approximate |
| Time to complete | About 30–45 minutes per window |
The Ideas, Cheapest and Boldest First
1. Backlit Silhouette Cutouts
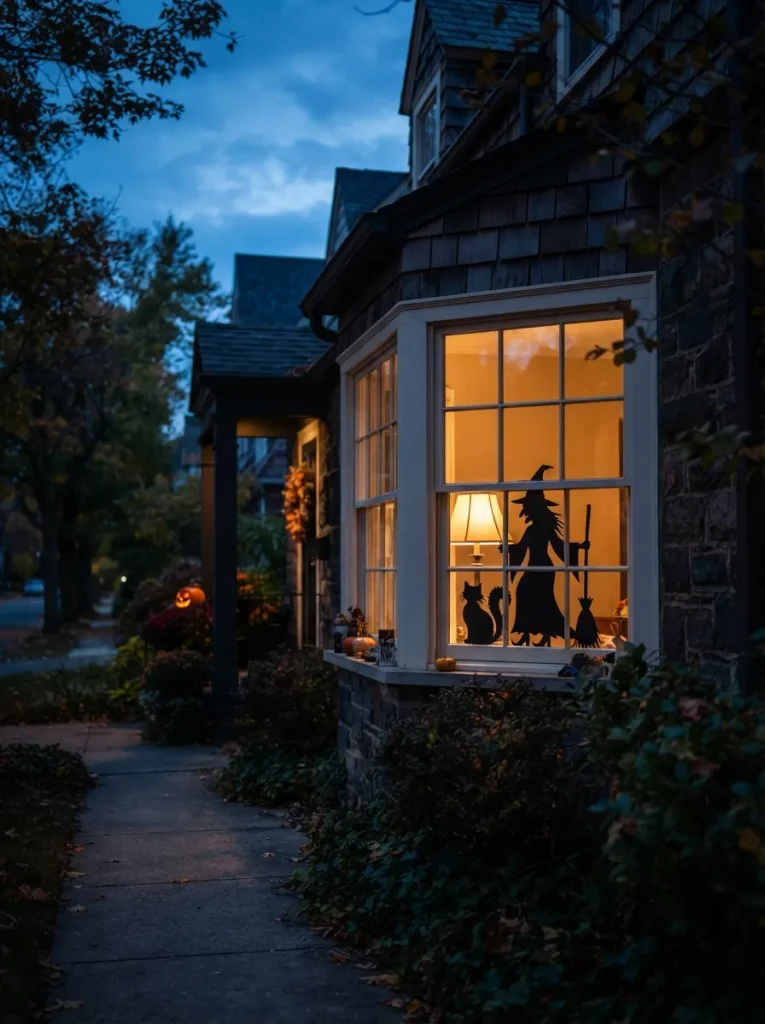
Start by cutting or buying flat black silhouettes a witch on a broom, a cat arching its back, a row of bats and pressing them directly against the glass. The detail almost nobody mentions: a silhouette only reads from the street if the light source sits behind it, not in front of it. A porch light aimed at the window just flattens the shape into a dark smudge.
Set a lamp or clip light two to three feet back from the glass, pointed at the cutout, and turn off any closer overhead lighting so the silhouette stays the brightest contrast in the frame. A warm 2700K bulb edges the black shape far better than a cool white one does. This is the one technique the rest of this list builds on.
Pro Tip: Stick the cutout to the glass with removable poster putty instead of tape it won’t leave residue if the window heats up in direct afternoon sun.
Shop This Look
| Product |
|---|
| Black silhouette window cling or craft foam cutout kit |
| Clip-on lamp with adjustable neck |
| Warm white (2700K) LED bulb |
2. Static Window Clings in a Repeating Pattern
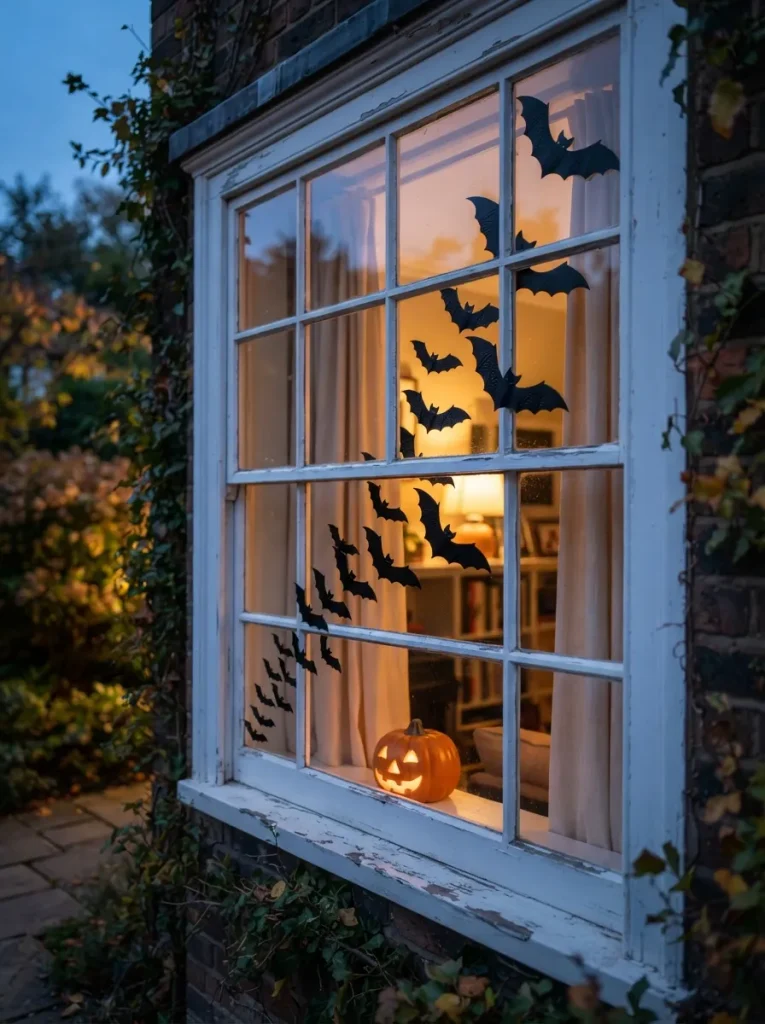
One big cling centered on the glass reads as a single shape. Scatter a dozen small bats in a diagonal flight path instead smaller near one corner, larger as they trail across the pane and the eye reads movement instead of a sticker.
Vinyl clings hold their static charge best on clean, cool glass. Apply them in the morning or evening rather than right after a window’s been baking in direct sun; warm glass makes the adhesive backing stick rather than cling, and pulling it off later can leave a faint outline behind.
A quick wipe with a vinegar-water solution beforehand also helps plain water tends to leave streaks that show through a black cling far more than they’d show through curtains.
Budget Version: A single sheet of black cling vinyl makes enough bats for two or three windows, and costs less than most pre-cut sets.
Shop This Look
| Product |
|---|
| Black vinyl bat window cling set |
| Reusable static window film roll (for custom shapes) |
3. Orange & Purple Fairy Light Frame
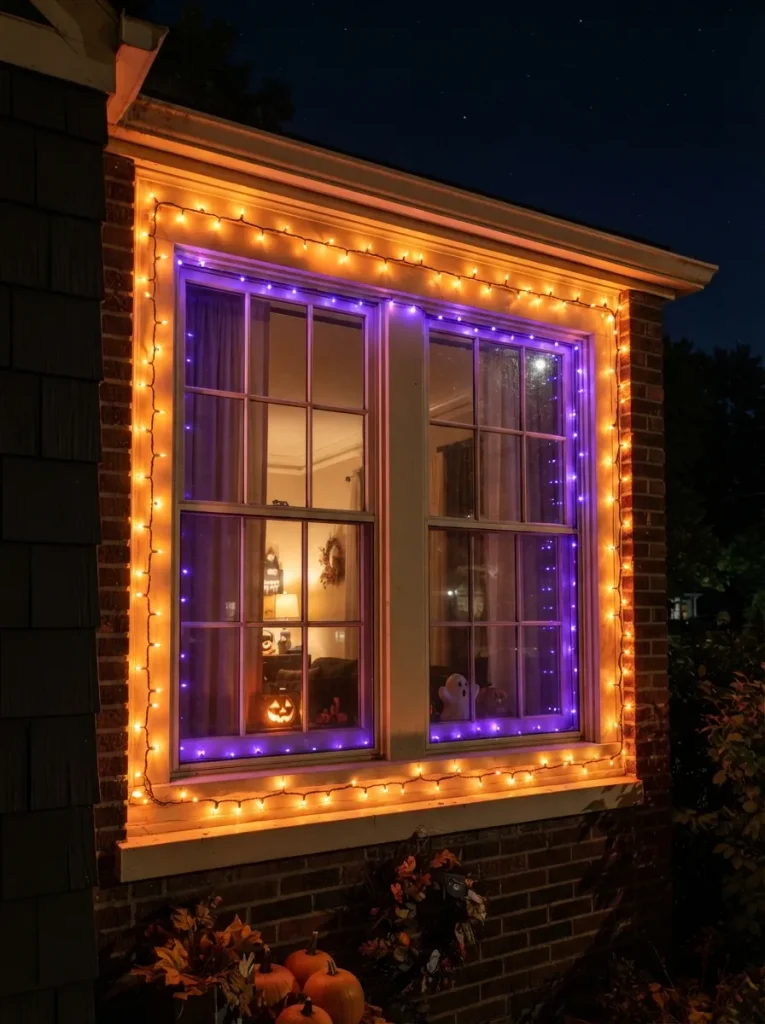
Color contrast does more work than color choice alone. A single strand of orange lights around a window frame looks fine on its own; layering a thinner strand of purple just behind it, so the purple only peeks out at the edges, creates a warm-cool contrast that reads far more saturated from a distance than either color would alone.
Outline just the frame rather than the whole pane, so the light traces the window’s architecture instead of competing with whatever’s inside it. Battery-powered micro LEDs on a timer are worth the extra cost over a plug-in set if the nearest outlet isn’t close it keeps a cord from running across a walkway or sill where someone could trip on it.
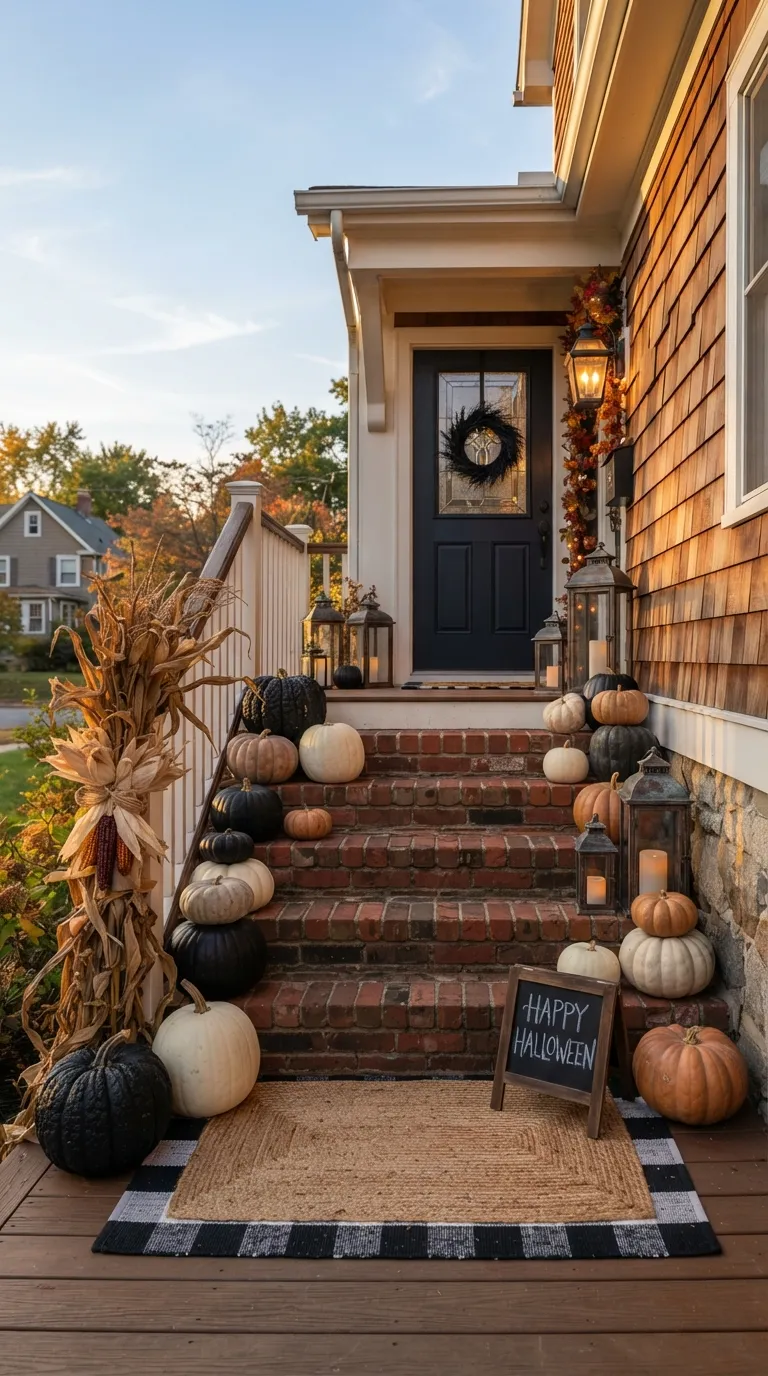
This is also a natural companion to any fall porch ideas you’re already running along the entry, so the light carries from the door to the window instead of stopping at the frame.
Styling Note: Keep the purple strand a shade dimmer than the orange one, or set it a few inches farther back at equal brightness, the two colors mix into a muddy brown instead of a contrast.
Shop This Look
| Product |
|---|
| Warm orange micro LED fairy lights |
| Purple LED string lights |
| Battery-powered light timer |
Up next: a technique that gives a flat window actual depth using nothing but fabric and a few inches of air.
4. Layered Depth Scene Using Sheer Fabric
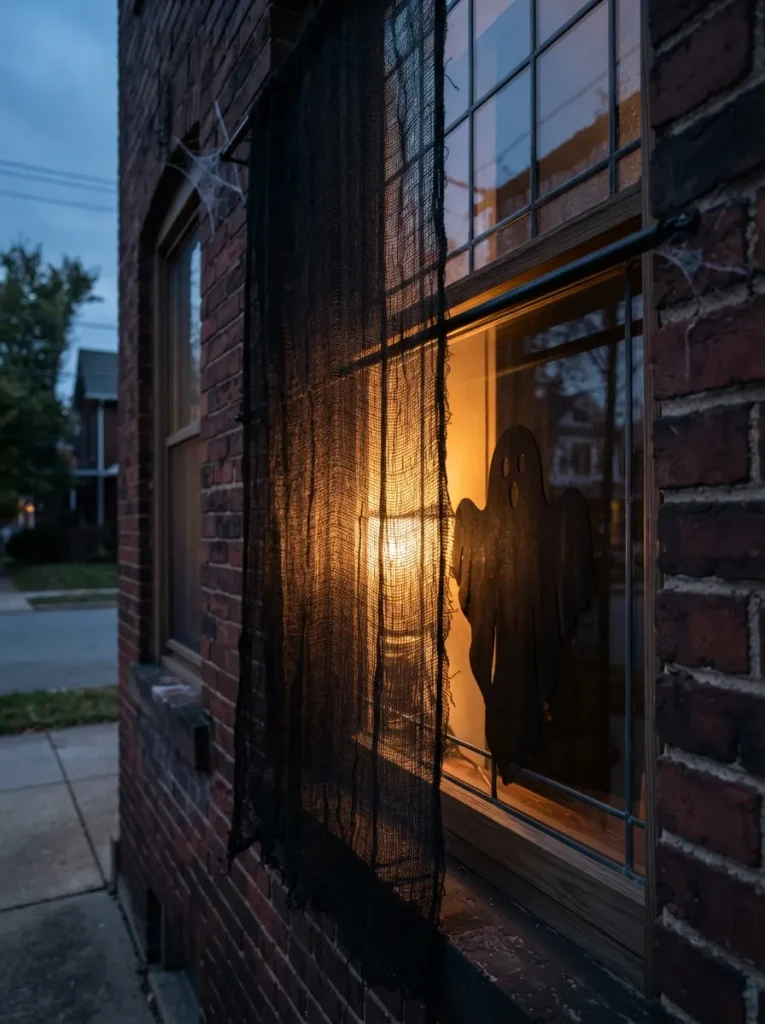
Most window scenes get flattened onto the glass itself a cling here, a cutout there, all sitting on the same plane. Hang a layer of sheer black fabric a few inches in front of the pane instead, and there’s suddenly real depth: a prop behind the fabric reads as farther away than the fabric itself, especially once backlighting hits both layers differently.
Cheesecloth or a sheer black curtain panel both work well for this. Mount it on a spring tension rod sized to the window’s inner frame so it hangs freely, four to six inches off the glass any closer and the two layers merge back into one flat shape from the street.
✅ CHECKLIST
Building the Layered Scene:
- [ ] Measure the inner window frame and size a spring tension rod to fit
- [ ] Hang the sheer fabric panel four to six inches in front of the glass
- [ ] Place a silhouette or prop directly behind the fabric, against the pane
- [ ] Position a warm light source behind the prop, not the fabric
5. Spiderweb Corner Clusters
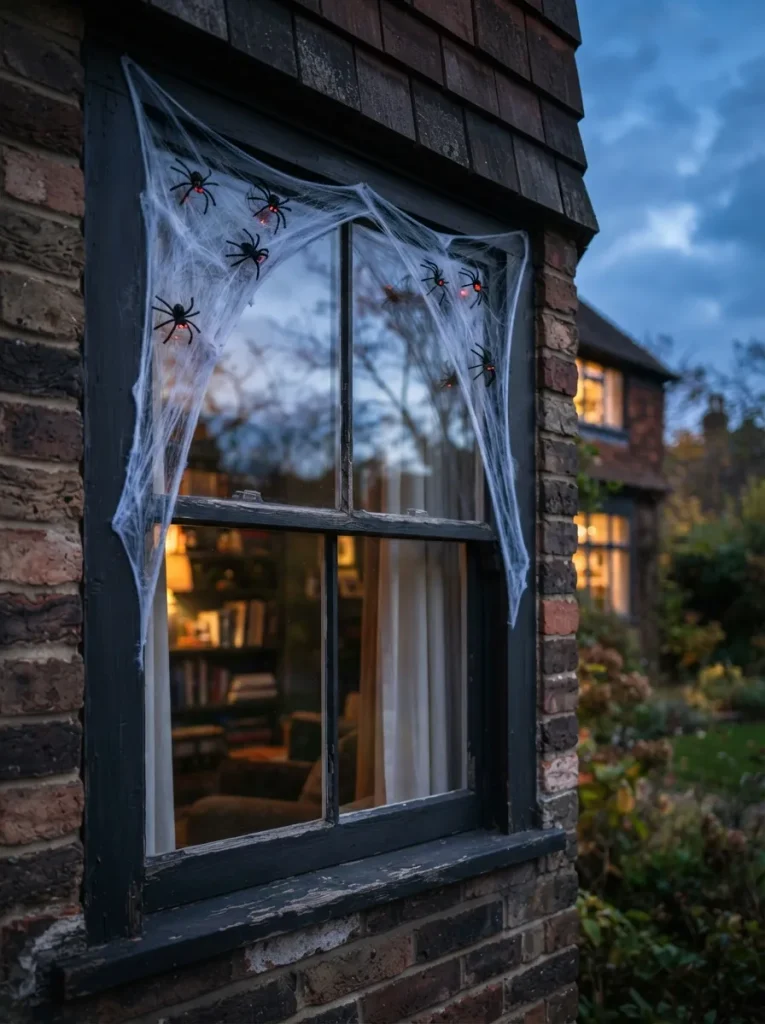
Renters, or anyone working with a window that can’t be drilled or heavily taped, should start here. Spray-web material only needs a light stretch across the upper corners it clings to itself, not the glass or trim so nothing sticks to paint.
Tuck a couple of small battery LED spiders into the webbing rather than lining them up in a row; a loose cluster reads as more natural and lets the eye find them gradually instead of all at once. Leave the center third of the pane clear. A fully webbed window looks impressive up close but reads as a gray smudge from the sidewalk it’s the contrast between clear glass and webbed corners that carries from a distance. The same low-commitment approach works just as well applied to Halloween front door decor if you want the web motif to continue past the window.
Small-Space Tip: On a narrow apartment window, one corner cluster is usually enough two full corners can crowd a pane that’s much under two feet wide.
6. Pumpkin Lantern Row on the Sill
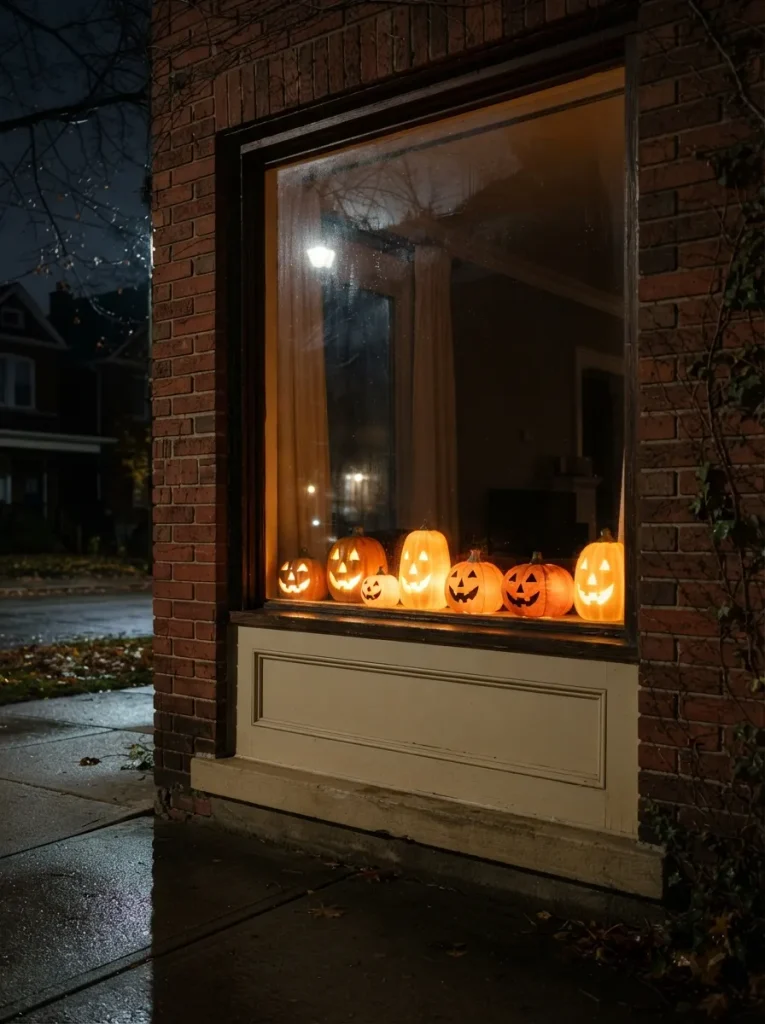
A row of glowing pumpkins along the sill is one of the simplest window moves on this list, and one of the most consistent it works in any window with a flat ledge, no tools or adhesive involved.
Vary the heights and angle a few lanterns slightly outward instead of lining every face forward; it keeps the row from reading as a flat wall of identical circles.
Flameless LED versions with a built-in flicker setting are worth the small premium over real candles an open flame that close to a curtain or sheer panel is a genuine fire risk, full stop. If you’re layering this alongside other rooms, it’s worth a look at broader Halloween decor ideas so the sill doesn’t end up mismatched with the rest of the house.
Important: “Flameless” doesn’t mean cool to the touch. LED lanterns still warm up after hours of use keep them a few inches clear of any fabric panel, not touching it.
Shop This Look
| Product |
|---|
| Flameless LED pumpkin lanterns (set of 3–5) |
| Warm-white flicker bulbs (if buying separately) |
Next: the garland trick that turns a flat row of bats into something with actual movement.
7. Bat Garland Cascading from the Curtain Rod
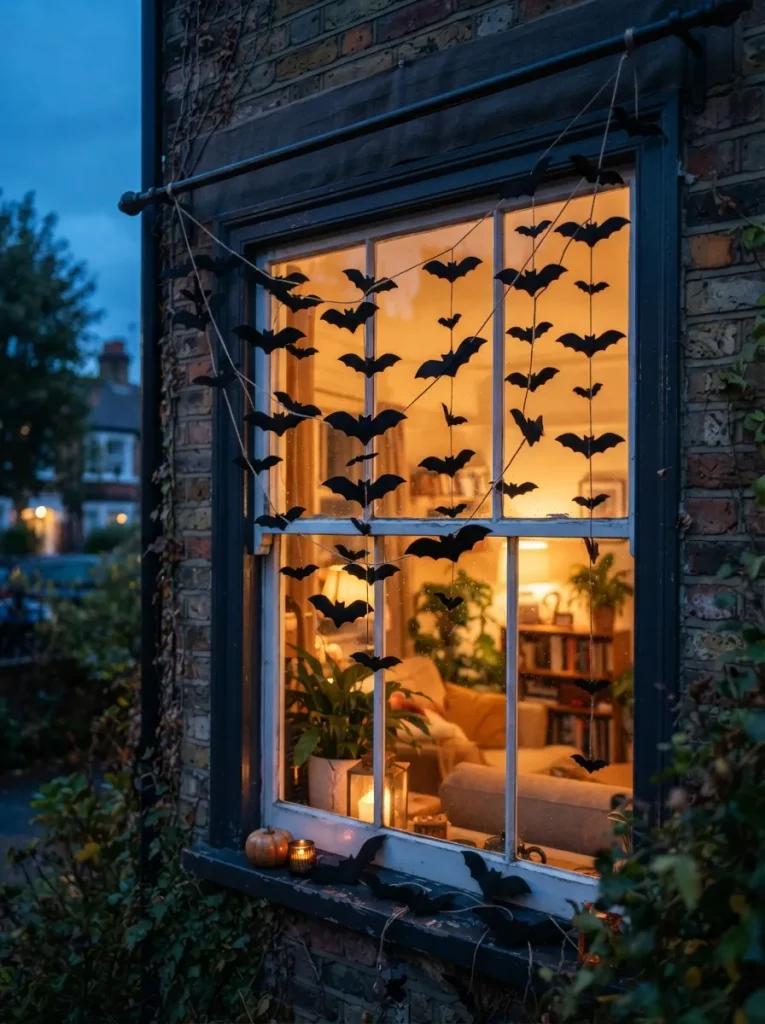
Hang a bat garland from the curtain rod at three or four different lengths instead of one even row, and it stops reading as a garland and starts reading as bats mid-flight some closer to the glass, some hanging deeper into the room.
Knot the garland string at uneven points before hanging so the lengths are set in advance, not something you’re adjusting bat by bat later. A slight breeze from a cracked window or a ceiling fan on low adds real motion, which is the one thing static props can’t fake.
Quick Win: No curtain rod in that window? A mini tension rod sized to the inner frame holds a garland just as well and skips the hardware entirely.
Shop This Look
| Product |
|---|
| Felt bat garland |
| Mini tension curtain rod |
OBSERVATION
The counterintuitive part: the biggest visibility killer for window decor usually isn’t the decor at all it’s a porch light left on nearby. A bright white porch light a few feet from the window washes out the exact color contrast every backlit or LED display depends on. Turn that light off, or swap it for a warm bulb, and a display that looked flat suddenly reads several shades more vivid from the same distance.
8. Monochrome Ghost Silhouette for Narrow Panes
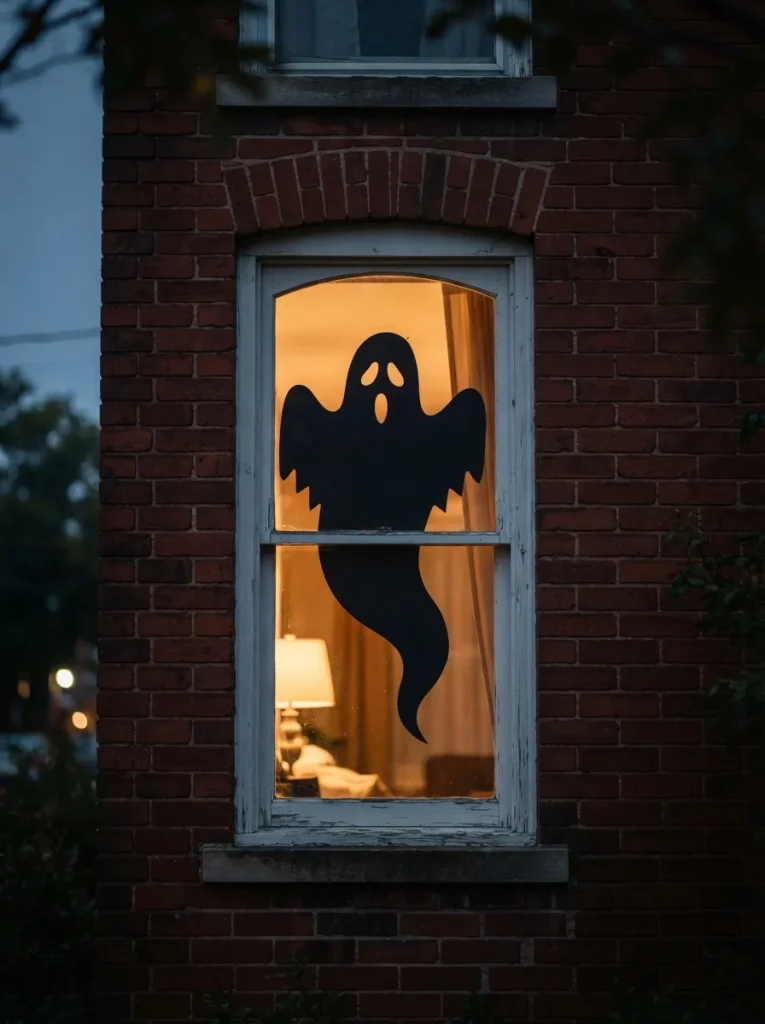
Small or narrow windows a bathroom transom, an apartment’s single pane don’t have room for a scene. They have room for one shape, sized big.
One oversized ghost or cat silhouette spanning most of the pane’s height reads clearly from the street; three or four small props crammed into the same space blur into a cluttered smudge at any real distance.
As a rough guide, aim for a silhouette covering roughly two-thirds of the pane’s height smaller than that and the detail gets lost before it reaches the sidewalk. This scaling trick is worth keeping in mind for Halloween bathroom decor too, where the transom or single pane is often the only exterior-facing spot in the room.
9. Painted Glass Accent With Washable Window Paint
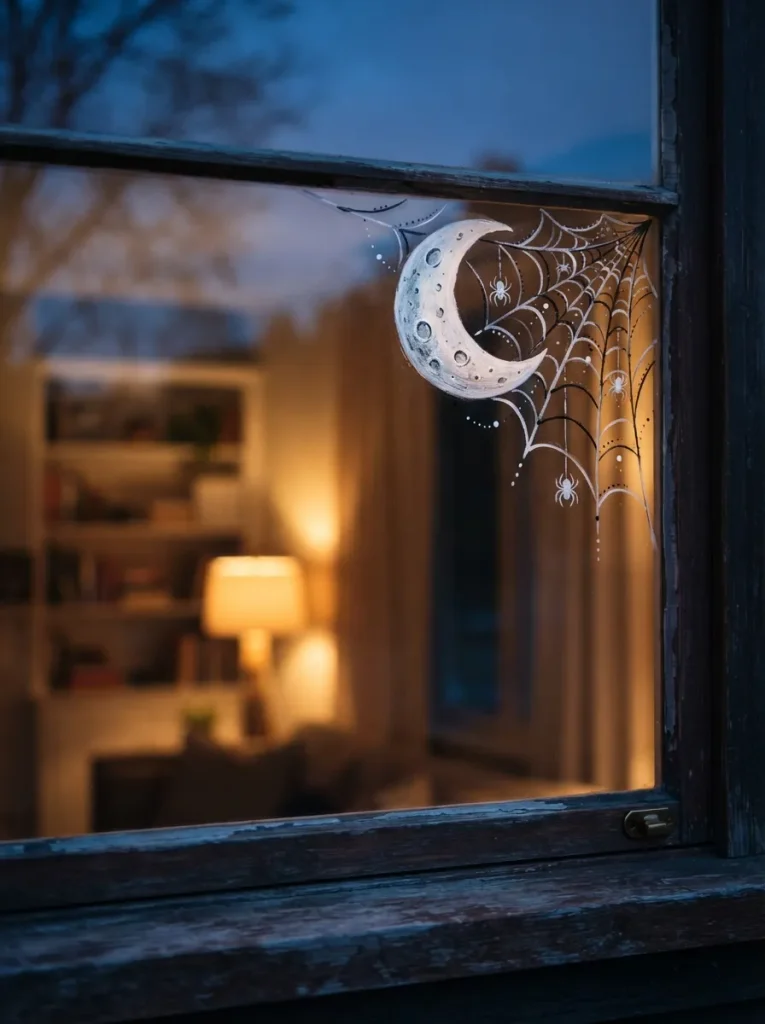
Washable window paint the kind sold specifically for glass, not regular craft acrylic turns a blank corner into a hand-painted accent that wipes off with glass cleaner come November. A crescent moon, a spiderweb, a single spider dangling on a painted thread: small, corner-only designs read as intentional. Painting an entire pane usually looks muddy once it’s backlit, since the paint blocks light instead of working with it.
Warning: Regular craft acrylic isn’t the same as glass paint. It can bond to the glass in direct sun and need scraping or a razor blade to remove, sometimes leaving a faint haze behind. Check the label for “washable” or “removable” glass paint specifically before buying.
How to Start Your Halloween Window Decor Transformation
The right first move is almost always the window facing the street not the biggest window, not the one with the best indoor view, but whichever pane a passerby sees first. Get the backlighting technique working there before touching a second window. A single window with a light source correctly angled behind a black silhouette does more for curb appeal than five under-lit ones.
The most common fixable mistake is front-lighting a display instead of back-lighting it leaving the porch light on and expecting a cutout or cling to pop against it. Flip that instead: dim or switch off the closest exterior light and let the window’s own interior glow carry the contrast.
Three items get a first window most of the way there: a roll of black cling vinyl for custom shapes, a set of warm 2700K micro fairy lights, and a clip-on lamp to handle backlighting duty in a window without a fixture nearby. Together they usually land under fifty dollars total, and all three carry over to next year’s display.
A single window takes about half an hour once the materials are on hand most of that time goes to positioning the light source, not applying decor. A starter budget of $20–$40 covers one strong window; decorating every street-facing window in a typical house runs closer to $100–$150 for a full, layered look. Either version holds up fine from opening night through November 1st, and it’s the same logic that shapes good exterior house paint colors what reads well from the sidewalk is what actually matters.
Ready to Create Your Dream Halloween Window Display?
Nine ideas, one shared thread: windows read from the street differently than they read from the couch, and a display that accounts for that backlit, corner-clustered, scaled to the pane beats one that just looks good up close. Color contrast, layered depth, and scale all matter more than the total number of props crammed onto the glass.
Start with a single window. The backlit silhouette technique in idea one is the fastest win and the one every other idea on this list builds on, so it’s worth getting right before adding a second display. From there, add a garland, a lantern row, or a painted corner as the mood, and the free evenings, allow.
Once it’s up, walk to the end of the driveway after dark and look at it the way a trick-or-treater will that’s the real test every idea above is built around. Save the ones that fit your window shape now; the layered fabric technique and the oversized single-silhouette idea are worth revisiting even outside of October.
Keep Exploring