10 Mason Jar Crafts That Actually Get Used (Not Just Pinned)
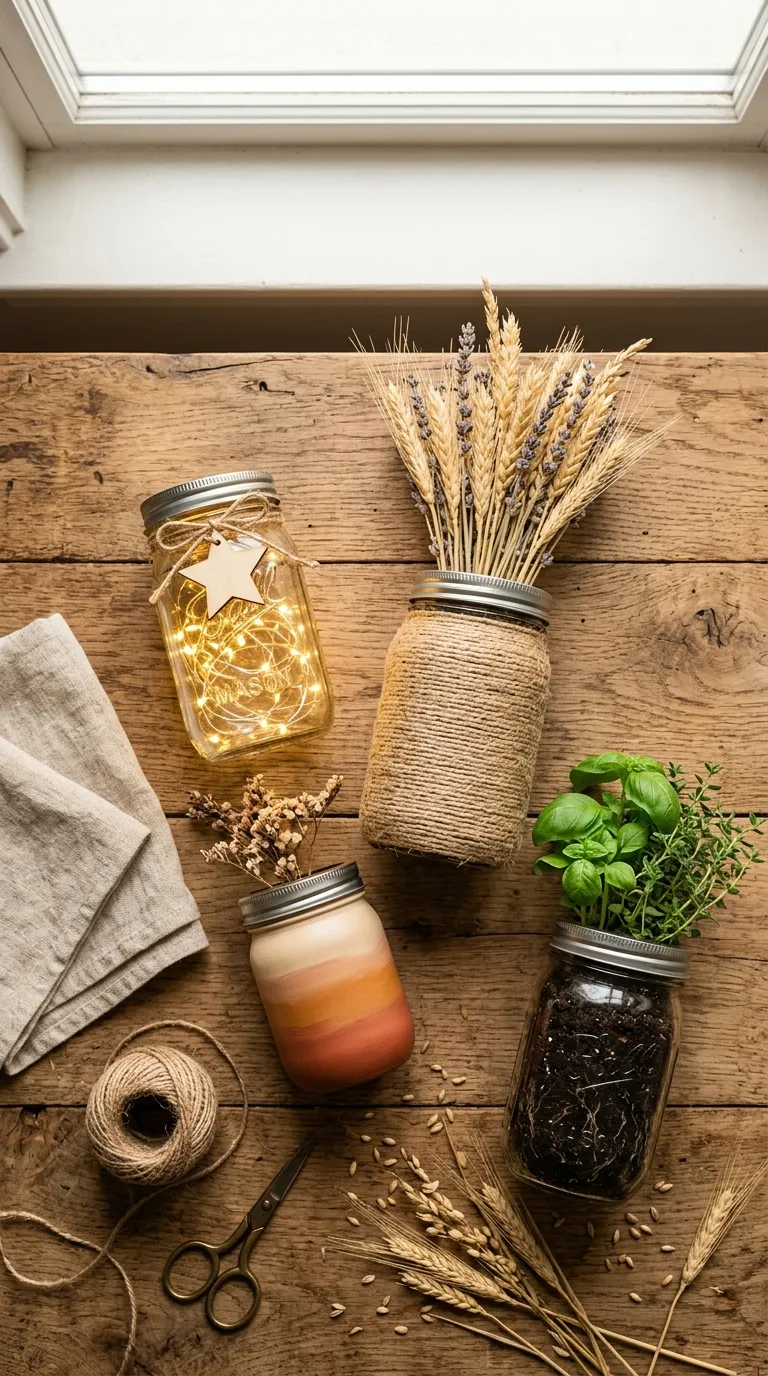
A mason jar craft is just an empty jar you were about to recycle, turned into something you’d actually keep on a shelf. Here are 10 mason jar crafts some decorative, some genuinely useful that take under an hour each and don’t call for a workshop.
There’s a specific kind of satisfaction in finishing a project with supplies already sitting in a kitchen drawer. Glass catches window light in a way plastic never does, and that’s half the reason these ideas keep showing up on porches and countertops years after the trend first hit.
None of this requires a hot glue gun scar or a trip to three different craft stores. Grab a jar. This list starts easy and gets more ambitious from there.
Jump To
- Mason Jar Fairy Light Lanterns
- Rustic Twine-Wrapped Vase
- Painted Ombre Jars
- Herb Garden Windowsill Jars
- Mason Jar Soap Dispenser
- Hanging Mason Jar Wall Planter
- Mason Jar Utensil Caddy
- Layered Sand Art Jars
- Mason Jar Candle with Layered Wax
- Mason Jar Snow Globe
Why Mason Jar Crafts Make Such a Difference
Mason jar crafts stuck around because the jar itself does most of the hard work thick glass, a screw-top lid, and a shape that already looks intentional before you touch it.
Ball and Kerr jars in the standard wide-mouth pint and quart sizes are the easiest to find secondhand, and clear glass takes paint, twine, and LED lights without much prep.
The format works in a studio apartment as easily as a full kitchen, since one jar takes up less counter space than a coffee mug. Start with a jar you already own before buying a case of new ones.
| Best starting point | One clean, label-free pint jar and a roll of jute twine |
| Biggest impact area | Kitchen windowsill or entryway shelf |
| Budget to start | $5–$15 for your first 2–3 jars |
| Time to complete | 20–45 minutes per jar |
1. Mason Jar Fairy Light Lanterns
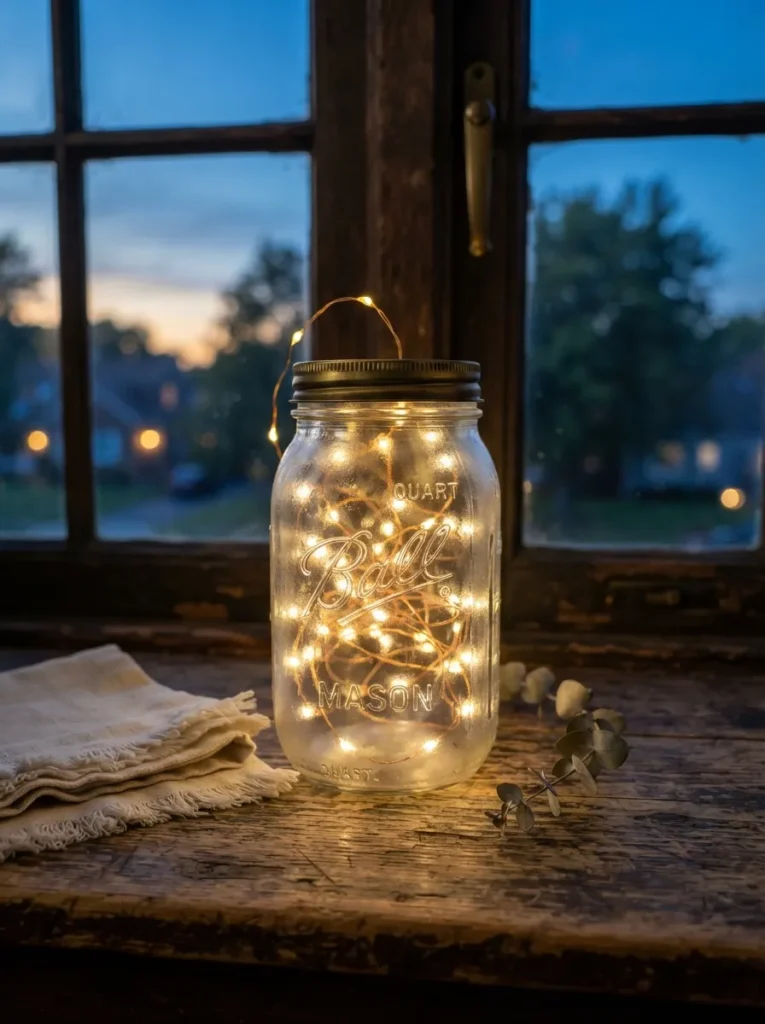
What it looks like: Warm light glowing through ridged glass casts a soft honeycomb pattern across the windowsill.
Why it works: Mason jar glass has just enough texture to diffuse a bare LED strand without a shade the same trick lighting designers use with frosted pendant glass. It hides the hot point of each bulb and turns a $6 strand of lights into something that reads as intentional rather than thrown together.
How to copy it: Feed a battery-powered LED strand not a plug-in strand through a small hole drilled in the lid, coil it loosely so the wire doesn’t press flat against one side of the glass, and tuck the battery pack under the lid ring where it won’t show.
Best for:Renters who want ambient lighting without installing a fixture, and anyone hosting an outdoor dinner who needs light that won’t trip a breaker..
Quick Win: Skip the drill entirely battery-pack fairy lights with a built-in switch loop over the jar’s mouth under a loosely set lid, no hole required.
What You’ll Need
| Product |
|---|
| Wide-mouth quart mason jars (set of 4) |
| Battery-operated warm white micro LED strand lights |
| Cordless drill with a 3/8-inch glass and tile bit |
| Rubber-gasket replacement lids |
| Weatherproof outdoor extension hooks |
2. Rustic Twine-Wrapped Vase
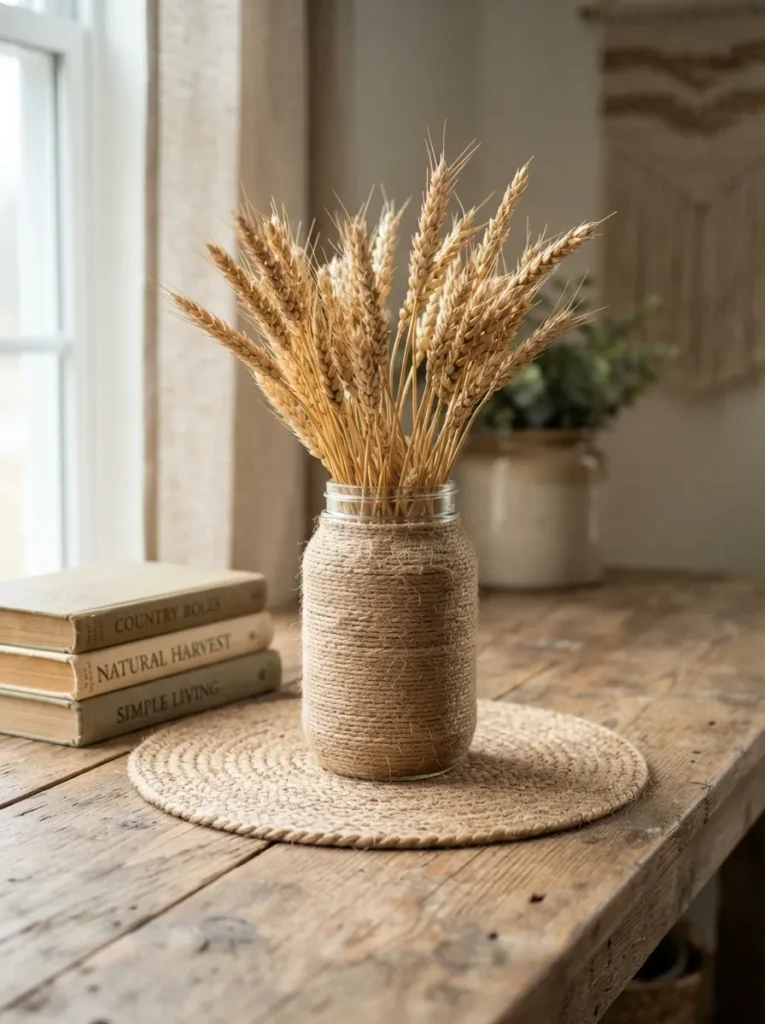
What it looks like: Rough, sun-bleached twine wound tight enough that no glass shows through at all.
Why it works: Twine adds visual weight and texture contrast against smooth glass the same layering principle stylists use to make a single object read as collected rather than store-bought. The slightly irregular wrap line is what sells it as handmade; the twine itself is almost incidental.
How to copy it: Run a bead of hot glue in a 2-inch vertical line down the jar, press the twine end into it, then wrap tight and slightly overlapping as you spiral upward, adding a fresh glue dot every three or four wraps so the wrap doesn’t loosen later.
Best for: Budget decorators who want a farmhouse-adjacent, grandma-chic look without buying a new vase, and beginners testing hot glue for the first time..
Pro Tip: Wrap toward yourself, not away pulling the twine toward your body keeps tension even, while wrapping away tends to leave visible gaps once the glue sets.
3. Painted Ombre Jars
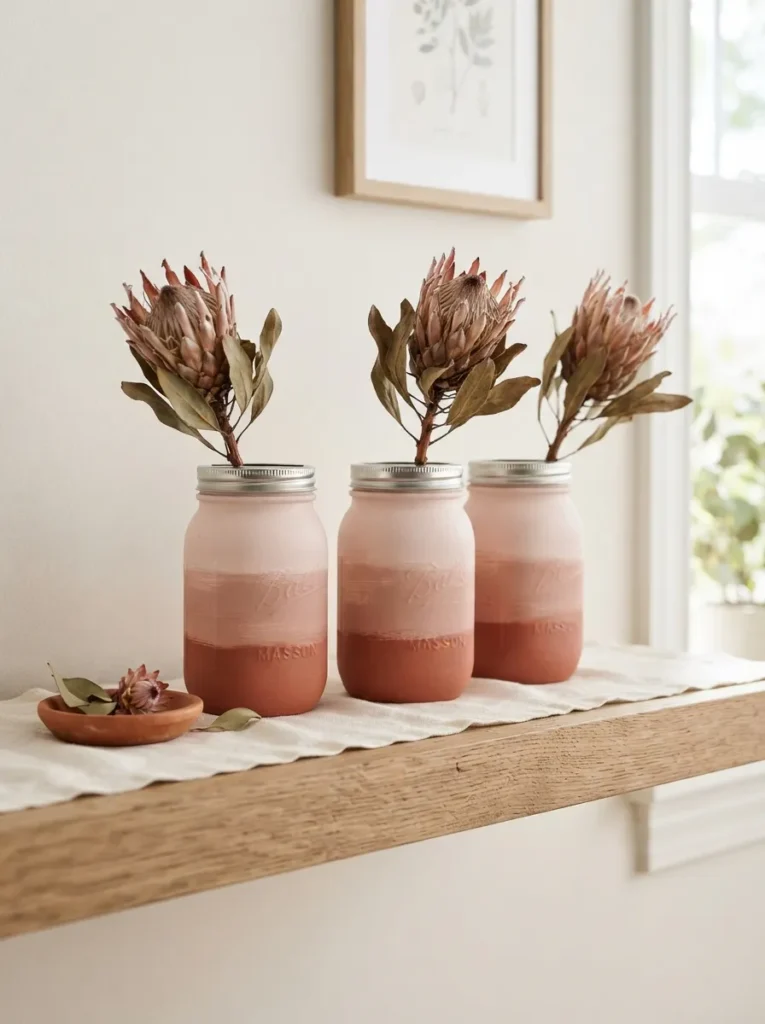
What it looks like: Color fades from solid at the base to almost bare glass near the rim, like a dip that never fully dried.
Why it works: A gradient forces the eye to travel up the object instead of stopping flat the same principle behind ombre hair and dip-dye textiles. Diluting glass paint with water in three separate cups, each a shade lighter, is what creates the fade instead of a hard line.
How to copy it: Mix your base paint color at full strength in one cup, then two more cups at 50% and 25% water dilution. Dip the jar bottom-first into the darkest mix, let it drip-dry upside down, then dip progressively shorter into each lighter mix before it fully cures.
Best for: Color-confident decorators and anyone styling open shelving who wants a set that reads as coordinated, not matched.
Budget Version: Skip the dedicated glass-paint set leftover craft-paint sample pots plus a tablespoon of dish soap mixed in for adhesion work almost as well.
Up next: the one most people already have the ingredients for and never think to try.
4. Herb Garden Windowsill Jars
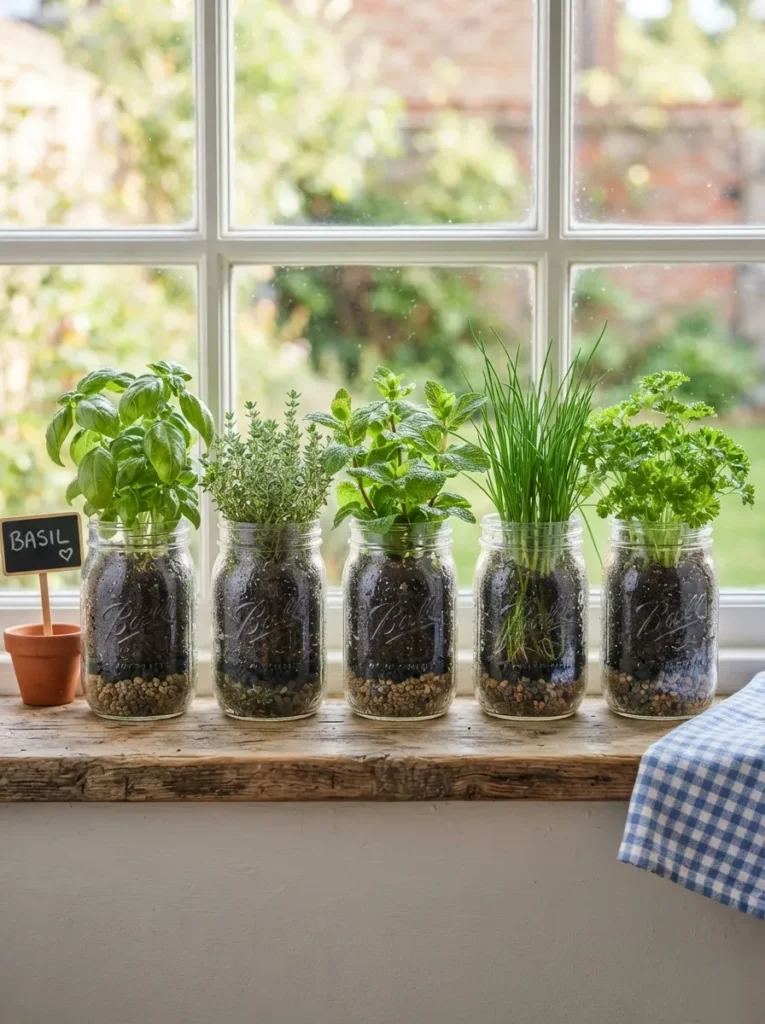
What it looks like: A tight row of green against glass, condensation fogging the lower inch of each jar after watering.
Why it works: Mason jars have no drainage hole, so the real technique is a false bottom an inch of gravel or lava rock under the soil that keeps roots from sitting in standing water. It’s the same principle terrariums use, just scaled down to a single herb.
How to copy it: Layer one inch of small gravel, then a thin layer of activated charcoal, then potting soil, before planting. Water sparingly and check the gravel layer for pooling before adding more.
Best for: Small-space cooks who want fresh herbs within arm’s reach of the stove, and renters who can’t drill into a windowsill for a planter box.
Styling Note: Group odd numbers three or five jars rather than an even row; it reads as gathered instead of lined up for inspection.
5. Mason Jar Soap Dispenser
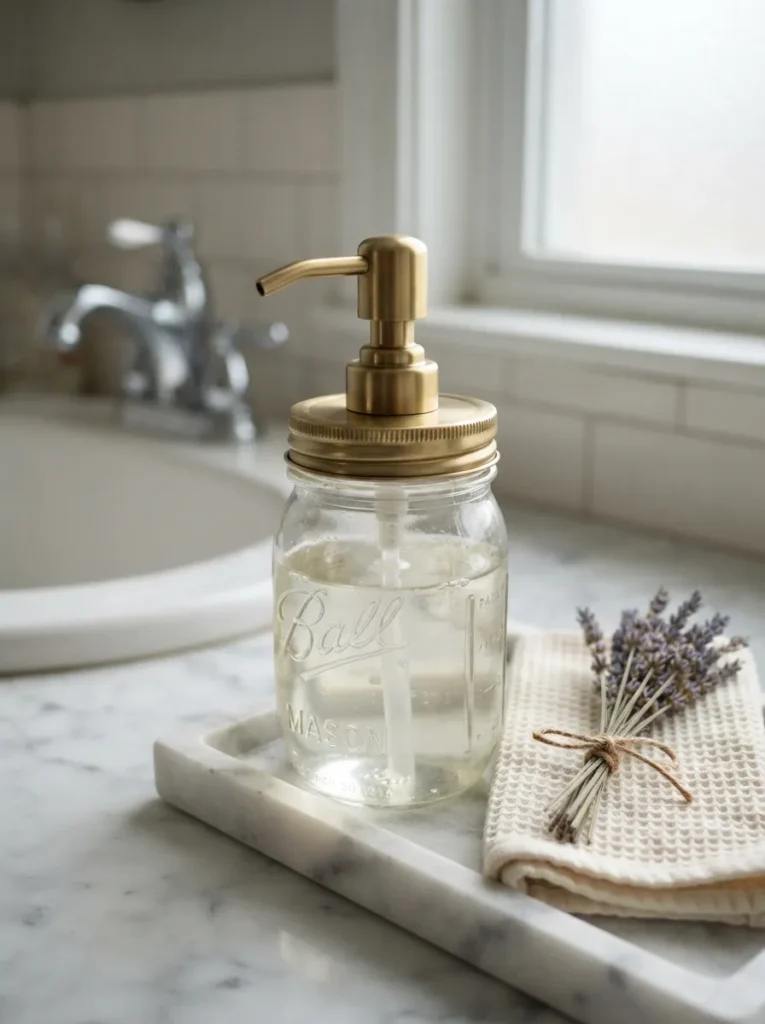
What it looks like: A plain jar suddenly looks like it belongs in a boutique bathroom, just from swapping the lid.
Why it works: The pump collar is what makes this feel finished a standard mason jar mouth is slightly wider than a generic pump’s threading, so an ill-fitting top is the single thing that gives a DIY project away. Matching the collar size to the jar band is a fit problem, not a style problem.
How to copy it: Buy a pump top sized specifically for regular-mouth mason jars, not a universal bottle pump, and test the threading dry before filling the jar with liquid soap.
Best for: Anyone refilling plastic soap bottles who wants a bathroom or kitchen counter to look less cluttered.
Warning: A universal pump forced onto a mason jar’s threading will screw on crooked and leak from the gap within days always buy a mason-jar-specific pump collar rather than adapting a generic one.
What You’ll Need
| Product |
|---|
| Regular-mouth mason jar pump-top lid kit |
| Unscented liquid castile soap base |
| Small glass or ceramic funnel |
| Reusable chalkboard labels |
6. Hanging Mason Jar Wall Planter
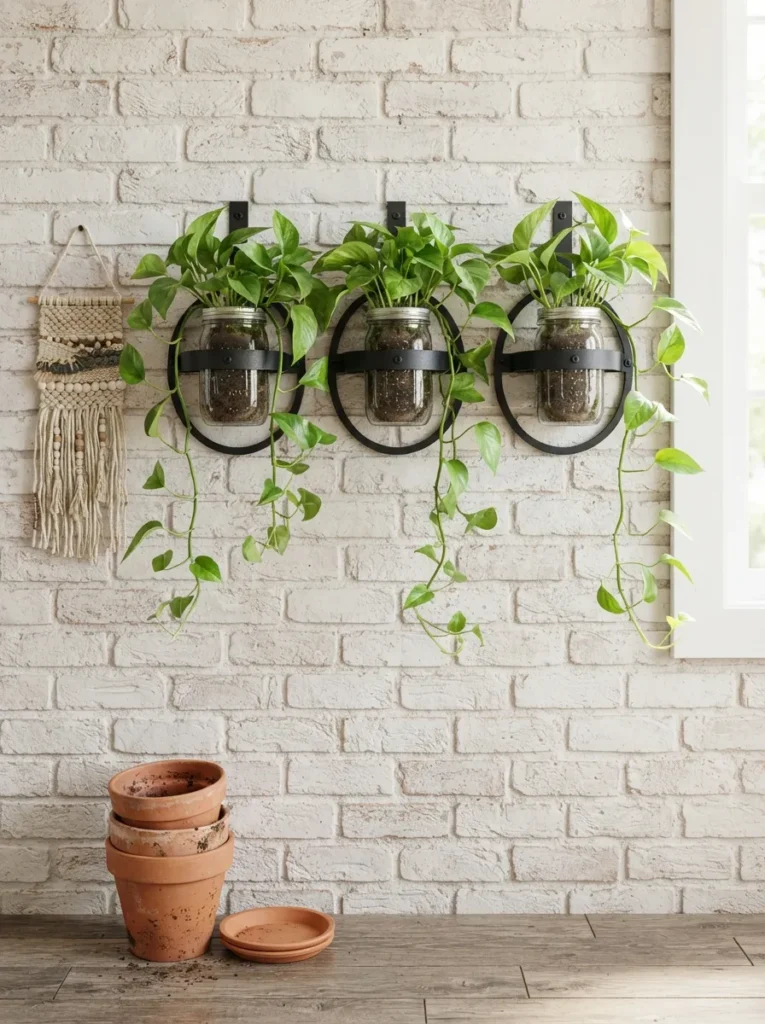
What it looks like: Trailing vines cascade at uneven lengths from three jars staggered slightly apart on the wall.
Why it works: Staggering the bracket heights rather than lining them up level creates visual rhythm a design principle called asymmetric balance, where uneven spacing actually reads as more intentional than a perfectly even row.
How to copy it:Mount metal hoop brackets into wall studs (not just drywall anchors, which can’t hold wet soil weight long-term) at three different heights, four to six inches apart, then plant trailing varieties like pothos or string of pearls so the vines fill the gaps between jars..
Best for: Plant owners short on floor and shelf space, and anyone renting who can patch three small screw holes at move-out.
Small-Space Tip: No stud access? Use adhesive-backed hook strips rated for at least 5 pounds and choose the lightest jar size a half-pint holds enough soil for one small trailing plant without exceeding the weight limit.
The next idea takes the longest of the ten, but it’s the one that solves the most actual clutter.
7. Mason Jar Utensil Caddy
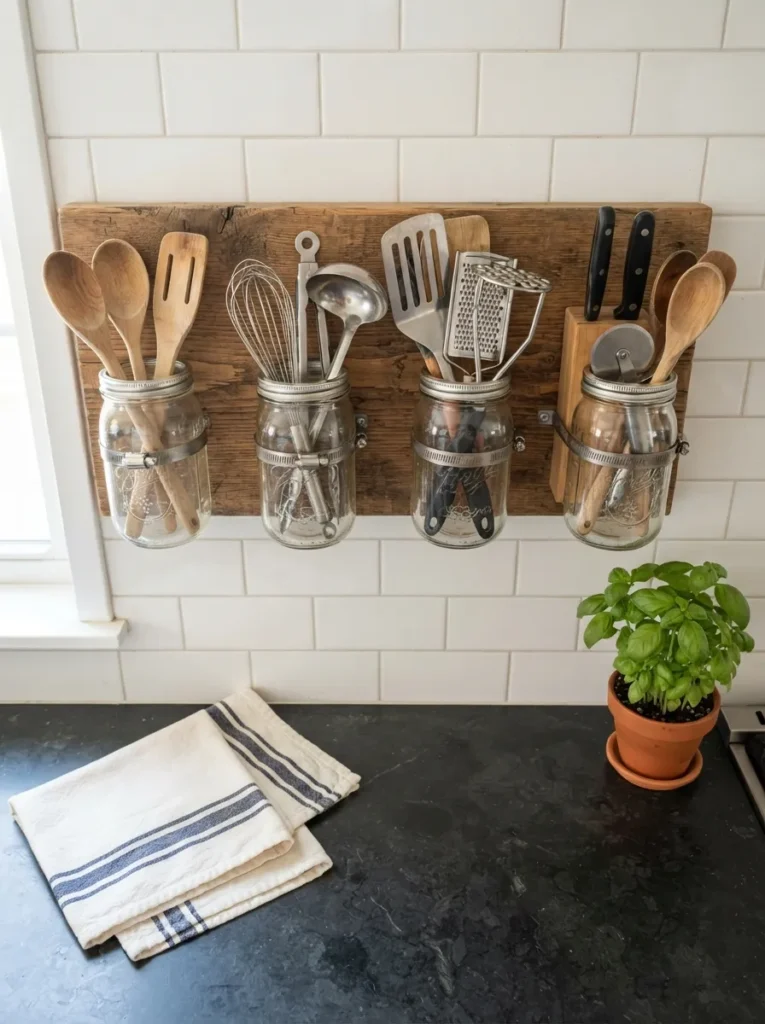
What it looks like: Four jars stand shoulder to shoulder on a single wood board, each sorted by utensil type instead of piled together.
Why it works: Grouping by category rather than by frequency of use is what actually keeps a caddy organized past week one sorting utensils into “cooking,” “baking,” “serving,” and “gadgets” prevents the single drawer-dump habit that makes most caddies messy within a month.
How to copy it: Cut a piece of one-inch pine board to your counter width, screw hose clamps at even intervals along the board (sized to the jar’s widest point), slide each jar into its clamp, and tighten just until snug against the wood not fully compressed, which can crack the glass.
Best for: Cooks with limited drawer space and anyone who wants counter tools visible instead of hidden.
✅ Before You Mount It:
- [ ] Measure your counter width and cut the board to size
- [ ] Mark clamp positions evenly along the board with a pencil
- [ ] Pre-drill pilot holes before screwing in the hose clamps
- [ ] Slide jars in and tighten clamps until snug, not compressed
- [ ] Mount the finished board to the wall using studs or heavy-duty anchors
What You’ll Need
| Product |
|---|
| Regular-mouth pint mason jars (set of 4) |
| Adjustable stainless hose clamps |
| Unfinished pine board, 1-inch thick |
| Wood screws and wall anchors |
8. Layered Sand Art Jars
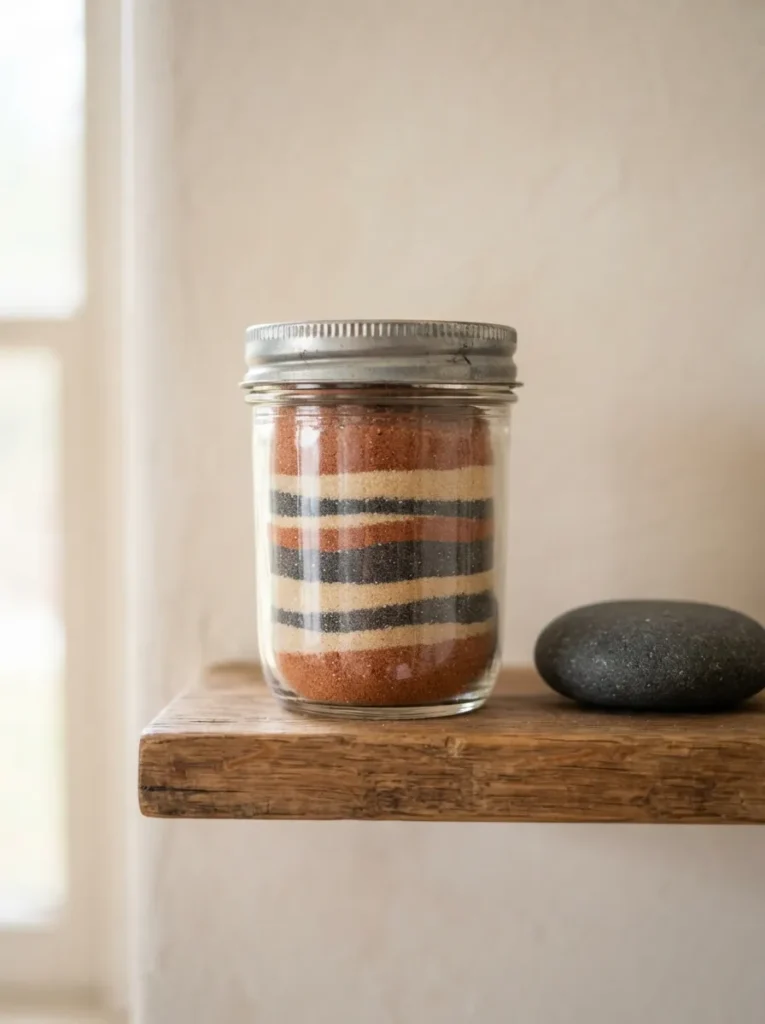
What it looks like: Clean horizontal bands of color stack without bleeding into one another, like a tiny geological cross-section.
Why it works: Layer separation depends on pouring technique, not the sand itself pouring straight down the center disturbs the layer below it, while pouring slowly against the tilted inner wall of the jar lets each new layer settle on top without mixing.
How to copy it: Tilt the jar at roughly 30 degrees, pour each sand color slowly down the same inner wall using a small funnel or folded paper cone, and let the jar sit upright and undisturbed for a few minutes between colors before adding the next.
Best for: Beginners who want a low-mess, no-glue craft, and anyone decorating a narrow shelf where depth is limited.
Small-Space Tip: Use half-pint jars instead of quarts for this one the narrower diameter actually makes the layer lines look crisper and takes up almost no shelf depth.
In my experience, the biggest mistake with any painted or wax-filled jar craft is skipping the label-glue removal step a quick soak in hot water with a tablespoon of baking soda lifts most residue in about ten minutes, and skipping it is the single reason paint peels or wax pulls away from the glass within a season.
9. Mason Jar Candle with Layered Wax
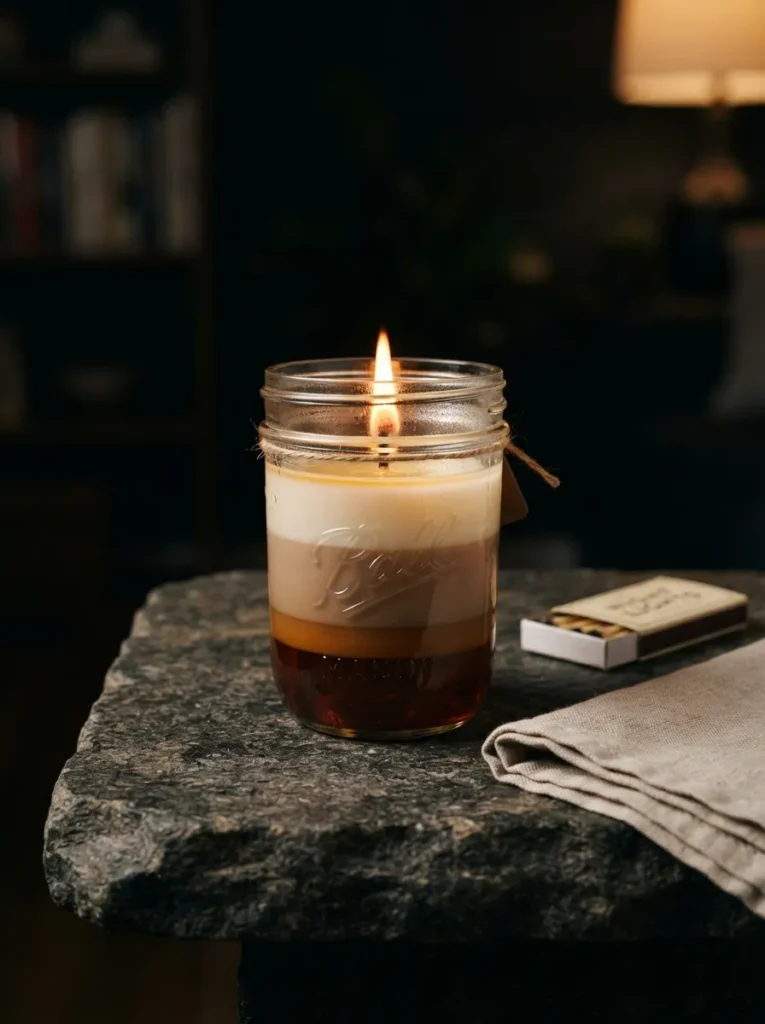
What it looks like: Distinct wax bands hold their color and don’t blur at the seams, even after the candle’s been burned partway down.
Why it works: Clean layer lines depend on temperature timing, not the dye pouring the next layer while the one below is still warm causes the colors to blend at the seam, while waiting until each layer is fully set (and slightly scored on top) gives the next pour something to grip instead of melt into.
How to copy it: Melt soy wax in a double boiler, add dye chips and pour your first color, let it fully harden for about 45 minutes, lightly score the surface with a fork, then pour the next color once it’s cooled to touch but still pourable.
Best for:: Gift-givers who want a handmade item that doesn’t look homemade, and anyone who already owns a double boiler..
Important: Most people assume any candle wick works in any jar size it doesn’t. A wick sized for a votive will drown in a quart jar’s wax pool, so match wick diameter to jar diameter using a wick-sizing chart before pouring.
What You’ll Need
| Product |
|---|
| Soy wax flakes |
| Pre-tabbed cotton candle wicks, assorted sizes |
| Candle dye chips |
| Wooden wick centering bars |
Last one on the list, and it’s the one people underestimate the most.
10. Mason Jar Snow Globe
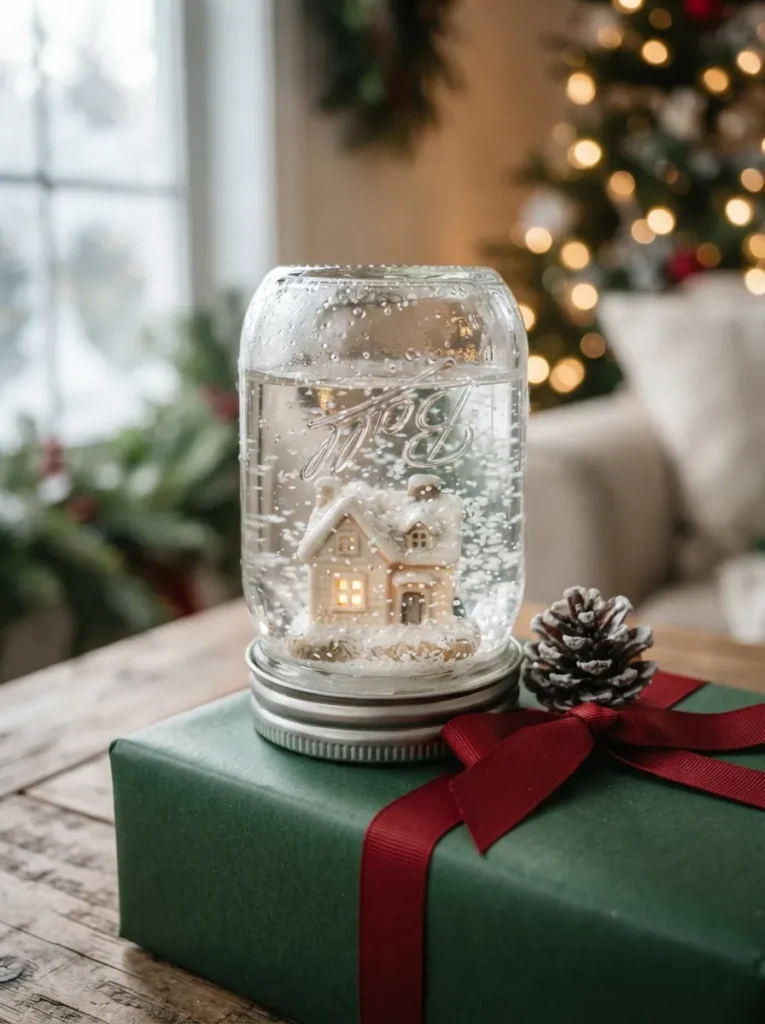
What it looks like: Fine glitter drifts slowly through clear liquid around a tiny glued-in scene, settling in a soft pile at the top of the upside-down jar.
Why it works: Glycerin, not just water, is what makes the glitter fall slowly instead of dropping instantly it increases the liquid’s viscosity, the same principle used in commercial snow globes, and it’s the detail most homemade versions skip.
How to copy it: Hot-glue a small waterproof figurine to the inside of the lid, fill the jar with distilled water mixed with a tablespoon of glycerin per cup, add a pinch of fine glitter, then screw the lid on tight with a bead of waterproof glue around the threading before flipping it over.
Best for: Anyone making holiday gifts on a budget, and crafters who want a project kids can help assemble
Pro Tip: Use distilled water instead of tap minerals in regular tap water cloud the liquid within a few weeks, while distilled stays clear indefinitely.
How to Start Your Mason Jar Craft Collection
What I’ve found with real batches of these: the jar itself matters less than getting one tool right first a mini hot glue gun with a fine-tip nozzle. It handles twine, figurines, and lid hardware without the thick glue strings a full-size gun leaves behind, and it’s the single tool that shows up across seven of the ten ideas above.
The most common fixable mistake is skipping the label removal step before painting or wrapping anything. Old adhesive residue left under a coat of paint or a layer of twine causes both to lift within a few weeks a ten-minute soak in hot water with baking soda solves it every time.
Three items under $50 that cover most of this list: a mini hot glue gun with extra glue sticks (around $12), a battery-operated warm white LED fairy light strand three-pack (around $15), and a roll of natural jute twine (around $6).
A single jar craft takes 20 to 45 minutes start to finish, so a full set of five or six is a realistic weekend project or the centerpiece of a craft night with friends. Budget $40 to $60 total for a first batch, including tools you’ll reuse on the next one.
Ready to Turn Your Empty Jars Into Something Worth Keeping?
These ten ideas cover color, light, and layout from a five-minute pump-top swap to a proper weekend build like the utensil caddy.
None of it needs to happen at once, and honestly, most of these look better as a growing collection than a single weekend haul. Pick one jar sitting in your recycling bin right now and start there.
There’s something quietly satisfying about a shelf full of jars that all started as something you were about to throw away. Save this one you’ll want the layered candle and the ombre jars again once the next holiday season rolls around.