14 Outdoor Yard Haunt Ideas to Scare the Whole Neighborhood
A yard haunt that spooks the neighborhood isn’t about how much fog you can buy it’s about timing, sightlines, and the one prop nobody sees coming. Here are 14 outdoor yard haunt ideas built to turn your front lawn into the stop every trick-or-treater talks about on the walk home.
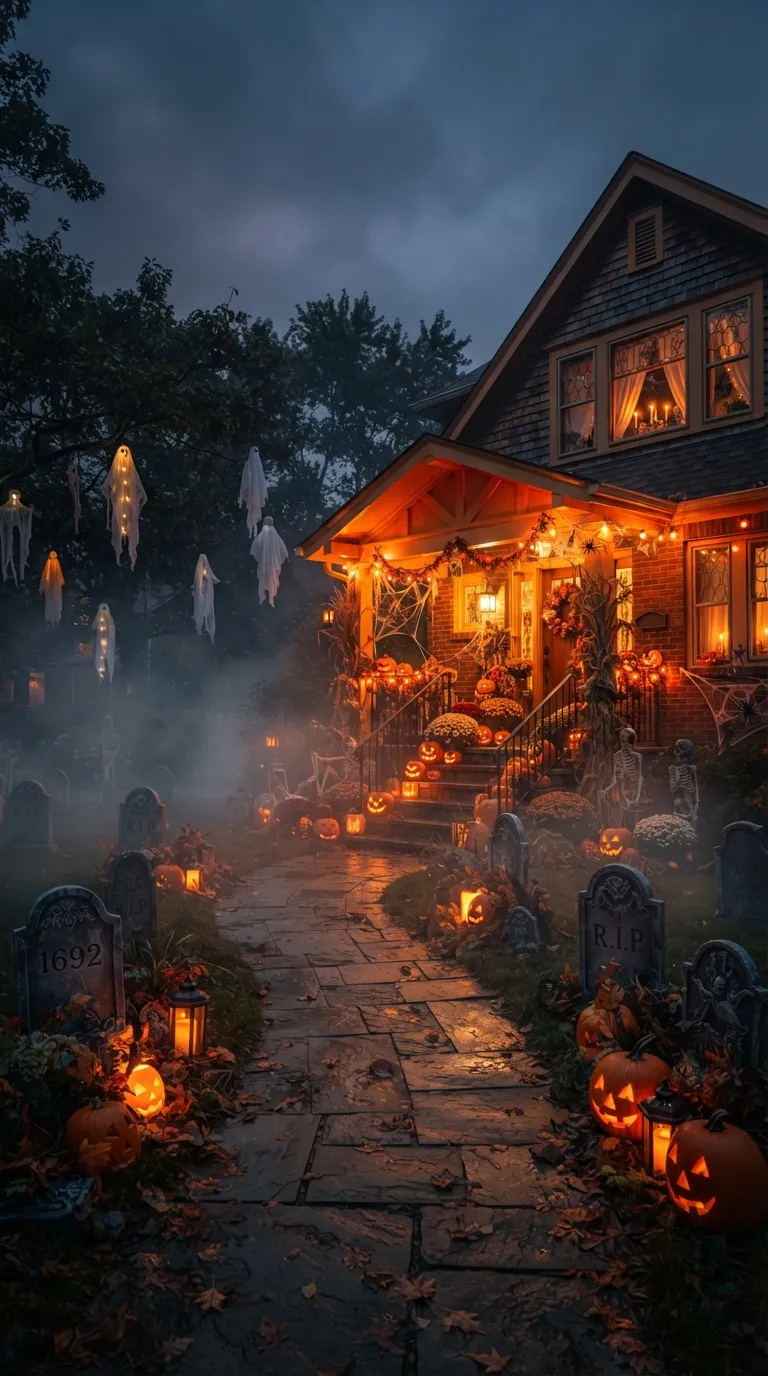
Picture cold fog pooling at ankle height while a strobe flickers behind an upstairs curtain. Somewhere past the tombstones, something moves that shouldn’t. The air smells like dead leaves and machine fog, and every kid on the sidewalk slows down without meaning to. That’s the whole point dread before the jump scare.
Quick Navigation
- Why Outdoor Yard Haunts Make Such a Difference
- The Ideas, From First Scare to Full Yard Takeover
- How to Start Your Yard Haunt Transformation
- Ready to Haunt Your Whole Neighborhood?
Why Outdoor Yard Haunts Make Such a Difference
A yard haunt works because it plays with expectation, not just decoration motion, sound, and darkness matter more than how many skeletons you own. Effective haunts layer a few well-lit focal points against long stretches of shadow, so the eye never quite settles.
Even non-decorators want one big photo moment for the block every October, and the whole concept scales from a single lit tombstone to a full walkthrough. Start with lighting and one strong prop before buying anything else everything downstream depends on those two choices.
Quick Reference
| Best starting point | Warm-white porch light swapped for a single colored spotlight |
| Biggest impact area | The walkway leading to your front door |
| Budget to start | Roughly $40–$120 for a starter haunt |
| Time to complete | One afternoon for basics, a full weekend for a layered display |
The Ideas, From First Scare to Full Yard Takeover
1. A Fog-Lit Graveyard Path That Leads Straight to Your Door
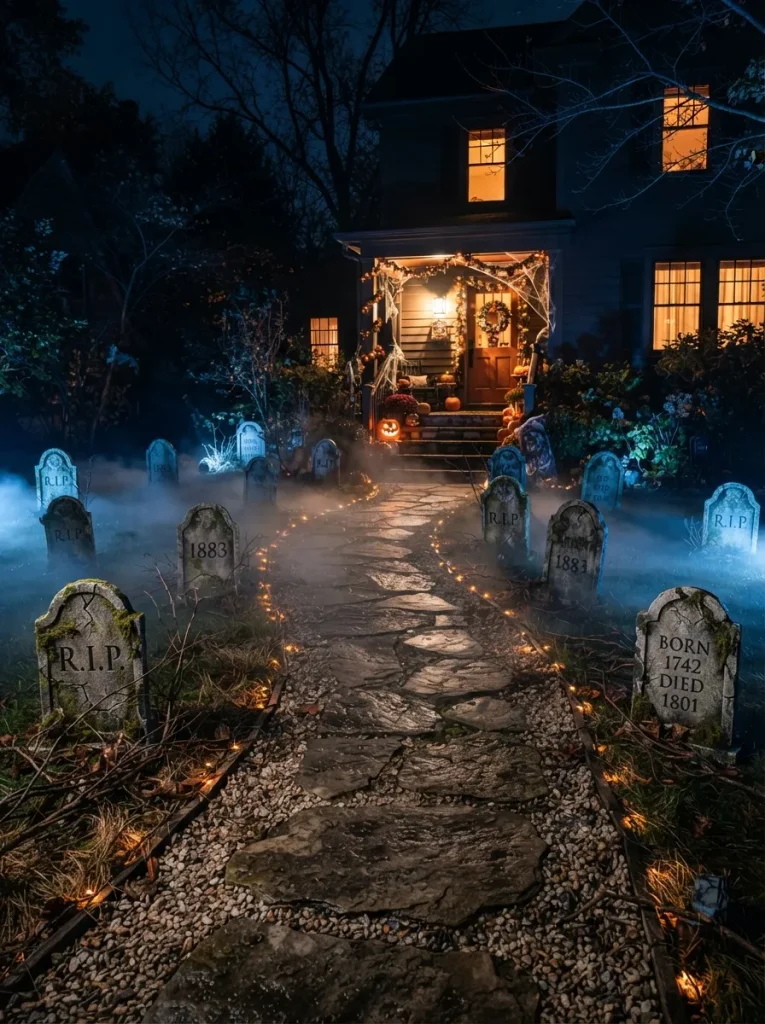
The path is what people walk through, so it deserves more attention than the tombstones lining it. Fog pooled low ankle height, not chest height reads as unsettling instead of theatrical, because it hides what’s underfoot without blocking the view ahead.
The trick is placing your fog source off to one side rather than directly on the path, so the haze drifts naturally instead of gushing in one obvious column. Space the tombstones unevenly along the edges instead of in a straight, matched row; real graveyards never look planned, and that irregularity is what sells the illusion.
Keep the actual walking surface clear and lit enough that guests don’t trip, even as everything around it stays dim. Get this one right first it’s the first thing guests see on their way to your front door display, and it sets the tone for everything after it.
Pro Tip: Point the fog machine’s nozzle downward and let it pool before it drifts aimed straight ahead, it looks like machine smoke instead of graveyard mist.
2. Strobe “Lightning” Flashes Behind an Upstairs Curtain
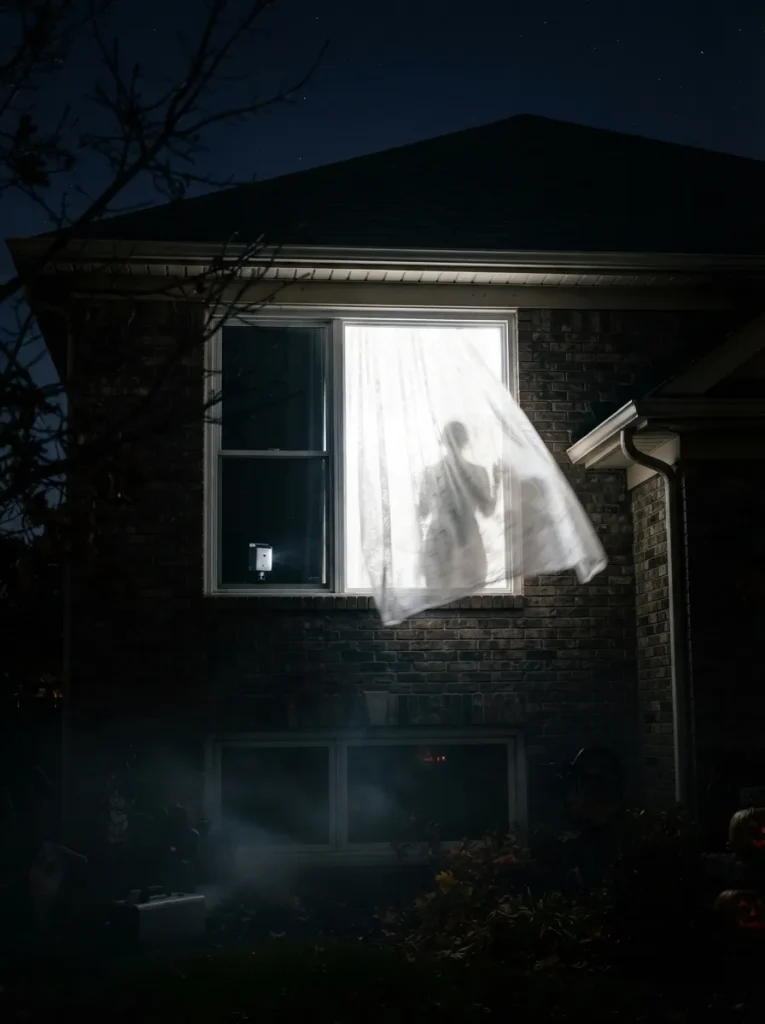
Run a cheap strobe light behind a sheer curtain in an upstairs window and set it on a random-interval timer instead of a steady pulse steady flicker reads as a broken bulb, random bursts read as something moving.
Add a silhouette cutout taped loosely to a fan or a length of fishing line just behind the curtain, and the strobe catches it mid-swing for a split second at a time, which is far more effective than any static prop. This works in almost any upstairs window and costs less than most single decorations on this list. Test the timing after dark before your event night; strobes look different against black sky than they do in daylight, and intervals that feel dramatic at 2 p.m. often feel relentless by 8.
Warning: Running strobes and fog machines off a single indoor extension cord through a cracked window is the fastest way to trip a breaker mid-haunt use a dedicated outdoor-rated cord and, if you’re running more than two devices, split them across separate circuits.
3. DIY Foam Tombstones That Don’t Look Like Foam
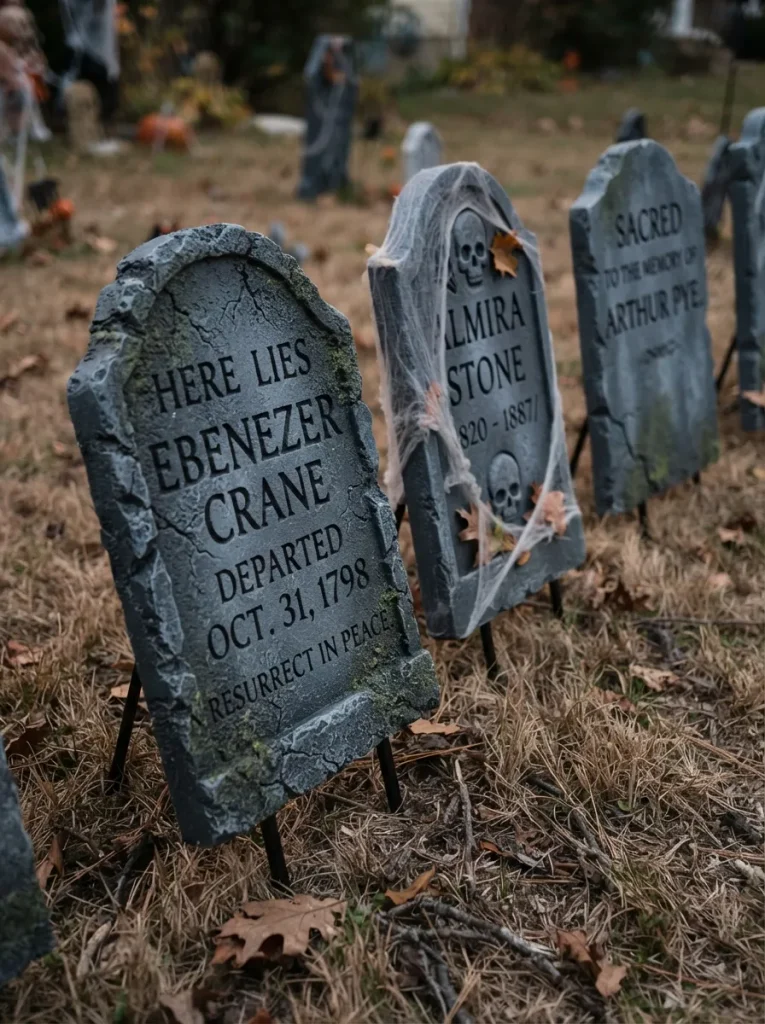
Most yard tombstones fail for the same reason: flat gray paint on smooth foam reads as a prop the second porch light hits it. Real stone has depth pitted texture, lichen-like discoloration, edges that have chipped unevenly over decades and you can fake all of it with two-inch rigid foam insulation board, a serrated knife, and a heat gun to soften the carved edges so they don’t look razor-cut.
Base coat in concrete gray, then dry-brush a lighter gray across raised areas and a thinned black wash into the carved letters and cracks; that single contrast step does more than any amount of extra detail. Seal with exterior spray sealant so rain doesn’t turn your tombstones back into wet foam by the second night of display.
✅ Foam Tombstone Build Order:
- [ ] Cut the tombstone silhouette from 2-inch rigid foam board
- [ ] Carve epitaph letters and cracks with a heat gun or foam knife
- [ ] Base coat in concrete gray, then dry-brush highlights
- [ ] Wash carved details with thinned black paint
- [ ] Seal with exterior-rated spray sealant before staking outdoors
Get the Look
| Product |
|---|
| Rigid foam insulation board |
| Foam carving hot knife |
| Exterior stone-textured spray paint |
| Outdoor spray sealant |
| Ground stakes for foam props |
Next up: the prop that needs zero maintenance between now and Halloween night you set it once and it resets itself.
4. A Motion-Activated Skeleton That Pops Up From the Ground
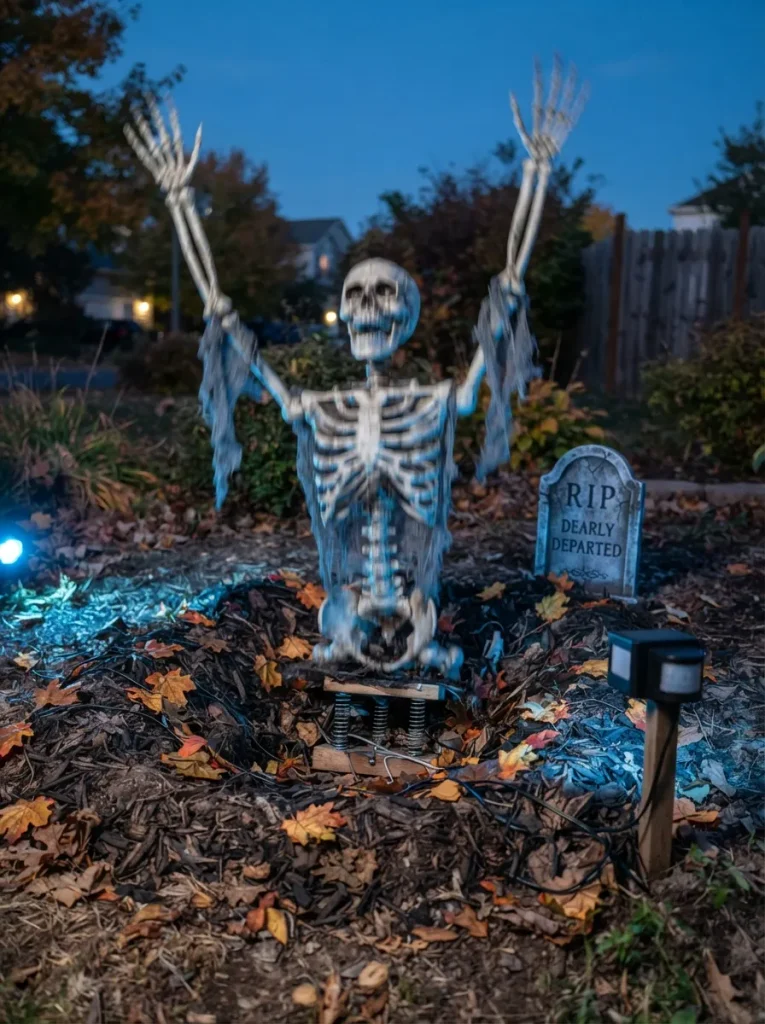
This one’s for anyone who wants the loudest reaction for the least amount of daily setup plug it in once, and it resets itself for every group that walks past. A motion-sensor pop-up skeleton mounted in a shallow disguised pit or planter does the actual scaring; your job is just camouflage.
Bury the mechanism’s base under mulch or fake leaves so the trigger point isn’t visible, and place the sensor a few feet before the prop so it fires before guests are standing right on top of it timing the surprise matters more than the prop’s detail. Skip this if your yard doesn’t have a spot to hide the base; a visible mechanism kills the effect instantly.
Quick Win: No time to build a hidden pit? A motion-activated skeleton mounted flat against a fence or wall works almost as well the surprise comes from the sudden movement, not the ground reveal.
Get the Look
| Product |
|---|
| Motion-activated pop-up skeleton prop |
| Standalone PIR motion sensor |
| Outdoor-rated extension cord |
| Bag of artificial fallen leaves |
5. A Black-and-Orange Uplighting Wash Across the Whole Facade
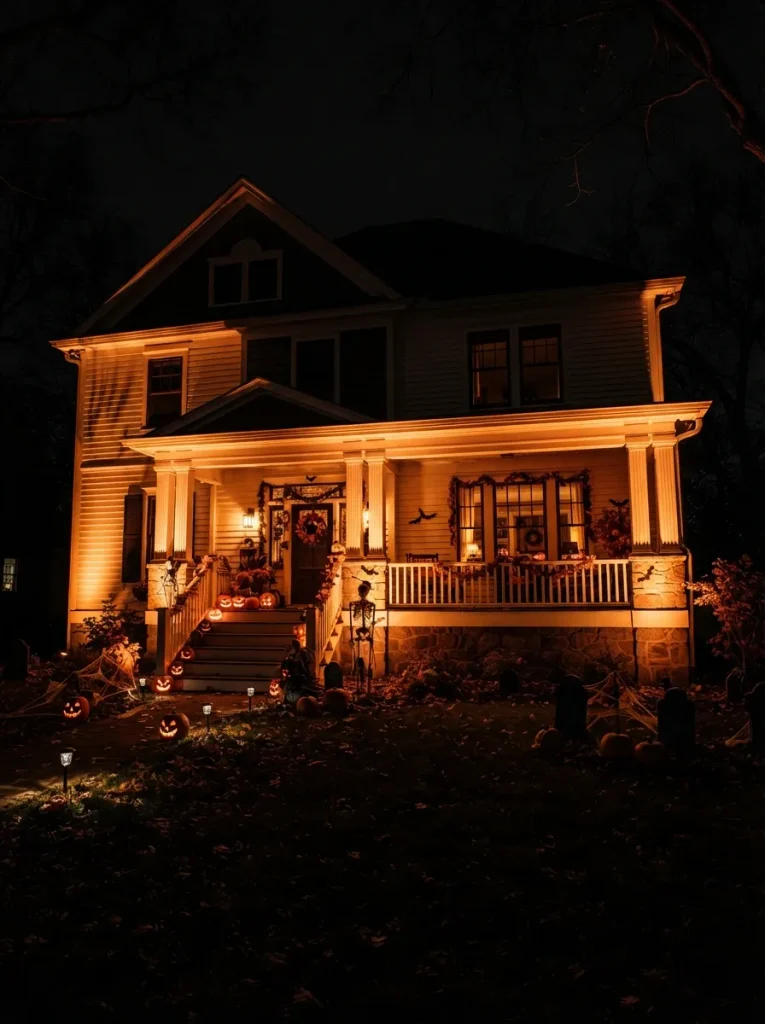
Swap your porch floodlights for a handful of orange LED uplights staked into the flower beds, angled up at the house rather than down at the walkway, and the entire facade shifts from friendly to foreboding without a single prop added.
Uplighting throws long shadows upward instead of down, which is the opposite of how daylight ever hits a house that inversion is what makes it feel wrong in a way most people can’t quite name. Stick to one or two colors maximum; orange alone reads as intentional, orange plus green plus purple all at once reads as a light-up yard sale. Save the second color for a single accent, like one purple light on the door.
Important: Most solar uplights aren’t bright enough to compete with a lit porch for a facade wash that actually reads at dusk, budget for wired or rechargeable LED spotlights instead.
6. A Porch Archway Buried in Layered Spiderweb
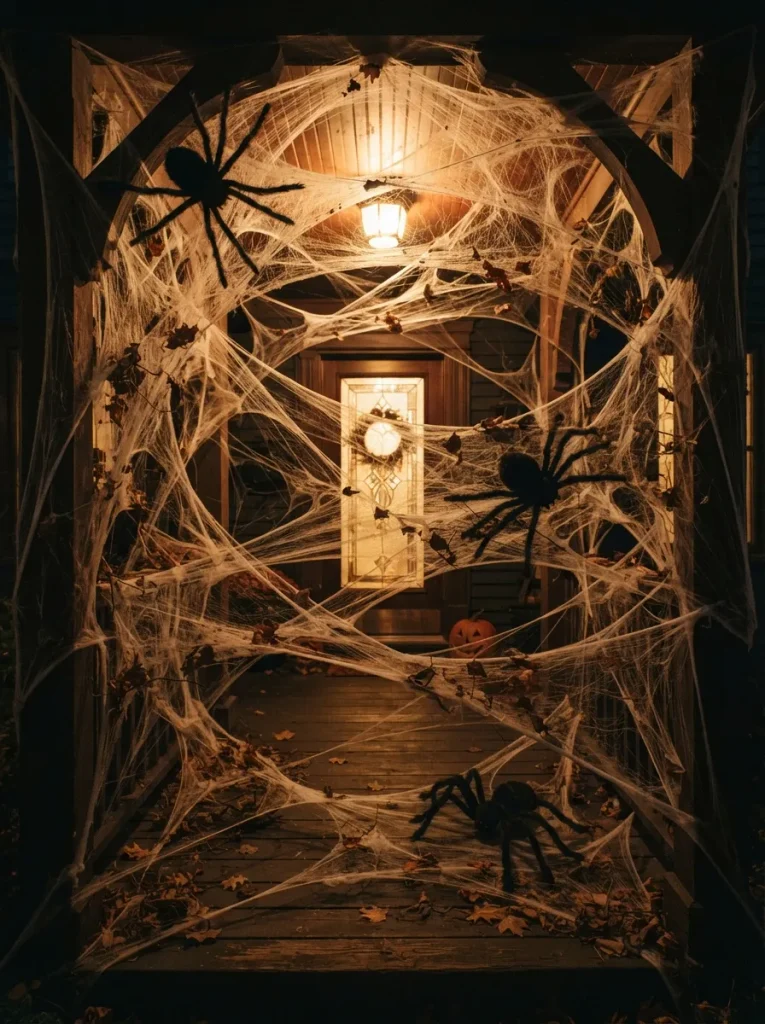
A porch archway buried in web reads as abandoned rather than decorated the moment you stop using a single flat sheet and start layering three or four pulled-apart sections at different depths one tight against the beam, one looser a foot out, one draped loose enough to catch a breeze. Flat, factory-fresh webbing photographs like a costume shop; pulled, uneven webbing photographs like something that’s been growing there since summer.
Anchor the layers with hot glue at a few points only, not every edge, so the middle sections sag naturally instead of sitting flush against the wood. Tuck one or two oversized spider props into the gaps between layers rather than on top of the web hidden is scarier than displayed.
Budget Version: Two standard 60-square-foot stretch web packs, pulled apart and layered, cover most porch archways for under $15 skip the premium “cobweb spray” cans entirely.
Up next: the six-inch prop that outperforms every giant inflatable on this list, purely because of how it moves.
7. A Crawling Spider on a Fishing-Line Track
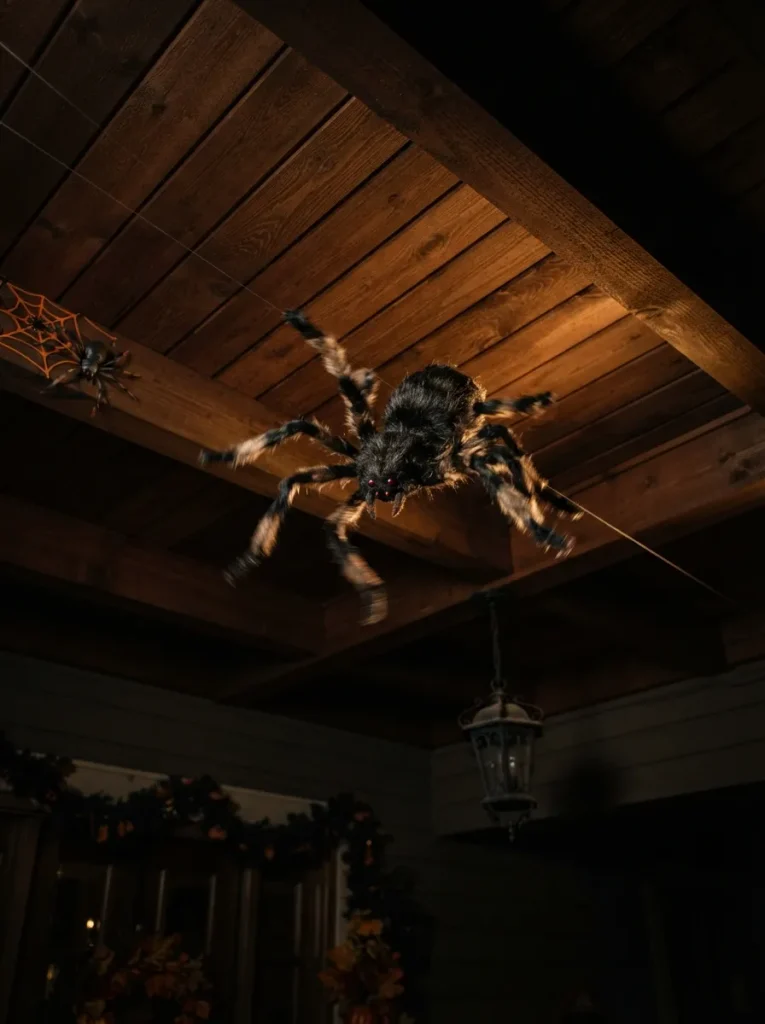
The principle behind this one is that motion beats size every time a two-foot spider that doesn’t move gets a glance, while a six-inch spider that suddenly crawls six feet across a porch ceiling gets a scream.
Run fishing line at an angle between two anchor points, thread it through a screw eye on the spider’s back, and let gravity pull the prop down the line when you release a second cord from a hidden pulley. Steeper angles move faster and read more suddenly. Keep the line thin 20 to 30-pound test disappears against most porch ceilings after dark, where thicker cord catches the light and gives the trick away before it happens.
Important: Most crawling-spider kits are built for a flat ceiling run if your porch has a sloped roofline, you’ll need a steeper line angle than the kit’s default, or the spider stalls out halfway across.
Get the Look
| Product |
|---|
| Oversized articulated spider prop |
| Fishing line, 20–30 lb test |
| Screw eye hooks |
| Small pulley hardware |
8. A Compact Tombstone Cluster for Narrow Yards and Apartment Patios
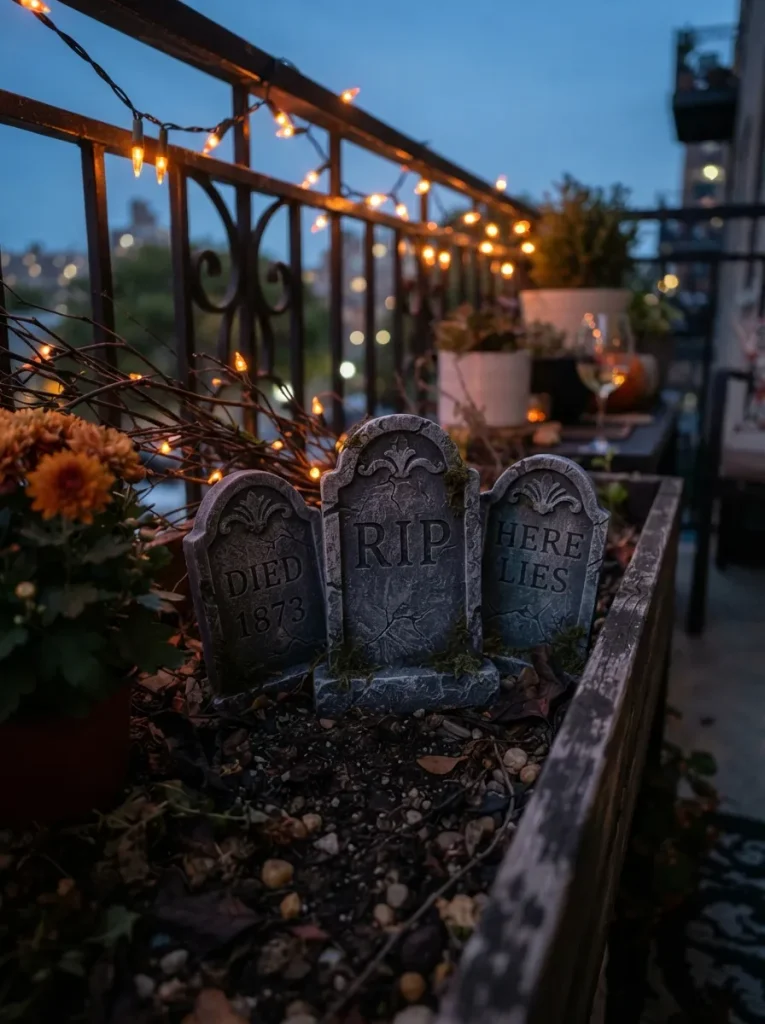
This one’s for anyone working with a patio, a stoop, or a strip of yard too narrow for a full graveyard layout. Three knee-height tombstones clustered tightly together closer than you’d space them in an open yard read as a dense, cramped graveyard corner instead of a sparse leftover display.
Scale matters more than quantity here; oversized props in a small footprint just look crowded, while three modest ones clustered around a single planter or stoop step look deliberate. Add one light source close to the cluster rather than lighting the whole patio, so the tombstones catch shadow instead of washing out flat under overhead light.
Small-Space Tip: No yard at all? The same clustered approach works stacked in a large planter by the front steps group the tombstones instead of spacing them out, and let one string light do all the work.
9. Hanging Ghost Figures Lit From Below, Not Above
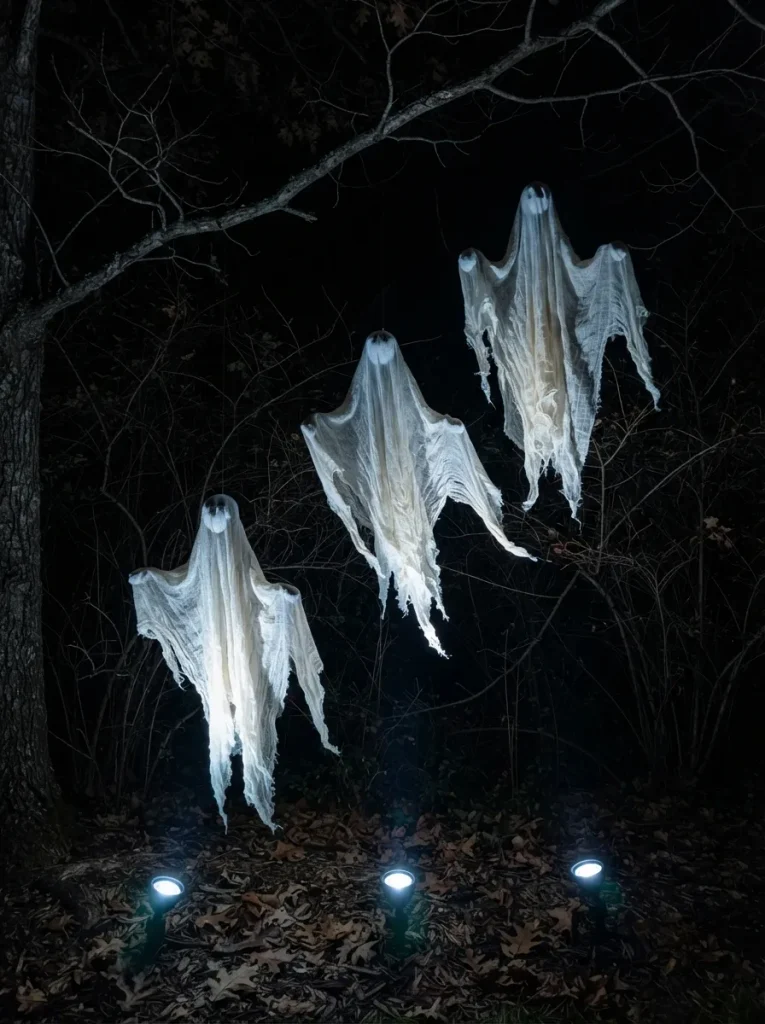
Hang fabric ghost figures from a tree branch at staggered heights, then light each one from a small spotlight staked directly beneath it instead of relying on ambient porch light from above. Uplighting throws the fabric’s folds and shadows upward across the figure instead of down its front, which is the opposite of how light naturally falls on a floating object and that mismatch is exactly what reads as wrong to the eye without anyone consciously clocking why.
Stagger the hanging heights by at least a foot between figures so they don’t read as a matched set; uneven spacing feels like they drifted there rather than were hung. A light breeze does the rest of the work for free.
Important: Plain white bedsheet ghosts flatten out under uplighting because the fabric is too stiff to fold naturally lightweight cheesecloth or a thin sheer fabric drapes and catches shadow far more convincingly.
Get the Look
| Product |
|---|
| Sheer or cheesecloth ghost fabric |
| Outdoor ground spotlights |
| Adjustable tree-hanging hooks |
| Weatherproof zip ties |
Next: the furniture piece most people already own, repurposed into the eeriest vignette on the whole porch.
10. A Haunted Rocking Chair Vignette Using Furniture You Already Own
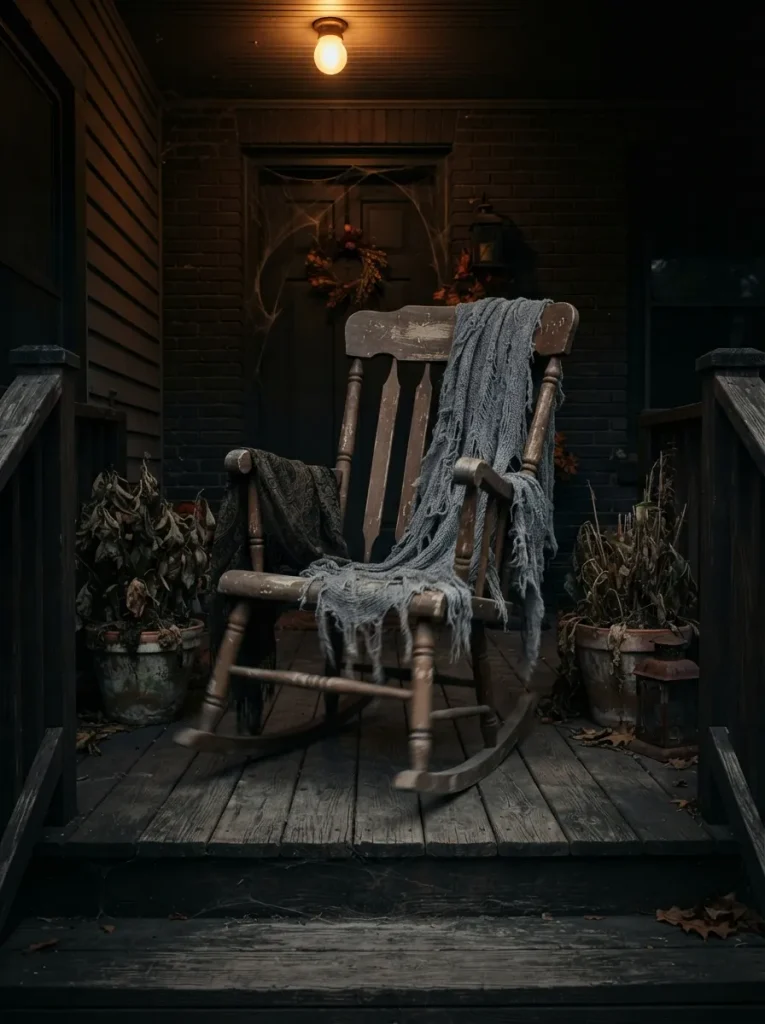
Most porch haunts skip furniture entirely and go straight to purchased props, which is a missed opportunity an ordinary rocking chair, rigged to rock on its own with a small motor or even just a taut fishing line pulled from inside a window, unsettles people precisely because it looks like it belongs there.
An everyday object moving on its own reads as far stranger than a purpose-built prop ever could, since nothing about a rocking chair signals “decoration.” Drape it in a tattered throw, add one dead or dried-out potted plant beside it, and keep the rest of that porch corner dim so the chair is the only thing catching light. Layer it into a broader fall porch setup you’re already building for the season and it does double duty long after Halloween night.
Mistake to Avoid: A rocking chair moving in a perfectly steady rhythm looks mechanical, not haunted an irregular pull, timed manually or on a randomized motor, sells the illusion far better than a constant back-and-forth.
11. A Green-to-Purple Color-Shifting Spotlight Wash
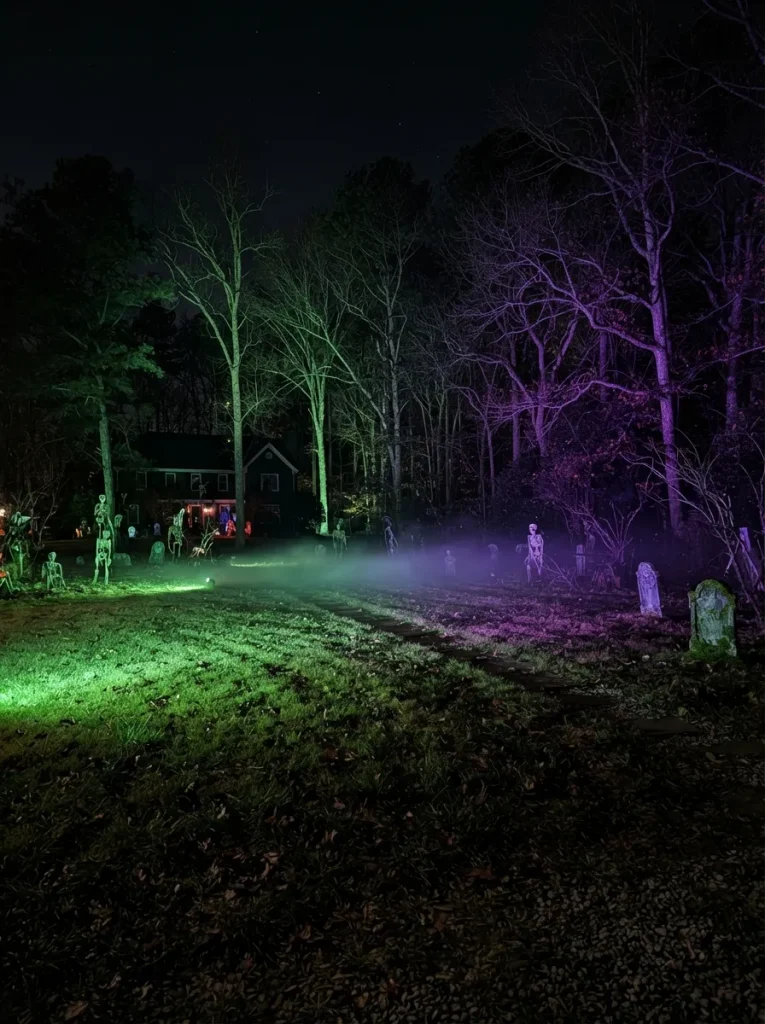
A slow color shift reads as far more unsettling than a static color choice, because the change happens too gradually for most people to consciously register they just notice the yard feels different than it did five minutes ago.
Sickly green transitioning into deep purple works especially well against a lawn, since green already carries an unnatural, toxic association most people connect with decay. Set the transition speed slow, somewhere in the range of a full minute or more per cycle, rather than the fast rainbow-cycle default most color-changing floodlights ship with; fast cycling reads as a party light, not a haunt. One or two fixtures aimed across the widest open stretch of lawn covers more visual ground than several fixtures crowded near the house.
Pro Tip: Most color-changing floodlights let you lock a custom transition speed through the included remote dig it out of the box instead of settling for the factory default cycle.
12. A “Body in the Yard” Prop That Reads as Real Fabric, Not Plastic
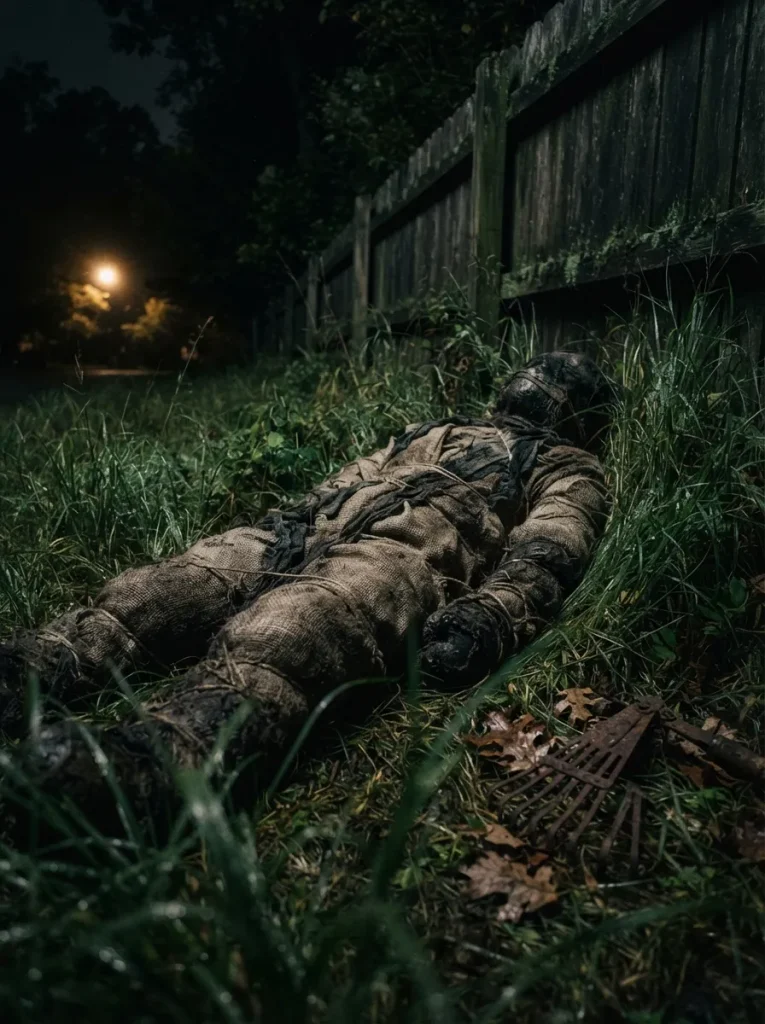
The principle here is texture over shape a body-shaped prop reads as convincing or as a Halloween-aisle joke almost entirely based on what it’s wrapped in, not its silhouette. Shiny plastic and stiff polyester catch light in a flat, uniform way that immediately signals costume-shop prop.
Burlap, torn cotton, or an old dyed bedsheet absorbs light unevenly instead, with real fold shadows and frayed edges a smooth synthetic fabric can’t fake. Stain the fabric lightly with diluted brown or black paint before wrapping a completely clean prop looks staged no matter how good the fabric is. Position it partially obscured by grass, mulch, or a fence line rather than fully visible in the open; half-hidden reads as discovered, fully displayed reads as decorated.
Styling Note: Skip a full head and face if you’re going for unsettling over gory a fabric-wrapped form with the head turned away or tucked under an arm leaves more to the imagination than a detailed mask ever will.
Observation
The counterintuitive part: the scariest yard haunts are mostly dark, not mostly lit. A single well-placed spotlight against ten feet of true shadow does more than a yard strung wall-to-wall in string lights, because darkness is where the imagination does the actual work a prop half-hidden in shadow gets built up in someone’s mind into something worse than whatever you bought. Cut your lighting by a third from your first instinct and let the shadow carry it.
One more before the finale: the treat station that convinces trick-or-treaters your whole display was designed by a professional.
13. An Apothecary-Style Treat Station Built From Furniture You’re Repurposing
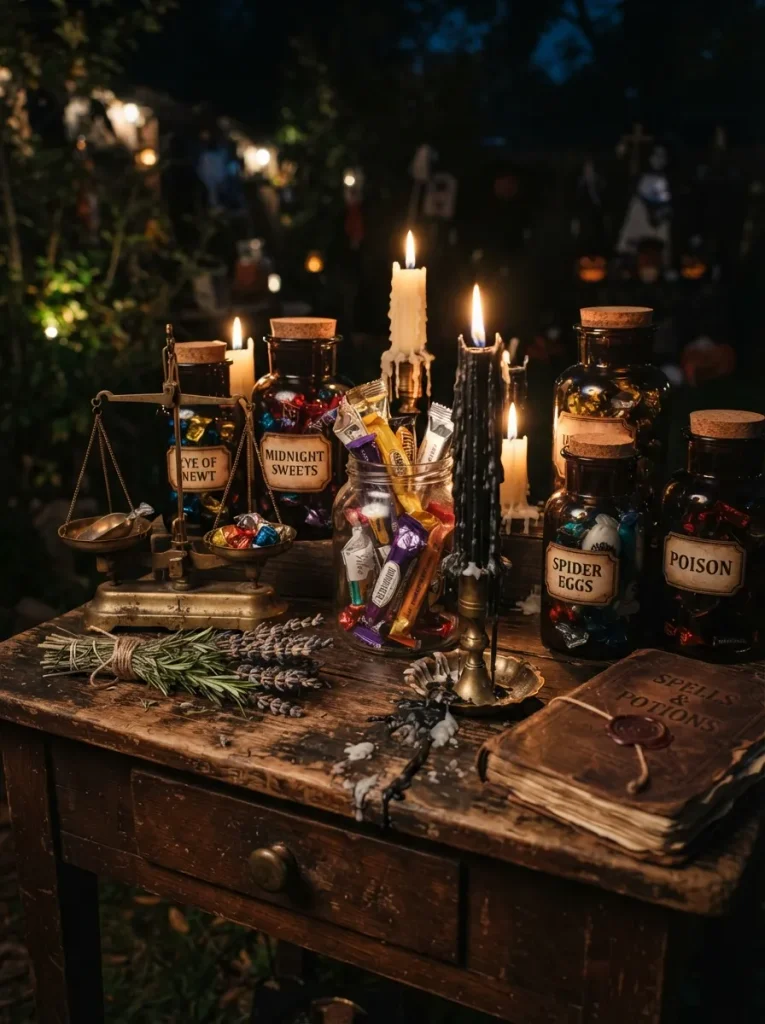
This one’s for the host who wants trick-or-treaters to linger at the end of the driveway instead of grabbing candy and moving straight to the next house. An old side table or bar cart, repurposed as an apothecary counter, does more work than any single prop on this list because it invites interaction kids want to look at the jars before they reach in.
Dark glass jars hide the actual candy brand and color, which matters more than it sounds like it should; visible name-brand wrappers through clear glass break the illusion instantly. A couple of real dripping candles, kept a safe distance from any fabric or paper decor, finish the mood better than battery tea lights ever manage.
Important: Dark amber or cobalt glass jars hide candy wrappers far better than clear glass if you’re repurposing clear jars, a quick wrap of dark tissue paper around the inside does the same job for almost nothing.
Get the Look
| Product |
|---|
| Dark glass apothecary jars |
| Small decorative brass scale |
| Dripping-wax pillar candles |
| Dried herb bundle for styling |
14. The Finale One Coordinated Fog, Light, and Sound Cue Instead of Everything at Once
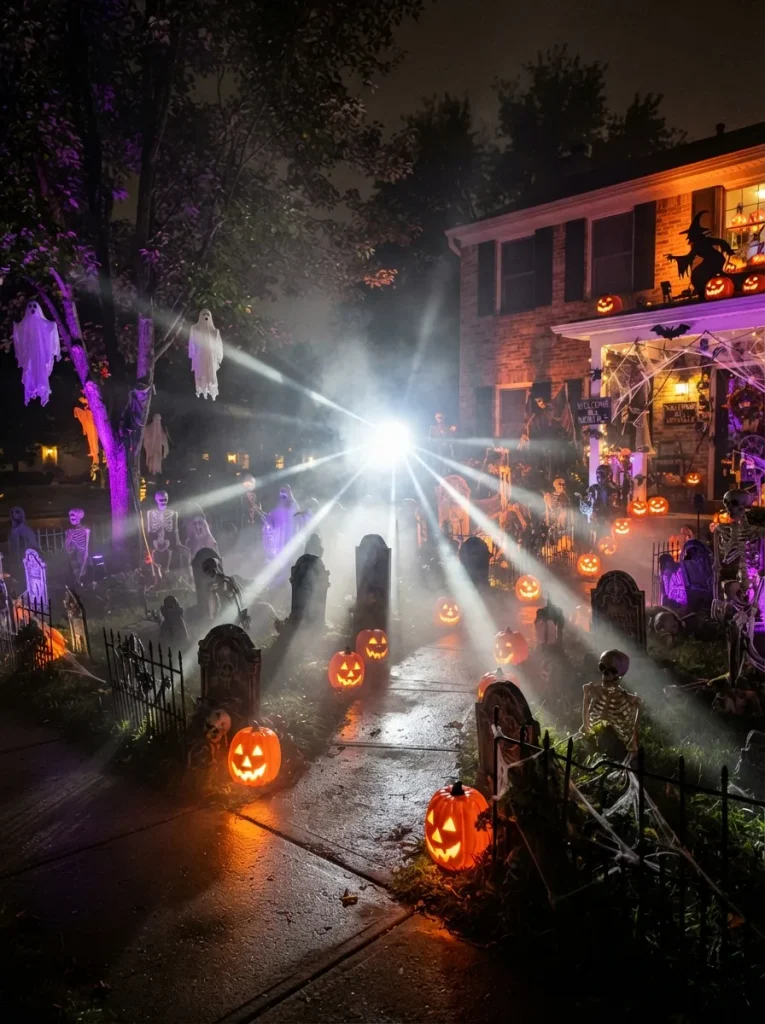
Most home haunts run every effect constantly, all night, which means the single best moment fog, strobe, and sound all triggering together never reads as a moment because it’s just the ambient state of the yard.
Wire your fog burst, strobe flash, and a single sound cue (a scream, a creak, a low growl) to a motion sensor or remote trigger instead of leaving everything on a loop, and save that combination for the instant someone reaches your front steps.
That contrast between quiet atmosphere and one coordinated burst does more than any individual prop on this list, because it’s the only moment built entirely around timing rather than visual detail. Everything else on this list feeds into this one: it ties your whole Halloween decor plan together instead of leaving it as a pile of separate props.
Quick Win: Don’t have smart-trigger equipment? A hidden helper with a remote-control outlet backstage does the same job just less hands-free.
How to Start Your Yard Haunt Transformation
Start with light, not props. The right first move is almost always lighting swap your porch bulb for a single colored floodlight and everything else in the yard reads differently before you’ve bought a single tombstone. Lighting sets the mood that every later prop depends on, so getting it right first means nothing you add later fights against it.
Avoid the even-spacing trap. The most common beginner mistake is buying too many small props and spacing them evenly across the whole yard. Even spacing looks arranged, not haunted, and a dozen mismatched dollar-store items read as clutter rather than atmosphere. Pick three or four props you actually like, place them unevenly, and let the darkness between them do the rest.
Three items worth grabbing early, each well under $50 individually: a colored LED floodlight for the facade wash, a compact fog machine for the walkway, and a roll of stretch spiderweb for the porch. All three work across almost every idea on this list, which makes them the highest-value starting purchases.
Timeline and budget. A basic haunt lighting, fog, and two or three props comes together in a single afternoon and typically runs $40 to $120 depending on what you already own. A full layered display with a graveyard path, hanging figures, and a coordinated finale is closer to a weekend project and a $150–$300 budget, spread across a few purchases rather than one big haul.
Ready to Haunt Your Whole Neighborhood?
Fourteen outdoor yard haunt ideas, and every one of them comes down to the same three levers: light, motion, and timing. Done well, three or four of these will out-scare a yard crowded with every prop on this list shadow between props does as much work as the props themselves. Start tonight with the porch light swap; it’s a five-minute change that resets how the rest of your display reads.
However far you take it this year, the goal is the same feeling: cold air, low fog, and one moment nobody sees coming. Snap a photo of whatever you build and pin it next October, you’ll want the reminder of what worked.
You Might Also Like
- 12 Halloween Front Porch Ideas That Stop Trick-or-Treaters in Their Tracks
- 10 Budget-Friendly Halloween Decorations That Still Look Terrifying
- 8 Fall Porch Ideas to Transition From Halloween Into Thanksgiving