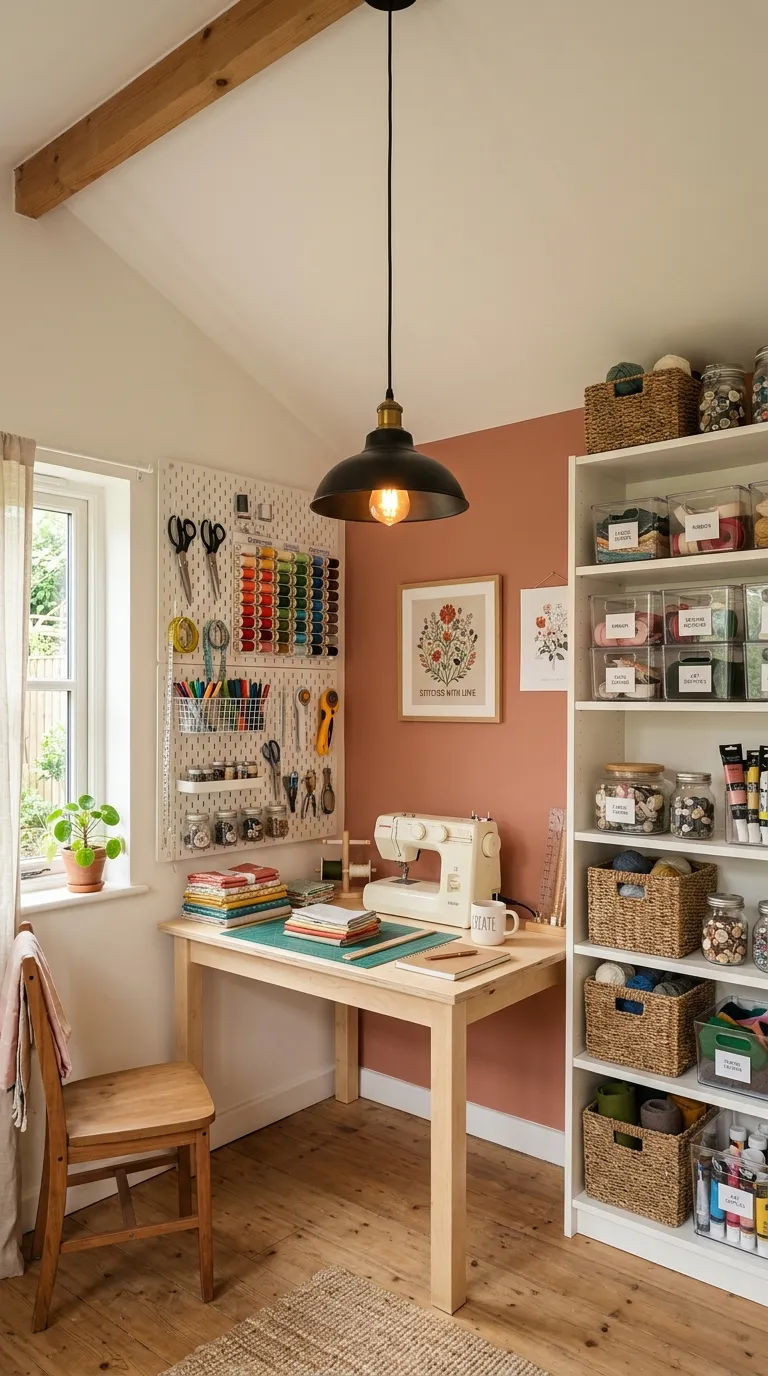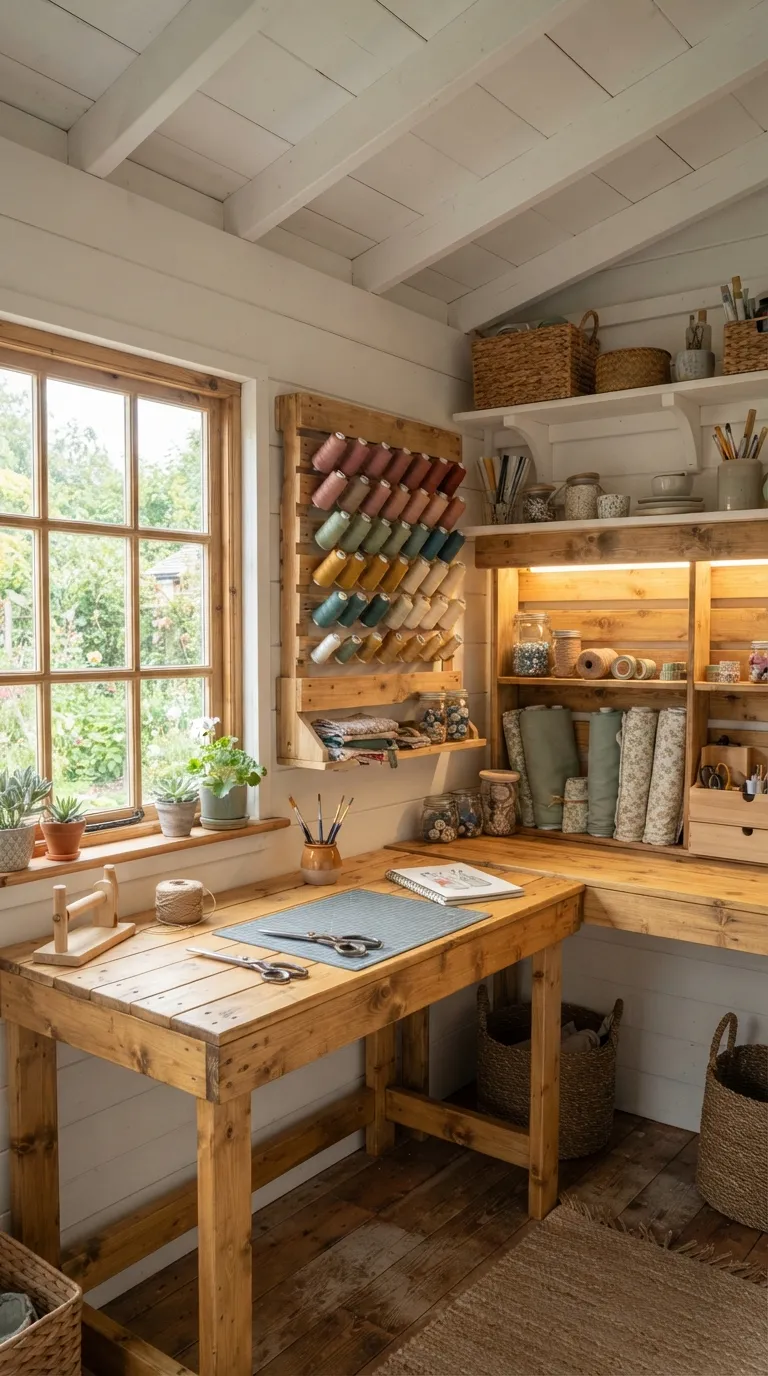
14 She-Shed Pallet Furniture Ideas for Your Craft Room
Pallet furniture is the cheapest way to build a craft room around how you work, as long as you fix what raw pallets get wrong: splinters, wide gaps, and unknown chemical history. Here are 14 she-shed pallet furniture ideas for your craft room, including a desk that won’t snag silk, shelving that keeps beads in place, and a cart that rolls to wherever the project is.
Picture a worktable at exactly your elbow height, thread sorted by color along a wall of weathered slats, and light landing on your hands instead of behind them. Nothing catches a sleeve. Nothing rolls under the shelf. The shed smells faintly of sanded pine, and every tool sits one step away.
Pallet wood, minus the splinters.
Quick Navigation
- Why She-Shed Pallet Furniture Makes Such a Difference
- The Builds, Starting With the Mistakes to Skip
- How to Start Your She-Shed Pallet Furniture Transformation
- Ready to Create Your Dream She-Shed Craft Room?
- Keep Exploring
Why She-Shed Pallet Furniture Makes Such a Difference
Pallet wood shows up as honey pine, gray weathered oak, or mixed hardwood: rough, gappy, and stamped. Sanded, backed with hardboard where gaps matter, and sealed with a water-based clear finish, it becomes furniture sized to a shed instead of squeezed into one.
That fit is the payoff. Shelves can match your thread cones, tables your hip height, and footprints the door swing. Small sheds should build vertical first, since wall space is the one thing they have plenty of.
| Best starting point | A sanded pallet desk (idea 1) |
| Biggest impact area | Wall storage and the work surface |
| Budget to start | Approx. $30–$100 for finish and hardware, pallets excluded |
| Time to complete | About one weekend per piece |
The Builds, Starting With the Mistakes to Skip
1. A Sanded Pallet Craft Desk Smooth Enough for Silk and Yarn
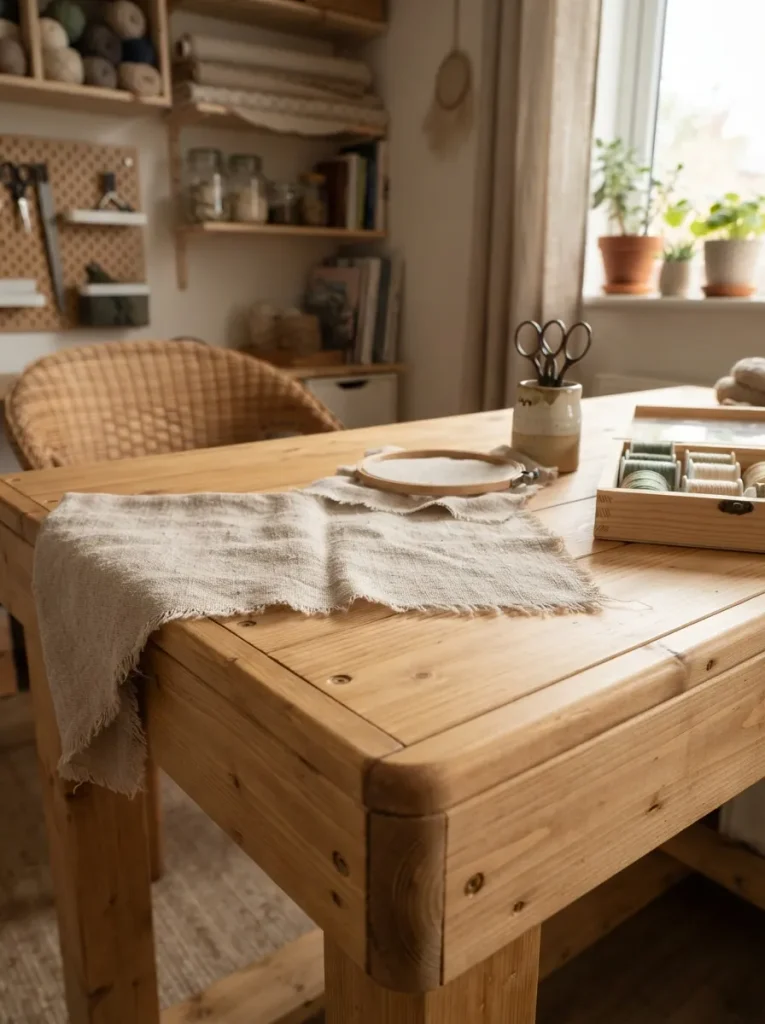
Most pallet desks fail at the first touch: a rough top pulls threads from a sleeve and snags loose weave before the first stitch. Sand in stages, starting coarse (around 80 grit) to level the boards, then 120, then a final pass at 180, and round every edge and corner.
Drag an old nylon stocking or a scrap of loose-weave fabric across the top afterward. Anything that catches needs another pass. Sink nail heads below the surface with a nail set, or swap them for screws.
A seated desk height of 28 to 30 inches suits most people, so adjust to your elbow. It’s built for sewers, knitters, and paper crafters who work in a chair, and it’s the one piece where more sanding than feels reasonable is the right amount. Most people stop early and regret it. Pallets keep the cost low; these budget pallet furniture ideas show how far a few of them stretch.
Important: A clean-looking pallet isn’t automatically a safe one. Look for the stamp on the side: HT means heat-treated, which is what you want, while MB means it was fumigated with methyl bromide, so leave it behind. No stamp at all? Pass on it, and skip anything oily, stained, or chemical-smelling.
2. Bead and Button Shelving With a Hardboard Back
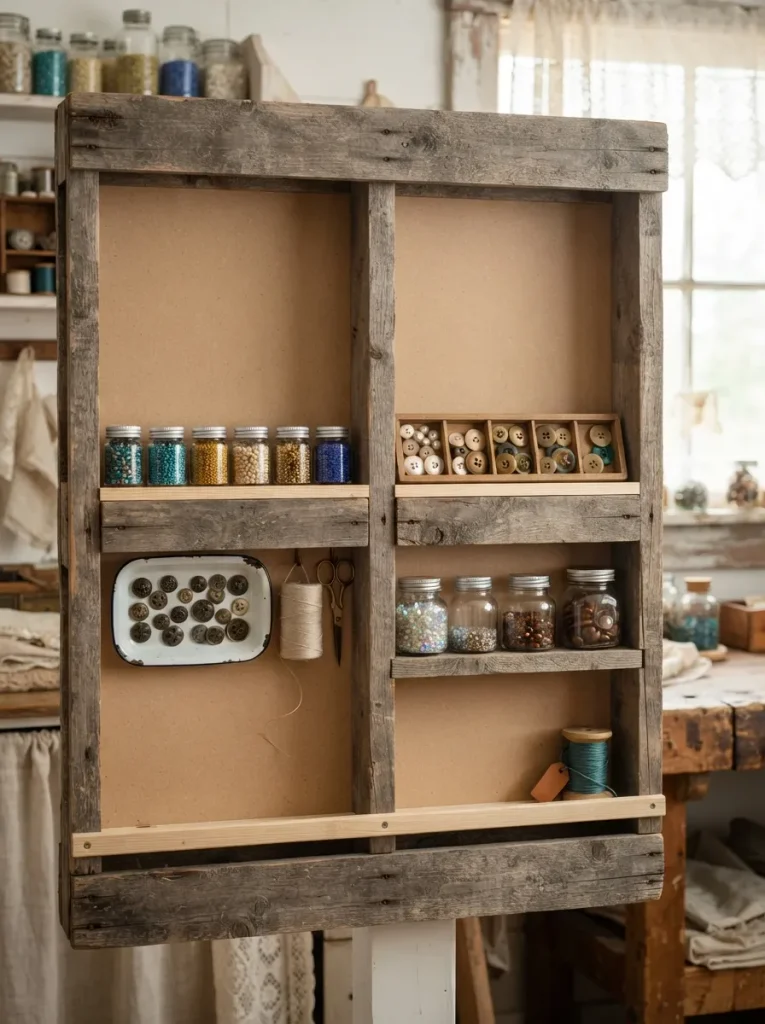
Anyone storing beads, buttons, or sequins on open pallet shelves meets the gap problem fast: small things drop between the slats and vanish behind the unit. Stand the pallet on its side so the bays face forward, fasten a hardboard panel across the back to close every gap, and nail a thin strip along each shelf’s front edge as a lip.
A back panel does double duty. Hardboard stiffens the frame, so a pallet on its side won’t rack out of square as you load it. Jewelry makers, scrapbookers, and anyone whose supplies are measured in millimeters get the most from this build. Measure your smallest storage tray against each opening before fastening anything, since slat spacing varies between pallets. For heavier loads, these pallet storage furniture ideas go further.
3. A Pallet Hutch With LED Bars Under the Top Shelf
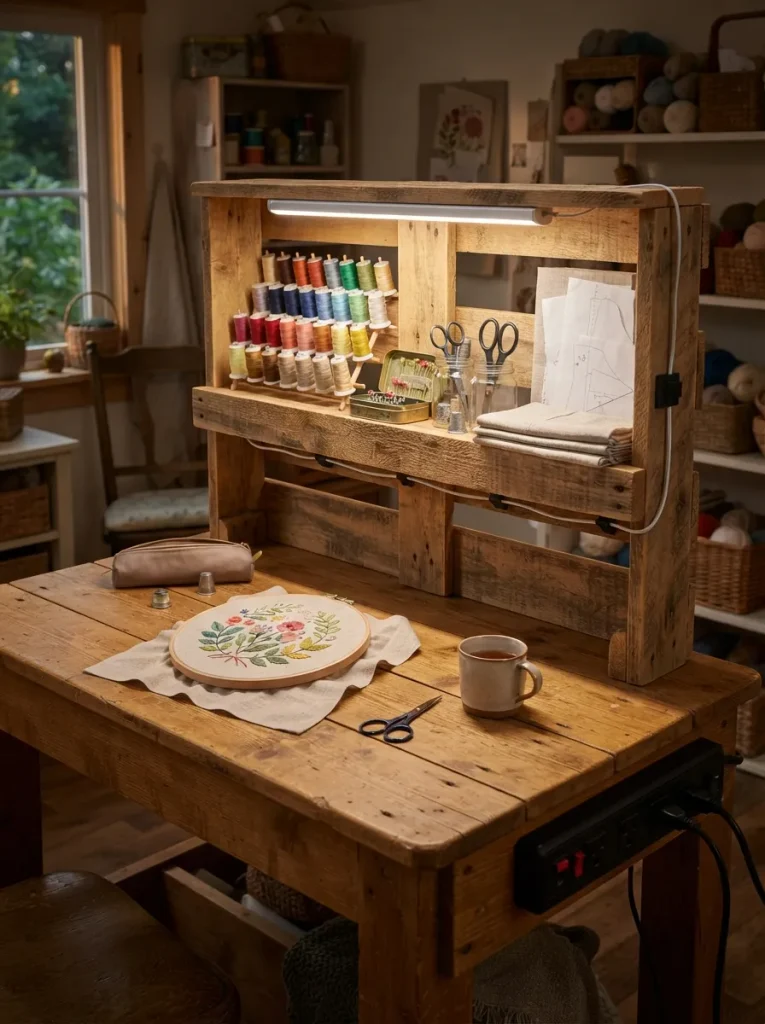
Stand a pallet upright at the back of your desk to make a hutch, then mount a plug-in LED bar under the top shelf, close to the front edge. From there, light lands on your hands and the work instead of the wall behind them, which keeps your own shadow out of your stitches.
Choose a neutral-to-daylight white, roughly 4000K to 5000K, so thread and fabric colors read truthfully. Run the cord along the underside of a stringer and clip it in place, because a dangling cord is the first thing a sleeve catches. Evening crafters and anyone with a single-window shed get the most from this, since daylight ends before the projects do.
Pro Tip: Match every light in the shed to the same color temperature. Mixing warm bulbs with daylight bars puts two color casts on your fabric, and thread that matched at the desk can look wrong outside.
Shop This Look
| Product |
|---|
| Plug-in LED light bars, neutral white |
| Surge-protected power strip |
| Adhesive-backed cord clips |
Next up: a finish thin enough to show the grain, and why it can brighten a one-window shed more than a second lamp.
4. A Whitewashed Cutting Table at Standing Height
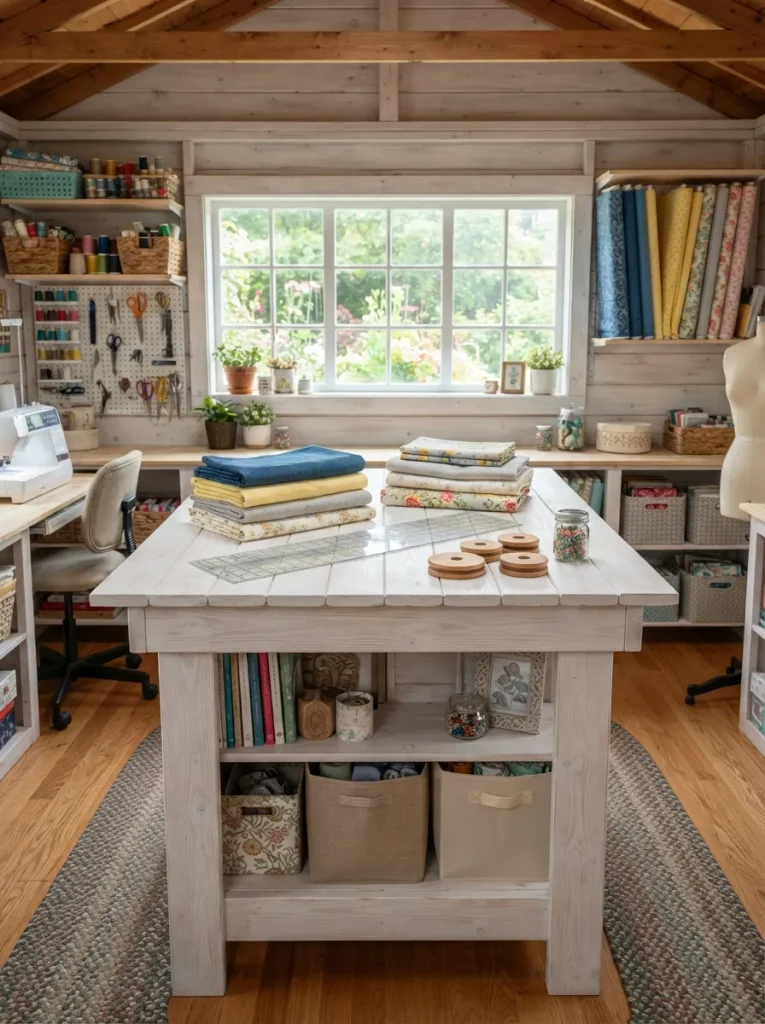
Light surfaces bounce daylight around a room, while raw pallet wood absorbs it, which is why a single-window shed can feel darker than it is. A whitewash, made by thinning white paint with roughly equal parts water, lets the grain show and lifts the tone without hiding the wood.
Build the table to standing height, around 36 inches for most people, so long cutting sessions don’t hunch your back. If you cut with a rotary cutter and mat, close every deck-board gap or add a plywood top, because a mat bridging gaps sags and drifts the cut line. Quilters and garment sewers who cut big yardage will use this every session.
✅ Whitewash Finish, in Order:
- [ ] Sand to 180 grit and wipe off the dust with a damp cloth
- [ ] Spot-prime knots with a shellac-based primer so resin doesn’t bleed through
- [ ] Brush on white paint thinned with roughly equal parts water
- [ ] Wipe back with a rag along the grain before it dries
- [ ] Seal with two thin coats of water-based clear polyurethane
5. A Wall-Mounted Spool Rack That Uses the Slats as Row Guides
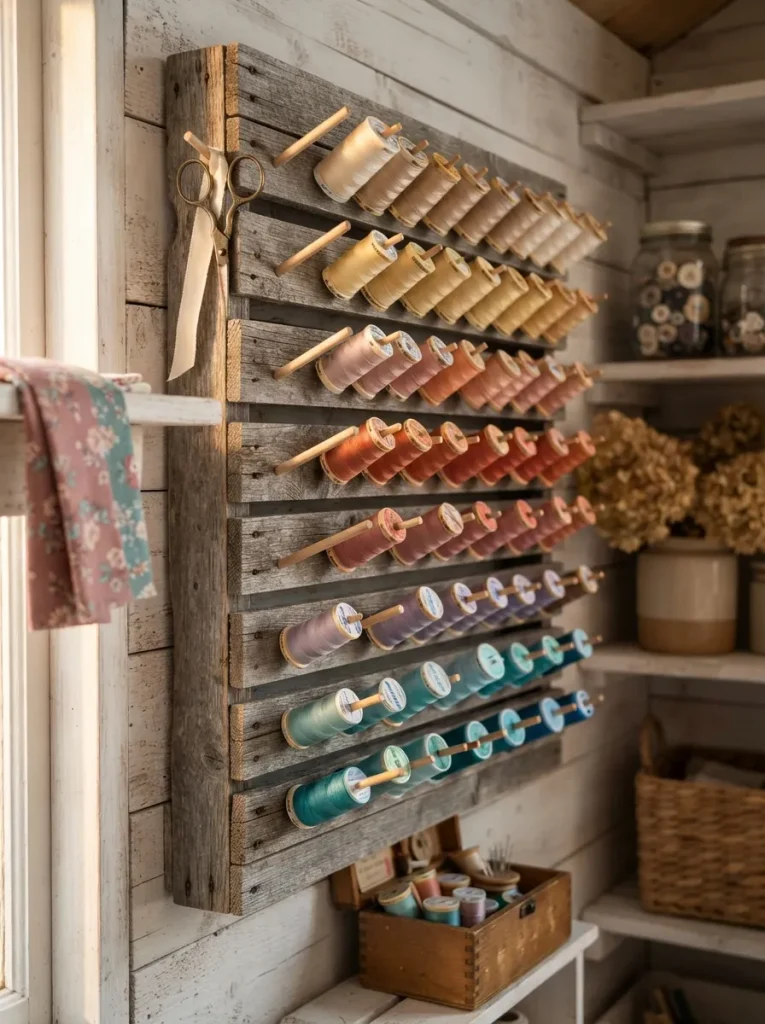
Rows of thread run light to dark down a wall of weathered slats, each spool seated on a short dowel peg. Slat lines double as row guides, so the pegs stay straight without measuring every one. Drill each hole with a slight upward tilt before gluing in the dowel, and spools lean back against the wood instead of sliding off.
Measure a few spool center holes first and match the dowel diameter to them. Screw through the pallet’s stringers into wall studs, since thread in bulk weighs more than it looks. Sewers whose stash has outgrown a drawer will see this earn its wall space fast. For wider ideas on organizing supplies, browse these craft closet ideas.
Styling Note: Sort by hue first, then by shade inside each hue. A gradient reads as decor the moment someone steps into the shed, and a missing spool shows up as a visible gap.
6. An L-Shaped Work Zone Instead of Two Pieces Along One Wall
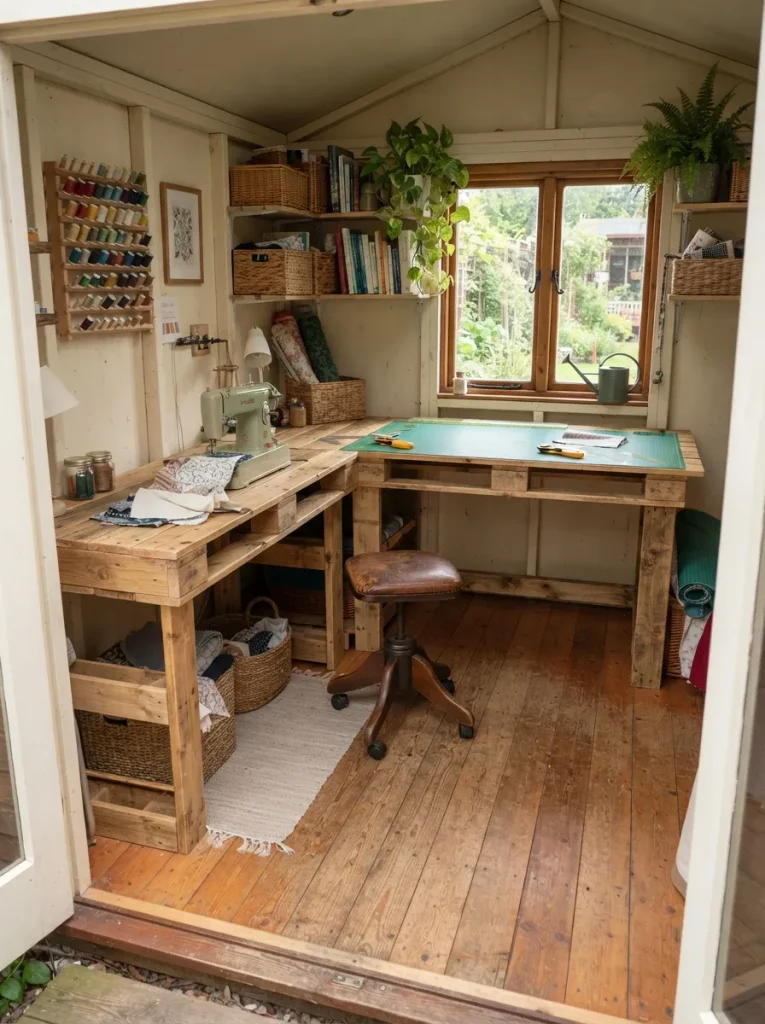
Two pieces lined up along one wall is the default layout, and it wastes the best spot in a shed: the corner. Set the desk and cutting table at a right angle instead, with a rolling stool at the inside of the L. You pivot between sewing and cutting rather than walking between them.
Keep about three feet of clear floor behind the chair, and check that the door and any outward-opening window swing freely before anything gets fastened down. Solo crafters working in a single shed room benefit most. For tighter footprints, these small she-shed craft room ideas cover more layouts.
Important: Shed floors are often not quite level, so check each piece with a level after it is in its final spot and shim the low legs. A table that tilts, even slightly, rolls pins, beads, and pencils toward one edge.
Next: a desk that folds flat against the wall, and the one fastening shortcut that lets it drop.
7. A Fold-Down Pallet Desk That Frees the Floor When You’re Done
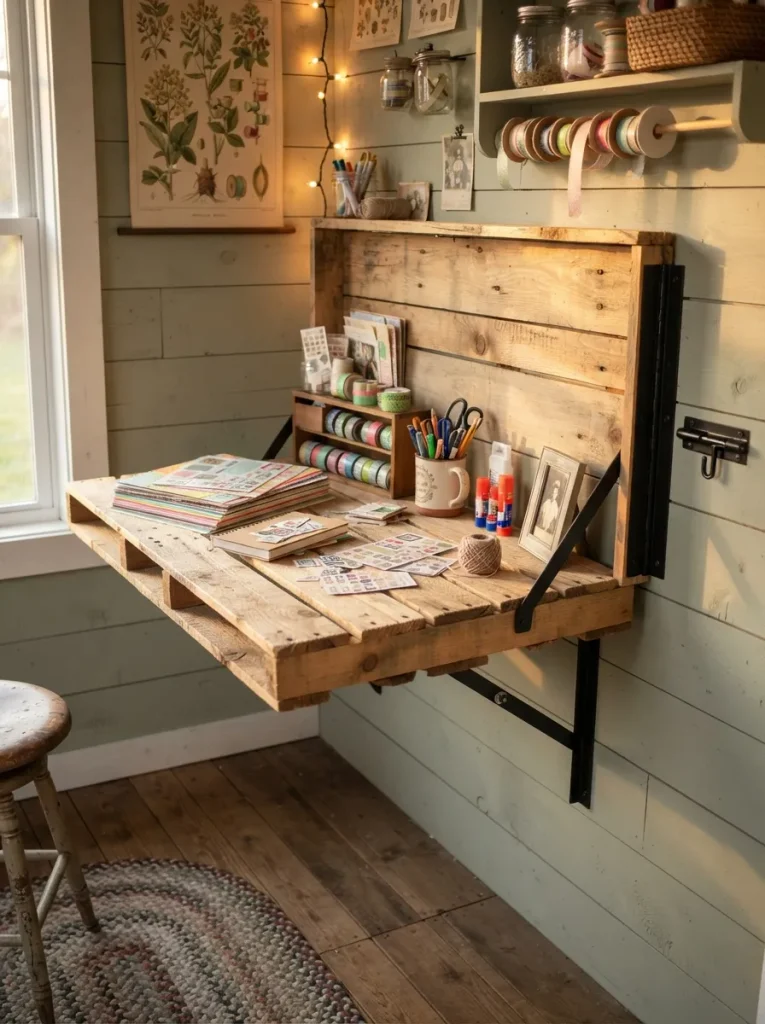
Hinge a pallet-board desktop to a wall-mounted frame, then let heavy-duty folding brackets hold it level when it’s open. Fold it up, latch it, and the floor is yours again. Brackets carry the load, so the hinge only positions the desktop and shouldn’t bear weight.
A depth of about 20 to 24 inches fits a sewing machine or scrapbooking layout without pulling hard on the wall. Sheds shared with garden tools, bikes, or storage boxes get the most from a desk that only exists while you’re working. More space-saving pallet builds live in these tiny house pallet furniture ideas.
Warning: Fasten the brackets into wall studs, not just the shed’s wall sheathing. Shed sheathing is often thin, and a loaded desk can pull screws straight out of it. If your walls are open framing, add a horizontal block of 2×4 lumber between studs and mount into that.
Shop This Look
| Product |
|---|
| Heavy-duty folding shelf brackets |
| Continuous (piano) hinge |
| Slide-bolt latch |
8. A Wipe-Clean Paint and Glue Station
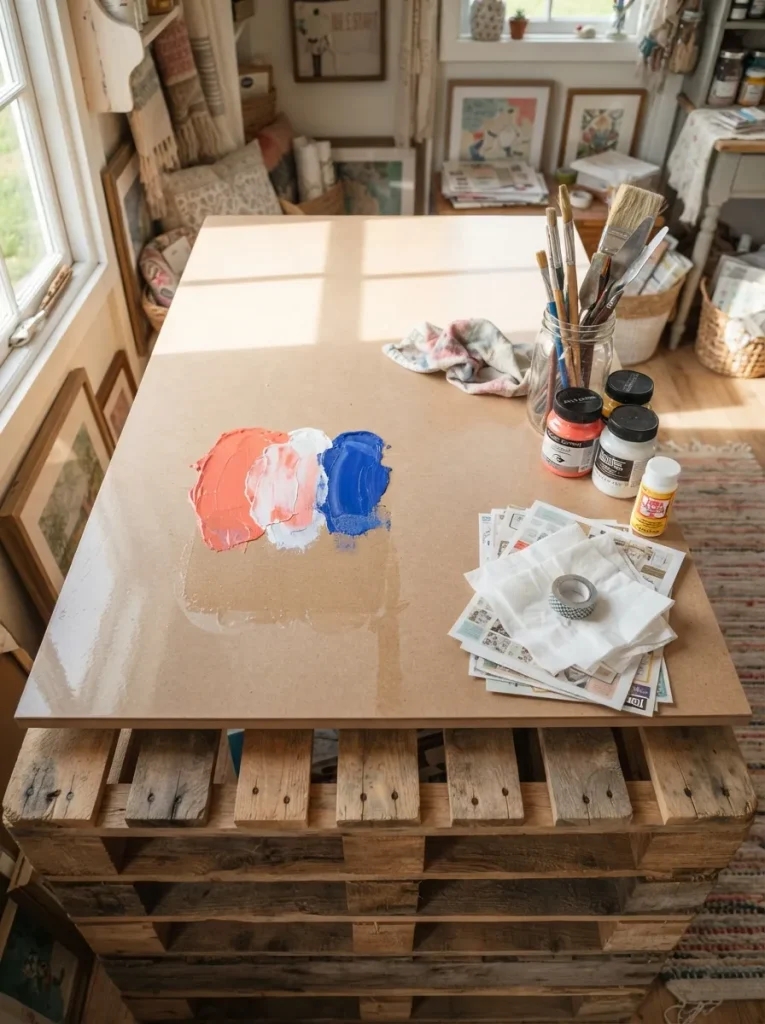
Painters, resin crafters, and decoupage fans need a top that shrugs off spills, and raw pallet wood never will. Stack the deck boards edge to edge, then cover them with a sheet of hardboard sealed with clear polyurethane, or with a laminate offcut, so acrylic and glue wipe up instead of soaking in.
Laminate wins on spill resistance; sealed hardboard costs less but lets moisture in once it’s scratched, so recoat it when it looks worn. Leave the pallet base raw for contrast. A small overhang on the top keeps drips off the frame.
9. A Stacked-Pallet Reading Seat for Hand-Work Breaks
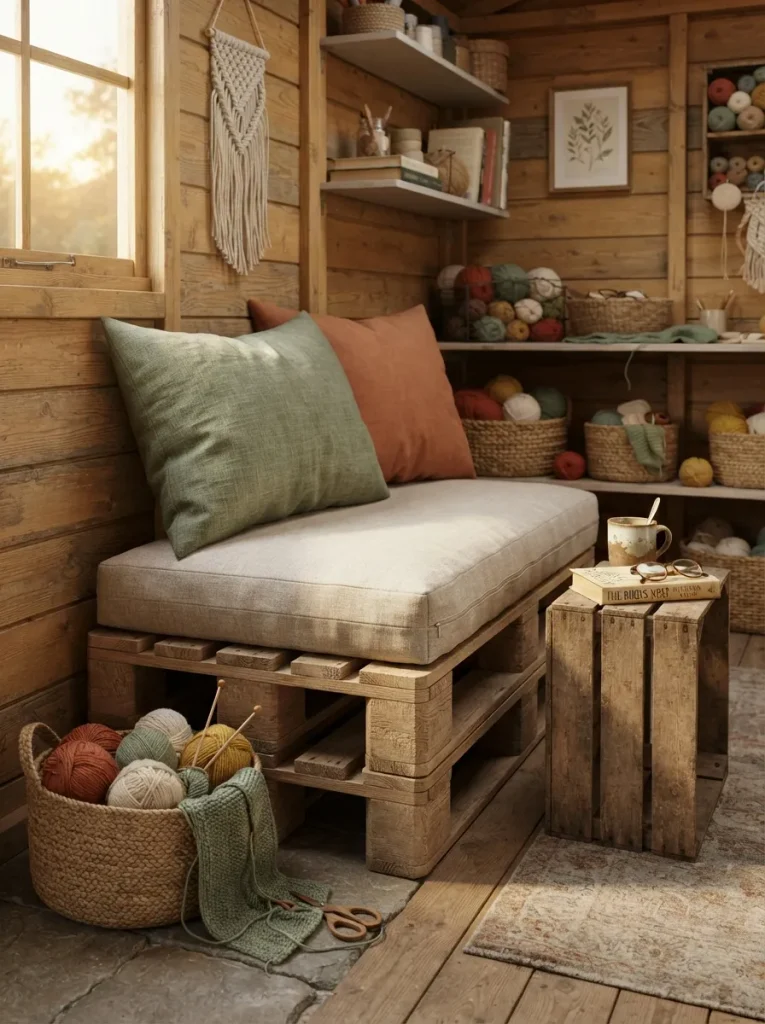
A low, deep seat piled with cushions sits in the corner, close enough to the desk for a quick sit-down and far enough away to feel like a break. One pallet is too low to sit on, so stack two and add a firm cushion; that lands near lounge-seat height, but measure a chair you like and compare before fastening.
Sand every edge a leg will touch. Choose removable covers, since a shed collects sawdust and lint quickly, and store foam indoors in damp months if mildew is a risk. Hand-sewers, knitters, and anyone who needs a place to rest tired hands will use it daily. Pallet seating gets more coverage in these garden and patio pallet furniture ideas, and most translate indoors.
Small-Space Tip: In a very small shed, cut the stacked pair down to a narrow bench and lean two back cushions against the wall. It reads as a sofa while taking about half the floor.
Shop This Look
| Product |
|---|
| Firm foam seat cushion |
| Zippered, washable cushion covers |
| Lumbar-style back cushions |
Coming up: the paint choice that ends the hunt for a teal spool you know you own.
10. Contrast-Painted Cubby Interiors for Faster Finding
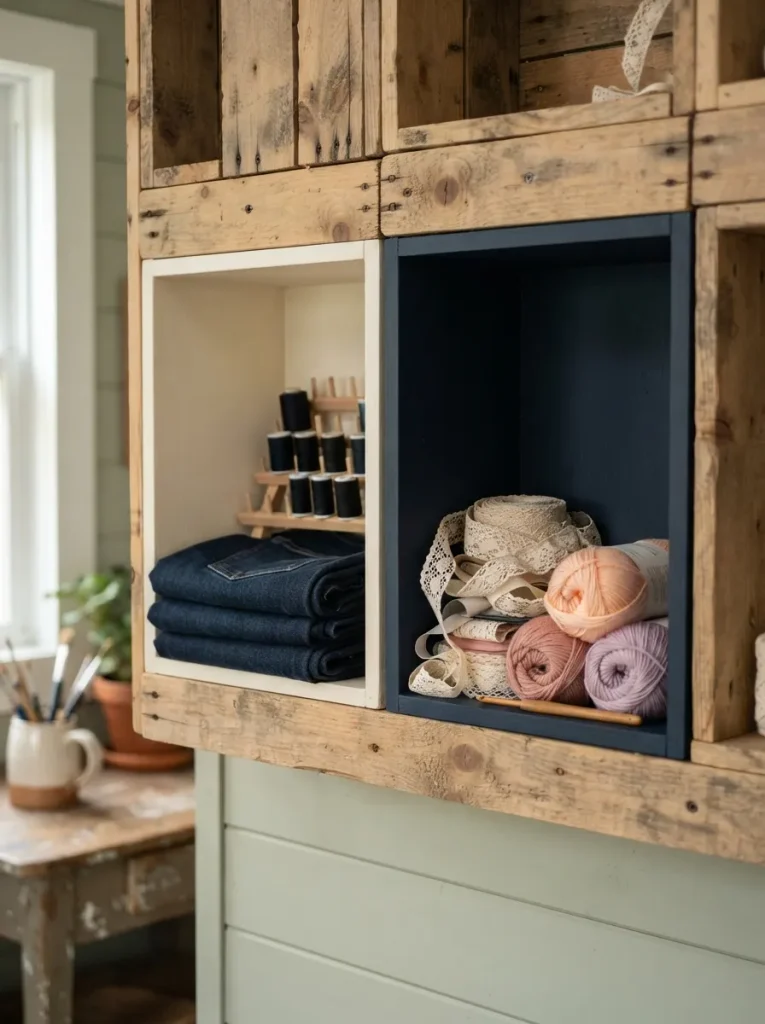
Contrast is what makes supplies findable at a glance: a pale interior makes dark items stand out, and a deep one does the same for pale items. In a grid of cubbies built from pallet boards and sized for folded fabric and yarn, paint the inside of each cubby a flat matte color chosen for what lives there, warm white behind denim and black thread, deep navy or charcoal behind cream lace and pastel yarn.
Skip gloss, which throws glare that flattens color. Leave the exteriors natural so the paint reads as a deliberate reveal. Crafters with big mixed collections of yarn, fabric, and paint gain the most. Cubby-style storage pairs well with these IKEA Kallax craft room storage ideas.
Pro Tip: Paint a test swatch on a hardboard offcut and prop it inside the cubby with your real supplies for a day. Check it under the same light you’ll work in; shed light shifts a color more than a paint chip suggests.
11. A Window-Side Counter for True-Color Matching
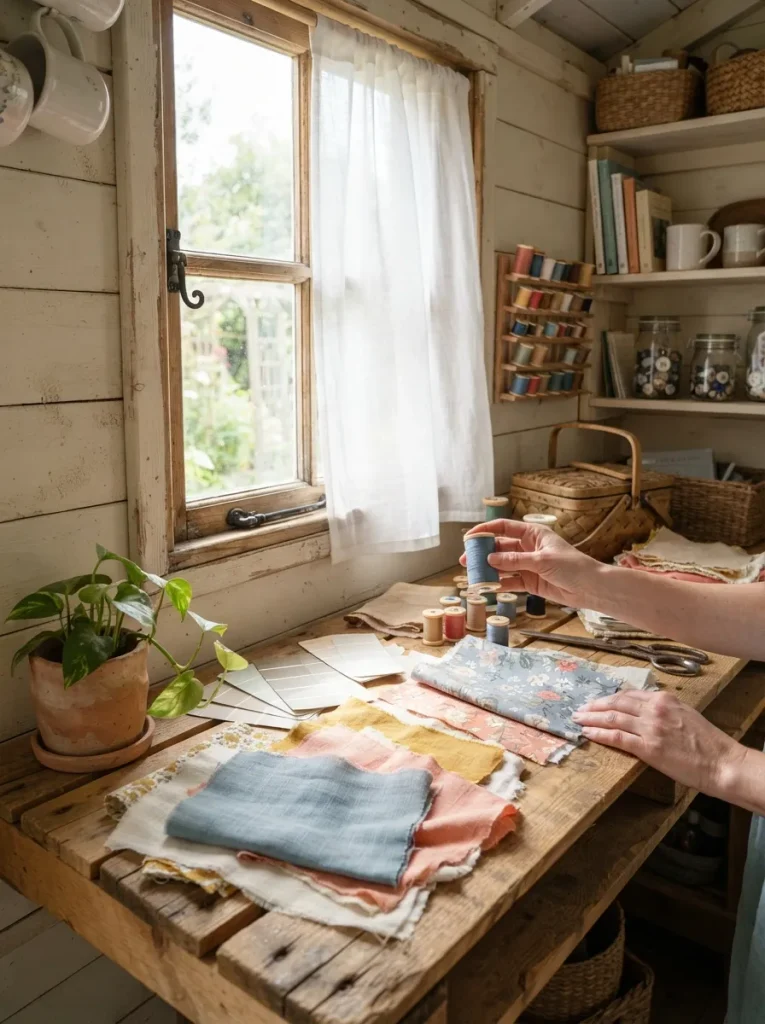
Most craft tables get pushed against the darkest wall, exactly where color judgment goes wrong. A narrow counter built from pallet planks and fixed beneath the shed window sits in daylight, which shows thread, paint, and fabric colors more truthfully than most bulbs.
Position it so window light arrives from the side opposite your dominant hand, and your hand stops shadowing the work. Hang a sheer curtain to soften midday glare, and keep fiber storage out of direct sun, since ultraviolet light fades yarn and fabric over time. Quilters, embroiderers, and painters who match colors constantly will feel the difference first.
12. Pegboard Set Into a Pallet Frame
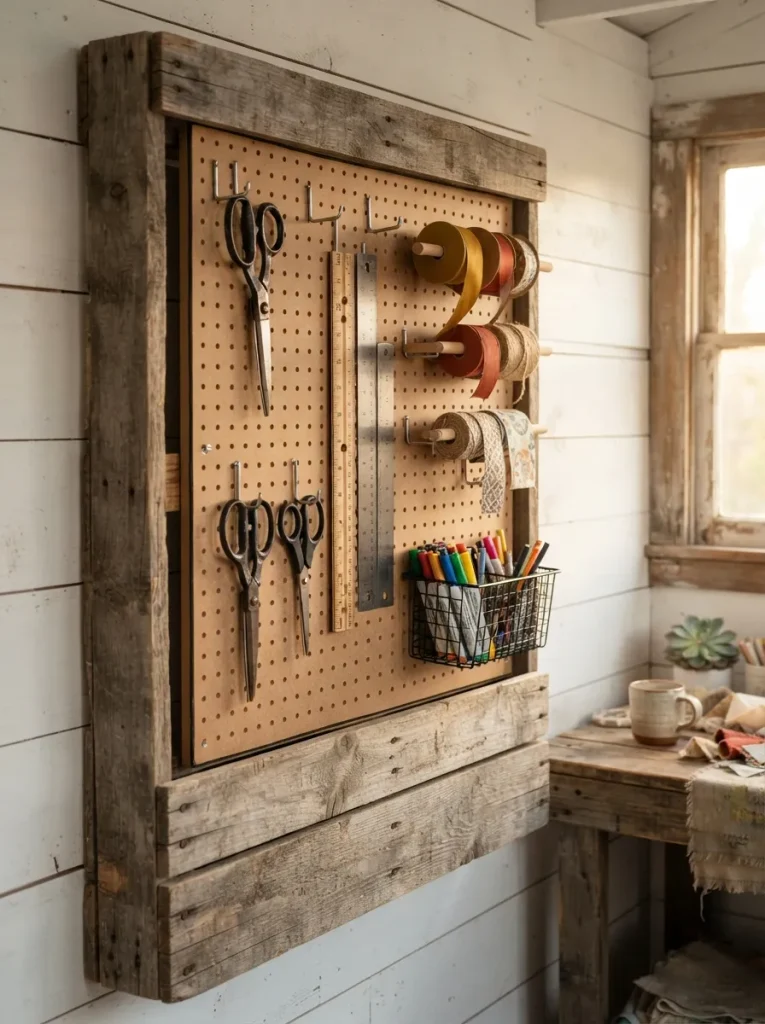
Cut a pegboard panel to sit inside a frame built from pallet boards, then mount it on spacers so hooks have room to seat behind it. Offcuts from the pallet slats work well as spacers, and the rough frame turns a plain panel into something worth looking at.
Arrange the hooks before committing: daily tools at shoulder height, scissors and rulers within easy reach, seldom-used items above. Trace each tool’s outline with a marker so a missing pair of scissors is obvious at a glance. It’s a strong fit for crafters with lots of small tools and no drawer space.
Important: Hole size and spacing differ between pegboard styles, so hooks from one brand don’t always seat in another’s panel. Buy the panel and hooks together, or measure a hole and its spacing before you shop.
Shop This Look
| Product |
|---|
| Pegboard panel |
| Assorted pegboard hooks and holders |
| Small pegboard baskets |
Insider Observation
A detail that changes the result more than it should: wiping the wood with a damp cloth before the final sanding pass. Finer grit isn’t what stops pallet wood from snagging fabric, because moisture raises the grain, and a shed that turns humid stands a fresh crop of fibers back up on a surface that passed the stocking test the week before. Sand to 180, wipe damp, let it dry fully, sand lightly again, then seal.
Up next: a rolling cart, and the arithmetic on four small wheels that decides whether it glides or gives out.
13. A Slim Rolling Craft Cart on Locking Casters
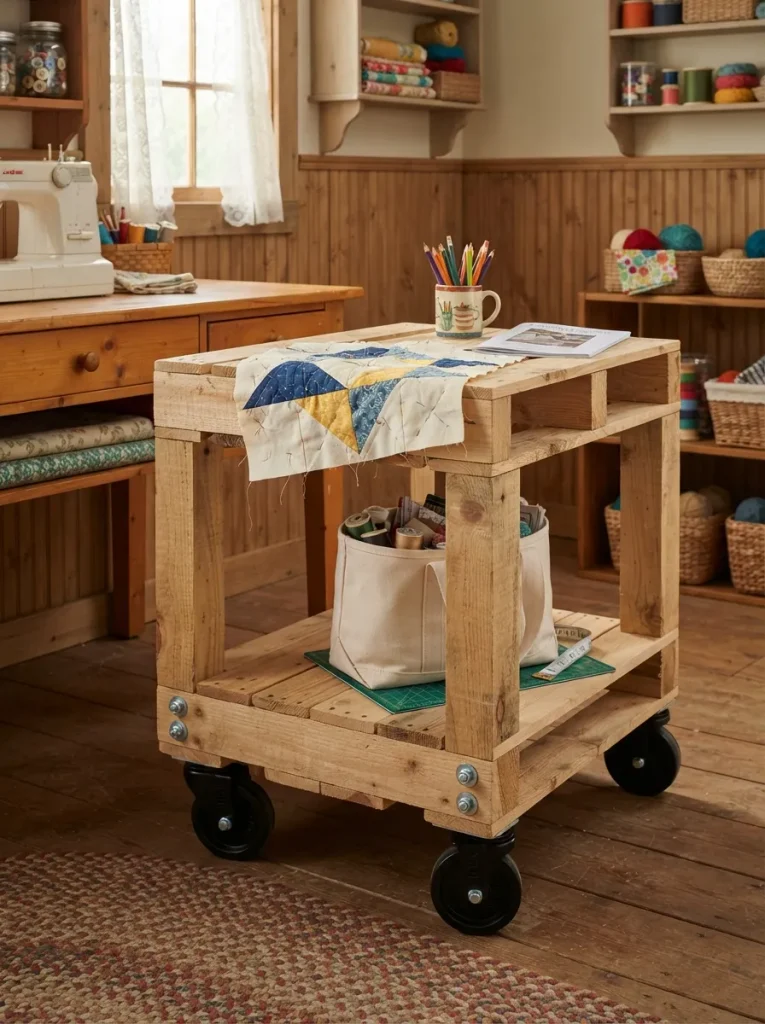
A slim two-shelf cart parked at the desk, loaded with whatever project is live, then rolled against the wall when the shed needs the floor back. Cut a pallet to the width you want, add a lower shelf from pallet boards, and fix a metal bar to one end as a push handle.
Bolt the casters through the stringers rather than into thin deck boards, where screws pull loose under load. Crafters juggling several projects at once get the most from it, since each project keeps its own shelf.
Warning: Size casters by dividing the total load by three, not four. On an uneven shed floor one wheel tends to lift, and the other three carry the weight. Check each caster’s rated capacity before you buy.
Shop This Look
| Product |
|---|
| Locking swivel casters, set of four |
| Metal towel bar for the push handle |
| Carriage bolts with washers and lock nuts |
14. A Vertical Drying Rack for Wet Paint and Prints
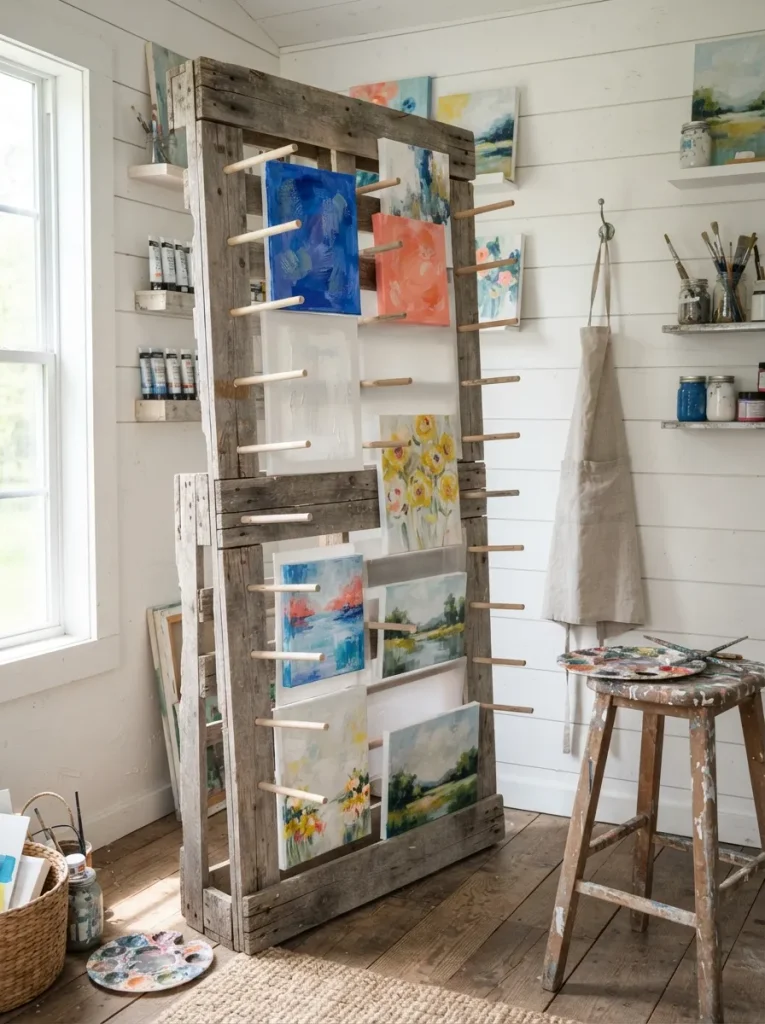
Wet work needs air, and air needs space, which a small shed lacks on the floor but has going up. Stand a pallet upright and fit removable dowels into drilled holes to make adjustable levels, each pair of dowels holding one canvas or sheet.
Leave a hand’s width between levels so pieces don’t touch, and keep the rack a few inches off the wall so air can move behind it. Move the dowels to change spacing for different sizes. Painters, printmakers, and anyone who dries pieces overnight get the floor back.
How to Start Your She-Shed Pallet Furniture Transformation
Start here: the sanded desk from idea 1, built from a single HT-stamped pallet. It anchors everything else because the sand, wipe, and seal routine you learn on it repeats on every other piece in the shed, and it gives you a work surface for the rest.
One beginner error breaks more builds than any other: assembling without a dry fit. Pallet boards vary in thickness, and a single board sitting slightly proud turns a flat top into a table that nudges pins and beads across the surface. Clamp everything together, or use a couple of temporary screws, and check with a straightedge before the final fastening.
Three tools handle most of this build list: a flat pry bar for taking pallets apart without splitting the boards, a sanding block with 80-, 120-, and 180-grit sheets, and a stud finder for anything that mounts to a wall. Each typically lands well under $50.
A single piece, sanded and sealed, fits in a weekend, with finish drying time spread across the days around it. The whitewashed table, cubby paint, and wall-mounted builds take longer because of curing and stud work. Plan roughly $30–$100 for a starter piece’s finish and hardware, pallets excluded, and roughly $150–$400 across a full room once you add lights, pegboard, casters, and cushions. Both ranges are approximate and swing with how many pallets you source free. A full craft room is a few months of weekends, not a single push.
Ready to Create Your Dream She-Shed Craft Room?
These 14 she-shed pallet furniture ideas for your craft room cover the whole range: work surfaces and light, storage and layout, color that helps you find things, and pieces that fold, roll, or stand straight up to save floor. None of it has to happen at once. One sanded desk in one weekend already makes the shed work better than it did on Friday.
Today, pick a pallet and read its stamp; HT is the one worth taking home. Once the pieces are in, the room should feel like an extension of your hands, with everything in reach and nothing snagging. Save the ideas you’d build first so they’re waiting on the weekend you’re ready.
Keep Exploring
- 12 She-Shed Craft Room Lighting Ideas for Long Evening Projects
- 13 Rustic Pallet Wall Ideas for a Cozy Craft Shed
- 11 Craft Room Organization Ideas for Sewing, Yarn, and Paper Supplies