10 Last-Minute Halloween Decor Ideas You Can Set Up in Under an Hour
The gap between an empty living room and a properly spooky one isn’t time it’s knowing which five moves read as decorated. Ten last-minute Halloween decor ideas make up this roundup, each one doable in under an hour with things you probably already own.
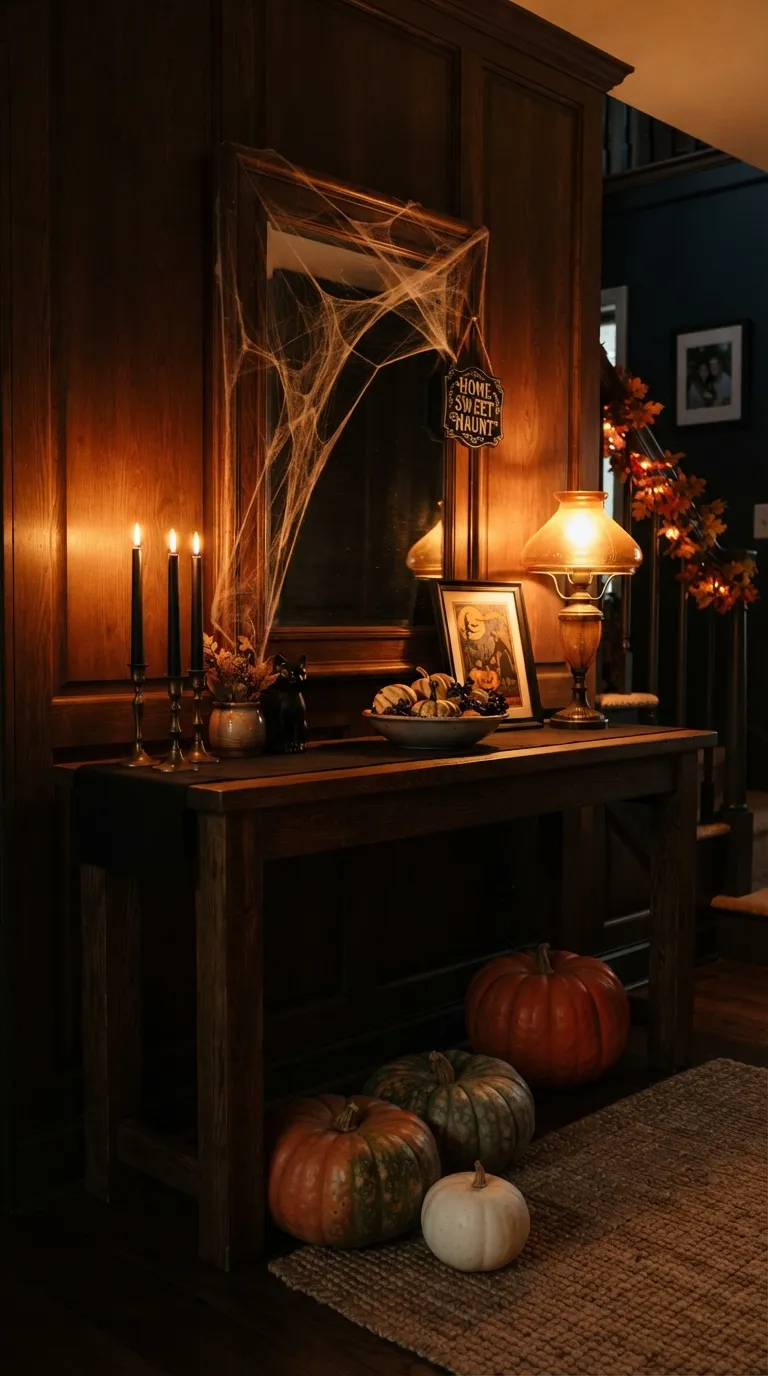
Picture warm, low light pooling in doorway corners instead of harsh overhead glare. A stretch of gauzy cobweb catches lamp light instead of a plastic skeleton propped in the corner. Deep orange, aubergine, and matte black show up in small, deliberate doses not head to toe. Spooky doesn’t take a shopping trip; it takes five smart moves.
Quick Navigation
- Why Last-Minute Halloween Decor Makes Such a Difference
- The Ideas, Quickest Wins First
- How to Start Your Halloween Decor Transformation
- Ready for a Halloween That Feels Pulled Together?
Why Last-Minute Halloween Decor Makes Such a Difference
Last-minute Halloween decor works best when it leans on atmosphere instead of accumulation lighting, texture, and a tight color story do more in twenty minutes than a bag of dollar-store trinkets does in two hours.
Warm bulbs swapped for amber ones, a length of stretched cobweb catching that light, and one or two grouped vignettes near the entry carry most of the visual weight. It works in apartments and studios just as well as full houses, since the technique scales down instead of requiring more square footage. Start with lighting it’s the one change every other idea in this list depends on.
| Best starting point | Swap your entry or living room bulbs for warm amber ones |
| Biggest impact area | Front door and entryway — the first thing guests see |
| Budget to start | Under $30, using items already in the house |
| Time to complete | 45–60 minutes for the full look |
The Ideas, Quickest Wins First
1. Swap Your Entry Bulbs for Warm Amber Light
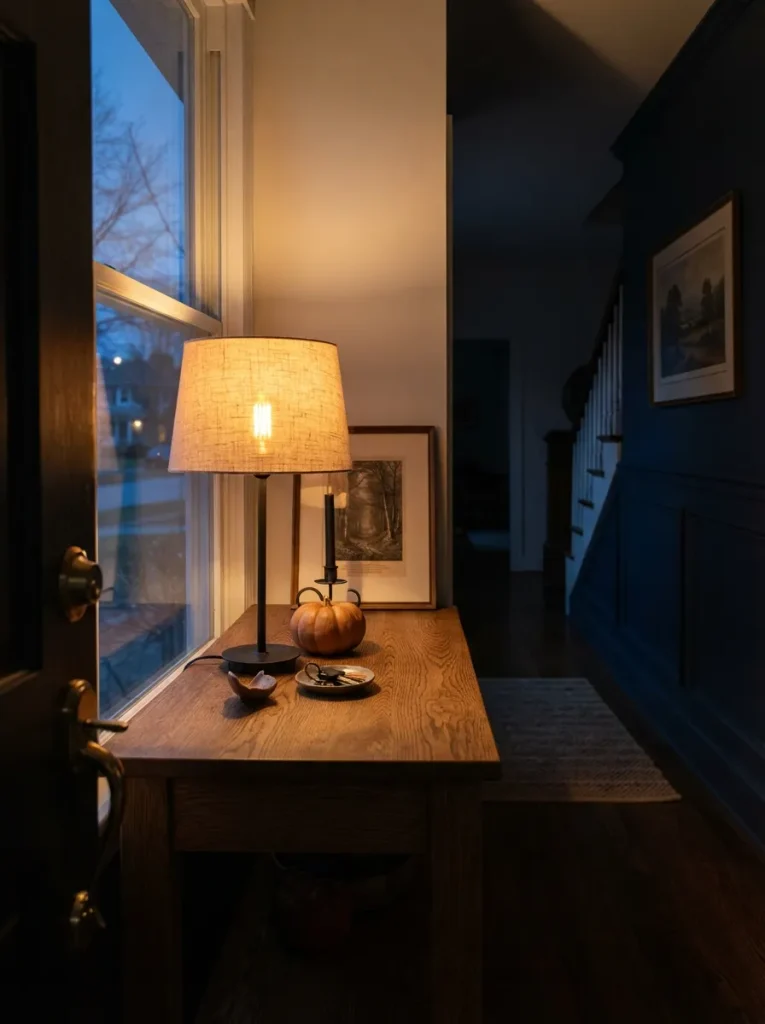
Unscrew whatever’s in your entry or porch fixture and drop in a warm amber or “Halloween orange” LED bulb most hardware stores stock them seasonally, and a 2700K warm-white bulb does nearly the same job if that’s already what you have.
Color temperature does the actual work: light above 3000K reads clinical, while anything below reads candlelit and faintly unsettling once the sun drops. Pair the swap with one lamp turned low instead of an overhead left on full a single low source throws longer shadows than a bright ceiling fixture ever will.
This is the fifteen-minute change that makes everything else on this list look more intentional, since it sets the mood the rest of the space gets judged against. Renters can use it exactly the same way owners can, since nothing about it is permanent. For the porch side of the same space, our front door Halloween ideas picks up from here.
Pro Tip: Battery-powered flicker bulbs mimic candlelight without an outlet nearby useful for porch fixtures that aren’t wired to a switch.
Shop This Look
| Product |
|---|
| Warm amber LED bulb (2700K, “Halloween orange”) |
| Table lamp with fabric shade |
| Small decorative pumpkin |
2. Cut Black Paper Silhouettes for Your Door or Window Glass
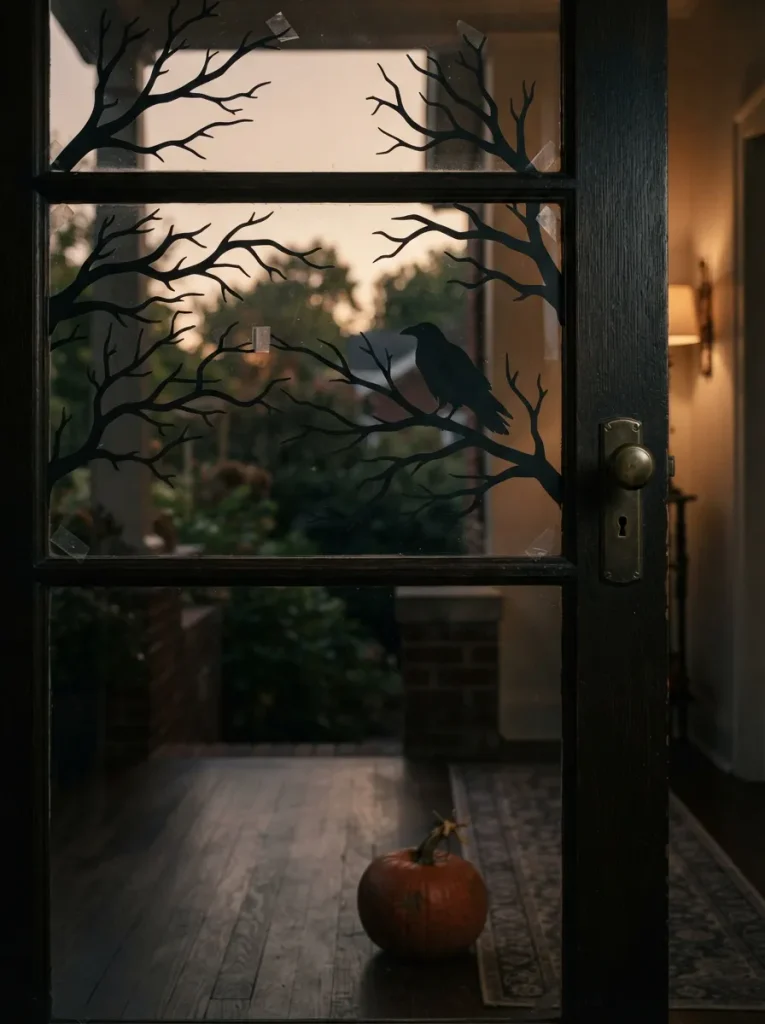
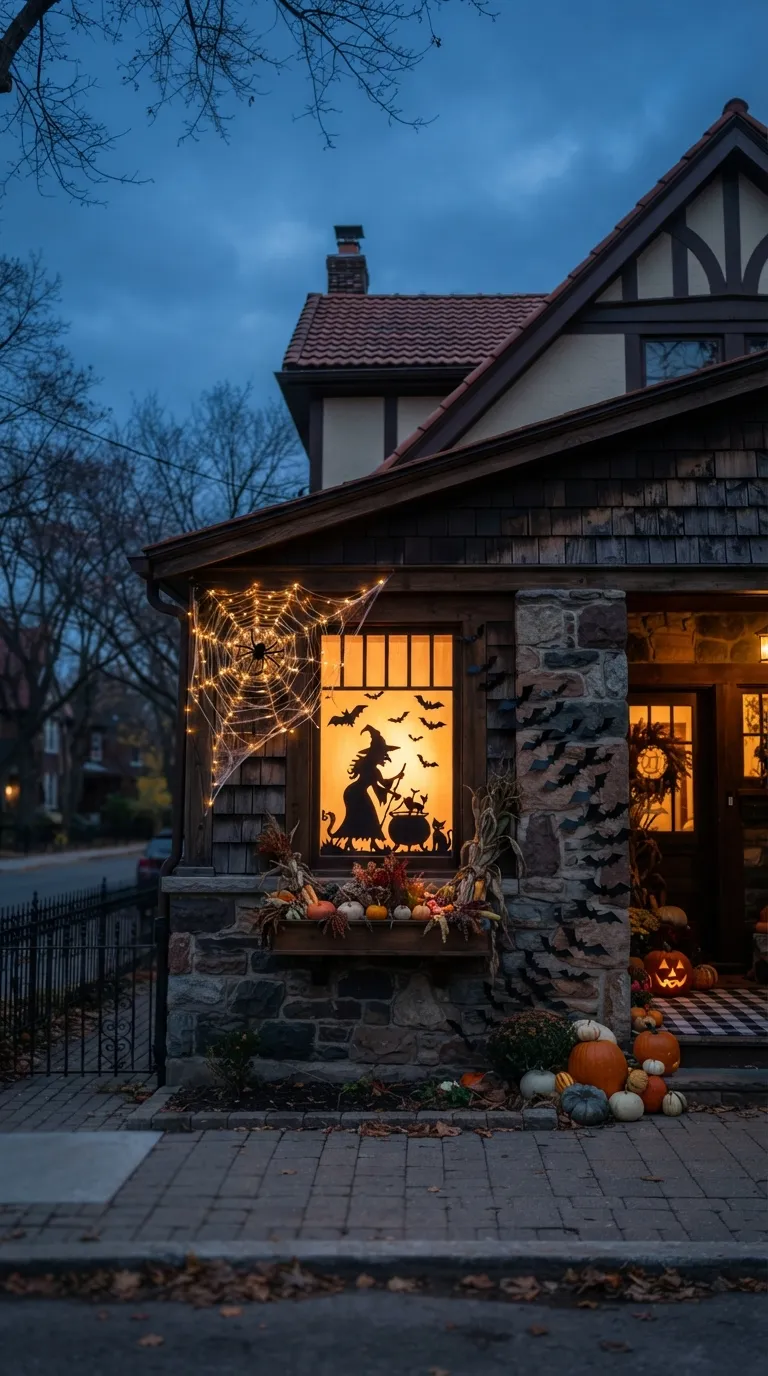
Most people head straight for plastic window clings, and most plastic window clings look exactly like what they are by the second week of October. Black cardstock or kraft paper does the same job for less money and reads as intentional instead of mass-produced, especially once it’s backlit by whatever’s happening outside after dark.
Sketch a simple shape bare branches, a crow, a cat’s silhouette straight onto the paper, cut it out, and tape it flat against the inside of the glass with the smooth side facing out. Skip fine detail; from the street, a bold, simple outline reads clearer than an intricate one ever does.
This works on any glass surface in the house, not just the front door a bathroom or bedroom window catches the same backlit effect. For more window-specific looks beyond this one, our Halloween window decor guide has a full set.
Mistake to Avoid: Taping paper to the outside of the glass instead of the inside it curls and peels within a day of any humidity or rain.
3. Group What You Already Own Into One Tight Vignette
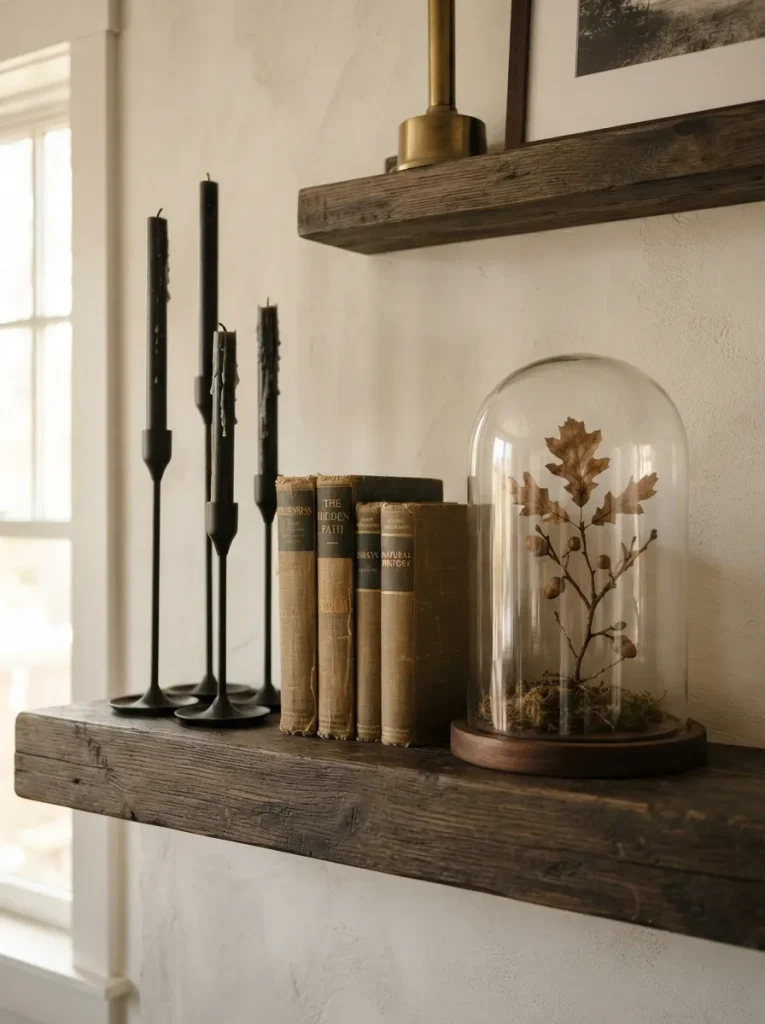
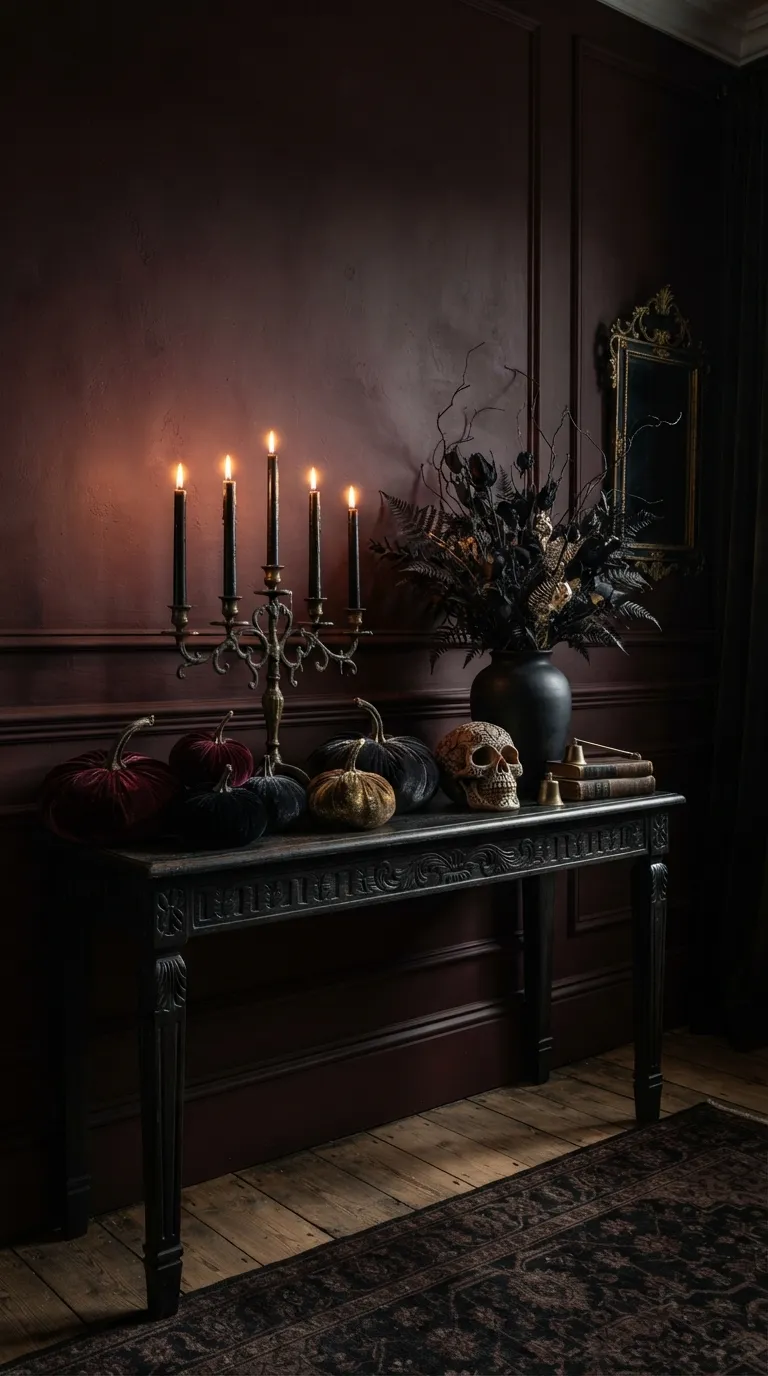
This one’s for anyone who doesn’t want to buy a single new item. Walk through the house and pull anything black, glass, or slightly aged-looking candlesticks, an old cloche, dark hardcover books, a ceramic vase you never use and cluster it on one surface: mantel, console, or the top of a bookshelf.
The grouping rule that matters is odd numbers and varied height, since three or five objects at different heights reads as a curated collection while two matching pieces read like decorating that got interrupted.
Stack the books flat, set something on top of them to break the horizontal line, then tuck the tallest candlestick toward the back so nothing blocks anything else. It takes ten minutes once everything’s pulled, and it costs nothing beyond a walk around your own house. For a broader set of ideas along the same lines, our full Halloween decor roundup is worth a look.
Shop This Look
| Product |
|---|
| Black taper candlestick holders, set of 3 |
| Glass cloche display dome |
| Dark hardcover decorative books |
Next up: the one color rule most people get backwards when they try to “theme” a room for Halloween.
4. Swap in Halloween-Toned Textiles, Nothing Else
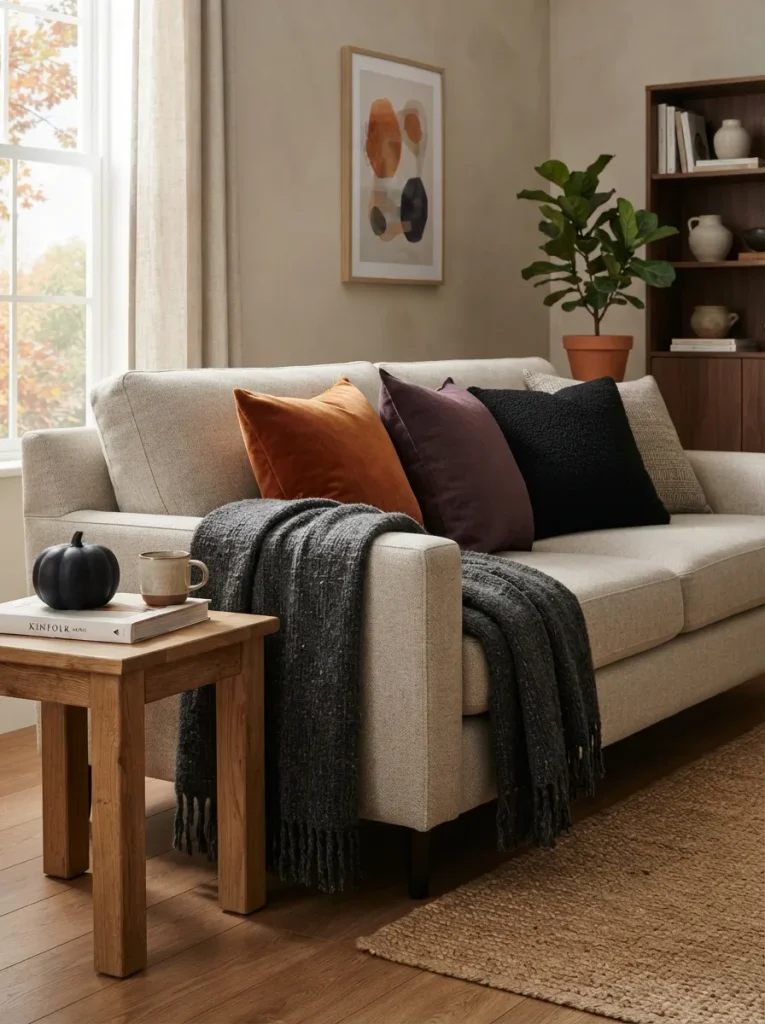
A room can look seasonal without a single Halloween-specific object in it, just by changing what color is sitting on the furniture. Swap your usual throw pillow covers for deep orange, aubergine, or matte black ones, add one heavier-textured throw blanket in charcoal or rust, and leave everything else in the room exactly as it is.
Three colors is the ceiling here pick orange, black, and one deep accent (aubergine, forest green, or oxblood work equally well), and stop there, since a fourth color tips the room from “seasonal” into “costume party.” Renters get the most out of this one, since pillow covers slide off in under a minute each and nothing about the swap is permanent. The same trick works in literally any room in the house, too, not just the entry or living room.
Important: Velvet and matte-finish textiles read “richer” under warm lighting than glossy or satin fabrics worth factoring in if you’re also doing the bulb swap from idea one.
5. Stretch Cobweb Over a Mirror Instead of a Corner
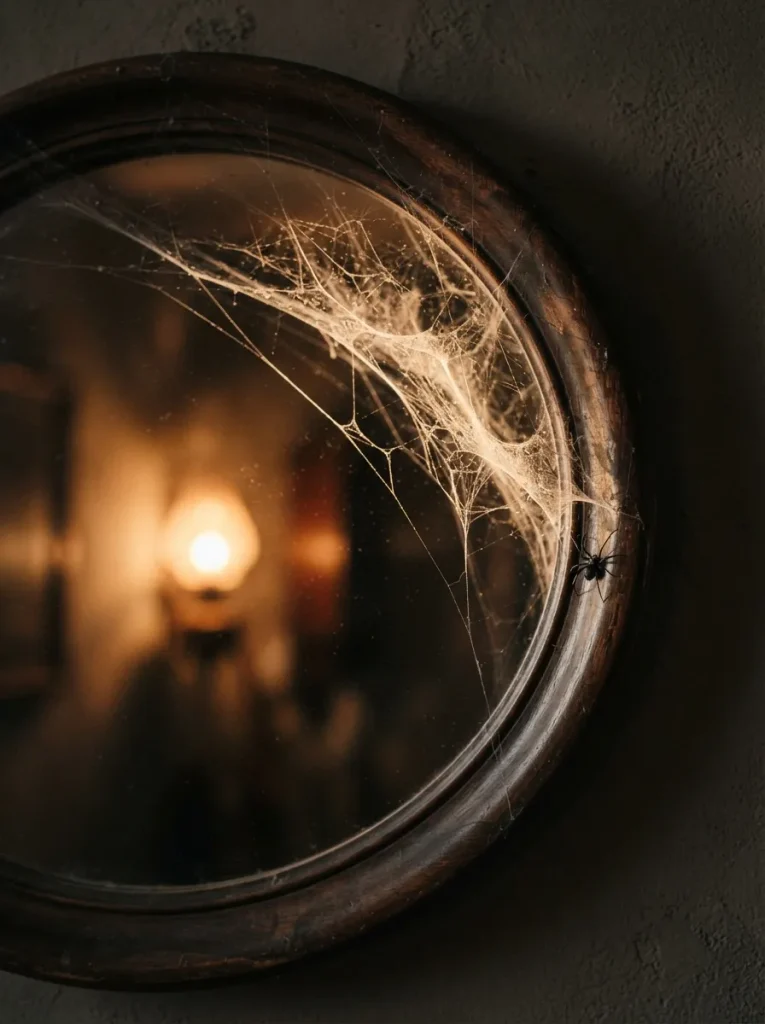
What it looks like: A faint web catching and scattering light instead of sitting flat and dusty in a corner nobody looks at.
Why it works: Reflection multiplies light. A mirror bounces whatever’s behind the cobweb back into the room, so material that looks flat on a wall looks lit from within once it’s draped across glass the same principle stage lighting designers use with scrims.
How to copy it: Pull apart stretch cobweb material until it’s thin enough to see through in patches, then drape it loosely over one corner of a mirror, never the whole surface, or the reflection stops doing any work. Anchor the top edge with a small piece of tape on the frame, not the glass.
Who it’s for: Anyone with a mirror already hanging somewhere visible most rooms in most houses. For more on getting the most out of a mirror’s placement generally, our bathroom mirror ideas covers the same reflective-light principle.
Small-Space Tip: In a studio or small apartment, use an entry or bathroom mirror instead of a living room one the effect reads stronger in a smaller, dimmer space.
Shop This Look
| Product |
|---|
| Stretch spider web decor material |
| Small black spider ornaments |
| Round wall mirror with dark wood frame |
6. Turn a Console or Bar Cart Into an Apothecary Station
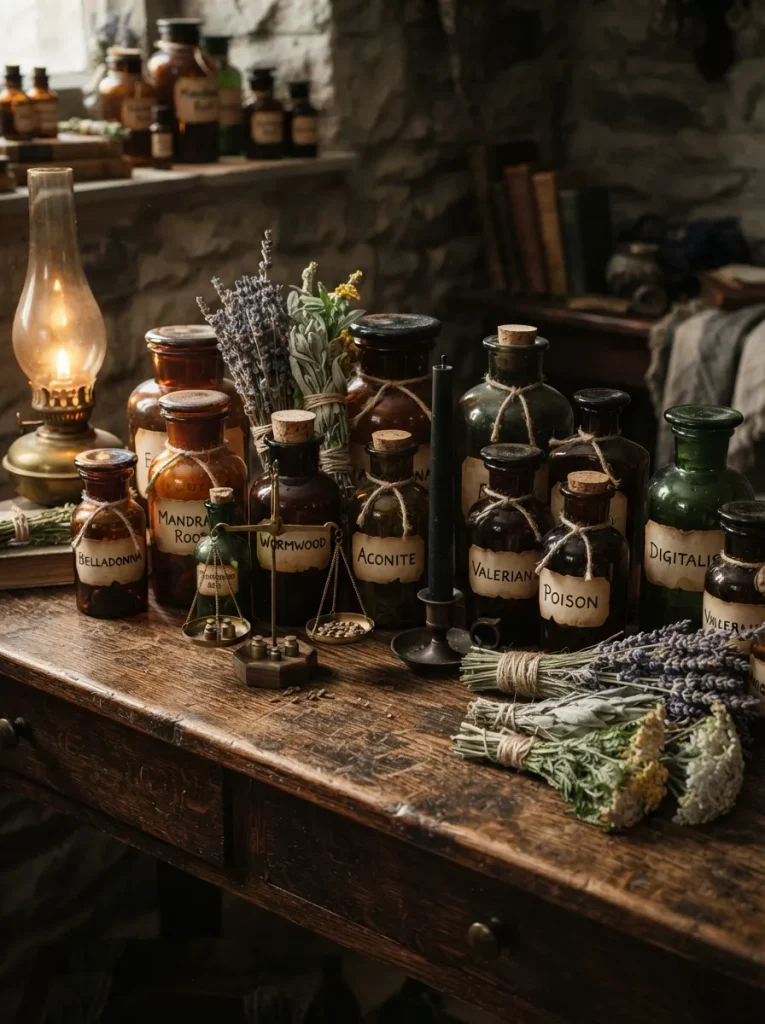
Pull every amber or dark glass bottle out of your kitchen and bathroom old spice jars, empty wine bottles, vintage medicine bottles if you’ve got them and cluster six to ten of them on a console table or bar cart.
Write vague, ominous-sounding labels on kraft paper tags and loop them around the bottle necks with twine; the handwritten look matters more than what the labels actually say, since a printed label reads costume-store and a handwritten one reads collected over time.
Add a bundle of dried herbs from the kitchen tied with the same twine, and if a non-digital kitchen scale is on hand, set it among the bottles for height variety. Group everything the same way you’d group candlesticks tallest toward the back, nothing blocking anything else. This idea has the most staying power once November hits, since it reads as a plant-and-herb display the moment the labels come off.
Budget Version: Skip buying anything thrifted spice jars and a roll of masking tape cover this entire idea for under $5, since the bottles you already have are doing most of the visual work.
Shop This Look
| Product |
|---|
| Amber apothecary glass bottles, set |
| Kraft paper gift tags |
| Dried herb bundle |
Next: the fix for garland that looks store-bought no matter how much of it you buy.
7. Layer a Garland Along the Staircase Bannister
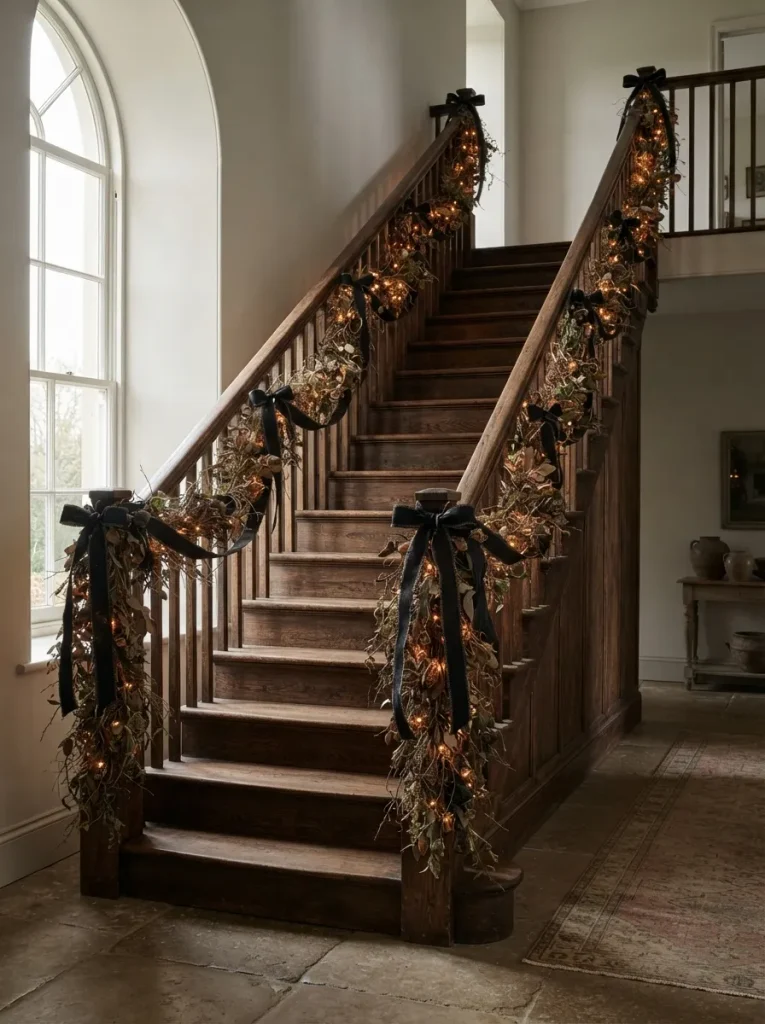
Most garland ends up looking sad by the second day because it’s draped loose over the bannister with nothing holding the swag shape, so it slides and flattens the moment someone brushes past it.
Anchor a faux vine or leaf garland at every newel post first, using twist ties or garden wire looped around the post rather than tape, then let the garland swag naturally between anchor points instead of pulling it tight. Tight garland reads flat; a slightly loose swag with real depth reads intentional.
Weave a strand of warm fairy lights through it while you’re at it, since the light catches the texture the same way it does with the cobweb-and-mirror idea earlier in this list. Anchor points matter more than the amount of garland itself two full bundles anchored well beat four bundles anchored loosely, every time.
Pro Tip: Measure the distance between newel posts before buying garland most pre-made bundles run six feet, and a staircase with tighter post spacing needs less material than it looks like from the box.
8. Decorate an Apartment Door Without Drilling Anything
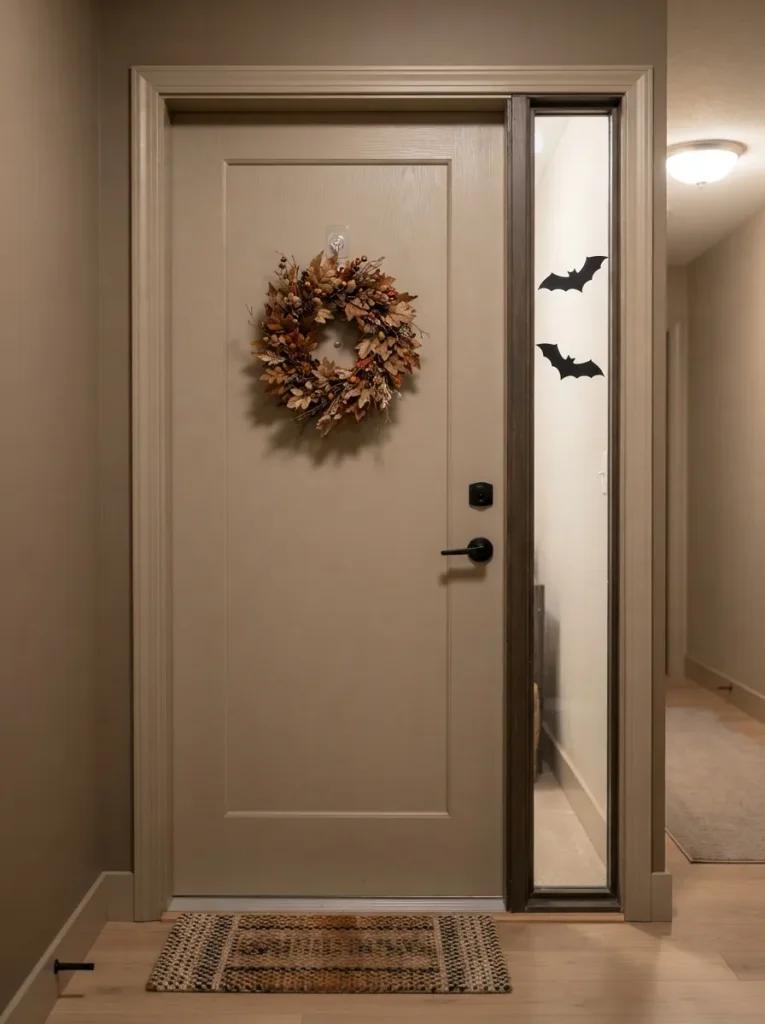
This one’s for anyone in a rental with a strict no-holes policy on the door. A removable adhesive hook rated for at least five pounds holds a lightweight wreath without leaving a mark, and static window clings the kind that stick with water or static rather than adhesive work on any glass side panel without residue.
Skip anything that requires nails, screws, or permanent adhesive strips, even the “damage-free” kind, since apartment doors get inspected more closely than any other surface in the unit. The whole setup comes down in under two minutes at the end of the season, which matters as much as how fast it goes up. If no-drill decorating is a recurring problem in other rooms too, our IKEA Kallax no-drill hacks covers the same renter-friendly approach applied to shelving.
✅ Door Decor, Start to Finish:
- [ ] Clean the door surface where the hook will go
- [ ] Apply the adhesive hook and let it set for the time listed on the packaging
- [ ] Hang the wreath once the hook has fully bonded
- [ ] Apply static clings to the glass panel, smoothing out air bubbles
OBSERVATION
The thing nobody mentions: more decorations almost always read as less finished, not more. A room with four confident moves one lighting change, one textile swap, one grouped vignette, one graphic silhouette photographs and reads more “done” than a room with fifteen scattered trinkets fighting for attention, because the eye needs somewhere to land instead of somewhere to search. If a space feels incomplete after finishing five or six of the ideas here, the fix is almost never a sixth idea it’s making one of the first five slightly bigger or bolder.
9. Group Candles by Height, Not by Type
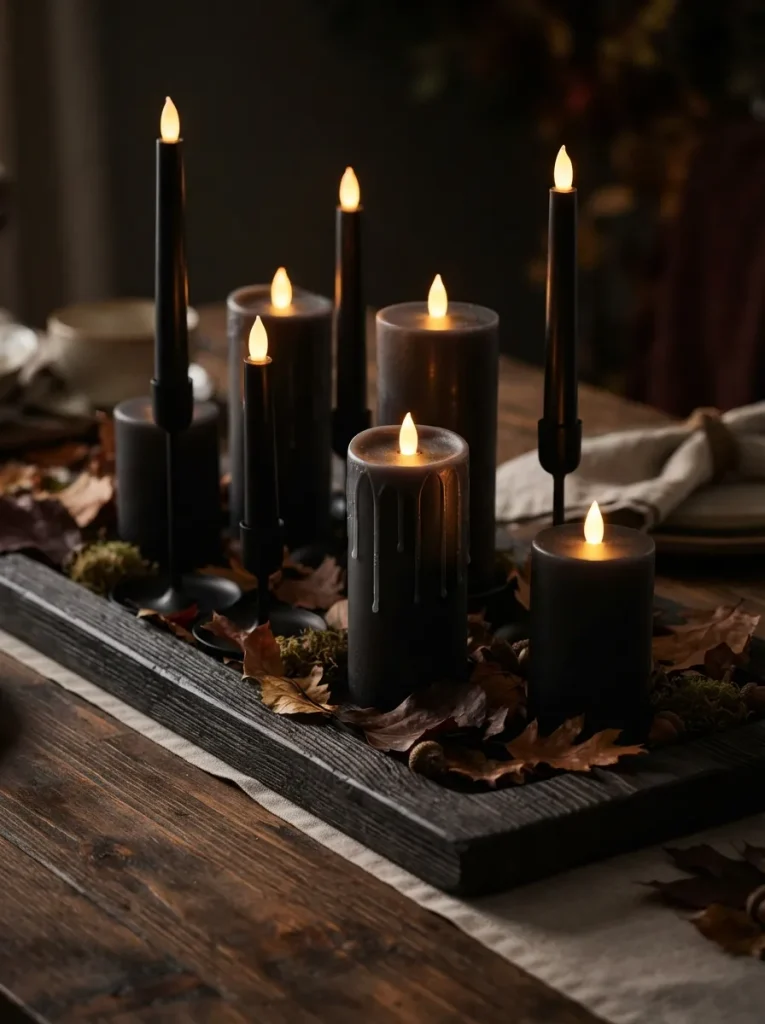
What it looks like: A cluster of candles at staggered heights instead of one centerpiece candle standing alone in the middle of the table.
Why it works: Height variation creates the same visual rhythm as the book-and-candlestick vignette earlier in this list the eye reads a cluster as considered rather than an afterthought, especially once the flames, real or LED, start casting shadows against each other.
How to copy it: Mix taper and pillar shapes on a single tray, grouping three to five at different heights, with the tallest slightly off-center rather than dead-center. Flameless LED candles get a wax-drip look from a quick coat of white craft paint dabbed down one side before grouping, mimicking real burn-down with no open flame.
Who it’s for: Anyone with kids, pets, or a table close to curtains, where real flame isn’t the safer option. For a moodier, more elevated take on this same candle-cluster idea, our luxury Halloween decor guide pushes the concept further.
Warning: Real taper candles left unattended near stretched cobweb material (idea five) or a dried garland (idea seven) is a genuine fire risk keep open flame at least a foot from anything flammable, or swap to flameless LEDs in those rooms specifically.
Shop This Look
| Product |
|---|
| Flameless LED taper candles, black |
| Flameless LED pillar candles, black |
| Wood serving tray |
Last one: the tablescape trick that uses stuff already sitting in your pantry.
10. Build a Tablescape From What’s Already in the Pantry
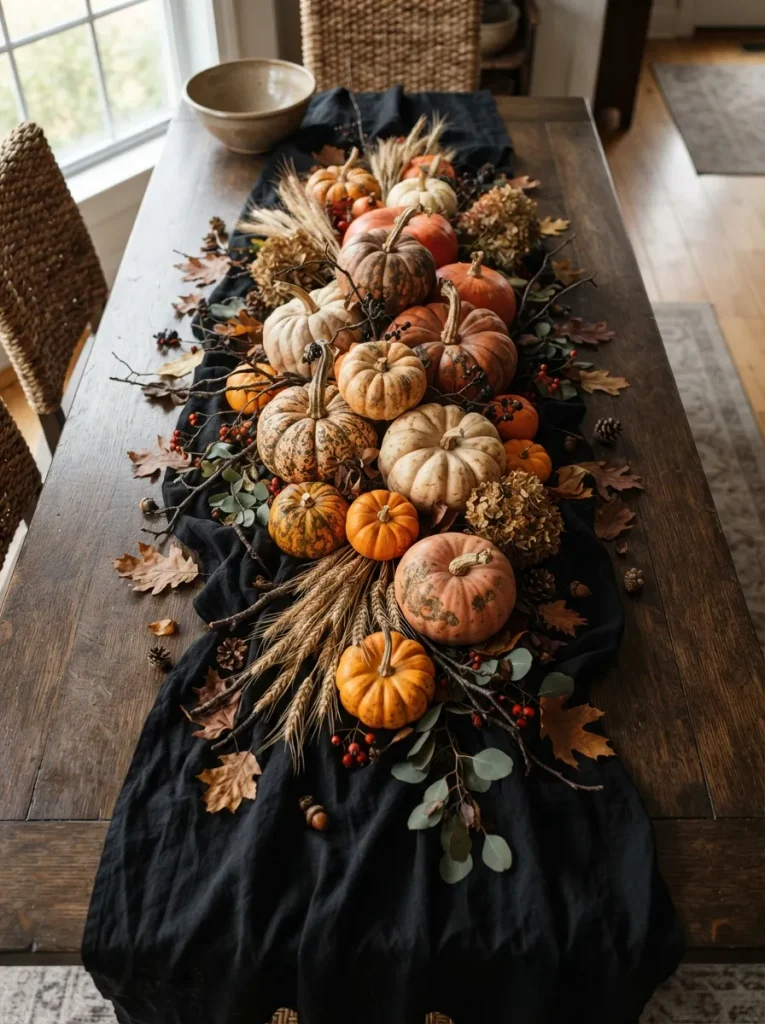
Asymmetry is the principle most centerpieces get wrong a single pumpkin dead-center on the table reads like a prop, while the same pumpkin pushed two-thirds down the runner, next to something taller and something lower, reads like it was styled.
Drape a black tablecloth, flat sheet, or even a dark towel down the center of the table as a runner, then cluster real or faux pumpkins with dried branches or wheat stalks from the pantry or yard, keeping everything off-center and at three different heights.
Odd numbers again: three pumpkins read considered, two read like you ran out. If real pumpkins are part of the mix, plan this as a same-day or next-day project rather than a set-it-and-forget-it one, since they don’t stay fresh indefinitely. For more ways to style a dining table beyond Halloween specifically, our elegant dining room ideas covers the same asymmetry principle.
Important: Real pumpkins left on a runner start sweating and staining fabric after about three to four days indoors set a folded towel underneath if you’re not swapping the runner out before then.
How to Start Your Halloween Decor Transformation
Start here: the lighting swap from idea one. Every other idea on this list photographs and reads better under warm, low light, so it’s the one change that makes the rest of the room’s effort show.
The most common fixable mistake is buying too much and placing it too evenly one pumpkin on every surface, cobwebs in every corner which flattens the whole room into background noise instead of a few moments guests actually notice. Concentrate everything into two or three zones (the entry, one seating area, the dining table) and leave the rest of the house alone; a half-decorated room with strong zones beats a fully decorated room with none.
Three inexpensive items cover what’s still missing after the free ideas: a roll of black ribbon, a bundle of faux ivy garland, and a bag of dried Spanish moss for tucking into vignettes. None of these repeat what’s already listed above, and all three stretch across more than one idea if plans change mid-decorating.
A single zone just the entry takes about twenty minutes and costs close to nothing if it’s built from items already in the house. The full ten-idea version realistically takes forty-five minutes to an hour and stays under $50 total, even shopping for every product listed above, since most of what’s needed is small and reusable next year. Weekend-length Halloween projects exist, but nothing on this list requires one.
Ready for a Halloween That Feels Pulled Together?
Ten ideas, and not one of them requires a full weekend just a lighting swap, a few textile changes, one tight vignette, and the confidence to stop before the room gets cluttered. That’s the real promise of last-minute Halloween decor: starting small still counts, and even just the entry bulb swap plus one grouped vignette on the mantel reads as finished the moment someone walks through the door.
Pick one idea to knock out today the amber bulb swap takes fifteen minutes and changes how every other room in the house reads after dark. The goal isn’t a haunted house, it’s a home that feels warm, a little moody, and clearly cared for once the sun goes down. Save whichever ideas fit the rooms guests see first, since those are worth revisiting before the next item on the to-do list gets in the way.
Keep Exploring
- 12 Front Door Halloween Ideas for Every Style of Home
- 15 Halloween Window Decor Ideas Renters Can Use
- 9 Fall Porch Ideas to Set Up Before Halloween Even Starts