15 IKEA Kallax Farmhouse Styling Ideas for Rustic Homes
A farmhouse-style IKEA Kallax is just a boxy cube shelf that’s been talked into acting like a hundred-year-old built-in paint, wood, and the right hardware do all the convincing. Here are 15 ways to get there, from five-minute paint fixes to weekend-long wood conversions.
Picture worn linen baskets tucked into warm white cubbies, morning light catching the grain of a stained oak cap on top. It feels lived-in before it’s even finished a little imperfect, a little sun-bleached, entirely unbothered by trends. Farmhouse doesn’t shout. It just settles in and stays.
Let’s get your Kallax there.
Jump To
- Why Farmhouse Kallax Styling Works So Well
- 15 Farmhouse Kallax Styling Ideas for a Warm, Rustic Home
- How to Start Your Farmhouse Kallax Transformation
- Ready to Create Your Dream Farmhouse Kallax Corner?
Why Farmhouse Kallax Styling Works So Well
Farmhouse styling grew out of real working homes Belgian linen, salvaged pine, and hardware that was built to be handled, not admired. On a Kallax, that translates to warm white or greige paint, unfinished or lightly stained oak, aged brass or black iron pulls, and woven grasses instead of plastic bins.
It’s having a real resurgence right now because it reads as calm and unfussy against a lot of overly polished interiors. It works in small spaces too start with paint and baskets before touching wood or hardware; those two moves alone shift the whole feel.
| Element | Farmhouse (Warm) | Farmhouse (Rustic-Industrial) |
|---|---|---|
| Philosophy | Worn-in comfort over polish | Function-first, built to last |
| Materials | Oak, linen, seagrass, cast iron | Reclaimed wood, galvanized metal, black iron |
| Color palette | Warm white, greige, soft terracotta | Charcoal, natural wood, aged brass |
15 Farmhouse Kallax Styling Ideas for a Warm, Rustic Home
1. The Warm White Chalk-Paint Farmhouse Kallax Everyone Starts With
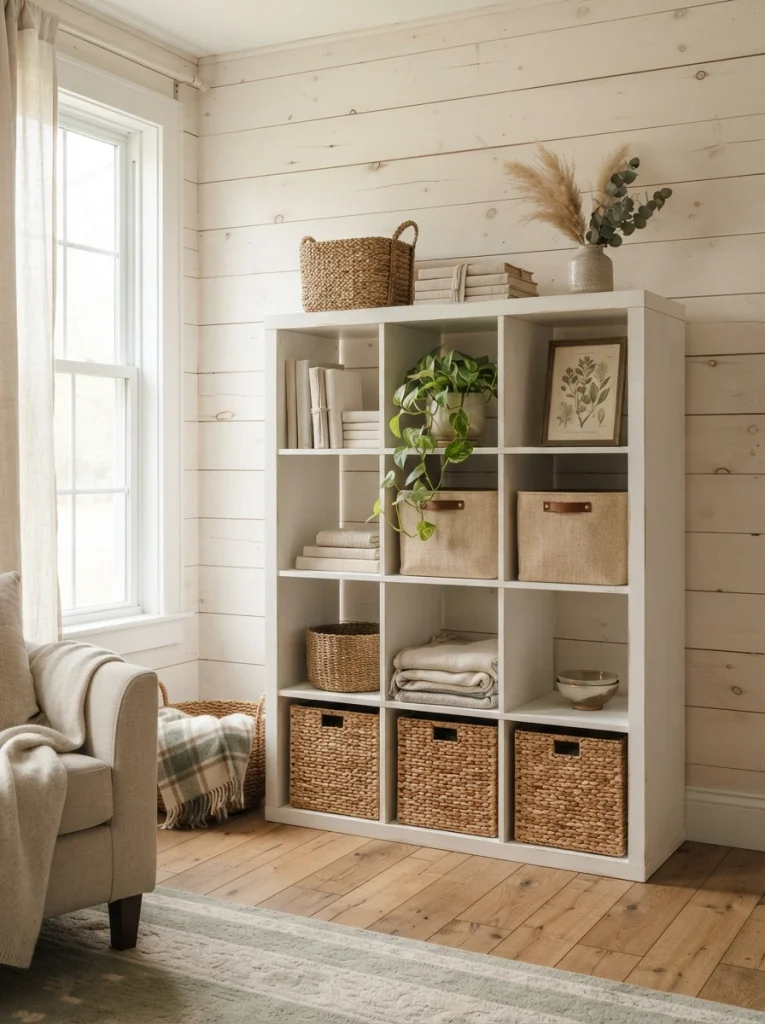
What it looks like: Soft, matte, and a little chalky under the light like it’s always been there.
Why it works: White paint flattens the boxy grid lines of the unit so it reads as furniture instead of storage a classic proportion trick that quiets a strong shape. Chalk-style paint leaves a slightly textured, non-glossy surface, which is what keeps it from looking like a laminate rental piece. It’s also the fastest entry point into the wider Kallax styling approach, which is why most people try it first.
How to copy it: Sand the melamine surface lightly with 220-grit, prime with a bonding primer made for laminate, then apply two thin coats of a chalk-style paint in a warm white not stark white. Finish with a matte wax sealer for durability.
Best for: Renters and first-time painters who want the biggest visual shift for the least skill required.
Budget Version: A quart of chalk-style paint and a wax pot run under $35 total and cover a full 4×4 Kallax with two coats to spare.
2. Woven Seagrass Baskets That Hide the Clutter
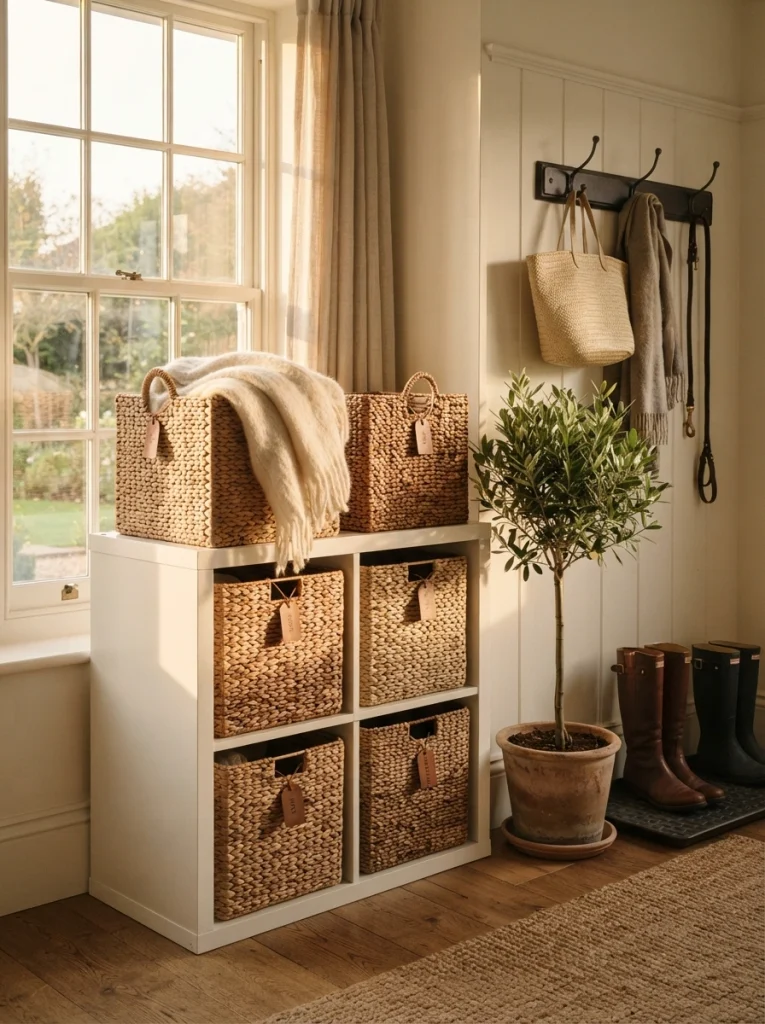
What it looks like: Textured and a little uneven no two baskets sit exactly the same, and that’s the point.
Why it works: Natural fiber baskets soften the hard right angles of the cube grid through texture contrast, the same principle that makes a wood floor read warmer next to a metal chair. They also hide mismatched storage without adding another color to track.
How to copy it: Measure your cube depth first most Kallax cubes run about 13 inches square, so look for baskets sized 12.5 to 13 inches to avoid side gaps. Mix two basket heights per row instead of matching them all; it reads more collected-over-time.
Best for: People who need real storage capacity and don’t want it to look like storage.
Pro Tip: Buy one basket in person before ordering a full set online seagrass color and weave tightness vary more between batches than most listings show.
Shop This Look
| Product |
|---|
| Seagrass storage baskets, cube-fit size |
| Chunky knit wool throw blanket |
| Small artificial olive tree in a woven planter |
| Natural jute rug runner |
| Ceramic labeled basket tags |
3. Shiplap-Backed Cubbies for Instant Farmhouse Depth
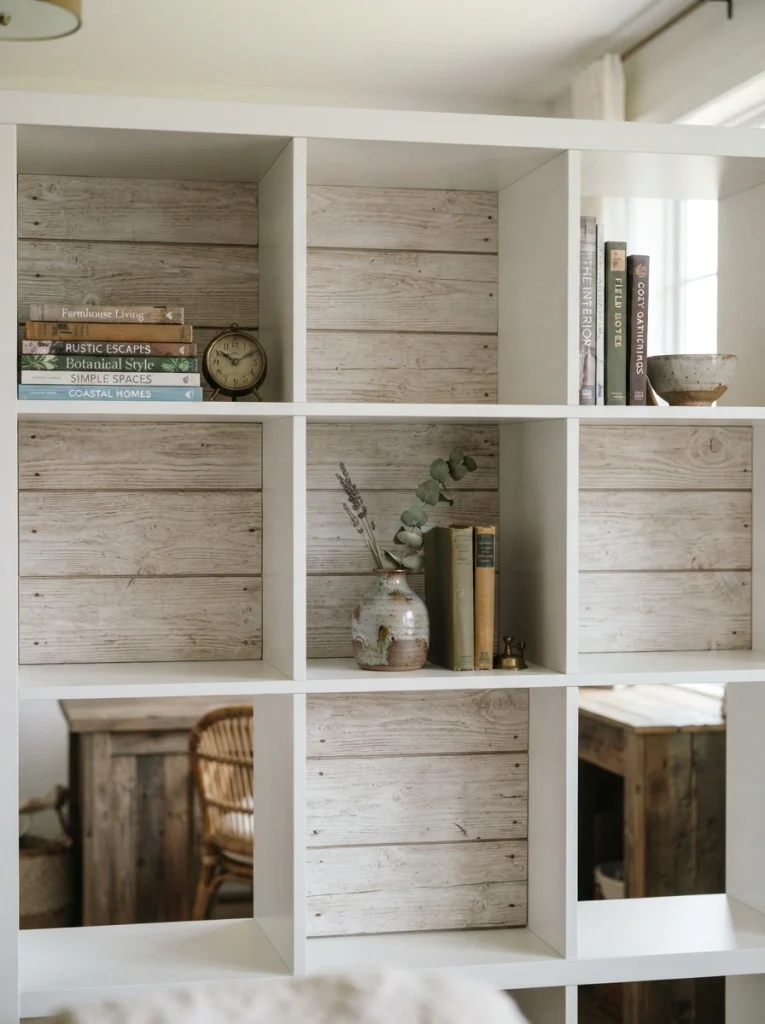
What it looks like: Grooved and a little raw, like the back wall of a real cabin peeking through.
Why it works: Adding a textured backing to open cubbies creates depth and shadow lines a flat melamine back can’t manage it’s a lighting trick as much as a material one, since the grooves catch shadow all day. It also gives your eye somewhere to land instead of straight through to the wall behind. Once the backing’s in, our bookshelf styling guide covers how to layer what goes on top of it.
How to copy it: Cut thin MDF shiplap panels (about ¼ inch thick) to the exact cube depth, whitewash them with a diluted white paint wash so grain still shows through, then glue them into the back of just 3 to 4 cubbies not the whole unit, which reads more curated.
Best for: Anyone who already owns basic tools and wants a built-in look without a full carpentry project.
Important: Full shiplap boards add real weight and eat into your storage depth thin MDF shiplap gives the same look at a fraction of the thickness and weight.
Up next: the lighting trick that makes even a plain shelf look intentional after dark.
4. Warm String Lighting Tucked Into the Top Row
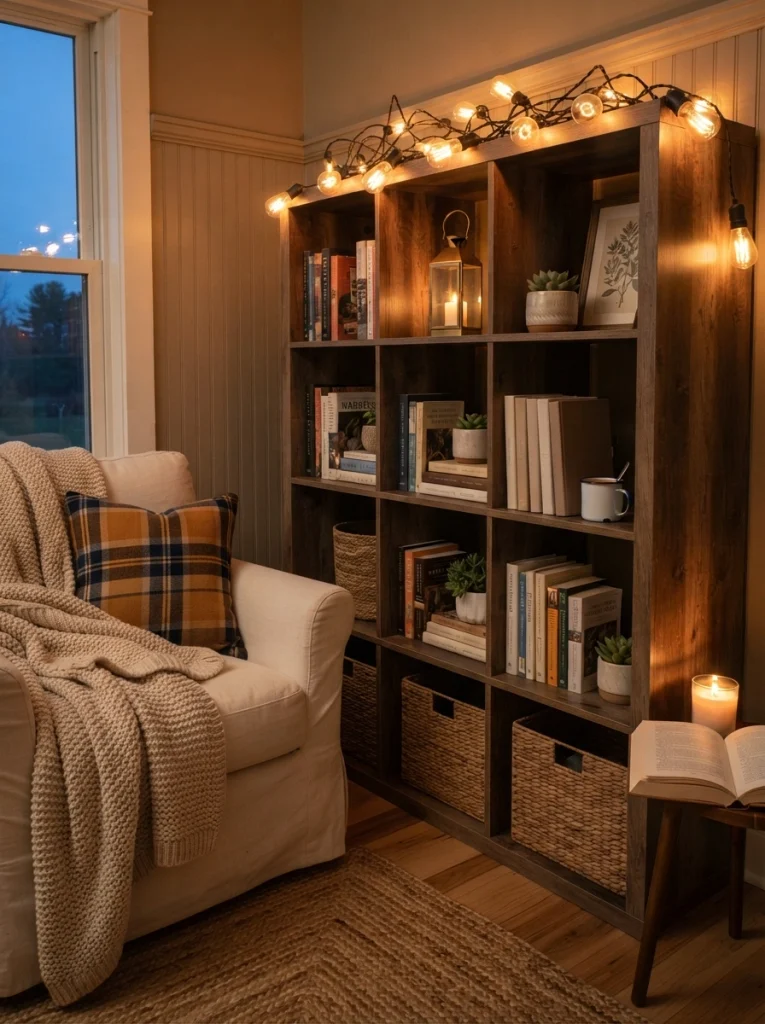
What it looks like: Soft and amber-toned, the kind of light that makes a room feel later in the evening than it is.
Why it works: Warm-temperature bulbs (2200K to 2700K, not daylight white) shift the whole unit’s color cast toward orange, which is what makes farmhouse spaces feel lived-in after sundown instead of showroom-bright.
How to copy it: Run a battery-powered or USB warm-white fairy light strand along the back edge of just the top row of cubbies, tucking the wire behind books or baskets so it disappears during the day.
Best for: Renters who can’t run electrical work and want ambiance without a lamp taking up shelf space.
Styling Note: Skip bright white LED strands even “warm white” LED can read cool next to real wood tones. Filament-style bulbs match farmhouse warmth far more reliably.
5. Turned Wood Legs to Lift It Off the Floor
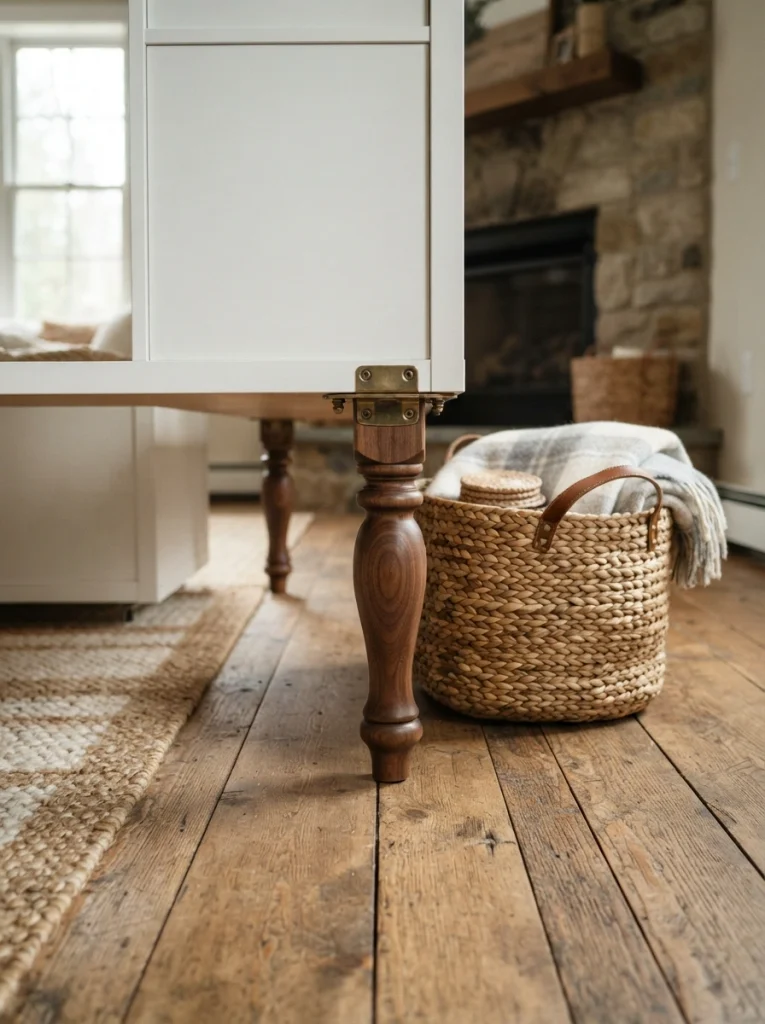
What it looks like: Lifted and lighter than it has any right to be for something this boxy.
Why it works: Raising a low, wide piece off the floor creates visual weight distribution you can see floor and shadow underneath it, which tricks the eye into reading the whole piece as smaller and more furniture-like. It’s the same reason a sofa on exposed legs feels less bulky than one with a skirt.
How to copy it: Buy furniture legs rated for at least 50 lbs each (four per unit), attach mounting plates to the underside corners with the included screws, and add felt pads to protect flooring. This works especially well if you’re eyeing the unit for a media console setup later on.
Best for: People who find the standard Kallax silhouette too heavy or block-like for their room.
Pro Tip: Measure your mounting plate screws against the particleboard thickness before buying screws even ¼ inch too long will poke straight through the top surface.
6. A Two-Tone Black-and-Natural-Wood Finish
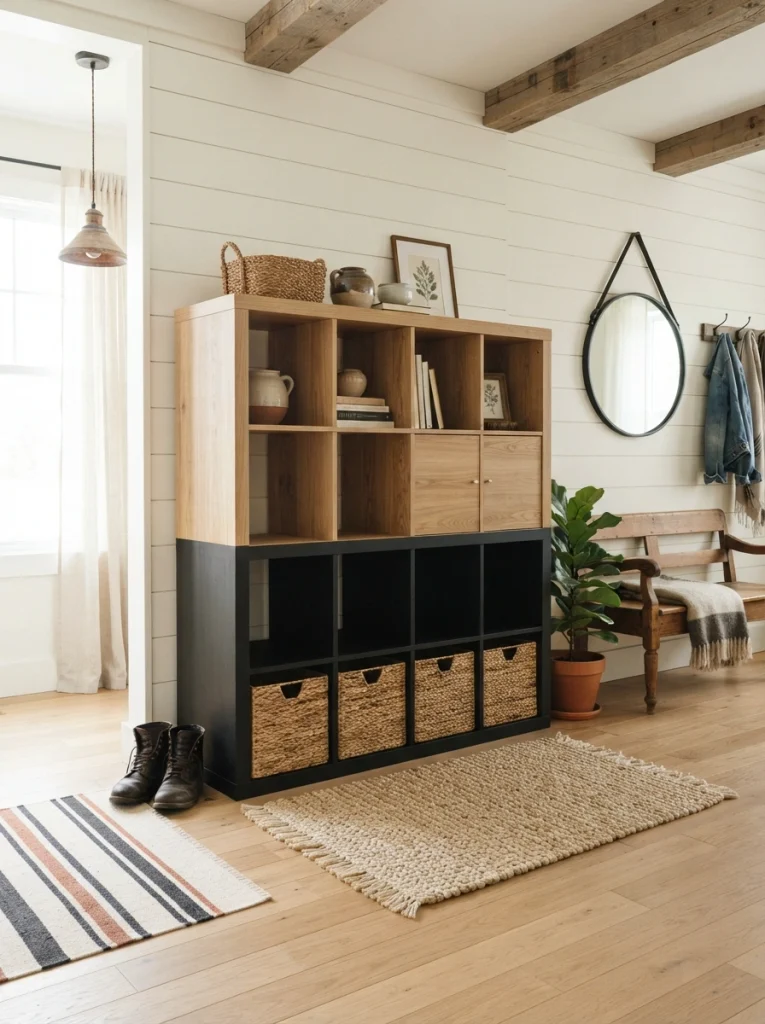
What it looks like: Split clean down the middle in tone heavy on the bottom, light on top.
Why it works: Color-blocking a piece this size keeps it from reading as one giant block of a single color; the visual weight sits low, a proportion rule borrowed straight from paneled walls and two-tone kitchen cabinets.
How to copy it: Tape off the bottom two rows with painter’s tape, prime, then paint in matte black. Leave the top rows as bare or lightly stained wood, or swap the veneer panels entirely if your unit’s finish won’t take paint well.
Best for: Modern-farmhouse fans who want more contrast than an all-white finish gives.
Quick Win: No time to paint? Swap in solid black cube inserts for the bottom row instead same visual split, zero drying time.
The next idea solves a problem almost every Kallax owner runs into eventually mismatched bins.
7. Galvanized Metal Bins for a Farmhouse-Industrial Mix
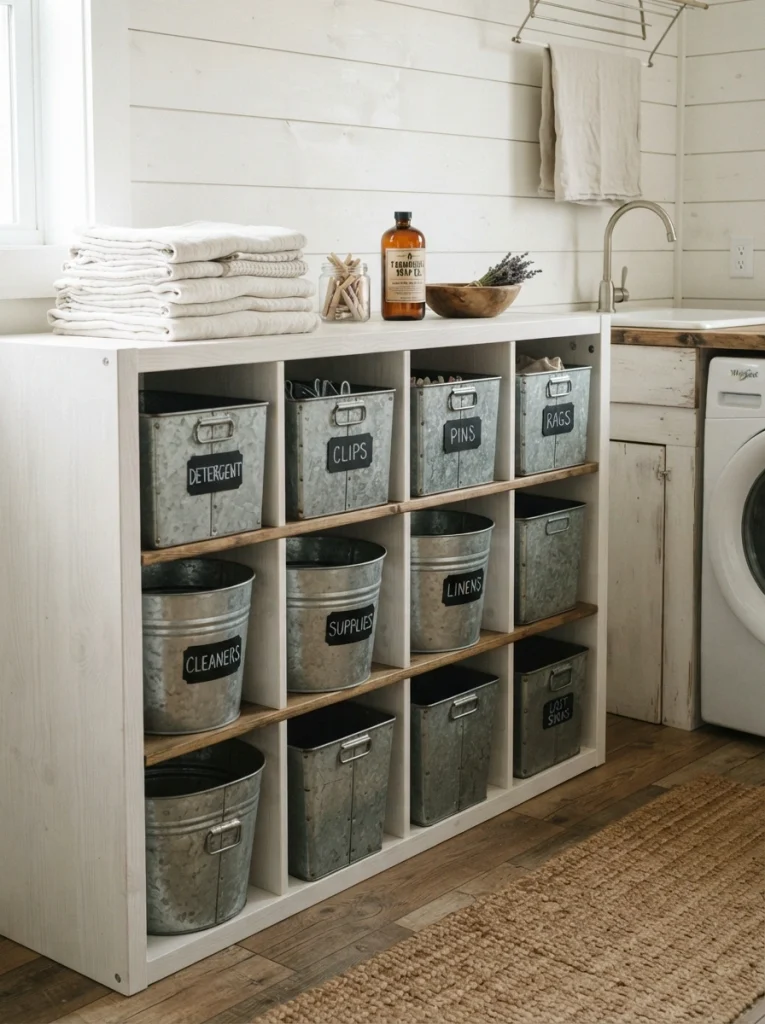
What it looks like: Cool and slightly industrial against all that warm wood a deliberate contrast, not a clash.
Why it works: Mixing one hard, cool-toned material into a mostly warm, soft palette keeps the whole shelf from feeling one-note. Designers treat this as an accent material, and it should stay under about 20 percent of what’s visible.
How to copy it: Use galvanized bins in just one or two cubes, not the whole unit, and pair them with a chalkboard or kraft paper label so they still feel intentional rather than purely utilitarian.
Best for: Laundry rooms, mudrooms, or garages where you want farmhouse warmth without losing durability.
Important: Standard galvanized bins often run slightly deeper than a Kallax cube measure before buying, since an overhanging bin front will keep a cube door from closing flush.
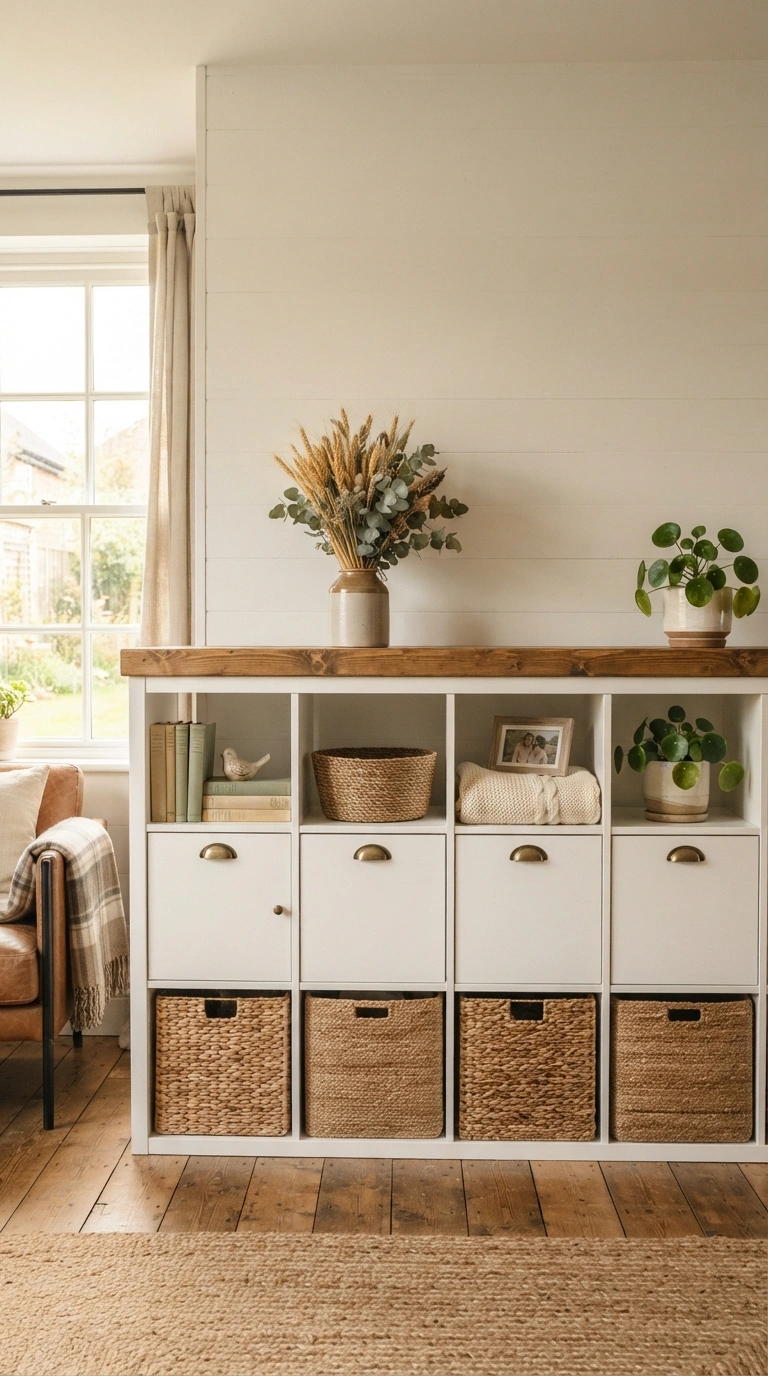
8. A Rustic Wood Cap on Top
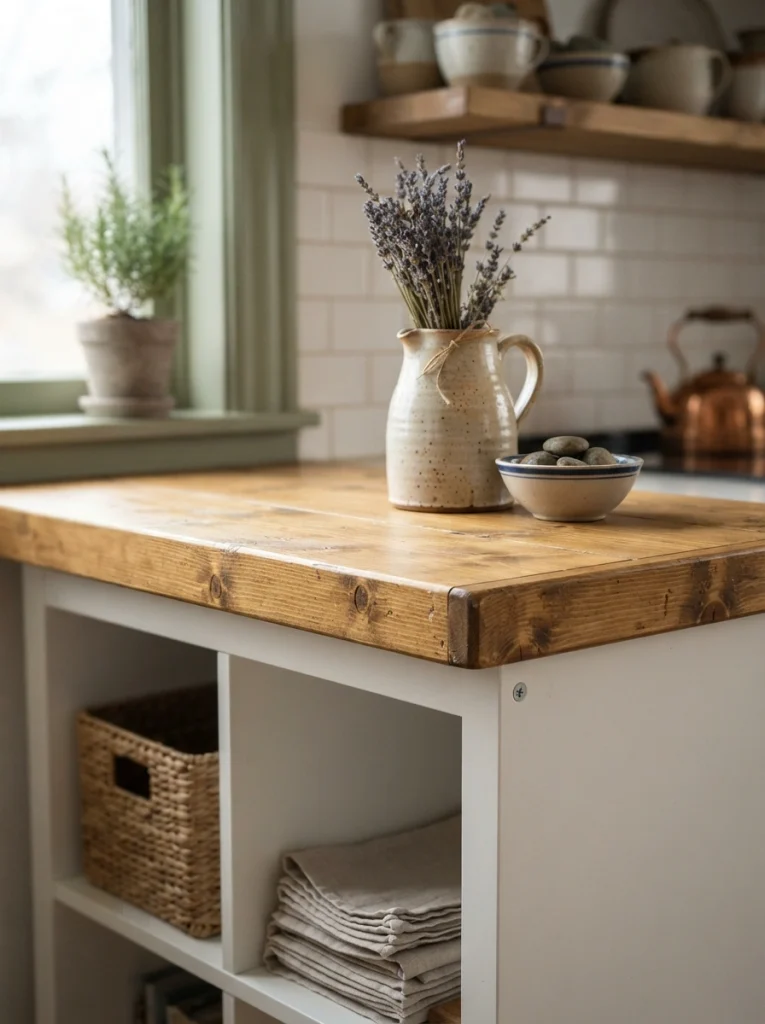
What it looks like: Solid and slightly heavy-looking on top, like a countertop that wandered off from the kitchen.
Why it works: A thick top cap changes the silhouette from “shelf unit” to “furniture piece” by adding a defined cap line the same trick used on farmhouse kitchen islands and console tables. It gives the eye a clear top edge to rest on.
How to copy it: Cut a 1-inch-thick pine or poplar board to overhang the unit by about half an inch on all sides, sand and stain in a honey or walnut tone, then attach with L-brackets from underneath.
Best for: People turning a Kallax into an entryway console, TV stand, or kitchen island extension.
Mistake to Avoid: An overhang wider than an inch on any side makes the cap look loose or unattached keep it tight and it reads built-in instead of added-on.
Shop This Look
| Product |
|---|
| 1-inch pine or poplar project board |
| Wood stain in honey oak or walnut |
| L-bracket shelf supports (4-pack) |
| Stoneware pitcher vase |
| Dried lavender bundle |
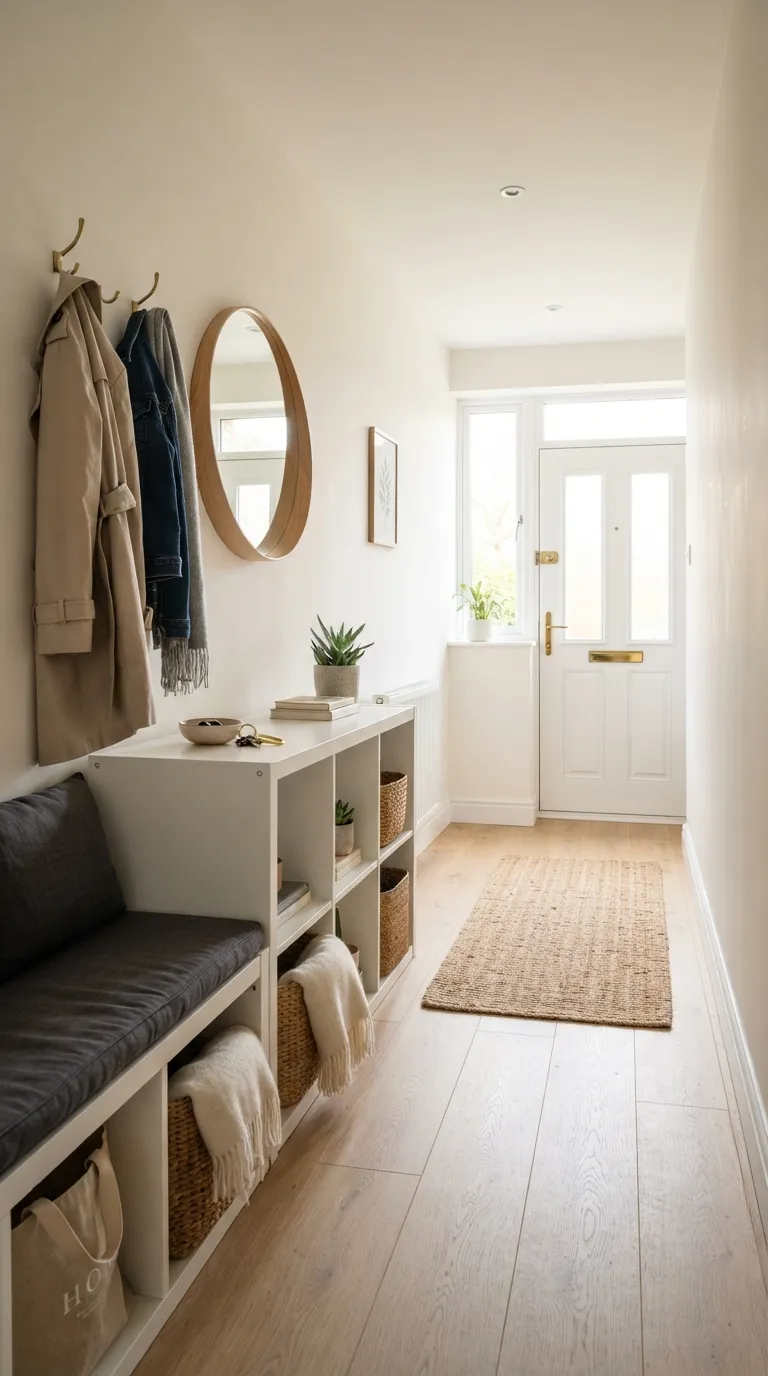
9. Pairing Two Kallax Units as a Farmhouse Mudroom Bench
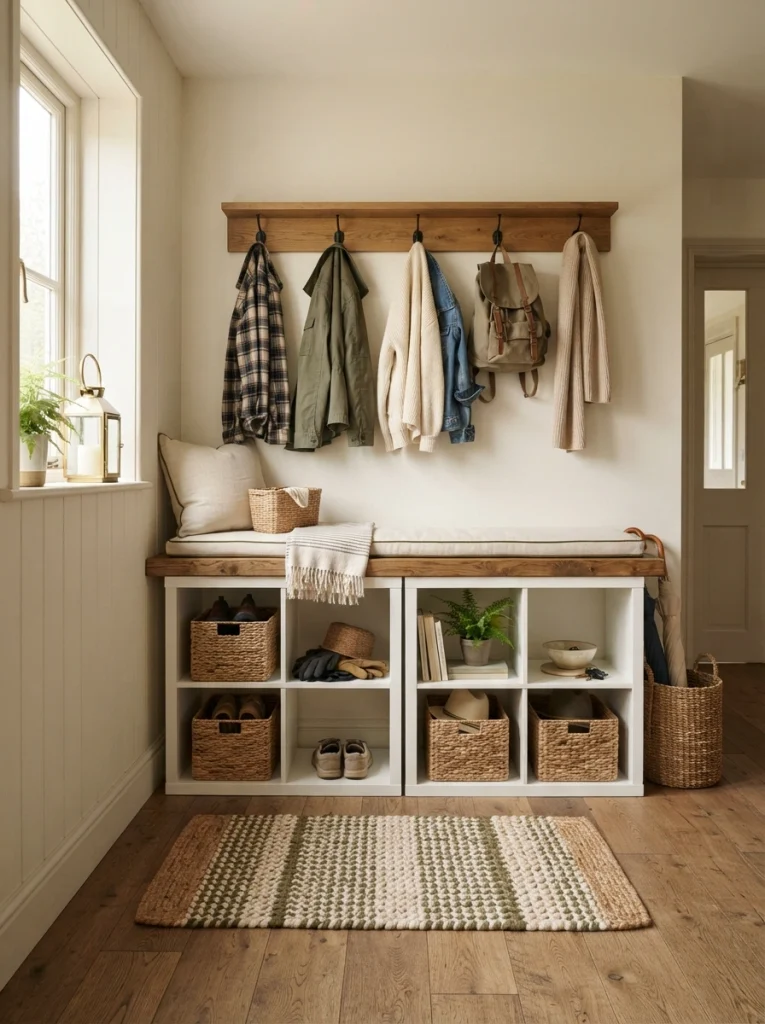
What it looks like: Long and low, more built-in bench than shelving unit once the bench top goes on.
Why it works: Laying out two units side by side with a shared top surface creates a single unified silhouette instead of two separate pieces matching heights and one continuous surface line reads as one intentional build rather than furniture pushed together. If you’re building out a full mudroom, our entryway ideas roundup goes deeper on hooks and layout.
How to copy it: Set two Kallax units level and flush against each other, then span a cushioned wood bench top across both, securing it to the top of each unit with L-brackets so it can’t shift under weight.
Best for: Entryways and mudrooms that need a landing zone for shoes, bags, and coats.
Warning: IKEA doesn’t rate the Kallax top surface for regular sitting weight without reinforcement underneath, repeated sitting can crack the particleboard over time. Add a plywood support brace across the span before topping it as a bench.
The next idea is a small change with a visible result.
10. A Single Brass Picture Light Above the Vignette
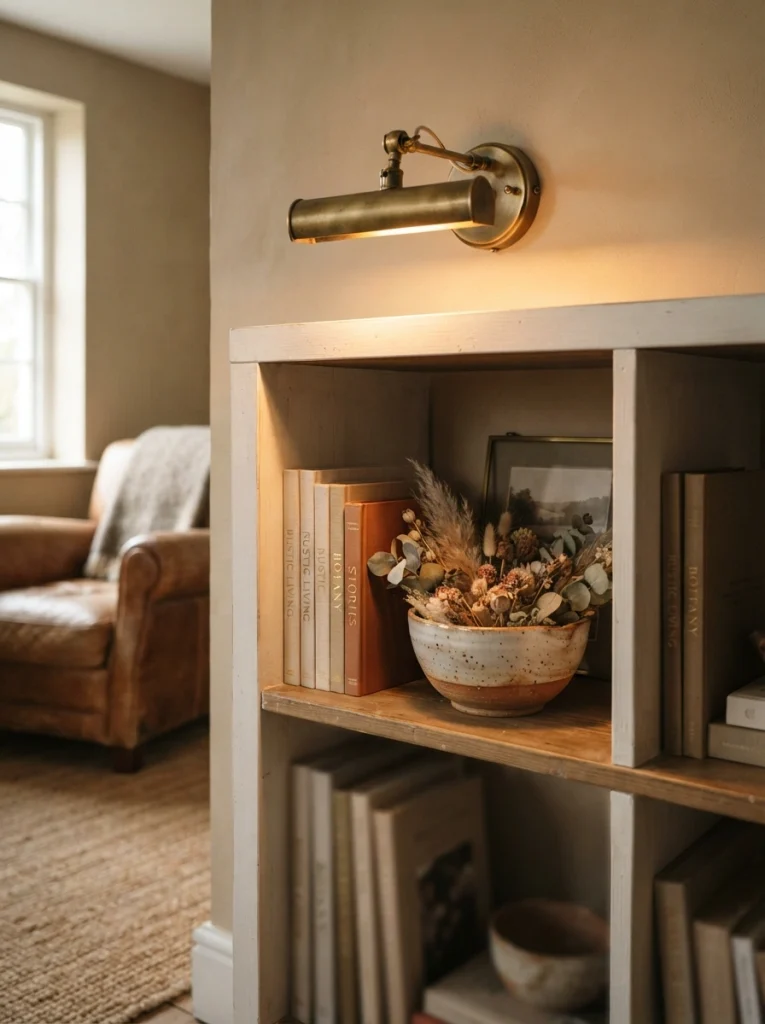
What it looks like: Focused and a little theatrical, like a single spotlight on the one shelf you want people to notice.
Why it works: Directional accent lighting draws the eye to one vignette instead of letting the whole unit compete for attention at once the same principle museums use to make you look exactly where they want you to.
How to copy it: Mount a battery-operated or plug-in brass picture light along the top edge above your best-styled cube, angled down at about 30 degrees, and keep every other cube in ambient room light only.
Best for: People with one really well-styled shelf who want it to get noticed.
Styling Note: Warm-toned brass fixtures read more farmhouse than brushed nickel or chrome even a small hardware swap on the light itself changes the whole feel.
11. Sliding Barn-Door Panels on Select Cubbies
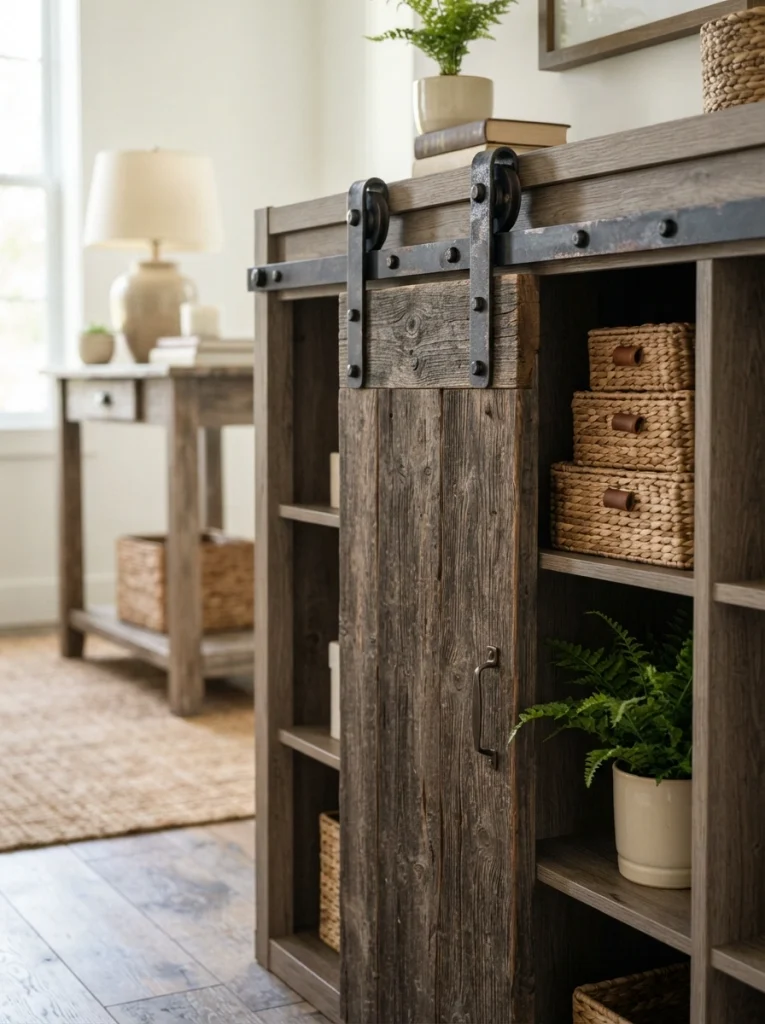
What it looks like: Rustic and mechanical at once the little track and rollers are half the charm.
Why it works: A sliding panel hides clutter completely while adding a genuine farmhouse hardware detail the track itself doing double duty as function and decoration, which most closed storage solutions only manage one of. It’s a smaller-scale version of the same hardware trick used in our closet conversion projects.
How to copy it: Use a mini barn-door hardware kit sized for small panels, cut thin wood panels to just larger than the cubby opening, and mount the track along the top edge so the panel slides freely without touching the shelf below.
Best for: Anyone who wants closed storage in just one or two cubbies without full cabinet doors.
✅ Before You Build This One:
- [ ] Measure the exact cubby width and add 2 inches for panel overlap on each side
- [ ] Buy a mini barn-door track kit rated for at least 15 lbs
- [ ] Cut and sand your panel before staining, not after mounting
- [ ] Mount the track first, then hang the panel and test the slide before adding a handle
Shop This Look
| Product |
|---|
| Mini barn-door sliding hardware kit |
| Thin wood project panel |
| Wood stain, driftwood gray tone |
| Small black iron pull handle |
12. Warm Terracotta Accent Backs
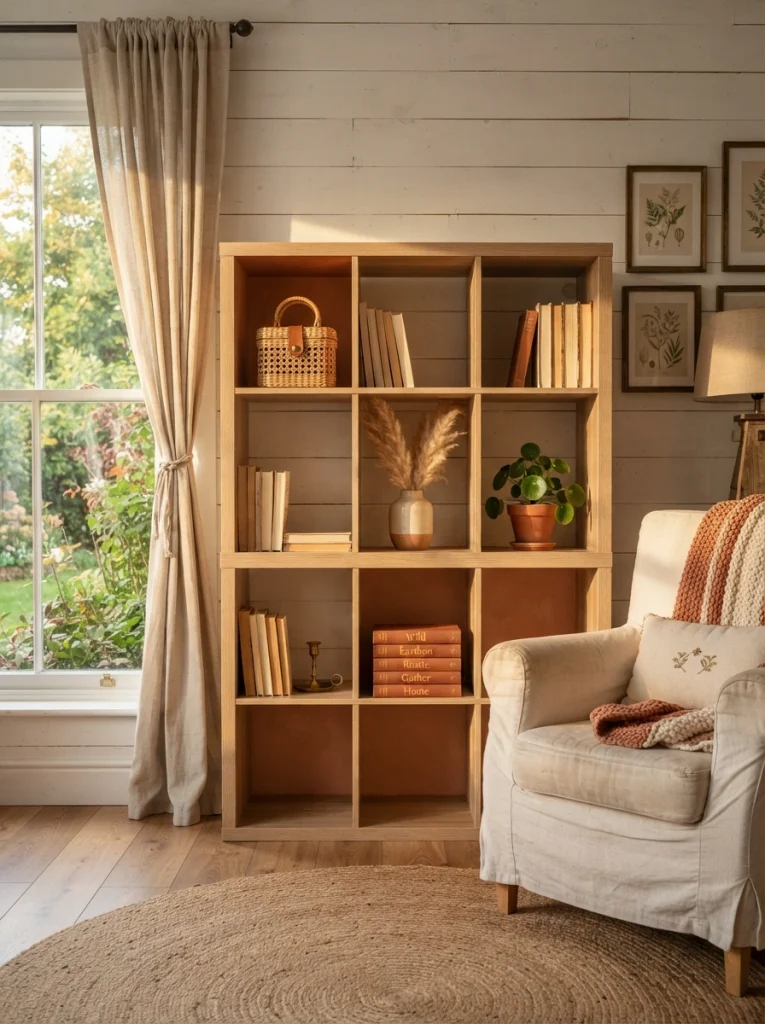
What it looks like: Warm and sun-baked, like the color showed up before the rest of the room caught on.
Why it works: Painting just the interior backs of select cubes not the whole unit adds color in controlled doses, which keeps a farmhouse palette from tipping into something busier or more maximalist than it’s meant to be.
How to copy it: Paint the back panel of 2 out of your total cubes in a muted terracotta or clay tone, leaving the frame and remaining cubes in their natural or painted-white finish, and let it dry fully before restocking.
Best for: People who love color but don’t want to commit to painting the whole piece.
Pro Tip: Test your terracotta shade on the actual cube interior before committing the small, shadowed space of a cube reads a color darker and more saturated than a paint chip in daylight ever will.
One more thing before the last few ideas something most guides skip entirely.
My Views:
Here’s something most guides won’t tell you: farmhouse Kallax projects fail more often from over-symmetry than from bad materials. In my experience, styling every single cube identically same basket, same spacing, same books-then-vase pattern is what makes a shelf look like a display instead of a home.
Leave at least one cube empty or half-full, and let two adjacent cubes break the pattern completely. A 36-inch-wide unit with four matching baskets across the bottom row reads staged; the same unit with three baskets and one open gap reads collected.
13. Stacking a Single Kallax Column as a Narrow Farmhouse Tower
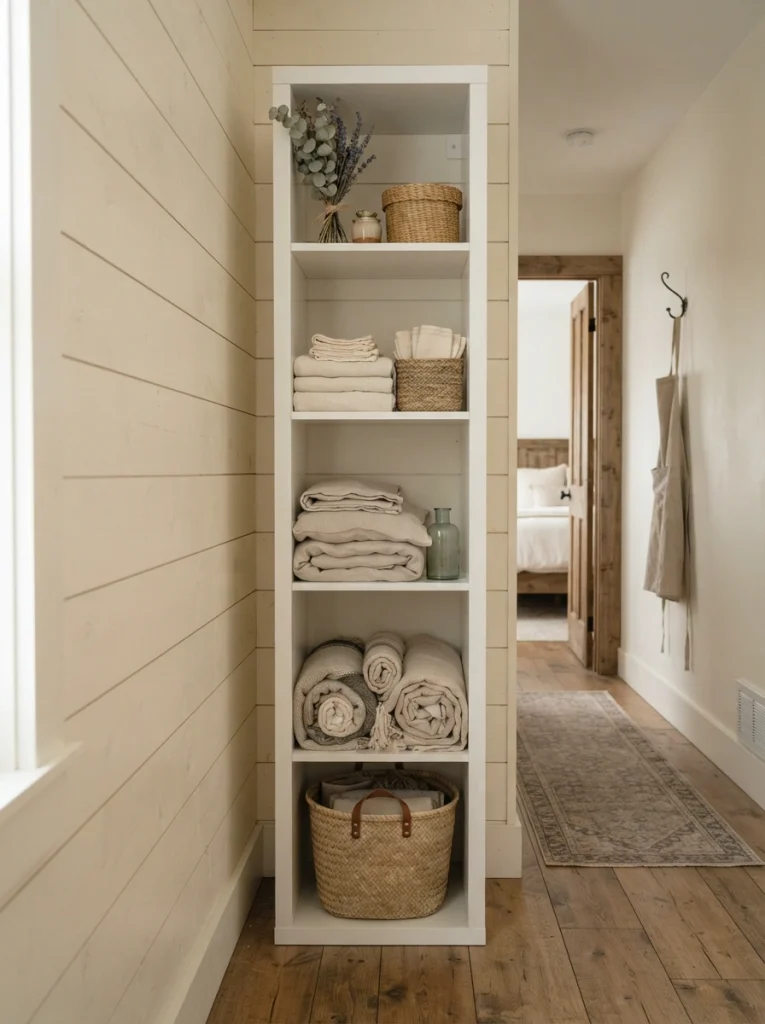
What it looks like: Tall and narrow, more tower than shelf, tucked into a gap most furniture wouldn’t fit.
Why it works: Standing a single column of cubes vertically instead of horizontally uses floor footprint efficiently while still giving the same storage volume a basic small-space principle of building up instead of out. It’s a close cousin to the layout used in our under-stairs storage ideas, just freestanding instead of built-in.
How to copy it: Use a single 1×4 or 2×2 column Kallax unit, anchor it to the wall with the included anti-tip strap non-negotiable for a tall, narrow piece and style the bottom two cubes heavier than the top for visual stability.
Best for: Narrow hallways, small entryways, or linen storage where floor space is tight.
Small-Space Tip: A single column reads taller and less bulky if you paint it to match the wall behind it exactly the eye stops registering it as furniture and starts reading it as built-in.
14. Swapping in Aged Brass or Black Iron Hardware
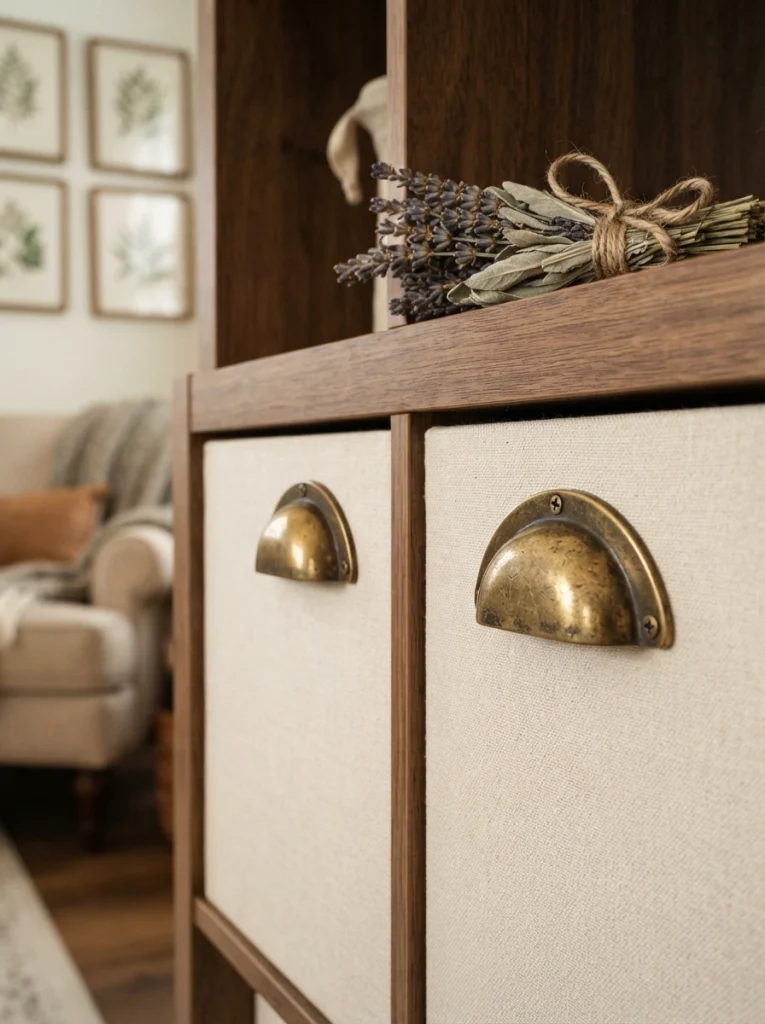
What it looks like: Small but noticeable the kind of detail people clock without knowing why the piece suddenly looks nicer.
Why it works: Hardware is one of the highest-impact, lowest-cost changes because it sits at eye level and hand level, exactly where people touch and look at furniture. Swapping plastic knobs for aged metal changes the perceived material quality of the entire piece even though nothing structural changed.
How to copy it: Remove the plastic Kallax door knobs and drill new holes if needed for cup pulls or bin pulls in aged brass or matte black check your existing hole spacing first so you can reuse it if the new hardware matches.
Best for: Anyone with Kallax door or drawer inserts who wants a fast, low-effort upgrade.
Important: Most Kallax insert doors use a single center hole, while farmhouse-style cup pulls often need two holes spaced 3 inches apart measure before buying, or choose a single-hole pull to skip drilling entirely.
15. The Styled Farmhouse Kallax Vignette That Ties It All Together
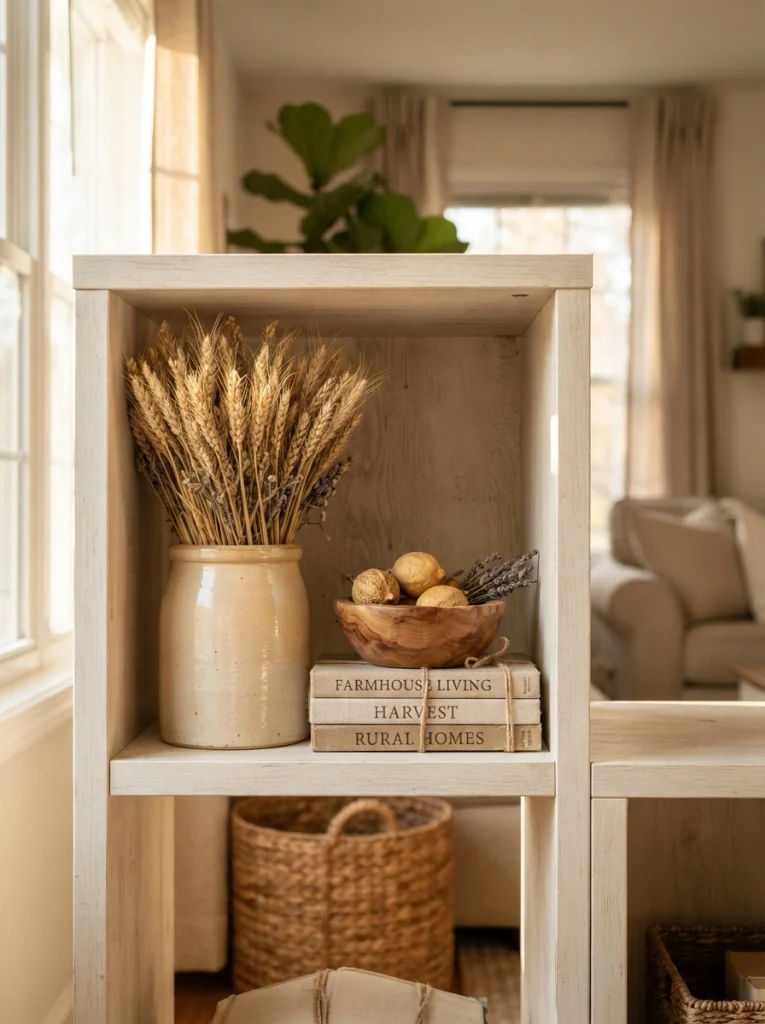
What it looks like: Layered and a little imperfect, the kind of shelf that looks collected over years, not shopped in an afternoon.
Why it works: Grouping objects in odd numbers with varied height a tall vase, a mid-height stack of books, a low bowl creates the visual triangle designers rely on for any tabletop or shelf vignette, which is why it reads intentional instead of random. For more ways to layer greenery into this exact kind of vignette, see our plant shelf styling guide.
How to copy it: Pick one cube, add a tall item (dried wheat or pampas in a stoneware vase), a mid-height stack (2 to 3 linen-bound books), and one low, wide item (a wood bowl or ceramic dish), keeping every piece in the same warm neutral color family.
Best for: The final finishing touch once your other 14 ideas are already in place this is the one people actually stop and photograph.
Styling Note: Real dried botanicals (wheat, pampas, bunny tail grass) hold up far longer than fresh stems and look better as they age lean into it instead of replacing them.
How to Start Your Farmhouse Kallax Transformation
In practice, paint always comes first. Start with a full coat of warm white or soft greige chalk-style paint before you touch legs, lighting, or hardware it’s the base every other farmhouse detail sits on top of, and doing it last means repainting around baskets and bins you’ve already arranged.
The most common fixable error is going stark white instead of warm white. A true, cool-toned white fights against the wood, brass, and linen tones farmhouse styling relies on. Swap it for a warm white with a hint of cream or beige undertone and the whole piece settles into the rest of the room instead of standing apart from it.
A single stem of dried pampas grass in a matte stoneware bud vase, a set of two seagrass storage baskets sized for one cube each, and a pack of aged-brass cup pulls to swap onto existing door inserts all three run under $50 combined and change the shelf’s whole character in an afternoon.
A paint-and-baskets refresh takes one weekend and runs $60 to $120 depending on paint and basket count. A full transformation legs, wood cap, hardware, and lighting included is closer to $250 to $450 and takes two to three weekends spread out, mostly waiting on paint and stain to cure between coats.
Ready to Create Your Dream Farmhouse Kallax Corner?
Between the paint, the wood caps, the hardware swaps, and that one styled vignette, you’ve now got fifteen different ways to take a plain Kallax toward something warmer. None of this has to happen at once most farmhouse transformations that last were built one weekend project at a time, not finished in a single sprint.
If you’re starting today, grab a quart of warm white chalk-style paint and just do the top row first. Farmhouse styling, at its core, is about a room that feels settled rather than staged and that’s exactly what a well-worn, well-styled Kallax ends up giving back. Save this one before you start shopping you’ll want to come back to the hardware and lighting ideas once the paint’s dry.
Keep Exploring
- 17 IKEA Kallax Entryway Ideas for Narrow Hallways
- 12 Farmhouse Kallax Bedroom Storage Ideas for a Cozy Cottage Feel
- 9 Farmhouse Kallax Paint Colors That Never Go Out of Style