19 IKEA Kallax TV Unit Ideas That Actually Solve Your Living Room Clutter
The IKEA Kallax TV unit has quietly become one of the most repurposed shelf systems on the internet one square-cube frame, endless configurations. This guide covers 19 ways to turn that same basic Kallax into a media setup that looks intentional instead of assembled in a weekend panic.
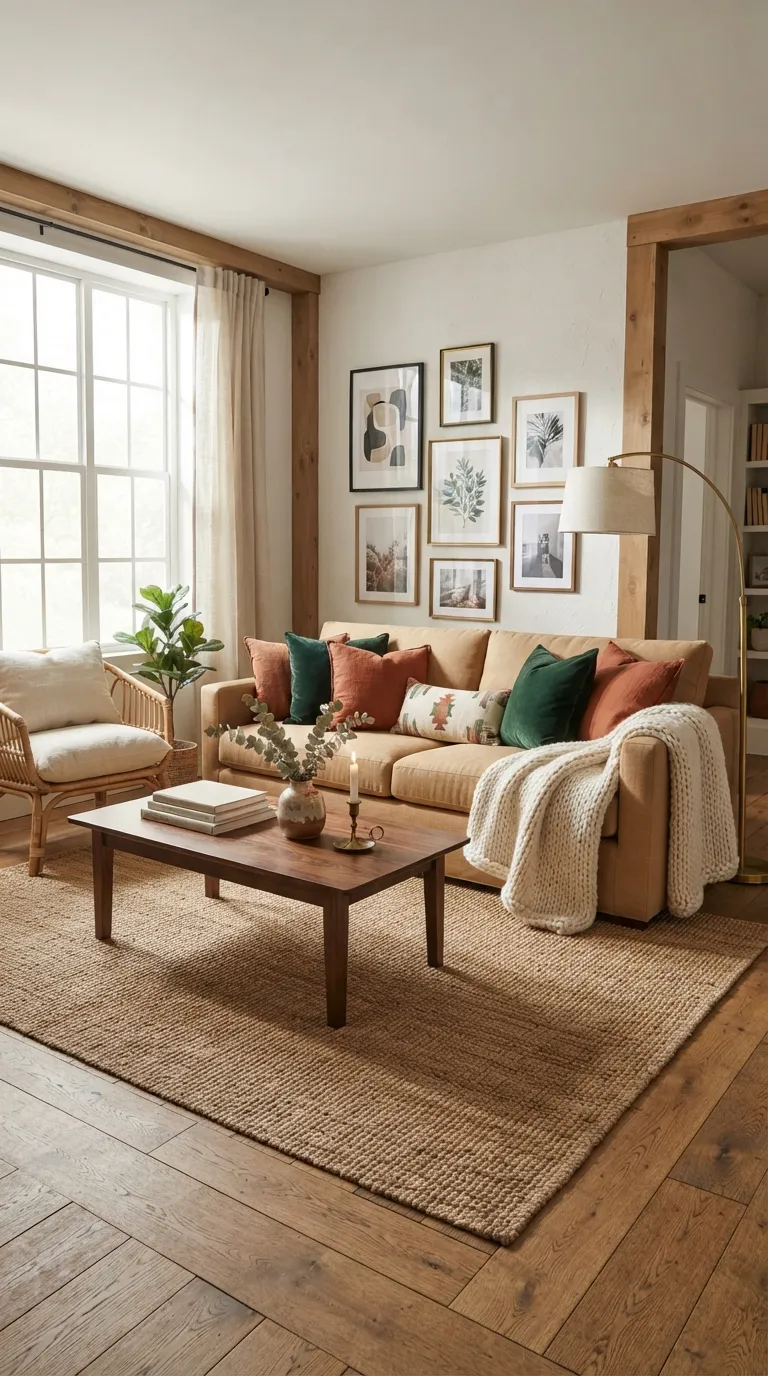
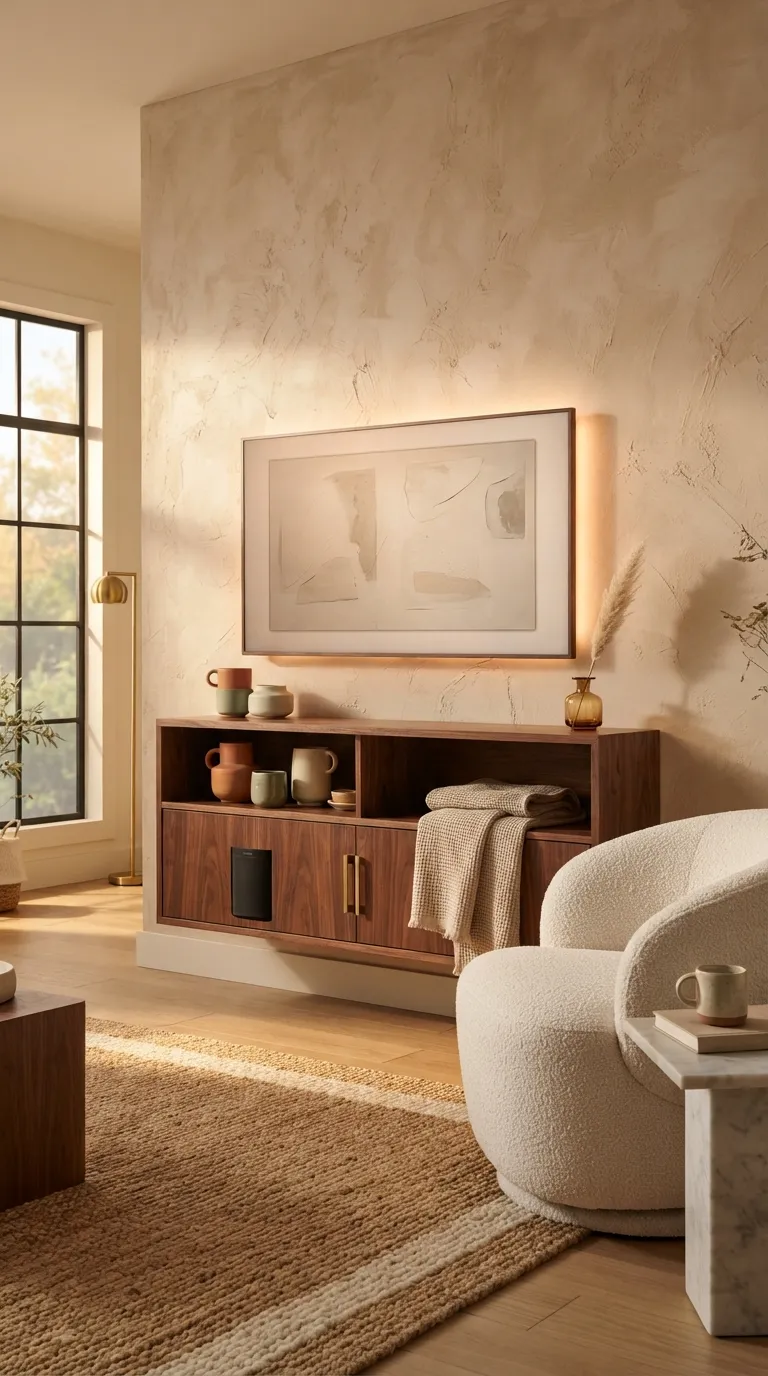
Done right, it feels less like storage and more like the room finally exhaling no cords snaking across the floor, no mismatched bins fighting for attention. Warm light spills from a cubby or two instead of just the bare TV glow. The whole wall reads calm, a little grounded, genuinely lived-in rather than staged.
Some of these ideas cost under $20. Others take a Saturday. All of them work.
Jump To
- Why a Kallax TV Unit Makes Such a Difference
- 19 Kallax TV Unit Ideas for Every Living Room
- How to Start Your Kallax TV Unit Transformation
- Ready to Build Your Kallax TV Unit?
Why a Kallax TV Unit Makes Such a Difference
A Kallax TV unit solves a problem most living rooms share: too many devices, not enough places to hide them. The shelf system comes in matte white, black-brown, and white stained oak effect, with walnut and oak veneer tops sold separately durable enough for daily use, modular enough to grow with your setup.
It scales well; a single 2×2 fits a studio apartment, while a 4×4 anchors a full media wall. In small spaces, prioritize depth first Kallax runs about 15 inches deep, which limits console and soundbar placement more than most people expect.
| Best starting point | Measure TV height needs against cubby clearance before buying |
| Biggest impact area | Cord concealment and anti-tip anchoring |
| Budget to start | $70–150 for one unit plus basic inserts |
| Time to complete | An afternoon; full media wall builds take a weekend |
19 Kallax TV Unit Ideas for Every Living Room
1. Anchor Your Kallax TV Unit Before You Style It
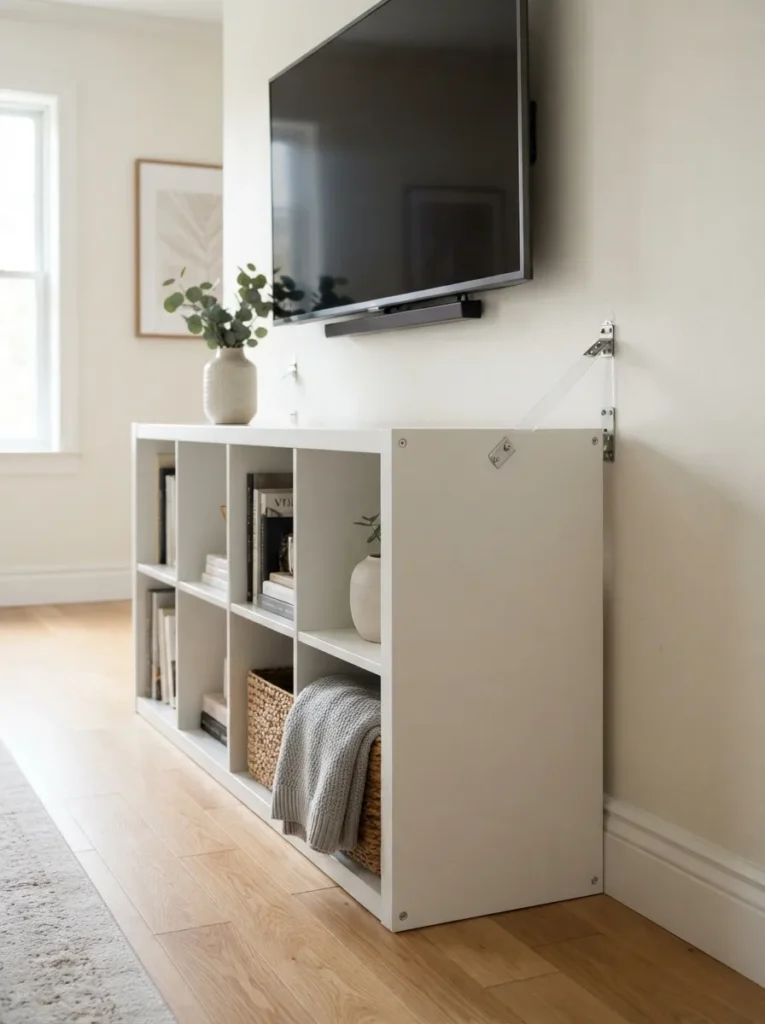
What it looks like: Flush and steady nothing wobbles when someone leans on it.
Why it works: Kallax units get top-heavy once a TV sits on top, and anchor straps distribute the pull-force across two points instead of one, which is what actually prevents tipping.
How to copy it: Use two anti-tip straps rated for at least 50 lbs, screw into wall studs rather than drywall alone, and re-check tension every six months since laminate shelving settles over time.
Best for: Anyone with kids, pets, or a TV over 32 inches.
✅ Before You Mount Anything:
- [ ] Locate wall studs with a stud finder
- [ ] Attach anti-tip straps to the back of the unit
- [ ] Screw strap anchors directly into studs, not just drywall
- [ ] Test stability by applying forward pressure at the top
Shop This Look
| Product |
|---|
| Furniture anti-tip anchor strap kit |
| Stud finder |
| Heavy-duty wall anchor screws |
| Cable raceway cover kit |
2. Solve Cord Chaos With a Cable Box Insert
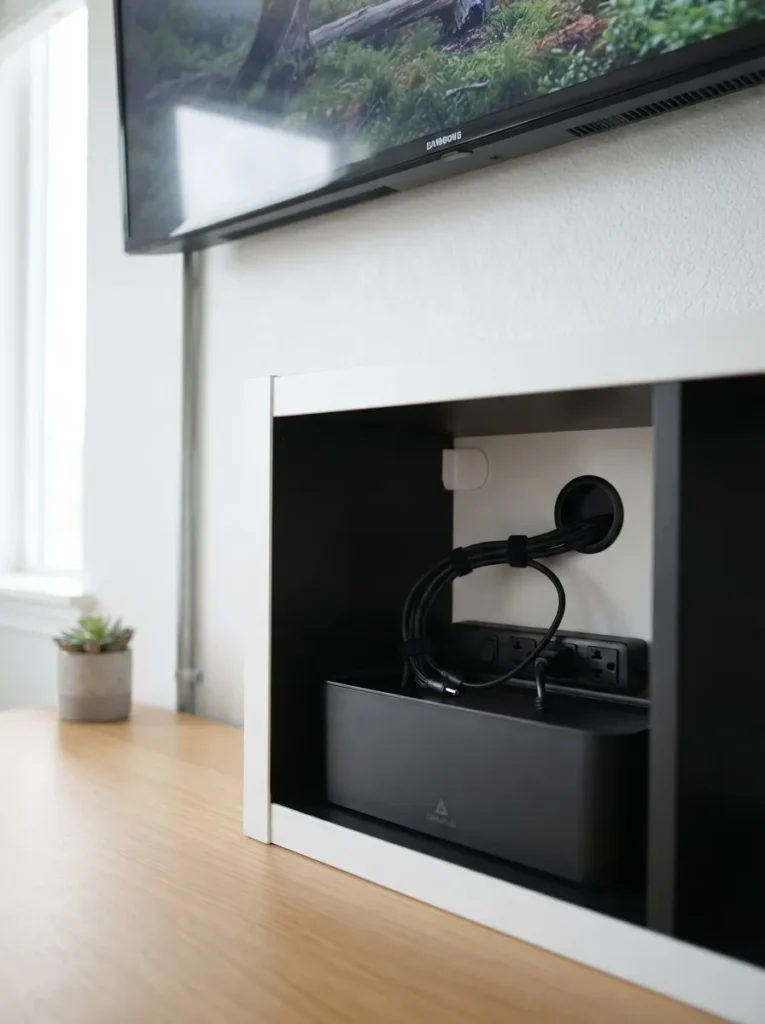
What it looks like: Hidden and resolved the cubby you forget is doing any work at all.
Why it works: Cord clutter is the biggest reason a Kallax TV setup looks unfinished; grouping cables into one enclosed cubby with a drilled pass-through hides visual noise without blocking airflow.
How to copy it: Drill a 1.5-inch grommet hole in the back panel of one cubby, feed all cords through it, and use a slim surge protector rather than a bulky power strip so the box still closes most of the way.
Best for: Anyone with a soundbar, console, and streaming box all fighting for outlets.
Quick Win: A $12 cord-management box with a lid cuts visible clutter in one purchase no drilling required if you’re renting.
3. Paint It Matte Black for a Media Wall Anchor
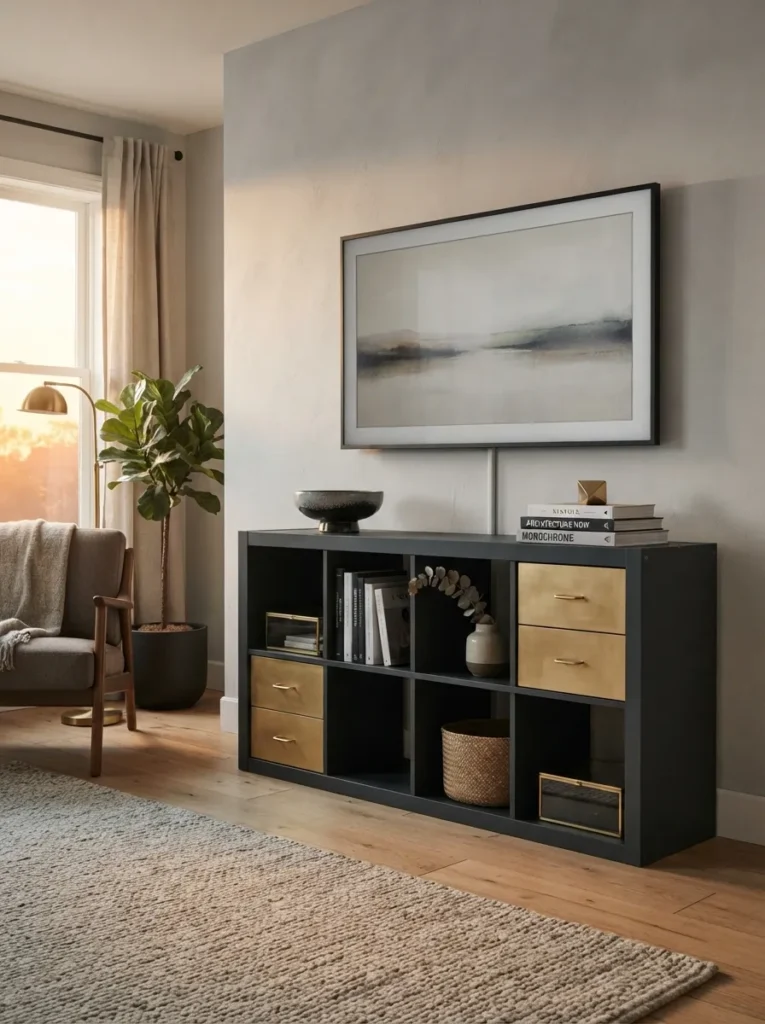
What it looks like: Grounded and deliberate the TV stops looking like a bright rectangle floating on white laminate.
Why it works: A dark base creates visual weight low in the room, balancing screen brightness above it the same contrast principle used in gallery walls, applied to furniture instead.
How to copy it: Sand the laminate lightly with 220-grit paper, prime with a bonding primer made for melamine, then apply two thin coats of matte chalk-style paint skip glossy finishes, which show fingerprints near a TV.
Best for: Renters wanting a bold look without buying new furniture.
Pro Tip: Bonding primer is non-negotiable on laminate regular primer peels off in sheets within months of daily use.
The next idea solves the one problem paint can’t a flat top that still looks like flat-pack furniture.
4. Add a Butcher Block Top for Instant Furniture Weight
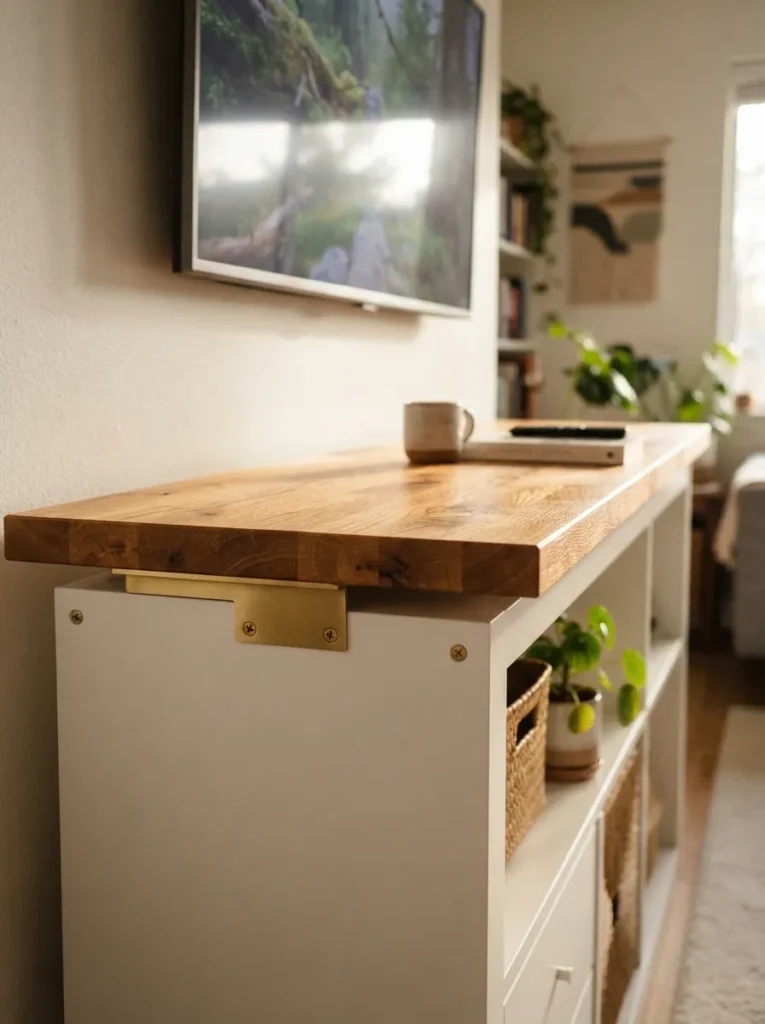
What it looks like: Warm and substantial a slab of oak turns a shelf into furniture.
Why it works: A solid wood or oak-veneer top adds visual weight and hides the seam where cubbies meet, which is usually the giveaway that it’s flat-pack shelving.
How to copy it: Cut an oak veneer countertop to the exact width of the unit, leave a half-inch overhang on the front edge, and attach with L-brackets screwed up from inside the top cubbies so no hardware shows.
Best for: People who want the look of custom built-ins without custom carpentry.
Shop This Look
| Product |
|---|
| Oak veneer butcher block countertop, cut-to-size |
| L-shaped mounting brackets |
| Wood edge sealer |
| Countertop wood conditioner |
5. Backlight It With a Warm LED Strip
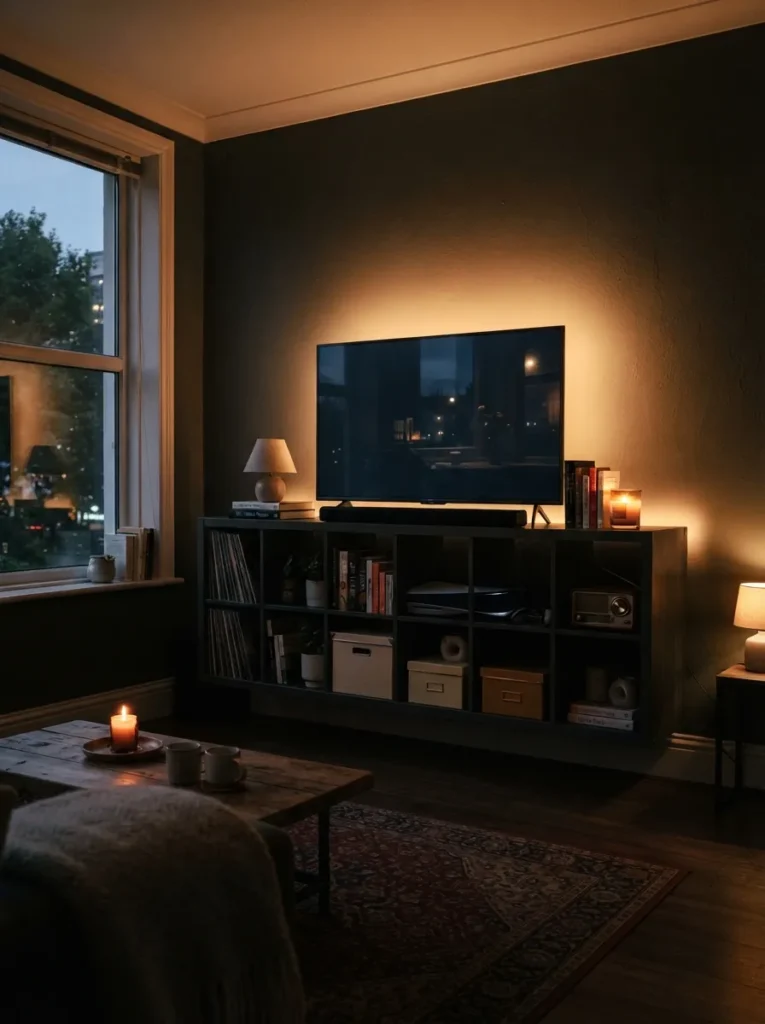
What it looks like: A soft glow bleeding out from behind the unit, like the wall has its own halo.
Why it works: Bias lighting behind a screen reduces eye strain from contrast between a bright screen and dark wall, and it visually separates the Kallax from the wall instead of letting it read as one flat block.
How to copy it: Run a warm-white (2700K) LED strip along the back top edge, angled to bounce off the wall rather than shine forward, on a separate switch from the TV so it can stay on after the show ends.
Best for: Evening TV watchers and anyone sensitive to screen glare.
Important: Cool white LED strips (above 4000K) clash badly against warm wood tones stick to warm white unless the room is already cool-toned.
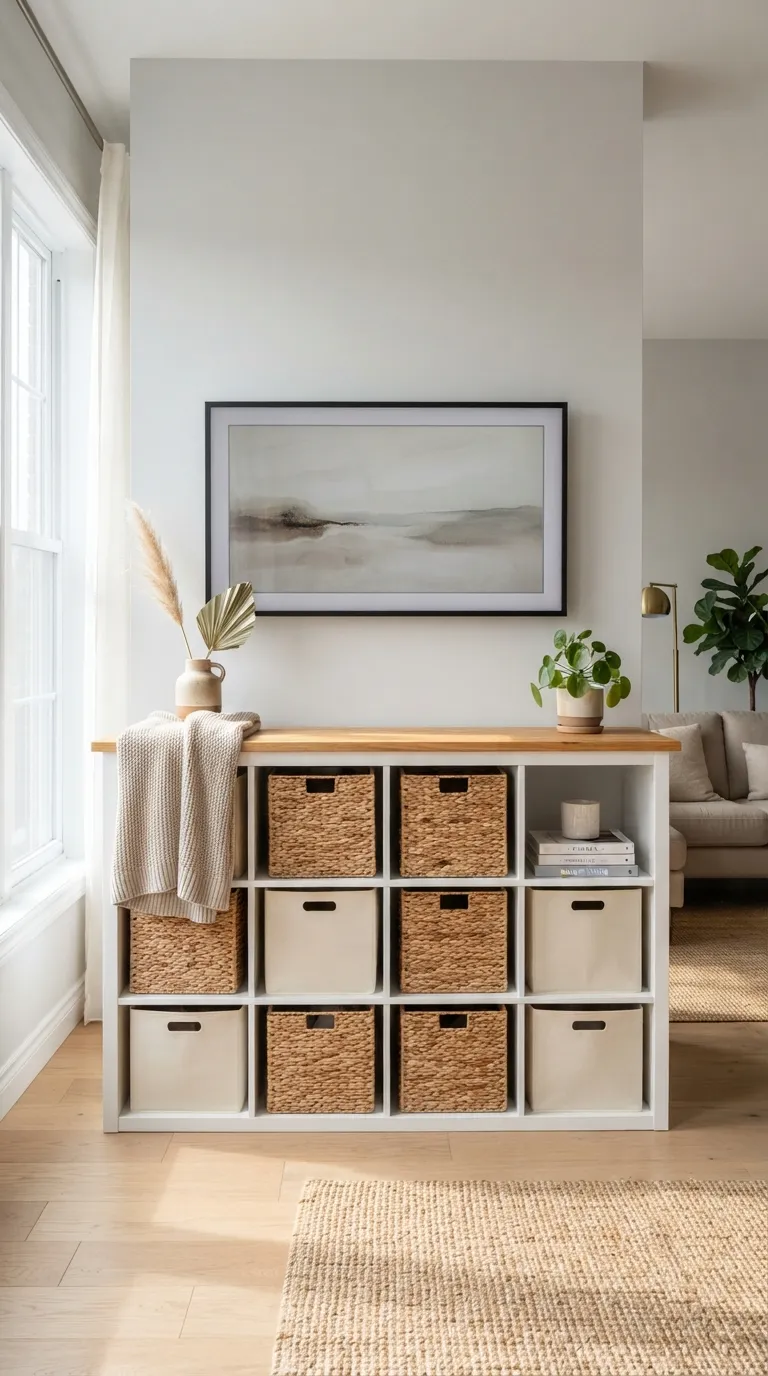
6. Mix Woven and Solid Bins Instead of Matching Sets
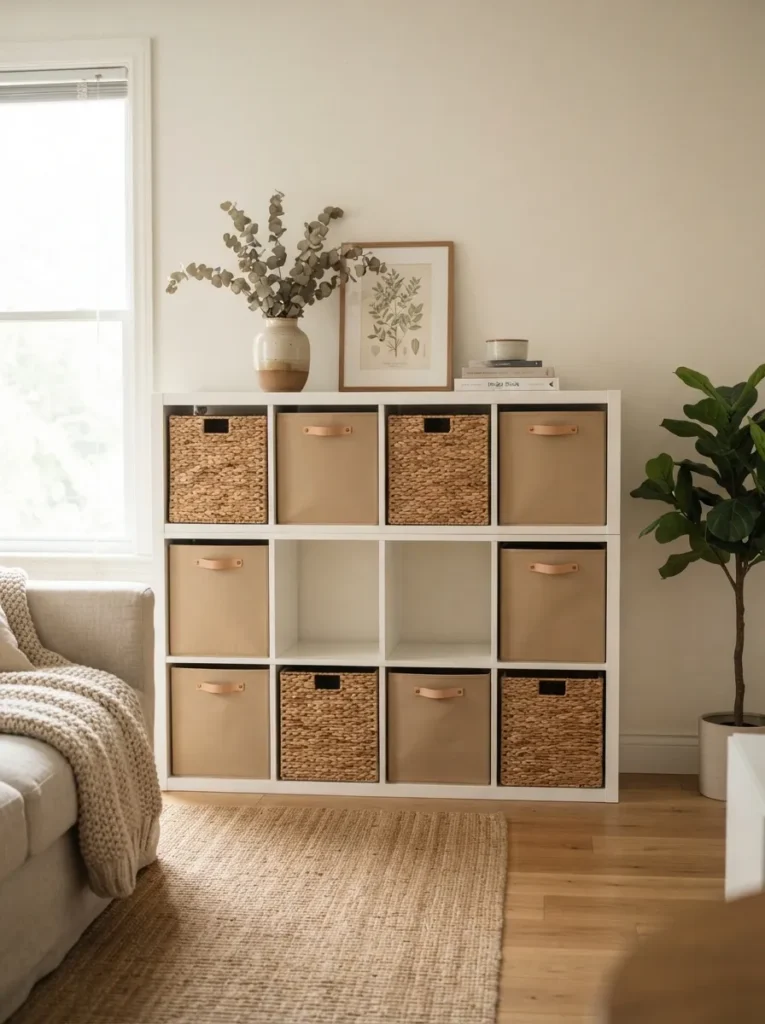
What it looks like: Textural and layered woven baskets next to solid bins instead of nine identical boxes.
Why it works: Repeating one bin style reads institutional; mixing two textures creates the layered look that makes open storage feel curated rather than utilitarian.
How to copy it: Fill every other cubby with a woven basket, alternate with solid-color fabric bins in a matching tone, and leave one or two cubbies fully open for books or a plant.
Best for: Open-shelf lovers who still want somewhere to hide remotes and cords.
Styling Note: Keep bin colors to one family even two shades of the same tan reads more intentional than five random colors.
Up next: the size most small apartments actually need, not the size Pinterest usually shows.
7. Go Compact With a 2×2 for Small Apartments
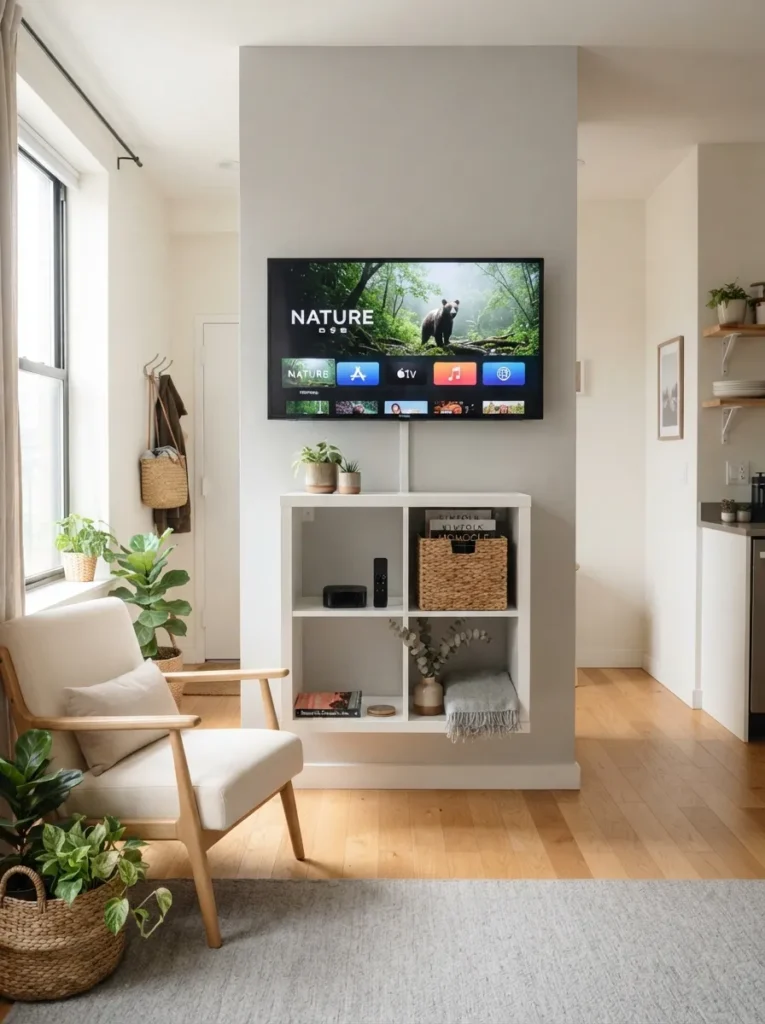
What it looks like: Compact and contained everything a small living room needs in one footprint.
Why it works: A 2×2 Kallax fits apartments without dominating the wall, and using it as a base rather than a full media console keeps sightlines open, which matters more in small rooms than most people assume.
How to copy it: Mount the TV on the wall above rather than resting it on top, keep only the router, one streaming box, and a single basket inside resist filling every cubby just because it’s there.
Best for: Studio apartments and small living rooms under 200 square feet.
Warning: Enclosed streaming boxes and routers overheat in tight cubbies with a bin blocking airflow leave at least one cubby with a device fully open or vented.
8. Add Legs to Lighten a Bulky Unit
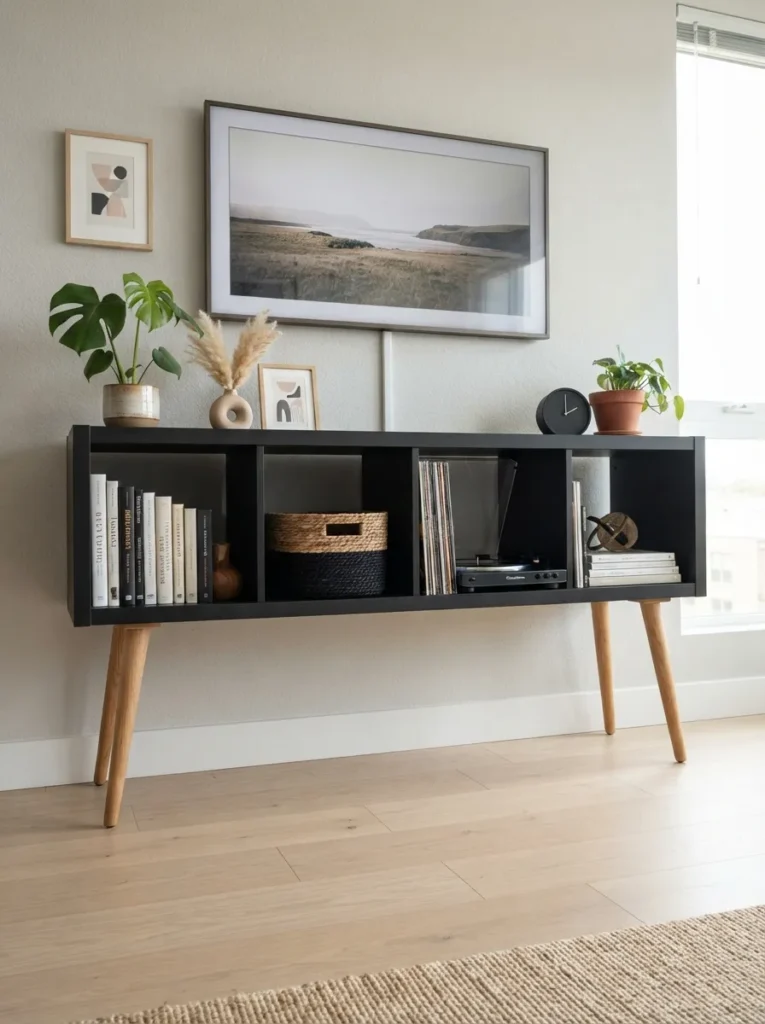
What it looks like: Lifted and lighter a few inches of visible floor changes the whole proportion of the wall.
Why it works: Furniture sitting flush on the floor reads heavier than furniture with visible legs, since legs let light and floor color show through a classic trick for making bulky pieces feel less dominant.
How to copy it: Attach 4-inch tapered wood or metal hairpin legs rated for the unit’s loaded weight, and match the leg finish to other metal accents already in the room brass with brass, black with black.
Best for: Rooms with a large or bulky Kallax that needs to feel less heavy.
9. Build an L-Shaped Kallax TV Unit for Corner Walls
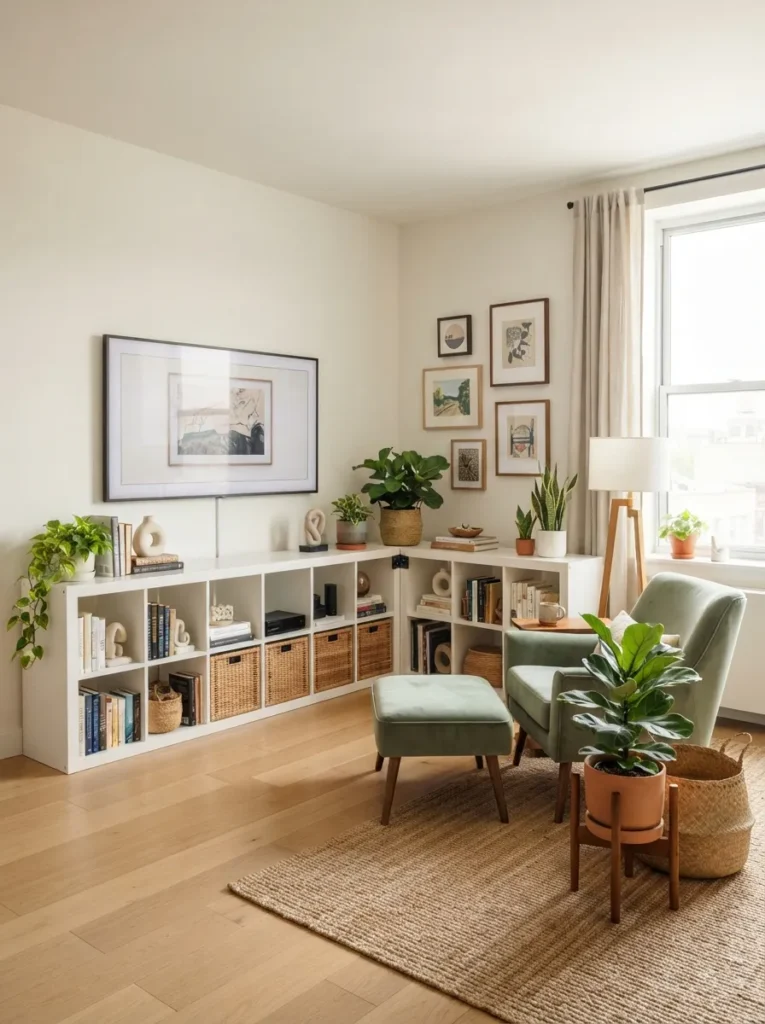
What it looks like: Full corner-to-corner coverage, like a built-in that was planned from the start.
Why it works: Two Kallax units joined at a corner use dead space that’s usually wasted, and the L-shape creates a natural spot for a chair or plant stand in the remaining nook proportion, not just storage.
How to copy it: Join two 4×4 units at a 90-degree corner using an L-bracket at the shared edge, and keep the TV centered on the longer wall run so the visual weight doesn’t tip toward one side.
Best for: Larger living rooms with an underused corner.
Pro Tip: Measure corner clearance for door swing and foot traffic before committing L-shaped builds are hard to reconfigure once anchored.
Shop This Look
| Product |
|---|
| Corner L-bracket connector kit |
| Second Kallax 4×4 unit |
| Corner floor plant stand |
| Furniture floor protector pads |
Next up: a color trick that’s a lot less commitment than repainting the whole thing.
10. Try Two-Tone Painted Cubby Backs
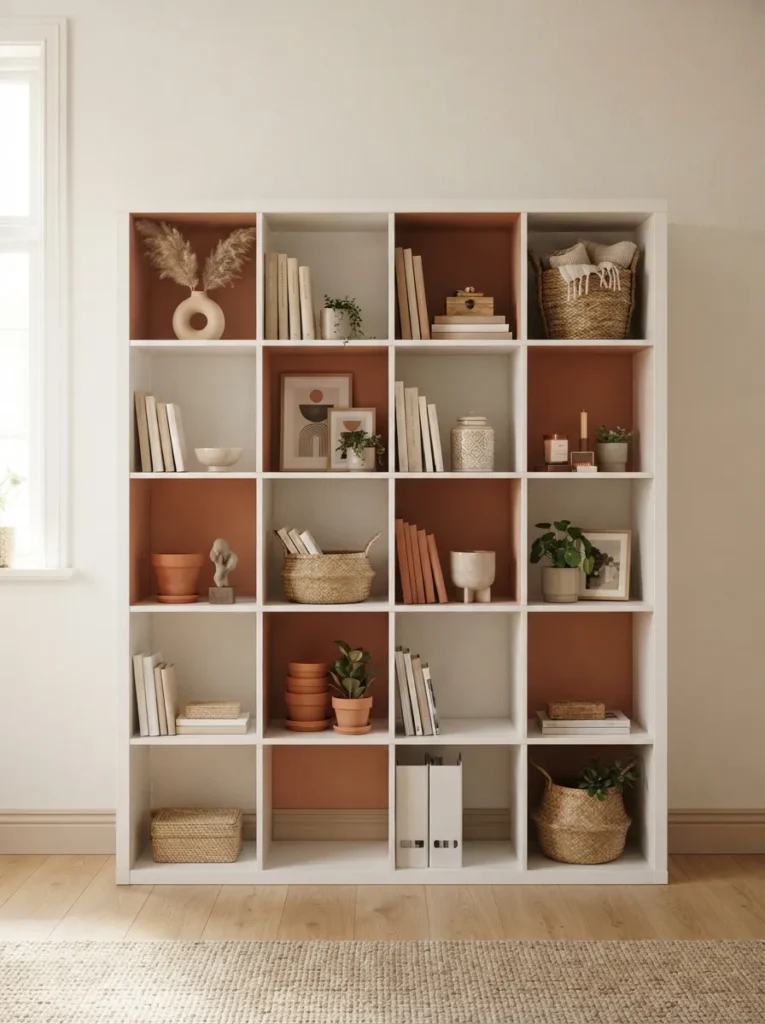
What it looks like: Playful but controlled alternating painted cubby backs instead of one flat color.
Why it works: Painting only the back panels of alternating cubbies creates a checkerboard depth effect without overwhelming the room, since the color is contained rather than covering every surface.
How to copy it: Remove back panels if possible, paint every other one in a single accent color like dusty terracotta or sage, then reinsert leaving frame edges their original white or black.
Best for: People who want color without repainting the entire piece.
Styling Note: Choose an accent color already present elsewhere in the room a throw pillow or rug so the painted cubbies feel connected, not random.
11. Wrap It in Wood Veneer for a Real-Wood Look
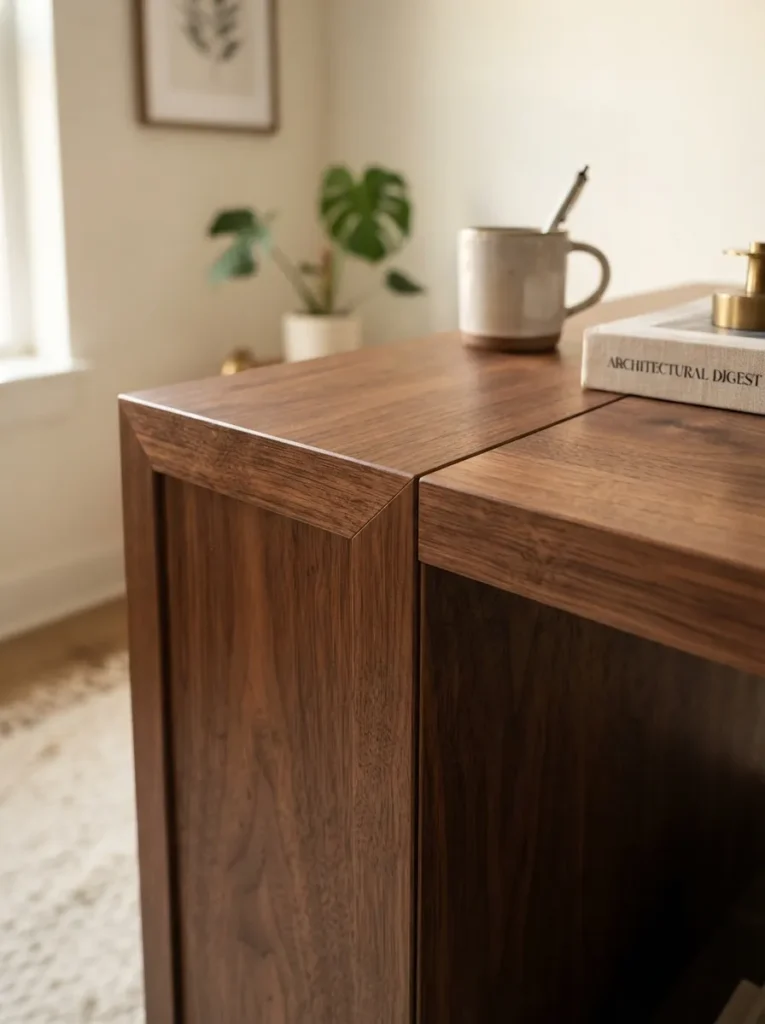
What it looks like: Upgraded, almost unrecognizable laminate replaced by real wood grain texture.
Why it works: Peel-and-stick wood veneer covers the visible particleboard edges that give away flat-pack furniture, adding texture depth that catches light differently than flat laminate.
How to copy it: Clean the surface with rubbing alcohol first, apply walnut or white oak veneer sheeting in long even strokes with a squeegee, and trim excess with a sharp blade rather than scissors for a clean edge.
Best for: People upgrading an older, worn Kallax without buying new.
Important: Veneer wrap adheres poorly to laminate that’s already peeling sand rough spots smooth first or the wrap will bubble within weeks.
12. Add Battery Puck Lights Inside Open Cubbies
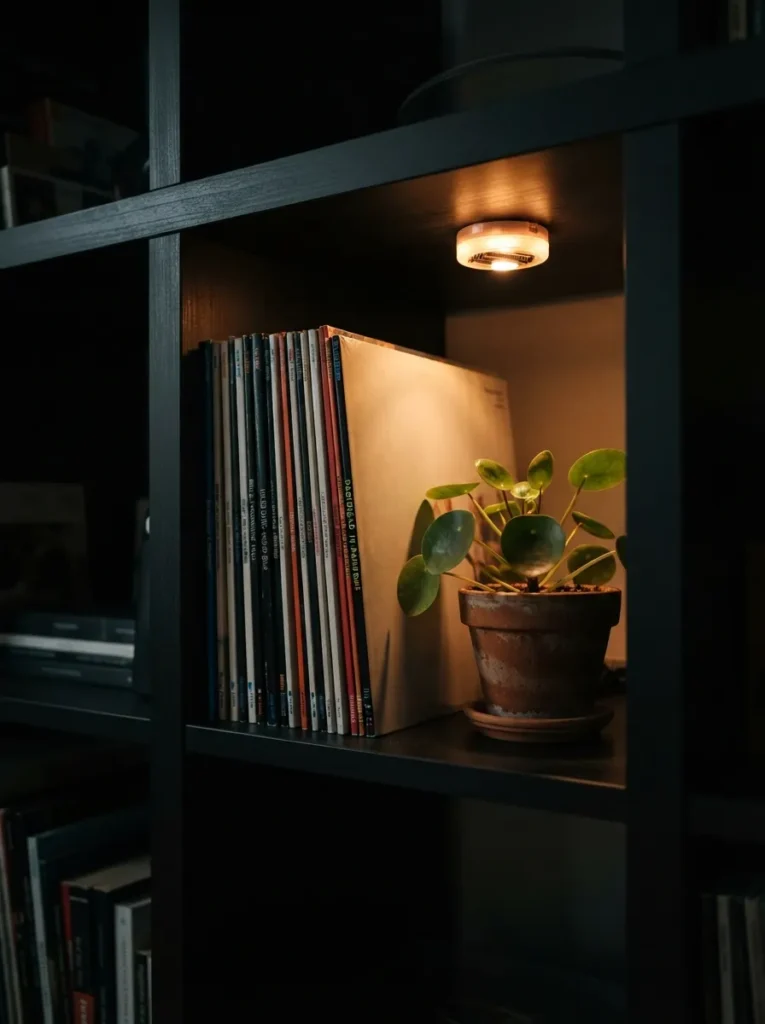
What it looks like: Softly lit vignettes a plant or a stack of records glowing instead of sitting in shadow.
Why it works: Most cubbies sit in shadow once a TV or console blocks nearby room light; small battery puck lights inside two or three cubbies pull focus toward styled objects instead of leaving the unit visually flat.
How to copy it: Stick battery-powered puck lights to the top interior corner of two non-adjacent cubbies, angle them slightly downward, and use warm-toned bulbs to match any backlighting already installed.
Best for: Renters who can’t run electrical wiring for built-in lighting.
Quick Win: Battery puck lights with a remote dimmer cost under $25 for a three-pack and need zero installation.
My Views:
Here’s something most guides won’t tell you: the TV height everyone recommends eye level while seated almost never works once a Kallax is under it, because the unit itself adds 11 to 15 inches before the TV even starts. I’ve measured this wrong more than once. Hold a piece of cardboard at the proposed screen center before mounting anything; on a standard 30-inch Kallax base, most TVs end up 4 to 6 inches higher than actually feels comfortable.
13. Style Open Cubbies in Odd-Numbered Groups
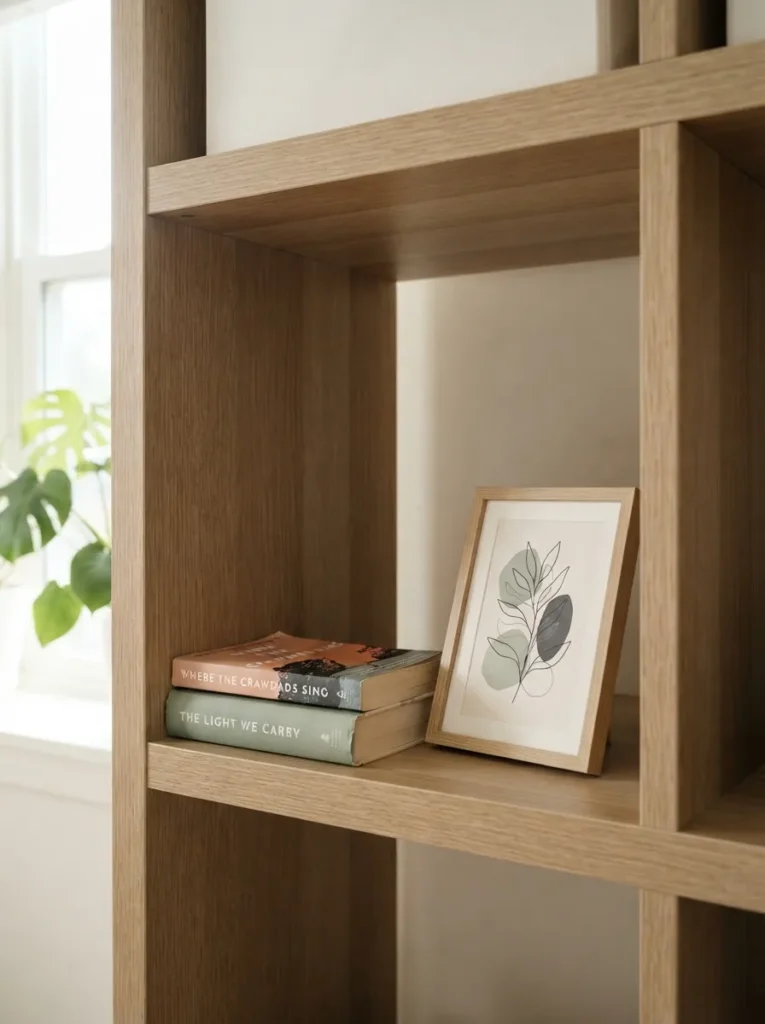
What it looks like: Curated and uneven three objects per cubby instead of one lonely item floating in empty space.
Why it works: Empty or under-filled cubbies read as unfinished; grouping objects in odd numbers at varying heights creates the visual rhythm designers rely on instead of a static grid.
How to copy it: In open cubbies, stack two books flat, add one vertical object like a vase or framed print leaning against the back, and leave roughly a third of the cubby visibly empty for breathing room.
Best for: Anyone who left cubbies open but isn’t sure what to put in them.
Pro Tip: Vary object height across neighboring open cubbies two cubbies styled at exactly the same height in a row looks accidental, not intentional.
14. Float a Single-Row Shelf Instead of a Full Unit
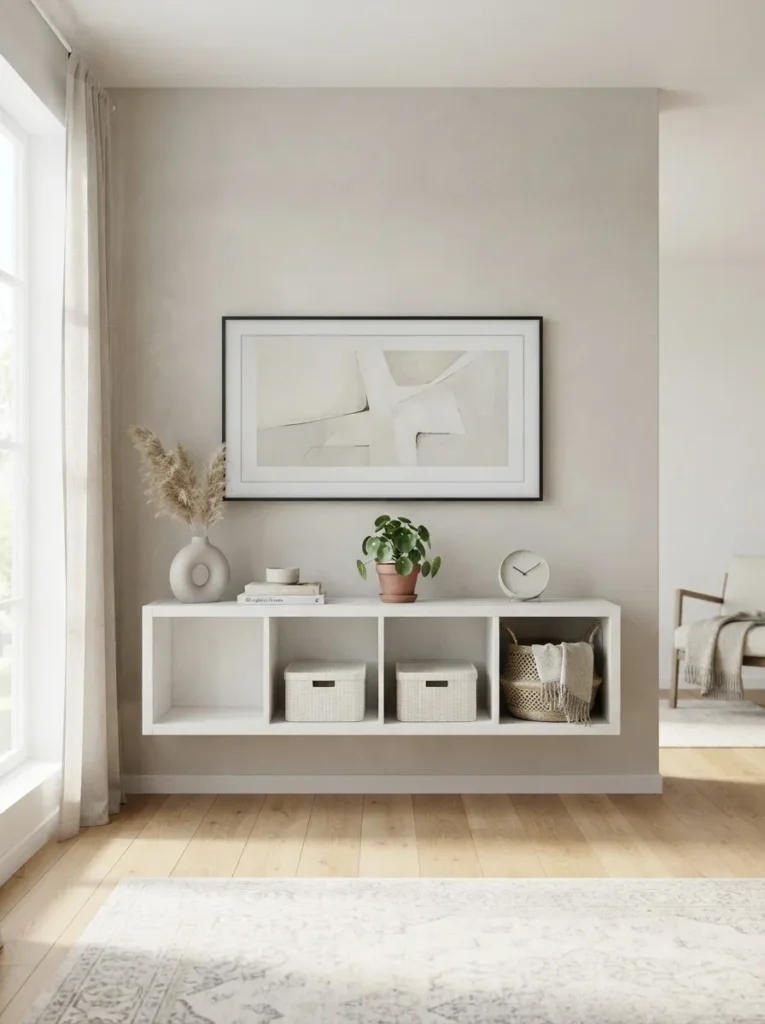
What it looks like: Weightless against the wall no visible base at all.
Why it works: Wall-mounting a smaller insert frees up floor space entirely, which matters most in small rooms where floor visibility affects perceived size more than square footage does.
How to copy it: Use a single-row Kallax insert with a wall-mount bracket kit rated for its loaded weight, and hang it 4 to 6 inches below the TV rather than directly touching it, so cords have a place to route between.
Best for: Small rooms where every inch of visible floor counts.
Small-Space Tip: A floating single-row shelf reads larger from across the room than a floor-standing unit half its size floor visibility does more visual work than shelf capacity.
One more layout idea before the color options this one’s for wide, open walls.
15. Run a Low Single Row Beneath a Wall-Mounted TV
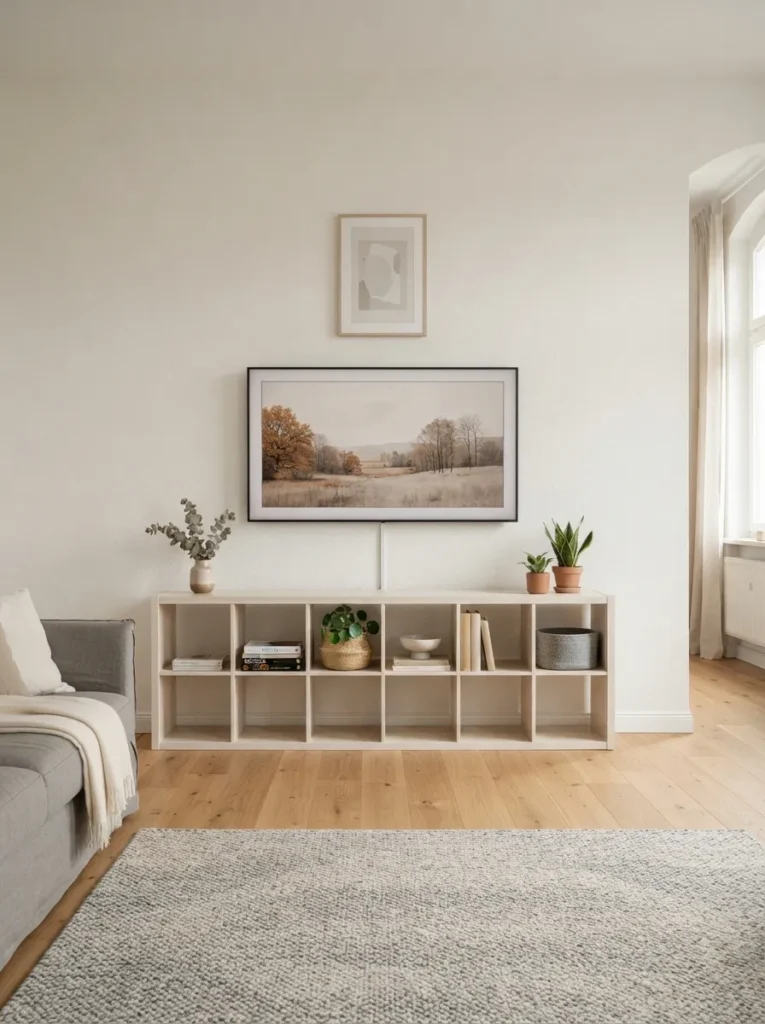
What it looks like: Low and horizontal a long, quiet line beneath a wall-mounted screen.
Why it works: A single-row Kallax keeps the visual center of gravity low, balancing a wall-mounted TV placed higher up and preventing the floating-screen-with-nothing-below-it look that makes rooms feel unfinished.
How to copy it: Position the low unit so its top surface sits 4 to 8 inches below the TV’s bottom edge, center it under the screen rather than off to one side, and keep styling minimal.
Best for: Wide walls with a single focal TV point.
Warning: Centering the shelf under the TV but off-center from the wall itself creates a lopsided look from the doorway center it to the wall, not just the screen.
16. Choose a White Finish to Brighten Small Rooms
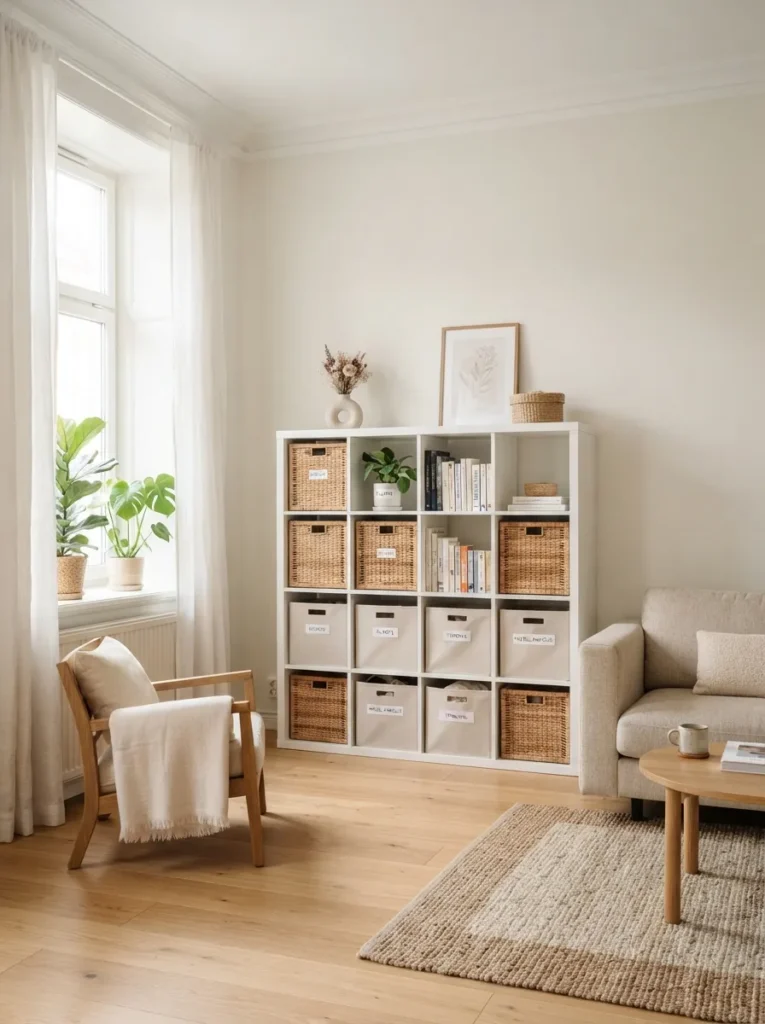
What it looks like: Bright and expansive white cubbies practically disappear into a white or pale wall.
Why it works: Matching the unit color closely to the wall reduces visual contrast, making the furniture recede rather than compete for attention useful in small or low-light rooms where dark objects read heavier than they are.
How to copy it: Choose a Kallax finish within one or two shades of the wall color rather than stark white against warm white, and keep bin colors light too, so nothing creates a hard visual break.
Best for: Small or naturally dark rooms that need to feel bigger.
Budget Version: A $20 quart of wall-matching paint on an older white Kallax achieves the same blending effect without buying new furniture.
17. Add Glass Door Inserts for Display Storage
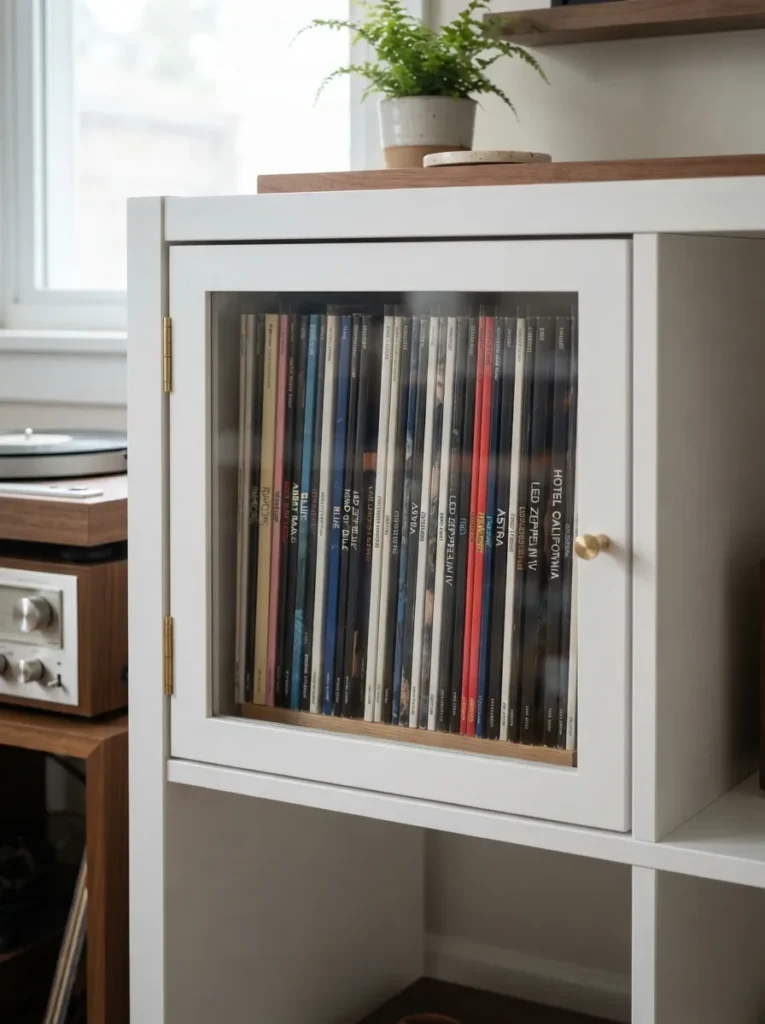
What it looks like: Polished and collector-grade records or glassware visible but dust-free behind a clear panel.
Why it works: Glass-front inserts protect items like vinyl or glassware from dust while keeping them visually part of the room, which solid doors can’t do display and storage in the same move.
How to copy it: Use pre-made glass-door cube inserts sized for a 13-inch Kallax opening, choose ones with a soft-close hinge so they don’t slam near a TV, and reserve glass fronts for cubbies with objects worth looking at.
Best for: Record or glassware collectors who want display without the dusting.
Important: Not every glass insert brand fits Kallax’s exact interior dimensions measure the cube opening before ordering, since even a quarter-inch off means it won’t sit flush.
Shop This Look
| Product |
|---|
| Glass-front cube door insert, soft-close hinge |
| Interior cube LED light strip |
| Microfiber glass cleaning cloth |
| Felt shelf liner |
18. Choose a Warm Oak-Effect Finish for Cozy Warmth
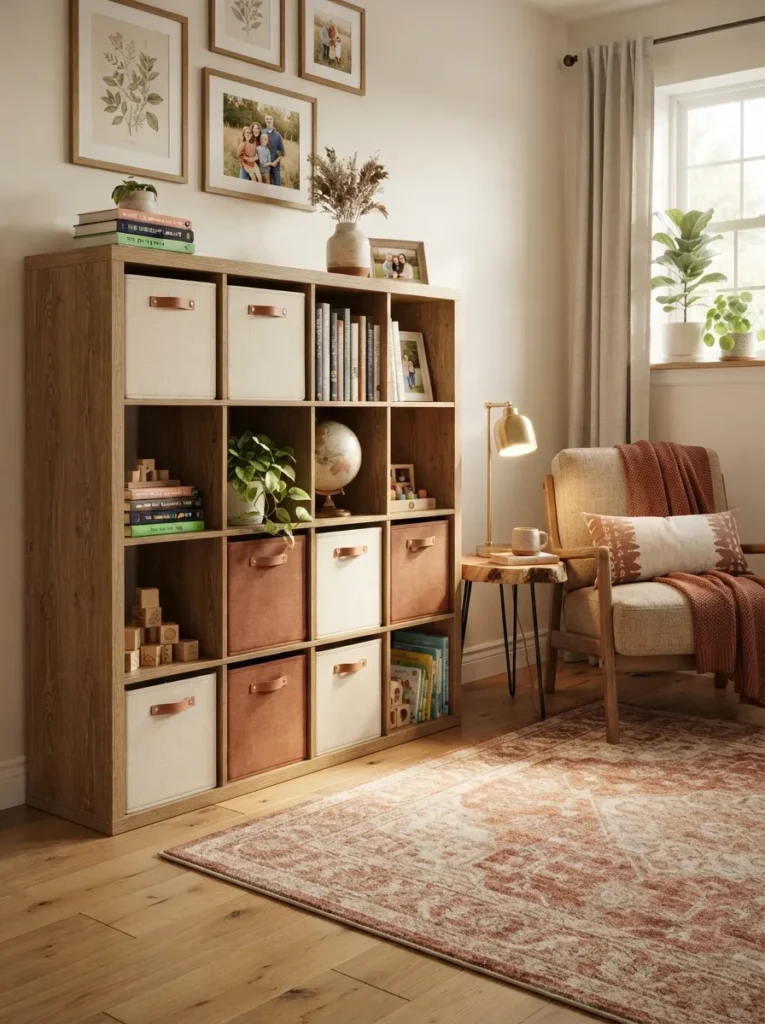
What it looks like: Warm and textured a honey-toned wood grain instead of flat paint or stark white.
Why it works: Wood-effect finishes read as warmer and less clinical than white or black paint, suiting dens and family rooms going for coziness over a sharp, modern edge the grain pattern also hides small scuffs better than matte paint.
How to copy it: Choose the white stained oak effect finish at purchase rather than repainting later, and pair it with warm-toned bins in cream or rust rather than cool grays, which clash with the wood undertone.
Best for: Family rooms and dens going for a cozy, lived-in feel over a modern one.
Last one and it solves the problem of a Kallax TV unit on a narrow wall with nowhere to go but up.
19. Stack Two Units Into a Tall Kallax TV Unit Tower
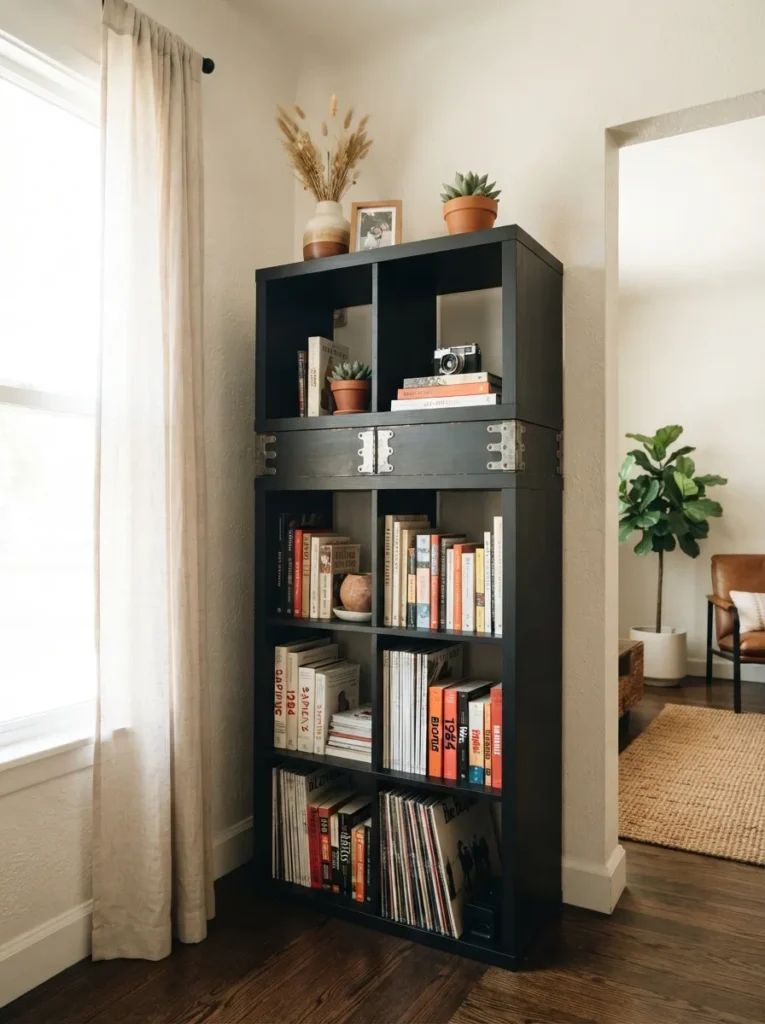
What it looks like: Vertical and substantial storage climbing up the wall instead of spreading along it.
Why it works: Stacking a 2×2 on top of a 4×4 adds display and storage height without widening the footprint, suiting narrow walls where a long horizontal unit wouldn’t fit.
How to copy it: Secure the top unit to the bottom one with mending plates at the interior corners before anchoring the whole stack to the wall, and keep heavier items like books in the bottom section only never the top, for stability.
Best for: Narrow walls or rooms where floor space is tighter than wall space.
Pro Tip: Never rely on stacking alone for stability the wall anchor still has to hold the combined weight of both units plus contents, so use anchor hardware rated above what one unit alone would need.
How to Start Your Kallax TV Unit Transformation
In practice, the first move that actually matters is anchoring the unit to the wall not painting it, not styling the bins. A loaded Kallax with a TV on top has enough top-heavy weight that skipping this step risks the whole project later; everything else builds on a unit that isn’t going anywhere.
The most common fixable error is buying inserts before measuring the cube opening. Kallax cubes measure roughly 13 by 13 inches inside, but bins marketed as “Kallax-compatible” vary by up to an inch. Measure the actual opening first, then shop, or you’ll return half of what you bought.
A warm-white LED strip for backlighting, a set of two woven paper-cord baskets in a matching tone, and a slim surge protector sized to fit inside one cubby all three cost under $50 combined and solve the three most common complaints: dark cubbies, mismatched bins, and visible cords.
A basic anchored-and-styled Kallax TV unit takes one afternoon and roughly $100 to $180 including the unit itself. A full media wall with a wood top, backlighting, and an L-shaped second unit is a realistic weekend project, budgeting closer to $300 to $500 depending on finishes.
Ready to Build Your Kallax TV Unit?
Between the color choices, the wood tops, the lighting tricks, and the small-space fixes, there’s a version of this Kallax TV unit built for almost any living room. None of this has to happen in one weekend anchoring the unit and clearing the cords already solves the two problems most people notice first.
If today’s the only day you have, start by locating your wall studs and getting the anti-tip straps on; everything else can wait. A settled, cord-free media wall changes how a room feels at the end of a long day quieter, less cluttered, easier to actually sit in. Pin your favorite configuration now, because between the paint colors and the layout options, it’s easy to forget which idea matched your wall.
You Might Also Like
- 12 IKEA Kallax Hacks for Small Bedrooms
- 15 Budget-Friendly Media Wall Ideas for Any Style
- 10 Cord-Hiding Tricks for a Cleaner Living Room