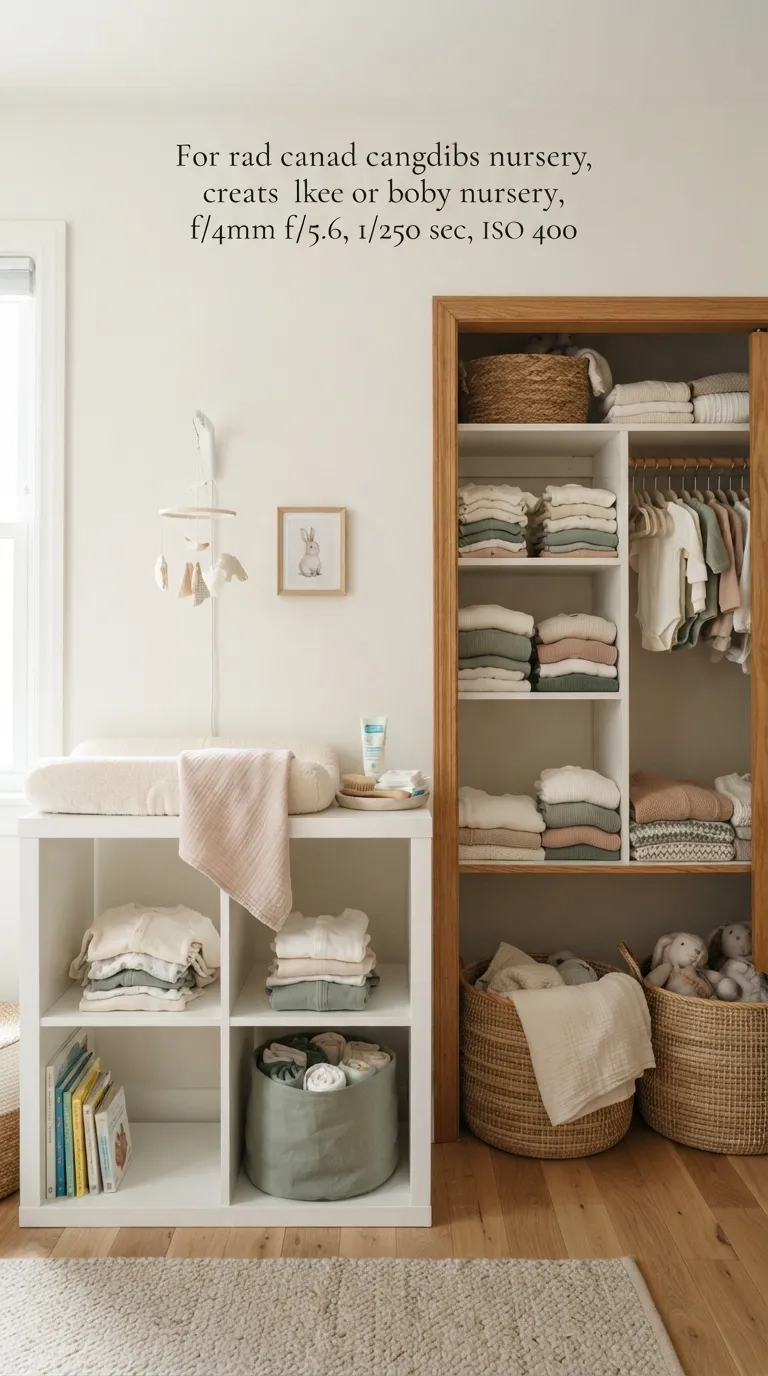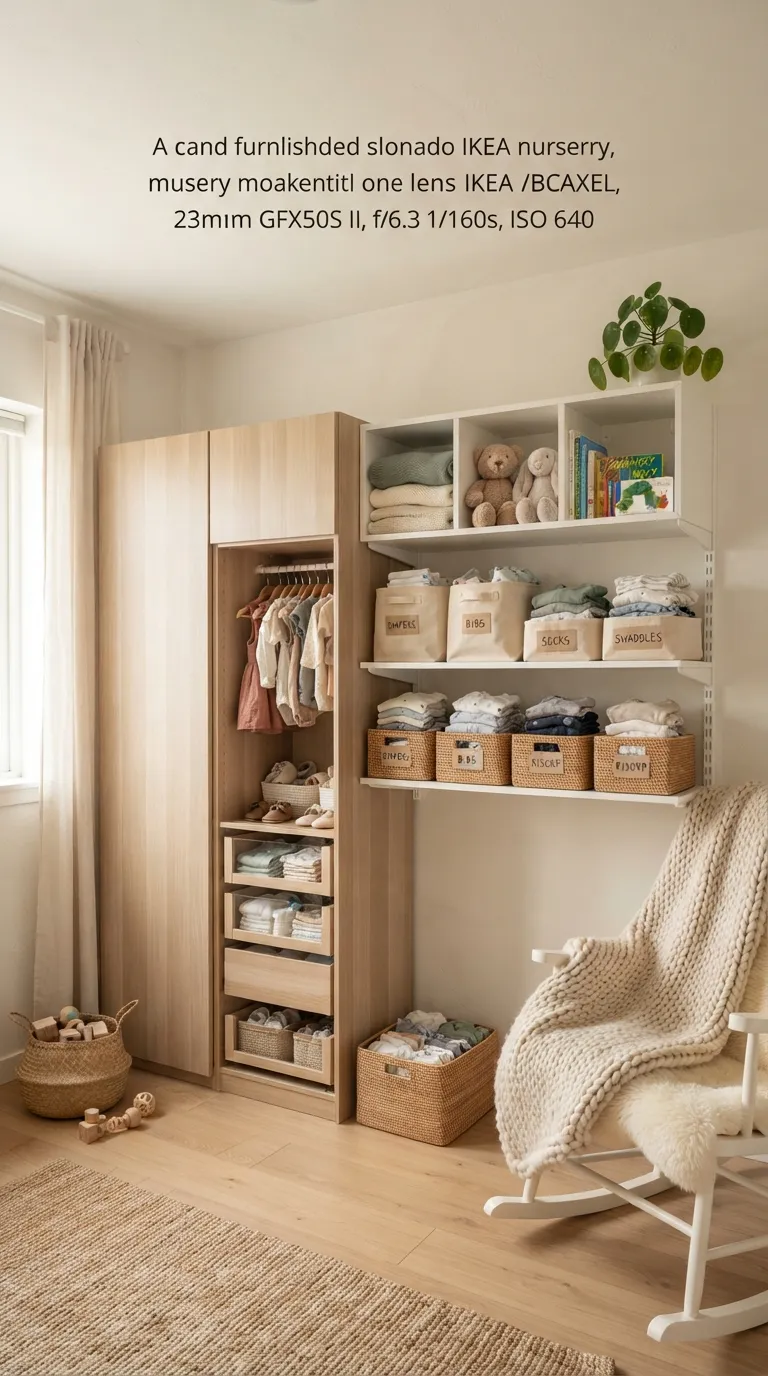
21 IKEA Nursery Storage Hacks Every Parent Needs
IKEA nursery storage hacks are the small, repeatable systems bins, rails, wall units that turn a chaotic baby room into one where everything actually has a spot. This guide walks through 21 of them, from $15 fixes to full wardrobe overhauls, all built around pieces you can find in the IKEA catalog right now.
A nursery that works doesn’t ask anything of you at 3 a.m. Diapers are where your hand expects them. The dresser drawer opens without a fight. That kind of order is the real luxury in a baby’s first year not matching decor, just less friction.
Here’s how to build it, piece by piece.
Jump To
- Why IKEA Nursery Storage Hacks Make Such a Difference
- 21 IKEA Nursery Storage Hacks
- How to Start Your IKEA Nursery Storage Transformation
- Ready to Get Your Nursery Organized?
Why IKEA Nursery Storage Hacks Make Such a Difference
Nursery storage isn’t about matching baskets it’s about designing a room that still functions when you’re exhausted and one-handed. IKEA’s modular systems (KALLAX, TROFAST, SMÅSTAD, PAX) work well here because they’re built to be reconfigured as your baby grows from bassinet to toddler bed.
Warm oak-toned SMÅSTAD frames, matte white EKET cubes, and woven SKUBB bins keep the room visually calm without hiding function. Even a small nursery 80 square feet or less can hold a full changing station, a week of clothing, and toy storage if you prioritize wall space before floor space.
| Best starting point | A wall-mounted BOAXEL or EKET shelf near the changing table |
| Biggest impact area | Vertical wall storage above crib-height clutter zones |
| Budget to start | $60–150 for a basic bin-and-shelf system |
| Time to complete | A weekend for basics, 2–3 weekends for a full built-out wall |
21 IKEA Nursery Storage Hacks
1. Map the Nursery Into Three Zones Before You Buy Anything
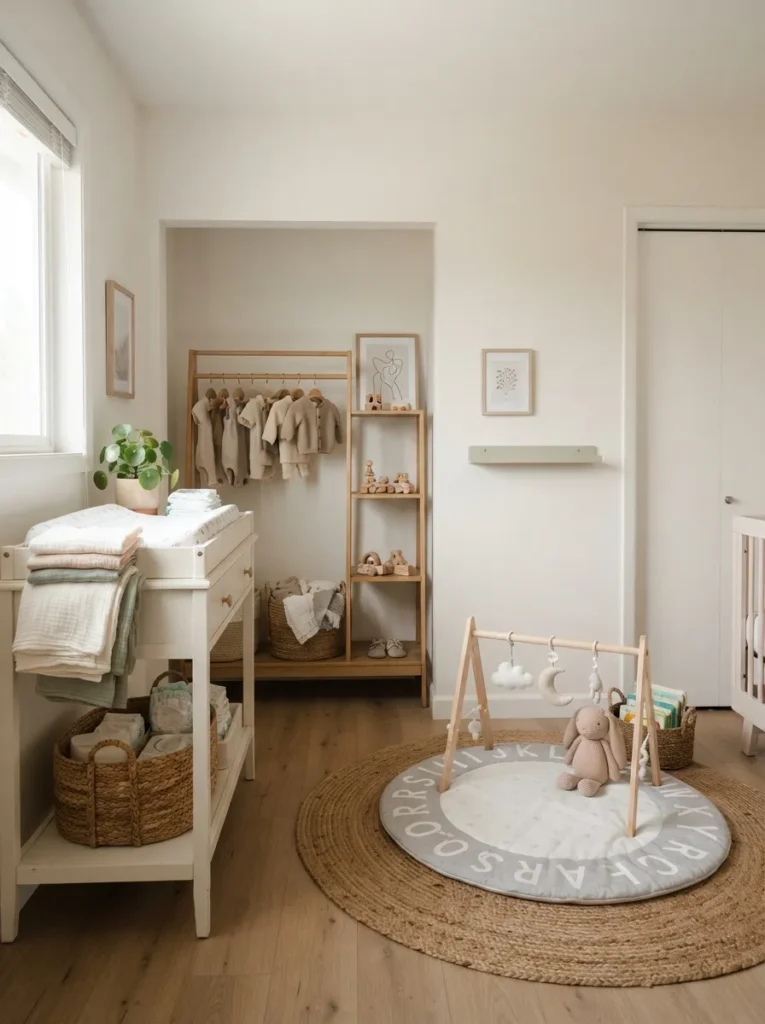
What it looks like: A nursery where the changing table, the closet, and the play area are visually and physically separated nothing overlaps by accident.
Why it works: Zoning reduces decision fatigue when every category of item has one designated square footage, you stop hunting across the room mid-task. It’s a spatial version of “a place for everything,” which matters most in a room you’ll use half-asleep.
How to copy it: Before buying a single bin, walk the room and tape off three rough rectangles on the floor with painter’s tape changing, clothing, play. Only then decide which IKEA piece fills each zone. Most first-time nursery shoppers buy storage before they’ve settled on layout, which is the single most expensive mistake to reverse later.
Best for: Parents furnishing a nursery from scratch, before any purchases are locked in.
✅ Nursery Zone Planning Checklist:
- [ ] Tape off three zones on the floor: changing, clothing, play
- [ ] Confirm the changing zone sits within arm’s reach of a water source or wipes station
- [ ] Measure wall space in each zone before shopping
- [ ] Choose one storage piece per zone — resist buying “just in case” extras
What You’ll Need
| Product |
|---|
| Small area rug to visually anchor the play zone |
| Wall-mounted floating shelf for the changing zone |
| Freestanding closet unit for the clothing zone |
| Painter’s tape (for planning, not permanent) |
| Storage bin labels |
2. Go Vertical Before You Add a Single Floor Piece
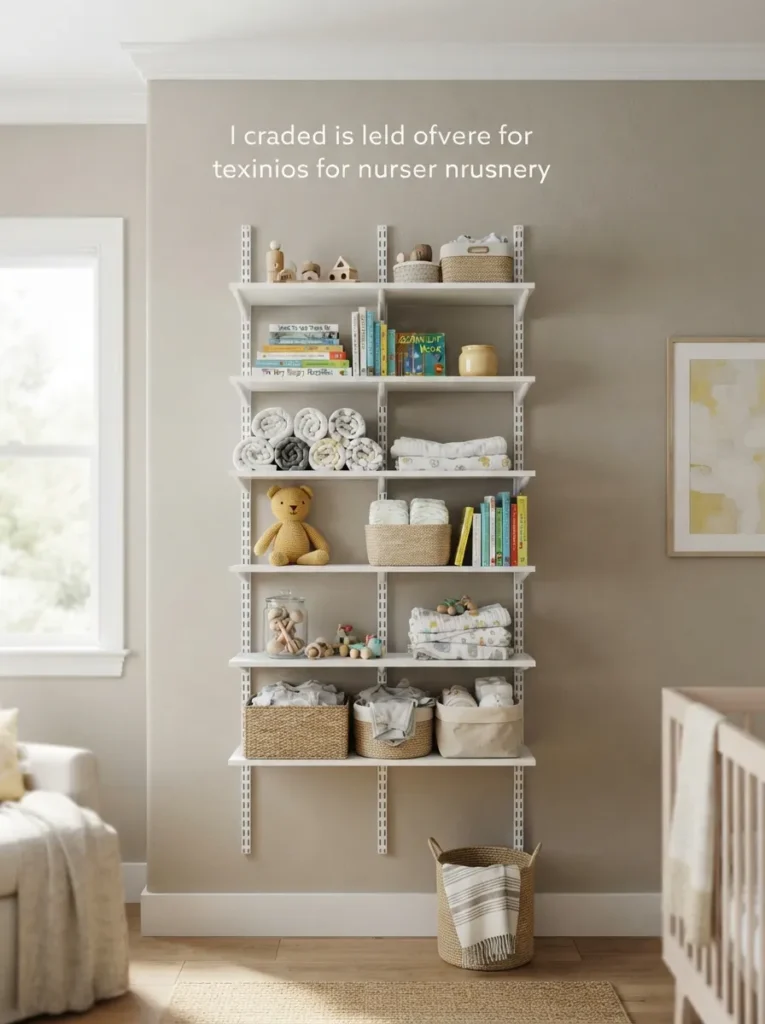
What it looks like: A slim wall system that climbs toward the ceiling instead of spreading across the floor, leaving the crib-side rug completely clear.
Why it works: In small nurseries, floor space is the scarcest resource vertical storage borrows unused wall height instead, which keeps walking paths open and the room feeling larger than its square footage.
How to copy it: Install a wall-track shelving system starting 12 inches off the floor and running to 78 inches, with the heaviest bins on the lowest shelf for stability. Skip anything freestanding under 24 inches wide in rooms smaller than 90 square feet it eats floor space without earning it back in storage.
Best for: Small nurseries, shared rooms, and apartment layouts with limited square footage.
Small-Space Tip: Mount shelving on the wall opposite the door so the eye travels upward on entry, making the whole room read taller.
3. Let One Wardrobe Do the Job of Three Pieces
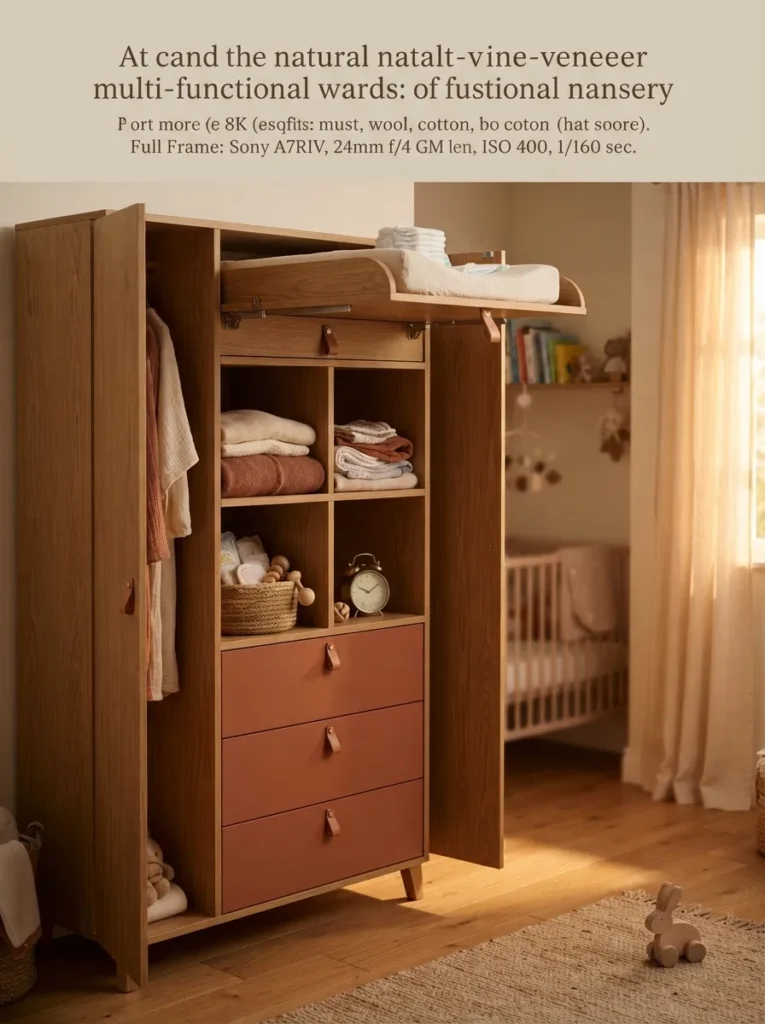
What it looks like: A single tall wardrobe with a hanging rail up top, open cubbies at eye level, and drawers below no separate dresser needed.
Why it works: Combining storage functions into one footprint is the core principle behind small-space furniture every inch does double duty, and you avoid the visual clutter of three mismatched pieces lining one wall.
How to copy it: Choose a wardrobe with a removable changing table topper, so the piece converts to a standard closet once diapering ends no repurchase needed at 18 months. Add the changing pad on top rather than buying a separate changing table.
Best for: Parents who want the room to grow with the baby without buying new furniture twice.
Pro Tip: Order the wardrobe with the topper attachment from day one, even if you don’t need the changing surface yet it’s harder to source separately later.
The next hack costs less than a takeout dinner and it fixes the drawer nobody can close.
4. Swap Deep Drawers for Soft-Sided Fabric Bins
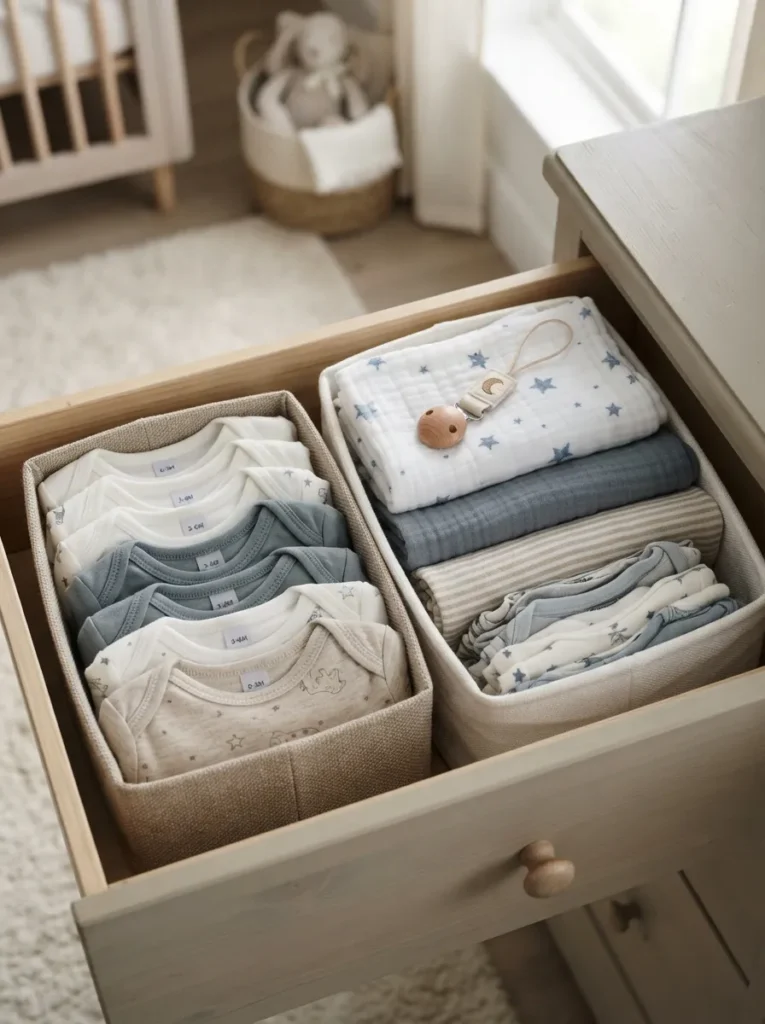
What it looks like: A dresser drawer divided into soft, collapsible fabric bins instead of one deep, jumbled pile of baby clothes.
Why it works: Deep drawers hide inventory you forget what’s at the bottom within a week. Fabric dividers create visible sub-categories inside the same drawer, so 0–3 month onesies never get buried under burp cloths.
How to copy it: Measure the drawer interior first, then buy fabric boxes in the size that leaves no gaps gaps let contents shift and re-jumble within days. Label each box by size range, not by item type, since babies outgrow by size faster than by category.
Best for: Anyone dealing with a single overstuffed dresser drawer and no closet space to expand into.
Budget Version: Buy fabric boxes in one size only across the whole dresser bulk-buying a single size is often cheaper per unit than mixing sizes, and dividers can be added later.
What You’ll Need
| Product |
|---|
| Woven fabric storage boxes, drawer-depth sized |
| Drawer dividers, adjustable width |
| Fabric-safe garment labels |
| Small clip-on drawer tags |
5. Color-Code Bins by Category, Not by Aesthetic
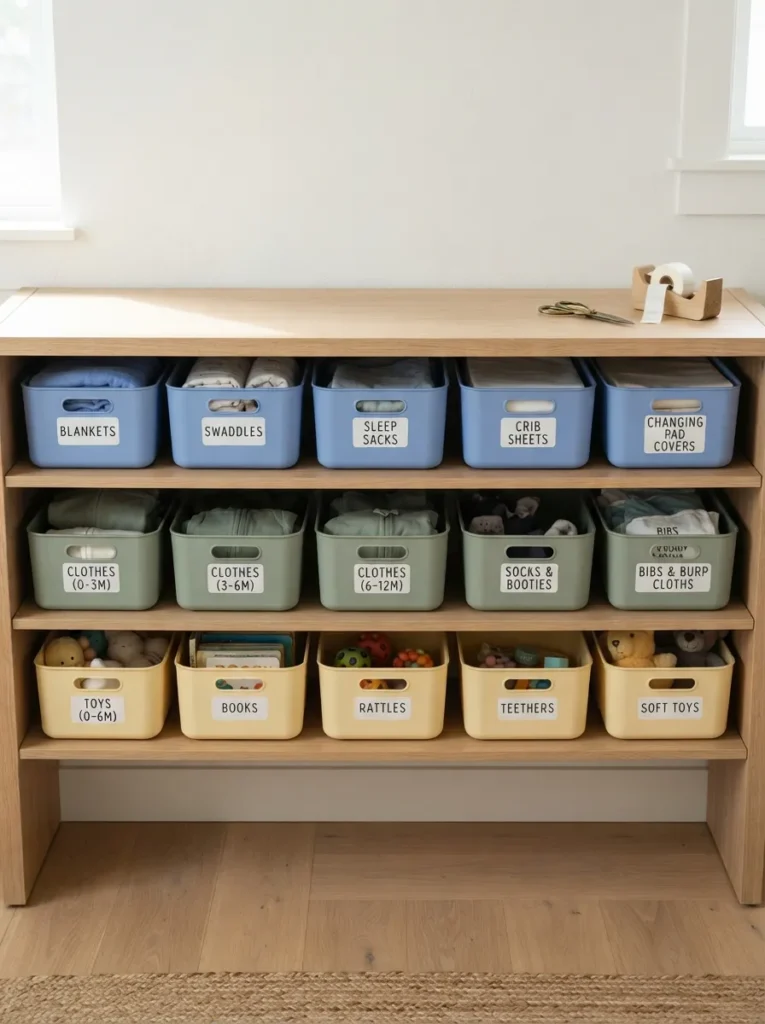
What it looks like: A shelf of bins where color instantly tells you what’s inside blue for laundry, green for toys before you read a single label.
Why it works: Color-coding taps into pattern recognition faster than text does, which matters when you’re reaching for supplies one-handed in dim light during a night feeding.
How to copy it: Pick four colors maximum and assign each to a fixed category more than four and the system stops being instantly readable. Keep the same color consistent across every room in the house if you have a shared laundry or toy system elsewhere.
Best for: Parents managing nursery supplies across multiple rooms or with a co-parent who needs the system to be self-explanatory.
Warning: Don’t color-code by aesthetic preference instead of function a system built around “what looks nice together” collapses the first time you’re restocking at midnight and can’t remember which pastel meant what.
6. Add Under-Shelf Lighting to the Changing Station
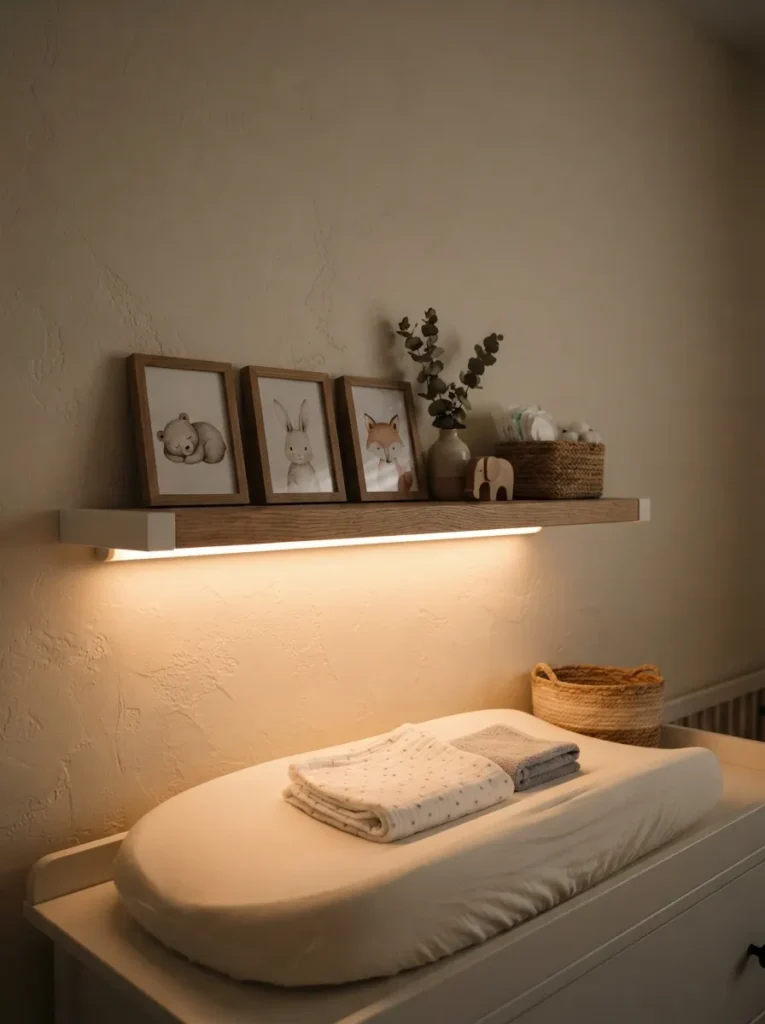
What it looks like: A thin strip of warm light tucked under the shelf edge above the changing pad, glowing low without a harsh overhead switch.
Why it works: Task lighting at the changing station means you’re not fumbling for a light switch or a phone flashlight during a 2 a.m. diaper change, and dim warm light disturbs sleep less than a bright overhead fixture.
How to copy it: Mount a battery-powered LED strip along the underside of the shelf directly above the changing pad, angled so light falls on the pad rather than into the baby’s eyes. Choose warm white (2700K) over daylight bulbs for this specific spot.
Best for: Any nursery where the changing station doesn’t already sit near a dimmable lamp.
Budget Version: A battery-operated stick-on LED puck light costs under $15 and skips wiring entirely reposition it as needed.
Up next: the labeling trick that actually survives contact with a toddler.
7. Use a Bag-and-Label System for Small Loose Items
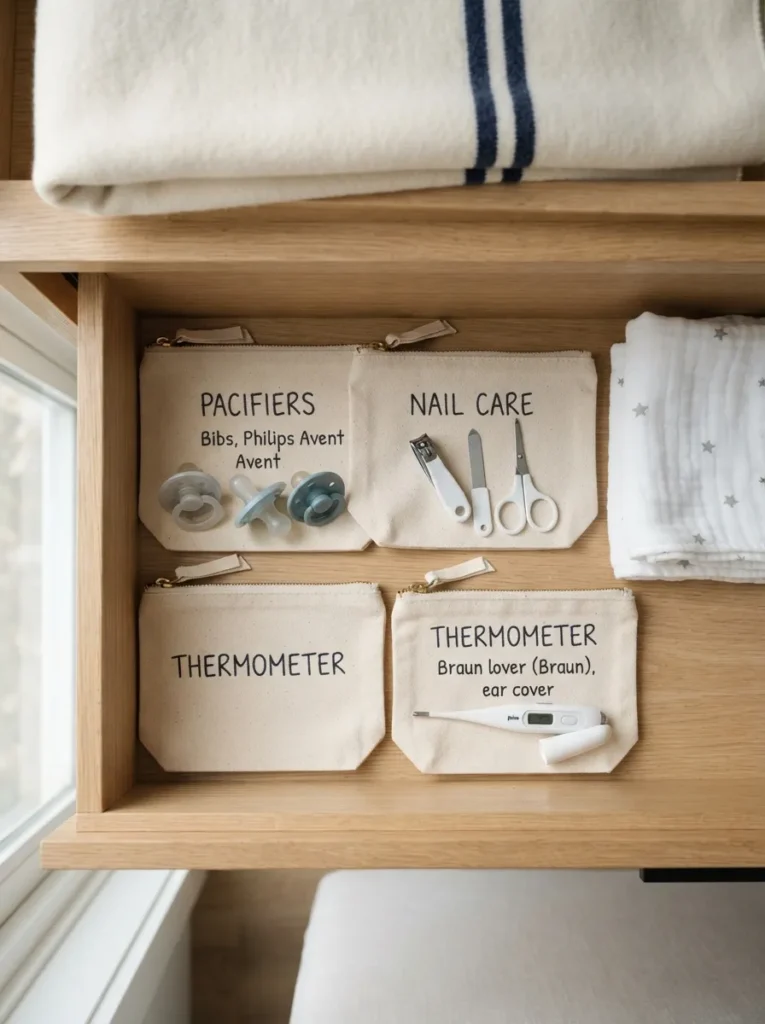
What it looks like: A drawer of small zippered pouches, each labeled and holding one category of tiny loose items pacifiers in one, grooming tools in another.
Why it works: Small items are the fastest thing to become a junk drawer bagging by category before they scatter prevents the slow creep of loose clutter that no bin system fully solves on its own.
How to copy it: Use small zippered bags for anything under 4 inches pacifiers, nail clippers, thermometer, teething rings and write the category on the bag itself, not a separate tag that falls off. Reassess and re-sort monthly for the first six months, since needs shift fast.
Best for: Parents who keep losing track of small grooming and feeding accessories.
Important: Most people assume label makers are necessary for a system like this a permanent marker on canvas tags holds up just as well and costs a fraction as much.
8. Turn a Cube Shelving Unit Into a Storage-Backed Room Divider
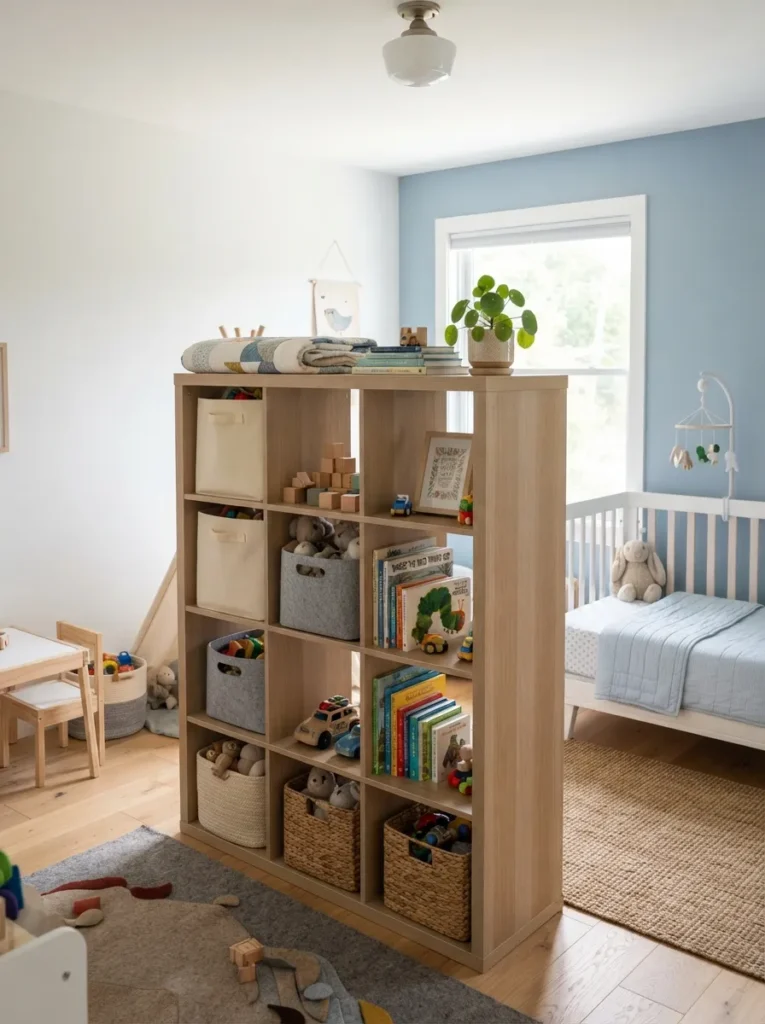
What it looks like: A cube shelving unit standing perpendicular to the wall instead of flush against it, creating a soft partition between two zones of one room.
Why it works: In shared rooms nursery-office combos or nursery-toddler rooms a storage piece that also divides space solves two problems in one purchase, and open-backed cube units let light pass through so the room doesn’t feel chopped up.
How to copy it: Anchor the unit to the wall or floor with the included anti-tip kit before adding a single bin, since freestanding dividers in a child’s room carry real tip-over risk. Fill the baby-facing side with soft bins only no hard-edged books or bins at crib height.
Best for: Shared bedrooms, nursery-office combinations, or two-child rooms needing a visual boundary.
Mistake to Avoid: Skipping the wall anchor is the single most common error with cube shelving in kids’ rooms it takes ten minutes and prevents a genuinely dangerous tip-over.
9. Add a Step Stool and Low Pegs for Toddler Independence
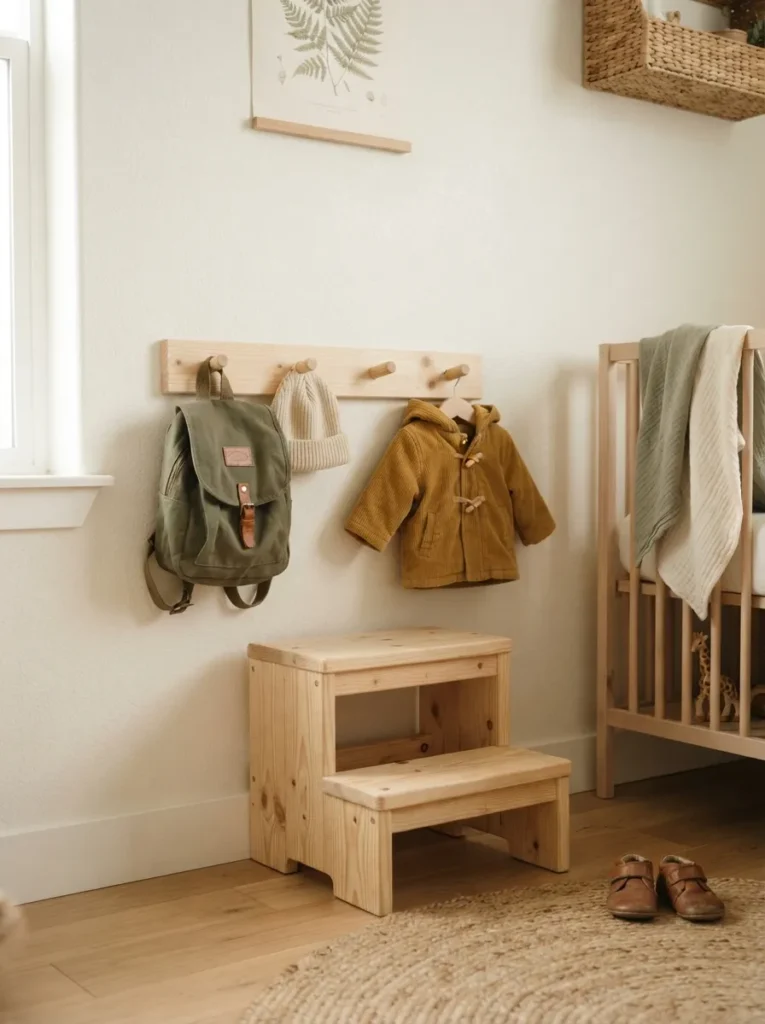
What it looks like: A low wooden stool parked under a row of pegs mounted at exactly toddler-shoulder height, holding one jacket and one bag.
Why it works: Storage that a toddler can reach independently rather than everything sized for adult reach teaches early self-sufficiency and cuts down on the daily friction of dressing and undressing a resistant two-year-old.
How to copy it: Mount pegs no higher than 30 inches from the floor, and pair with a stable stool for anything just out of reach. Limit pegs to three or four hooks maximum more becomes visual clutter a toddler won’t actually use.
Best for: Nurseries transitioning into toddler rooms, where independence is becoming part of the routine.
Pro Tip: Unfinished pine pegs and stools can be finished with a single coat of clear wax rather than paint it protects the wood without the off-gassing smell of fresh paint in a baby’s room.
What You’ll Need
| Product |
|---|
| Low wooden step stool, unfinished pine |
| Wall-mounted coat pegs, toddler height |
| Anchor screws rated for wall-mounted hooks |
| Clear wood wax finish |
This next one is easy to overlook but it’s the reason some nurseries never feel crowded, even at eighteen months.
10. Paint Alternating Cubes to Zone by Color Without Extra Bins
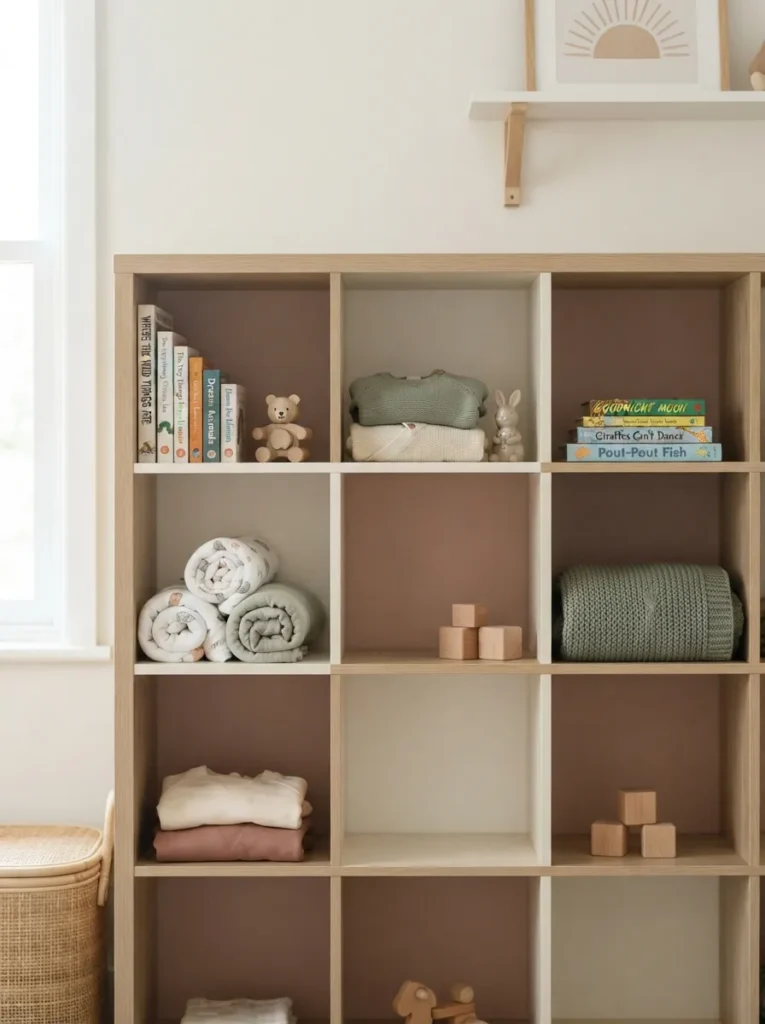
What it looks like: A cube shelf where every other opening carries a soft second color, so the zones read as separate categories without adding a single extra bin.
Why it works: Two-tone paint does the sorting work that labels usually do your eye clocks “these four cubes are clothing, those four are toys” instantly, which matters more than most parents expect in a room used half-asleep.
How to copy it: Paint the interior back panel of alternating cubes never the frame in a muted second tone like dusty clay or sage, leaving the shelf’s structure neutral. Two colors maximum; a third starts reading as decoration rather than function.
Best for: Parents who want a sorting system without buying additional bins.
Styling Note: Match the painted panel to one accent color already in the room’s textiles, so the shelf reads as intentional rather than mismatched.
11. Install an Interior Light Inside the Closet Wardrobe
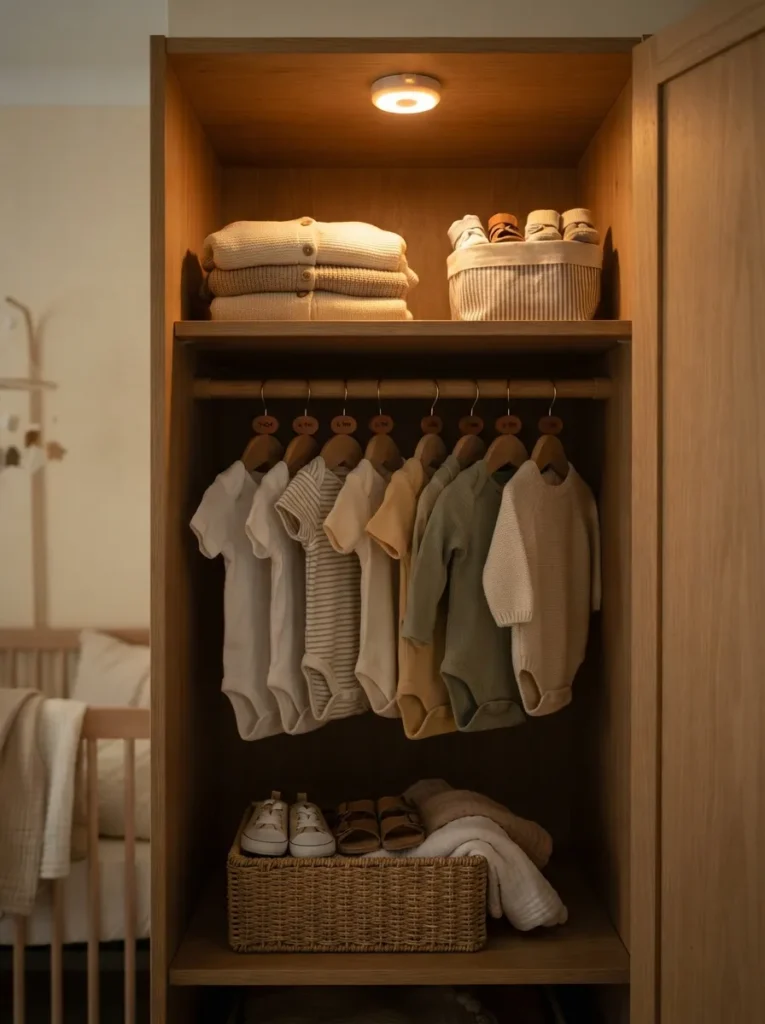
What it looks like: A wardrobe interior lit from within, so opening the door at night doesn’t mean squinting into a dark closet for a specific onesie.
Why it works: Closets are almost always the dimmest storage spot in a nursery, and interior lighting removes the last excuse to leave the overhead light on and wake a sleeping baby during a late outfit change.
How to copy it: Choose a motion-activated battery puck light mounted to the top interior panel of the wardrobe, angled downward across the hanging rail. Battery models avoid running wiring through a wardrobe you might reconfigure later.
Best for: Any nursery where the closet sits more than a few steps from a light switch.
Quick Win: Motion-activated lights turn off automatically after the door closes no habit change required to make this work.
12. Mount a Rail With S-Hooks for Bibs, Burp Cloths, and Bags
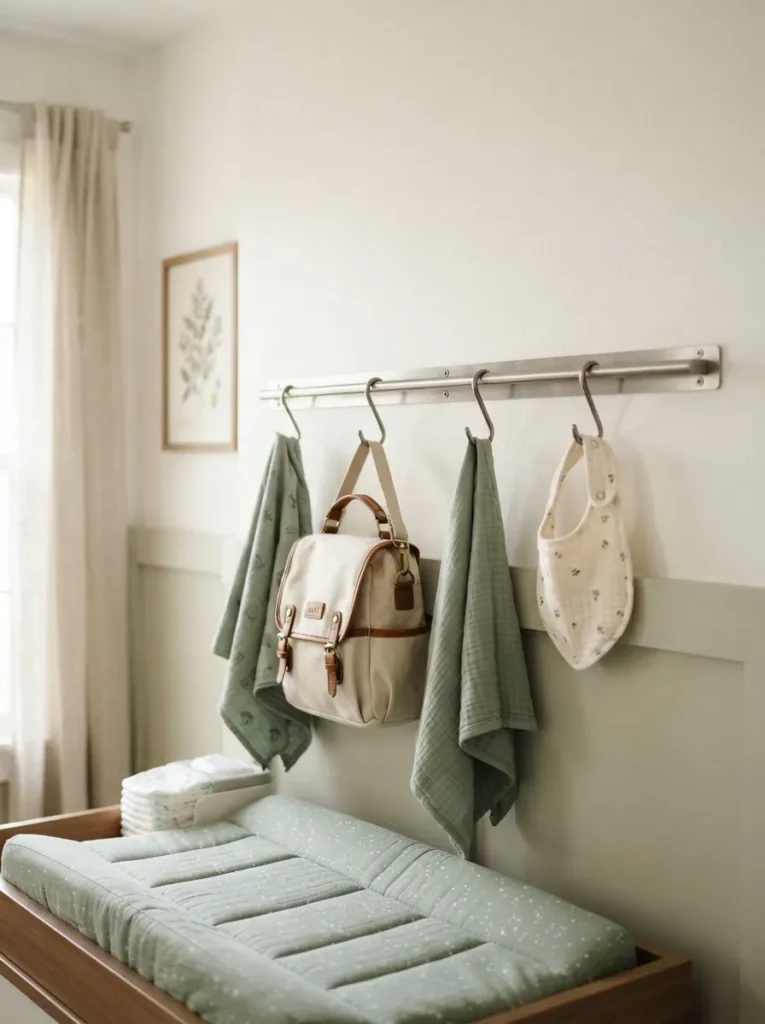
What it looks like: A slim metal rail mounted beside the changing station, hung with a handful of S-hooks holding whatever’s in daily rotation bibs, a burp cloth, the diaper bag strap.
Why it works: Items used multiple times a day don’t belong in a drawer rail-and-hook storage keeps daily-rotation items visible and grabbable in one motion, which matters most in the first exhausting months.
How to copy it: Mount a stainless rail at adult shoulder height, 8–10 inches from the changing pad, with three to five S-hooks maximum. Rotate what hangs there weekly rather than letting it become permanent overflow storage.
Best for: The specific handful of items you reach for multiple times daily.
Warning: Overloading the rail past five hooks turns it into the exact clutter it was meant to prevent if you’re adding a sixth hook, something needs to move to a drawer instead.
13. Use a Low Bin Frame for Toys That Need to Disappear Fast
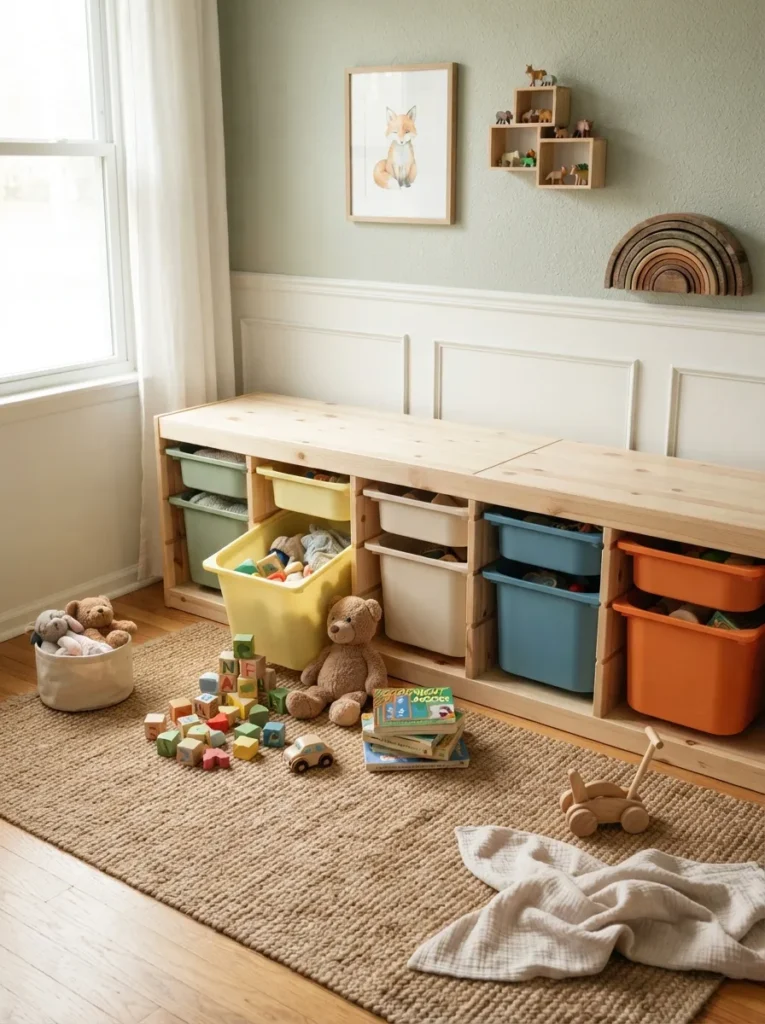
What it looks like: A low, floor-level frame of pull-out bins sized for toddler reach, built specifically for the fast toy-cleanup routine rather than long-term storage.
Why it works: Toy clutter multiplies faster than any other nursery category a low bin frame works because bins pull straight out and dump back in, with no folding or careful placement required, which is the only system a toddler will actually use unprompted.
How to copy it: Set the frame directly on the floor rather than elevated, so bins stay within a two-year-old’s reach without a step stool. Assign one bin per toy type blocks, soft toys, books capped at four bins total before the system starts feeling like more work than it saves.
Best for: Parents managing daily toy cleanup with a toddler, not just a newborn.
Small-Space Tip: A two-bin-wide frame fits along a wall narrower than most furniture options and still holds a full toy rotation.
14. Add Clear Drawer Dividers So Nothing Hides at the Bottom
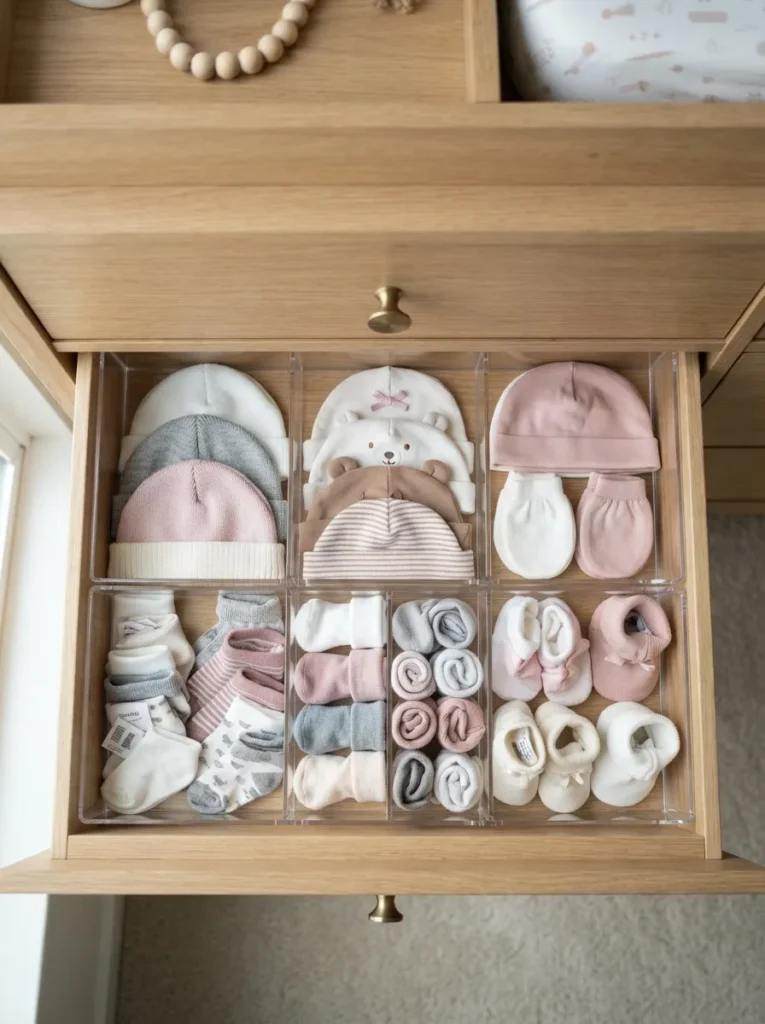
What it looks like: A drawer split into clear compartments, so socks, hats, and mittens each sit in their own visible section instead of one tangled pile.
Why it works: Clear dividers solve the “out of sight, out of mind” problem that opaque bins create you can see at a glance that you’re down to one clean hat, which matters more with fast-growing baby sizes than it would in an adult dresser.
How to copy it: Choose adjustable clear dividers sized to the exact drawer width, rather than fixed-size trays that leave gaps. Reserve clear dividers specifically for small, easily-lost items socks, mittens, hair clips not for folded clothing, which doesn’t need the same visibility.
Best for: The specific drawer where small items keep vanishing.
Budget Version: Repurposed shoebox lids cut to drawer width work as a free substitute until you’re ready to buy a fitted divider set.
What You’ll Need
| Product |
|---|
| Clear adjustable drawer divider set |
| Small dresser-width fitted drawer |
| Sock and mitten sorting trays |
| Non-slip drawer liner |
15. Choose One Pastel Family for a Gender-Neutral Palette
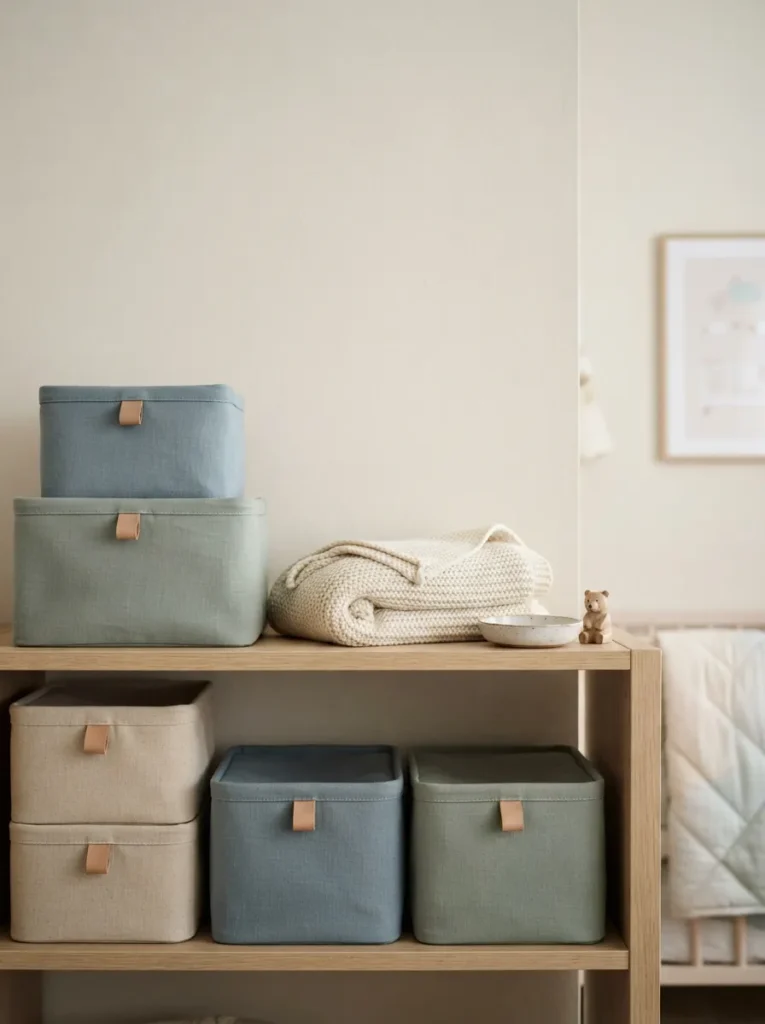
What it looks like: A shelf of storage boxes all pulled from one soft pastel family oat, sage, dusty blue instead of mismatched primary colors.
Why it works: A single restrained palette reads as calm and intentional rather than themed, which matters if the room needs to feel gender-neutral or transition smoothly past infancy without a full redecorate.
How to copy it: Pick three tones maximum from the same undertone family all warm or all cool, never mixed and apply them only to bins and boxes, keeping furniture neutral. Avoid true pastels with a pink or blue base if gender-neutral is the actual goal; sage, oat, and clay read as neutral in a way baby pink and baby blue don’t.
Best for: Parents wanting the storage system to outlast the newborn phase without a redo.
Pro Tip: Buy one extra box in the palette now brands frequently discontinue specific colorways, and matching later gets harder every year.
My Views:
Here’s something most guides won’t tell you: the number one nursery storage failure isn’t lack of bins, it’s bins sized for newborn clothes that get repurposed for 2T without anyone measuring first. A drawer that holds forty onesies perfectly holds maybe twelve toddler outfits the system quietly breaks around month fourteen, and most parents just assume they bought the wrong furniture instead of realizing the sizing shifted underneath them.
16. Use Flat Under-Crib Bins for Off-Season Storage Only
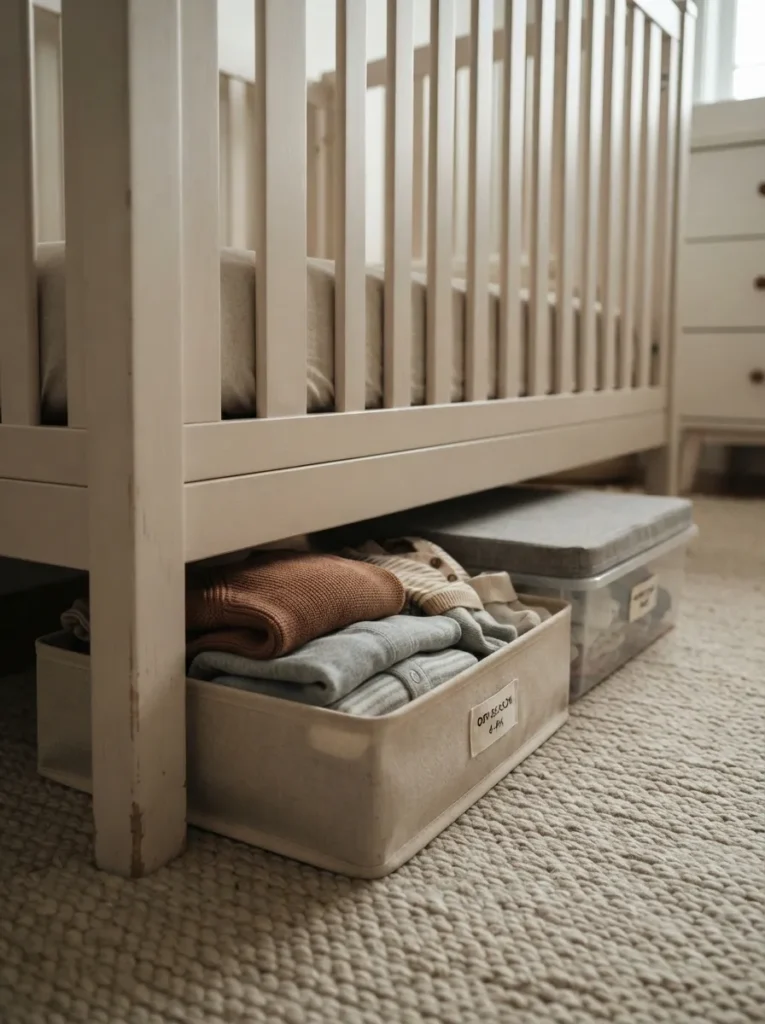
What it looks like: Shallow, flat bins tucked into the unused space beneath the crib frame, low enough to slide freely without scraping the floor.
Why it works: The space under a crib is dead square footage in almost every nursery using it for off-season sizes rather than daily items means you’re not bending under the crib multiple times a day, just seasonally.
How to copy it: Measure crib clearance before buying most standard cribs allow 6 to 9 inches, so choose bins under 6 inches tall to guarantee clearance. Reserve this space strictly for clothes sized more than two months ahead, not daily essentials.
Best for: Small nurseries with no closet space to spare for off-season rotation.
Mistake to Avoid: Storing daily diapering supplies under the crib means kneeling and reaching under a sleeping baby multiple times a day keep this zone for rotation stock only, never daily-use items.
17. Position Open Shelving Near the Nightlight, Not the Overhead Fixture
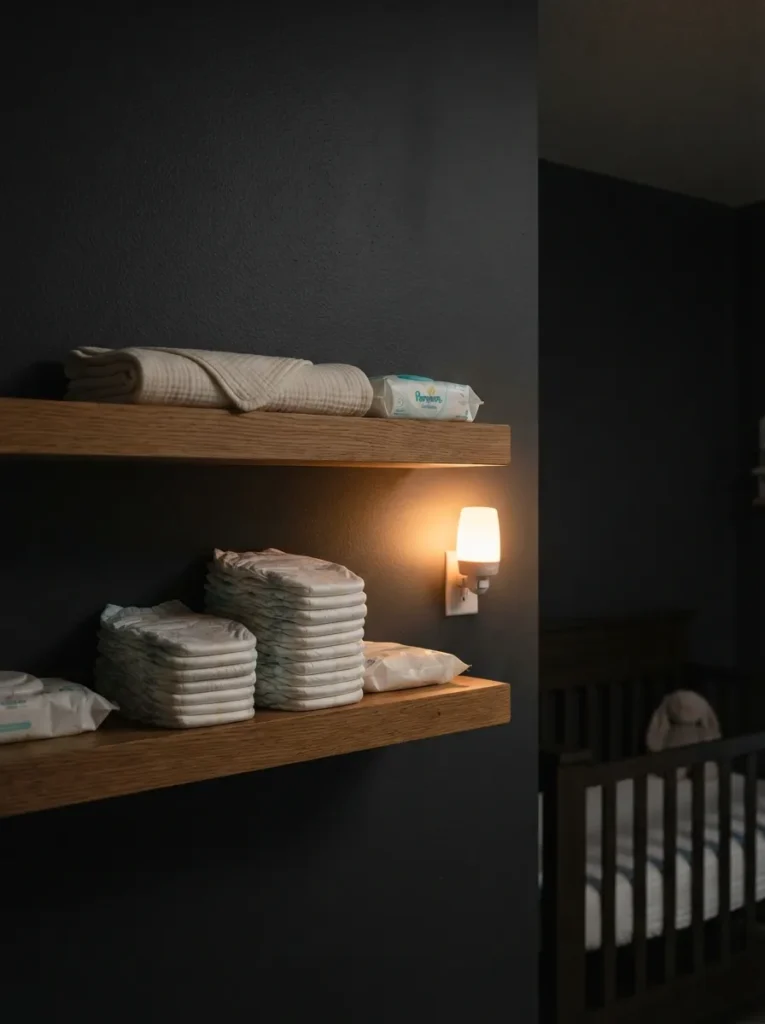
What it looks like: Open shelving placed within the soft glow radius of a plug-in nightlight, so nighttime restocking never requires the overhead switch.
Why it works: Light placement is a storage decision as much as a furniture one shelving that’s only usable under bright light forces a full wake-up during night changes, while shelving lit by ambient nightlight glow stays functional without disrupting sleep.
How to copy it: Map where the nightlight’s glow actually reaches before mounting shelves, then position diaper and wipe storage inside that radius specifically. Keep the overhead fixture on a dimmer if replacing it isn’t an option, so full brightness is a choice rather than the only setting.
Best for: Parents doing frequent overnight changes in the first few months.
Styling Note: A warm-toned amber nightlight reads as cozier than a cool white one and disturbs a baby’s melatonin cycle less.
18. Hang an Over-the-Door Organizer for Overflow Only
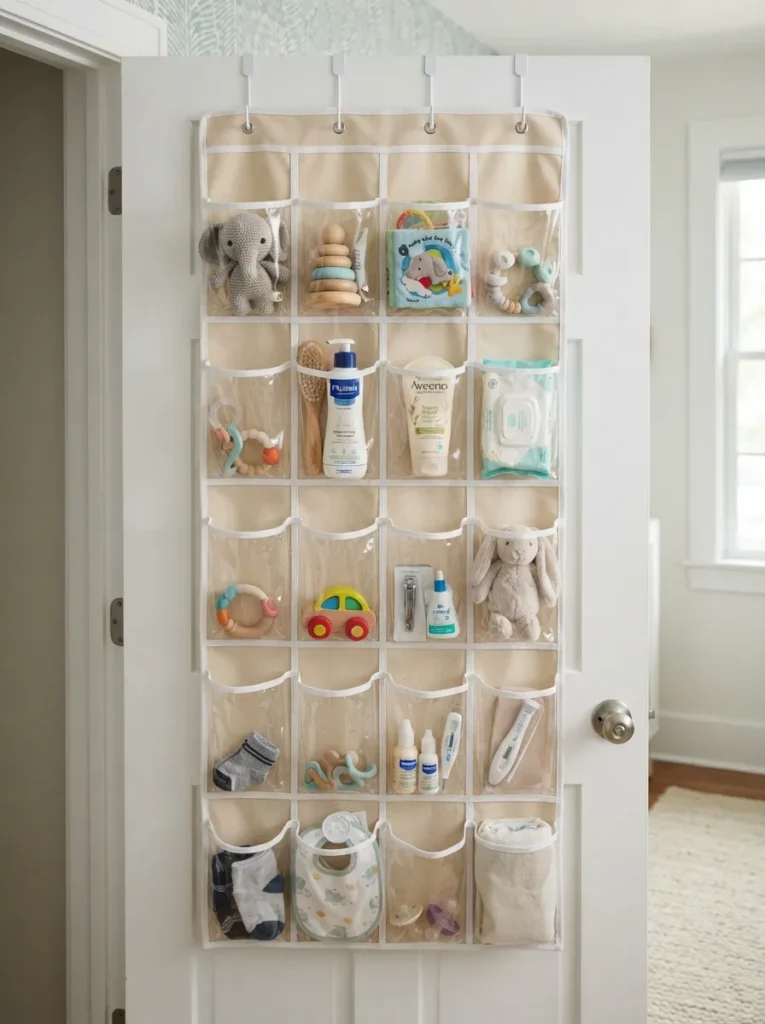
What it looks like: A pocketed fabric organizer hung on the back of the closet door, holding the small overflow items that don’t have a drawer home yet.
Why it works: Door-back space is entirely unused in most nurseries treating it as designated overflow, rather than primary storage, keeps it from becoming a catch-all that’s impossible to search through.
How to copy it: Hang a pocket organizer on the inside of the closet door specifically for items you use less than weekly spare pacifiers, sunscreen, growth-chart supplies. Anything used daily should live somewhere more accessible than a closed door.
Best for: The specific category of items you need occasionally but not daily.
Important: Most people hang these organizers for daily items and then stop opening the closet door to check them reserve this spot for true overflow, not primary storage.
One more thing before the final two this next fix is the one experienced parents wish they’d done from week one.
19. Line Open Shelving With Canvas Boxes for a Soft Finished Look
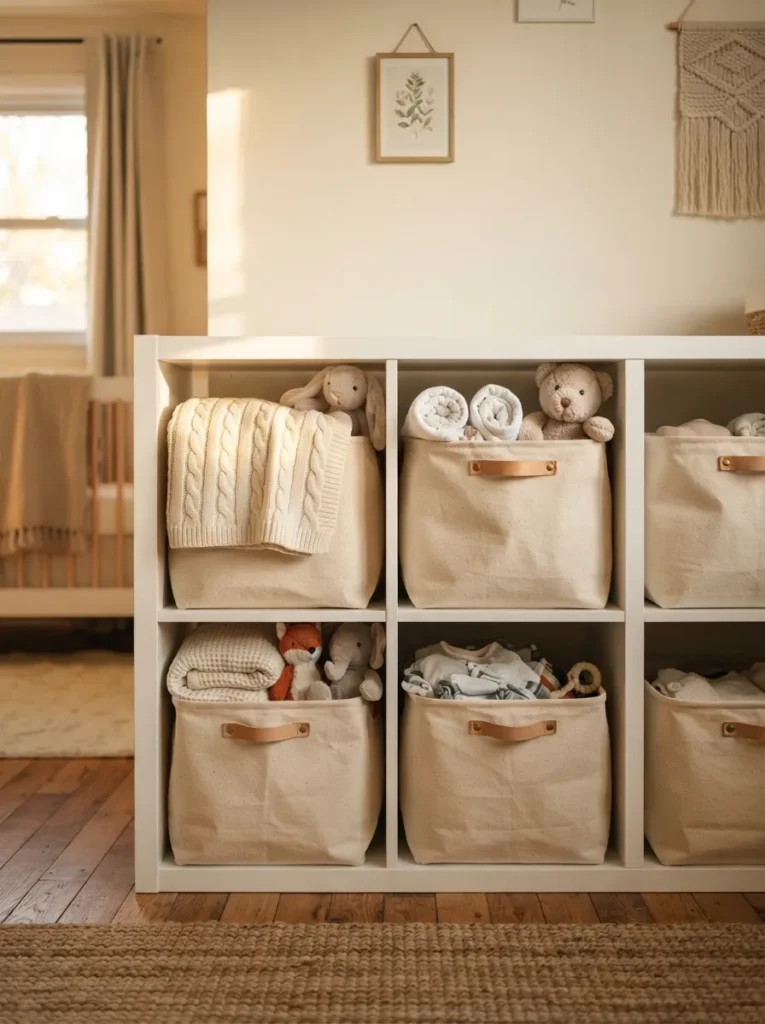
What it looks like: Open shelving fronted with soft canvas boxes instead of exposed contents, giving the shelf a finished look without a single closed cabinet door.
Why it works: Canvas boxes soften the visual noise of open storage the texture reads as intentional rather than makeshift, and unlike hard plastic bins, they compress slightly to fit shelves that aren’t perfectly standard-sized.
How to copy it: Choose unbleached natural cotton canvas boxes in a size that leaves roughly an inch of clearance on each side of the shelf opening too tight and they’re hard to pull out one-handed. Reserve canvas for soft goods like blankets and stuffed toys; canvas sags under heavier items over time.
Best for: Parents who want open shelving without the visual clutter of exposed loose items.
Quick Win: Fold canvas box tops down by an inch before placing on the shelf it reinforces the opening and keeps the box from collapsing inward when half-empty.
What You’ll Need
| Product |
|---|
| Natural cotton canvas storage boxes |
| Open cube shelving unit |
| Soft-fold garment tags |
| Shelf liner for canvas box stability |
20. Choose White Wall Cabinets to Keep the Palette Quiet
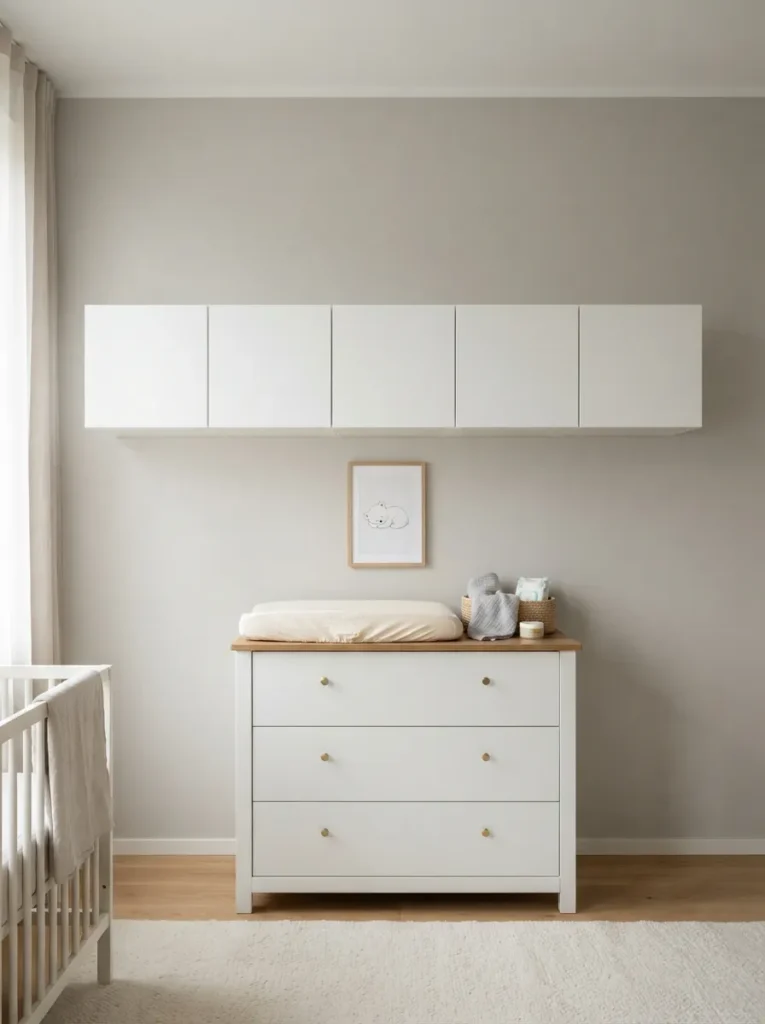
What it looks like: A row of closed white wall cabinets mounted above the changing area, hiding contents completely behind a single quiet color.
Why it works: Closed white storage acts as a visual reset in a room that otherwise holds a lot of small, colorful baby items it gives the eye somewhere calm to land, which matters in a space you’re in daily under stress.
How to copy it: Mount closed-door cabinets in matte white specifically above eye level, reserving open, colorful storage for below this keeps the “busy” storage low and the “calm” storage high. Avoid glossy white, which shows fingerprints and reflects overhead light in a way that reads harsher than matte.
Best for: Parents who want a hidden-storage option without losing wall space to a closet buildout.
Small-Space Tip: Wall-mounted cabinets free the floor entirely, which matters most in nurseries under 90 square feet where every foot of clear floor counts.
21. Build a Modular Corner System for Awkward Angles
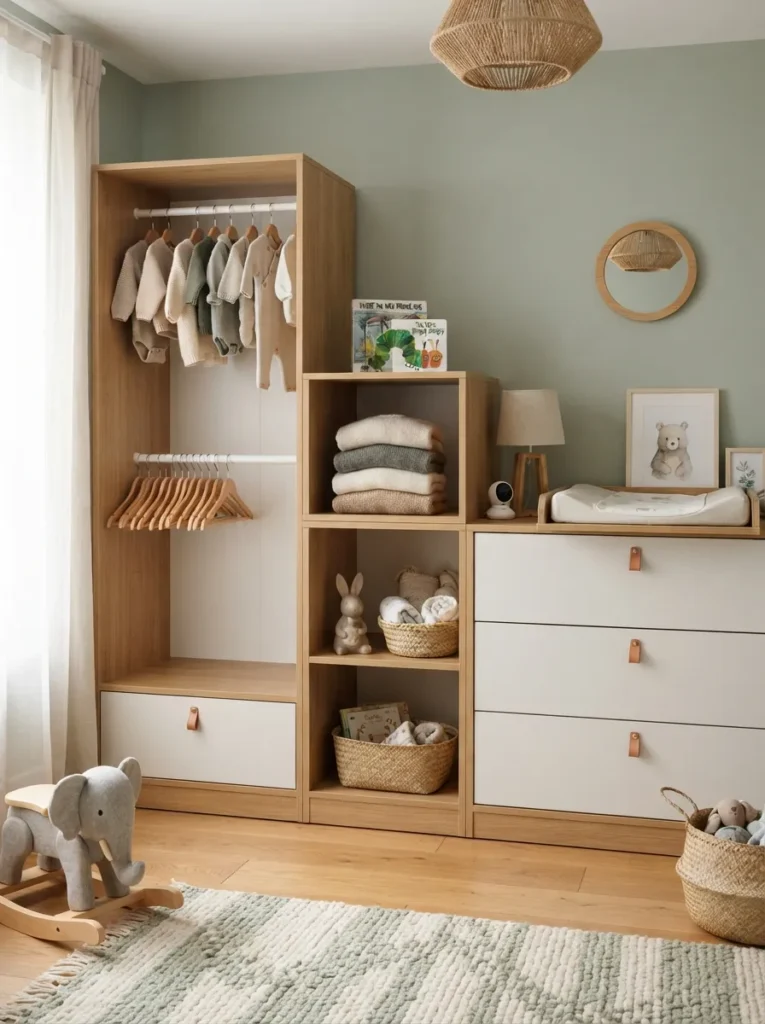
What it looks like: A modular storage system built specifically to wrap a room’s corner, using the awkward angle instead of losing it to dead space.
Why it works: Corners are the most commonly wasted square footage in any room a modular system can be configured piece by piece to follow the corner exactly, which a single rigid dresser or wardrobe never can.
How to copy it: Measure both walls of the corner separately before ordering modular pieces, since most corners aren’t perfectly square in older homes. Start with the corner unit itself, then build outward with matching modules rather than trying to fit a corner piece into an already-furnished layout.
Best for: Nurseries with an awkward or underused corner that’s currently empty.
Pro Tip: Order modular pieces in one batch rather than adding on later matching finishes across separate orders gets harder as product runs change over time.
How to Start Your IKEA Nursery Storage Transformation
In practice, the first move that actually matters is mounting one wall shelf directly above or beside the changing table not buying a full dresser, not planning the whole room. A single wall shelf anchors the one zone you’ll use multiple times a day from week one, and everything else can be added around it once you see how you actually move through the space.
The most common fixable error is buying storage sized for newborn clothes and expecting it to last a year. A drawer perfectly proportioned for forty 0–3 month onesies holds a fraction of that in 12-month sizes, so the system quietly fails around month nine unless you plan for volume to shrink as sizes grow, not stay constant.
A set of clear drawer dividers under $15 solves the sock-and-mitten problem immediately. A single stainless rail with three S-hooks, around $20, handles daily-rotation bibs and burp cloths. A four-pack of woven fabric boxes, typically under $30, converts one messy drawer into four visible sections all three together stay under $50 combined and solve the most immediate clutter points.
A basic version of this system one shelf, one set of drawer dividers, one rail is a single weekend project and costs $60 to $100 total. A full built-out wall with a modular wardrobe or corner system is closer to $400 to $800 and worth spreading across two or three weekends, especially if you’re waiting on delivery windows for larger pieces.
Ready to Get Your Nursery Organized?
Between the wall-mounted shelving, the color-coded bins, the corner systems, and the lighting fixes, these 21 IKEA nursery storage hacks cover almost every friction point a new parent runs into. You don’t need all 21 by next weekend most nurseries come together one zone at a time, and that’s the realistic version, not a shortcut.
If you do one thing today, mount a single shelf above the changing table and put the diapers on it. A room where storage actually matches how you move through it feels less like a space you’re managing and more like one that’s quietly on your side. Save the hacks that fit your layout now, and come back for the rest as your nursery and your baby grow into them.
Keep Exploring
- 15 Small Nursery Layout Ideas That Don’t Feel Cramped
- 12 IKEA Kallax Hacks for Kids’ Rooms That Actually Work
- 10 Budget-Friendly Baby Room Organization Ideas Under $200