14 Luxury Waterfall Quartz Kitchen Islands for a High-End Kitchen
A waterfall island is the fastest way to make a kitchen look custom-built and quartz gets you there without the upkeep natural stone demands. This roundup breaks down 14 luxury waterfall quartz kitchen island ideas, each one built around a real material or design decision instead of just a pretty photo.
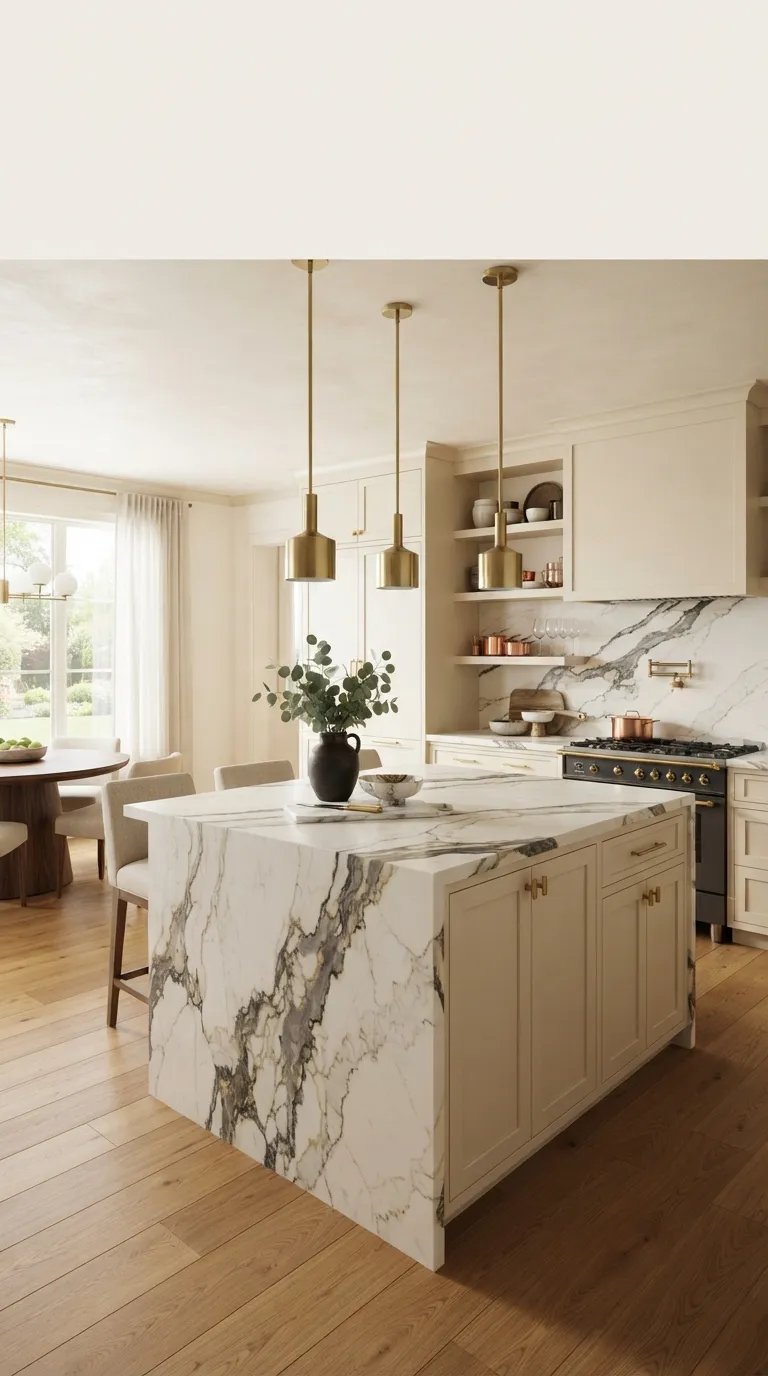
Picture light sliding down a single unbroken slab of stone, with no seam breaking the veining as it turns the corner toward the floor. That’s the effect a waterfall edge is built for a slab that reads less like a countertop and more like a piece of furniture. The palettes range from quiet, soft white to near-black drama, but every one of them shares the same bones: continuous stone, careful proportion, and a finish that catches light instead of fighting it. Get the seam right, and the whole kitchen looks like it cost more than it did.
Quick Navigation
- Why Waterfall Quartz Kitchen Islands Work So Well
- The Islands, From Easy Updates to Full Statement Pieces
- How to Start Your Waterfall Quartz Island Transformation
- Ready to Create Your Dream Luxury Kitchen?
Why Waterfall Quartz Kitchen Islands Work So Well
A waterfall edge is simply a countertop that continues down the side of the island in one continuous slab instead of stopping at a routed edge the term comes from the way the stone appears to pour over the side like water.
Quartz makes this accessible because it’s engineered to consistent thickness and pattern, so matching two slabs at a mitered corner is far more predictable than working with natural stone’s random veining. The palette runs from warm ivory with soft gold veining to charcoal with sharp white movement. Start with the vein direction before anything else that single decision determines whether the finished island looks continuous or pieced together.
Style at a Glance
| Element | Warm & Veined | Bold & Graphic |
|---|---|---|
| Philosophy | Continuous stone reads as furniture, not counter | Contrast and movement as the room’s focal point |
| Materials | Quartz with soft calacatta-style veining | Quartz with dramatic dark veining or a near-black base |
| Color palette | Ivory, soft gold, warm white | Charcoal, black, stark white contrast |
The Islands, From Easy Updates to Full Statement Pieces
1. Bold Bookmatched Veining at a True Mitered Corner
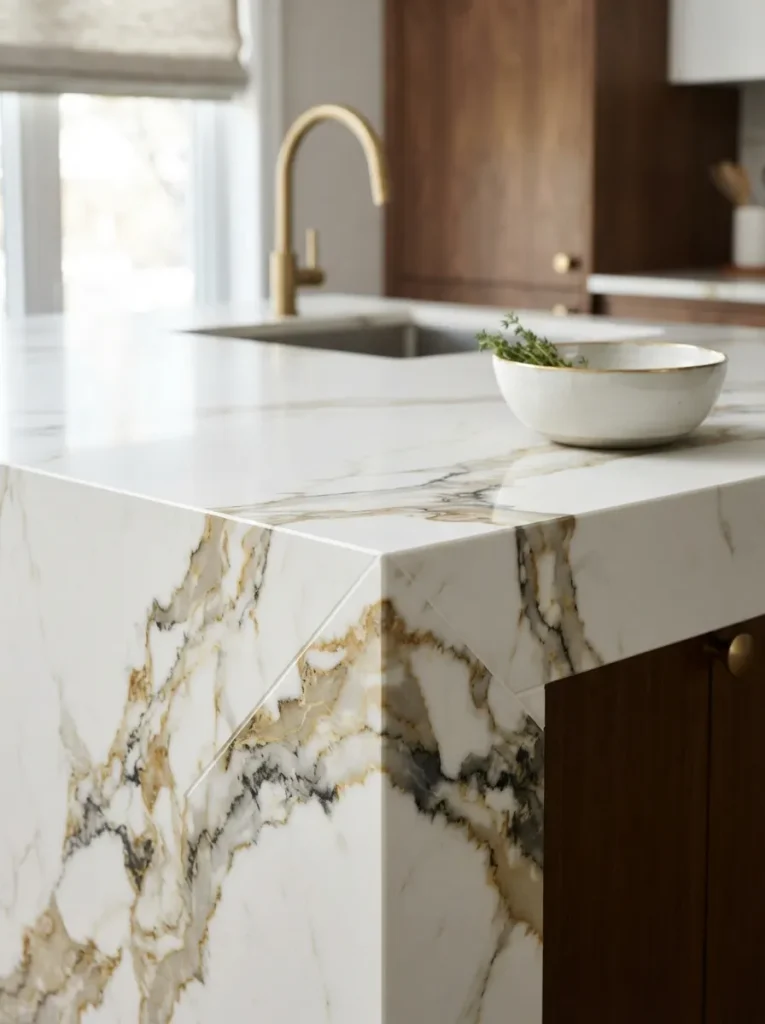
Stand at the corner of an island like this and the eye doesn’t find a seam it finds one continuous ribbon of stone pouring from the counter to the floor. That’s the whole point of a waterfall edge, and it only works when the veining lines up perfectly at the miter.
Fabricators get there by cutting the waterfall panel and the countertop from consecutive slabs off the same block sometimes called sequenced or bookmatched slabs so the pattern continues instead of jumping. Ask for this by name when you order; a generic slab pull from inventory almost never matches this cleanly. Bold, high-contrast veining shows off the technique best, since a subtle pattern hides small mismatches a busy one would expose.
Warning: Ordering a waterfall slab without seeing the full, un-cut piece in person is the costliest mistake here photos and small samples can’t show how the veining will align at the corner, and a mismatched miter means recutting (and repaying for) the whole panel.
2. A Quiet, Monochrome Waterfall for Understated Luxury
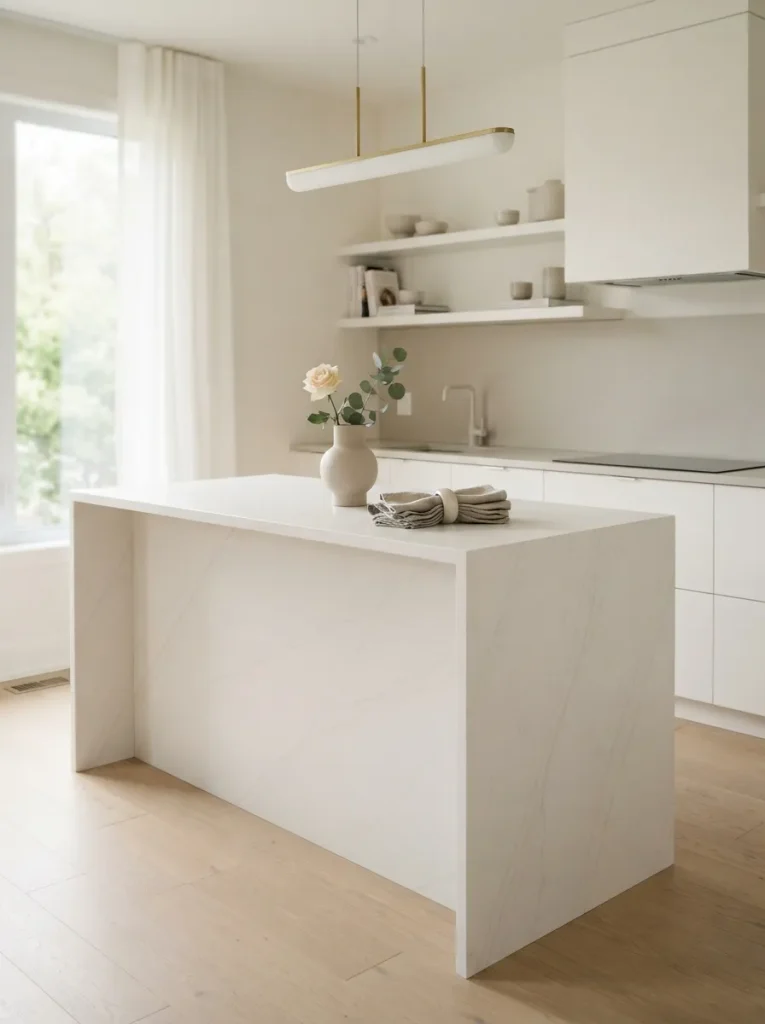
The principle behind a quiet island is negative space. When there’s no dramatic veining competing for attention, the room’s other materials wood floors, brass fixtures, an open shelf get to do the talking instead.
Monochrome or near-solid quartz, in soft white, warm greige, or pale taupe, reads as calm rather than plain because the surface still catches light and shows faint movement up close. It’s also the safer long-term choice: a busy pattern can start to feel dated the way bold wallpaper does, while a quiet stone tends to age like a neutral. If your kitchen already leans on pattern elsewhere, this keeps the island from competing with it. For more direction on keeping an island understated, this roundup of kitchen island ideas for minimal-style homes is worth a look.
Quick Win: Ask your fabricator for a full slab photo under natural daylight, not showroom lighting warm LED bulbs can make a cool greige quartz look yellow and throw off your whole color match.
3. The Curved Waterfall Corner
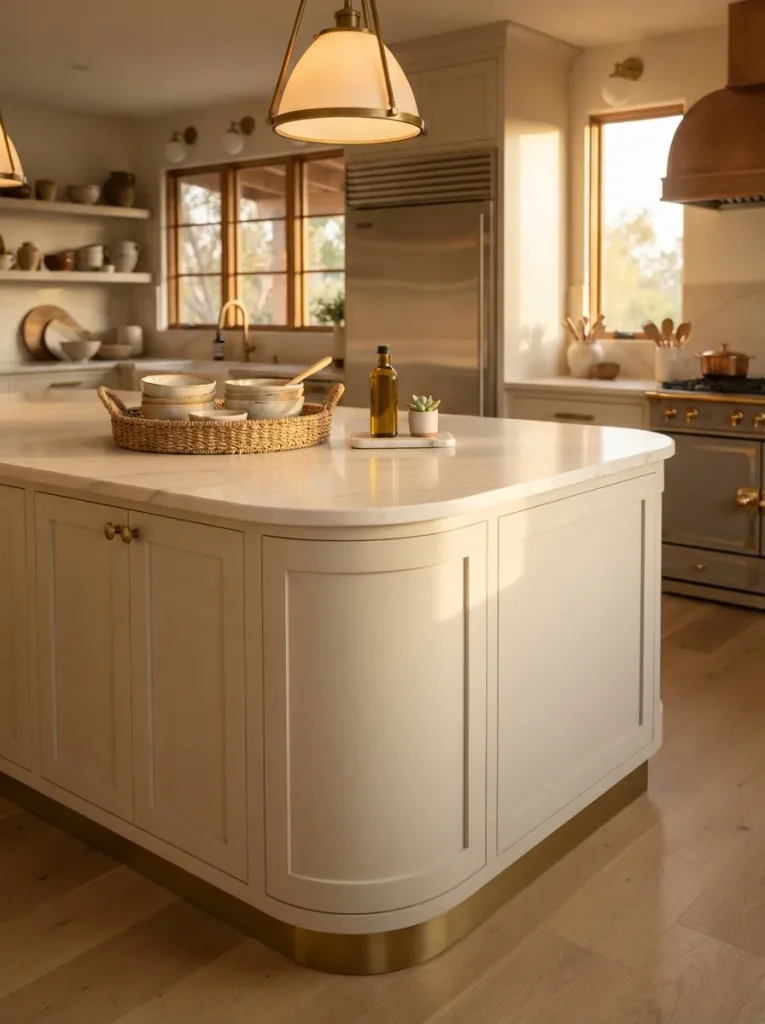
Most waterfall islands end in a sharp 90-degree miter, but a curved corner replaces that hard line with a soft radius and it changes how the whole piece feels in a kitchen where people walk close past the island constantly.
Rounding the corner also removes the single hardest point to match veining, since a mitered corner needs the pattern to line up exactly and a curve just flows around it. The tradeoff is fabrication: a curved waterfall panel is more labor-intensive to template and cut, so expect it to cost more than a standard miter.
It suits open-concept kitchens where the island doubles as a walking path, and homes with young kids who’d rather not have a sharp stone corner at hip height.
Next up: the color pairing that makes a waterfall island look twice as expensive as it was.
4. Two-Tone Contrast: Dark Waterfall Against Light Cabinetry
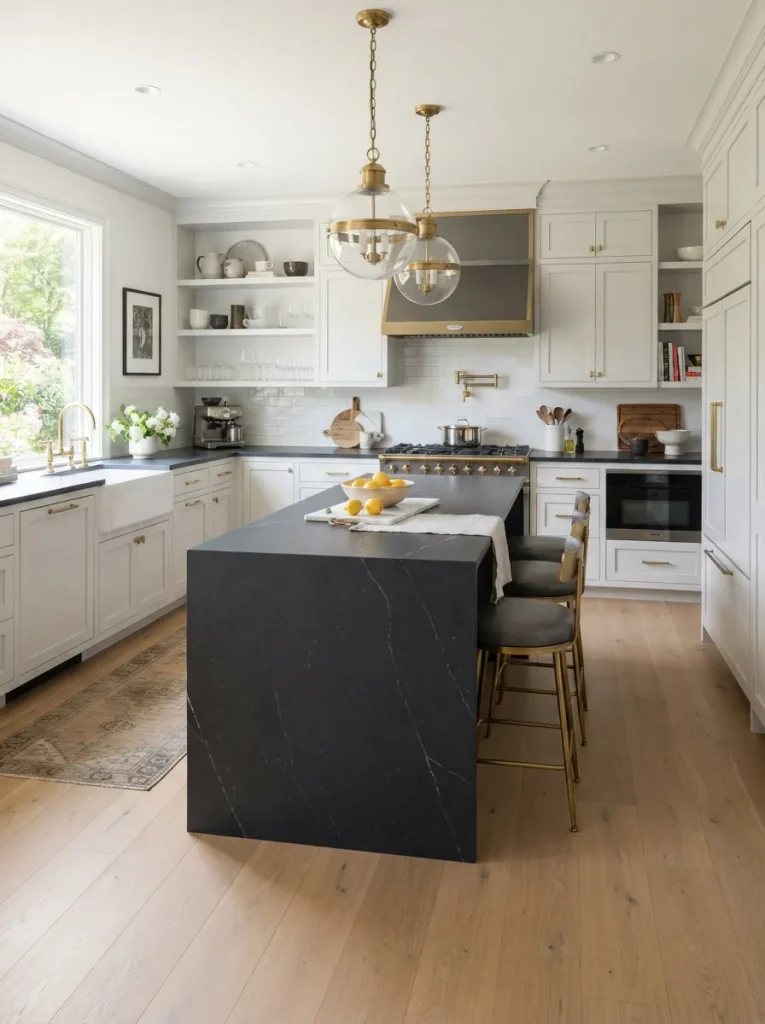
Best for kitchens where the island is meant to be the focal point, not blend in. Pairing a dark waterfall charcoal, deep green-black, or near-black quartz with light perimeter cabinetry creates contrast that reads as intentional rather than accidental.
The trick is keeping every other dark element in the room tied to the island’s undertone: if the quartz leans slightly warm, pull warm-toned black hardware and lighting to match, since a cool black island next to warm black fixtures will look like two separate decisions instead of one.
This pairing works especially well in kitchens with a lot of natural light, since the dark surface won’t feel heavy the way it might in a room with limited windows.
Pro Tip: Bring a cabinet door sample to the slab yard and hold it directly against the quartz before ordering undertones that look neutral apart can clash once they’re three feet apart in the same room.
5. Honed Matte Finish Instead of High-Gloss Polish
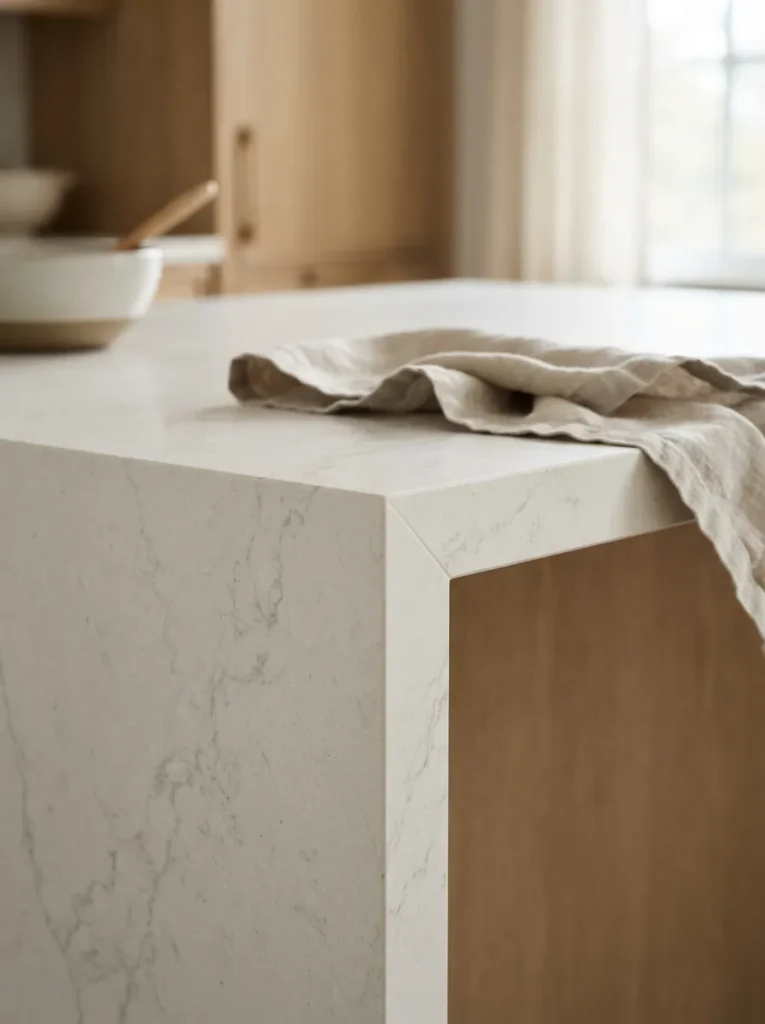
Ask for a honed finish instead of the standard polished gloss and the whole island reads differently softer and more matte, closer to soapstone or limestone than a shiny showroom slab. The technique is simple on the ordering side: honing is a finishing step most fabricators already offer, so it typically doesn’t require a different slab, just a different final pass.
What changes is maintenance and light behavior. A honed surface shows fingerprints and water spots less than gloss does, but it can show etching from acidic spills slightly more, since there’s less sealed sheen protecting it. It suits kitchens going for a quieter, more organic look, and pairs especially well with matte black or brass fixtures instead of polished chrome.
Budget Version: A honed finish on a mid-range quartz color often costs less overall than a polished finish in a premium veined pattern the finish does more visual work than the pattern price tag suggests.
6. Full-Height Waterfall with Proper Structural Backing
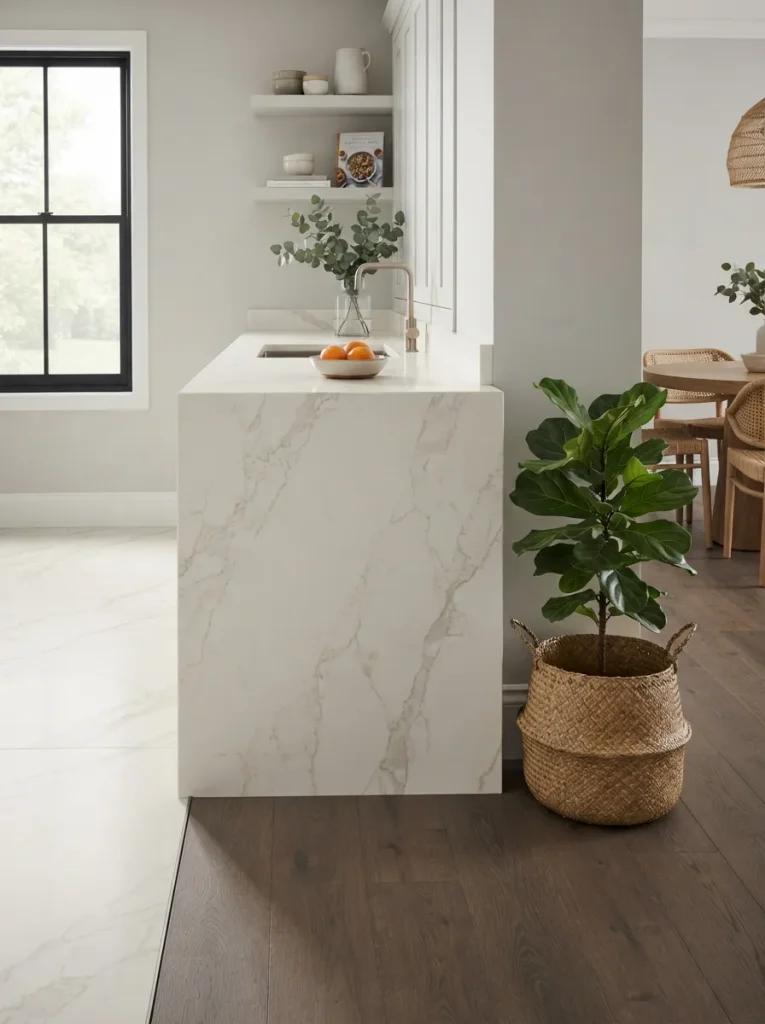
A full-height waterfall one that runs uninterrupted from the countertop all the way to the floor puts real weight on the island frame, and quartz doesn’t flex the way wood does, so the substrate underneath has to be built to take it.
The principle is simple: stone needs a rigid, fully supported surface behind it, not just the plywood skin of a standard cabinet box. Most fabricators plan for a continuous plywood or MDF substrate across the full panel before the stone goes on, plus a slight gap usually around 1/8 to 1/4 inch between the stone and the finished floor so it isn’t bearing weight on uneven tile or settling over time.
✅ Full-Height Waterfall Install Checklist:
- [ ] Confirm the island cabinet box is built to the full waterfall height before templating
- [ ] Add a continuous plywood or MDF substrate behind the panel, not just the standard cabinet back
- [ ] Leave a small gap between the stone and the finished floor
- [ ] Template on-site after cabinets are set, not from drawings alone
- [ ] Seal the mitered seam with a color-matched epoxy once the panel is installed
Coming up: a version of this look that costs less in stone and still reads as custom.
7. Partial-Drop Waterfall for Visual Lightness
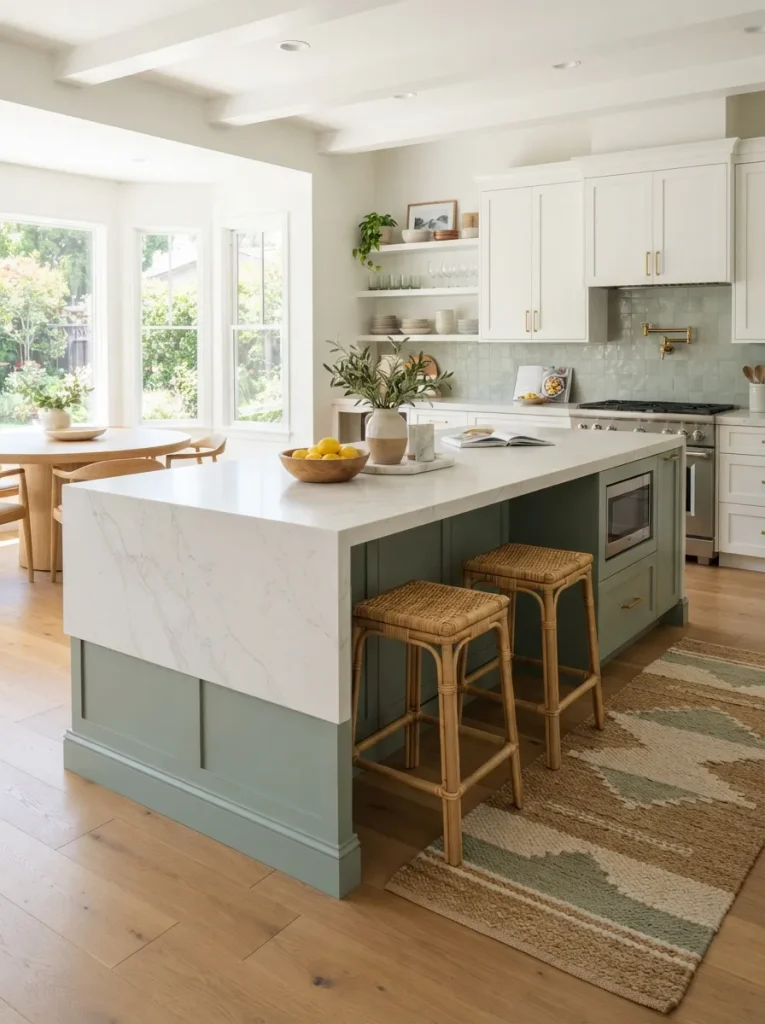
Most waterfall islands run the stone all the way to the floor, but a partial-drop where the panel stops a foot or so short and meets a painted or wood base below trades some of that dramatic “poured stone” look for lighter visual weight and a real cost saving, since less slab material is needed per island.
It suits smaller kitchens where a full-height dark stone panel could feel heavy, and it gives you a second material to work with, like a painted base in sage or navy that echoes cabinetry elsewhere. The look reads as intentional, not compromised, as long as the transition point lines up with a clean reveal or trim detail instead of an abrupt stop.
Important: A partial-drop waterfall still needs full support behind the stone portion the savings come from less material, not less structural planning.
8. Waterfall Island Paired with a Matching Slab Backsplash
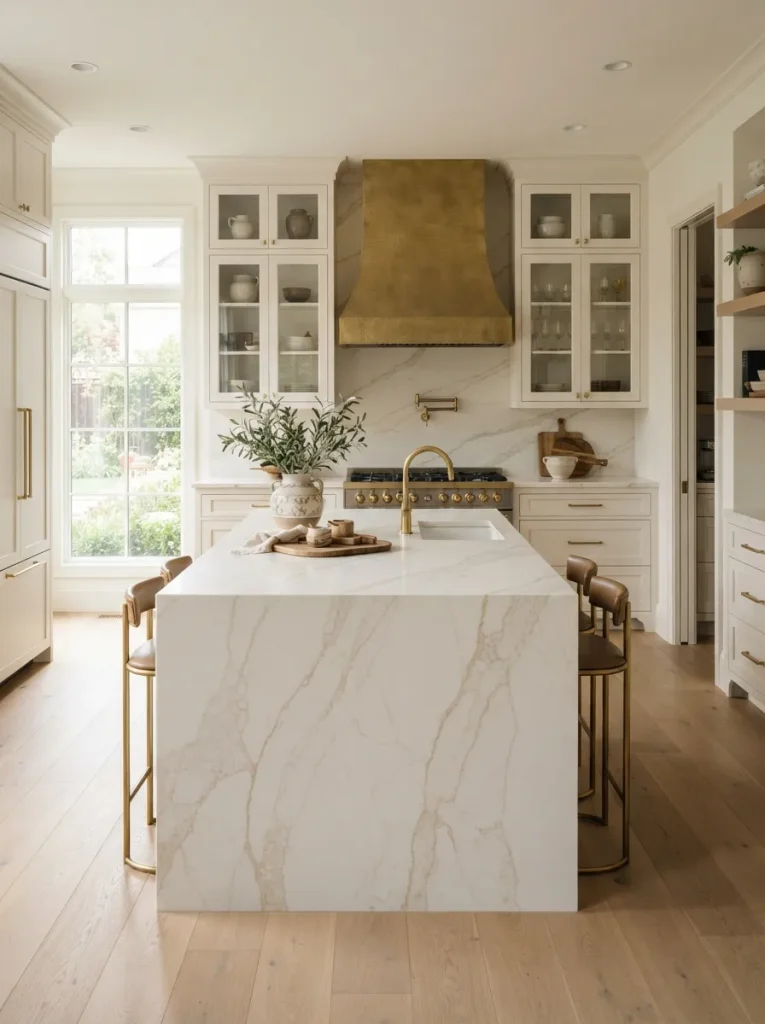
Order the backsplash slab from the same block as the island, and the whole kitchen reads as one continuous material instead of a countertop paired with tile. The technique is a fabrication and ordering decision more than a design one you need enough slab from a single block to cover both the waterfall panel and the backsplash run, a bigger material commitment than most kitchens require.
It pays off most behind a range or cooktop, where a full-height slab backsplash also skips the grout lines that would otherwise collect grease. Because it’s a heavier material investment, this pairing tends to show up in kitchens already going all-in on the waterfall look rather than as a standalone upgrade.
Styling Note: Keep wall décor minimal where the slab backsplash runs a floating shelf or two nearby lets the stone stay the visual anchor instead of competing with artwork.
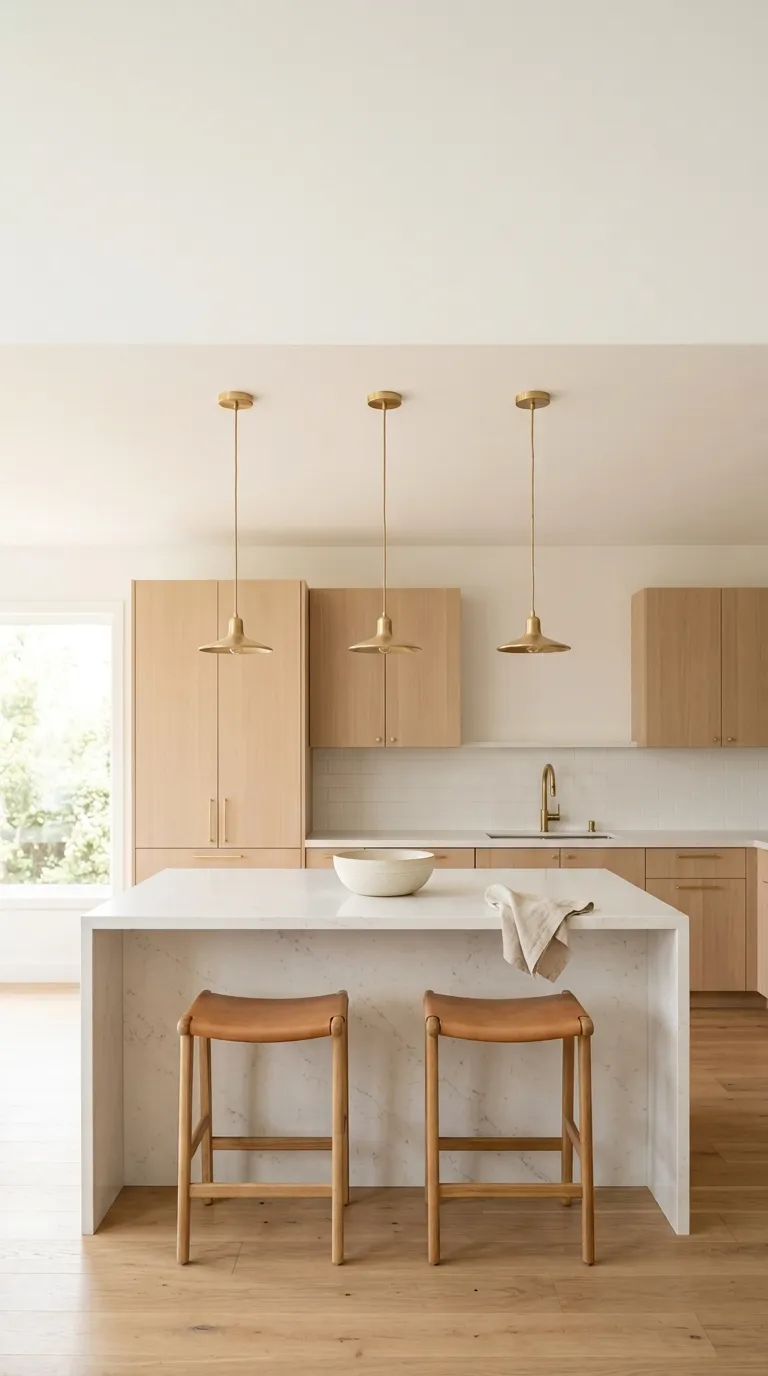
9. A Trio of Statement Pendants Over the Island
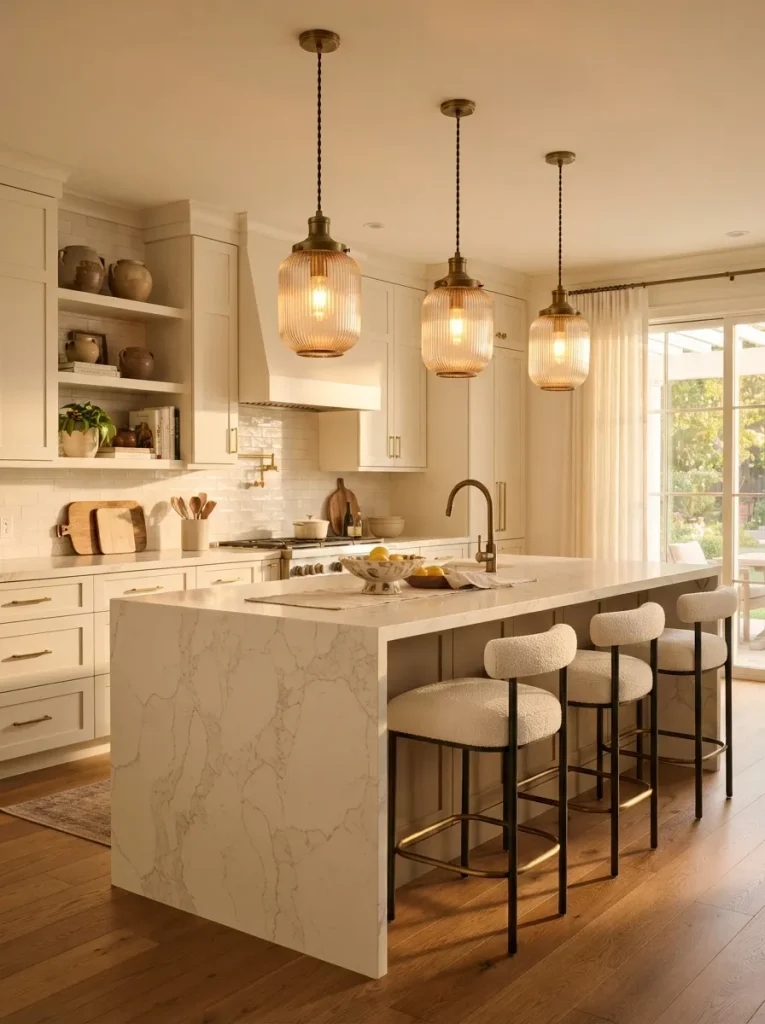
Three identical pendants in a row, centered over the island’s length rather than its exact geometric middle if there’s a sink or prep zone off-center, is one of the fastest ways to make a kitchen feel designed instead of default. Space them evenly usually about 24 to 30 inches between fixture centers, depending on island length and hang them so the bottom of the shade sits roughly 30 to 34 inches above the counter: low enough to feel intentional, high enough that no one’s ducking around them.
Warm brass or blackened bronze fixtures read as more expensive against a quartz waterfall than brushed nickel does, since the warmth echoes the veining instead of competing with the stone’s coolness.
Shop This Look
| Product |
|---|
| 3-light linear pendant chandelier |
| Brass or blackened bronze single pendant lights (set of 3) |
| Dimmer switch compatible with pendant lighting |
Up next: the lighting detail hiding under the island, not above it.
10. Toe-Kick LED Lighting That Makes the Stone Glow
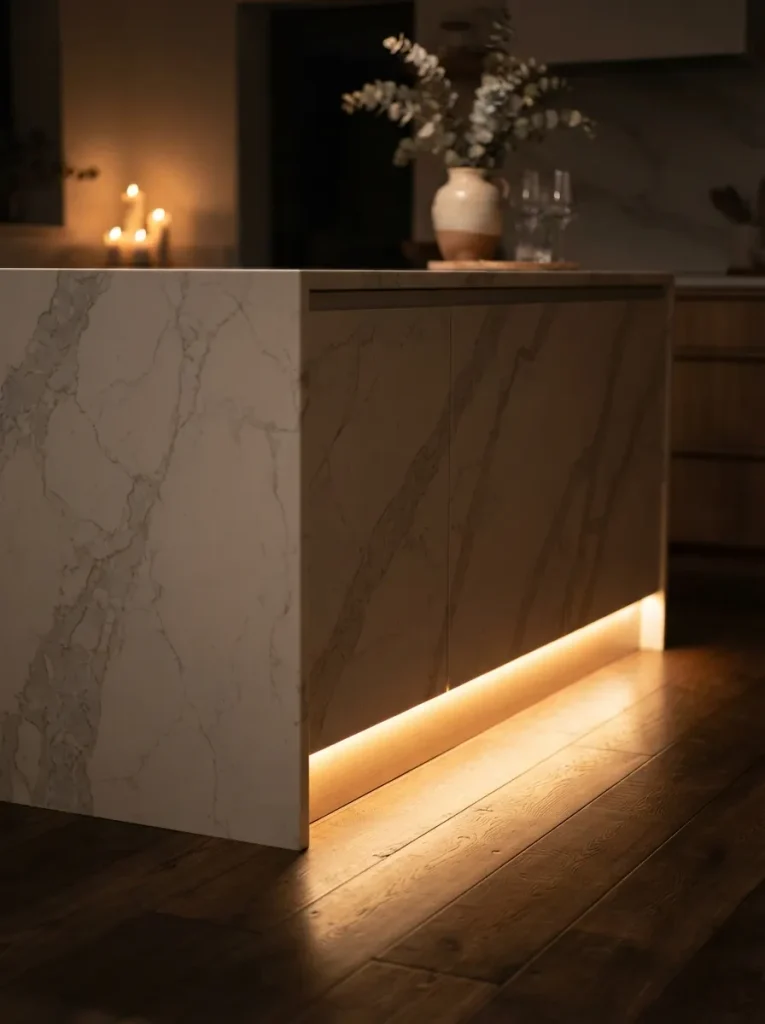
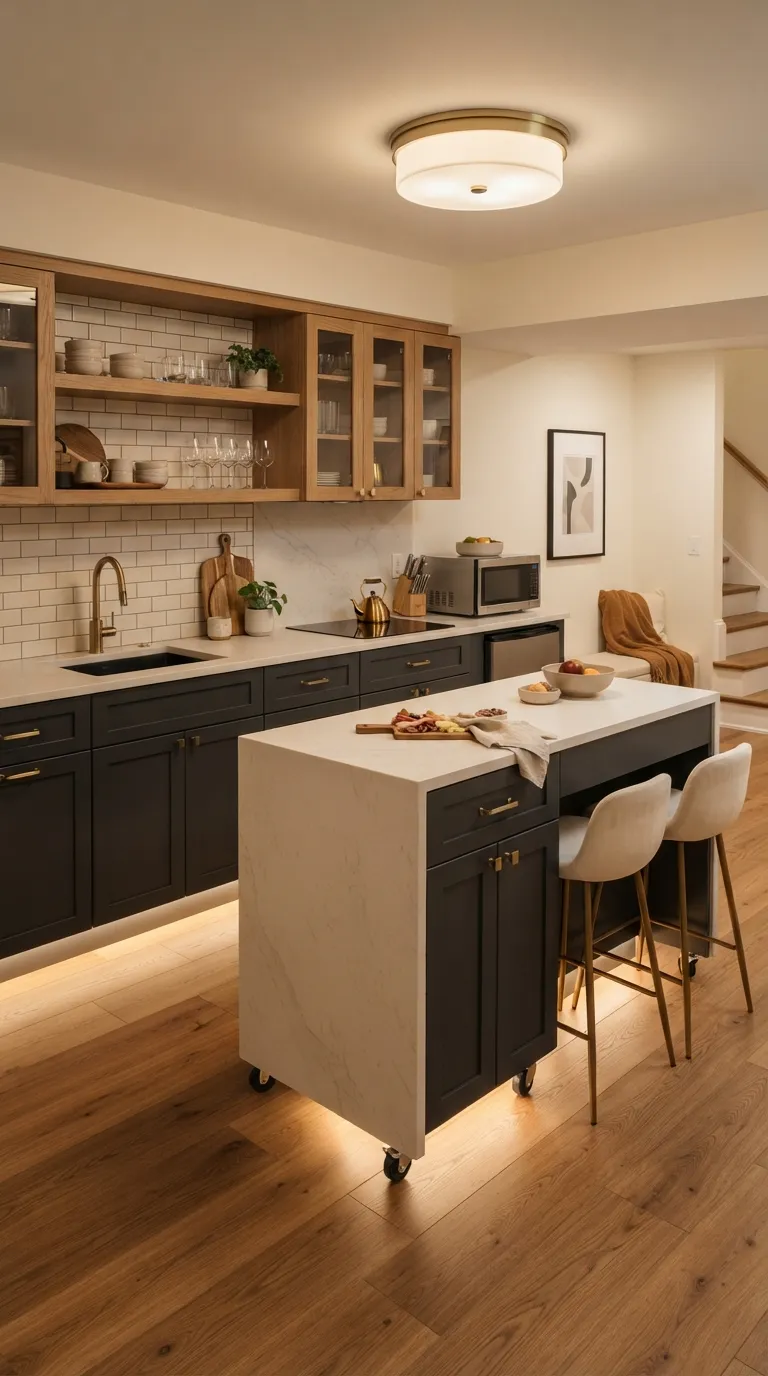
Run a warm-white LED strip along the toe-kick beneath the island, tucked behind a small lip so the strip itself stays hidden, and the light washes across the floor while catching the bottom edge of the waterfall panel.
It’s a low-effort add most kits are plug-and-play with adhesive backing and a simple on/off or motion sensor but the effect at night is disproportionate to the effort, turning a functional island into something that glows softly in a dark kitchen. Stick to warm white light, around 2700K to 3000K, to match most under-cabinet and pendant lighting; a cooler blue-white strip will clash and make the quartz look clinical instead of warm.
Pro Tip: Choose a dimmable LED kit full brightness toe-kick lighting is often too harsh for evening ambiance, while a dimmed strip reads as a design feature instead of a hallway night-light.
Shop This Look
| Product |
|---|
| Warm white LED strip lighting kit (plug-in, under-cabinet) |
| Dimmer remote or wireless dimmer switch |
| Aluminum channel/diffuser for LED strip lighting |
11. Brushed Brass Hardware Against Cool-Toned Quartz
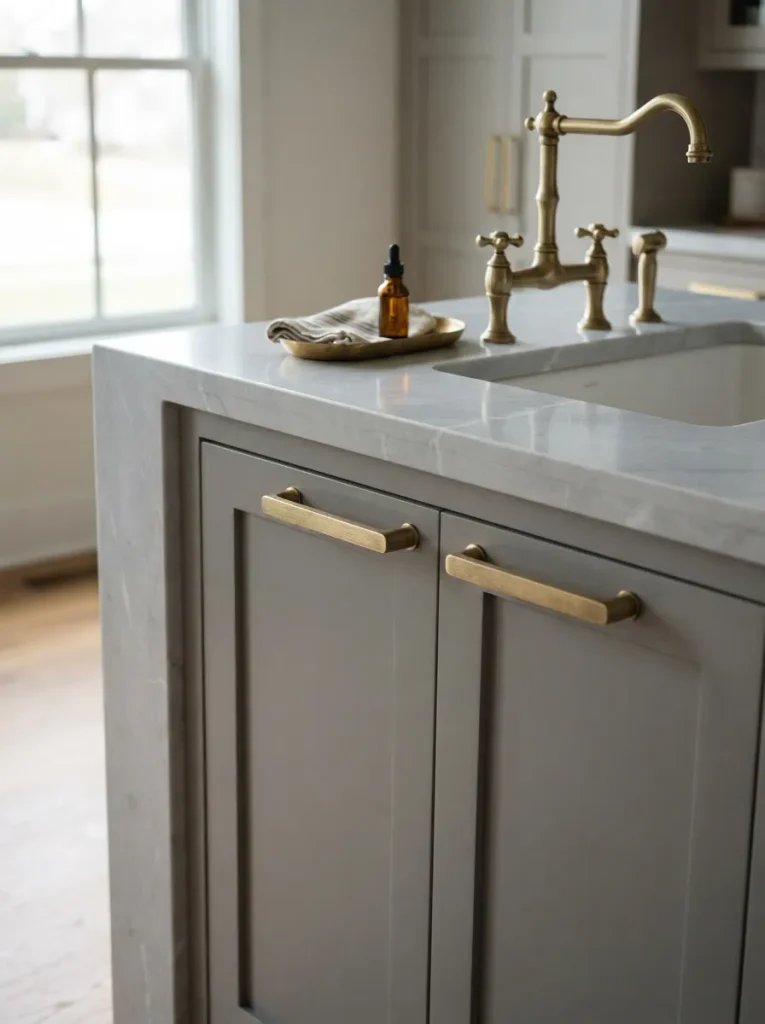
Best for a kitchen with cool-toned quartz grey, white-and-grey veining, or near-black that risks feeling sterile without a warm material to offset it. Brushed brass hardware and fixtures add exactly that kind of warmth without introducing a whole new color, since the metal reads as a neutral the same way the stone does.
Choose brushed or satin brass over a high-polish finish for a kitchen island specifically, since it shows fingerprints and water spots far less on pulls that get touched constantly. Pair it with at least one other brass element in the room a faucet, a pendant, open shelf brackets so the hardware doesn’t read as an isolated accent.
Mistake to Avoid: Mixing polished brass hardware with a brushed brass faucet (or vice versa) in the same sightline matching the metal but not the finish is one of the most common small missteps in an otherwise well-planned kitchen.
Shop This Look
| Product |
|---|
| Brushed brass cabinet pulls (bar-style) |
| Brushed brass cabinet knobs |
| Brushed brass bridge or gooseneck kitchen faucet |
12. Comfortable Counter-Height Seating with Real Overhang
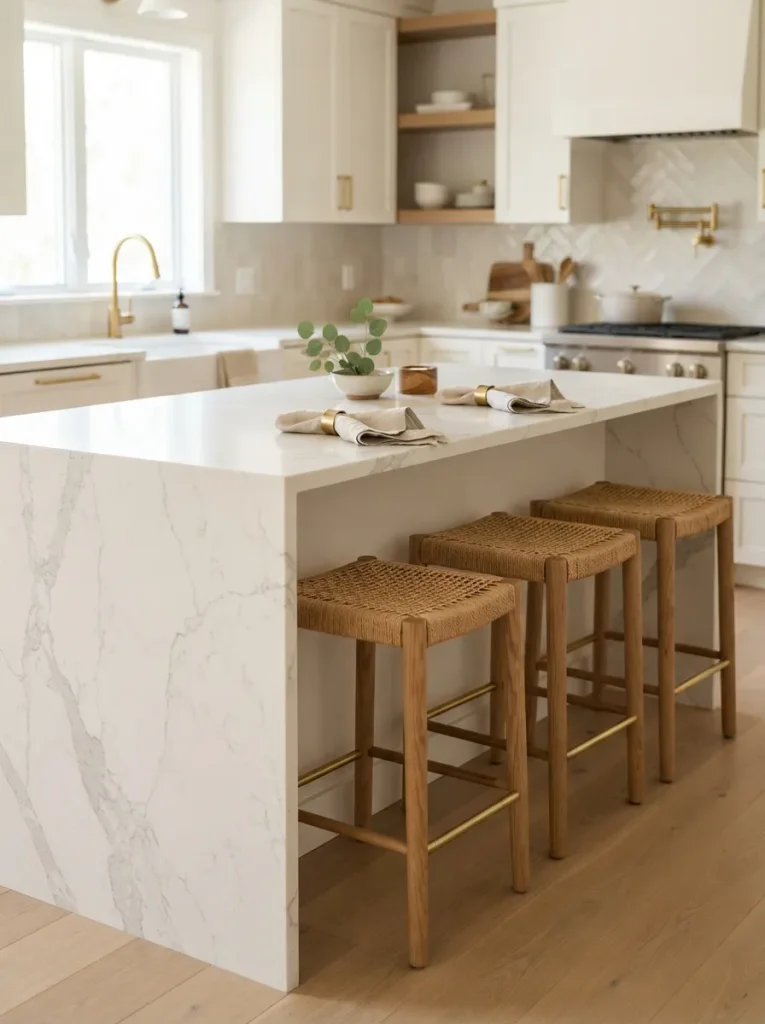
Leave at least 12 inches of counter overhang on the seating side of the island anything less and knees hit stone before feet find the footrest, which is the single most common reason a beautiful island still feels uncomfortable to sit at.
Counter-height stools, around 24 to 26 inches seat height for a standard 36-inch counter, work for most islands, but measure your specific counter height first, since custom waterfall islands sometimes run slightly taller than stock cabinetry. Backless or low-back stools tuck fully under the overhang when not in use, keeping the waterfall panel’s clean lines visible, while stools with backs need a few extra inches of clearance to push in and out comfortably.
Shop This Look
| Product |
|---|
| Backless counter-height stools |
| Low-back swivel counter stools |
| Leather or woven-seat counter stools with footrest |
Last stretch: a way to break up an all-stone island with a material that actually contrasts.
My Observation
The counterintuitive part: the busiest, most dramatic veining pattern is often the cheaper mistake to fix, and the quietest slab is the expensive one to get wrong. A bold, high-contrast quartz hides small seam or alignment imperfections in its own chaos nobody’s eye catches a half-inch veining shift in a pattern that’s already moving in six directions. A near-solid white or soft grey quartz has nowhere to hide that same half-inch shift; it shows up as a visible line down the corner of an otherwise flawless island. If you’re set on the quiet, monochrome look, budget extra time for template and fabrication precision it’s the harder slab to get right, not the safer one.
13. A Wood Shelf Insert Breaking Up the Waterfall Panel
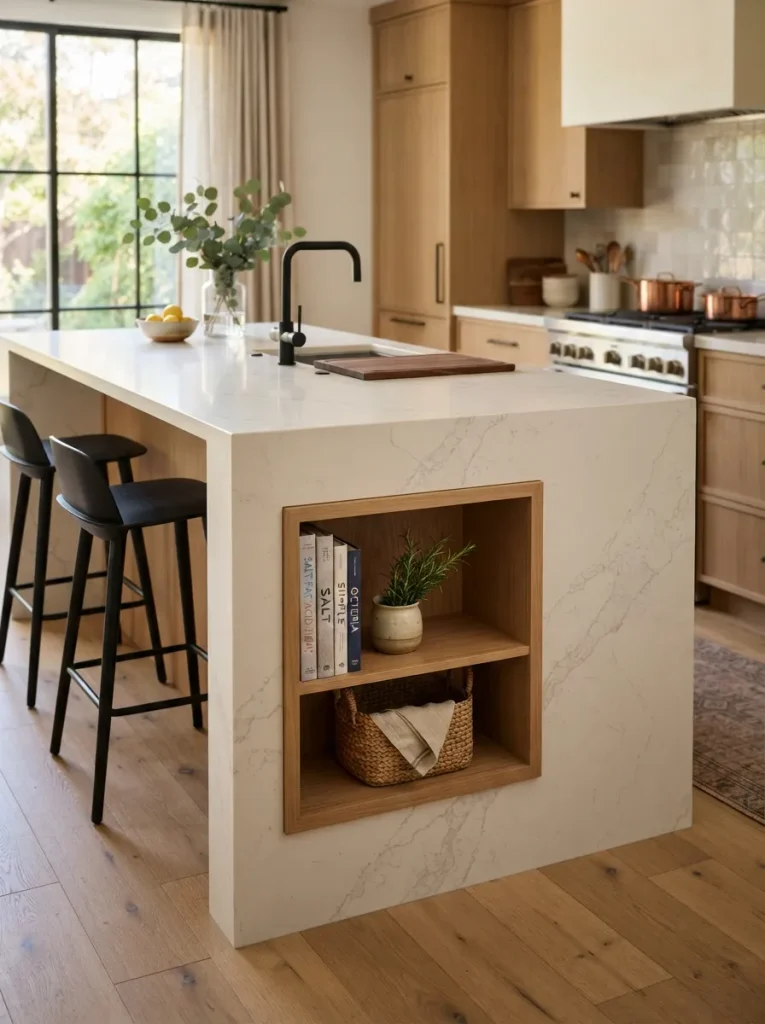
An all-stone waterfall island is dramatic, but it can also feel like one unbroken slab with nowhere for the eye to rest a small open wood shelf built into the panel, usually toward the seating end, breaks that up without interrupting the waterfall’s continuous line on the rest of the island.
The technique needs to be planned before fabrication, not added after, since the stone panel has to be cut around the niche rather than notched into a finished slab.
Warm oak or walnut against a cool white or grey quartz creates the same kind of contrast brass hardware does, just at a larger scale. It suits islands long enough to spare a foot or two of panel for the niche, and it gives you a spot for cookbooks or a stack of everyday bowls within reach of the seating.
Important: A wood insert set into stone needs a small expansion gap around the edges wood moves seasonally with humidity and quartz doesn’t, and a tight fit can crack the surrounding panel over time.
Shop This Look
| Product |
|---|
| Floating wood shelf brackets (blackened steel, L-bracket style) |
| Solid wood shelf board (oak or walnut) |
| Small woven storage basket sized for open shelving |
14. The Compact Waterfall Island for a Smaller Kitchen
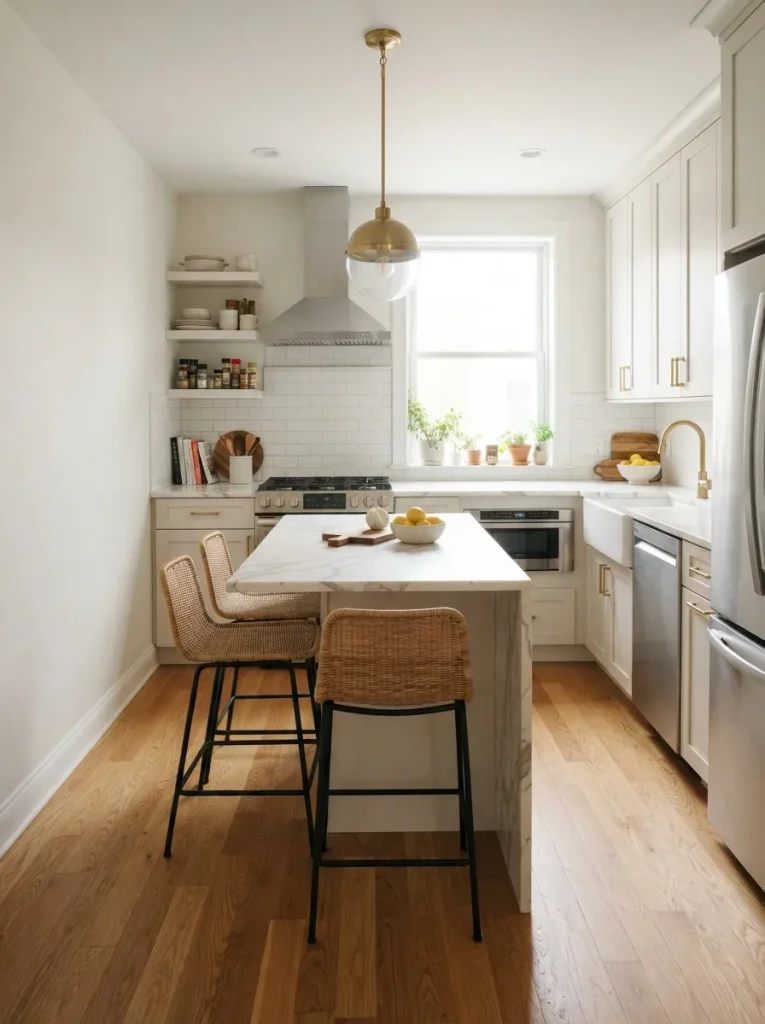
Best for kitchens where a full-size island would crowd the walkway, but a waterfall look still feels achievable at a smaller scale. A compact version often 30 to 40 inches long instead of the 6-plus feet a full island needs keeps the same continuous stone technique but on a shorter run, which also means less slab material and a lower total cost.
Keep at least 42 inches of clearance on all working sides so the island doesn’t turn a small kitchen into a tight squeeze, and consider a waterfall on just one visible end rather than both if the island backs up against a wall. For more ways to make a small footprint work hard, this roundup of small kitchen island ideas has more specific layouts.
Small-Space Tip: If floor space won’t allow a waterfall on both ends, put it on the end most visible from the main sightline into the kitchen usually the end facing the living or dining space so the technique still reads as intentional.
How to Start Your Waterfall Quartz Island Transformation
The right first move is almost always the slab itself, not the cabinetry or the layout. Visit a stone yard in person and pick the exact slab your island will be cut from quartz color names and small swatches don’t capture how a full slab’s veining moves, and that movement is what makes or breaks the waterfall effect. Once the slab is chosen, everything else cabinet color, hardware finish, lighting warmth gets planned around it instead of the other way around.
The most common beginner mistake is ordering from a sample or a photo without confirming slab availability and seeing the actual piece. Quartz colors are manufactured in batches, sometimes called lots, and even the same named color can shift slightly between lots, so the swatch in the showroom might not match what’s currently in stock. Always confirm you’re seeing the specific slab, or at minimum the current lot, before finalizing an order.
Three inexpensive additions worth having on hand: a pH-neutral stone cleaner spray made for engineered quartz, a set of silicone trivets to protect the surface from hot cookware, and a soft microfiber cloth set for daily wipe-downs without scratching the finish. None cost much, and all three protect an investment that’s much harder to redo than to maintain.
Fabrication and installation for a custom waterfall island typically takes several weeks from template to install once cabinets are in place, though install day itself is usually just one day. Budget varies enormously by slab choice and local labor, so treat any figure as a rough guideline rather than a quote a smaller compact waterfall panel sits at the lower end, while a full-height, bookmatched, dramatic-veined island with a matching backsplash sits at the top. Either way, it’s rarely a weekend project; plan the stone selection weeks before the rest of the kitchen timeline.
Ready to Create Your Dream Luxury Kitchen?
Fourteen ideas, one material, a lot of different ways to use it quiet monochrome slabs, bold bookmatched veining, curved corners, wood insets, and everything in between. None of these requires starting over on your whole kitchen; a waterfall island is often the one piece that gets fully replaced while cabinetry and flooring stay put, which makes it a realistic focal-point upgrade rather than an all-or-nothing renovation.
If you’re just starting to plan, spend today choosing the slab family you keep coming back to, then build the rest of the decisions finish, hardware, lighting around it. Done well, this is the kind of kitchen that feels calm and expensive at the same time, the stone doing quiet work in every direction you look. Save your favorites now; slab availability changes fast, and it helps to have a shortlist ready when you walk into the yard.
Keep Exploring