19 Easy Book Page Crafts That Look Expensive
Book page crafts turn old, water-stained, or simply unwanted books into something you’d actually pay full price for at a boutique. Here are 19 easy book page crafts that look expensive, from ombré wreaths to a gilded-edge coaster set, all built from pages you probably already have sitting on a shelf.
There’s a particular quiet to a room full of aged paper something between a library and an antique shop. The color does most of the work: warm ivory, soft sepia, the occasional streak of foxing that reads as patina instead of damage.
None of it costs much. Grab a book you were going to donate anyway. You’re closer to done than you think and if paper crafting turns out to be your thing, there’s a whole world of other easy paper craft ideas worth exploring beyond just books.
Jump To
- Why Book Page Crafts Make Such a Difference
- 19 Book Page Crafts to Try
- How to Start Your Book Page Craft Journey
- Ready to Fill Your Home with Book Page Charm?
Why Book Page Crafts Make Such a Difference
Book page crafting descends from altered book art rescuing pages headed for a landfill and turning them into something worth keeping. The best results lean on specific materials: yellowed paperback pages, sheet music, dictionary type, and matte Mod Podge rather than anything glossy.
It’s having a moment because thrifted, sustainable decor now outpaces anything mass-produced, and pages cost next to nothing. Small apartments benefit most start with one framed piece before committing a whole shelf to it.
| Best starting point | One damaged paperback from a thrift store or your own shelf |
| Biggest impact area | Entry table, mantel, or a single bookshelf vignette |
| Budget to start | $5–$20 |
| Time to complete | 20 minutes for small pieces, a weekend for anything framed |
19 Book Page Crafts to Try
1. The Ombré Book Page Wreath (Your Fastest Win)
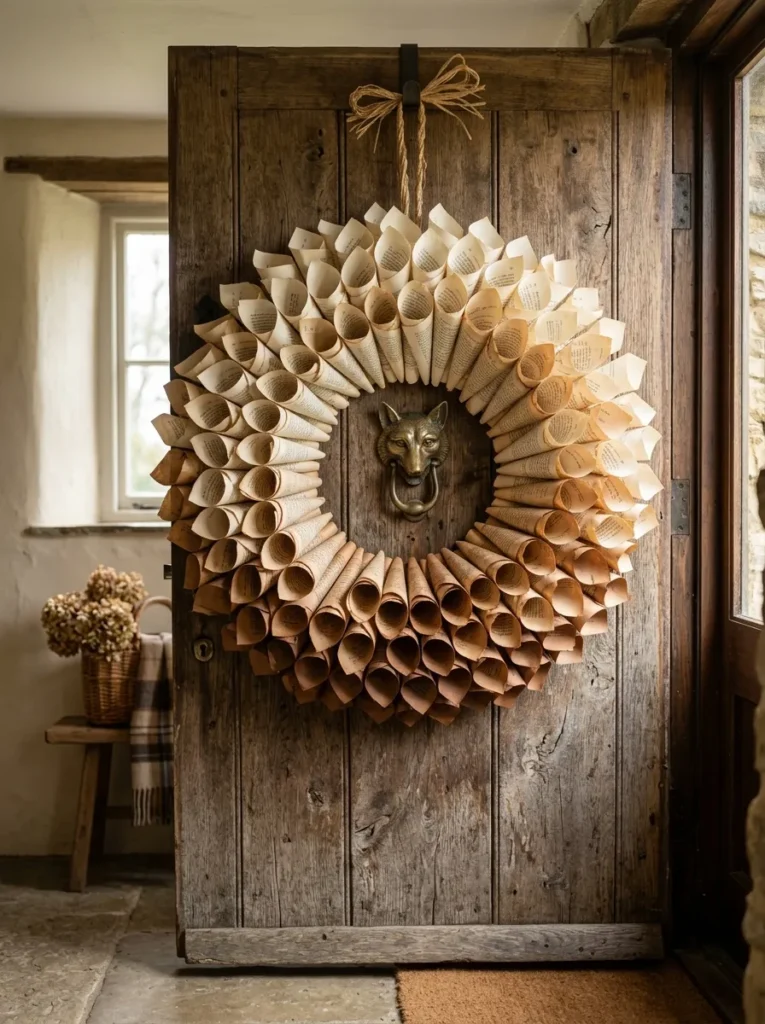
What it looks like: Rolled paper cones, dozens of them, dip-dyed in cold tea and arranged from palest cream at the top to deep walnut at the base layered, deliberate, nothing flimsy about it.
Why it works: The gradient adds visual weight at the bottom, which is what keeps a paper wreath from reading as cheap heavier color anchors, lighter color lifts. It’s the same proportion trick used in ombré paint walls.
How to copy it: Steep torn pages in strong black tea for 5–45 minutes depending on the depth of color you want, dry flat overnight, then roll each one into a cone with a hot glue dot at the tip before wiring it to a wreath form, darkest color at the bottom.
Best for: Beginners with zero crafting experience who want a finished piece in under two hours.
Quick Win: Skip the tea bath entirely and use a book with naturally yellowed pages you’ll get most of the effect for none of the extra time.
Up next: the version that takes even less effort than the wreath.
2. Rolled Book Page Roses (Ready in One Afternoon)
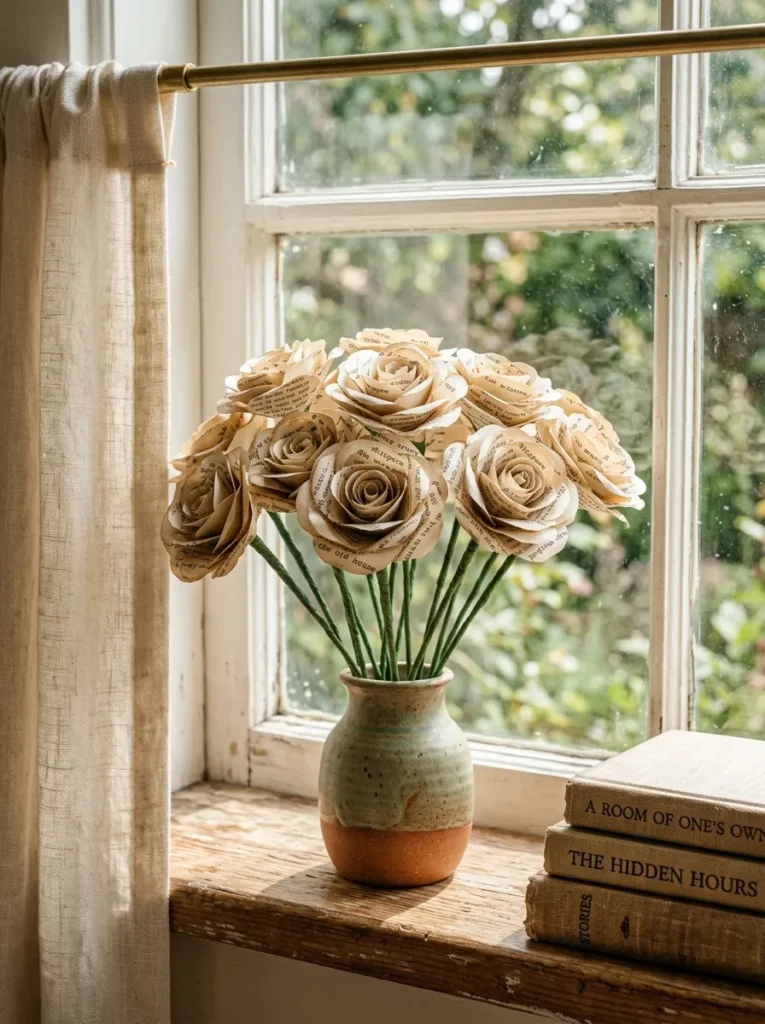
What it looks like: Raw, hand-shaped roses with slightly imperfect petal curls, the kind that look more like a florist’s sample than a craft project.
Why it works: Rolling paper around a pencil before pinching the base creates real dimensional texture, which is the design principle that separates a paper flower from a flat cutout.
How to copy it: Cut strips of book pages, roll each one loosely around a pencil while curling the top edges outward with your thumb, pinch the bottom into a cone, hot glue it shut, then attach to floral wire wrapped in green floral tape.
Best for: Renters who want a centerpiece with no upkeep, and anyone browsing handmade gift ideas for a last-minute present.
Pro Tip: Tear the paper strips instead of cutting them with scissors the rough edge catches light differently and reads as more expensive, not less.
Shop This Look
| Product |
|---|
| Small ceramic bud vase, matte glaze |
| 22-gauge floral stem wire |
| Green floral wrap tape |
| Craft glue gun with fine-tip nozzle |
3. Book Page Confetti — The Zero-Skill Tablescape Fix
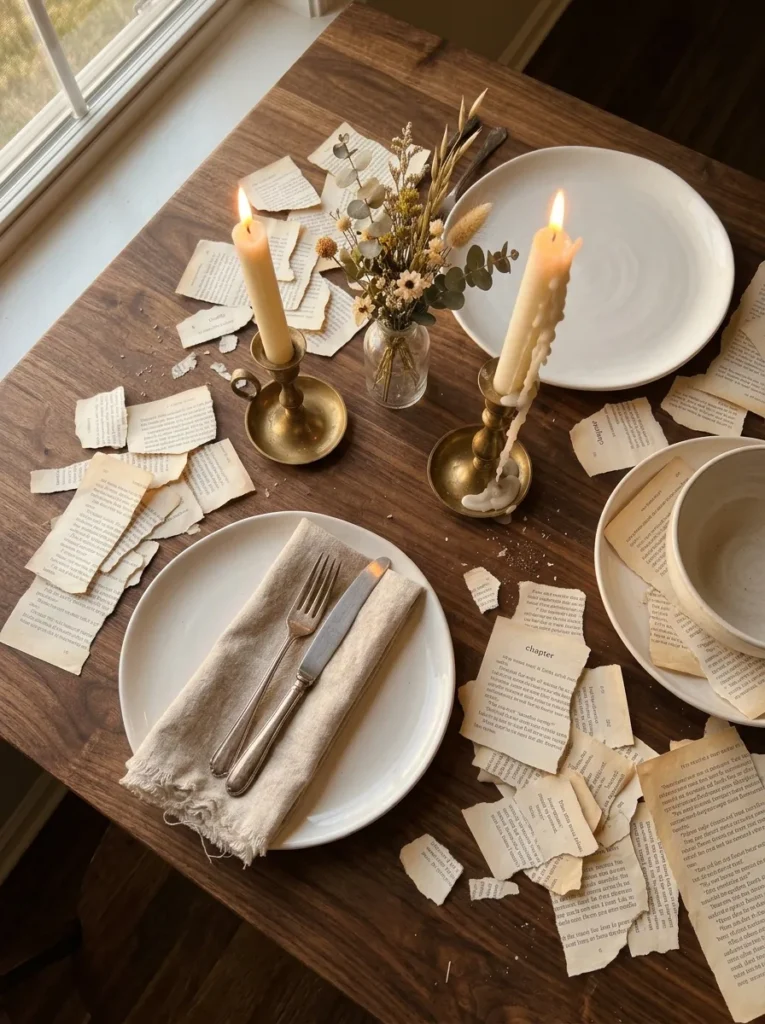
What it looks like: A scattering of hand-torn text fragments across a table runner sun-warmed, textured, closer to confetti at an outdoor wedding than a craft store bag.
Why it works: Negative space between the pieces matters as much as the paper itself; scattering too densely flattens the effect, while restraint keeps each fragment legible and intentional.
How to copy it: Tear pages by hand rather than cutting them, keep pieces roughly 1–2 inches across, and scatter unevenly in clusters near the centerpiece rather than in a uniform layer across the whole table.
Best for: Hosts who need a fast styling fix an hour before guests arrive.
Styling Note: Cluster the confetti near the base of your centerpiece rather than spreading it edge to edge a contained mess photographs better than an evenly dusted table.
The next idea is one most people overlook entirely it’s the one that finally gives your dictionary pages a real second life.
4. Framed Sepia Botanical Prints from Dictionary Pages
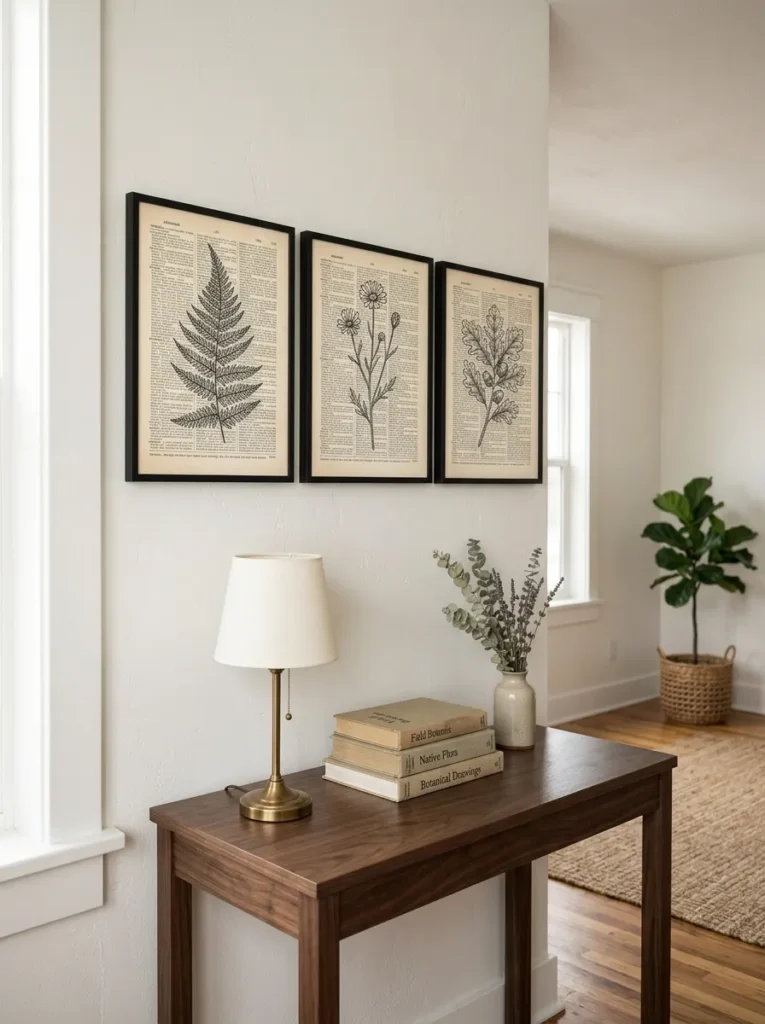
What it looks like: Botanical line drawings printed or hand-inked directly over a dictionary page, the definition text still faintly visible underneath still, considered, gallery-adjacent.
Why it works: Layering imagery over legible text creates depth without adding another material, which is the same trick used in mixed-media collage to avoid visual clutter.
How to copy it: Print a simple botanical outline onto vellum or trace one by hand directly onto the page in fine black pen, then mat and frame in a thin black or brass frame so the paper stays the visual focus.
Best for: Renters who want gallery-wall impact without buying actual art.
Budget Version: Skip printing altogether and trace a botanical illustration free-hand from a library book using a fine-liner pen three prints cost you only frame money.
5. Book Page Pendant Lampshade
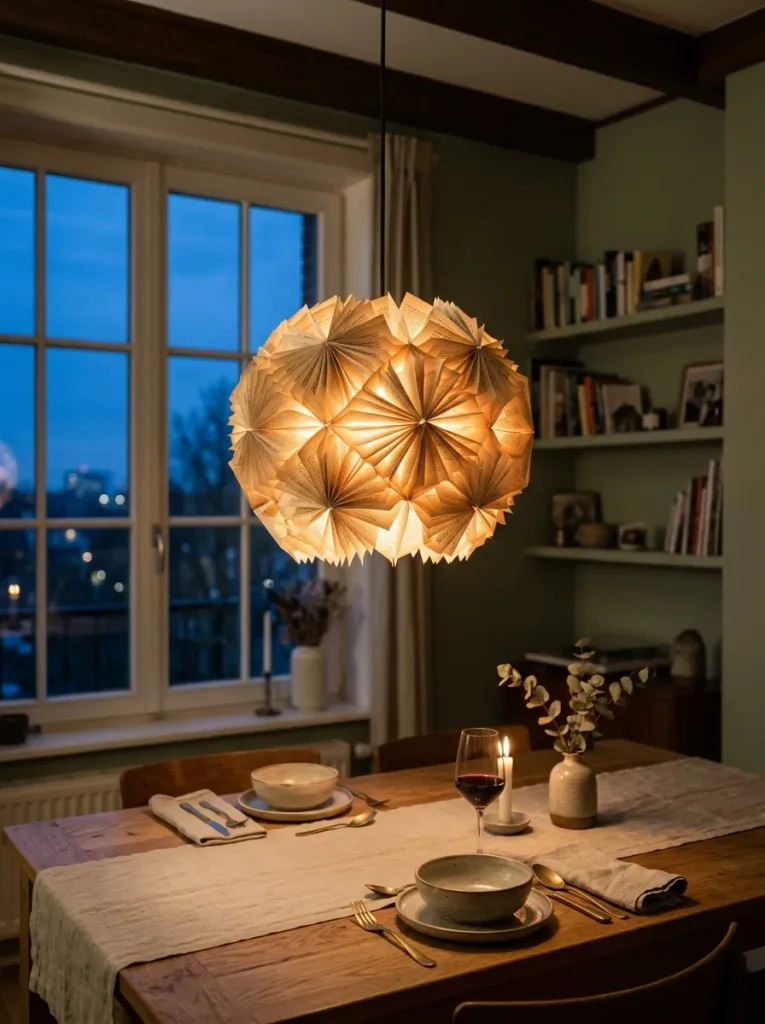
What it looks like: A shade built from overlapping folded pages that glow amber when the bulb is on, almost translucent at the thinnest folds warm, without a single visible seam.
Why it works: Light behavior is the whole idea here: paper diffuses a bulb’s harshness the way a fabric shade does, but at a fraction of the cost and with visible texture a fabric shade can’t offer.
How to copy it: Fold pages into fan shapes and hot glue them in overlapping rows to a wire pendant frame, working from the bottom ring upward so each row hides the glue line of the one below it.
Best for: Dining rooms and reading nooks that need warmer, more diffused light than a bare bulb.
Warning: Never pair this with an incandescent or halogen bulb the heat is a genuine fire risk against dry paper. Use an LED bulb only, and keep at least three inches of clearance between the bulb and any paper fold.
Up next: the project that finally makes your mantel look finished, not just decorated.
6. Book Page Garland Along the Mantel
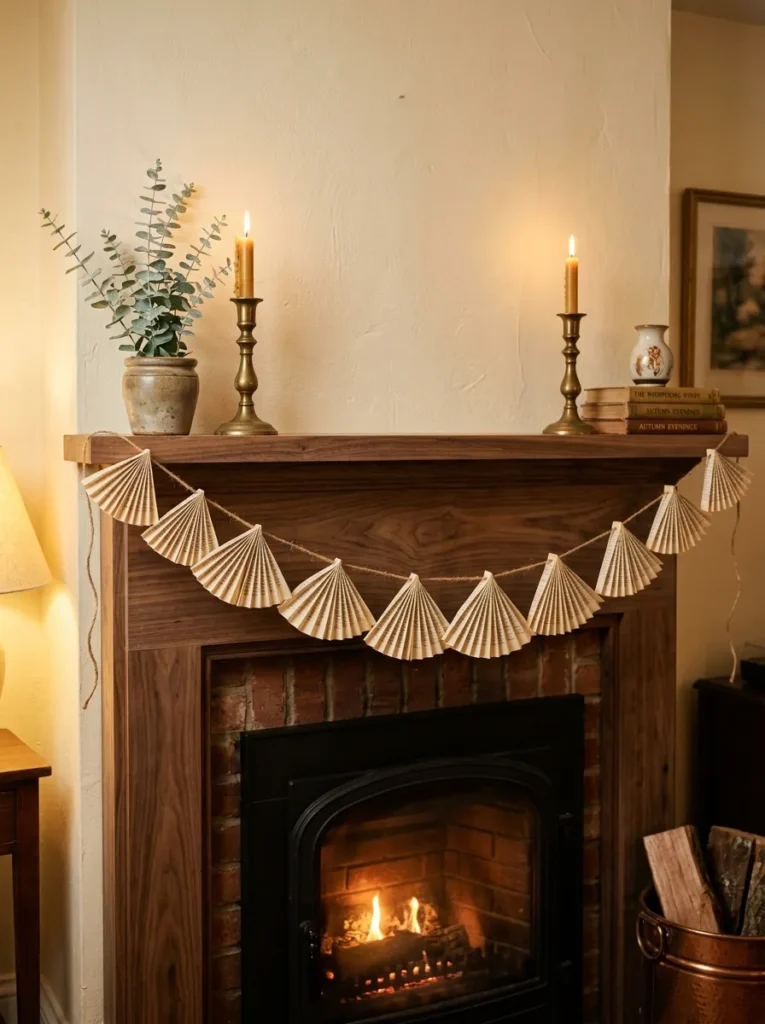
What it looks like: A string of small folded paper fans, evenly spaced, draping in a soft natural curve along the mantel edge layered without looking busy.
Why it works: The visual rhythm comes from consistent spacing between each fan; uneven gaps read as messy rather than handmade, so measuring twice here matters more than it does with any other project on this list.
How to copy it: Fold pages accordion-style into fans, pinch and glue the base of each, then hot glue or tie them to a length of twine at consistent four-inch intervals before draping across the mantel.
Best for: Anyone decorating for a season or holiday who wants something reusable, not disposable.
Mistake to Avoid: Spacing the fans by eye instead of measuring leads to a lopsided garland once it’s hung and gravity pulls the center down mark your twine with a pencil first.
7. Book Page Covered Vases and Vessels
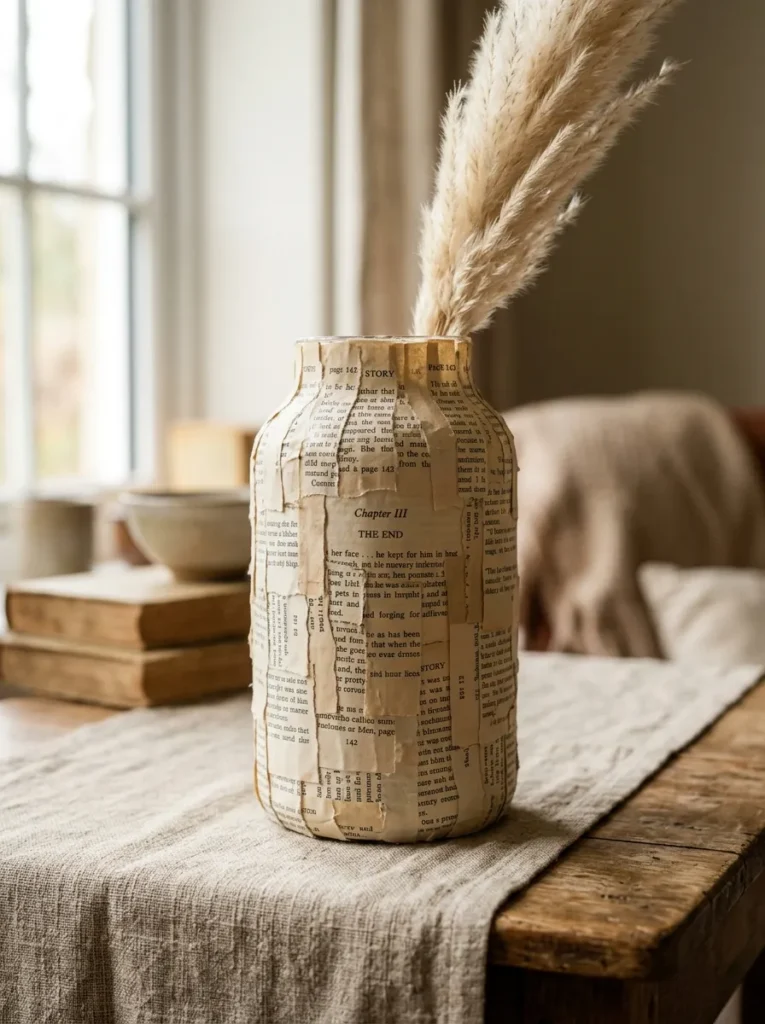
What it looks like: A plain glass or plastic vessel completely disguised under overlapping torn paper strips, sealed until it looks and feels closer to handmade ceramic than glass.
Why it works: Overlapping the strips at random angles instead of in neat rows hides seams and adds real textural depth the same layering principle used in traditional papier-mâché.
How to copy it: Tear pages into rough one-inch strips, brush the vessel with matte Mod Podge, apply strips in overlapping layers working in one direction, then seal with two thin top coats once fully dry.
Best for: People upcycling mismatched glassware they already own but rarely use.
Important: Most people assume a glossy sealer gives the most “finished” look. It actually does the opposite here glossy topcoats amplify every uneven seam, while a matte sealer hides minor imperfections completely.
This next one surprised even experienced decorators the first time they tried it.
8. Layered Book Page Butterfly Wall Display
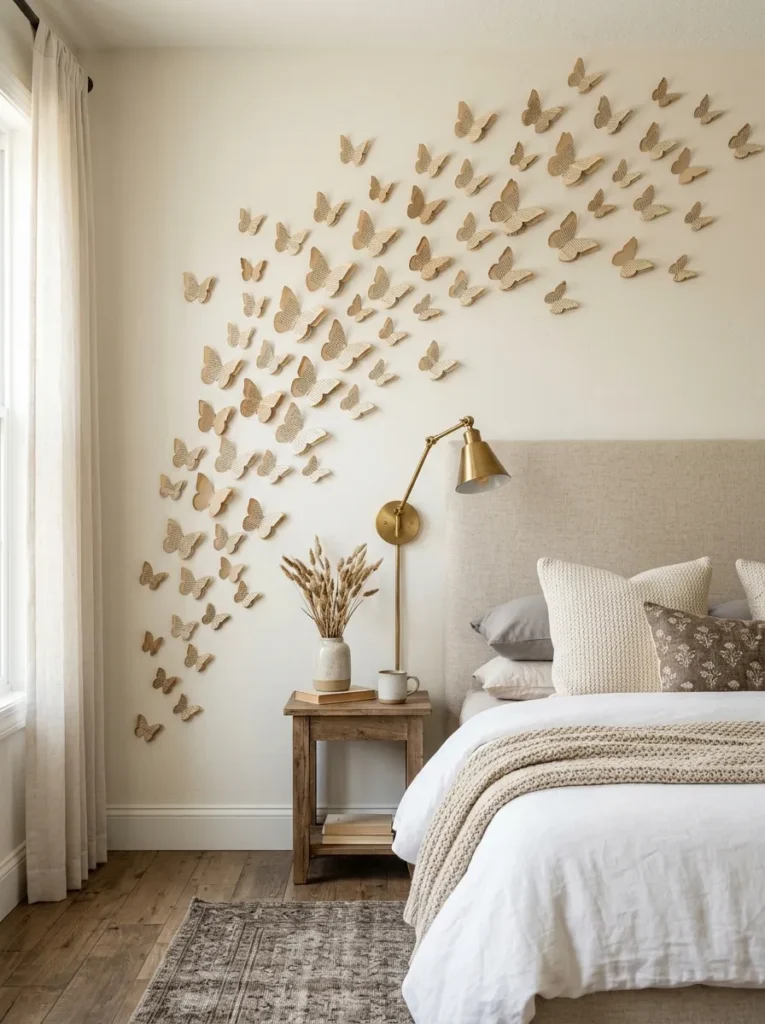
What it looks like: Dozens of small butterflies cut from book pages, wings gently curved upward off the wall so they cast tiny shadows airy, in motion, never flat.
Why it works: The scattered diagonal placement, rather than a symmetrical grid, mimics how butterflies actually cluster in nature, which is why it reads as intentional rather than like a kids’ craft project.
How to copy it: Cut butterfly shapes in three graduated sizes, crease each one down the center and curl the wings slightly around a pencil, then attach with foam dots so the wings lift away from the wall.
Best for: Bedrooms and nurseries that need texture on one blank wall without committing to paint or wallpaper and if you like the idea of textural wall pieces, crochet wall hangings are worth a look too.
Quick Win: Use a single butterfly punch tool instead of hand-cutting you’ll get 40 identically shaped butterflies in the time it takes to cut ten by hand.
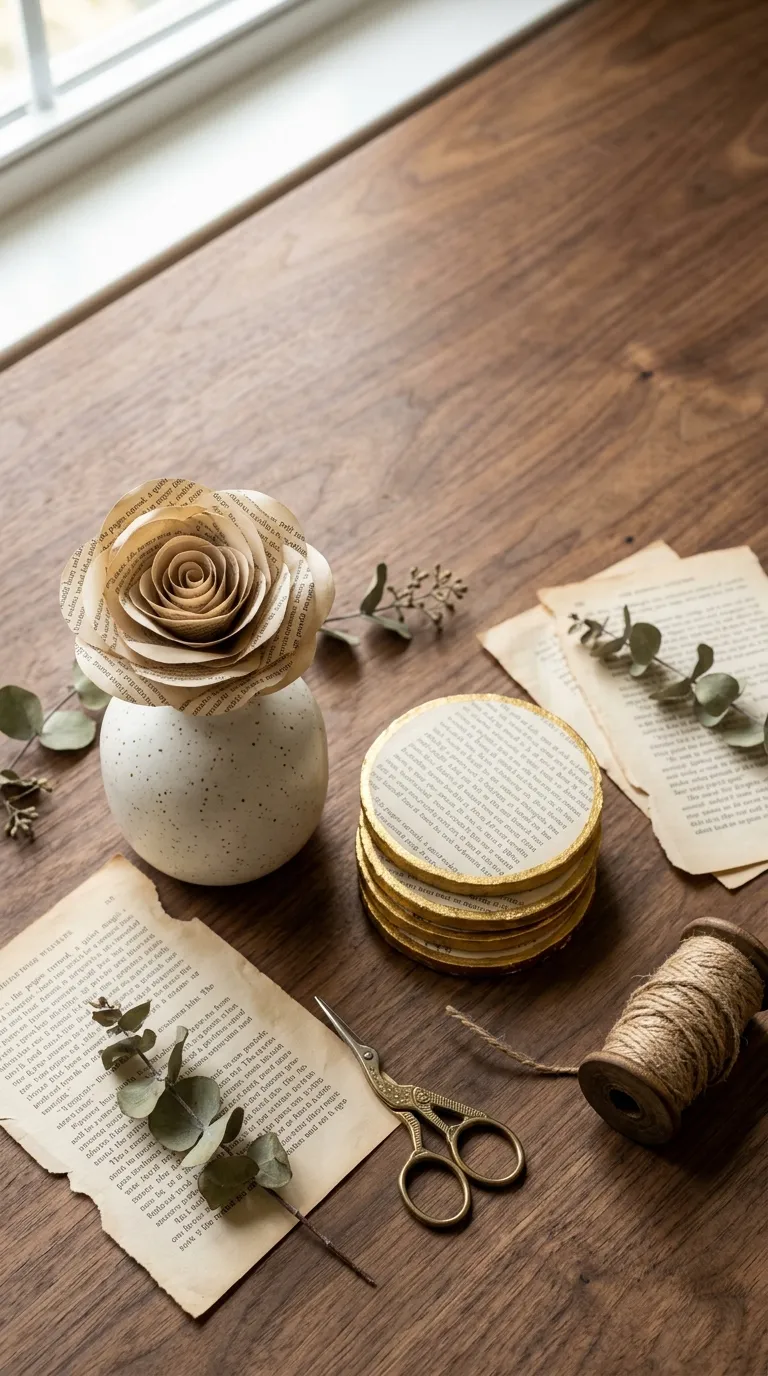
9. Gilded-Edge Book Page Coasters
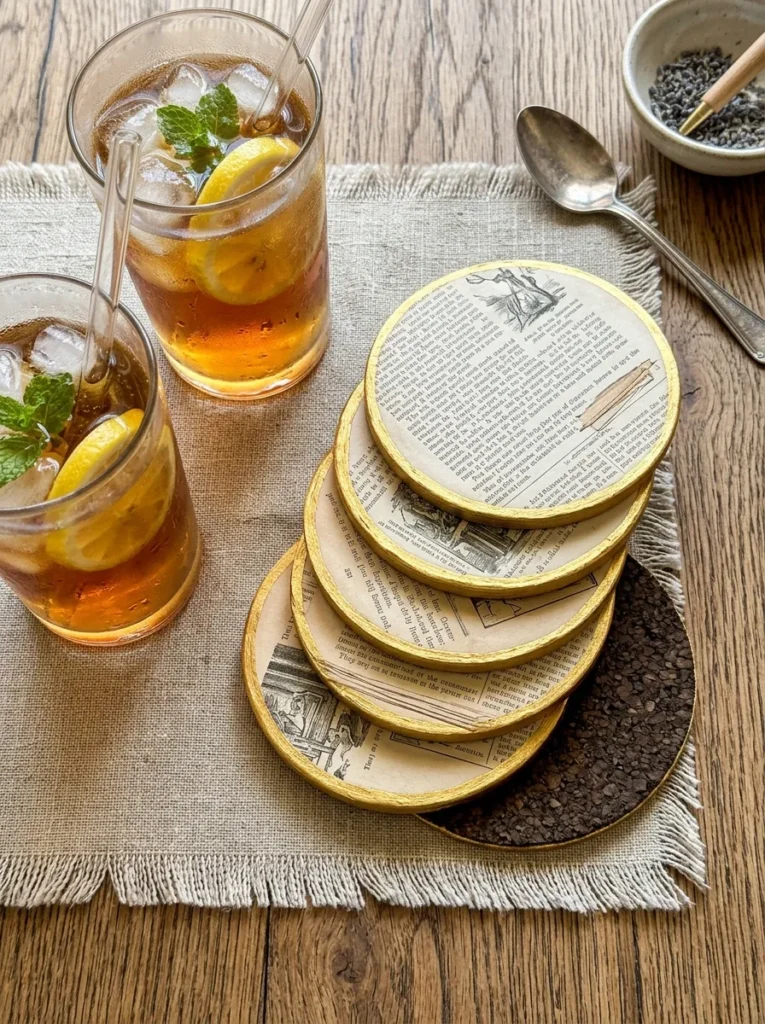
What it looks like: Stacked paper rounds with crisp metallic-gold edges, sealed flat and sturdy enough to hold a sweating glass luminous where the light catches the gilded rim.
Why it works: Gilding just the edge, rather than the whole surface, uses contrast deliberately: a single line of metallic against matte paper reads as expensive because it’s restrained, not because it’s shiny all over.
How to copy it: Cut and layer four to six page rounds per coaster, glue and clamp them flat overnight, seal with matte Mod Podge, then run a gold leaf paint pen carefully around just the edge before gluing on a cork backing round.
Best for: Anyone who wants a gift set that looks store-bought without a big time investment.
Pro Tip: Let the stacked layers dry under a heavy book overnight before sealing skipping this step is the single biggest reason homemade coasters end up warped.
Shop This Look
| Product |
|---|
| Self-adhesive cork backing sheets |
| Metallic gold leaf paint pen |
| Matte Mod Podge sealer |
| Round craft punch, 4-inch |
Up next: the seasonal project that costs almost nothing and disappears into storage the rest of the year.
10. Book Page Paper Pumpkins for Fall
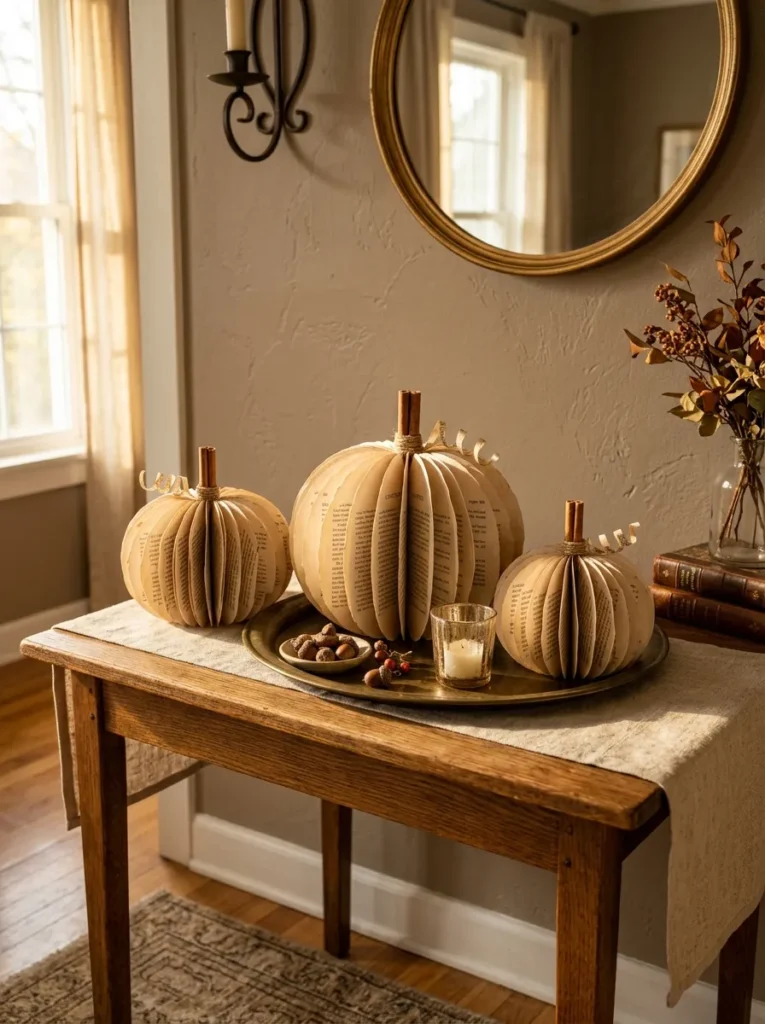
What it looks like: Accordion-folded paper compressed into a pumpkin shape and finished with a real cinnamon stick stem sun-warmed in tone, more apothecary than craft-fair.
Why it works: Swapping a hot-glued paper stem for a real cinnamon stick adds genuine material contrast and a bit of scent, both of which are cheap upgrades that make a paper craft feel finished rather than improvised.
How to copy it: Accordion-fold a stack of pages, thread twine through the center and cinch tightly into a circle, fan the folds outward into a pumpkin shape, then hot glue a cinnamon stick into the center hole as the stem.
Best for: Renters who want seasonal decor that folds flat into storage for eleven months of the year. Pair a few with your fall porch ideas for a matching entryway moment.
Small-Space Tip: Make these in three graduated sizes and nest them together on a single small tray you get a full seasonal vignette in under a square foot of surface space.
11. Metallic-Dipped Book Page Ornament Balls
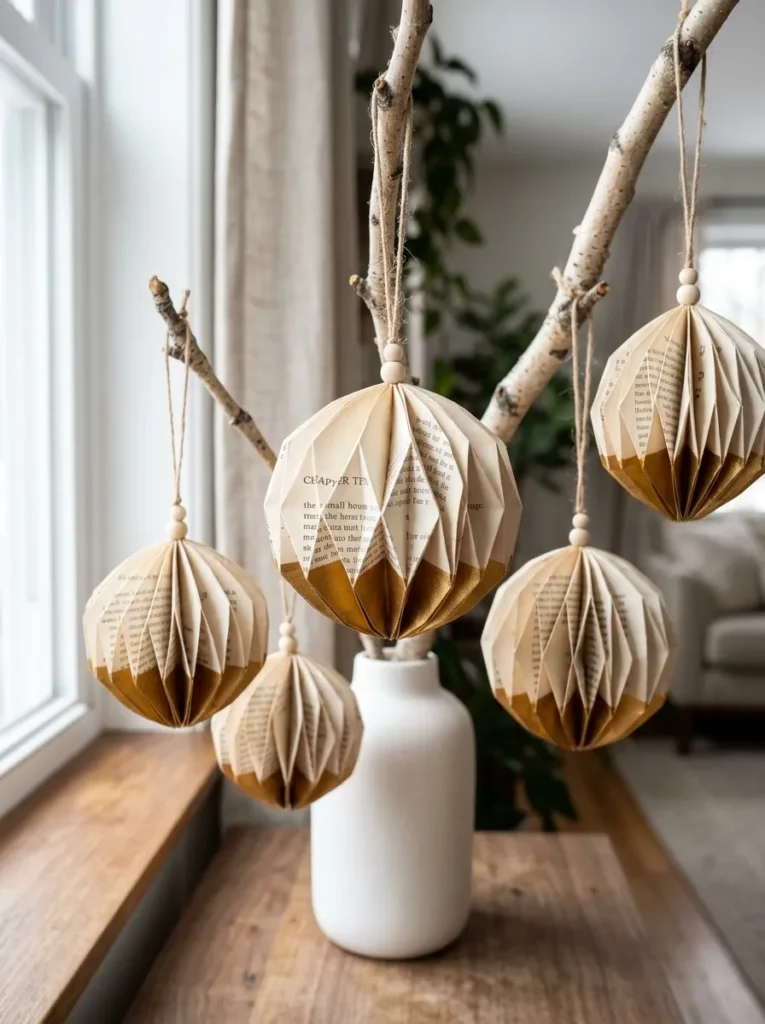
What it looks like: Folded paper spheres with just the bottom third dip-dyed in metallic gold, hung so the painted edge catches the light first luminous in small doses rather than all over.
Why it works: Partial dipping instead of fully painting the ornament keeps the paper texture visible on top while still delivering a metallic moment, which is a contrast principle borrowed straight from dipped-candle styling.
How to copy it: Fold and glue paper wedges into a sphere shape around a small foam ball, let dry fully, then dip just the bottom third into metallic acrylic paint and hang to dry before adding a thread loop.
Best for: Anyone who wants holiday decor with a modern edge instead of a traditional look.
Styling Note: Hang these at varied heights rather than lining them up evenly irregular clustering is what makes a branch display look gathered instead of assembled.
12. Book Page Wall Sconce Shade
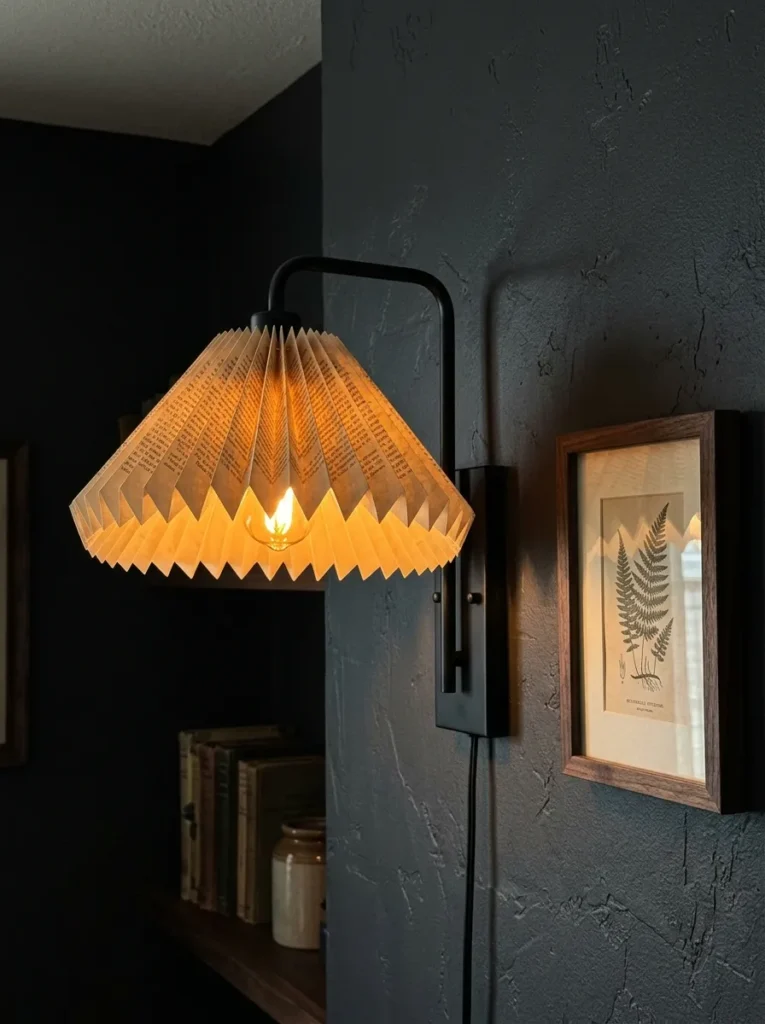
What it looks like: A small folded paper shade fitted over a wall sconce bulb, glowing amber against a dark wall moody, warm, closer to a boutique hotel hallway than a DIY fix.
Why it works: Paper’s natural warmth shifts a cool LED’s color temperature just enough to feel residential rather than commercial, without buying a warmer bulb at all.
How to copy it: Fold a strip of pages into a fan, wrap it into a cylinder around a wire frame sized to clip over the existing sconce shade, and secure with a single line of hot glue along the seam.
Best for: Hallways and stairwells that need warmer ambient light without an electrician.
Important: Most people assume any shade fits any sconce. Measure your specific bulb’s heat output and clearance first wall sconces sit closer to eye level than pendants, so a poorly sized shade is far more noticeable when it’s wrong.
The next idea takes the least time of anything on this list, which is exactly why it’s easy to underestimate.
13. Book Page Table Runner Strip
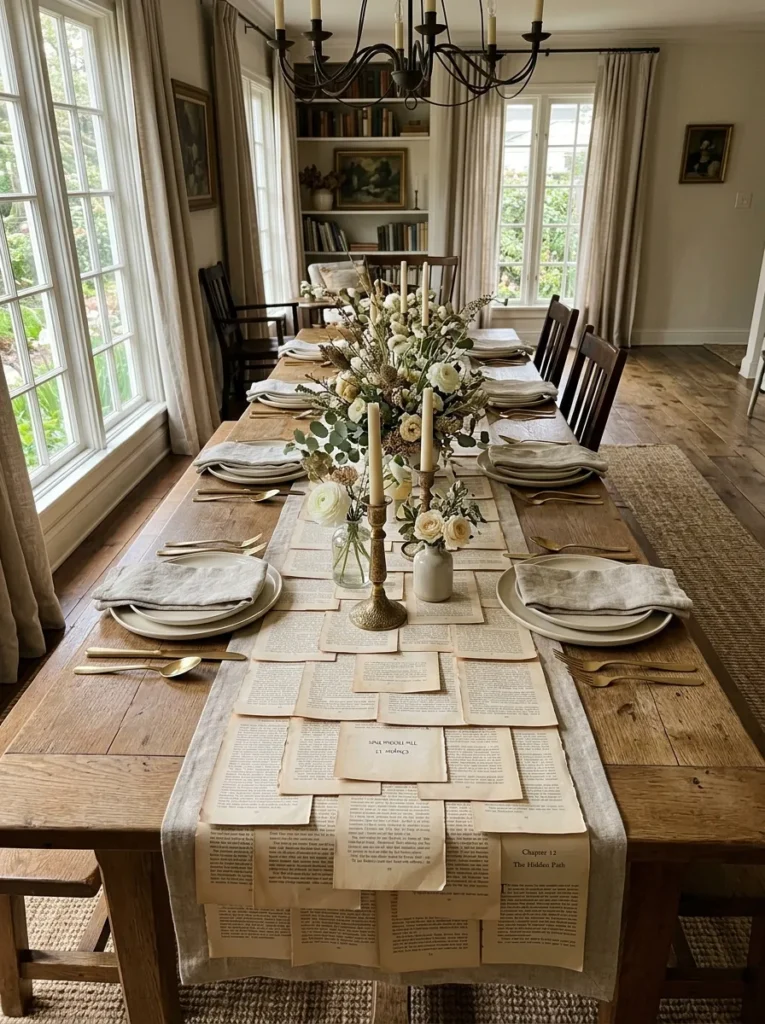
What it looks like: Pages shingled edge over edge down the center of the table like fish scales, glued to a plain linen strip still, considered, more editorial tablescape than paper craft.
Why it works: The shingle overlap is a repetition pattern that reads as intentional from across the room, the same visual logic as roof shingles or scalloped tile.
How to copy it: Glue a plain linen strip to the table as a base, then overlap pages by about a third of their width down the center, working from one end to the other, and trim the edges flush once dry.
Best for: Dinner parties and holiday tables that need a one-time statement piece.
Budget Version: Skip the fabric backing entirely and glue the shingled pages directly to a strip of kraft paper it costs almost nothing and still holds up for a single evening’s use.
14. Hanging Book Page Mobile for a Reading Nook
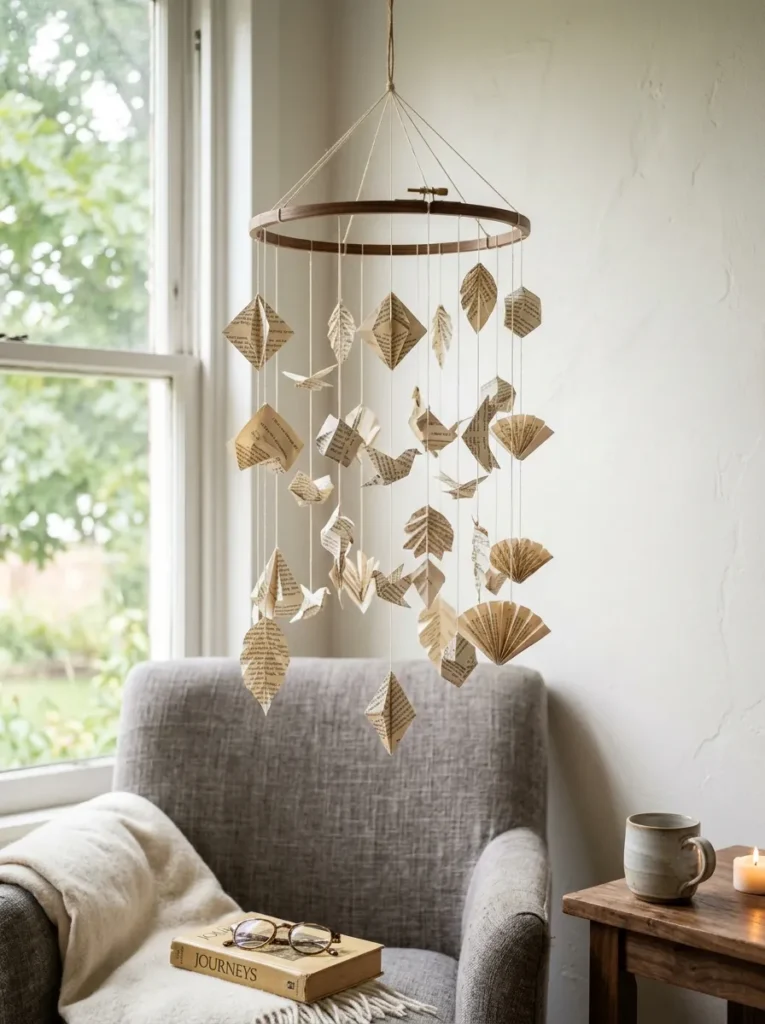
What it looks like: Small folded paper shapes hung at staggered thread lengths from a plain embroidery hoop, turning slowly with the room’s air still, but never static.
Why it works: Staggering the thread lengths instead of hanging every piece at the same height creates depth in a small vertical space, which matters most in a corner too tight for furniture or wall art.
How to copy it: Cut five to seven small shapes from pages, punch a hole in the top of each, thread with clear fishing line at varied lengths, and tie each line to an embroidery hoop suspended from the ceiling.
Best for: Small reading nooks or corners where floor and wall space are already spoken for.
Pro Tip: Use clear fishing line instead of visible thread or twine from more than three feet away, the paper shapes appear to float with no visible support at all.
This next one solves a problem most photo displays never bother addressing.
15. Book Page Photo Frame Mat
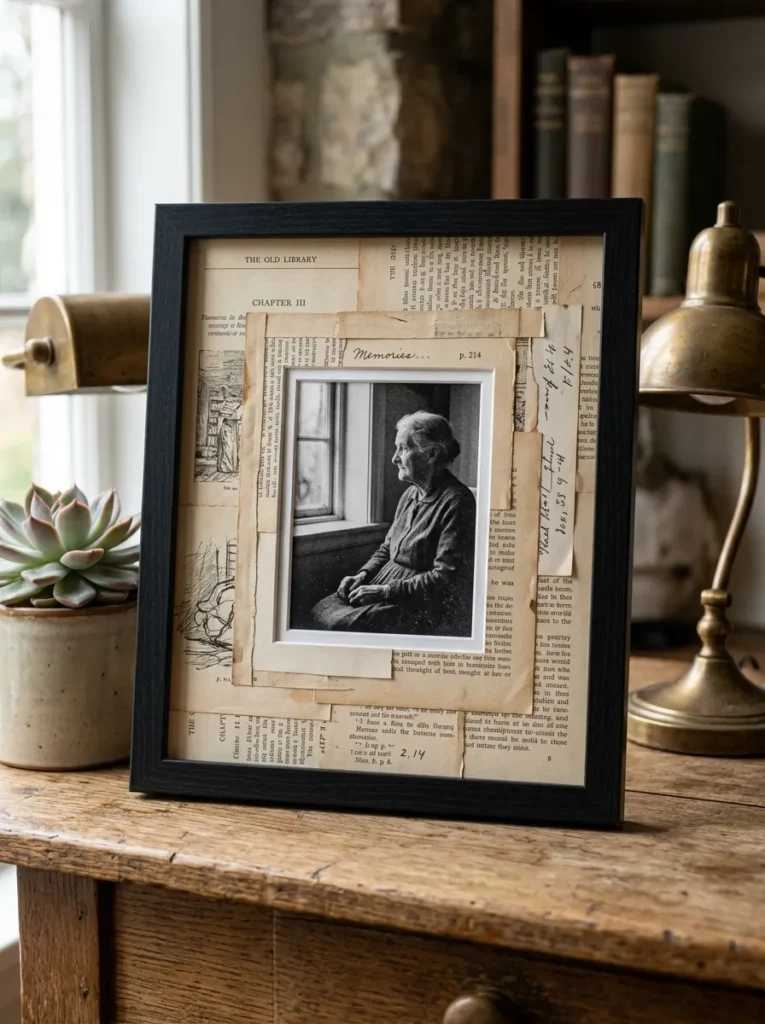
What it looks like: A photo mat built from layered book-page collage instead of plain cardstock, with a clean-cut window revealing the photo beneath hushed, textural, easy to miss as handmade.
Why it works: A textured mat draws the eye toward the frame’s border first and the photo second, using visual weight to make an ordinary snapshot feel curated rather than casual.
How to copy it: Glue pages flat onto mat board in overlapping layers, let it dry under weight, then measure and cut a clean window opening slightly smaller than your photo before inserting it behind the mat.
Best for: Anyone framing black-and-white or sepia-toned photos where the paper tone can echo the image itself.
Mistake to Avoid: Cutting the window opening before the glued mat board is fully dry causes the paper to buckle unevenly along the cut edge always let it cure flat overnight first.
In my experience…
In my experience, the biggest mistake with book page projects isn’t the folding it’s using pages from anything printed after the early 2000s. Modern paper is often bright white with a cool undertone, and tea-staining rarely fixes that evenly; it dries blotchy instead of warm.
Pages from books printed before the 1980s take stain far more consistently, because the paper fiber itself has already started to yellow at a chemical level. If you’re buying specifically for these projects, ask a thrift store for their oldest, most water-damaged stock it’s usually priced to move and it’s exactly what you want.
16. Rolled Book Page Flower Shadow Box
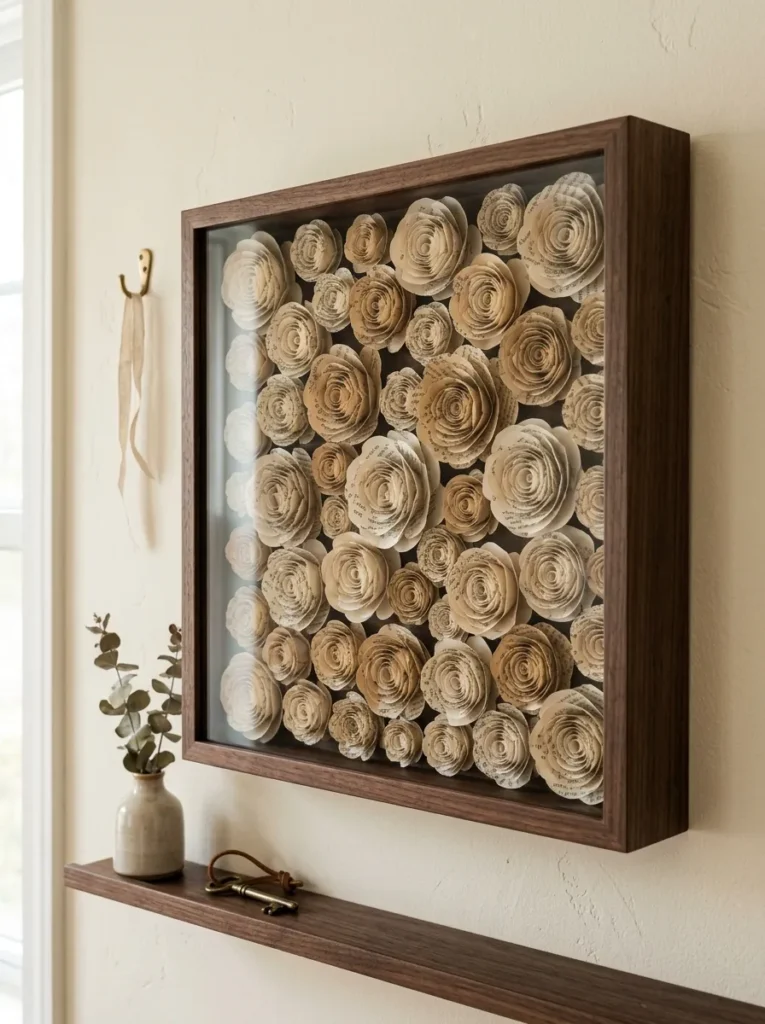
What it looks like: A cluster of rolled paper flowers mounted at varied depths inside a deep shadow box, so the glass front catches real dimensional shadow instead of a flat printed image.
Why it works: Depth is the entire design principle here a shadow box only justifies its price versus a regular frame when there’s genuine three-dimensional variation inside it, not just flat paper pressed to the backing.
How to copy it: Follow this sequence closely, since skipping a step here is the fastest way to end up with a crooked or crowded box.
✅ Shadow Box Setup Checklist:
- [ ] Remove the glass and measure the box’s interior depth before building any flowers
- [ ] Roll and glue 8–12 paper flowers in at least three different heights
- [ ] Dry-fit the arrangement inside the box before gluing anything to the backing
- [ ] Glue flowers to the backing panel, tallest toward the back, shortest toward the front glass
- [ ] Let the glued arrangement cure for a full 24 hours before reattaching the glass and hanging
Best for: Statement wall pieces above a console table or reading chair that need real texture up close.
Up next: the shelf-styling fix that solves a problem you didn’t know your bookends had.
17. Book Page Covered Bookend Wraps
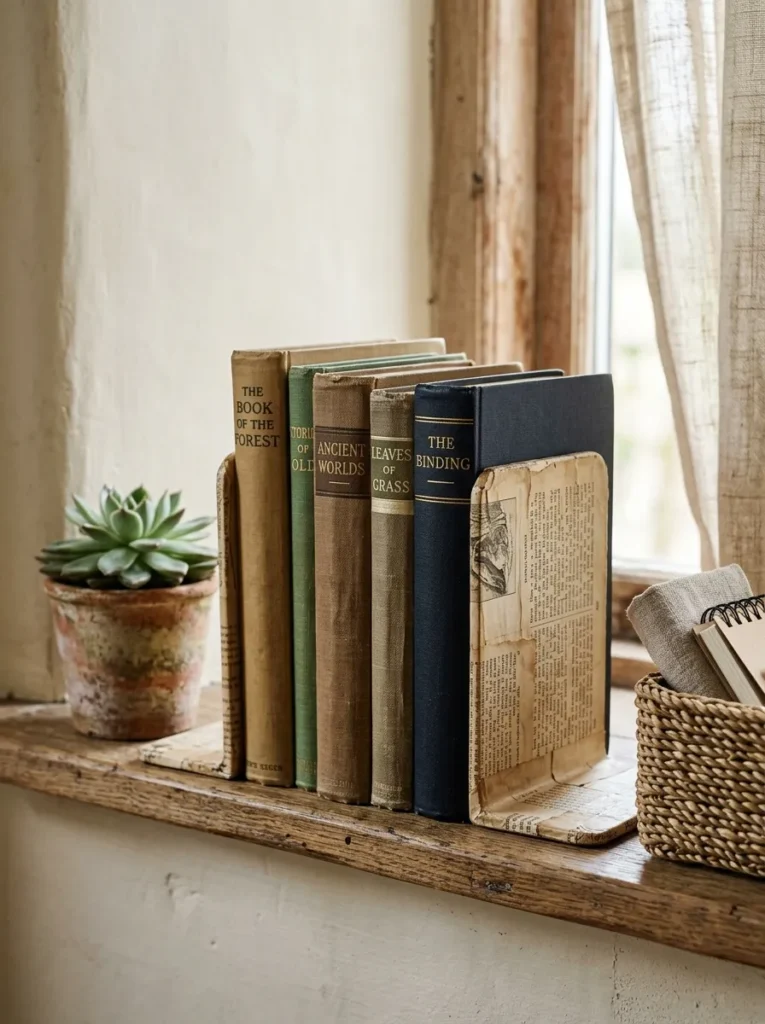
What it looks like: Plain metal bookends fully wrapped in decoupaged pages so no bare metal shows, holding a small stack of books on a narrow shelf raw, unfussy, easy to overlook as store-bought.
Why it works: Wrapping the object entirely, rather than just adding a paper label or accent, is what removes the “craft project” read and makes it look manufactured to match the room.
How to copy it: Brush the bookend with matte Mod Podge, wrap pages around every visible surface working in small sections, smoothing out air bubbles as you go, then seal with two coats once fully dry.
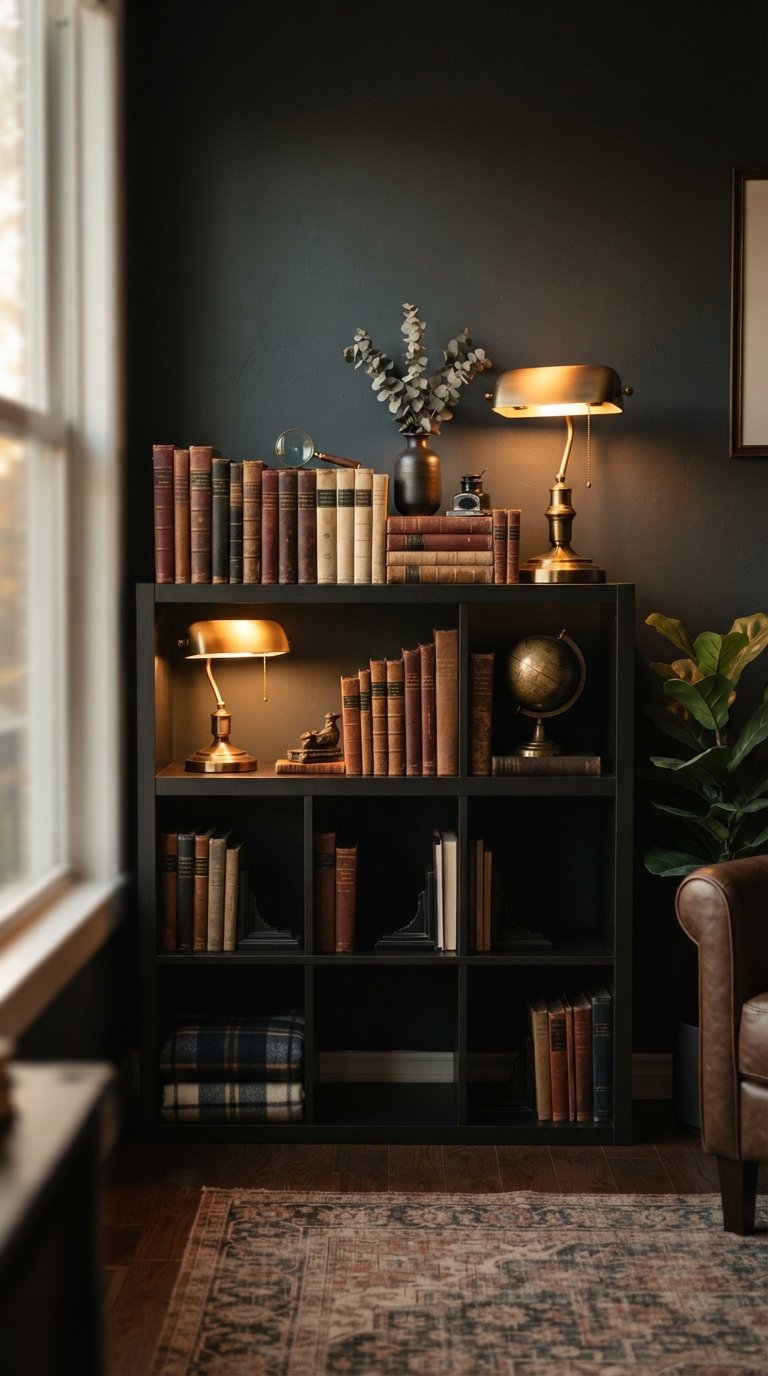
Best for: Small shelves where a narrow footprint matters more than a decorative statement piece these also work nicely if you’re styling an IKEA Kallax unit and want to soften all that cube storage.
Quick Win: Use bookends you already own instead of buying new ones plain metal L-brackets from a hardware store work just as well and cost less than half of decorative options.
18. Ombré Dipped Book Page Fan Display
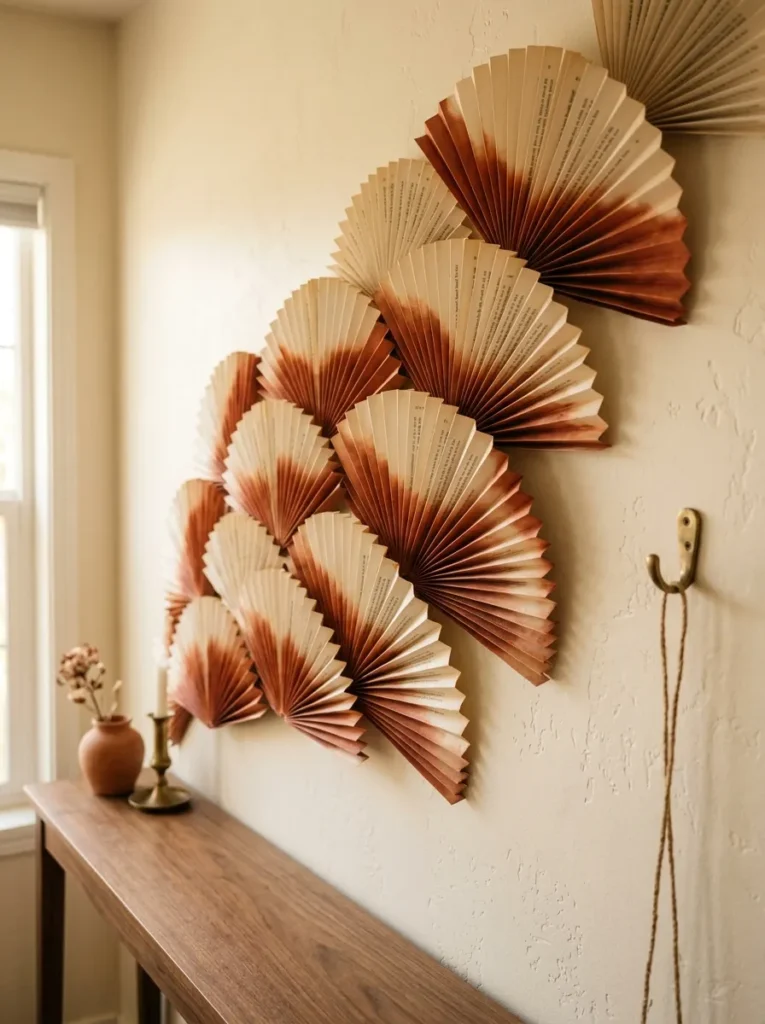
What it looks like: A rising arc of accordion-folded fans, each dip-dyed at the base in a gradient from pale cream to deep rust warm, layered, more art installation than paper craft.
Why it works: Arranging the fans in a rising arc rather than a straight row creates directional movement across the wall, which is the same compositional trick used in gallery-wall arrangements to guide the eye.
How to copy it: Fold pages accordion-style, dip just the bottom two inches of each into diluted fabric dye at increasing concentrations, dry flat, then mount in a slight upward arc using small nails or removable adhesive hooks.
Best for: A blank stairwell wall or an awkward narrow space beside a doorway.
Pro Tip: Dilute the dye more than feels intuitive at first paper absorbs color faster than fabric, and full-strength dye almost always comes out darker than expected on the first attempt.
Last one on the list and it’s the biggest statement piece of the bunch.
19. Book Page Chandelier — The Statement Piece
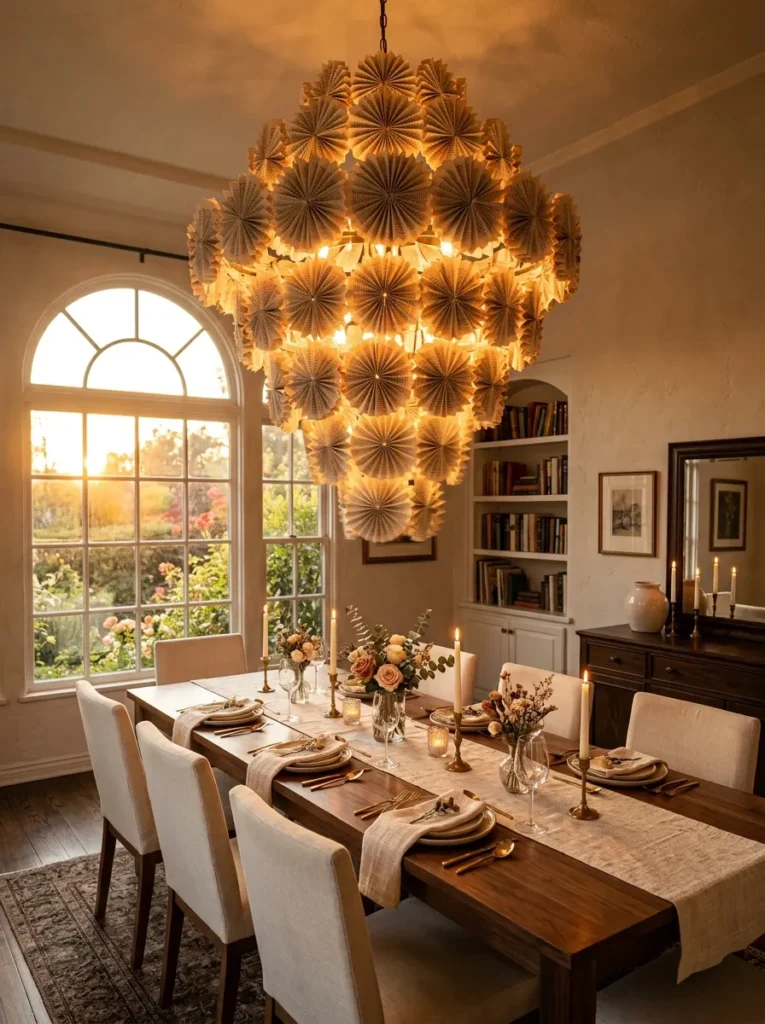
What it looks like: A full multi-tiered fixture built from dozens of layered paper rosettes, glowing amber from within the most dramatic, romantic piece on this entire list, and the only one meant to be the room’s focal point rather than an accent.
Why it works: Scale and repetition together create the visual weight of a real chandelier; a single tier would read as a craft project, but three or four stacked tiers of the same rosette shape reads as an intentional lighting fixture.
How to copy it: Build individual paper rosettes by layering and gluing five to six graduated paper circles per flower, attach dozens of them to a round wire frame in even tiers, and wire the frame around an existing pendant light kit rated for the paper’s clearance from the bulb.
Best for: A dining room or entry that wants one true showstopper rather than several smaller accents.
Shop This Look
| Product |
|---|
| Round wire chandelier frame, multi-tier |
| Pendant light conversion kit |
| LED bulb, warm white, low-heat |
| Craft glue gun with extra glue sticks |
How to Start Your Book Page Craft Journey
What I’ve found with real projects: skip buying a “craft book” new and instead find one damaged hardcover at a thrift store for a couple of dollars. Pre-yellowed paper from an older book skips the tea-staining step entirely and gives you a head start on every project on this list.
The most common fixable mistake is over-gluing with a glossy Mod Podge, which yellows unevenly and leaves a plasticky sheen that undercuts the whole point of using vintage paper. Switch to a matte formula and apply it in thin coats, letting each one dry before adding the next.
Three items under $50 that create immediate impact: a gold leaf paint pen for gilding edges, a three-piece embroidery hoop set for mobiles and wall art, and a bottle of matte Mod Podge sealer. If these supplies start multiplying, a few craft closet ideas will help keep them from taking over a shelf.
A single wreath or bouquet takes an afternoon. A full gallery wall, garland, or chandelier project is realistically a weekend. Budget $15–$30 to start with one or two small pieces, or $60–$100 if you’re outfitting an entire mantel, bookshelf, or dining room display.
Ready to Fill Your Home with Book Page Charm?
Between the color-graded wreaths, the gilded coasters, and that oversized paper chandelier, you’ve now got nineteen ways to turn pages nobody wanted into pieces people ask about. None of this needs to happen at once one framed print on a bookshelf is enough to start.
Pull a book off your shelf tonight and test-fold a single rose; you’ll know within ten minutes if this is a hobby worth keeping going, or gather a few friends and turn it into one of these creative craft night themes instead. There’s something steadying about decor made from words instead of plastic it just feels more lived-in. Pin your favorite three now, before the tab closes, because you will absolutely lose this list otherwise.
You Might Also Like
- 12 Vintage Book Storage Ideas That Don’t Look Like a Library
- 15 Thrifted Home Decor Finds That Look Custom-Made
- 9 Easy Paper Craft Gifts You Can Make in an Afternoon