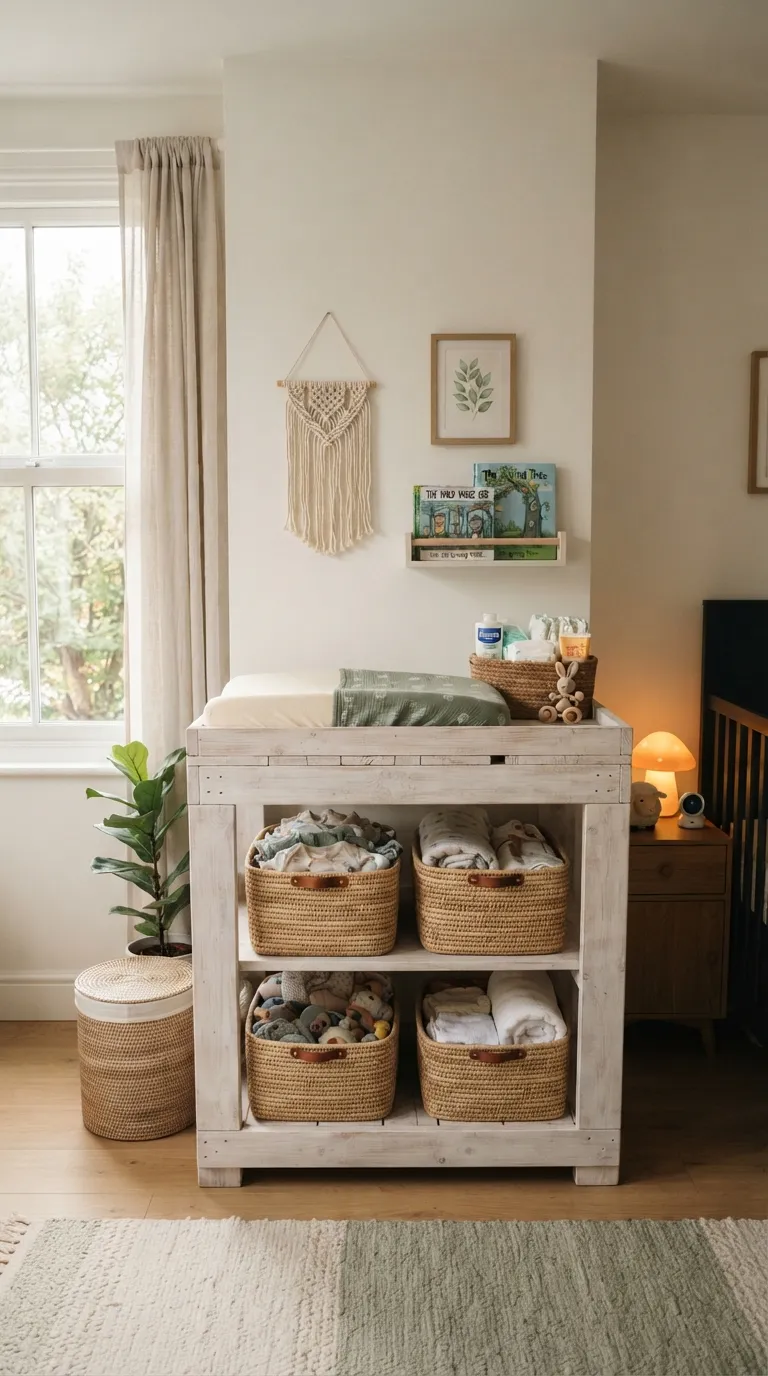
10 Pallet Nursery Furniture Ideas for New Parents on a Budget
Pallet wood turns a nursery budget that feels impossible into one you can pull off if you know which boards are safe and which ones to skip. This roundup covers 10 pallet nursery furniture ideas for new parents on a budget, each one a full piece you can build in a weekend for less than a store-bought equivalent.
The result looks less like a garage project and more like a room that was planned on purpose: warm, sanded wood next to soft paint, shelves sitting at exactly the height you’ll reach for them at 2 a.m., corners that don’t demand a router table you don’t own. Nothing here needs power tools you’d have to buy just for this project. Budget-friendly doesn’t have to mean unfinished.
Quick Navigation
- Why Pallet Nursery Furniture Makes Such a Difference
- The Builds Worth Your Weekend
- How to Start Your Pallet Nursery Furniture Transformation
- Ready to Build Your Budget-Friendly Nursery?
Why Pallet Nursery Furniture Makes Such a Difference
Pallet nursery furniture means building real pieces changing tables, shelving, storage benches out of reclaimed shipping pallets instead of buying them assembled. The appeal is straightforward: a single pallet often costs nothing, and the rough-cut pine or oak underneath sands down to something that looks intentional next to a $200 dresser.
It works especially well in small nurseries, since pallet boards break down into thin, wall-mountable pieces instead of one bulky footprint. The one thing to prioritize before anything else: not every pallet is safe to bring into a room where a baby sleeps.
Quick Reference:
| Best starting point | Check every pallet for an IPPC stamp before you touch a saw |
| Biggest impact area | The changing table — it’s the piece you’ll touch fifty times a week |
| Budget to start | Roughly $30–$60 per piece, approximate, using low-cost or free pallets |
| Time to complete | A single build is usually a weekend project, 4–8 hours |
The Builds Worth Your Weekend
1. A Single-Pallet Changing Table With Two Open Shelves
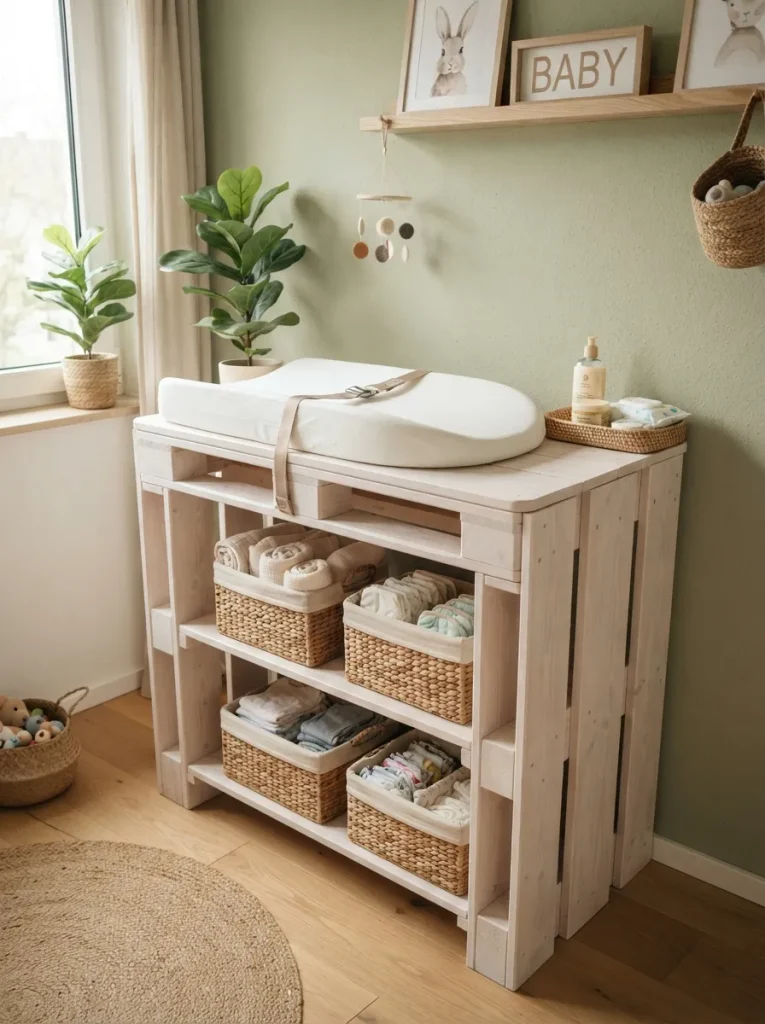
Most pallet changing tables skip the one thing a store-bought changer has built in a raised lip around the pad that keeps a rolling baby from going over the edge. A single stood-up pallet, cut down to about 36 inches tall with the middle slats removed for two open shelves, solves the storage half of the problem easily.
The safety half needs a fix you add yourself: a set of pad safety straps screwed into the top boards, buckled across the pad every single time, non-negotiable. Standard changing pads run about 16 inches wide, so trim the pallet’s top surface to match before mounting anything.
The two shelves underneath hold diaper bins and a wipes caddy at exactly arm height, which matters more than it sounds everything stays reachable with one hand while the other stays on the baby. If the shelves alone don’t cover everything you need within reach, pairing this build with a few of these nursery storage hacks closes the gap fast.
Building the Pallet Changing Table:
- [ ] Confirm the pallet’s IPPC stamp before cutting anything
- [ ] Trim the top surface to your changing pad’s width
- [ ] Remove or space the middle slats to form two open shelves
- [ ] Sand every edge to at least 220 grit
- [ ] Mount pad safety straps into the top boards before first use
Shop This Look
| Product |
|---|
| Contoured changing pad |
| Changing pad safety strap set |
| Waterproof changing pad cover |
| Woven storage baskets, shelf-fit size |
2. Check the Stamp Before Any Pallet Comes Inside
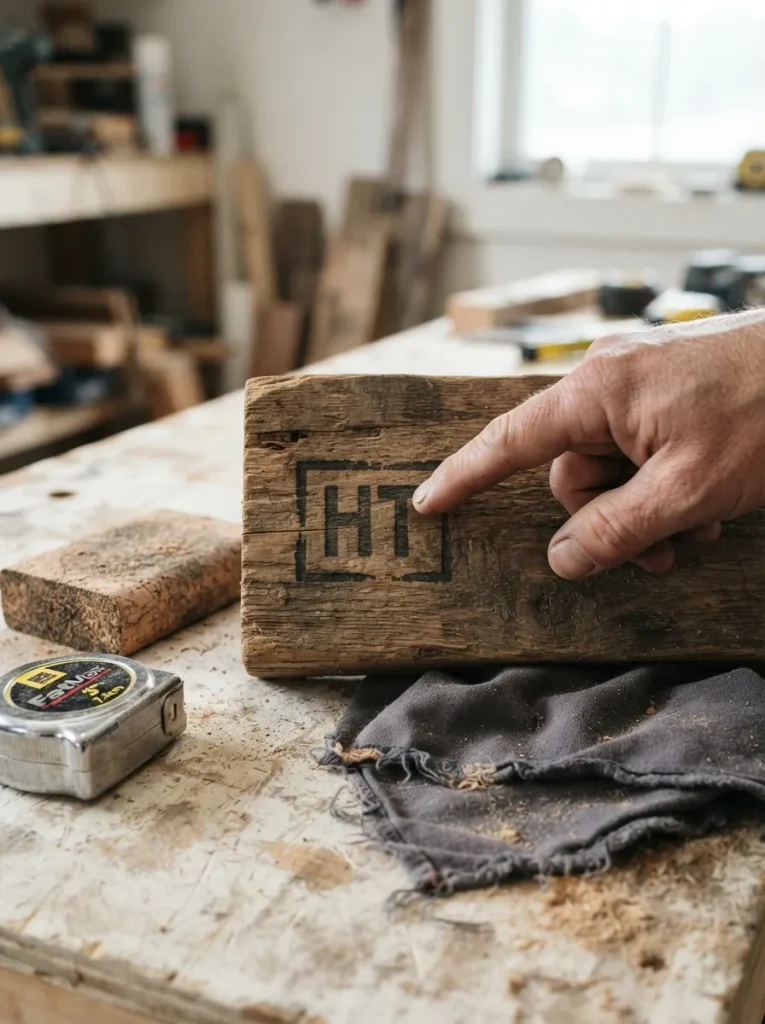
Every pallet carries a small stamped mark near the center block, usually inside a box outline, and it’s worth reading before the wood goes anywhere near a nursery. Pallets treated with heat, marked HT, are safe once cleaned and sanded. Pallets marked MB were fumigated with methyl bromide, a pesticide that soaks into the wood fibers and doesn’t sand out.
Skip anything stamped MB entirely, along with any pallet that has no stamp at all, dark staining, or a chemical smell. Once a pallet checks out, sand through three grits 80 to knock down rough fibers, 120 to smooth the surface, 220 to finish it soft enough to touch and seal with a zero-VOC or low-VOC finish rated for children’s furniture.
This check takes two minutes, and it’s the difference between a safe piece and one you’ll have to throw out after the fact. The same prep applies to any pallet build, indoors or out our pallet furniture guide for garden and patio pieces walks through the same stamp check.
Warning: An MB-stamped pallet was fumigated with methyl bromide. The chemical residue doesn’t sand or seal away treat any MB stamp as a hard no for nursery furniture, no exceptions.
3. Whitewash to Open the Room, Raw Grain to Ground It
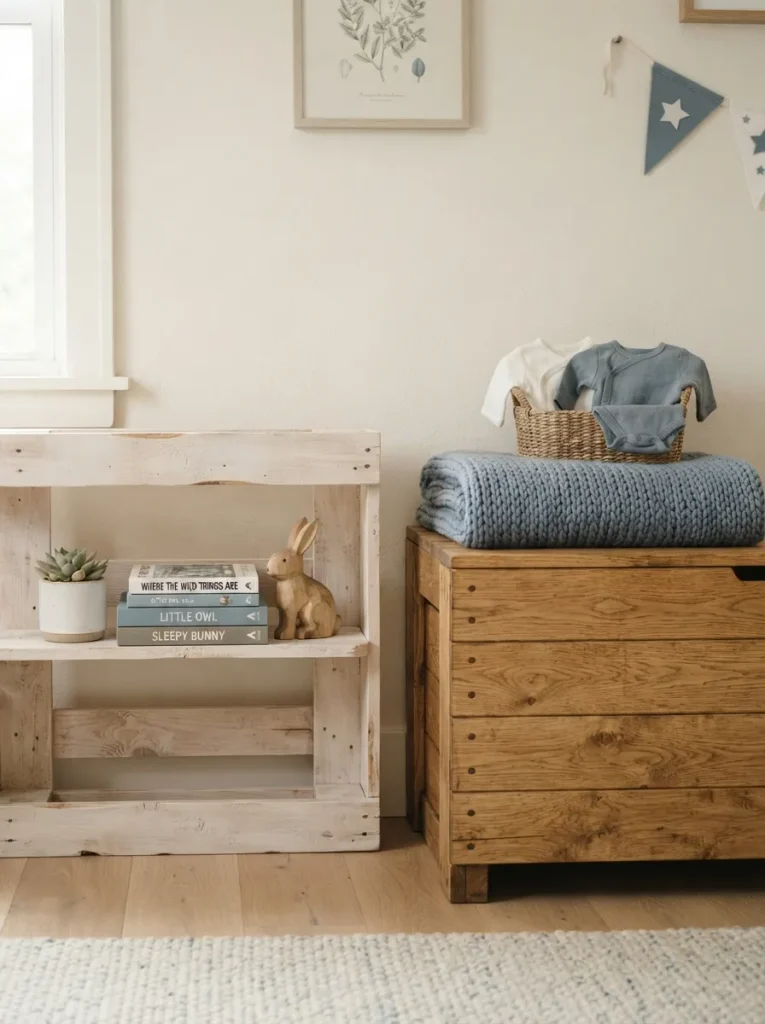
Color choice on pallet wood comes down to one trade-off: a thin whitewash one part white paint to one part water, wiped on and off with the grain lightens a room and bounces more window light around a small nursery, while a raw stain lets the wood’s own grain carry the visual weight instead of hiding under paint.
Neither is objectively better; it depends on what the room already has too much or too little of. A north-facing nursery that reads dim benefits from whitewash almost every time. A south-facing room already flooded with light can handle raw grain without feeling heavy. Test the finish on the underside of a scrap board first pallet wood species vary piece to piece, and the same whitewash can pull warmer on pine than on oak.
Quick Win: Wipe a diluted whitewash on with a rag instead of a brush it settles into the grain instead of sitting on top, and dries in under twenty minutes.
Next up: a shelf that looks purely decorative but is actually solving your nightlight problem.
4. A Floating Shelf Sized for a Nightlight, Not Just Décor
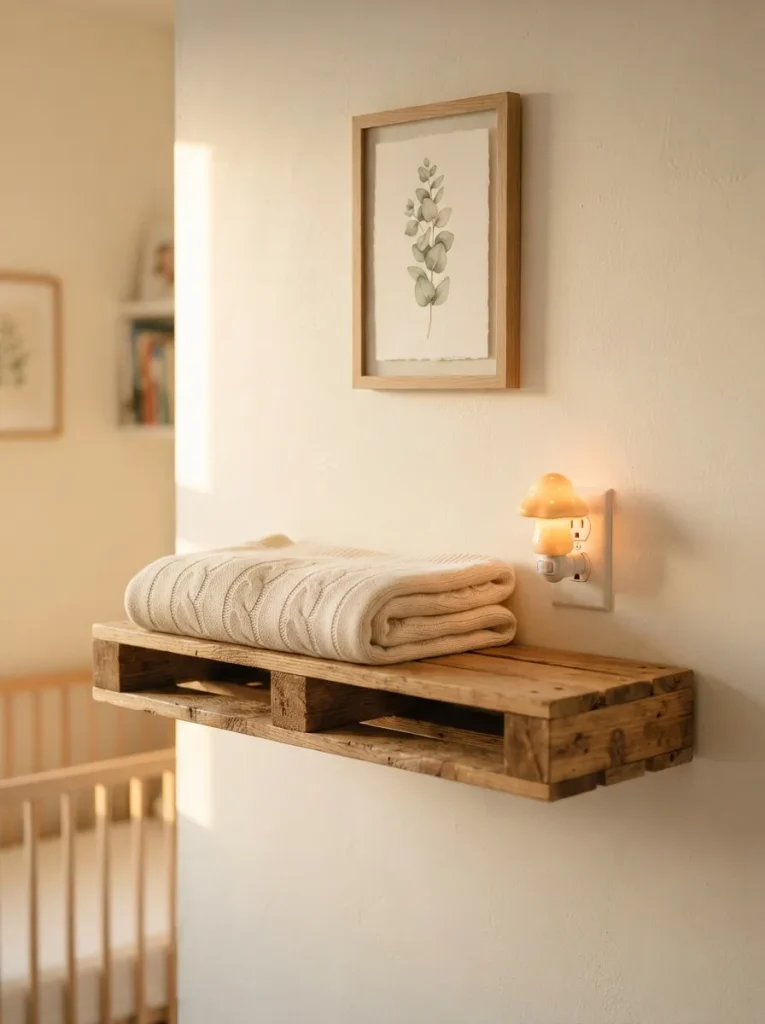
A single pallet slat, cut to about 18 inches and mounted with hidden L-brackets, reads as decor from across the room until you notice it’s sitting at exactly the right height for a plug-in nightlight, roughly 40 to 45 inches up, high enough that a standing adult can reach it without bending and low enough that the glow doesn’t hit a crib mattress at eye level.
That height range also keeps the nightlight’s cord well clear of crib rails; safe-sleep guidance generally recommends keeping cords well away from where a baby sleeps, and this placement does that automatically if the crib sits on the opposite wall. One shelf, one outlet below it, done no separate lamp table needed.
Pro Tip: Mount the shelf with the outlet directly underneath it, not beside it a cord running sideways across the wall is the first thing that gets pulled loose during a diaper change.
Shop This Look
| Product |
|---|
| Plug-in nightlight, warm glow |
| Hidden L-bracket shelf mounts |
| Floating shelf mounting hardware |
5. A Wall-Mounted Diaper Caddy You Never Have to Walk Away From
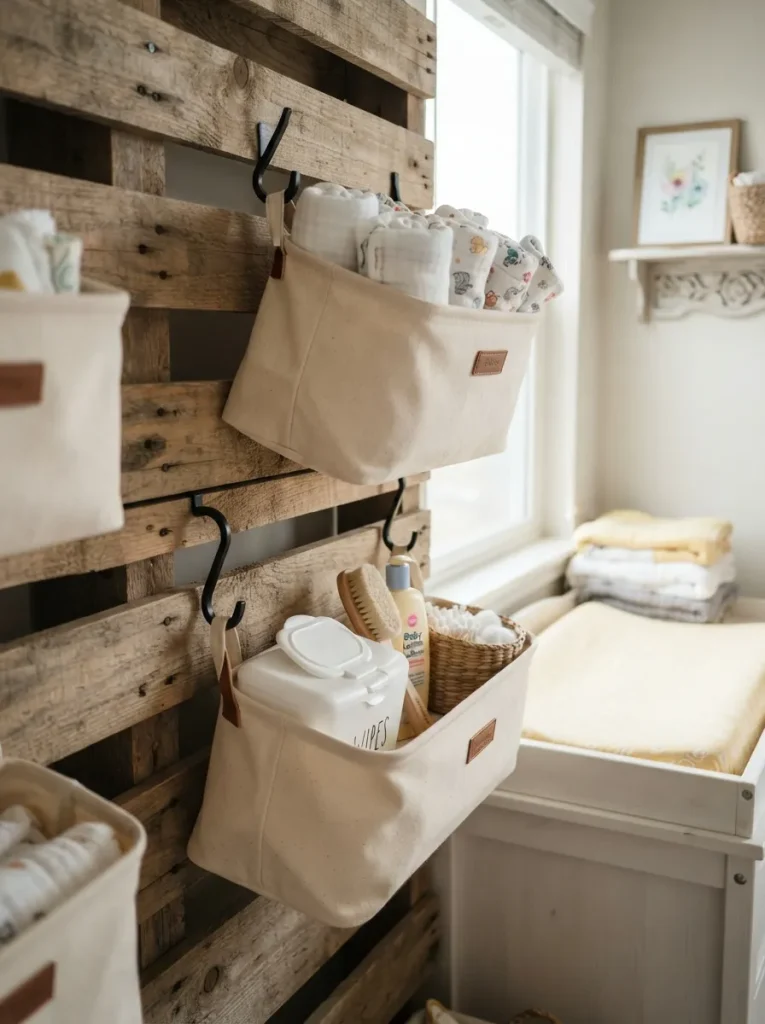
This one’s for anyone who’s ever turned to grab a wipe and realized it’s across the room. A short pallet board mounted vertically beside the changing table, fitted with three or four S-hooks, holds canvas bins for diapers, wipes, and a spare outfit within one-handed reach the same rule real changing stations follow, since you should never turn away from a baby on a raised surface to grab something.
Space the hooks about 6 inches apart so bins don’t crowd each other, and mount the board no higher than shoulder height so refilling it doesn’t require a step stool. It’s a fifteen-minute build using a pallet offcut too narrow for anything else on this list.
Small-Space Tip: In a nursery under 80 square feet, mount this organizer on the side of the changing table itself instead of the wall it saves the floor space a separate stand would take.
Shop This Look
| Product |
|---|
| Canvas hanging storage bins |
| Wall-mount S-hooks |
| Wipes dispenser with lid |
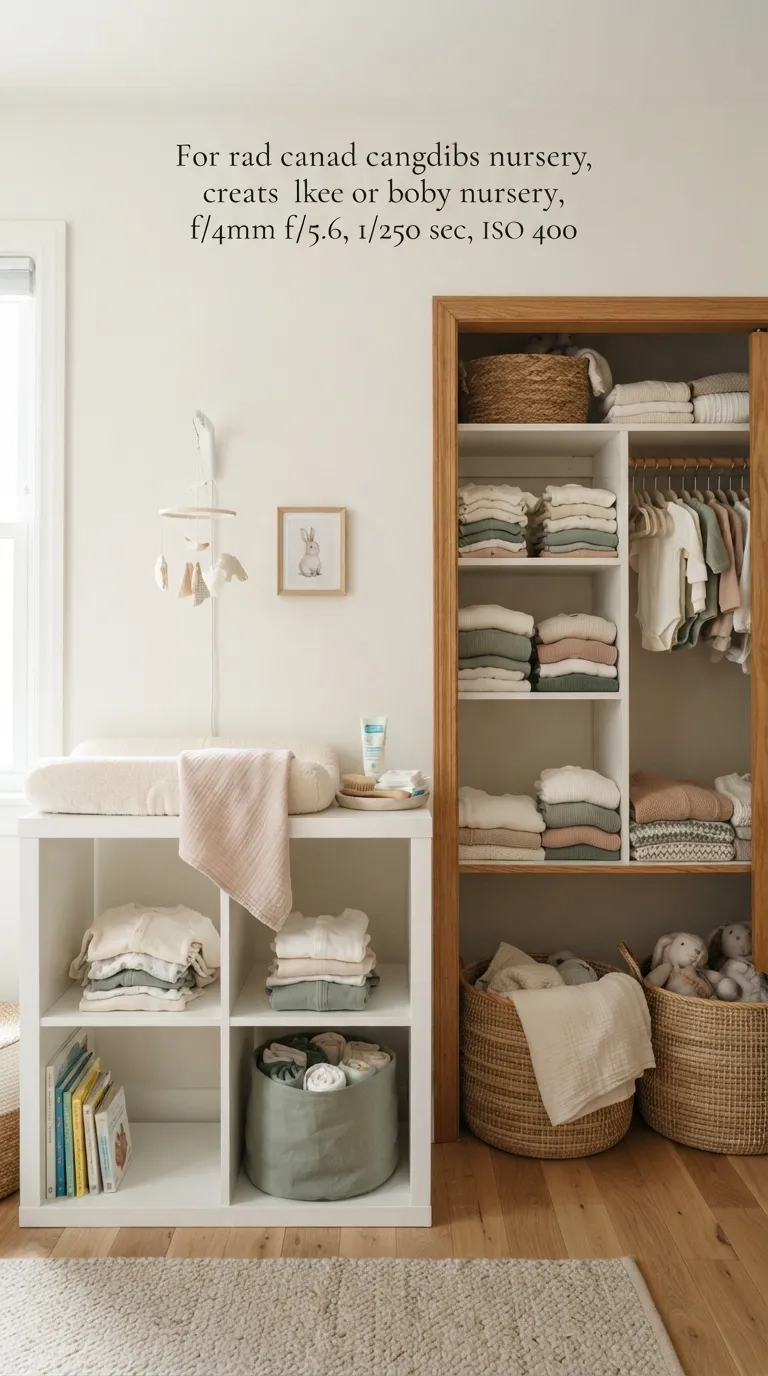
6. A Pallet-and-Wire-Basket Closet System
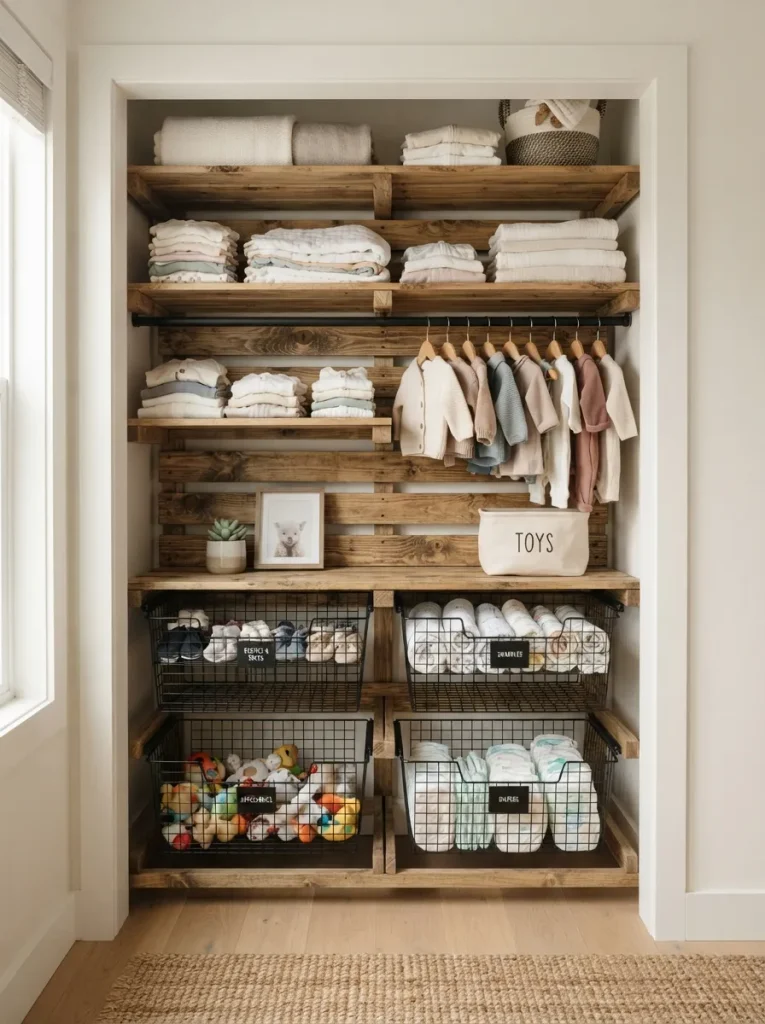
Pull the closet door off its hinges for a weekend and there’s a blank frame to build into. Cut pallet slats to the closet’s interior width and mount them on cleats as fixed shelves, spaced about 12 inches apart for folded clothing tighter than a standard 16-inch shelf gap, since baby clothes stack shorter.
Below the shelves, slide in wire pull-out baskets instead of more wood; the material contrast keeps the closet from reading as one solid block, and wire lets you see what’s inside without pulling each basket out.
This is the build most likely to save real money, since a comparable pre-built closet organizer system typically runs well past what a few pallets and basket hardware cost combined. It also handles the awkward transition years better swap bins as sizes change instead of rebuilding shelves. For more ways to squeeze storage out of an existing closet frame, these closet organization ideas cover the same cleat-and-shelf approach.
Important: Wire baskets rated for closet organizers aren’t the same as wire shelving rated for garages check the weight rating before loading folded clothing plus blankets into one basket.
Shop This Look
| Product |
|---|
| Wire pull-out storage baskets |
| Shelf mounting cleats |
| Fabric drawer labels |
Up next: where you put all of this relative to the glider because placement can undo good design fast.
7. The Corner Nursing Nook Layout
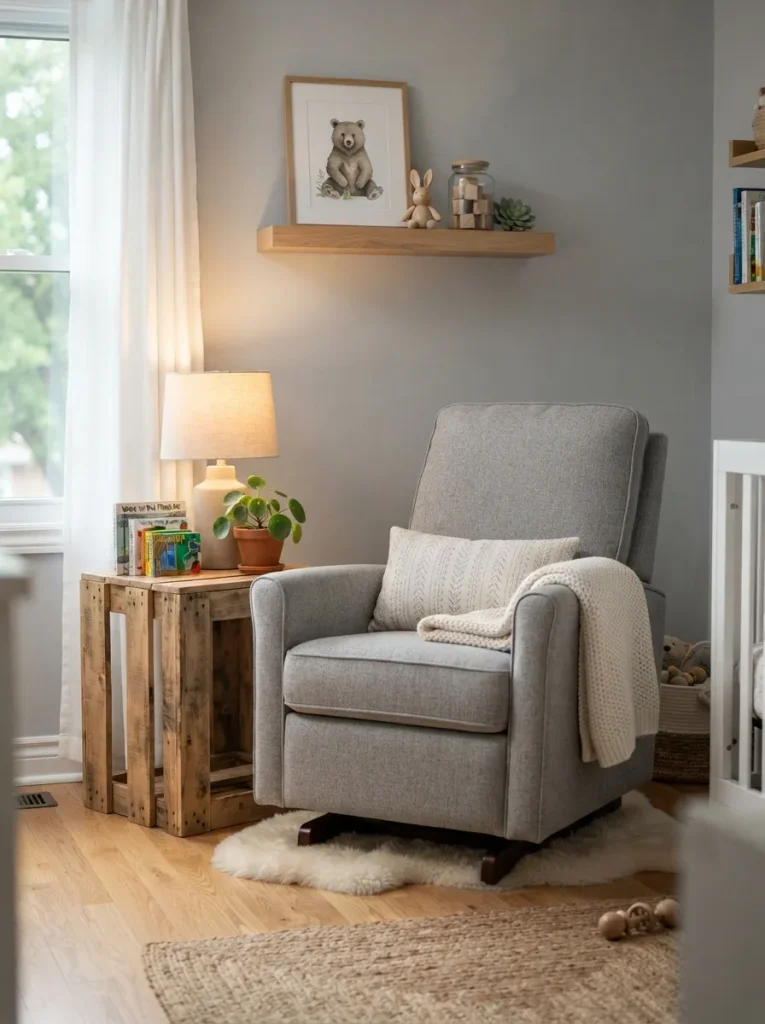
Furniture placement in a nursery corner follows one rule most guides skip: put the nursing station on the wall away from a window, not facing it. Cold air drops off window glass even with good insulation, and a newborn held still for twenty minutes in that draft feels it more than an adult standing nearby would.
A small pallet side table, cut from one pallet block into a 16-inch-square top with four short legs, fits the glider’s arm height and holds a lamp plus a water glass without crowding elbow room. Run the lamp cord along the baseboard, not across the floor, and route it away from the glider’s rocking radius so it doesn’t catch underfoot during a 3 a.m. feed. The whole layout takes about ten minutes to plan once you know which wall to start with.
Styling Note: Keep the side table’s top bare except for what you reach for mid-feed a lamp and a water glass. A diaper bin or basket belongs at the changing station, not here.
8. Two-Tone Color Blocking on One Statement Piece
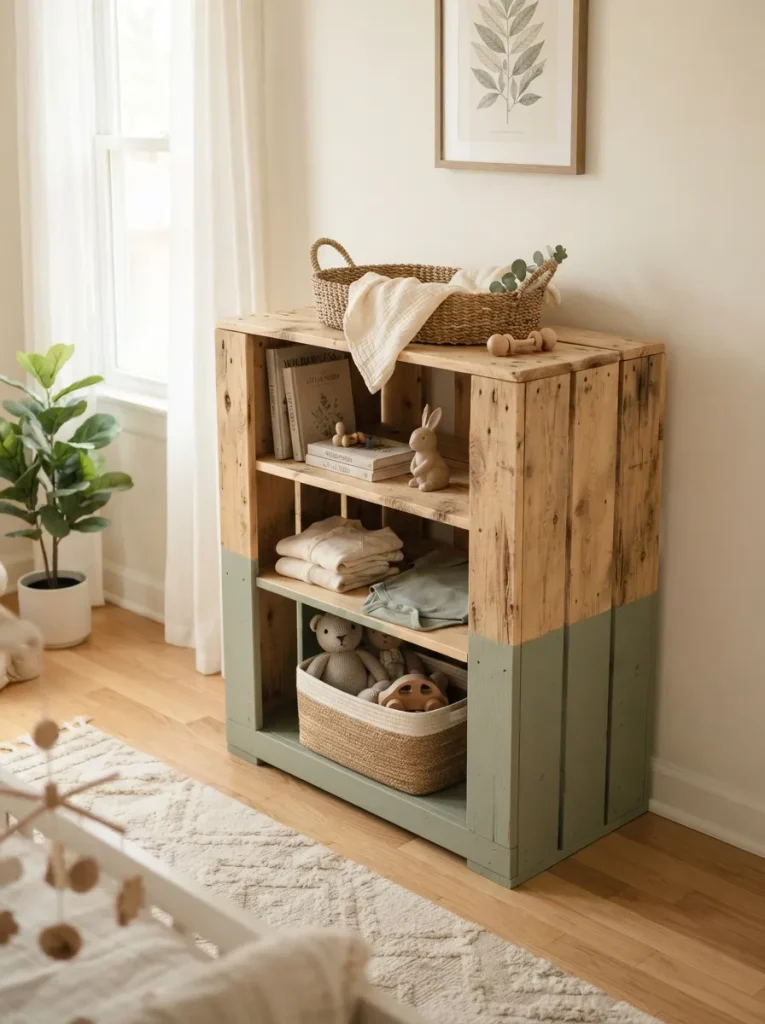
Painting an entire pallet piece one solid color is the default move, and it’s also the one that can make a small nursery feel more crowded, since a large block of color reads as more visual mass than the same piece left partly raw. Painting only the bottom third roughly knee height down and leaving the rest natural wood grain does the opposite: it grounds the piece without making it loom.
The paint line should land at a clean break point, like where a shelf or drawer front naturally starts, not at an arbitrary height that looks accidental. This works especially well on the closet system or a storage bench, giving one piece in the room a clear anchor color that can repeat in a rug or curtain without matching everything else to it.
Observation
The counterintuitive part: painting less of a piece, not more, is usually what makes a small nursery feel bigger. A fully painted dresser or shelf reads as one solid block of color, and solid blocks read as mass regardless of the actual square footage behind them. Leaving the top two-thirds of a piece raw or lightly whitewashed breaks up that block visually, even though the piece hasn’t gotten any smaller. It’s the same principle behind two-tone kitchen cabinets, just rarely applied to nursery furniture.
9. Vertical Pallet Shelving Instead of a Dresser
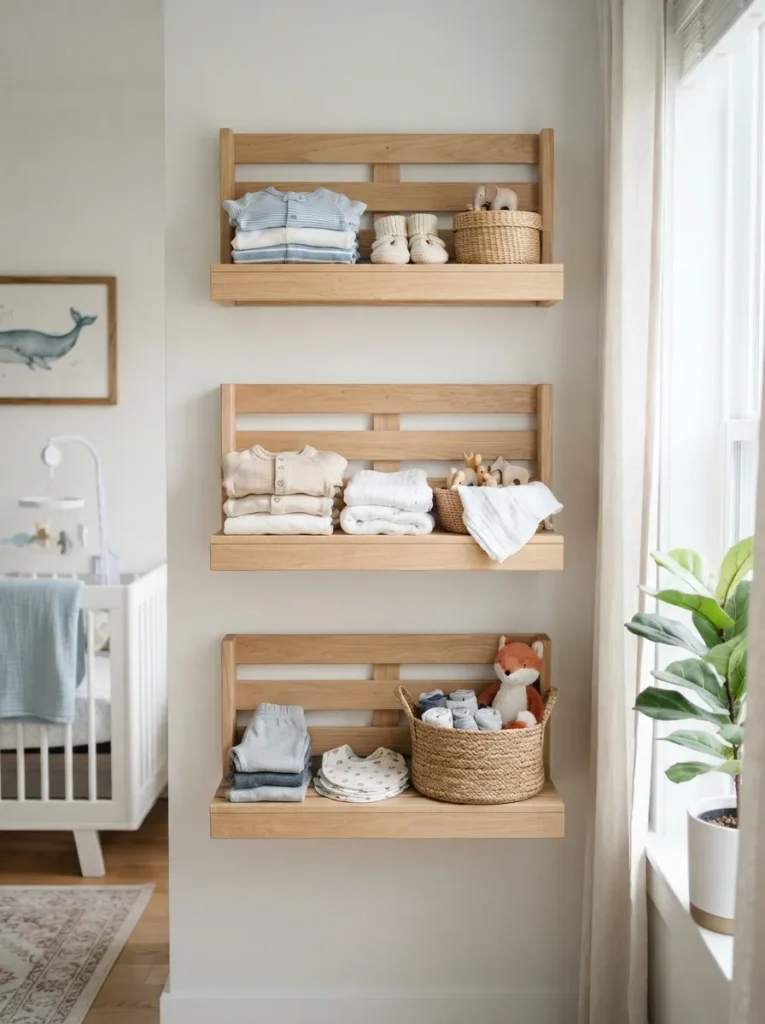
This one’s for a nursery sharing space with an office, a guest room, or just four narrow walls anywhere a standard 18-by-36-inch dresser eats too much floor. Three or four pallet slats, mounted horizontally up one wall with about 14 inches between them, hold roughly the same folded-clothing volume a dresser does, using less than 4 inches of depth instead of 18.
The trade-off is real: everything on open shelves is visible, so folding has to be tidier than a drawer would demand. Balance that by keeping the top shelf for display-worthy items and reserving the two lower shelves, at a height you can reach without a stool, for daily-use folded clothing in labeled baskets. This same wall-first approach shows up in these Kallax nursery ideas, which lean on the same vertical logic with a different frame.
Budget Version: Skip brackets entirely and rest each shelf on a cleat strip screwed into wall studs it holds the same weight for a fraction of the hardware cost.
Last one: the lighting trick that makes 2 a.m. feeds less jarring.
10. Warm LED Strip Lighting Under the Changing Shelf
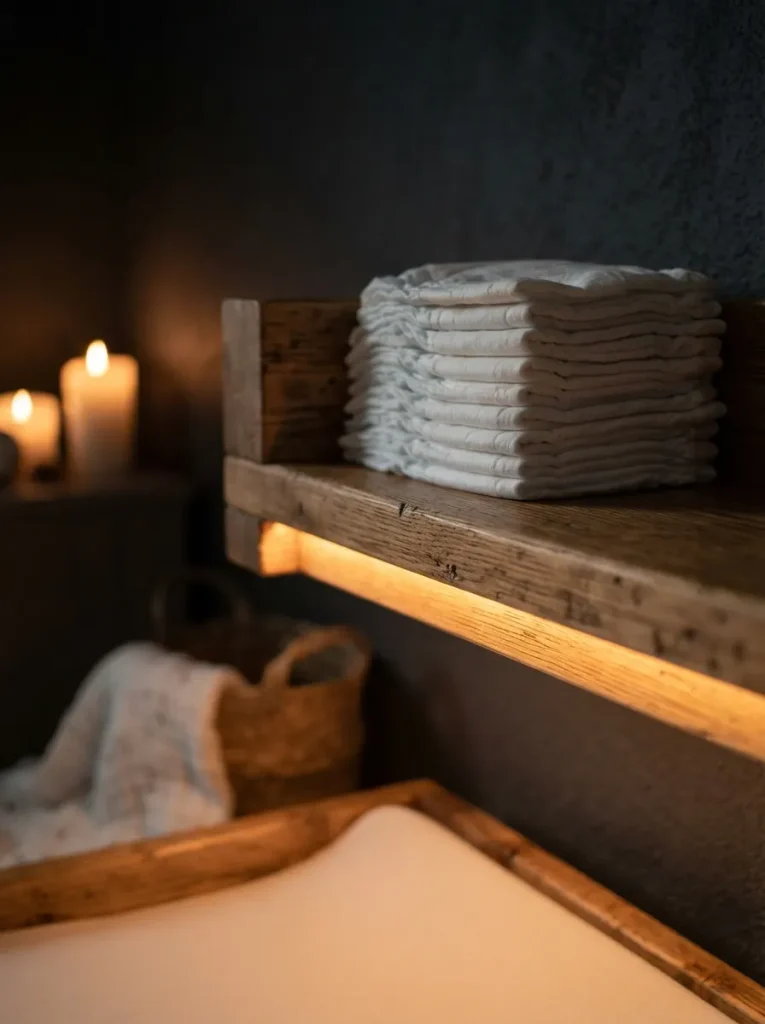
A thin battery-powered LED strip, tucked under the lip of a changing table shelf, throws just enough light to see what you’re doing at 2 a.m. without needing the overhead light on. Color temperature matters more than brightness here warm white, around 2,700K, mimics candlelight and doesn’t signal “daytime” to a half-asleep brain the way a cooler 4,000K strip does, which matters if the goal is getting back to sleep quickly after a change.
Stick-on strips with a built-in motion sensor skip the fumbling-for-a-switch problem entirely. Mount it along the front edge, angled slightly down, so the light hits the changing pad instead of bouncing back up at eye level.
Mistake to Avoid: Cool white or daylight-temperature LED strips are the most common pick here, mostly because they’re cheaper but they’re the exact wrong choice for a middle-of-the-night light source.
Shop This Look
| Product |
|---|
| Warm white LED strip light, battery-powered |
| Motion sensor LED light bar |
| Adhesive mounting clips |
How to Start Your Pallet Nursery Furniture Transformation
The right first move is almost always the stamp check, not the saw. Source two or three pallets, inspect each for an HT stamp, and only then plan which build comes first the changing table is the best starting point, since it’s the piece that gets used most and teaches the core techniques every other build on this list needs.
The most common fixable error is skipping the sealant step, on the logic that raw wood looks more “authentic.” Unsealed pallet wood absorbs spills, holds onto dust, and roughens over time in a way that’s harder to clean around a baby. A single coat of zero-VOC water-based sealant, left to cure the full 24 to 48 hours the label recommends before the piece comes inside, fixes this without changing how the wood looks.
Three inexpensive additions round out any pallet build without much cost: a can of low-VOC wood sealant, a multi-grit sanding sponge pack, and a set of L-bracket wall anchors for mounting shelves securely into studs.
A single piece changing table, shelf, or organizer is realistically a weekend project, four to eight hours spread across a Saturday and Sunday once pallets are sourced. Tackling the full room, all ten pieces, is closer to a month of weekend sessions for most first-time builders. Budget-wise, expect $30 to $60 per piece in hardware, sandpaper, and sealant if the pallets themselves are free, versus $150 to $400 or more for comparable store-bought furniture across the same pieces both figures approximate.
Ready to Build Your Budget-Friendly Nursery?
Ten pallet nursery furniture ideas, and every one of them starts from the same two free pallets sitting behind a hardware store or grocery warehouse the difference between them is just which cut list you follow first.
Some of these, like the changing table and the closet system, save real money over buying new. Others, like the two-tone paint line or the under-shelf LED strip, cost almost nothing and change how the room feels more than their price tag suggests.
Start with whichever piece intimidates you least; the sanding and sealing steps repeat across every build here, so the first piece teaches the next four. Pin whichever build matches your space today a small nursery calls for different pieces than one with room to spare, and it’s worth having options saved before the pallets actually show up in your garage.
Keep Exploring