11 Aging-in-Place Kitchen Island Ideas With Lowered, Accessible Counters
An accessible island doesn’t mean lowering the whole counter to wheelchair height and calling it done it means building in a few deliberate transitions so the island still works for whoever’s cooking that day. Here are 11 aging-in-place kitchen island ideas that lower counters, open up knee space, and add accessible details without the room reading like a hospital kitchen.
The best versions feel warm instead of clinical: soft-edged stone, brushed hardware that’s easy to grip, task lighting that doesn’t throw glare across a lowered counter. Nobody walking in should clock it as a retrofit. It should just feel like a kitchen that happens to work for everyone in the house. That’s the actual goal.
Quick Navigation
- Why Aging-in-Place Kitchen Design Makes Such a Difference
- The Ideas, Starting With What Most Kitchens Get Wrong
- How to Start Your Aging-in-Place Kitchen Transformation
- Ready to Create Your Dream Accessible Kitchen?
Why Aging-in-Place Kitchen Design Makes Such a Difference
Aging-in-place kitchen design just means building a kitchen that keeps working as grip strength, mobility, or eyesight change for a homeowner planning ahead, a multigenerational household, or someone recovering from surgery. It leans on matte quartz, warm wood, and brushed nickel or matte black hardware that’s easy to grip, plus a mix of counter heights instead of one compromise height for the whole room.
It matters more now that more households are renovating to stay put instead of moving. Small kitchens can do this too the priority is one lowered, knee-clear zone, not a full gut renovation.
| Best starting point | Add one lowered, knee-clear counter section (30–32″) near the sink or prep zone |
| Biggest impact area | Counter height transitions and under-counter knee clearance |
| Budget to start | Roughly $150–$400 for hardware, lighting, and outlet upgrades (approximate) |
| Time to complete | A weekend for hardware and lighting swaps; 2–4 weeks for a stepped counter rebuild |
The Ideas, Starting With What Most Kitchens Get Wrong
1. A Stepped Waterfall Counter With Two Working Heights
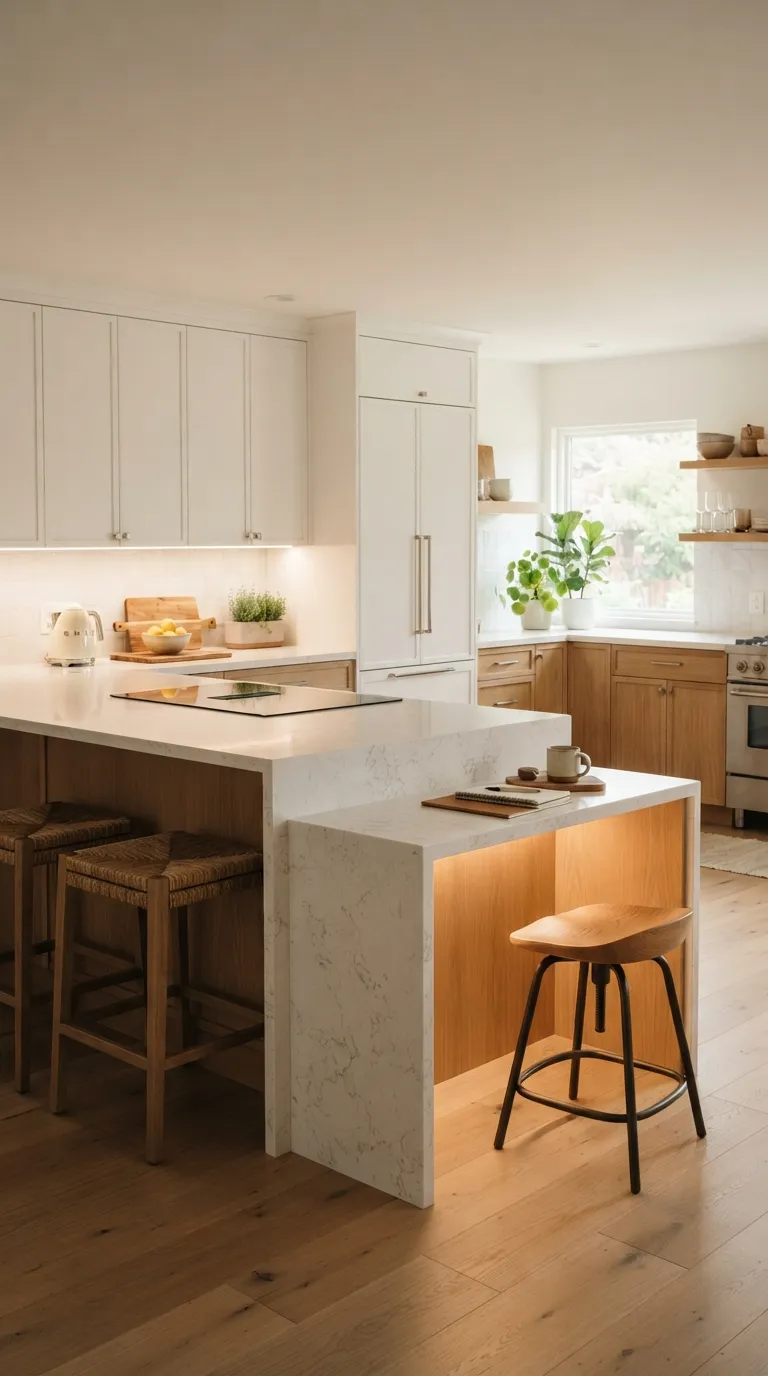
Most “accessible island” searches assume the whole counter has to drop to one wheelchair-friendly height, which ruins the surface for anyone who stands to cook. A stepped waterfall counter avoids that trade-off entirely.
One run stays at the standard 36 inches for regular prep and appliances; a second section, usually 4 to 6 feet long, steps down to 30 to 32 inches low enough for someone seated or using a wheelchair to work comfortably.
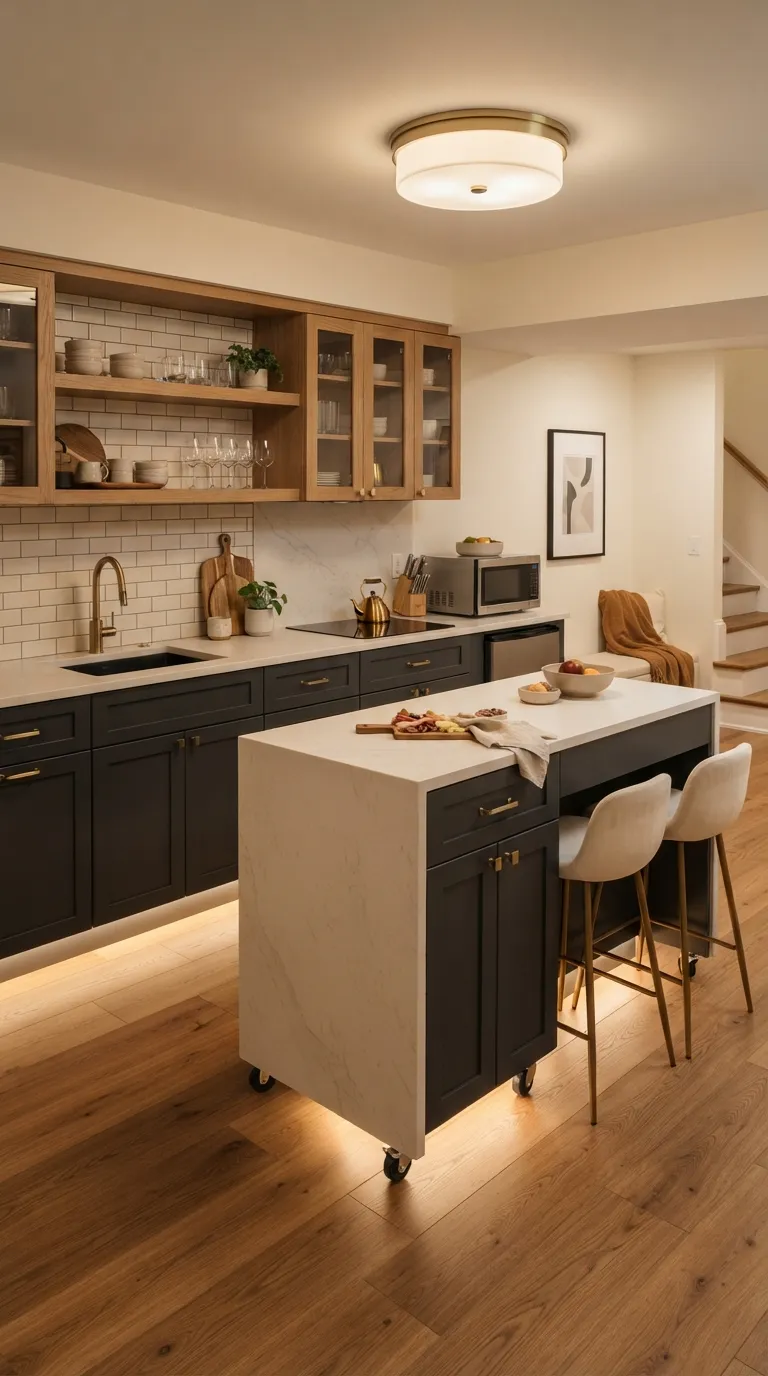
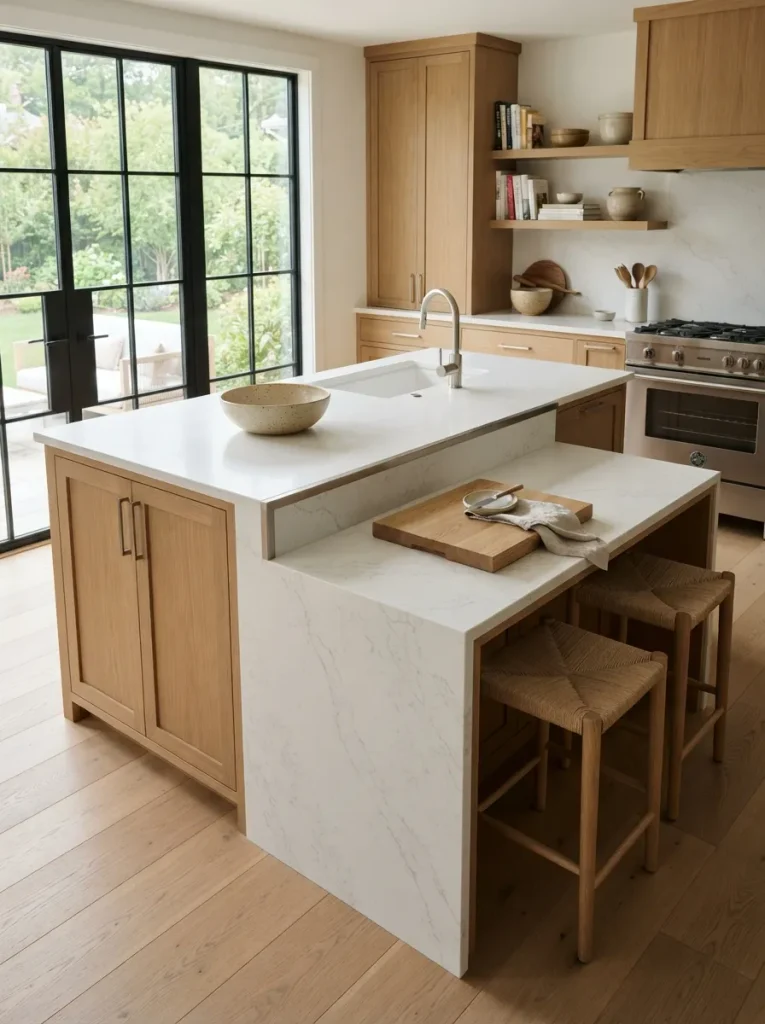
The waterfall edge connecting the two heights isn’t just decorative; it hides the structural drop so the transition doesn’t look like an afterthought. Quartz holds this detail better than laminate, since the mitered seam needs a material that won’t chip. These waterfall-edge islands show the fabrication detail well, even without a height change built in. This layout works best for households where more than one person cooks, at more than one ability level.
Pro Tip: Order the waterfall miter and the height drop as one continuous fabrication template cutting them separately almost always leaves a visible seam at the transition.
2. An Open Cantilever With True Knee Clearance
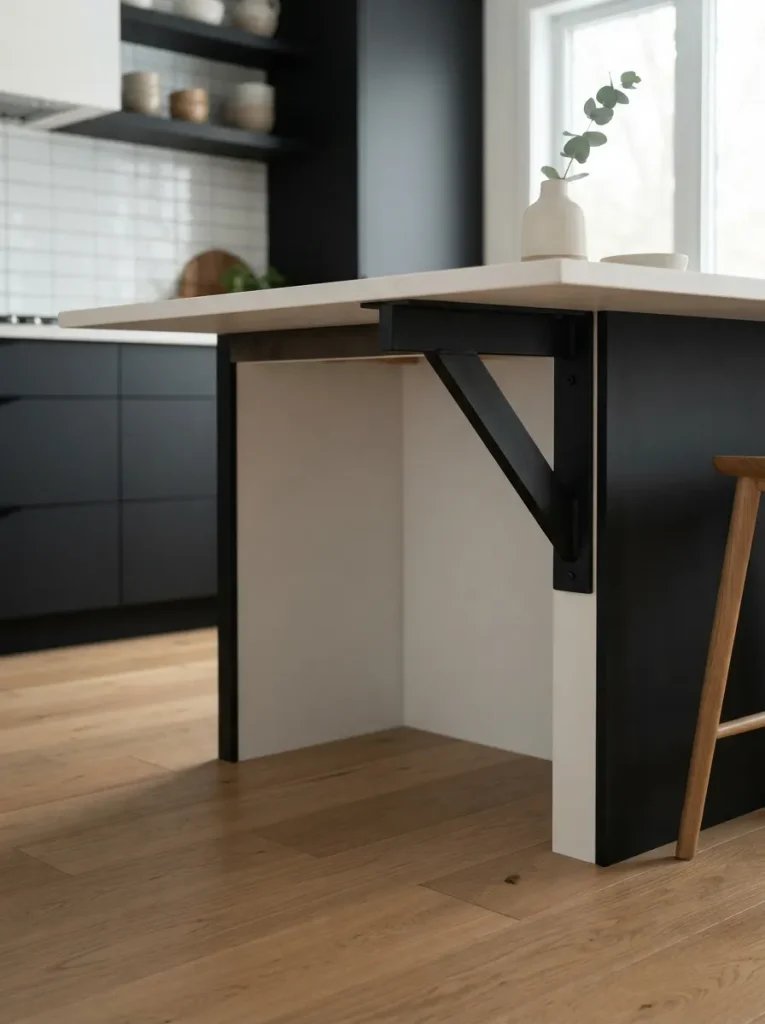
A lowered counter only helps if there’s somewhere to put your knees, and most accessible-kitchen advice skips straight past that to talk about height alone.
An open cantilever bay removes the base cabinet entirely under one section of the island, leaving at least 27 inches of vertical clearance and 24 inches of depth enough for a wheelchair or rolling stool to pull all the way in, not just up to the edge.
The counter above still needs real support, so this section leans on a hidden steel bracket rated for the cantilever load, not the counter material alone. Pair it with roughly 60 inches of open floor space in front of the bay so there’s room to approach and back away without a three-point turn.
✅ CHECKLIST: Before You Commit to a Cantilever Bay:
- [ ] Confirm at least 27 inches of vertical knee clearance and 24 inches of depth
- [ ] Verify the counter’s support bracket is load-rated for a cantilevered slab, not just anchored to the countertop
- [ ] Leave roughly 60 inches of open floor space in front of the bay for turning
- [ ] Check that outlets or plumbing lines don’t intrude into the clear knee space
3. Contrast-Banded Edges for Depth Perception
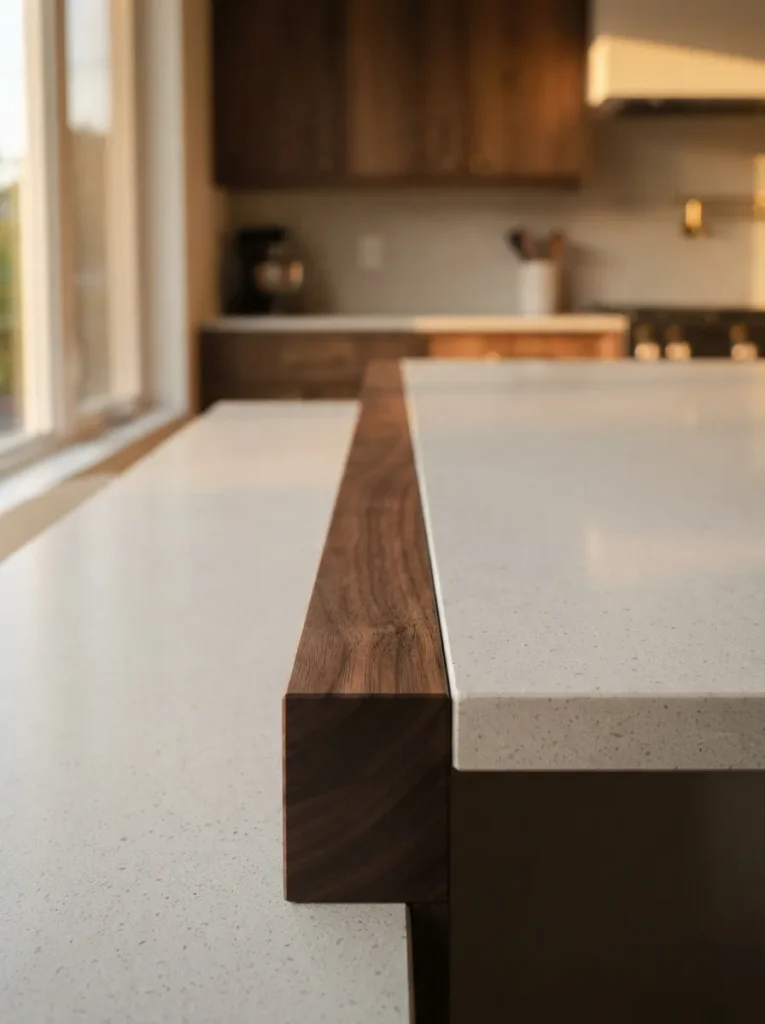
Depth perception relies on contrast as much as brightness, and counter edges are one of the easiest places to lose track of where a surface ends. A band of contrasting color or material along the front edge dark walnut trim against light quartz, or a matte black metal edge against white stone gives the eye a clear line to follow.
Run it along the whole island, not just the lowered section, so the height transition itself reads visually as well as physically. A one- to two-inch band usually registers without looking like a design accident.
Important: Most people assume any dark trim will do the job, but low contrast dark gray on medium gray, for example barely registers for someone with reduced vision. Aim for a genuine light-to-dark jump, not just a tonal shift.
Next up is the piece of hardware most kitchens overlook completely a motorized base that turns one whole counter section into two heights on demand.
4. A Motorized Sit-to-Stand Counter Section
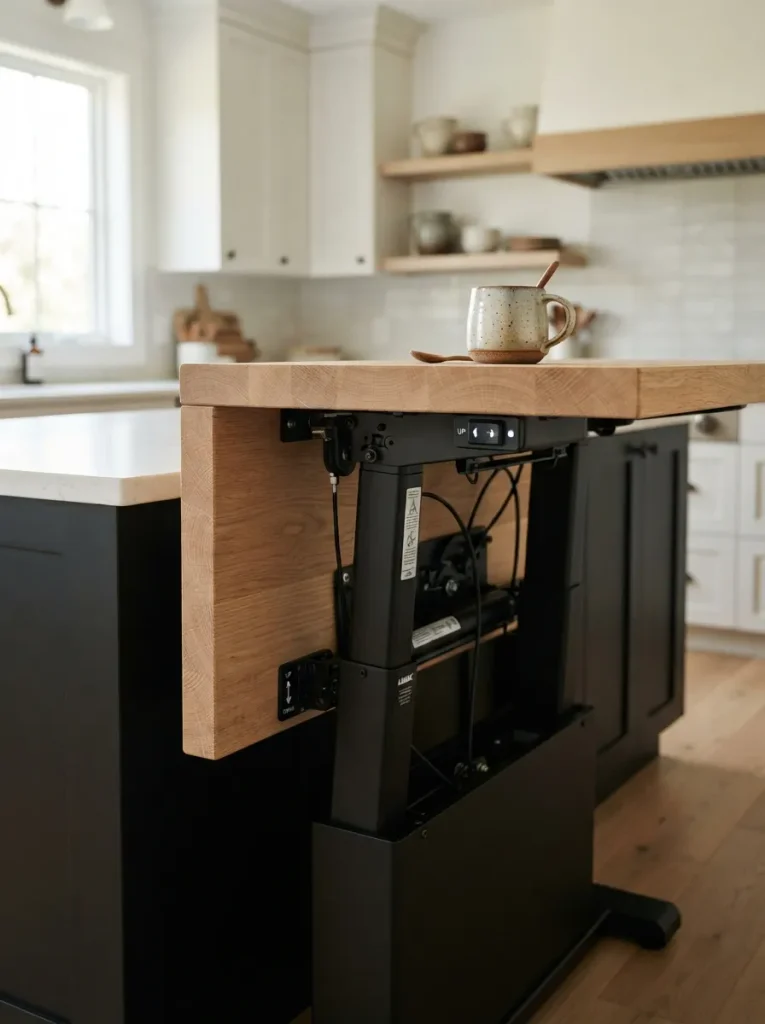
Start with a single electric lift mechanism installed under one 3- to 4-foot section of the island the same hardware used in adjustable-height desks, rated for the extra weight of stone or butcher block.
Wire it to a simple up-down toggle mounted low enough to reach from a seated position. The section travels roughly between 28 and 42 inches, covering seated prep, standing prep, and even bar height in one footprint.
This suits households where one person’s needs might change over time, or where a grandparent and grandkids use the same counter on different nights. Skip it if the island only ever needs one fixed accessible zone a stepped counter does that job for less money and no moving parts to maintain.
Budget Version: A single adjustable-height desk-style lift mechanism, sourced separately from a full custom island rebuild, keeps this well under the cost of a motorized cabinetry system built specifically for it.
Shop This Look
| Product |
|---|
| Electric height-adjustable table base/lift mechanism |
| Low-profile up/down toggle switch |
| Butcher block or laminate counter panel rated for mounting |
5. An Eased Bullnose Edge in Place of Sharp Corners
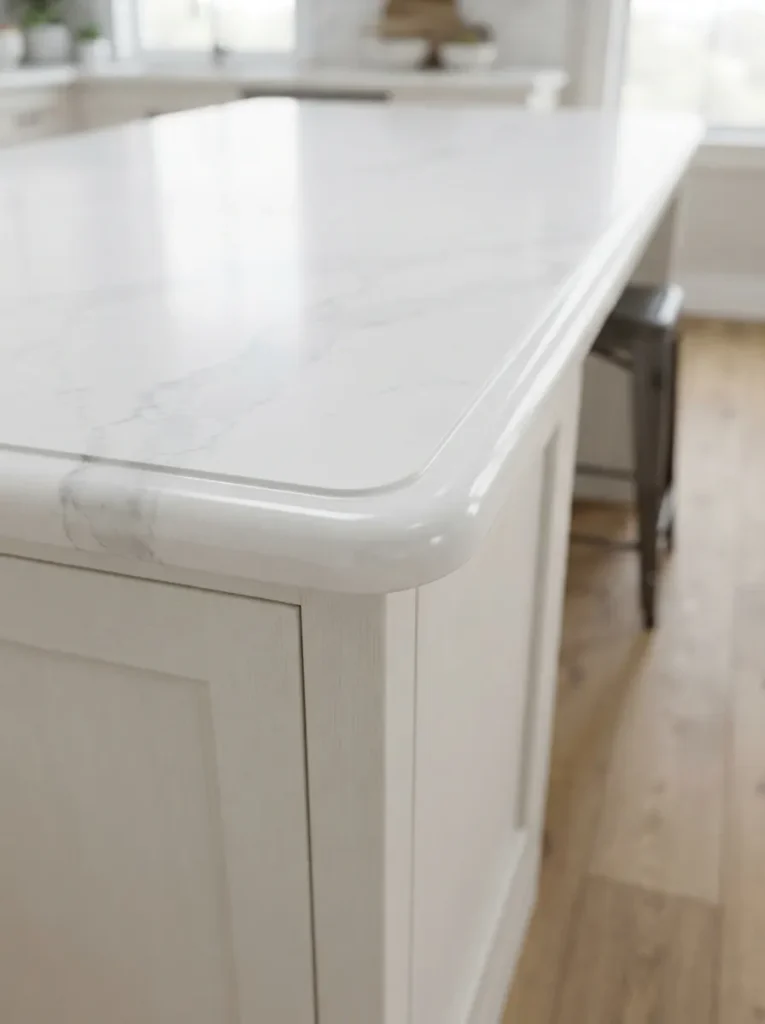
Square counter edges are sharp in two ways literally, and in how unforgiving they are to bump into. Swapping to a full bullnose or eased-radius profile softens every corner of the island, which matters most at hip height for anyone using a walker or cane nearby.
A half-inch to one-inch radius rounds the danger off without making the counter look dated. It also reads by touch, which helps anyone navigating the kitchen by feel rather than sight. This is a fabrication choice, not a redesign most stone or solid-surface counters can be re-profiled at the edge without replacing the slab, as long as there’s enough overhang material to work with.
Pro Tip: Ask the fabricator to profile the edge before final polish re-profiling after polishing usually leaves a visible seam where the finish doesn’t quite match.
6. Layered Lighting Set at Seated Eye Level
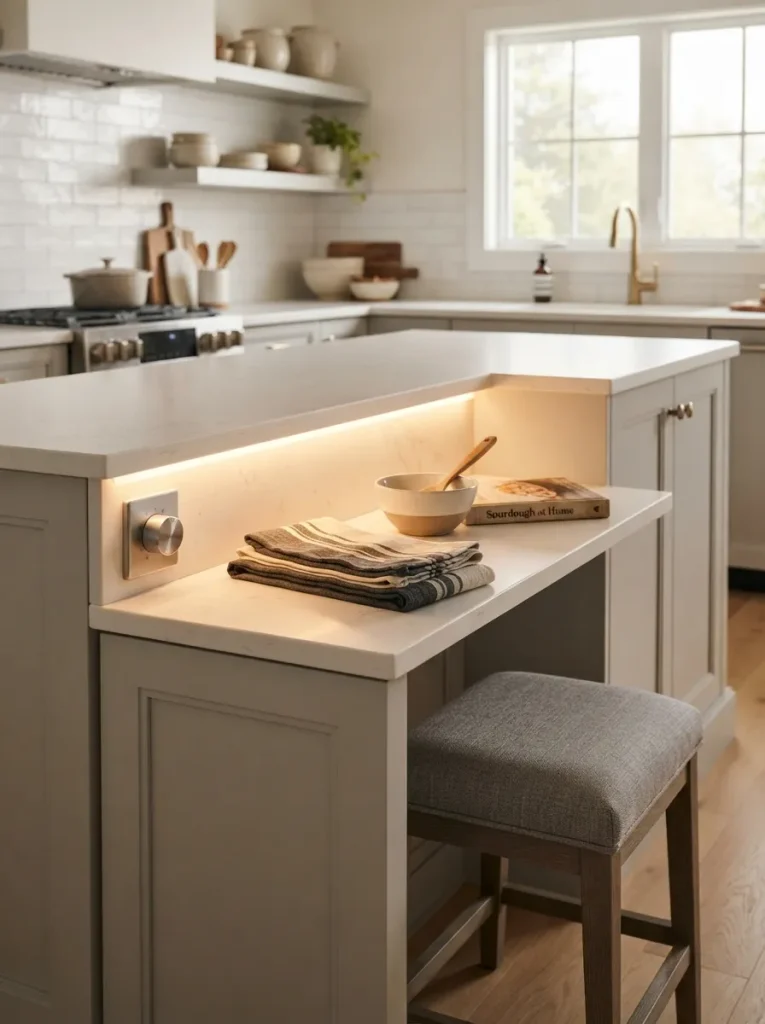
Light behaves differently depending on where your eyes sit. Overhead pendants that look perfect for someone standing throw shadow straight across a lowered counter for anyone seated at it, since their own head blocks the light source.
The fix is a second, lower layer: under-cabinet LED strips or a puck light mounted at the counter’s true working height, angled so the light source sits above and slightly in front of a seated user rather than directly overhead.
Pair it with a warm color temperature, around 2700K to 3000K, so the lowered zone doesn’t read colder than the rest of the island. This single detail does more for daily usability than almost anything else on this list.
Quick Win: A battery-powered LED puck light, stuck under the cabinet edge above the lowered section, gets you most of this benefit in an afternoon with no wiring.
Shop This Look
| Product |
|---|
| Under-cabinet LED light strip, warm white |
| Battery-powered puck lights |
| Dimmer switch or remote control for the strip |
Next: a counter section that only shows up when you need it no permanent height change required.
7. A Telescoping Pull-Out Prep Surface
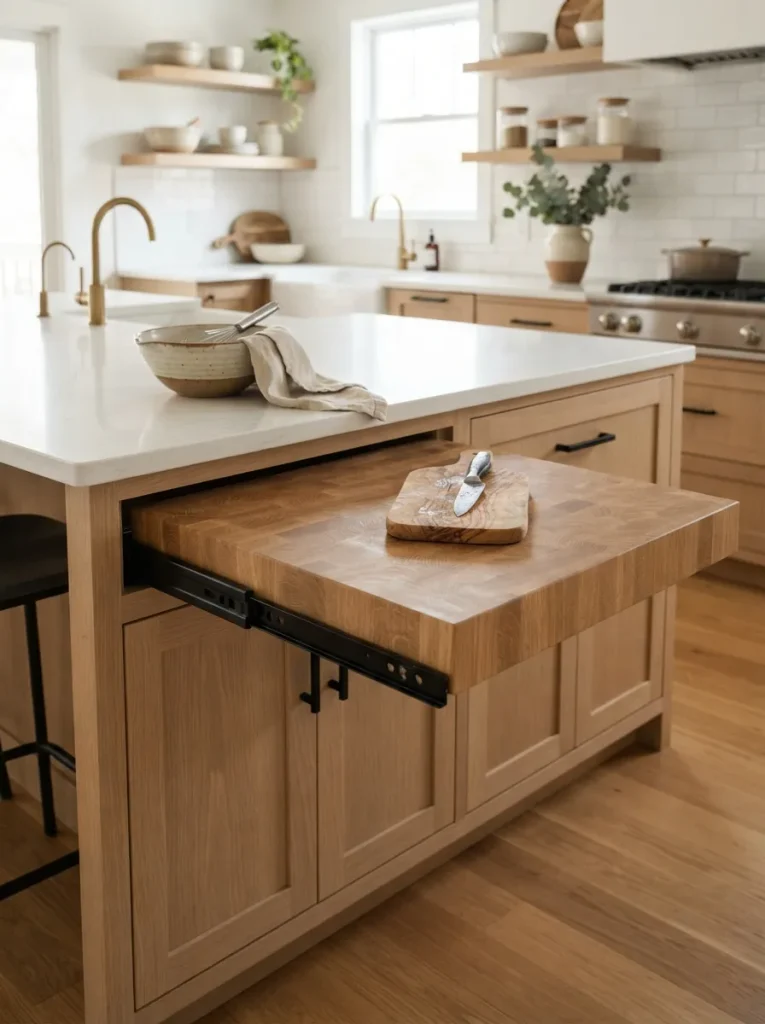
Not every kitchen has room to dedicate a full counter section to a single height. A telescoping or slide-out surface usually a butcher block or laminate panel on drawer slides, tucked under the main counter at standard height pulls out to 30 to 32 inches, essentially a hidden lowered counter that disappears when it’s not needed.
This works especially well in smaller kitchens where every inch of counter matters, since the accessible zone only exists when someone’s using it.
Rate the slides for the weight of the panel plus whatever sits on it most standard drawer slides top out around 100 pounds, plenty for prep work but not for a heavy stand mixer.
Pro Tip: Add a simple fold-down support leg under the far end of the pull-out slides alone will sag over time under repeated daily use.
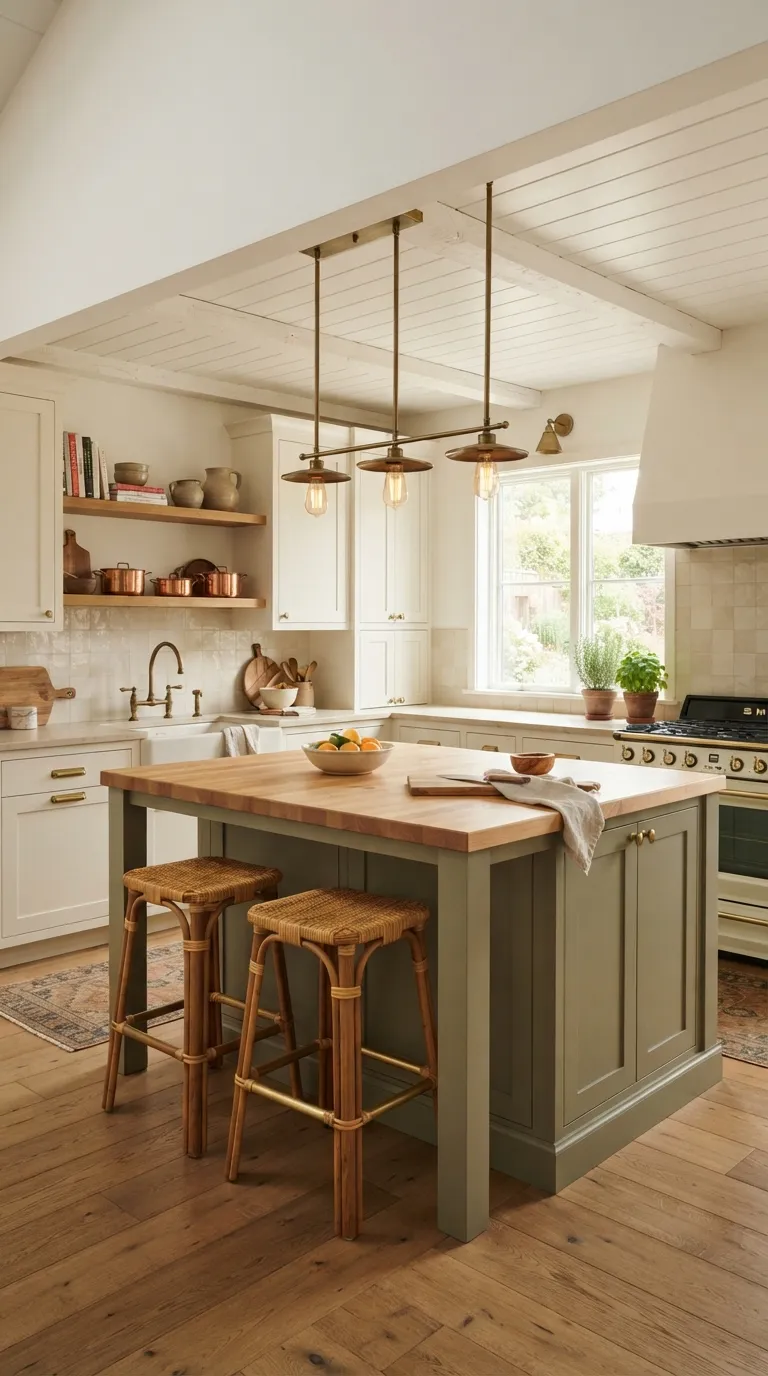
8. D-Shaped Pulls Instead of Knobs
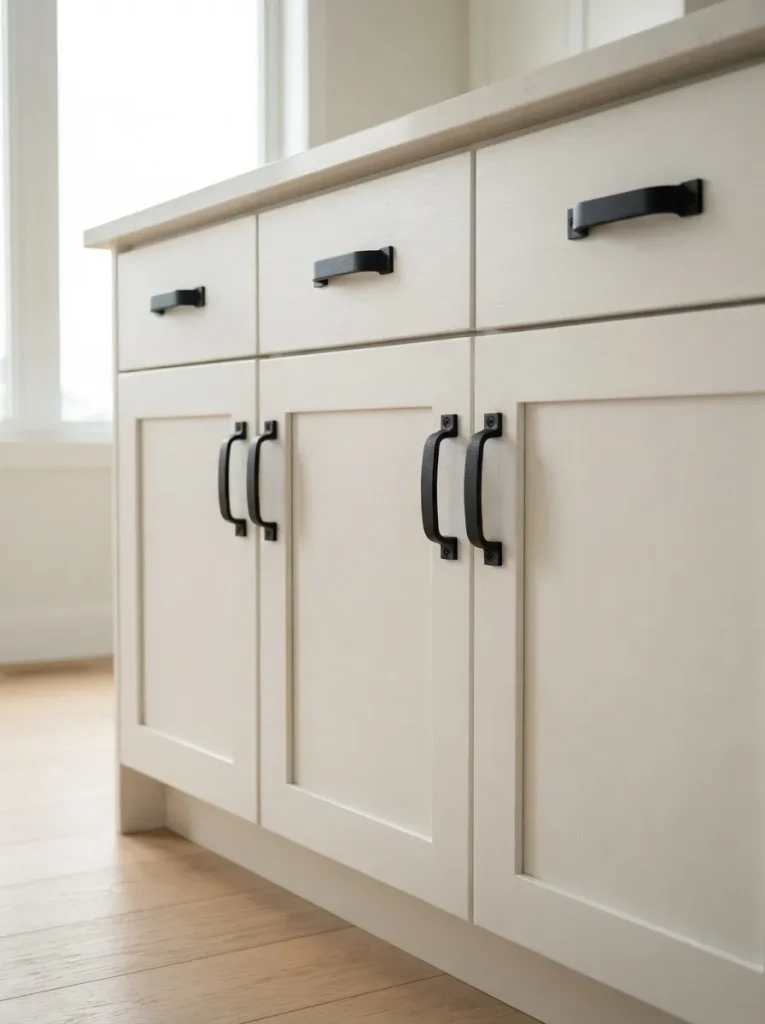
This one’s for anyone with reduced grip strength, arthritis, or limited fine motor control. Round knobs require a pinch grip that gets harder with age, while a D-shaped or bar pull only needs a hook of the fingers or even the back of a closed hand.
Swap every knob on the island to a D-pull at least 4 inches long, mounted horizontally on lower cabinets so the motion of opening matches a natural forward pull rather than an upward tug. Matte black or brushed nickel hides fingerprints better than polished chrome, which matters more here since these get touched constantly.
Styling Note: Keep pull length consistent across the whole island, even on narrower drawers mismatched pull sizes read as unfinished even when the accessibility logic behind them is sound.
Shop This Look
| Product |
|---|
| D-shaped bar cabinet pulls, 4-inch |
| Matching pulls sized for narrow drawers |
9. A Slip-Resistant, Threshold-Free Floor Transition
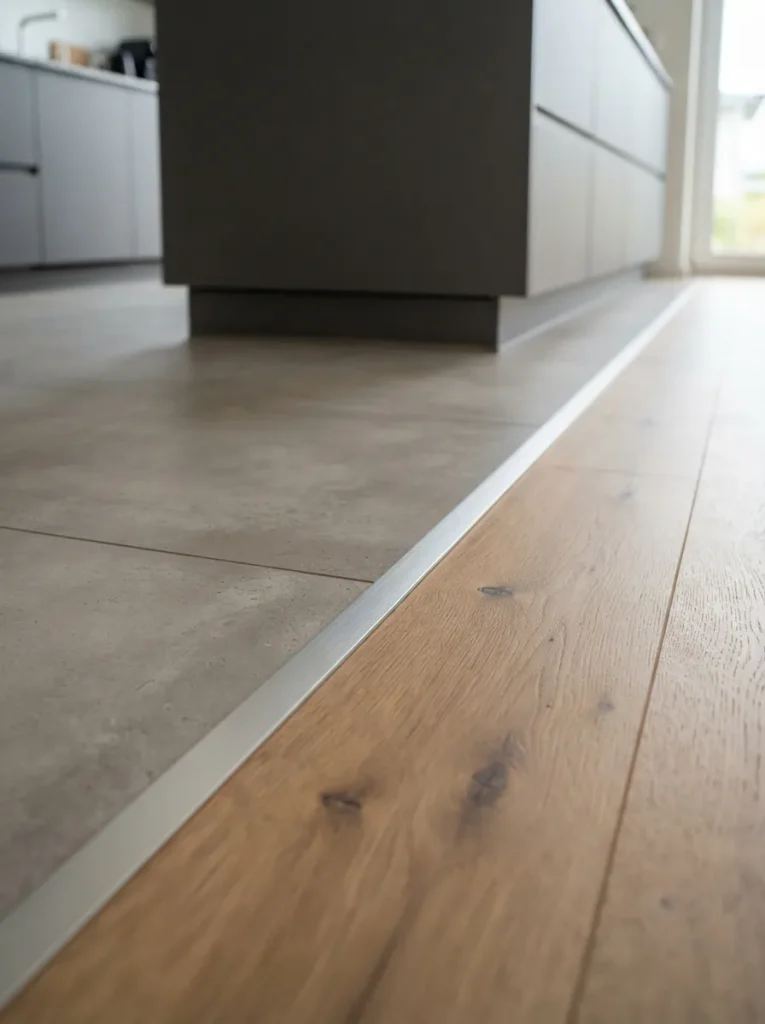
The floor around an accessible island matters as much as the counter above it, and it’s the detail most remodels skip.
Standard transition strips between flooring types are often raised a quarter-inch or more barely noticeable on foot, but enough to catch a wheelchair caster or a walker leg. A flush, beveled transition strip, rated for zero or near-zero threshold, keeps the path level from the main floor right up to the base of the island.
Pair it with a matte or textured finish rather than high-gloss tile, since gloss gets slick fast with any kitchen spill and shows every scuff from mobility equipment.
Warning: A standard transition strip ordered off the shelf usually sits a quarter-inch proud of the floor on at least one side enough to catch a wheel or a cane tip. Special-order a flush or ramped transition strip specifically, and confirm the height difference in writing before installation, not after.
Last practical swap before the styling notes: an island that solves the smallest kitchens’ clearance problem by simply rolling out of the way.
INSIDER OBSERVATION
The counterintuitive part: a fixed, built-in accessible zone is often less flexible than a mobile one. A stepped counter or cantilever bay solves the problem for exactly the clearance it was measured for if a wheelchair’s arm height or a walker’s footprint changes later, that built-in section doesn’t move with it.
A 60-inch turning circle measured for one mobility device doesn’t always work for the next. Keeping at least one accessible element mobile, instead of committing the whole island to fixed measurements, is what actually ages well.
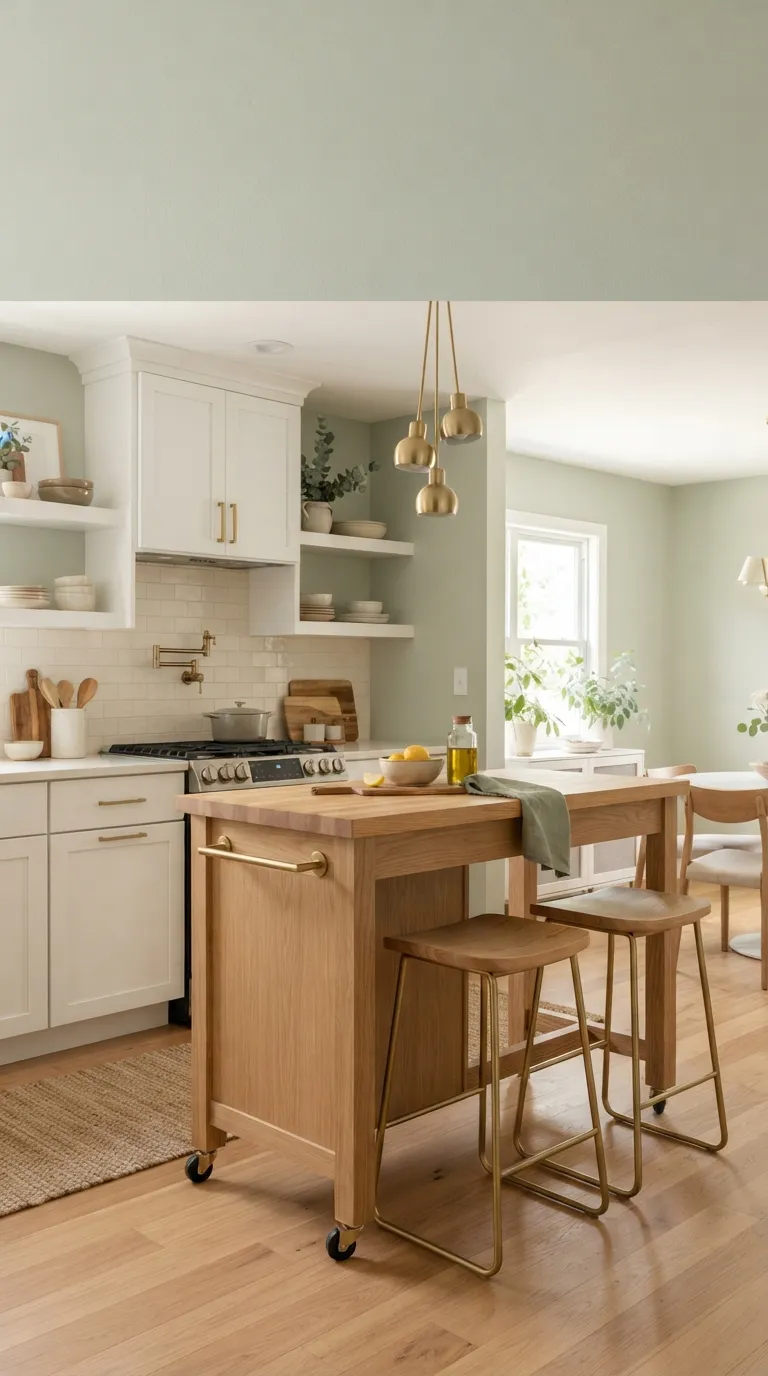
10. A Rolling Mobile Island With Locking Casters
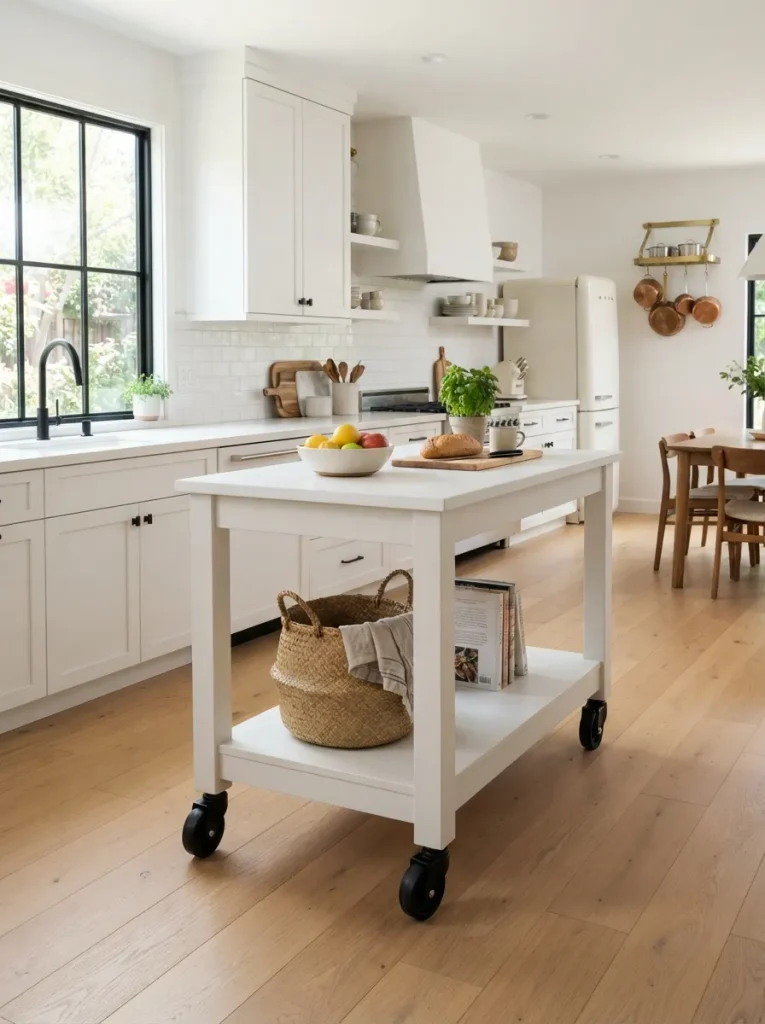
Most accessible-kitchen advice assumes a full island rebuild, which isn’t realistic in a small galley kitchen or a rental. A rolling island on locking casters skips the construction entirely it’s a standalone counter at whatever height works, usually 30 to 32 inches for seated use, that locks into place during cooking and rolls out of the way afterward, opening up the full floor for a wheelchair turn or a walker.
This works especially well in smaller kitchens where a fixed island would eat the whole clear-floor area. Choose casters rated to lock from a seated position some lower-end models need a foot press that’s hard to reach from a wheelchair.
Small-Space Tip: Measure the rolled-away parking spot before buying the island still needs a spot against a wall or under a counter overhang where it doesn’t block a doorway or the main turning circle.
Shop This Look
| Product |
|---|
| Rolling kitchen island/cart with locking casters |
| Locking caster wheel set (for a custom-built base) |
11. Pop-Up Outlets Set at Seated Reach Height
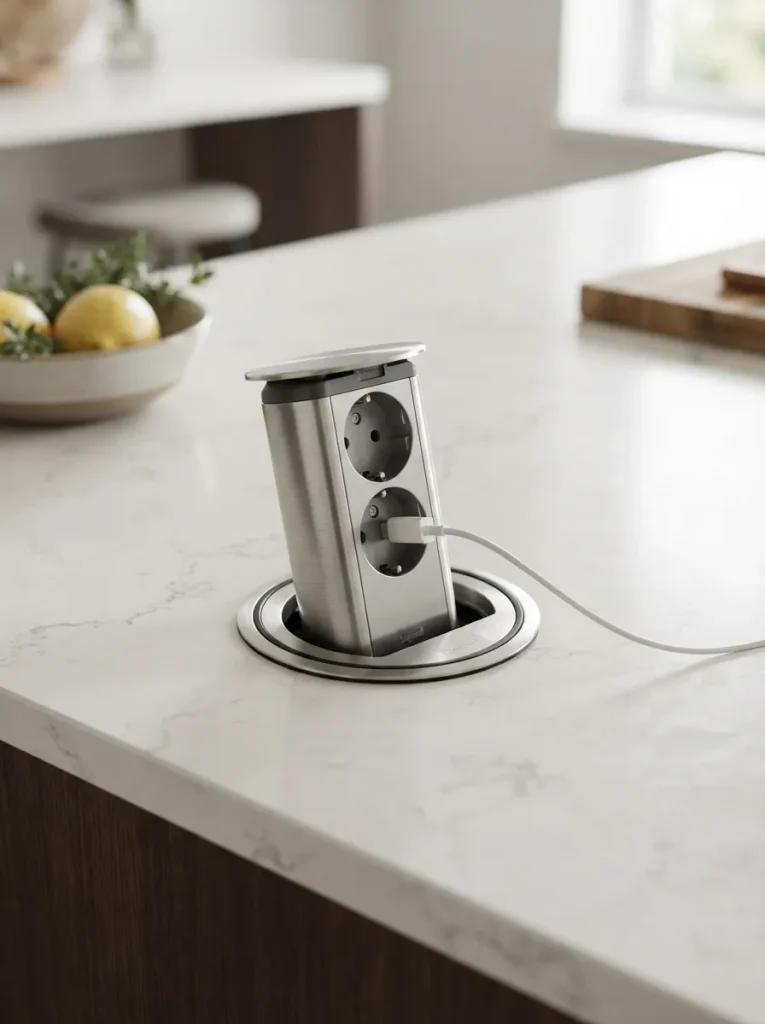
Standard backsplash outlets sit 18 to 20 inches above the counter fine standing, awkward or unreachable seated. A pop-up or flip-up outlet mounted directly in the countertop, recessed flush until it’s needed, solves this without adding a visible outlet strip to the wall.
Position it inside the lowered counter section, roughly centered so it’s reachable without a full reach-and-twist. Most pop-up units seal against spills when closed, which matters more here since they sit on a work surface rather than a vertical backsplash. This pairs naturally with any of the lowered-height ideas above rather than standing alone.
Important: Not every pop-up outlet is rated for countertop mounting near a sink or cooktop. Check the water and heat rating specifically, since some models are built for furniture or office use only.
Shop This Look
| Product |
|---|
| Countertop pop-up power outlet unit |
| GFCI-rated outlet insert (for wet zones) |
How to Start Your Aging-in-Place Kitchen Transformation
The right first move is almost always the knee clearance check, not the counter height. Measure the space under your current island if there’s already 24 inches of depth and a base cabinet that could be removed, you have the cheapest, highest-impact accessible zone available before spending anything on new stone.
The most common fixable error is treating “lowered” as one number for the whole island. A single 30-inch counter running the full length looks accessible but often isn’t functional for a standing cook the fix is keeping at least one section at standard 36-inch height and letting the lowered zone do its specific job.
Three low-cost swaps to start with: a peel-and-stick contrast edge trim strip for the counter’s front edge, a short grab bar mounted on the nearest wall or end panel for extra stability while standing, and a motion-sensor nightlight tucked under the island’s overhang for nighttime trips to the kitchen. None require a contractor, and all three typically run under $50 each.
A hardware-and-lighting pass pulls, lighting, a transition strip is a single weekend project and usually lands under $400 total. A full stepped or cantilevered counter rebuild is a bigger undertaking, closer to two to four weeks with a fabricator involved, and budgets vary widely depending on material, but plan for a few thousand dollars rather than a few hundred once custom stonework enters the picture.
Ready to Create Your Dream Accessible Kitchen?
These 11 ideas cover the full range counter height and material, lighting, hardware, flooring, and a couple of layout shifts that don’t require touching a single cabinet. Start small if a full rebuild isn’t realistic yet: swap the pulls, add the under-cabinet lighting, check the knee clearance under what you already have.
Every one of those moves is real progress, not just a placeholder until the bigger project happens. Once it’s done, the kitchen should feel less like a workaround and more like a room everyone in the house can use without asking for help. Save the ideas that fit your layout now, and come back for the rest when the budget catches up.
Read Next
- 10 Small Kitchen Island Ideas for Tight Layouts
- 9 Aging-in-Place Bathroom Ideas That Still Feel Stylish
- 8 Luxury Waterfall Quartz Kitchen Island Looks to Steal