19 Smart Kallax Toy Storage Ideas for a Playroom That Actually Stays Tidy
A Kallax shelving unit is basically a blank grid what turns it into real toy storage is how you fill each cube, not the shelf itself. This roundup walks through 19 smart Kallax toy storage ideas that actually get used by kids, not just Pinterest boards.
There’s a particular kind of relief in a playroom where every toy has a home no scavenger hunt for the missing puzzle piece, no five-minute meltdown before bedtime. Kallax units make that possible because the cube grid forces decisions: this bin holds blocks, that one holds animals, full stop. The furniture disappears into function. Let’s get into it.
Jump To
- Why Kallax Toy Storage Makes Such a Difference
- 19 Smart Kallax Toy Storage Ideas
- How to Start Your Kallax Toy Storage Transformation
- Ready to Create Your Dream Playroom?
Why Kallax Toy Storage Makes Such a Difference
Kallax toy storage works because the unit itself is neutral it’s just a grid of open cubes, usually in white, black-brown, or oak-effect laminate, that you can outfit however your kids’ collections demand. IKEA’s original 4×4 and 2×4 configurations are the most common starting points, though 1×2 units tuck into oddly shaped corners.
What makes this system relevant right now is flexibility: as interests shift from baby toys to Legos to board games, you swap bins instead of buying new furniture.
It works in small apartments as easily as dedicated playrooms start with one 2×4 unit near the main play zone before expanding, and if you want to see the same unit dressed up for open display rather than pure storage, our Kallax styling ideas guide covers that side of it.
| Best starting point | One 2×4 Kallax unit placed at kid height near the main play area |
| Biggest impact area | Bins and labels — not the shelf itself |
| Budget to start | $150–$300 for one unit plus a full set of bins |
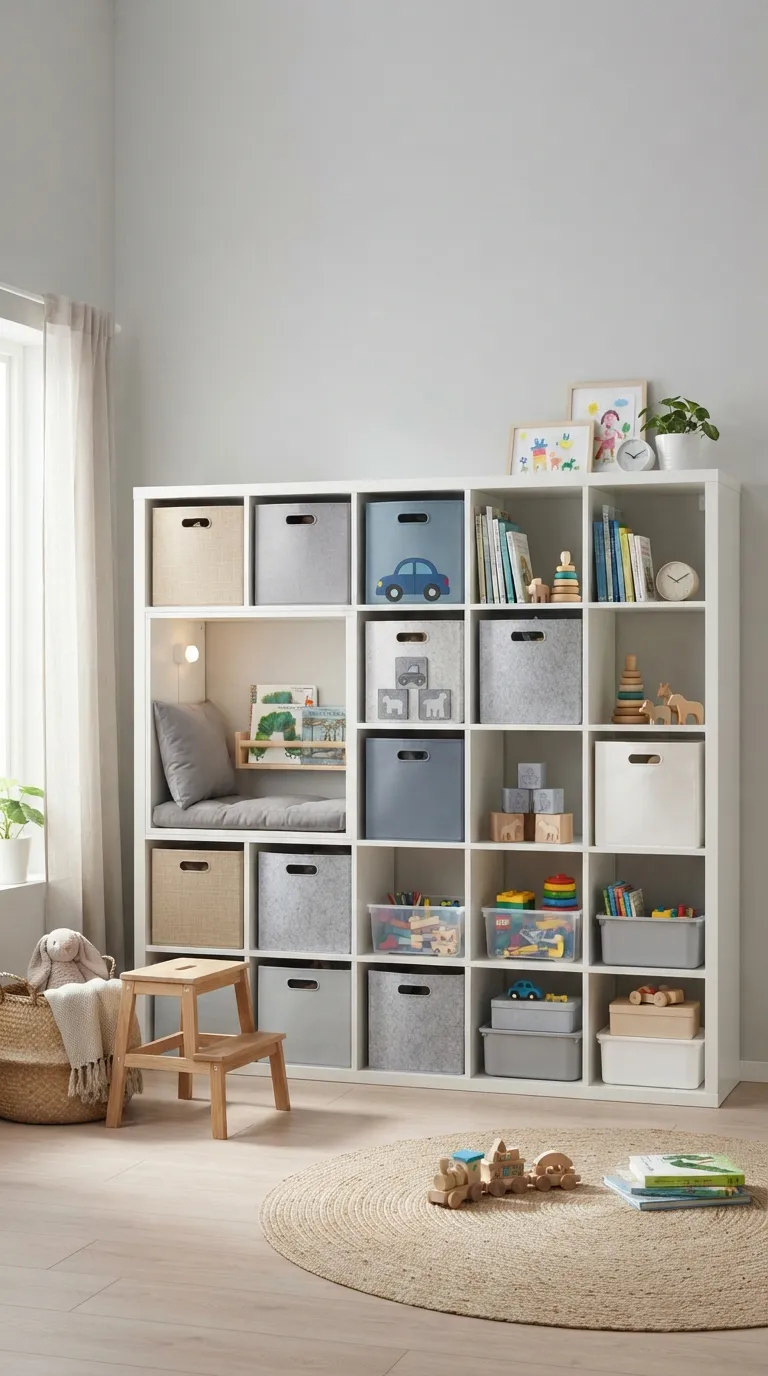
| Time to complete | A weekend for setup, ongoing tweaks over the first month |
19 Smart Kallax Toy Storage Ideas
1. Color-Coded Bins That End the “Where Does This Go” Problem
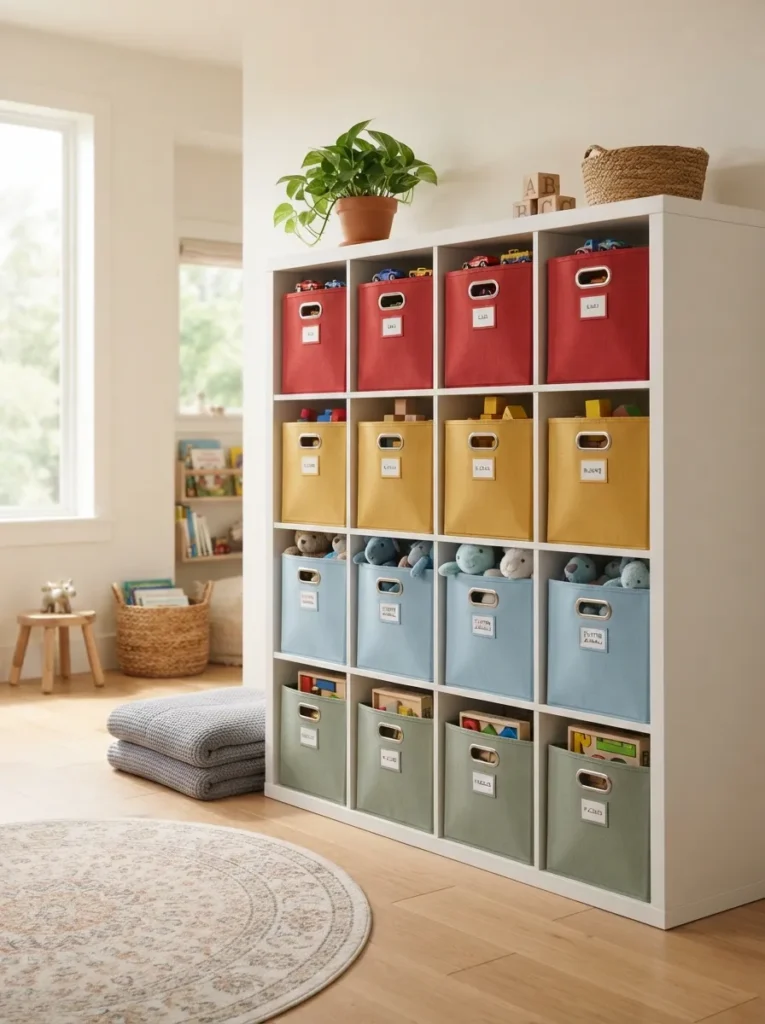
What it looks like: Four bins, four colors, zero guessing each cube reads like a category at a glance.
Why it works: Kids sort by color long before they sort by word, so color-coding taps into recognition instead of reading ability. It also turns cleanup into a matching game instead of a chore.
How to copy it: Assign one color per toy category red for vehicles, blue for animals and stick with the same four colors across every bin in the unit, even as contents rotate.
Best for: Families with kids under 6 who can’t read labels yet.
Pro Tip: Buy bins one size smaller than the cube opening a snug fit looks intentional, but bins that are too tight get left half-pushed-in and the whole system looks sloppy within a week.
2. Clear Acrylic Bins for At-a-Glance Sorting
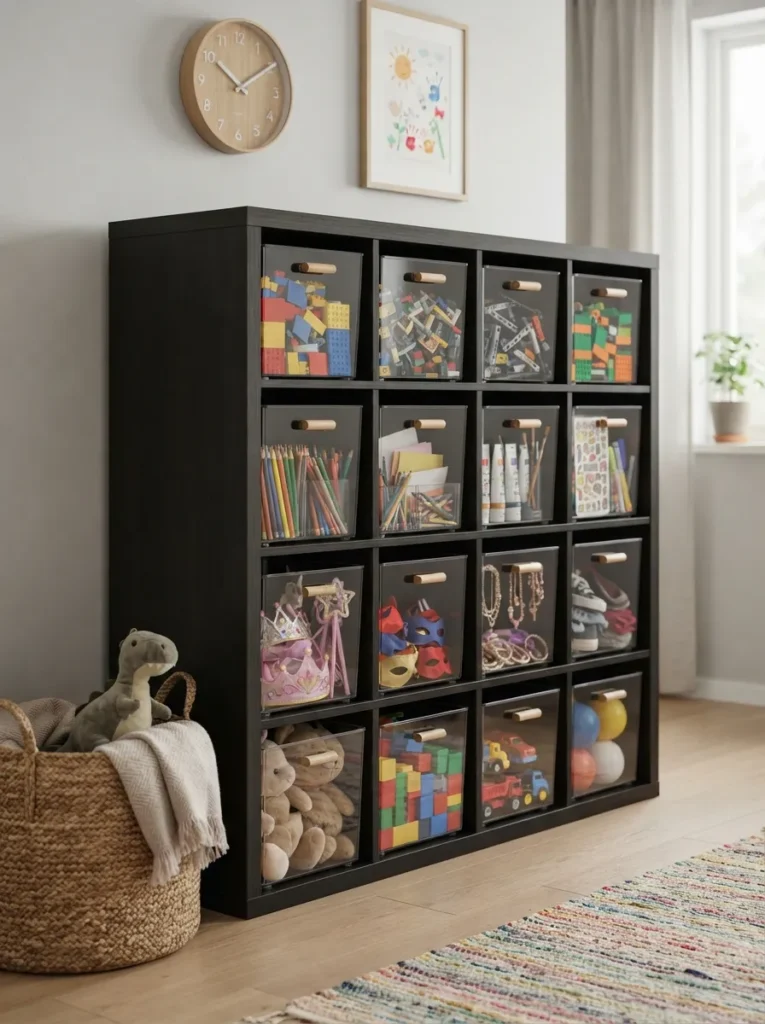
What it looks like: Every bin is see-through, so the contents do the labeling for you.
Why it works: Opaque bins hide clutter but also hide the toy your kid actually wants, which leads to every bin getting pulled and dumped. Clear bins solve the search problem at the source.
How to copy it: Use clear bins for anything with lots of small pieces Legos, puzzle sets, craft supplies and reserve opaque or fabric bins for bulkier toys where sorting matters less.
Best for: Kids with big Lego or building-block collections.
Quick Win: Skip labels entirely on clear bins for kids who can’t read yet the visibility alone does the job, saving you a label-making step.
What You’ll Need
| Product |
|---|
| Clear stackable plastic storage bins with lids |
| Clear shoebox-size totes for small pieces |
| Adhesive label tag holders |
| Clear drawer divider inserts |
| Clear over-the-door pocket organizer |
3. Rotating Toy Zones for Small Playrooms
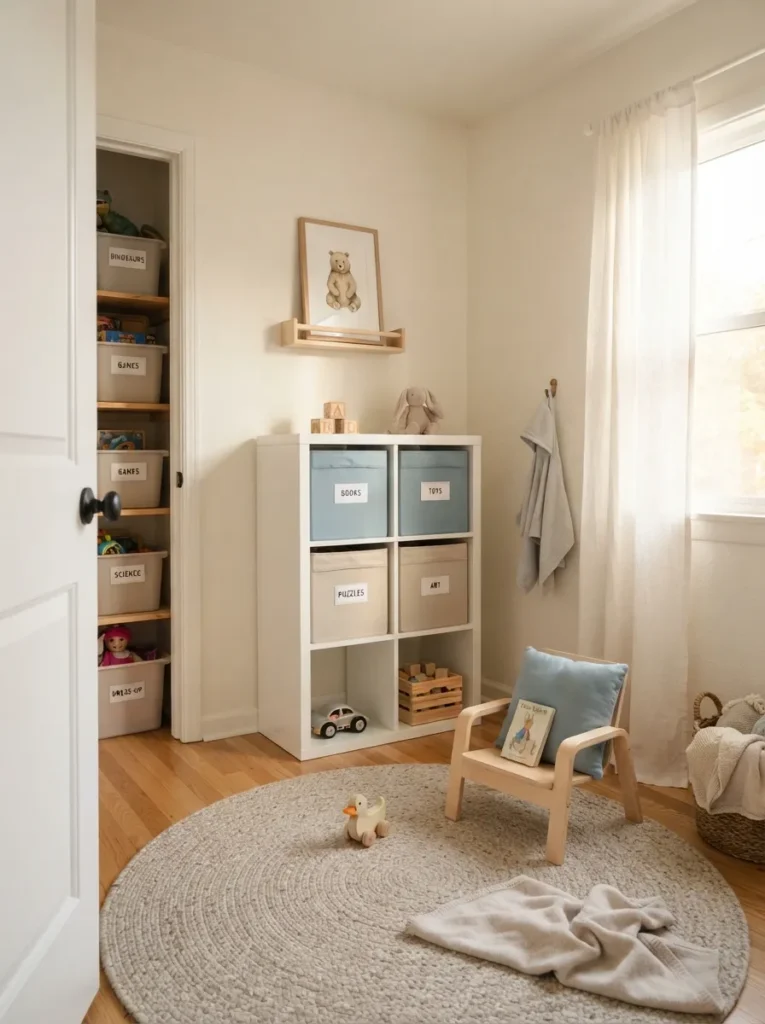
What it looks like: Half the cubes are in play, half are in reserve nothing spills onto the floor.
Why it works: Small spaces fail not because there isn’t enough storage, but because everything is out at once. Rotating toys reduces visual clutter and, surprisingly, increases engagement, since “new” toys reappear every few weeks.
How to copy it: Fill half the Kallax cubes with active bins and store the rest in labeled boxes in a closet. Swap every three to four weeks.
Best for: Shared bedrooms or apartments without a dedicated playroom.
Warning: Don’t rotate too often swapping weekly means kids never finish a play theme (building a full Lego set, for example) before it disappears. Three to four weeks is the sweet spot.
Up next: the layout trick that turns a Kallax into more than just a shelf.
4. Kallax as a Low-Profile Room Divider
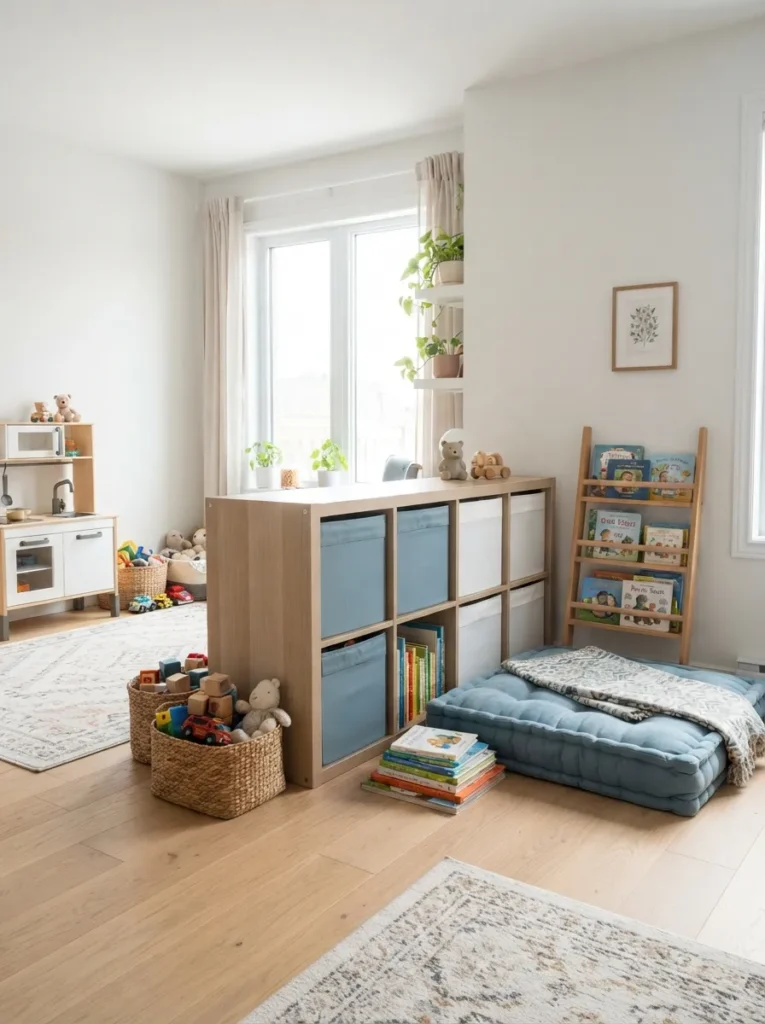
What it looks like: The shelf runs sideways through the room instead of against a wall, splitting one space into two.
Why it works: A hip-height divider keeps sightlines open so you can supervise from anywhere in the room, while still creating a visual boundary between loud play and quiet reading.
How to copy it: Use the 4×2 orientation (four cubes wide, two tall) so the unit stays low enough to see over. Anchor it to the floor or wall for stability.
Best for: Open-concept living rooms doing double duty as playrooms see our Kallax TV unit setup for how the same footprint works when it’s holding media gear instead of toy bins.
Small-Space Tip: In a studio or shared room, this same divider trick works to separate a crib area from play space just keep the orientation low so it doesn’t block light.
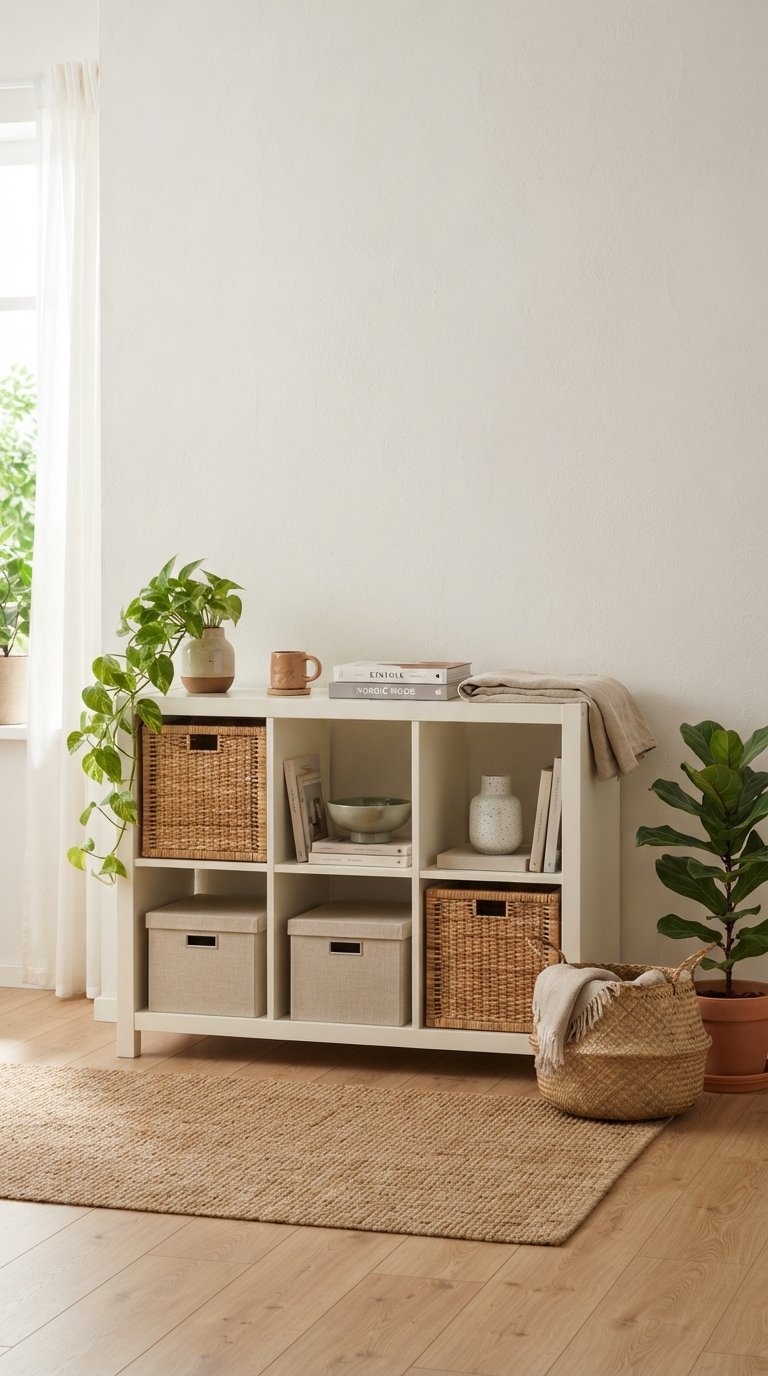
5. Woven Seagrass Baskets for a Softer Look
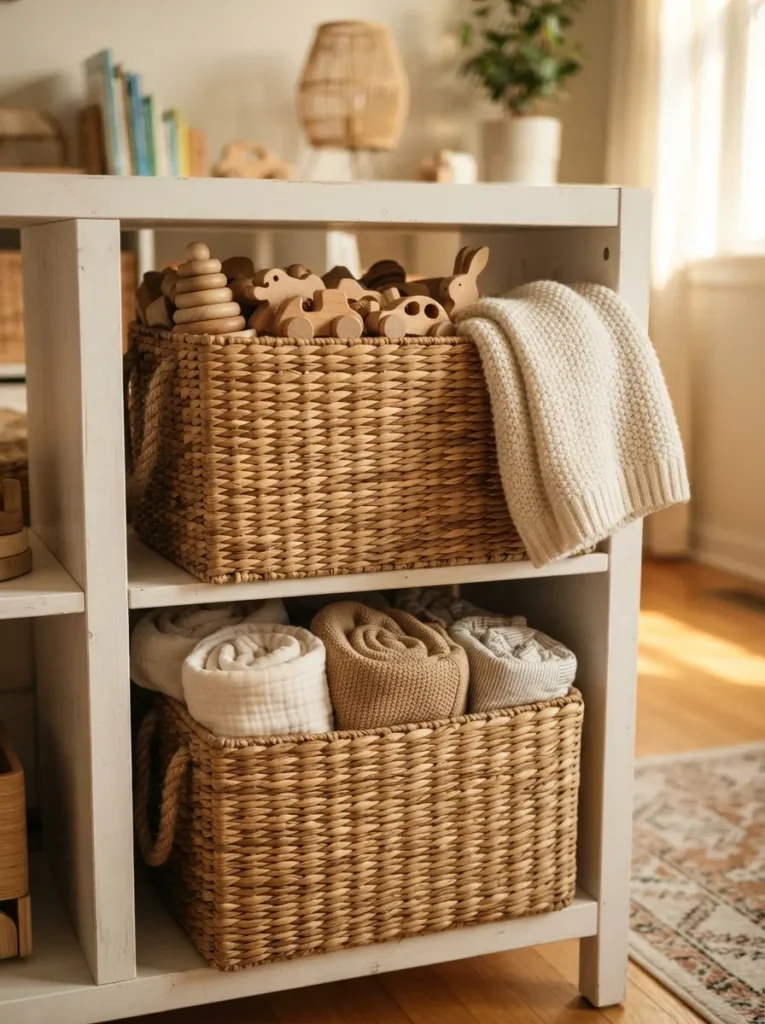
What it looks like: Natural woven texture instead of plastic it reads more like living room furniture than a toy bin.
Why it works: Seagrass and jute baskets hide contents completely while adding texture that plastic bins can’t, which matters if the Kallax sits in a shared living space rather than a closed-off playroom.
How to copy it: Reserve woven baskets for toys that don’t need visibility stuffed animals, wooden blocks, blankets since you can’t see through them to find a specific item.
Best for: Living rooms where the toy storage needs to blend in this is the texture move we’d reach for in a room like our tan sofa living room, where plastic bins would fight the existing palette.
Important: Seagrass baskets shed small fibers for the first few weeks of use vacuum nearby rugs more often at first, especially if a toddler chews on the rim.
6. Chalkboard Label Tags for an Easy Reset
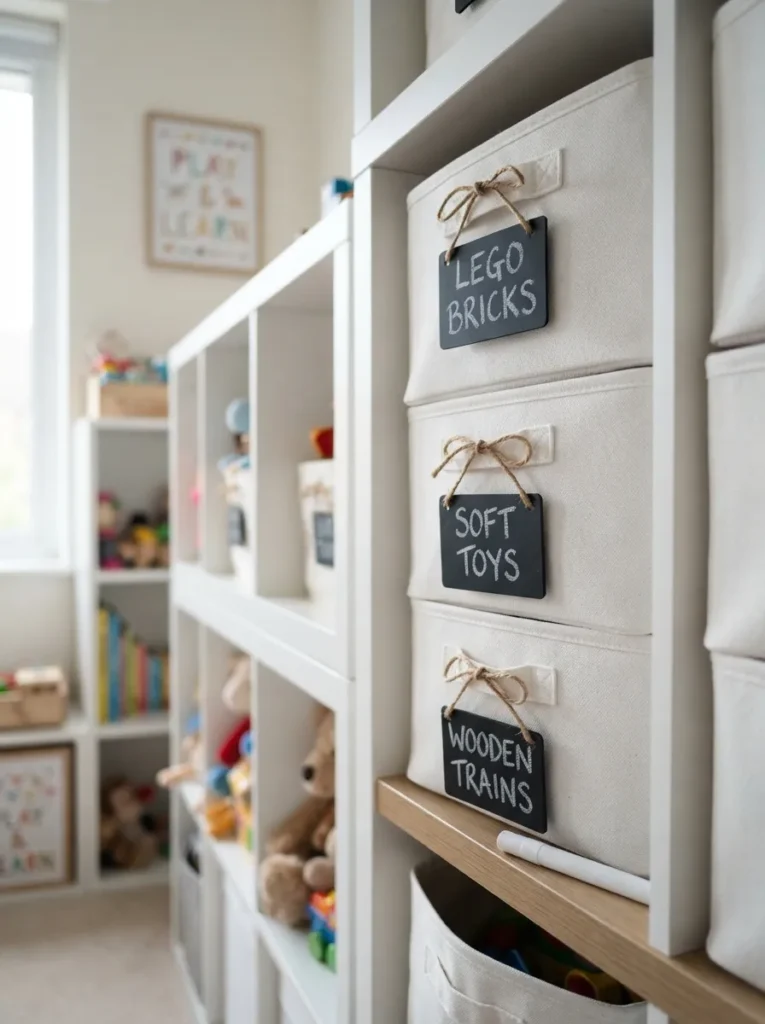
What it looks like: Small blackboard tags hang off each bin, handwritten and easy to update.
Why it works: Categories change as kids grow chalkboard tags let you relabel in seconds instead of replacing printed labels, which keeps the system accurate instead of abandoned.
How to copy it: Attach a mini chalkboard tag to each bin with twine or a binder ring, and use a chalk marker instead of actual chalk so labels don’t smudge during play.
Best for: Parents who want a labeling system that evolves as toy categories shift.
Budget Version: Cut label-size tags from a leftover paint sample card and write directly on it with a fine-tip marker costs nothing and works nearly as well as store-bought chalkboard tags.
What You’ll Need
| Product |
|---|
| Mini chalkboard label tags with twine |
| Liquid chalk marker, fine tip |
| Canvas storage bins with reinforced handles |
| Binder rings for attaching tags |
| Clear label holder clips |
The next idea solves a problem most families don’t notice until bedtime.
7. Under-Shelf LED Strips for Evening Cleanup
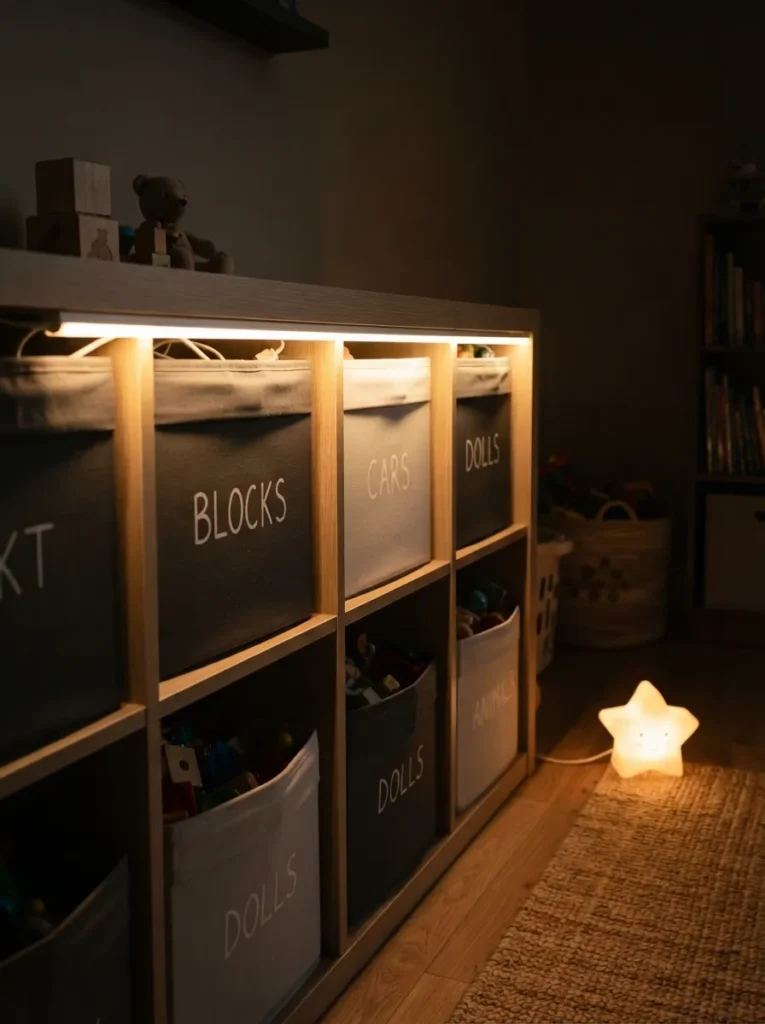
What it looks like: A soft glow washes down the front of the bins, even after the overhead light is off.
Why it works: Bedtime cleanup often happens in low light, and dim rooms are exactly when kids give up on sorting. A warm LED strip keeps labels visible without a harsh overhead light that signals “not bedtime yet.”
How to copy it: Mount a battery-powered, warm-white (not cool-white) LED strip to the underside of the top shelf, angled slightly forward so it lights the bin fronts rather than the ceiling.
Best for: Bedrooms where the Kallax doubles as bedtime storage.
Styling Note: Stick to warm white (2700K–3000K) LED strips cool white light in a bedroom reads more like a garage than a cozy corner.
8. Vertical Orientation for Tall, Narrow Rooms
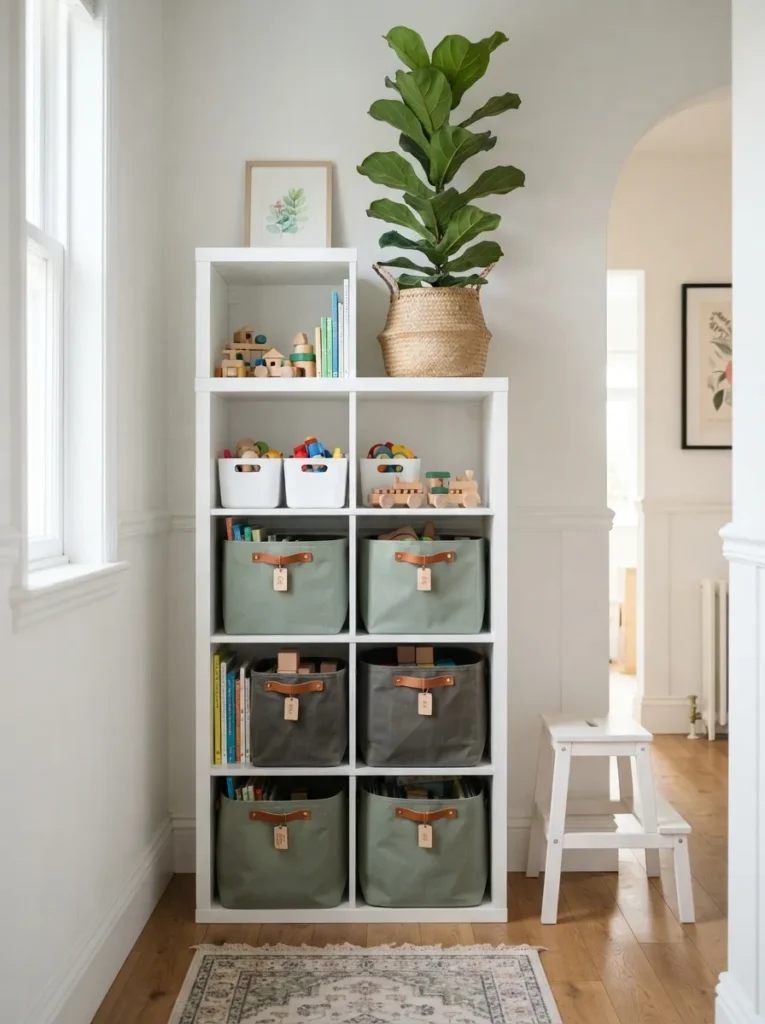
What it looks like: The same unit, standing tall instead of wide, tucked into a narrow gap most furniture can’t use.
Why it works: Vertical orientation shifts the center of gravity, so heavier bins belong on the bottom two cubes and lighter ones up top a detail that matters for tip-over safety, not just aesthetics.
How to copy it: Turn the unit vertically in hallway nooks or beside a doorway, and always load board games and books on bottom cubes, lightweight stuffed animals on top.
Best for: Narrow hallways or awkward gaps between furniture.
Pro Tip: Anchor any vertically oriented Kallax to the wall with an anti-tip strap the taller, narrower footprint makes it more likely to tip than the standard 4×4 layout.
9. Kallax Bench Seat with a Cushion Topper
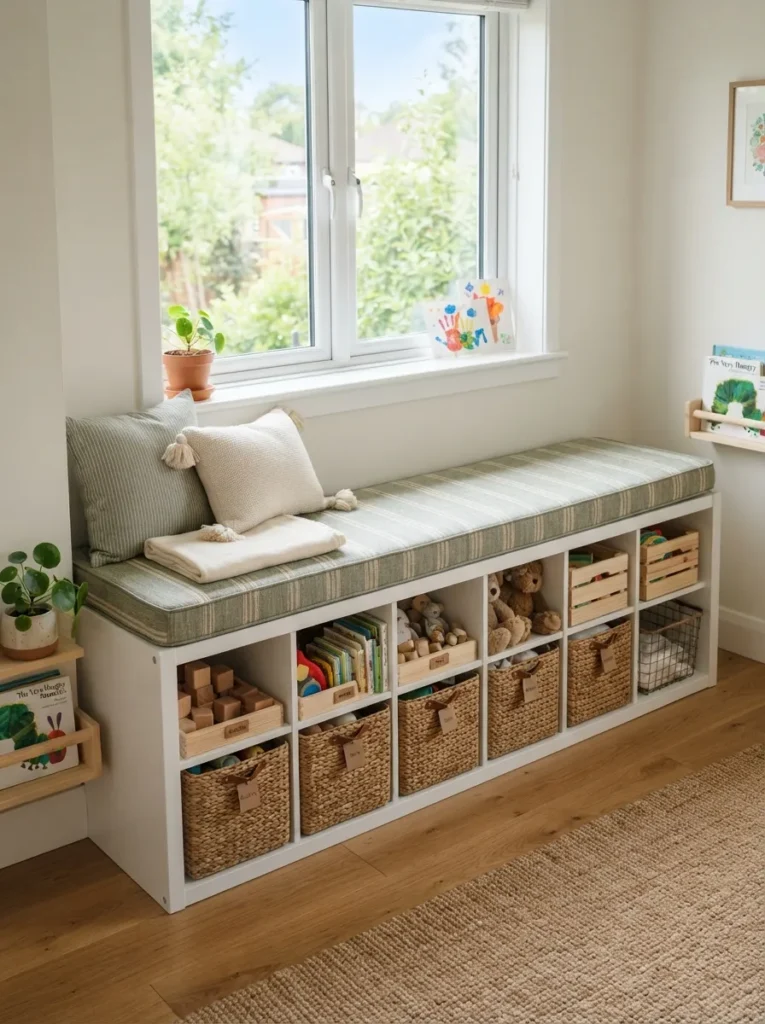
What it looks like: Storage on the bottom, seating on top a bench that reads as furniture, not a toy shelf.
Why it works: Doubling the unit as seating adds function without adding square footage, and putting a cushion on top discourages kids from climbing on open shelving, which is a real tip-over risk.
How to copy it: Order a foam cushion cut to the exact top dimensions of a 4×2 Kallax and use a removable, washable cover kids’ seating gets dirty fast.
Best for: Window nooks or entryways with limited floor space.
Budget Version: Skip a custom-cut cushion and use two standard bed pillows in a fitted cover instead less tailored, but a fraction of the cost.
This next idea is the one that keeps soft toys from taking over every other bin.
10. Felt Storage Inserts for Soft Toys
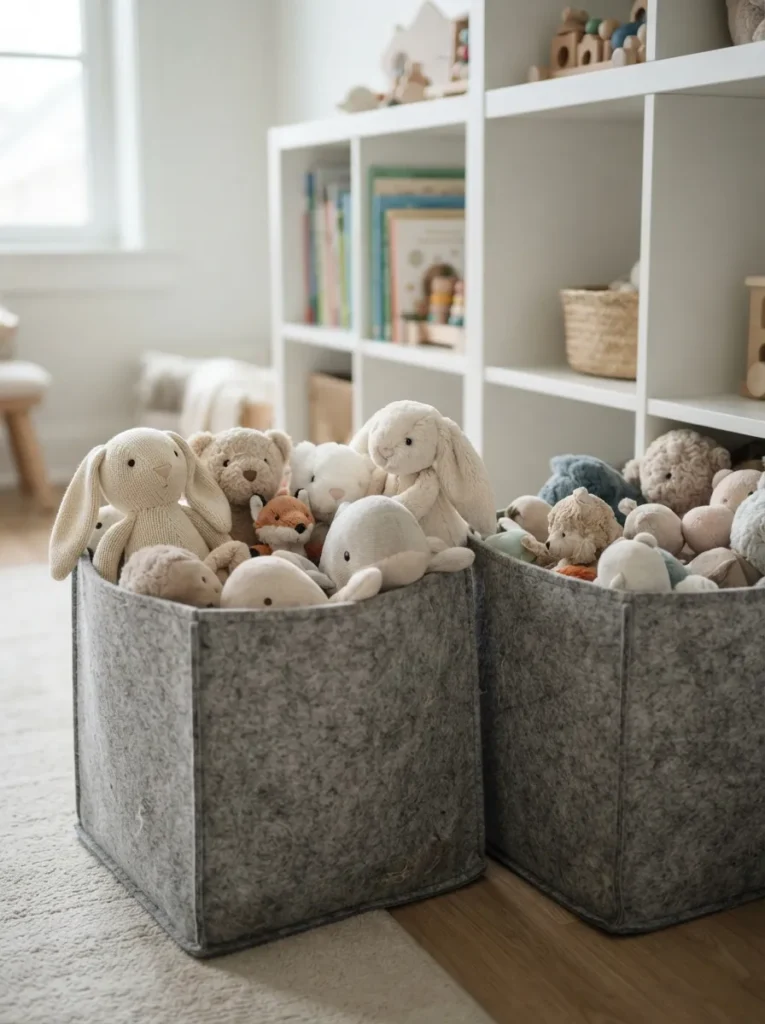
What it looks like: Soft-sided cubes that squish instead of scratch, sized to swallow an entire stuffed animal collection.
Why it works: Rigid plastic bins bruise under overstuffed plush collections and eventually crack at the corners. Felt inserts flex, so they can be genuinely overfilled without damage.
How to copy it: Choose felt cubes rated for at least 15 pounds and give stuffed animals their own dedicated cube mixing them with hard toys wastes the felt’s main advantage.
Best for: Kids with large stuffed animal collections.
Important: Felt inserts lose their shape faster than plastic expect to reshape or replace them every 12 to 18 months if they’re used daily.
What You’ll Need
| Product |
|---|
| Felt storage cube inserts, 13×13 inch |
| Collapsible fabric storage bins |
| No-show fabric bin liners |
| Felt drawer dividers |
| Soft-sided toy hammock net |
11. Color-Blocked Cubbies for Visual Wayfinding
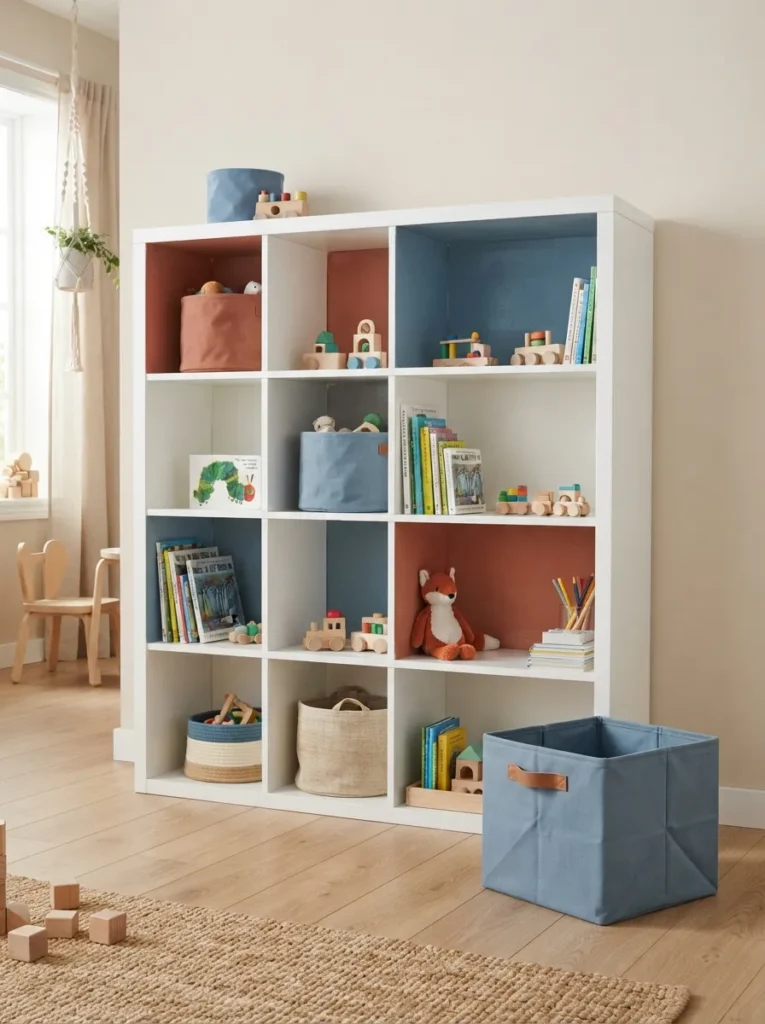
What it looks like: Painted color blocks inside the cubes themselves, visible even with the bins pulled out.
Why it works: Painting the interior back panel rather than just color-coding bins means the system survives even if a bin gets swapped or lost, since the cube itself still signals its category.
How to copy it: Paint the recessed back panel of each cube (not the front frame) in a flat interior paint, two coats, and let it cure fully before sliding bins back in.
Best for: Families who want a color system that outlasts bin replacements.
Quick Win: Painter’s tape off the cube opening edges before painting the back panel it keeps lines crisp without needing a steady hand.
12. Picture Labels for Pre-Readers
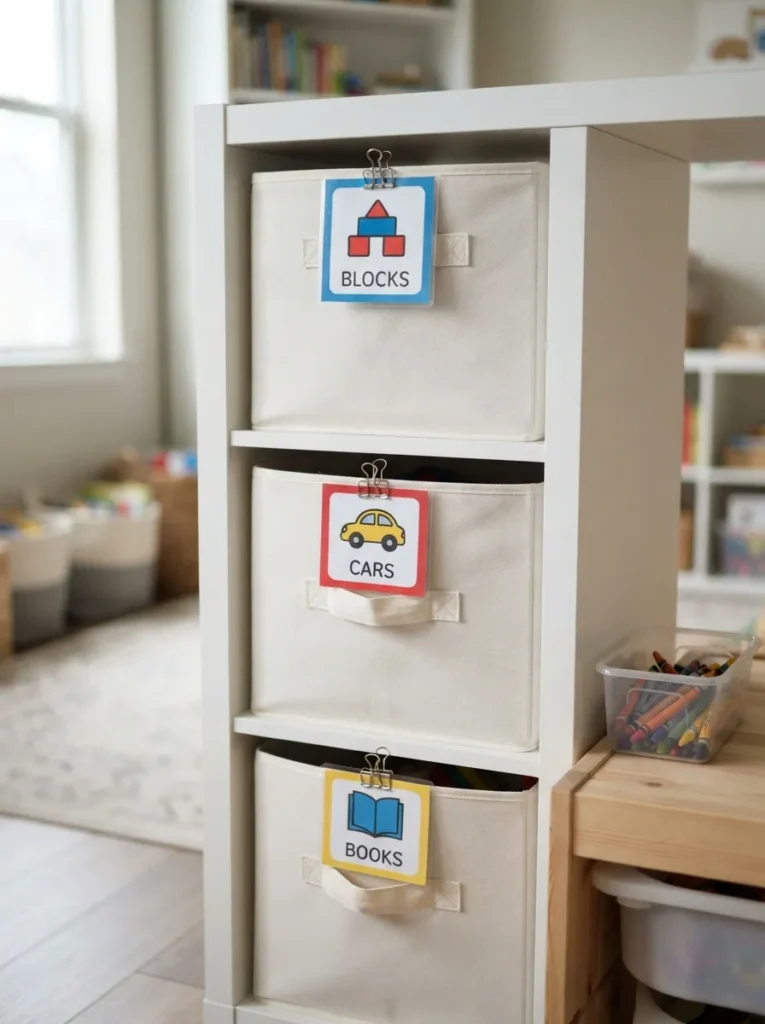
What it looks like: Simple icon labels a picture of a block, a car, a book clipped where a toddler can actually read them.
Why it works: Word labels only work once a child reads; picture labels work from toddlerhood on, and printing your own means the icons match your kid’s actual toys instead of generic clip art.
How to copy it: Take a quick photo of each toy category, print small, laminate, and attach with a binder clip so labels are swappable as collections change.
Best for: Toddlers and preschoolers not yet reading independently.
Styling Note: Keep icon backgrounds white or cream rather than colored busy label backgrounds compete with the bin colors instead of complementing them.
The next idea is the fix most people don’t think of until the unit’s already installed.
13. An L-Shaped Layout Using Two Units to Corner Off a Play Zone
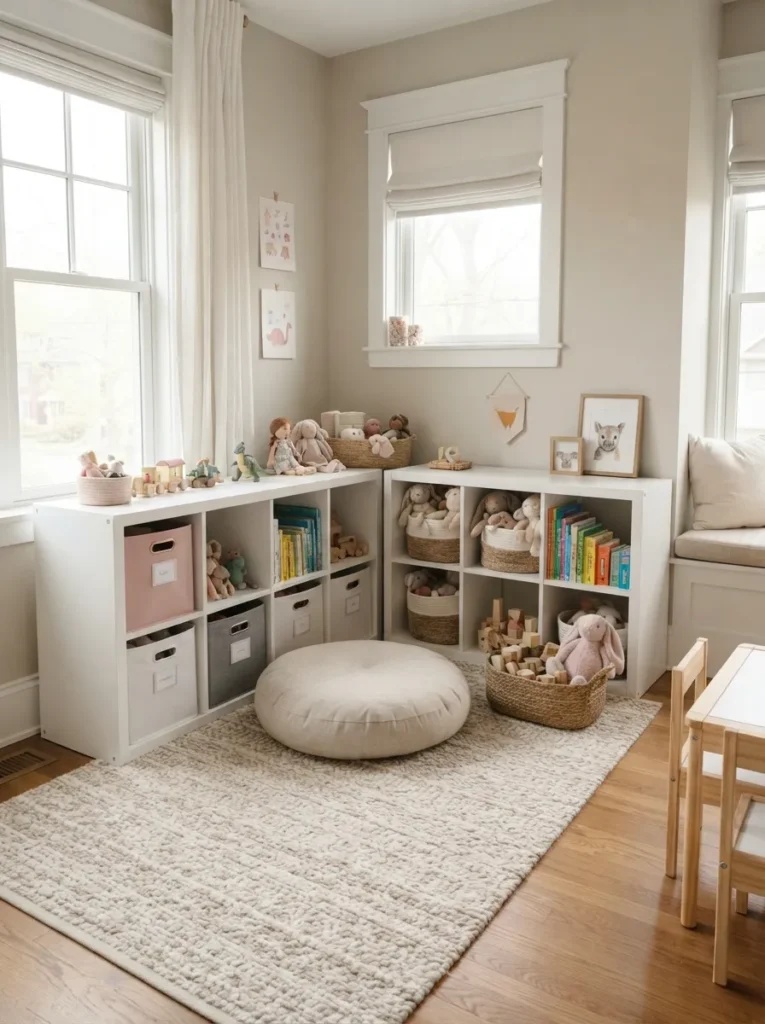
What it looks like: Two units meeting at a right angle carve out a defined play corner inside a bigger room.
Why it works: A single unit against a wall still leaves an open room; an L-shape creates a psychological boundary that signals “play happens here” without needing a physical wall.
How to copy it: Push one unit against each wall of a corner so the open backs meet, then anchor both to the wall for stability since neither is centered against a full wall span.
Best for: Bedrooms that need a defined play zone within a larger room.
Pro Tip: Leave at least 3 feet of open floor inside the L for actual play space cramming the corner with two full units and no clearance defeats the purpose.
14. Dedicated Art Supply Drawer Inserts
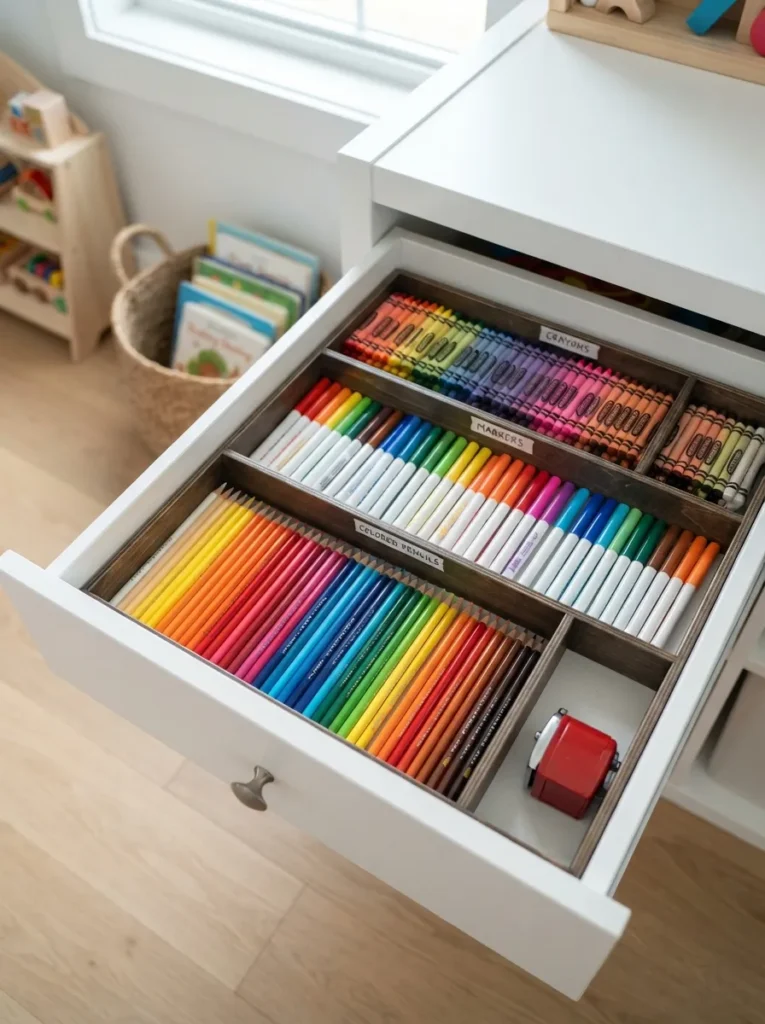
What it looks like: A shallow drawer that slides into the cube, sorting markers and crayons into their own compartments instead of one loose pile.
Why it works: Deep bins bury art supplies at the bottom within days, since kids rarely dig past the top layer. A shallow drawer keeps everything visible in one glance.
How to copy it: Look for a drawer insert sized specifically for a 13-inch Kallax cube opening, with at least four compartments one each for markers, crayons, pencils, and scissors.
Best for: Families with a dedicated art or craft cube for overflow supplies that don’t fit in the cube itself, our craft closet organization guide picks up where this leaves off.
Mistake to Avoid: Don’t use a drawer insert deeper than 4 inches for art supplies anything deeper defeats the point and buries pencils just like a bin would.
What You’ll Need
| Product |
|---|
| Shallow drawer organizer insert for cube shelving |
| Stackable pencil and marker trays |
| Compact desktop pencil sharpener |
| Washable felt-lined compartment tray |
| Rolling fabric pencil pouch |
My Views:
What I’ve seen in actual playrooms: the Kallax units that stay organized longest are never the ones with the most bins they’re the ones with the fewest. A fully packed 4×4 with sixteen different bins looks impressive on install day and falls apart within a month, because a 4-year-old can’t maintain sixteen categories. Six to eight bins, max, with everything else stored elsewhere on rotation, is what actually survives daily use.
15. A Warm Reading Lamp for the Cube-Turned-Nook
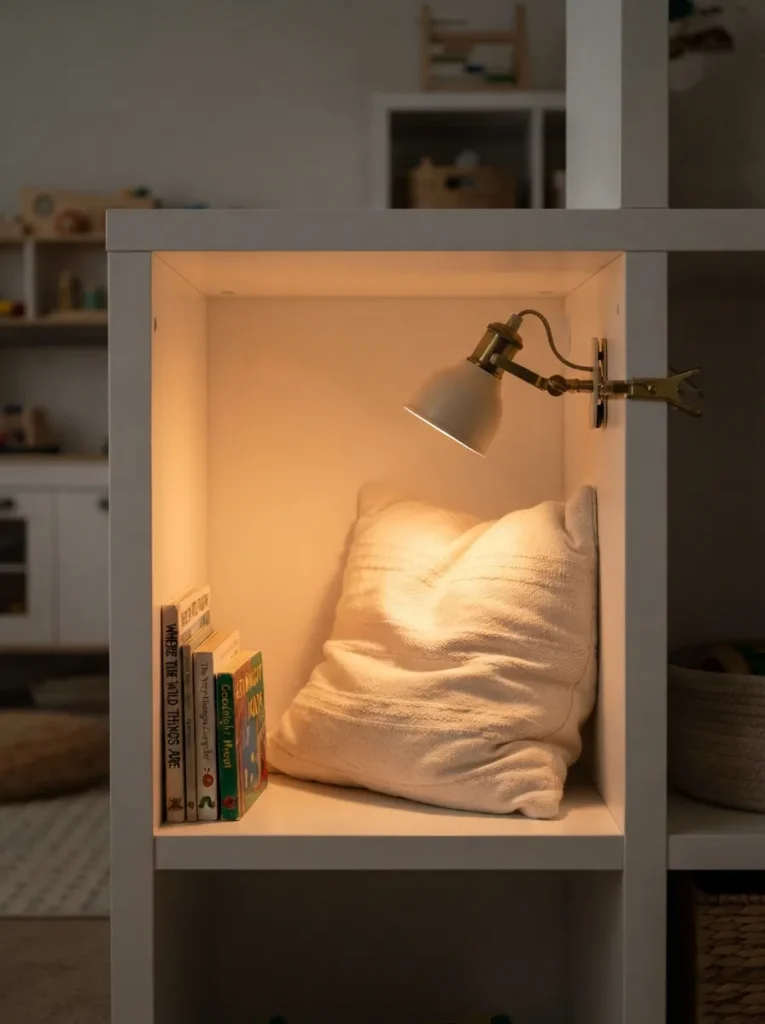
What it looks like: One cube left empty, cushioned, and lit just enough to read by a shelf that also became a hideaway.
Why it works: Kids gravitate toward small enclosed spaces, and a single lit cube gives them a defined reading spot without needing a separate reading chair or floor space.
How to copy it: Leave one bottom cube empty, add a flat cushion cut to fit, and clip a small battery- or USB-powered task lamp to the cube’s side panel angled downward.
Best for: Small bedrooms without room for a separate reading chair.
Quick Win: Choose a battery-powered clip lamp over a plugged-in one it skips the cord management problem entirely inside a tight cube.
Four more ideas to go including one that grows with your kid instead of getting replaced.
16. A Two-Tone Paint Hack for Zoning by Age
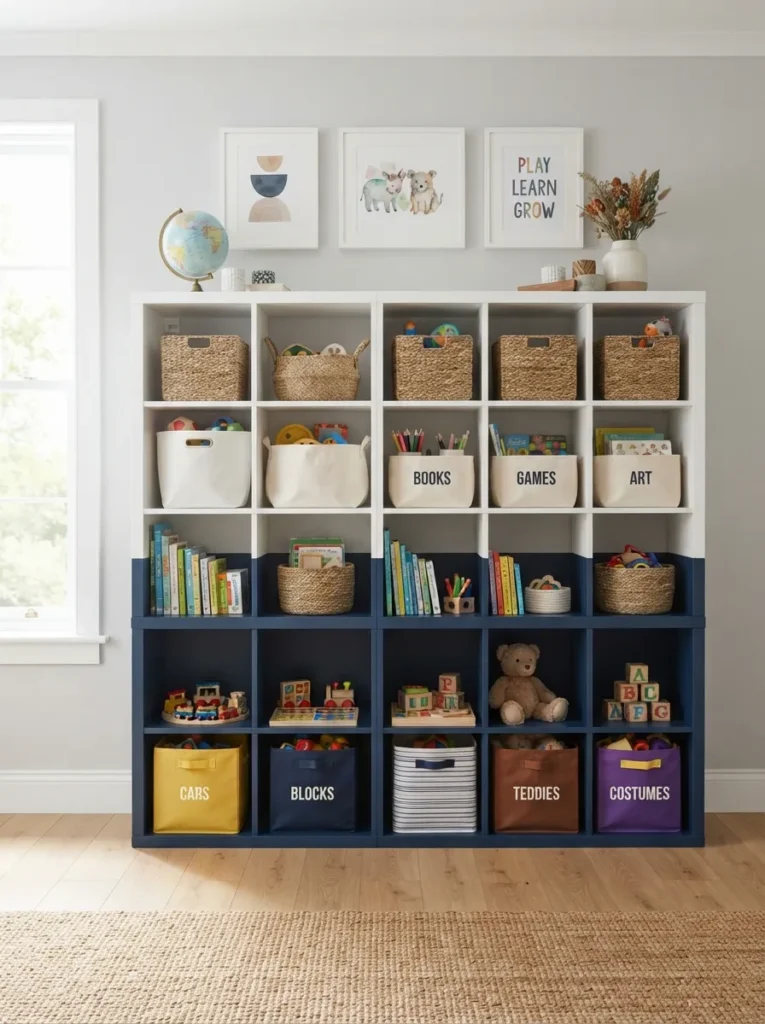
What it looks like: A visible color line splits the unit light on top, darker below marking exactly which shelves are within a toddler’s reach.
Why it works: Painting a clear boundary line does double duty: it looks intentional rather than accidental, and it nonverbally tells a toddler which shelves are theirs versus off-limits parent storage.
How to copy it: Paint the bottom two rows (the ones at or below your child’s eye level) in one color and leave or repaint the top two rows in another, using painter’s tape for a crisp division line.
Best for: Multi-age households sharing one storage unit.
Warning: Test paint adhesion on the laminate surface in a hidden spot first Kallax’s factory finish is slick, and paint without a bonding primer can chip within weeks of bins sliding in and out.
17. A Stacked Kallax Configuration for Vertical Storage
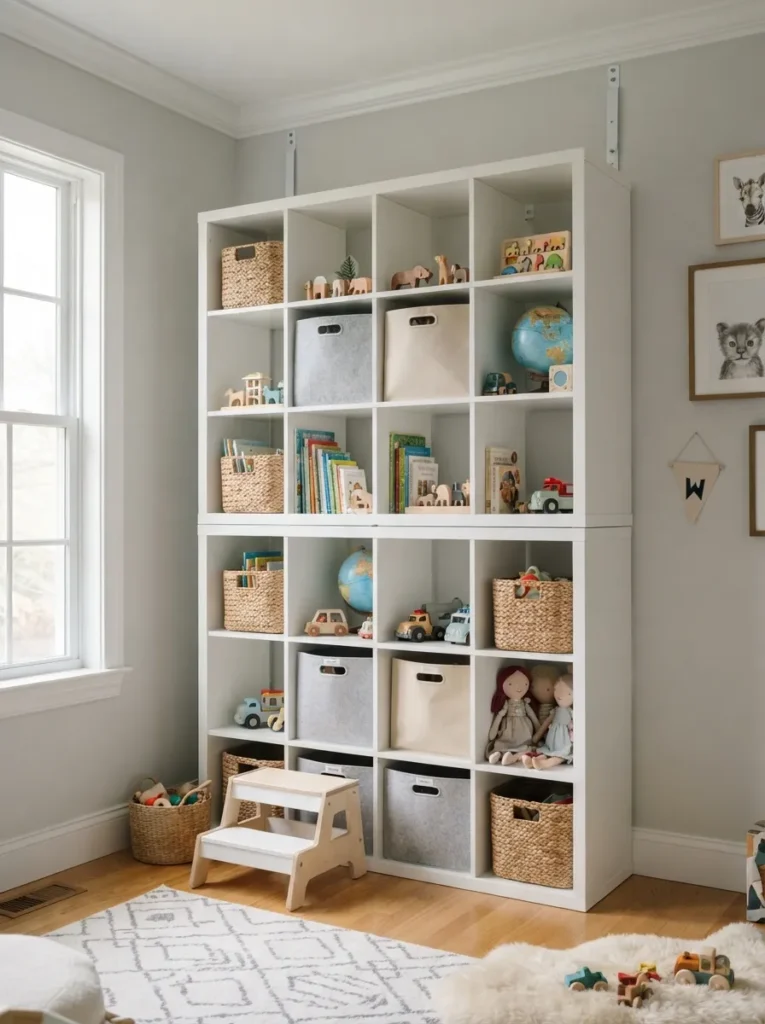
What it looks like: Two units stacked floor to ceiling, doubling storage in the same footprint — but only safe with the right hardware.
Why it works: Stacking effectively doubles cube count without using more floor space, which matters most in small rooms, but the taller the stack, the more critical proper wall anchoring becomes.
How to copy it: Reserve the bottom unit’s cubes for daily-use toys within reach and the top unit for seasonal or overflow storage that’s accessed less often.
Best for: Small playrooms that need maximum storage in a minimal footprint.
Before You Stack: Safety Checklist:
- [ ] Measure ceiling height to confirm two stacked units will clear with room to spare
- [ ] Locate wall studs behind the planned placement
- [ ] Purchase an anti-tip anchor kit rated for the combined stacked weight
- [ ] Attach anchor straps to studs before loading any bins
- [ ] Load heaviest bins into the bottom unit only
18. Rotating Labels That Grow With Your Kid
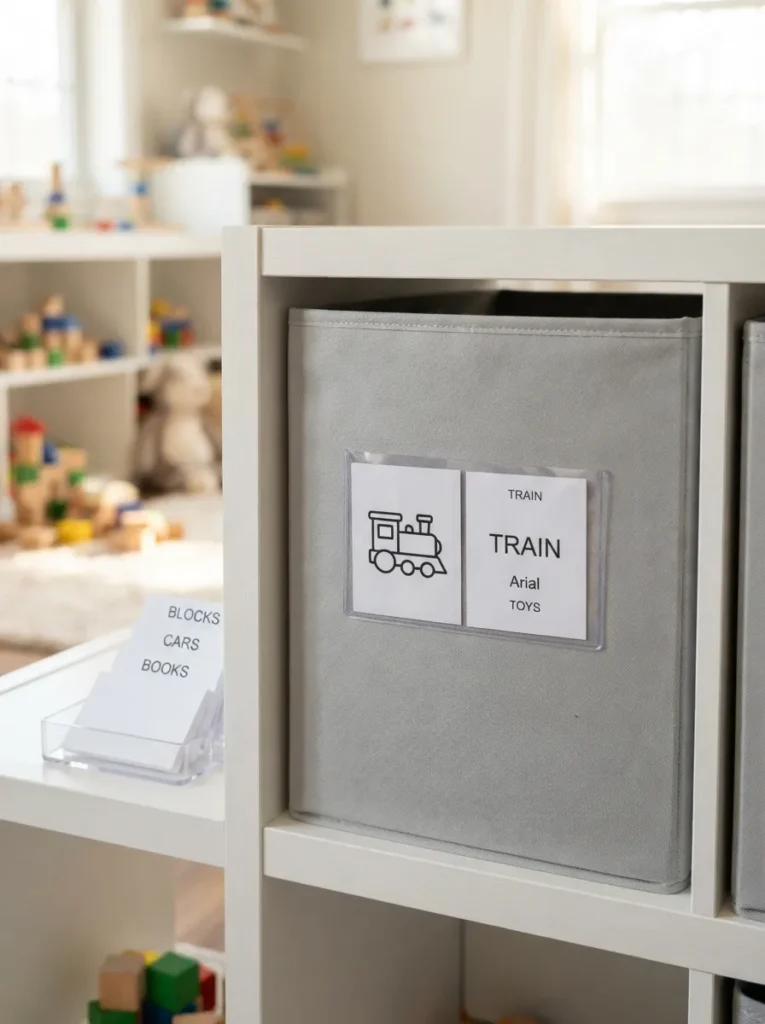
What it looks like: A clear label sleeve holding a swappable card picture labels today, word labels next year, same sleeve both times.
Why it works: Most labeling systems get replaced entirely once a kid starts reading, which means redoing the whole unit. A sleeve system lets the label evolve without touching the bin or shelf.
How to copy it: Attach a clear plastic label sleeve to each bin and print two card versions per category — one picture-only, one picture-plus-word swapping as reading skills develop.
Best for: Families who don’t want to relabel the entire system every year or two.
Budget Version: Use plain index cards cut to size instead of printed cardstock a marker and a laminating pouch (or even packing tape) gets you the same durability for a fraction of the cost.
One more idea and it’s the one that ties the whole room together.
19. Color-Coded Rug Zones to Anchor Play Areas
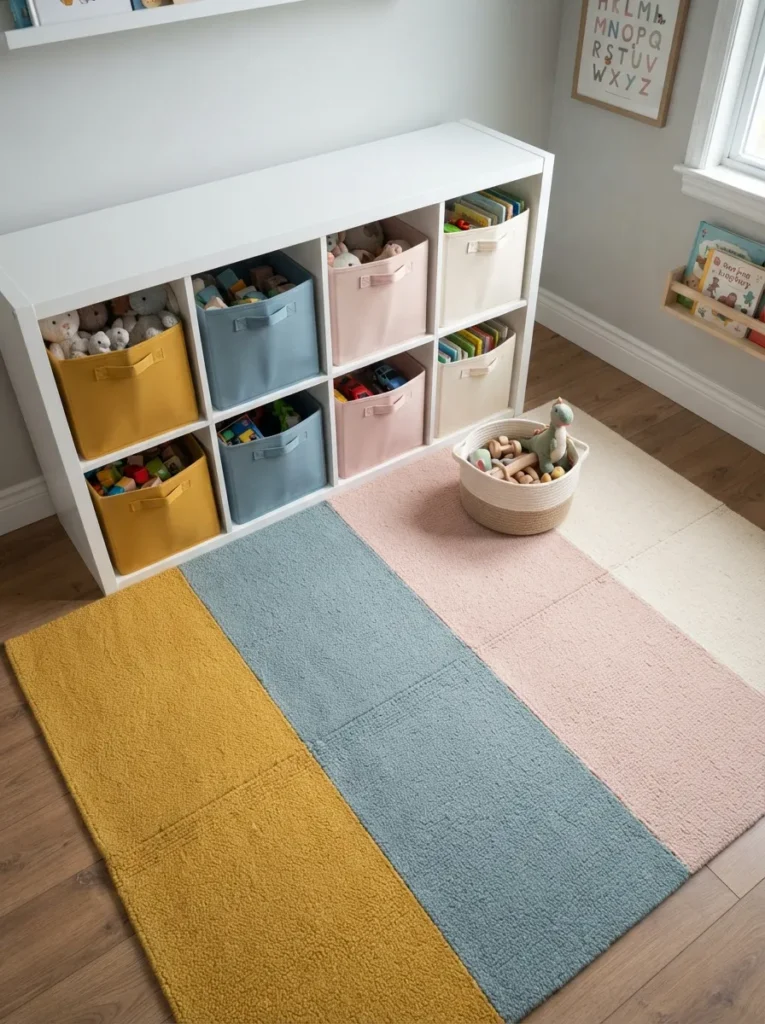
What it looks like: The floor rug picks up the same colors as the bins above it, so the whole zone reads as one system instead of separate pieces.
Why it works: Extending the color-coding from the shelf down to the floor reinforces the same sorting logic in a space kids actually play in, not just where they store things.
How to copy it: Choose a color-blocked or striped rug that echoes two or three of the same bin colors already used on the Kallax, rather than introducing an entirely new palette.
Best for: Playrooms where the color-coding system deserves to extend beyond the shelf.
Styling Note: Limit the rug to two or three matched colors max matching all four or five bin colors in the rug pattern starts to look busy instead of coordinated.
How to Start Your Kallax Toy Storage Transformation
What I’ve found with real playrooms: the first move isn’t buying bins it’s buying one Kallax unit and living with it empty for a few days to see how your kids actually move through the space. Start with a single white 4×4 unit against the most-used wall; its neutral finish won’t clash with whatever room it ends up in, and the size gives room to sort without overcommitting to a full wall of storage yet.
The most common fixable error is buying every bin on day one, before knowing what actually needs sorting. Parents typically buy sixteen matching bins for a 4×4 unit, then discover half their toys don’t fit cleanly into any category stray puzzle pieces, single shoes, mystery parts. Buy six to eight bins first, sort what you have, and only fill remaining cubes once you know what’s actually missing a home.
A pack of four canvas storage bins in a single accent color runs under $25 and covers the first round of sorting. A roll of chalkboard contact paper cut into small label tags costs under $10 and solves the labeling problem without a printer. A battery-powered warm-white LED puck light, around $15, handles evening visibility without an electrician.
A basic setup one unit, a handful of bins, and labels takes a single weekend and runs $150 to $250 depending on bin quality. A full transformation with a second stacked or L-shaped unit, drawer inserts, custom cushions, and lighting stretches closer to $400 to $600, and is worth spreading across a month rather than rushing in one trip.
Ready to Create Your Dream Playroom?
Nineteen ideas later, the throughline isn’t really about color or material or layout individually it’s about matching the system to how your specific kids actually play, not how a showroom photo suggests they should. Start small: pick one wall, one unit, six bins, and let the rest evolve as you see what sticks.
Tonight, that might just mean sorting the loose toys currently living on the floor into whatever bins you already own. A well-organized Kallax doesn’t just look calmer it means fewer bedtime arguments over missing pieces and more time actually playing instead of hunting. Save this one before cleanup day, because chances are you’ll want to come back to idea 17 once you’re ready to stack.
More Ideas You’ll Love
- 12 Kallax Bookshelf Styling Ideas for a Kid’s Reading Corner
- 15 Small Playroom Organization Ideas That Don’t Require a Renovation
- 10 Budget-Friendly Kids’ Room Storage Hacks Under $50