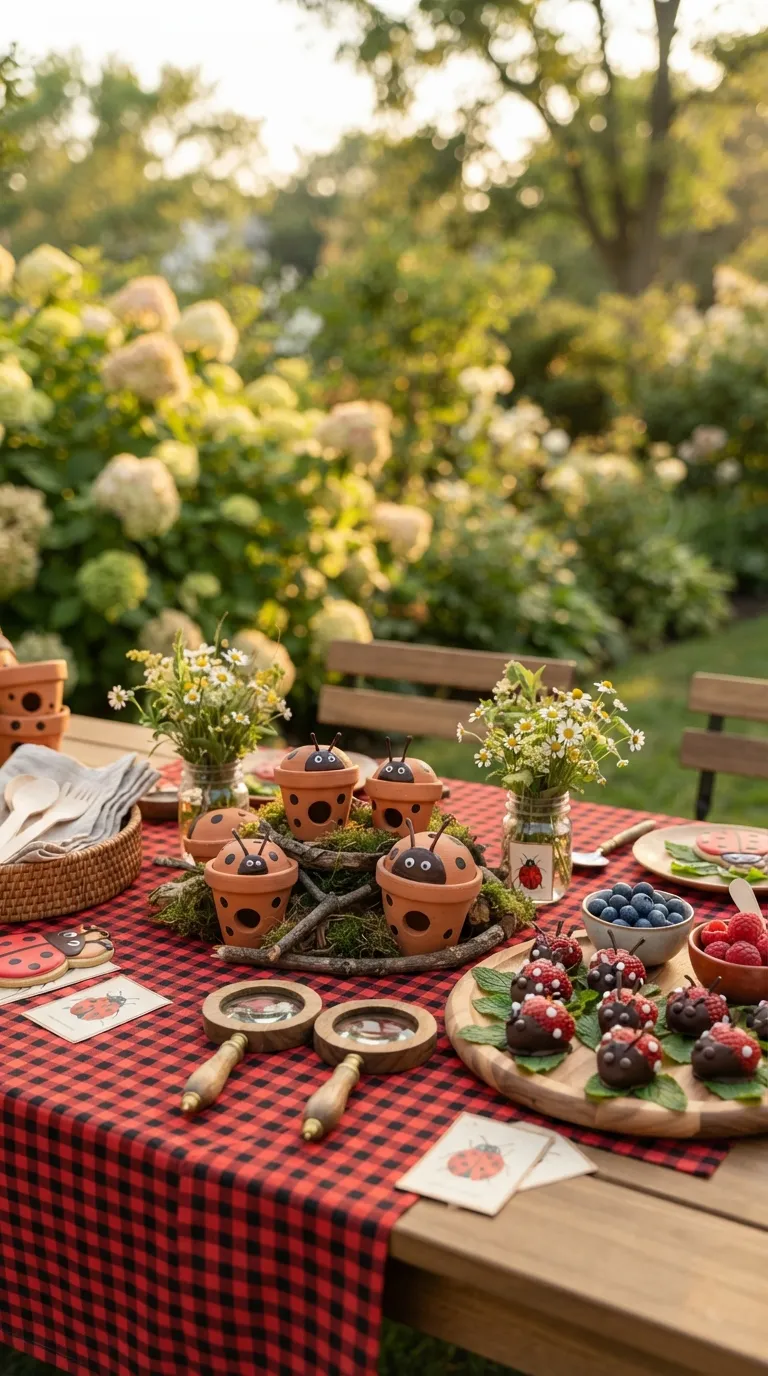
11 Ladybug Science Party Ideas for Curious 7-9 Year Olds
A ladybug science party works when the bugs feel real, not just printed on napkins kids this age want to touch, catch, and observe, not just decorate. Here are 11 ladybug science party ideas that pair hands-on entomology with cute, budget-friendly styling, built for the seven-to-nine set who ask a lot of “but why” questions.
Picture a backyard humming with the low buzz of kids crouched over jars, red-and-black polka dots catching the afternoon light, sticky fingers from a strawberry-and-chocolate-chip snack table, and a single magnifying glass passed hand to hand until the glass fogs up. It’s a little loud, a little sticky, and exactly the kind of party that gets talked about at school on Monday.
Quick Navigation
- Why Ladybug Science Parties Make Such a Difference
- The Ideas, Cheapest and Easiest First
- How to Start Planning Your Ladybug Science Party
- Ready to Host Your Dream Ladybug Science Party?
Why Ladybug Science Parties Make Such a Difference
A ladybug science party swaps the usual bounce-house chaos for something seven-to-nine-year-olds lean into: real observation, a real (or very convincing) bug, and a job to do. Kids this age are past parallel play they want a magnifying glass, a jar to fill, a station that’s theirs.
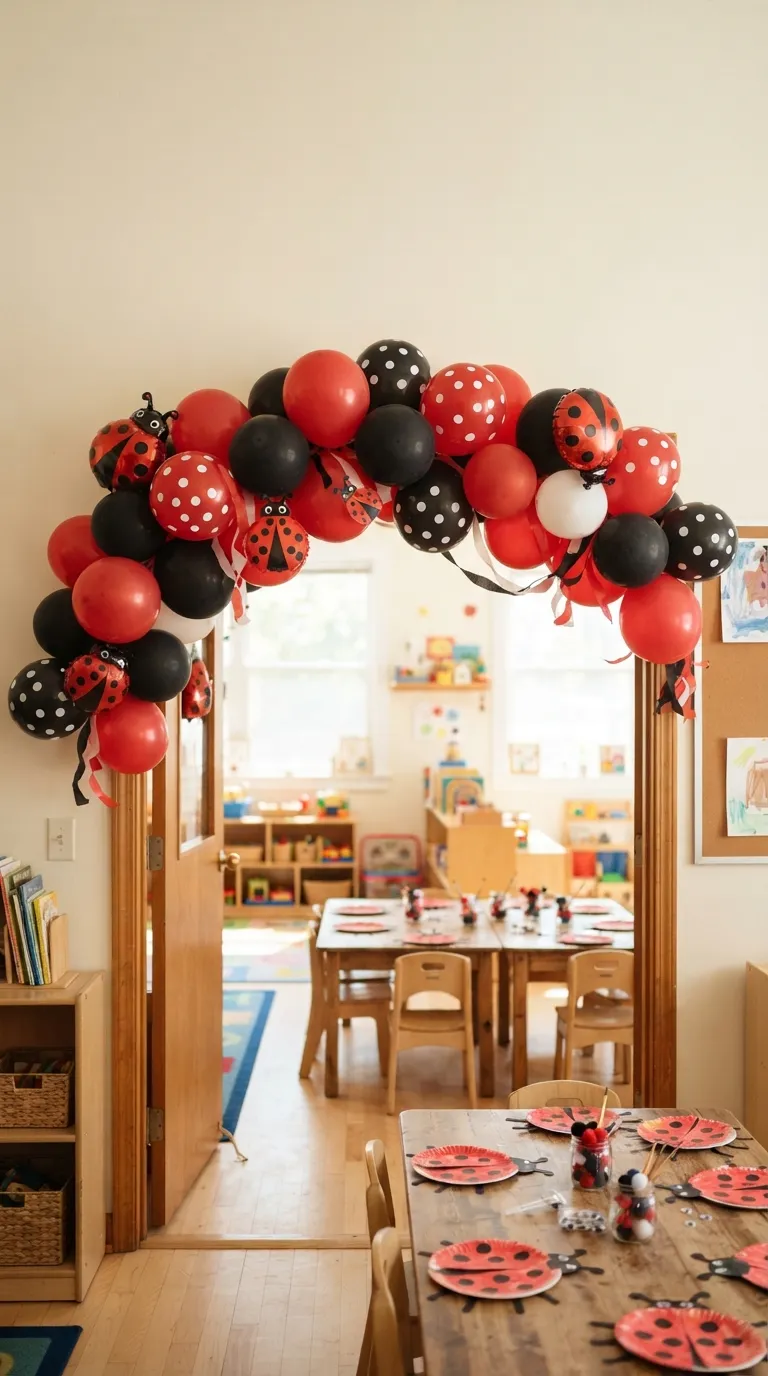
The palette stays simple: red, black, white, and leaf green pulled from real ladybug markings instead of cartoon ones, which keeps the decor cheap and the science credible. It works indoors on a rainy Saturday or spread across a backyard, and the habitat station is the one place worth building first.
| Best starting point | The ladybug habitat station |
| Biggest impact area | The snack table — red-and-black food does most of the visual work |
| Budget to start | Approximately $40–$70 for 8–10 kids |
| Time to complete | About 2–3 hours to set up |
The Ideas, Cheapest and Easiest First
1. DIY Antennae-and-Wing Headbands
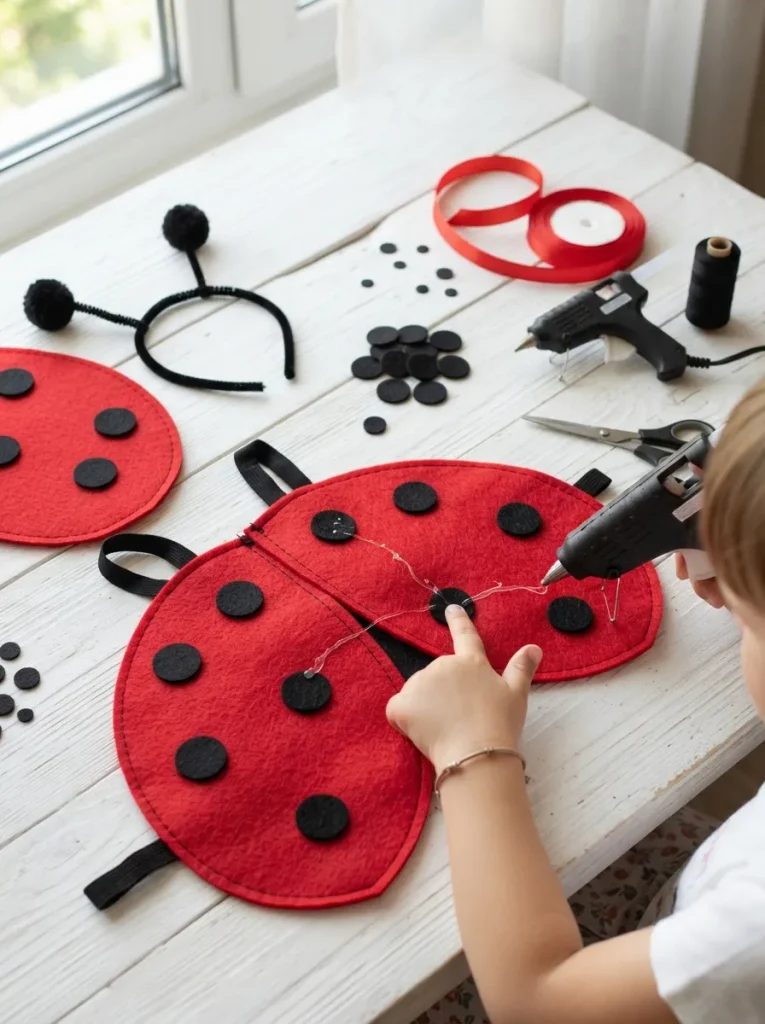
Two felt shapes and a headband turn any kid into the party’s mascot in under ten minutes. Cut wing shapes from red craft felt, glue on black felt circles in a rough 5-to-7 spot cluster (real ladybugs rarely have symmetrical spots, so imperfect placement reads as more authentic), and hot-glue them to a plain elastic headband alongside two black pipe-cleaner antennae topped with pom-poms.
Pre-cut the felt shapes before the party kids this age can glue but rarely cut a clean curve and let them do the spotting and assembly themselves. It’s the craft station most parents underbudget for and the one every kid actually wears home.
Pro Tip: Buy pre-cut felt wing shapes if you’re short on prep time hand-cutting eight to ten pairs the night before eats close to an hour.
| Product |
|---|
| Craft felt sheet assortment |
| Black craft foam dot stickers |
| Plain elastic headbands |
| Black pipe cleaners |
| Small pom-poms |
2. Strawberry-and-Chocolate-Chip Ladybug Bites
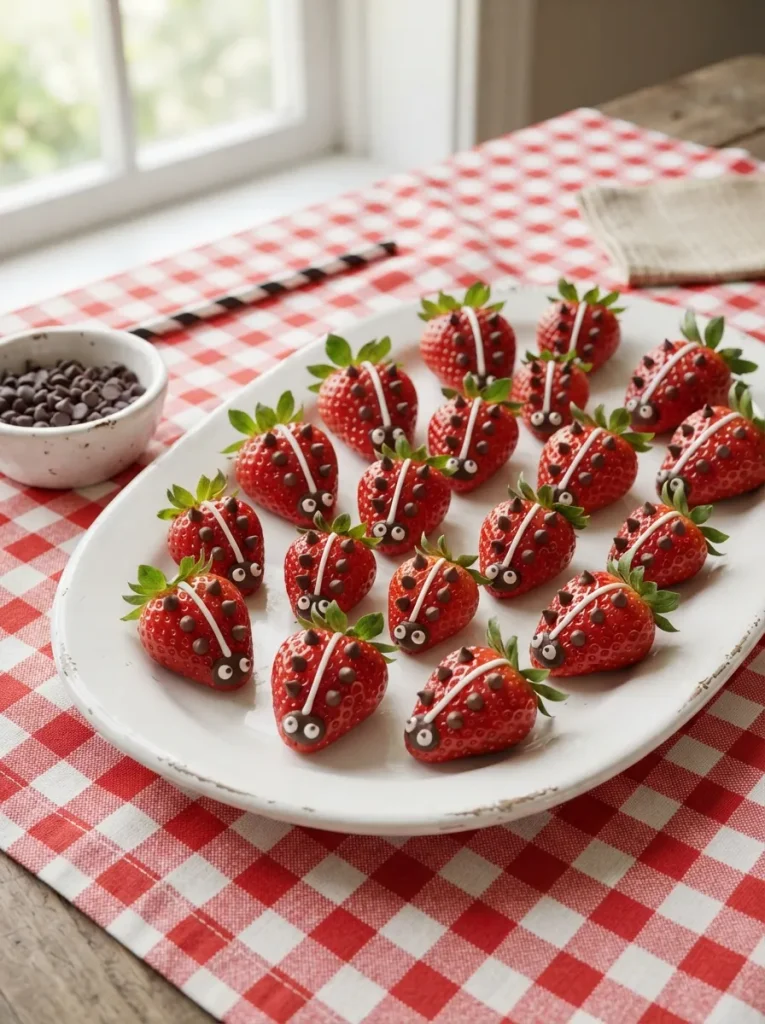
Halve strawberries lengthwise, pipe a thin white icing or yogurt line down the center to suggest the wing split, and press mini chocolate chips into the cut face for spots.
The proportion that sells the illusion: 5–6 chips per berry, clustered toward the wide end, never spread evenly evenly spaced spots read as a pattern, not a bug. Chill the berries for 20 minutes before serving so the icing sets and doesn’t slide.
This is the one snack-table idea that needs zero baking and survives a warm backyard afternoon better than anything frosted.
Budget Version: Skip the icing entirely and use a dot of peanut butter or cream cheese instead same hold, one less ingredient to buy.
3. The Red-Black-White Color Ratio
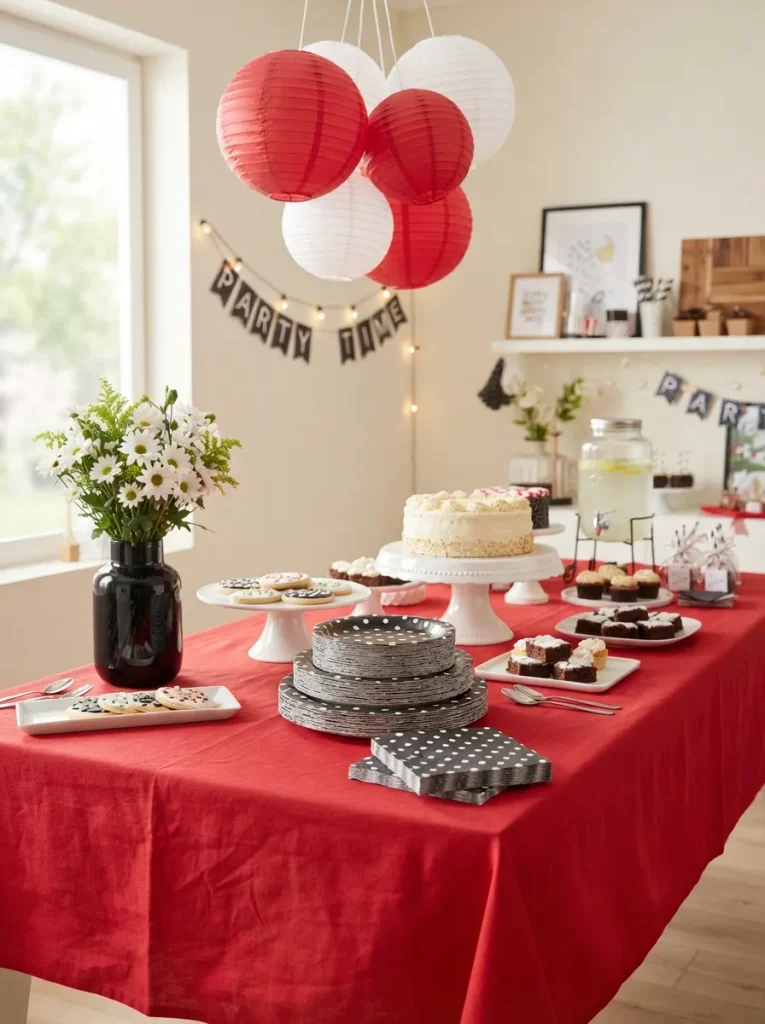
Most ladybug parties over-black themselves table settings that go heavy on black read more Halloween than garden bug.
Stick to roughly a 60-30-10 split: 60 percent red as the base (tablecloth, balloons), 30 percent white (plates, florals), and only 10 percent black, used just for spots and accents. Real ladybugs are mostly red shell with modest black markings, not the reverse, and matching that ratio is what makes the palette read as “ladybug” instead of “spooky.”
Layer in one unexpected note moss green from real leaves or ferns to keep it from looking like a printed party kit.
Next up: the habitat station that turns your backyard into an actual bug lab for the afternoon and the one material swap that keeps it from smelling like a compost bin by hour two.
4. The Terracotta Ladybug Habitat Station
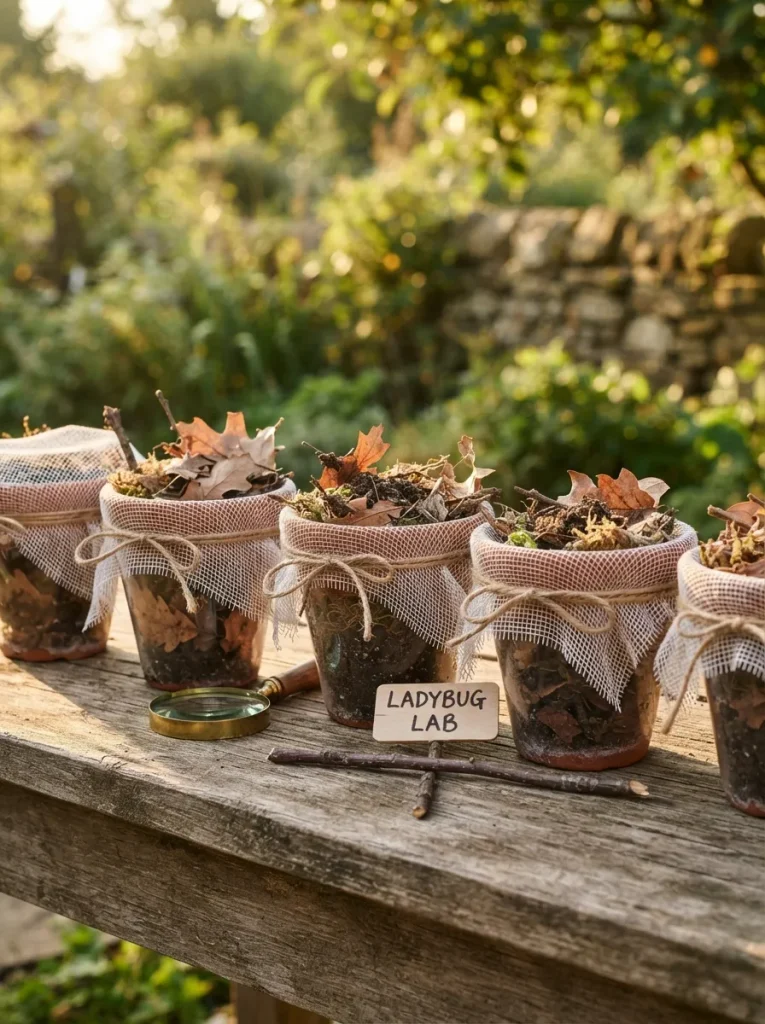
This is the station worth building the whole party around. Give each kid a small terracotta pot, layer in potting soil, a handful of dried leaves, and a few small twigs for ladybugs to climb, then cover the top with mesh netting instead of a solid lid real ladybug habitat setups need airflow, and a sealed jar overheats fast in direct sun.
If you’re releasing live ladybugs (sold in small mesh bags online for garden release), let each kid add a few to their own pot and observe for 20–30 minutes before releasing them into a garden bed at the end. Keep the whole station in shade direct sun on a covered pot can raise the internal temperature enough to stress the insects within minutes.
✅ Ladybug Habitat Setup:
- [ ] Layer 2 inches of potting soil in each terracotta pot
- [ ] Add a handful of dried leaves and one or two small twigs
- [ ] Add ladybugs (2–3 per pot) and cover with mesh netting, secured with twine
- [ ] Place the finished pots in shade, not direct sun
- [ ] Release ladybugs into a garden bed together at the party’s end
| Product |
|---|
| Small terracotta pots |
| Fine mesh netting |
| Natural garden soil |
| Handheld magnifying glass |
| Live ladybug release kit |
5. Zone-Based Party Layout
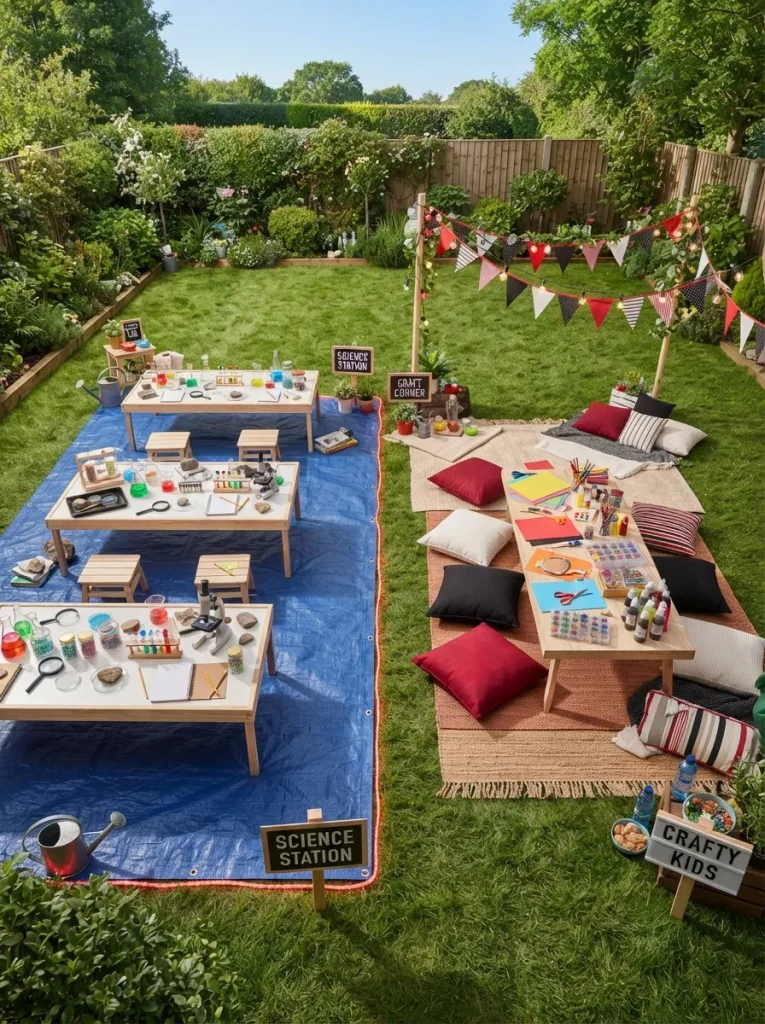
The single biggest mistake at bug-themed parties is putting the messy science station next to the quiet craft table spilled soil and glued felt do not share space well.
Split the yard or room into two zones instead: a “wet zone” for the habitat station, bug catching, and any water-based activity, and a “dry zone” for crafts, snacks, and seating. Mark the boundary with something visual kids register instantly, like a strip of colored tape on the grass or a row of potted plants, so nobody has to be told twice.
For eight or more kids, add a third, smaller zone a shaded rest spot with cushions since this age group runs hot and tires faster outdoors than parents expect.
Quick Win: No time to plan zones in advance? A single long table works as the dividing line science on one end, crafts on the other.
6. Mason Jar Glow Station
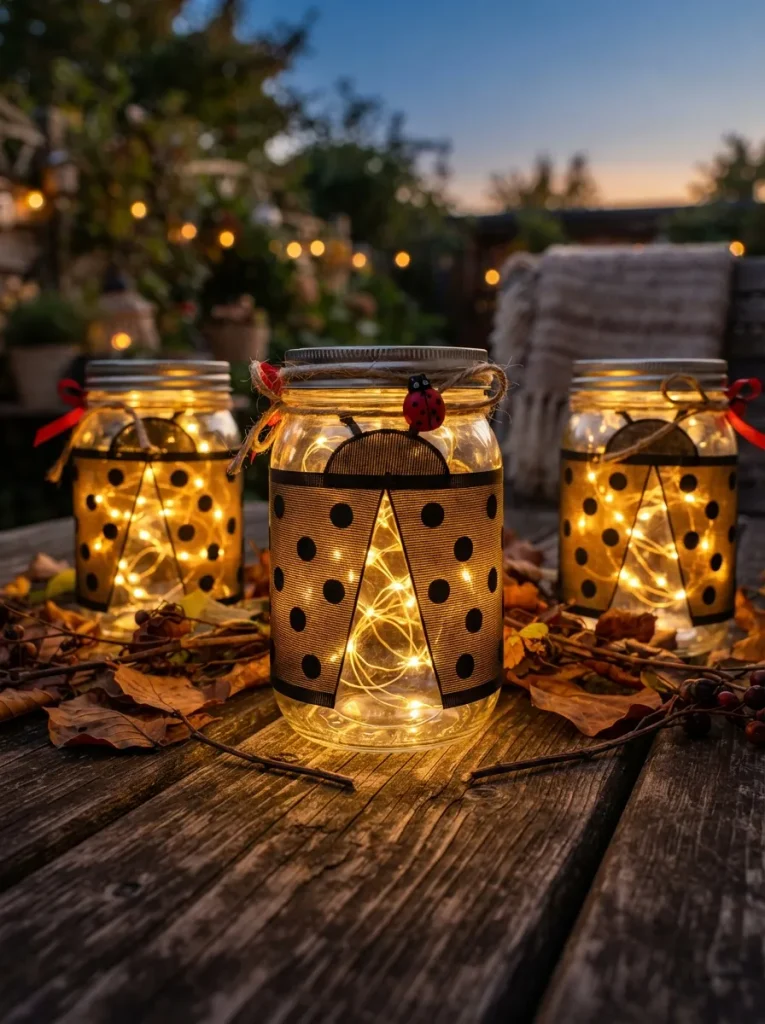
If the party runs into early evening, this is the idea that gets photographed the most. Wrap mason jars with a few strips of black ribbon to mimic ladybug spots, then drop in battery-powered LED fairy lights rather than real tea lights or candles.
Glass jars sitting on grass or a low table are exactly the height curious hands reach for, and an open flame at that height is a real, avoidable risk with a group of seven-to-nine-year-olds moving fast in low light.
LED strands also run for hours without needing to be relit or watched. Group five or six mason jar crafts in a loose cluster rather than a straight line clusters read as a glow, a row reads as a runway.
Warning: Skip real tea lights or votive candles here. LED versions cost only a little more and remove the single biggest safety risk at an evening kids’ party.
| Product |
|---|
| Wide-mouth mason jars |
| Battery-powered LED fairy lights |
| Black grosgrain ribbon |
| Natural jute twine |
The next station is where the actual “science” in science party happens and it needs a table height most parents get wrong on the first try.
7. Kid-Height Science Station Table
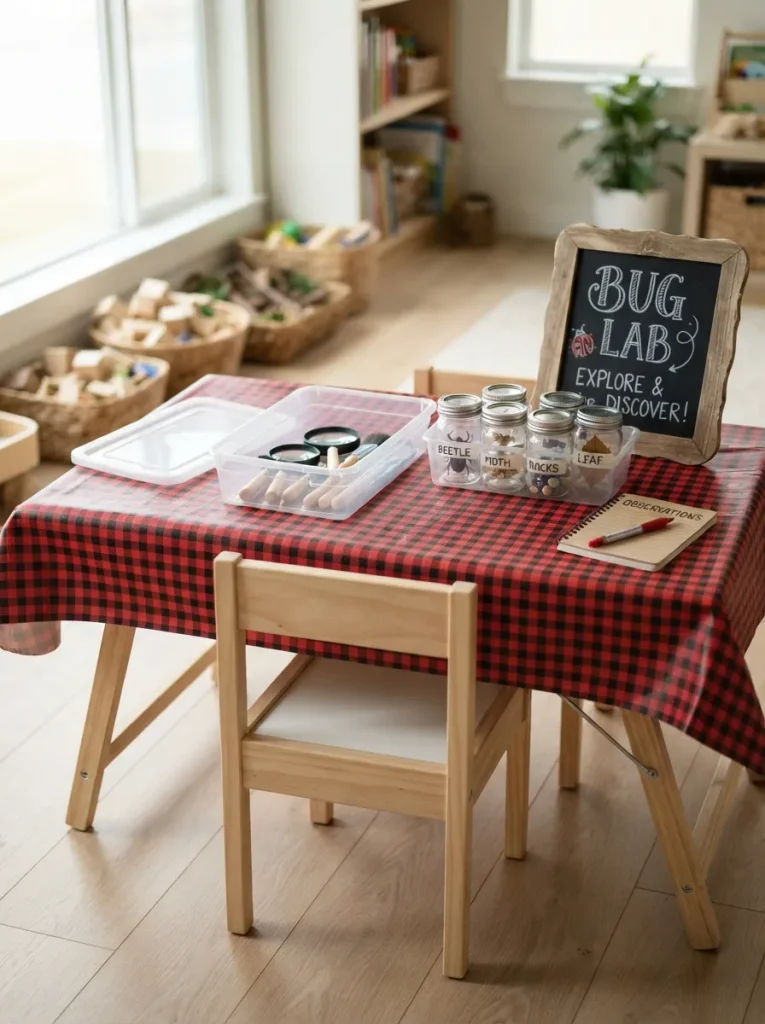
Most rented or borrowed folding tables sit around 29–30 inches tall, which is standard adult height and noticeably too tall for a seated seven-year-old to work comfortably at for more than a few minutes. Look for a kids’ activity table in the 20–22 inch range instead, or set a standard table’s legs to their lowest extension if it’s adjustable.
Top it with a wipeable tablecloth in the party’s red-and-black gingham, and organize supplies into clear labeled bins rather than one shared pile kids this age sort and categorize instinctively, and labeled stations (“Magnifiers,” “Specimen Jars,” “Sketch Pads”) keep the table from turning into a grab-and-scatter mess within the first five minutes.
Important: A “kids’ table” at most party rental companies is still adult height unless specifically labeled “junior” or listed under 24 inches always check the exact measurement before booking.
| Product |
|---|
| Low folding kids’ activity table |
| Clear plastic storage bins |
| Red-and-black gingham tablecloth |
| Handheld magnifying glasses (set of 6–8) |
8. Life-Cycle Color-Coded Stations
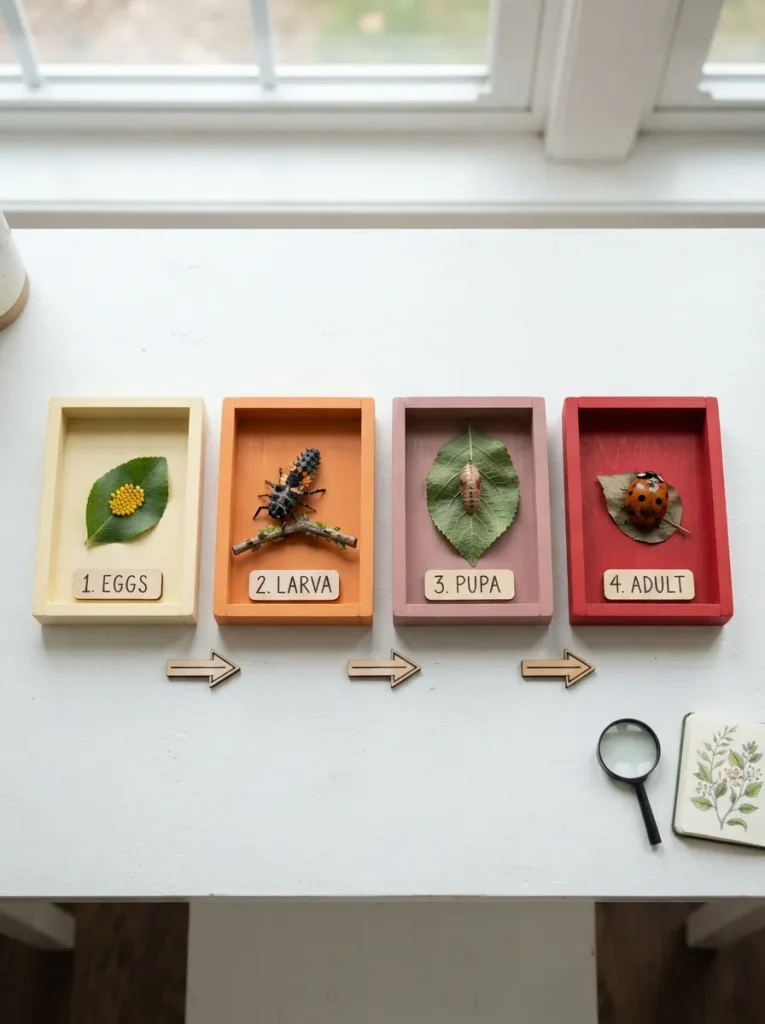
A ladybug’s life cycle has four distinct stages, and giving each one its own color rather than presenting them all in ladybug red helps this age group remember the sequence. Try pale yellow for eggs, orange for the spiky larva stage, dusty rose for the pupa, and true red only for the adult beetle, laid out left to right across a table or wall.
Kids move along the row and match a small model, sticker, or printed card to each station, which turns a fact they’d otherwise forget by dinnertime into something they physically walked through. Skip attempting exact scientific illustrations simple shapes in the right color read more clearly to this age group than detailed diagrams.
Styling Note: Keep the four colors in the same saturation range (all pastel or all bold) mixing intensities makes the sequence feel disconnected instead of like one continuous story.
Idea nine adapts the whole party for a small apartment or condo worth reading even if you’ve got a full backyard, since the trick works indoors either way.
9. Vertical Bug Hotel for Small Spaces
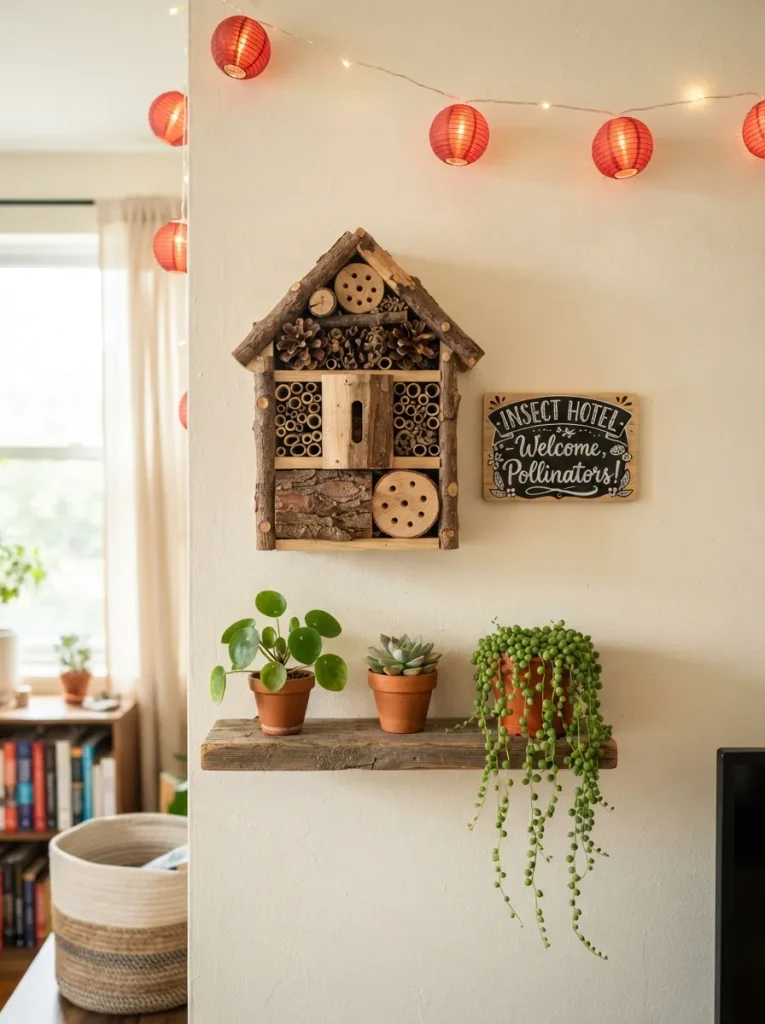
An apartment or small condo can’t fit a full backyard habitat spread, so move the science vertical instead of horizontal. A small wooden insect hotel mounted on a wall at kid-eye-height (about 40–45 inches off the floor) becomes the party’s centerpiece station, with a narrow shelf beneath it for a few potted plants and a magnifying glass.
Kids observe and sketch rather than handle, which actually suits an indoor party better than live release would. This swap solves the footprint problem entirely a wall-mounted station takes up roughly two square feet of floor space versus the six to eight feet a full table-based habitat setup needs.
OBSERVATION
The counterintuitive part: the science stations get more genuine engagement than the craft stations at this age, almost every time. Parents tend to over-invest in the craft table felt, glitter, stickers because it feels like “the party activity,” while a $15 mesh bag of live ladybugs and a few magnifying glasses holds a group of seven-to-nine-year-olds silent and focused for twenty straight minutes. Budget the habitat and observation stations first, and treat the crafts as the thing kids do while waiting their turn at the bugs, not the other way around.
10. Bug-Catching Ground Seating
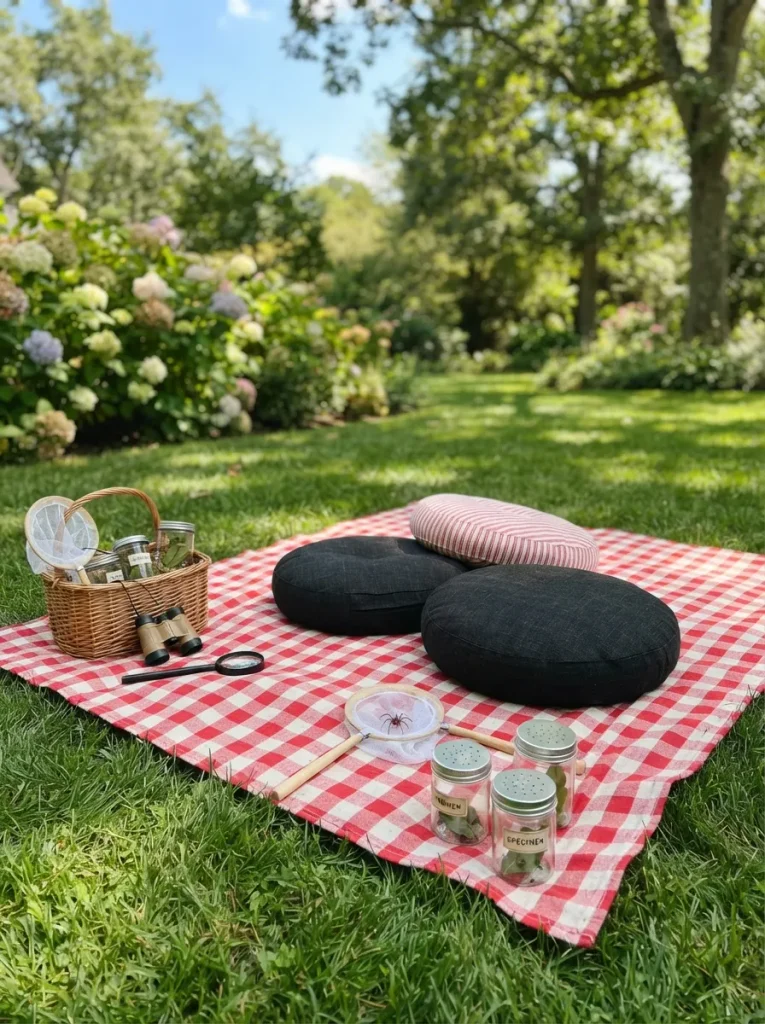
Skip renting extra chairs for the bug-catching portion of the party and go with ground seating instead a picnic blanket with a scatter of low floor cushions gets kids down at grass level, which is where the actual bugs are.
This matters more than it sounds: a seven-year-old in a chair three feet up spends the activity leaning over rather than searching, and low seating removes that barrier entirely. Round floor cushions hold up better than square ones for a group sitting and shifting position constantly, since there’s no corner to catch a foot on. Budget one cushion per two kids rather than one each they’ll cluster around whoever finds something first anyway.
11. Magnifying Glass Favor Bags
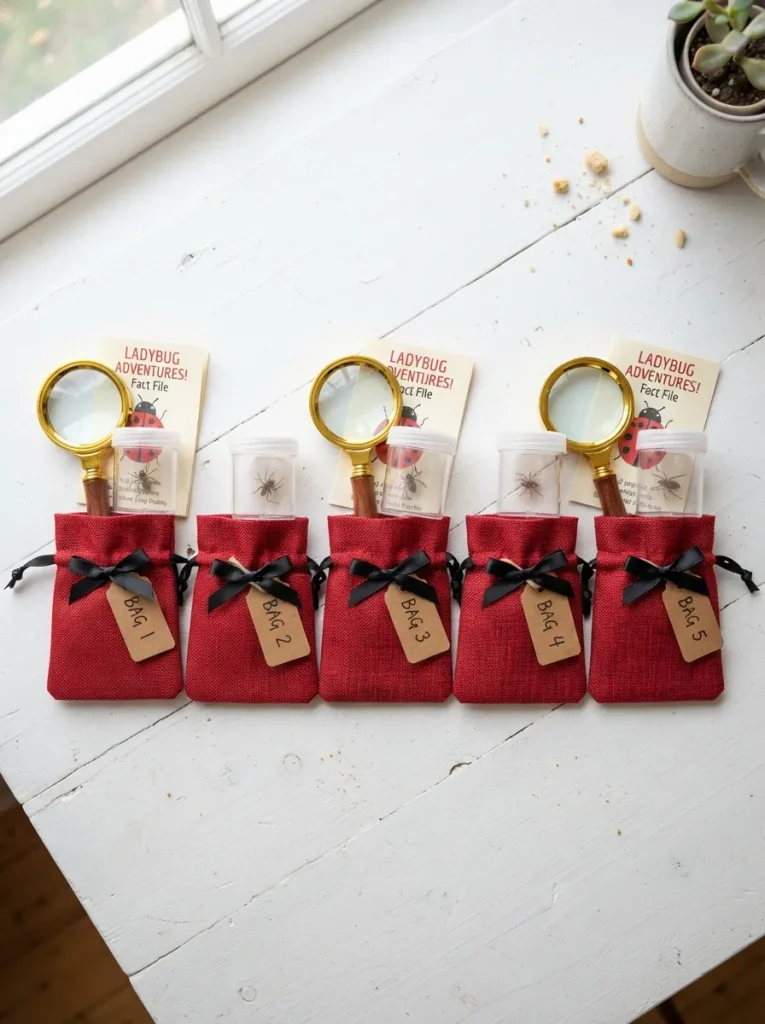
Send kids home with something they’ll use again rather than candy that’s gone in a day. A small handheld magnifying glass, a clear plastic bug-viewing jar with a few breathing holes already punched, and a folded paper card with three or four real ladybug facts covers the whole “science” theme in a bag that costs less than most character-branded favor sets.
Tie each bag closed with a length of black ribbon rather than a twist tie it reads more finished for the same handmade favor styling effort, and doubles as something the bug jar’s mesh lid can be tied down with later. Skip candy in this bag entirely; the snack table already covers that.
Pro Tip: Punch breathing holes in the bug jars before the party, not during a dozen jars takes longer than expected with a single hole punch.
| Product |
|---|
| Handheld magnifying glasses (bulk pack) |
| Clear plastic bug-viewing jars |
| Black ribbon spool |
| Small red drawstring favor bags |
How to Start Planning Your Ladybug Science Party
Start here: order the live ladybug release kit or the insect hotel first, since it’s the one element with a shipping lead time everything else on this list can be assembled from a craft store the same week.
The mistake almost everyone makes is buying dollar-store magnifying glasses. The plastic lenses distort at the edges badly enough that kids give up looking through them within a few minutes, which quietly kills the observation stations before they get going. Spend slightly more on a set with actual glass or high-grade acrylic lenses it’s the one line item worth not cutting.
Three items under $50 that stretch across the whole party: a roll of black-and-white polka dot paper tablecloth, a bag of red and black balloons, and a set of bug-shaped silicone ice cube trays for the drink table. None of these need to match the craft or habitat station supplies they just carry the color story through the rest of the setup.
A full setup, from ordering supplies to final decor placement, realistically takes one weekend: order the ladybug kit and magnifying glasses early in the week, assemble crafts and decor the day before, and set up stations the morning of. A pared-back version, indoors or for a smaller group, runs closer to $50–$60 total; a full backyard version with all eleven ideas lands closer to $130–$170 for ten kids.
Ready to Host Your Dream Ladybug Science Party?
Eleven ideas, and not one of them requires a bounce house: a color story built from real ladybug markings, a habitat station kids actually crouch over, food that doubles as decor, and a layout that keeps the mess contained to one zone. None of it has to happen at once start with the habitat station and the favor bags, and add the rest as budget and time allow.
Today’s one move: order the live ladybug release kit, since it’s the only piece with a shipping window. By party day, the yard smells like cut grass and warm cardboard favor bags, and there’s a good chance at least one kid asks to keep the magnifying glass. Save the ideas that fit your space now and come back for the rest later.
You Might Also Like
- 15 Backyard Bug Safari Party Ideas for Nature-Loving Kids
- 9 Ladybug-Themed Birthday Cake and Dessert Ideas
- 12 Rainy-Day Science Activities Kids Actually Want to Do