19 Ladybug DIY Ideas to Add Playful Charm to Your Home and Garden
Ladybug DIY projects turn one of the friendliest bugs in the garden into an easy craft theme painted rocks, planters, lanterns, and pillows that borrow its cheerful red-and-black pattern. Here are 19 ladybug ideas, ranging from a five-minute rock-painting project to a full weekend birdhouse build.
There’s something disarming about a row of spotted ladybugs lined up along a porch step or tucked into a windowsill. The color does most of the work warm red against matte black, bright enough to catch a passing glance but never loud. Kids notice them first. Adults end up keeping them around longer than they meant to. Grab a paintbrush; the first idea here takes less time than your coffee gets cold.
Quick Navigation
- Why Ladybug DIY Projects Make Such a Difference
- 19 Ladybug DIY Ideas for Every Corner of Your Home
- How to Start Your Ladybug DIY Collection
- Ready to Bring These Ladybug Ideas Home?
Why Ladybug DIY Projects Make Such a Difference
Ladybug crafts work because they’re low-cost, low-skill, and instantly recognizable nobody needs an explanation for a red dome dotted in black. The projects lean on materials most people already have some of on hand: acrylic paint, terracotta, mason glass, felt, reclaimed wood.
It’s having a moment because backyard and balcony gardening keeps growing, and a ladybug reads as a sign the garden is actually alive, not just landscaped. Renters and small-space dwellers can join in fully start with one small, portable piece, like a painted rock or a planter, before committing to anything mounted or built.
| Best starting point | A painted rock garden marker — no tools, under 15 minutes |
| Biggest impact area | Entryway, garden path, or a kid’s bedroom shelf |
| Budget to start | $10–$25 for one project; $100–$150 for a full themed set |
| Time to complete | 30 minutes for small crafts; a full weekend for the birdhouse or stool |
19 Ladybug DIY Ideas for Every Corner of Your Home
Start with these three they take under 30 minutes each and mostly use things already sitting in a junk drawer.
1. Painted Rock Ladybug Garden Markers
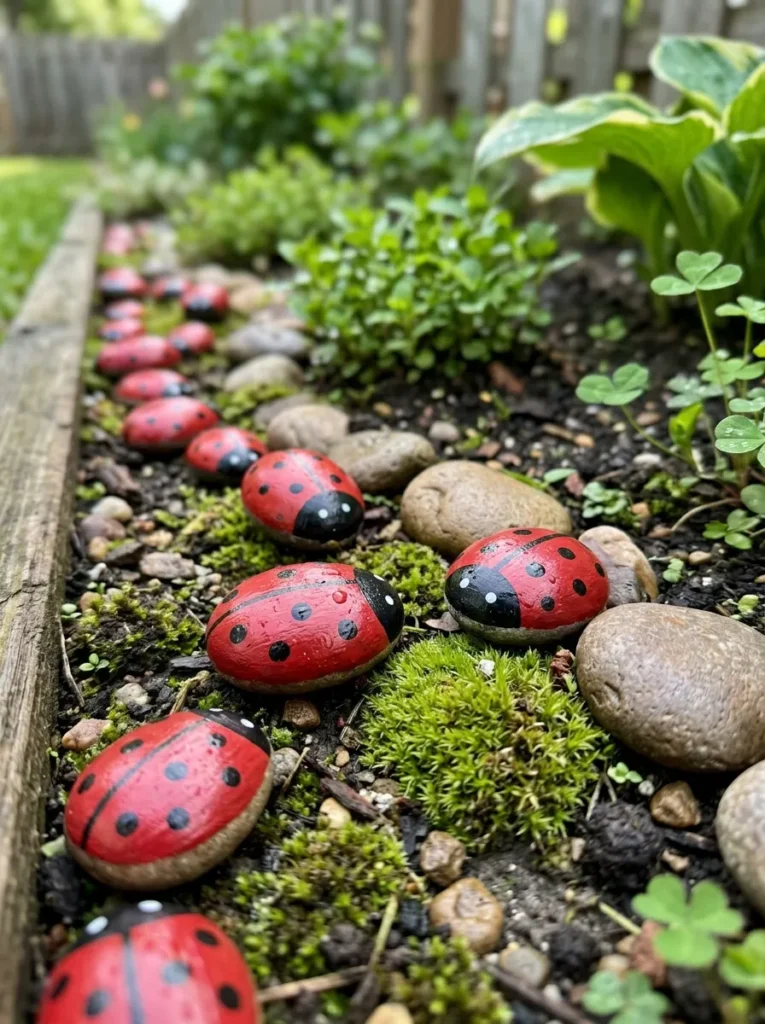
What it looks like: A cluster of smooth stones, each one a glossy red dome with hand-dotted black spots, tucked along the edge of a flower bed.
Why it works: Contrast does the heavy lifting here matte black against gloss red reads clearly from a distance, which is why garden markers need bold, simple shapes rather than fine detail.
How to copy it: Base-coat a smooth, flat stone in red outdoor acrylic, let it dry fully, then use a black paint pen (not a brush) for the dots and head a pen keeps the edges crisp where a brush wobbles.
Best for: Beginners and anyone who wants a finished project the same afternoon, no tools required.
Pro Tip: Seal outdoor rocks with two thin coats of matte spray sealant rather than one thick coat thick coats yellow and crack in direct sun within a single season.
2. Wine Cork Ladybug Fridge Magnets
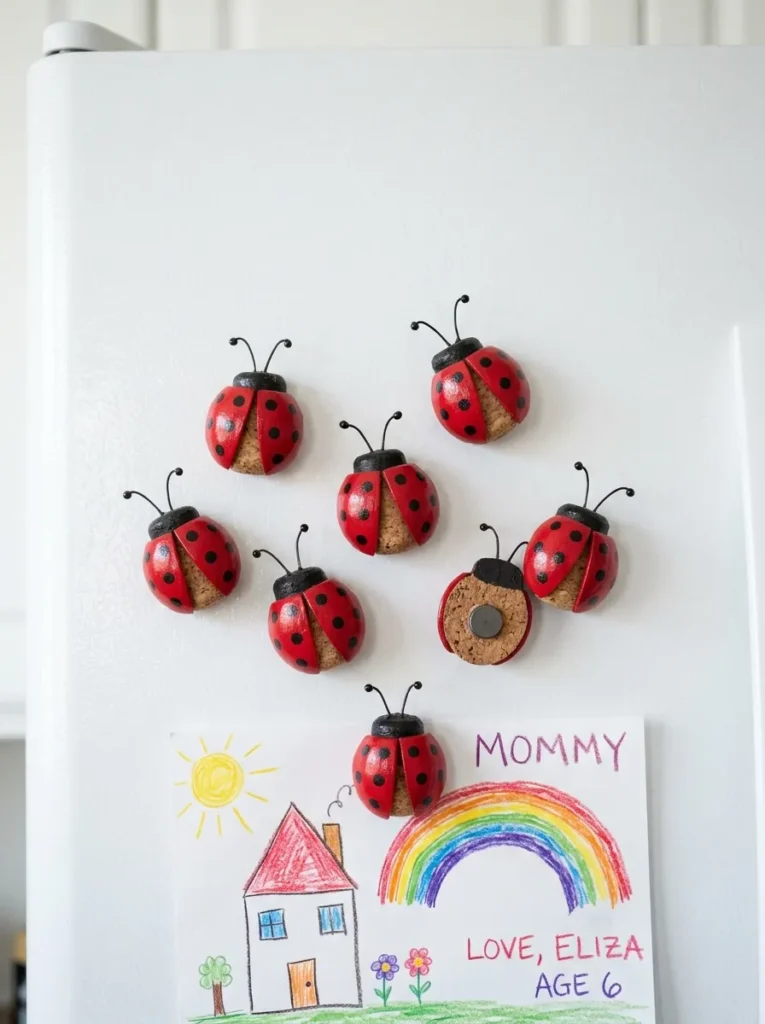
What it looks like: Half a wine cork, domed side up, painted into a tiny glossy ladybug stuck to a fridge door.
Why it works: Scale and repetition are doing the work a handful of tiny identical shapes reads as an intentional collection rather than one random craft.
How to copy it: Slice a cork in half lengthwise with a serrated knife, paint the rounded side, glue on a small adhesive magnet, and use a toothpick dipped in black paint for antennae a full brush is too thick for that detail.
Best for: Renters and anyone with a leftover cork collection and zero wall space to spare.These tiny magnets also make a sweet addition to a batch of handmade gifts for a neighbor or teacher.
Small-Space Tip: No corks on hand? Wine bars and restaurants will usually hand over a bag of used corks for free if you just ask.
3. Egg Carton Ladybug Wall Art
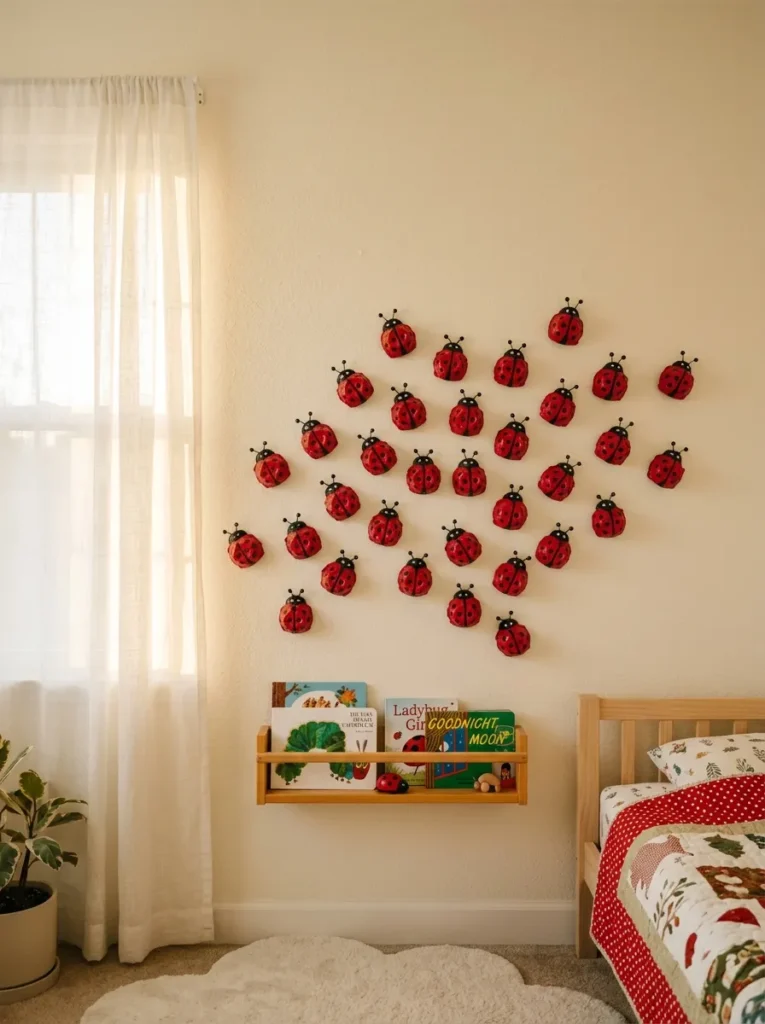
What it looks like: A scattered cluster of egg-carton domes painted as ladybugs, mounted straight onto a bedroom wall like a swarm mid-flight.
Why it works: Repetition at varying sizes and angles mimics real movement, which is the same principle behind scattered gallery walls irregular spacing reads as more alive than a perfect grid.
How to copy it: Cut individual cups from a cardboard egg carton, trim the rims smooth with scissors, paint and dot them, then mount with double-sided foam tape at slightly different heights and angles.
Best for: Parents decorating a kids’ room on a near-zero budget.It’s a nice companion project if you’re already working through a stack of easy paper craft ideas with the kids.
The next idea barely qualifies as a “craft” it’s mostly just paint and patience.
4. Painted Terracotta Ladybug Planters
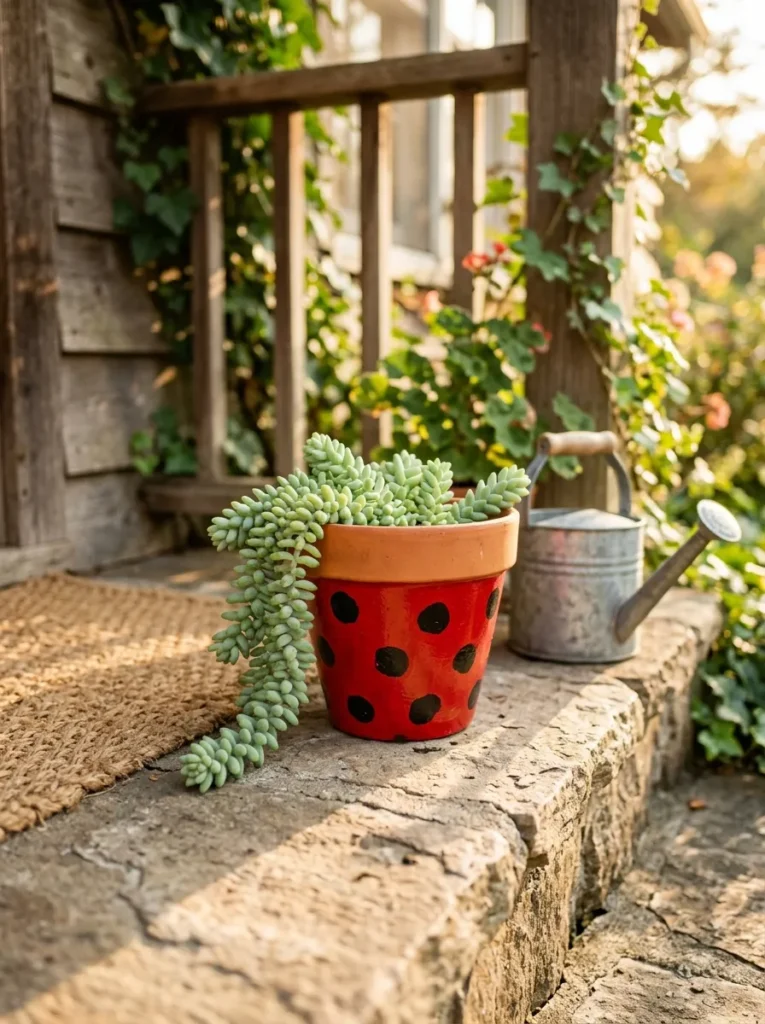
What it looks like: A classic terracotta pot, its round body painted glossy red with black spots, the raw clay rim left bare like a collar.
Why it works: Leaving the natural terracotta rim unpainted creates deliberate contrast a fully painted pot looks like a toy, but the exposed clay edge keeps it grounded as an actual planter.
How to copy it: Prime the pot with a clay-bonding primer first, since raw terracotta drinks regular paint unevenly, then apply two coats of outdoor acrylic and finish with a matte UV sealant before adding soil.
Best for: Porch and patio decorators who want something that still functions as a real planter.Pair it with a few of these modern succulent planter ideas for a mixed display that doesn’t lean too literal.
Warning: Skipping the sealant is the single most expensive mistake here an unsealed painted pot left outside will chalk, fade, and start flaking within one season, meaning a full repaint by early fall.
5. Mason Jar Ladybug Lanterns
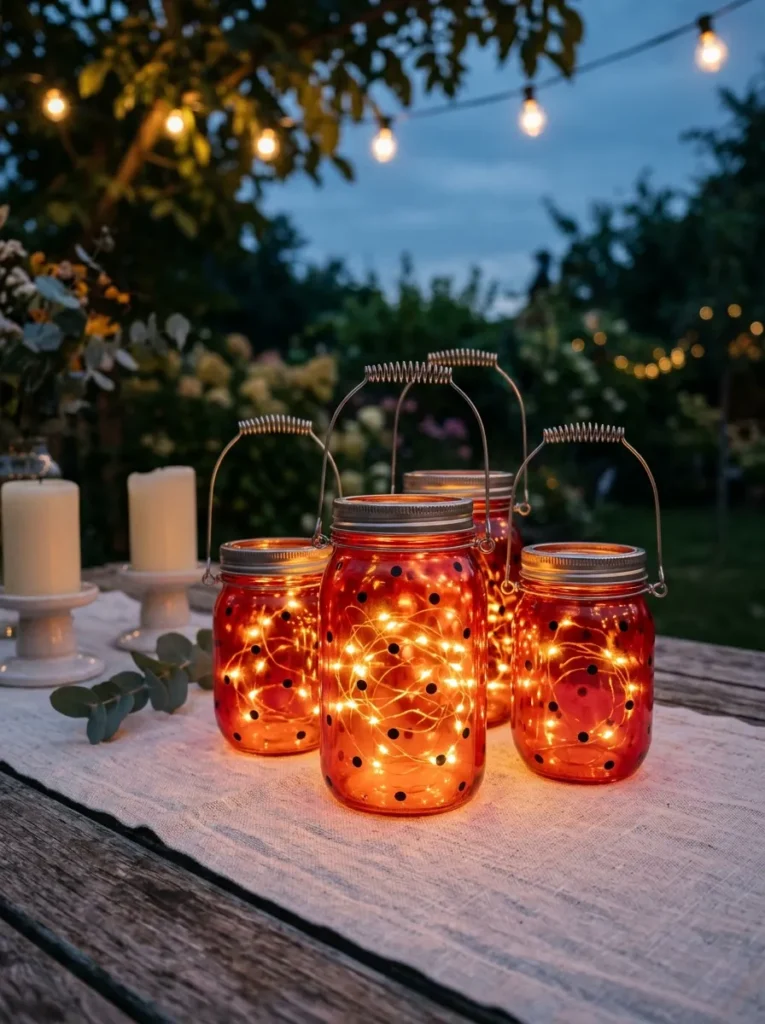
What it looks like: A mason jar glowing from within, its glass tinted translucent red with black dots painted around the shoulder.
Why it works: Using translucent glass paint instead of opaque acrylic lets light pass through, so the jar functions as an actual lantern rather than just a painted decoration that happens to sit near a light.
How to copy it: Mix a few drops of red glass stain into a clear glaze medium rather than using straight acrylic, brush it on in one thin even layer, and add battery fairy lights once fully cured.
Best for: Anyone hosting outdoor dinners who wants ambient lighting with a theme built in.If you like this technique, it’s worth browsing more mason jar crafts that use the same translucent-paint trick.
Styling Note: Warm white fairy lights (not cool white) are what make the red glass glow amber instead of looking flat and plasticky after dark.
6. No-Sew Felt Ladybug Throw Pillow
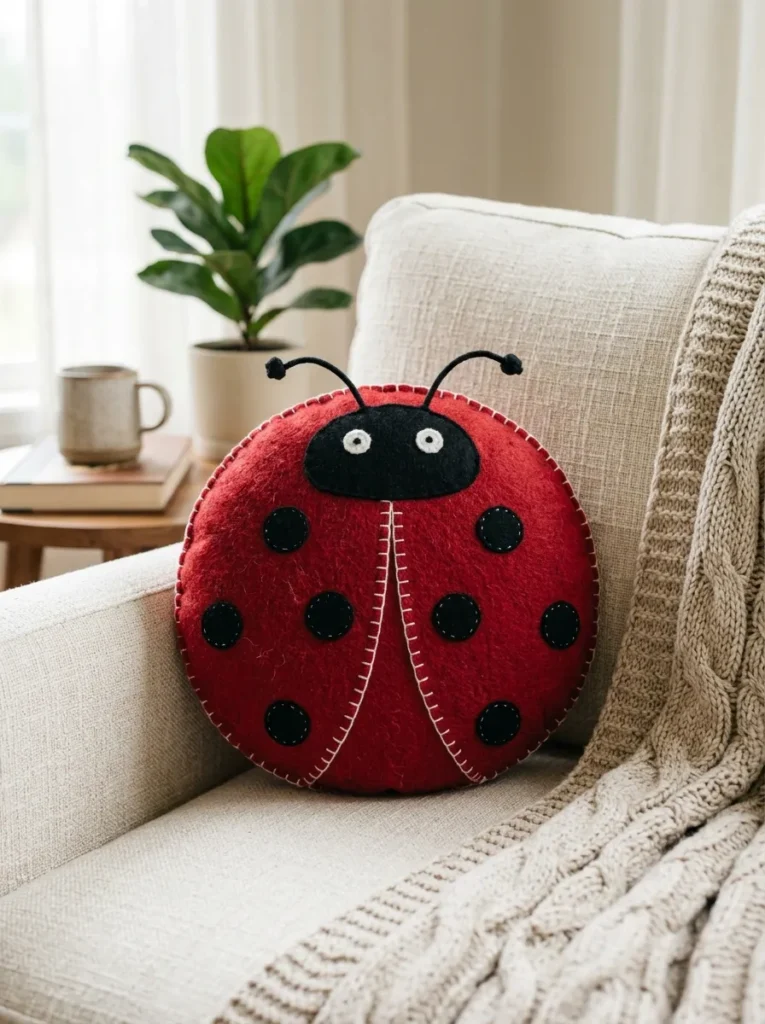
What it looks like: A round, slightly plump red pillow with a black felt head tucked at one edge, dots scattered across the body.
Why it works: Felt holds a clean die-cut edge without fraying, which is why no-sew felt projects rely on it specifically cotton or linen would need hemming to avoid unraveling.
How to copy it: Cut two matching red felt circles, glue the edges together with fabric glue leaving a small gap, stuff with polyfill, glue the gap shut, then add a black felt head and dots on top.
Best for: Beginners without a sewing machine who still want a finished textile piece.
Mistake to Avoid: Regular craft glue soaks through felt and leaves a stiff, visible ring — fabric-specific glue (or a hot glue gun on low heat) is what keeps the seam invisible.
Up next: the one project that doubles as an actual house sign.
7. Wooden Ladybug Welcome Sign
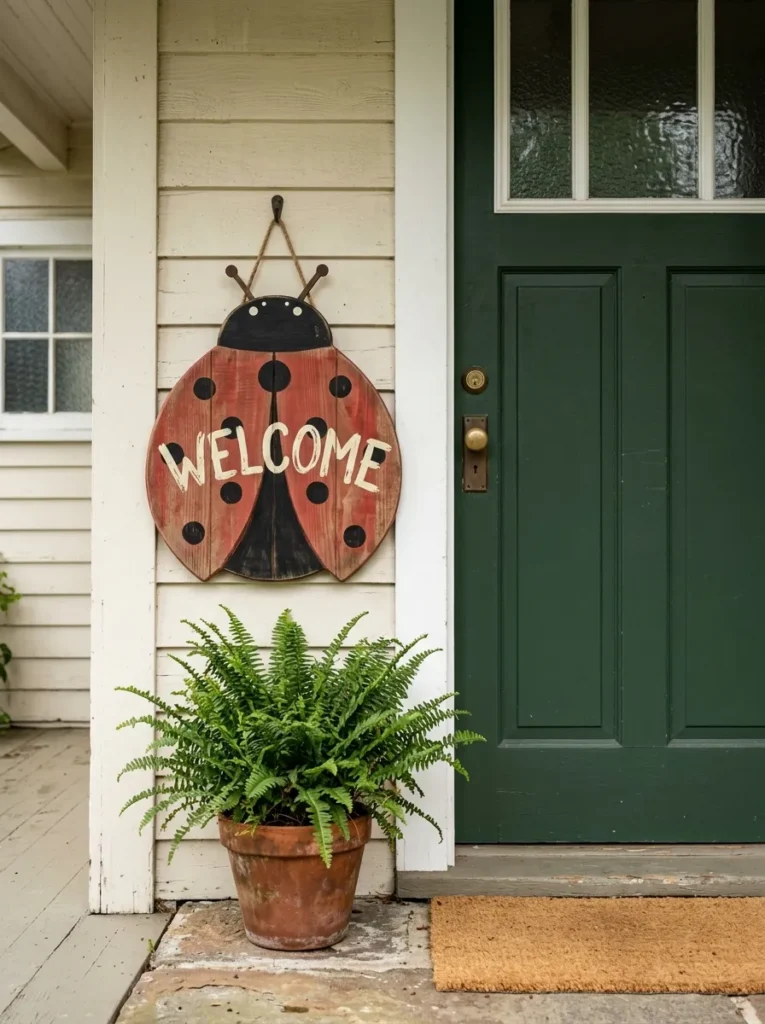
What it looks like: A rounded wood cutout, grain still faintly visible under a thin red wash, with a painted black seam splitting the wing case.
Why it works: A wash thinned paint rather than a solid opaque coat lets the wood grain show through, which is the specific technique that keeps a themed sign from reading as a mass-produced plastic decoration.
How to copy it: Thin acrylic paint with water at roughly a 1:1 ratio for the wash coat, wipe excess off with a rag while still wet so the grain stays visible, then paint the black seam and lettering once fully dry with a steady artist’s brush.
Best for: Anyone who wants a themed piece that still looks like real wood, not a toy.
Important: Untreated pine will still absorb moisture even with paint on top a coat of exterior polyurethane over the finished design is what actually prevents warping on an exposed porch.
8. Ladybug Stepping Stones
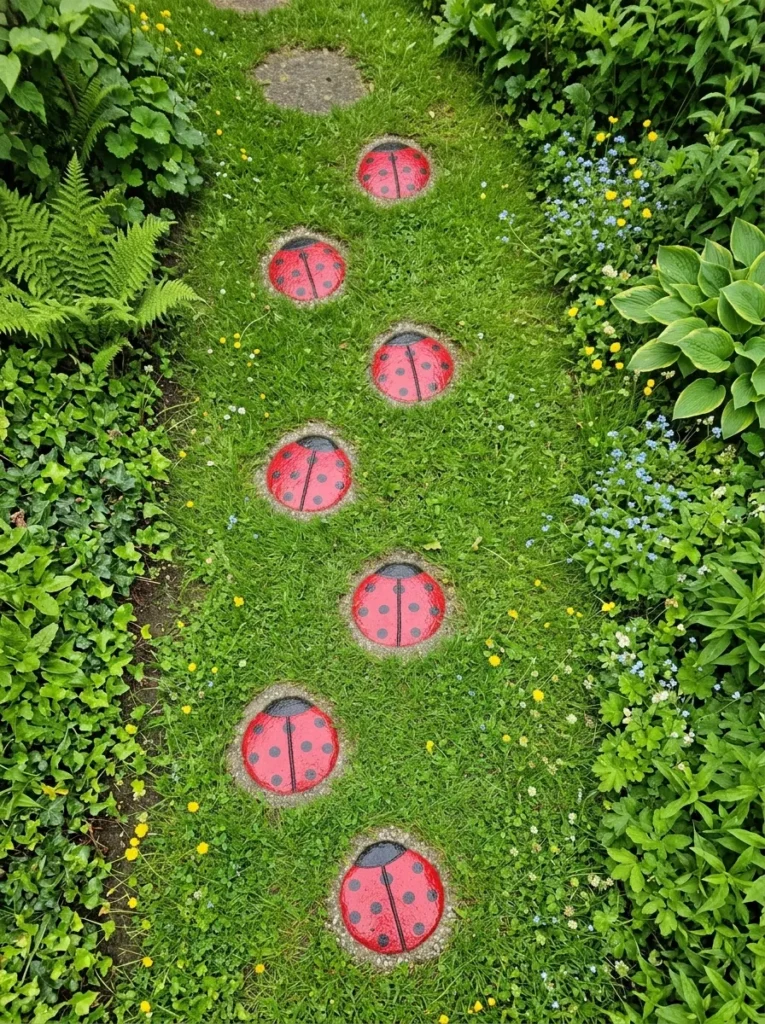
What it looks like: A row of round concrete stones set into grass, each one painted into a glossy red ladybug with a visible seam down the back.
Why it works: Repetition along a path creates a visual rhythm that pulls the eye and the foot forward, which is the same layout principle landscape designers use for any stepping stone path, themed or not.
How to copy it: Pour quick-set concrete into a round mold, let it cure fully (usually 24–48 hours) before painting, and use exterior masonry paint rather than standard acrylic since it bonds better to cured concrete.
Best for: Homeowners building out a garden path who want function and theme in one piece.
Budget Version: Pre-cast plain concrete stepping stones from a hardware store cost less than pouring your own and only need the paint step skip the mold entirely if time matters more than the project itself.
After this one, the projects move indoors for a stretch.
9. Tin Can Ladybug Balcony Planters
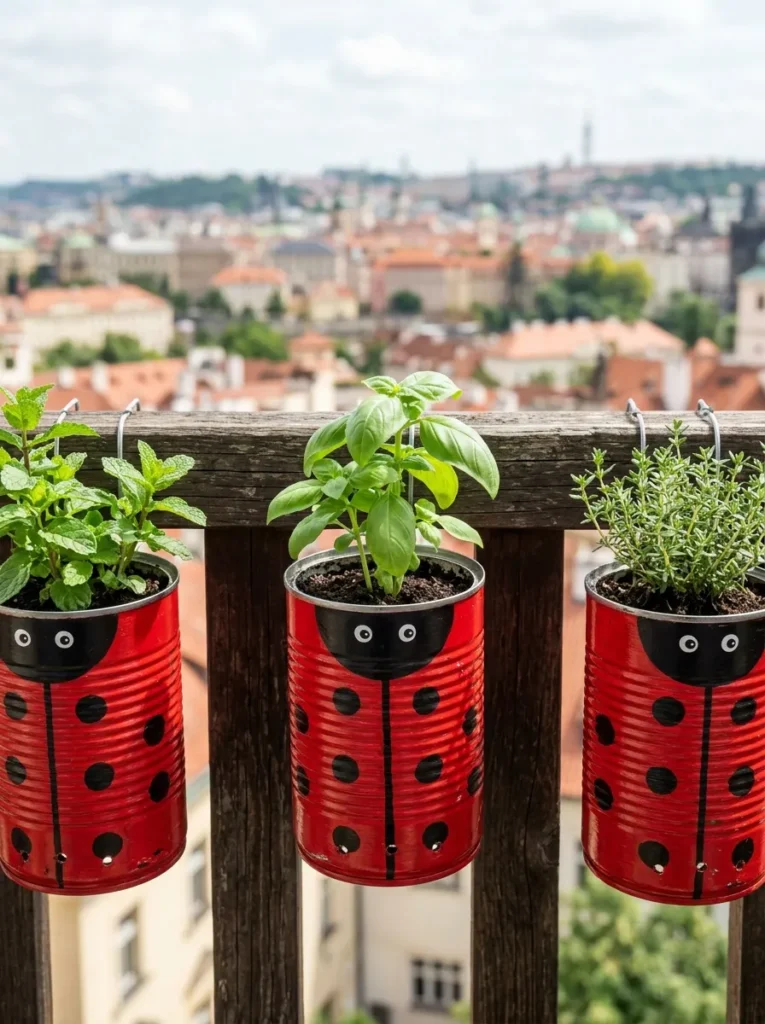
What it looks like: A row of tin cans, painted glossy red with black rims, mounted along a balcony rail and planted with small herbs.
Why it works: Mounting vertically along a rail solves the actual constraint of a small balcony floor space stays clear while the planting area effectively doubles, which is the core idea behind any rail-mounted planter system.
How to copy it: Sand the can’s exterior lightly so paint grips, drill 2–3 drainage holes in the base with a metal bit, then attach with hose clamps or a rail-mount bracket rather than adhesive, which won’t hold outdoor weight long-term.
Best for: Apartment dwellers and balcony gardeners working with almost no floor space.
What You’ll Need:
| Product |
|---|
| Galvanized tin planter cans (unpainted, drainage-ready) |
| Outdoor-rated red and black acrylic craft paint |
| Adjustable rail-mount planter brackets |
| Small herb starter plants (basil, mint, thyme) |
| Metal drill bit set for drainage holes |
Quick Win: Save actual food cans instead of buying craft tins a soaked-off label and a quick sand is the only prep difference, and it’s free.
Idea 10 skips paint entirely and goes straight to string lights.
10. Ladybug String Lights for the Patio
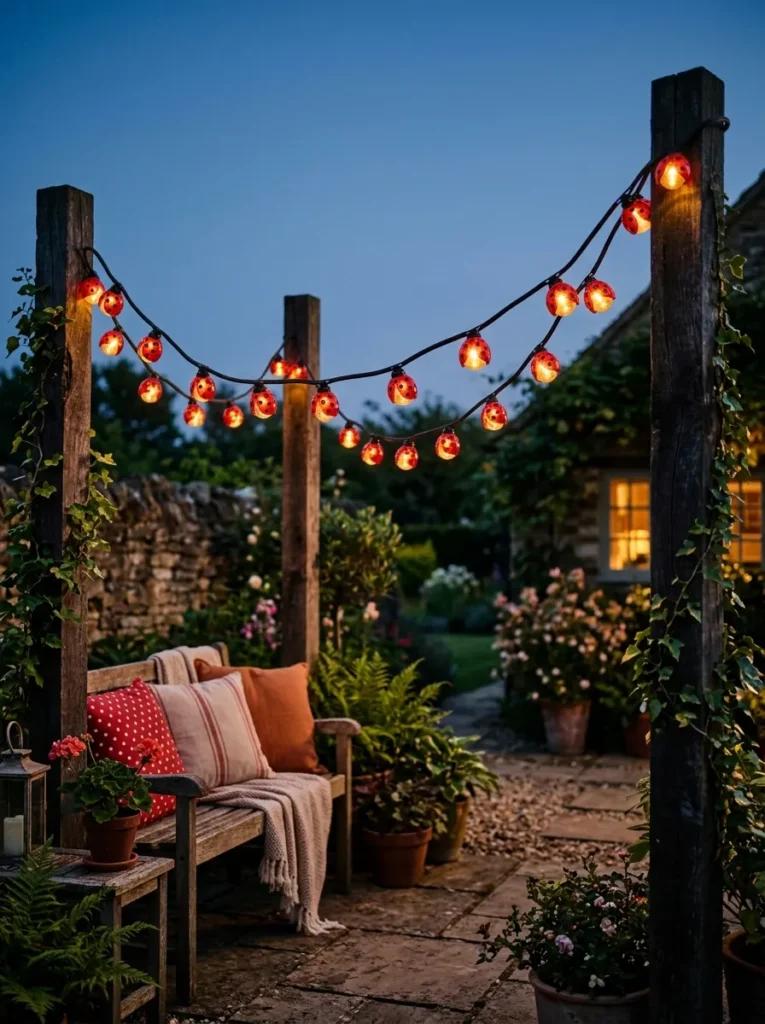
What it looks like: A string of patio lights, each bulb capped with a small red-and-black ladybug shade, strung in a loose curve overhead.
Why it works: A gentle sag in the string (not pulled taut) mimics the natural drape of garland lighting, which reads as more relaxed and intentional than a rigid straight line a small detail patio lighting guides consistently point to.
How to copy it: Buy plain felt or resin bulb covers, hand-paint or hot-glue on black felt dot appliqués, and hang the string with roughly a 10–15% sag between posts rather than pulling it fully taut.
Best for: Anyone hosting evening gatherings who wants ambient lighting with personality built in.
Pro Tip: Solar-powered string lights skip the extension cord entirely for a balcony or yard without an outlet, though they run noticeably dimmer than plug-in sets fine for ambiance, not for reading a menu by.
11. Painted Ladybug Mailbox Makeover
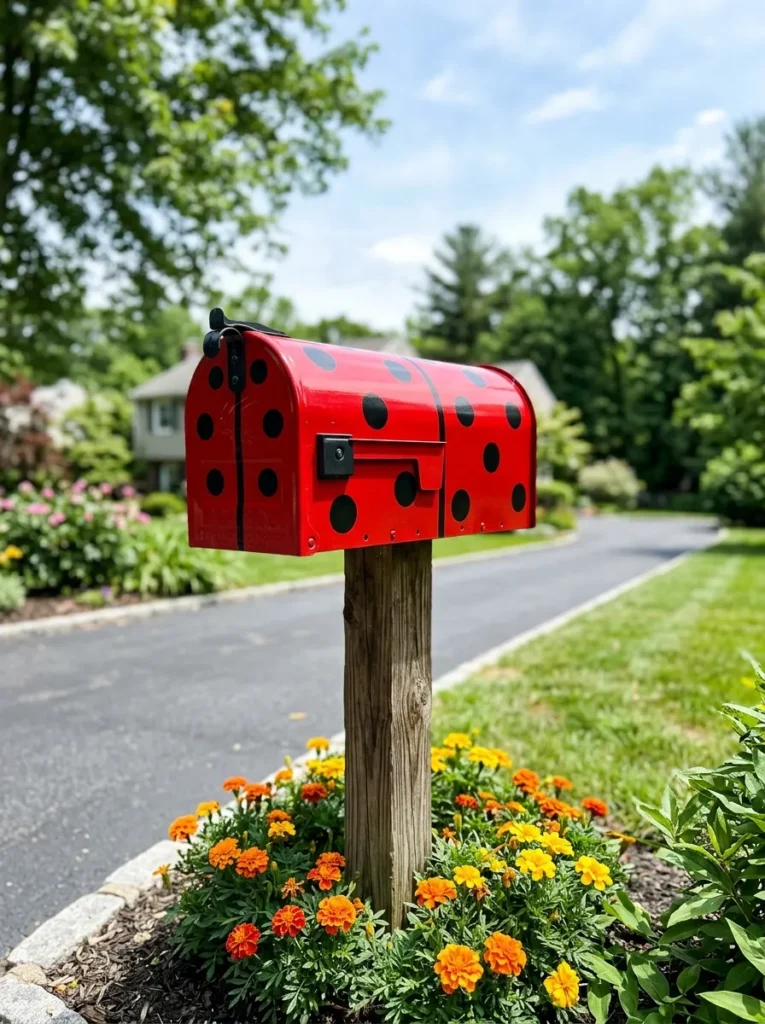
What it looks like: A standard curbside mailbox, its rounded top painted glossy red with black dots, looking like an oversized ladybug perched on a post.
Why it works: The mailbox’s natural domed shape is already ladybug-adjacent, so painting it requires almost no shape manipulation the design principle here is working with an object’s existing form instead of against it.
How to copy it: Sand off any existing rust or flaking paint first, prime with a metal-specific primer, then apply two coats of outdoor enamel enamel holds up to weather significantly better than standard craft acrylic on metal surfaces.
Best for: Homeowners wanting one bold, visible piece of curb appeal for very little cost.
Styling Note: Keep the flag and any house numbers unpainted in their original color it reads as intentional restraint rather than an unfinished project.The same idea working with a surface’s existing color rather than fighting it comes up again and again across these exterior house paint color picks too.
12. Ladybug Embroidery Hoop Wall Art
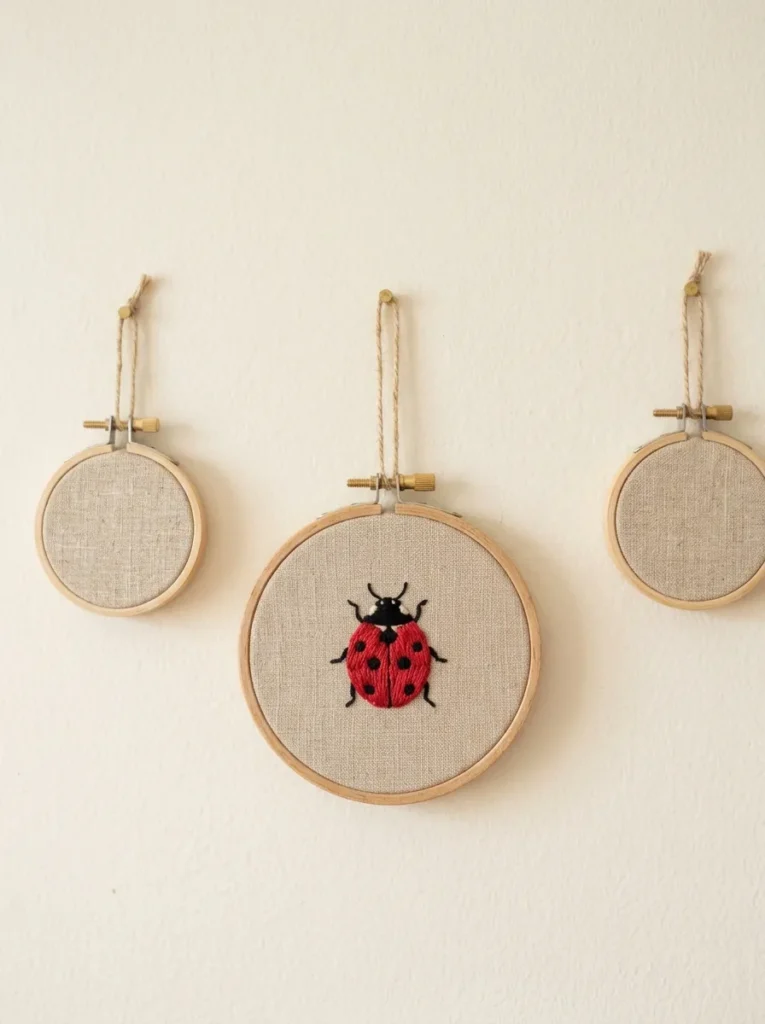
What it looks like: A small wooden hoop stretched with plain linen, a simple stitched ladybug sitting slightly off-center within it.
Why it works: Off-center placement within the hoop creates visual tension that a perfectly centered design wouldn’t it’s the same asymmetry principle used in most modern embroidery art to avoid looking like a static, dated pattern.
How to copy it: Stretch plain linen or cotton in an embroidery hoop, sketch a simple ladybug outline lightly in pencil, and fill it using satin stitch for the body and French knots for the dots French knots read as more textured than flat backstitch dots.
Best for: Crafters who enjoy slower, detail-oriented projects over quick paint jobs.
Quick Win: Iron-on embroidery transfer patterns remove the sketching step entirely for anyone unsure about freehand drawing.A finished hoop like this also makes a lovely addition to a handmade gift basket for someone who loves needlework.
Idea 13 moves from wall art to actual furniture.
13. Ladybug Garden Stool / Side Table
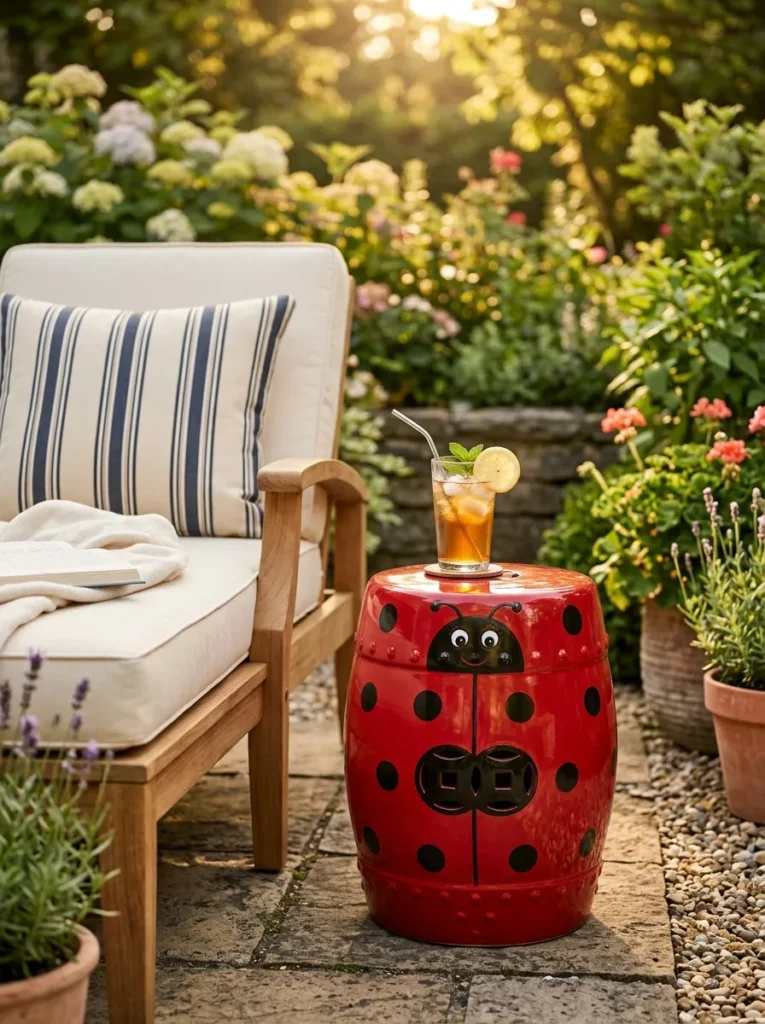
What it looks like: A round, drum-shaped stool painted glossy red with black cutout details, doing double duty as an outdoor side table.
Why it works: A single bold accent piece functions as a visual anchor for an entire seating area the same weight-and-balance principle behind any statement side table, themed or plain.
How to copy it: Use a concrete or fiberglass garden stool (not resin, which paint adheres to poorly), prime with a bonding primer, and mask off any existing cutout vents with tape before painting so they stay their natural color for contrast.
Best for: Patio decorators who want one statement piece instead of several small accents.It sits well alongside other pallet furniture ideas if you’re building out a full patio corner.
Important: Resin stools need a flexible outdoor paint, not rigid acrylic regular acrylic will crack and peel off resin within weeks since the material flexes slightly with temperature changes.
14. No-Sew Ladybug Fleece Blanket
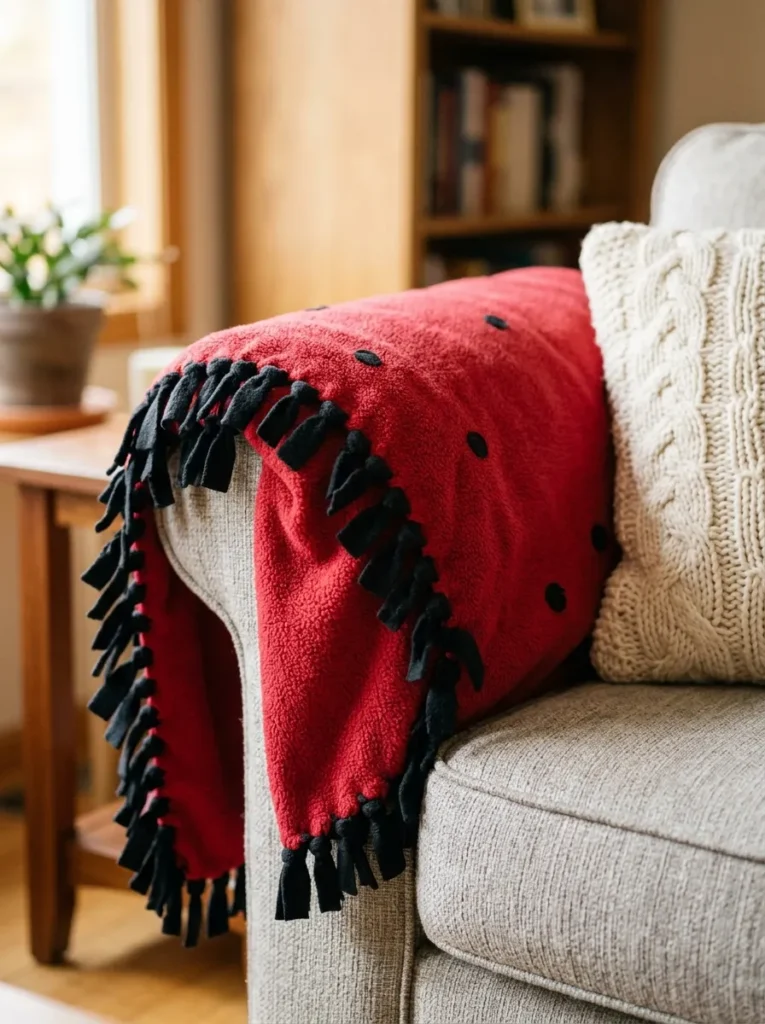
What it looks like: A soft red fleece throw with a hand-knotted black fringe border and a scattering of black felt dots across the surface.
Why it works: Fleece doesn’t fray at a cut edge, which is exactly why no-sew fringe blankets rely on it any woven fabric would need a finished hem to avoid unraveling within a few washes.
How to copy it: Layer two pieces of fleece (red and black) back to back, cut matching fringe strips around all four sides, and double-knot each pair together instead of single-knotting single knots work loose within a season of regular use.
Best for: Beginners wanting a cozy, functional project rather than a purely decorative one.This kind of unfussy, handmade comfort fits right into a vintage grandma house mood if that’s the look you’re after.
Budget Version: A single layer of red fleece with just a black-thread blanket stitch around the edge skips the fringe-tying step entirely and uses half the fabric.
My Views:
In my experience, the projects that fail aren’t the painting they’re the sealing. A ladybug planter or stepping stone left outside without a UV-rated topcoat will chalk and start flaking within a single summer season; two thin coats of matte spray sealant, applied a day apart, consistently outlast one thick coat brushed on all at once.
15. Wire Ladybug Garden Topiary
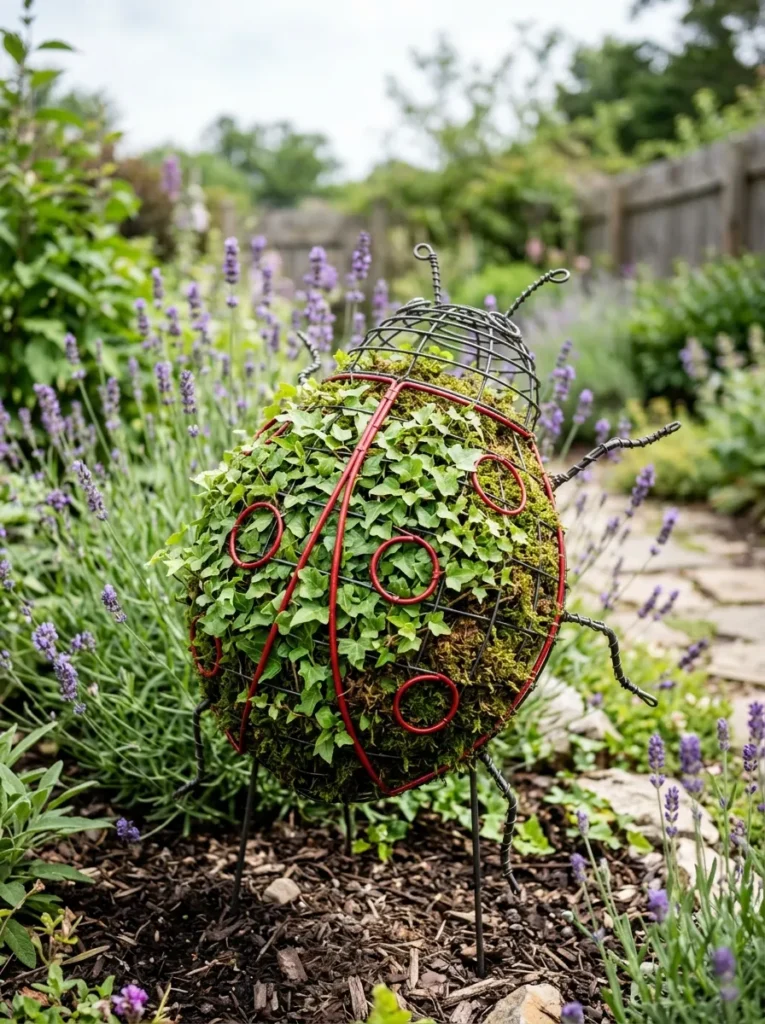
What it looks like: A wire frame shaped like a ladybug, packed with moss and trailing ivy, standing upright in a garden bed like a living sculpture.
Why it works: Negative space between the wire ribs and the greenery lets the shape read clearly even from a distance overpacking the frame with foliage is the single fastest way to lose the silhouette entirely.
How to copy it: Bend heavy-gauge garden wire into a domed ladybug outline, line the interior with sphagnum moss to hold soil, plant small ivy starts directly into the moss, and wrap thin red-painted wire along the wing seam for definition.
Best for: Gardeners comfortable with a bigger structural project and some patience while the ivy fills in.
Mistake to Avoid: Planting full-grown ivy instead of small starts overcrowds the frame immediately and hides the shape for good smaller starts fill in gradually while keeping the silhouette visible.
Idea 16 goes back to something small enough for an apartment window.
16. Ladybug Wind Chimes

What it looks like: A cluster of small painted wooden discs, each a tiny red ladybug, dangling at staggered heights from a porch overhang.
Why it works: Staggered lengths rather than a uniform row let the pieces catch different air currents and move independently, which is what actually produces sound and motion a wind chime with all pieces at one length barely moves.
How to copy it: Cut small wooden discs, paint and seal them, drill a hole at the top of each, and string them at varying lengths (roughly 2-inch increments) from a horizontal dowel using clear fishing line so the wood appears to float.
Best for: Porch decorators who want gentle movement and sound, not just a static piece.
Styling Note: A small metal washer strung at the very bottom center acts as a subtle wind-catcher and keeps the whole piece from tangling in a breeze.
17. Ladybug Balcony Rail Planter Boxes
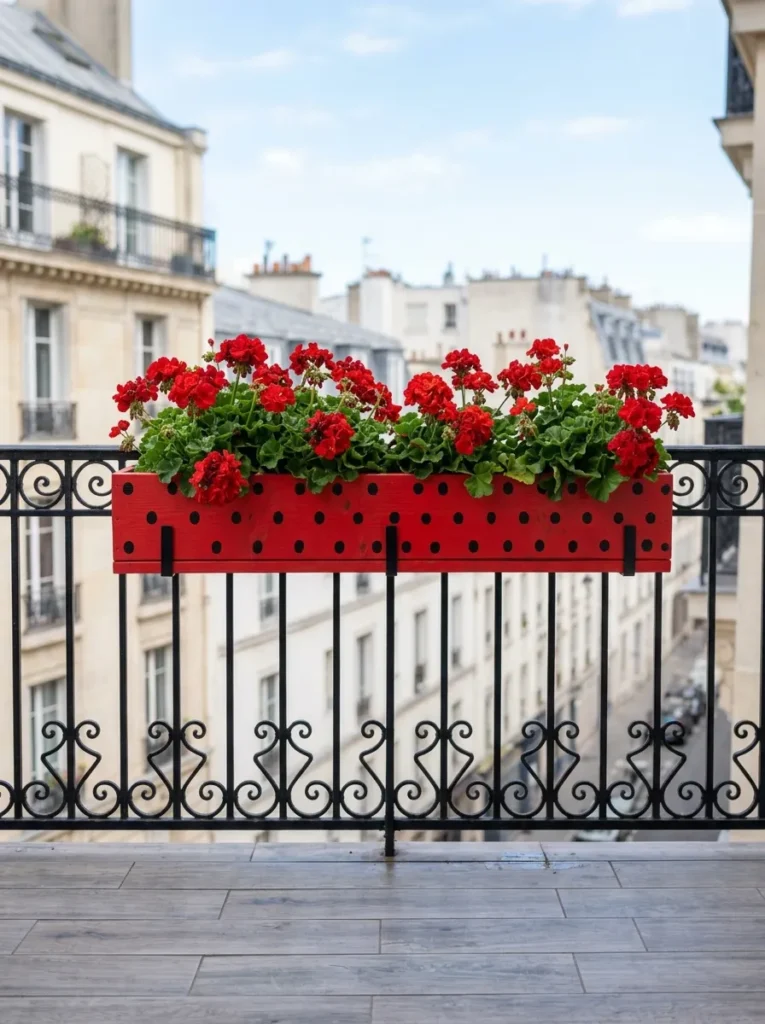
What it looks like: A long rectangular planter box mounted along a balcony rail, its front panel painted with a simple black dot pattern, spilling over with red flowers.
Why it works: Keeping the ladybug motif to a flat, repeating dot pattern rather than a literal bug shape lets the box still function visually as a planter first a common mistake with themed furniture is over-committing to the literal shape.
How to copy it: Build or buy a cedar rail box rated for the actual width of the railing, drill drainage holes before painting, and stencil evenly spaced black dots across the front rather than freehanding them for a cleaner repeating pattern.
Best for: Renters who need a planting solution that clips on and off without permanent mounting.
Small-Space Tip: Choose a box rated for the exact rail width and weight limit before buying flowers a box that’s even slightly too wide sits crooked and stresses the mounting clips over time.
Last two one’s a build, one’s for the bedroom.
18. Ladybug Birdhouse
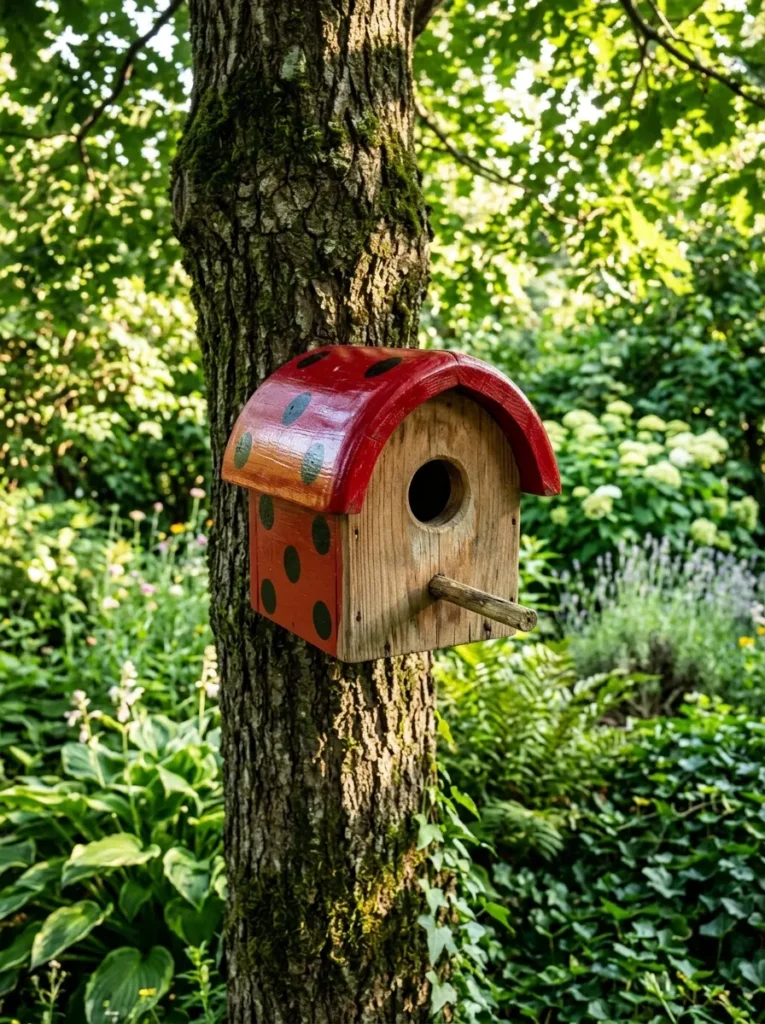
What it looks like: A simple wooden birdhouse, its domed roof painted glossy red with black spots, mounted at an angle against a tree trunk.
Why it works: Leaving the entrance hole and the surrounding wood unpainted keeps the actual functional part of the birdhouse visually distinct from the decorative shell, which matters since paint fumes and texture right at the entrance can discourage nesting birds.
How to copy it: Build or buy an unfinished wooden birdhouse kit, paint only the roof and upper body in red and black, leave the entrance hole and perch in raw or lightly oiled wood, and mount facing away from the prevailing wind direction.
Best for: Garden hobbyists wanting a themed piece that also serves actual wildlife.
Before You Mount the Birdhouse:
- [ ] Sand all edges smooth, especially around the entrance hole
- [ ] Paint and fully seal the body before attaching the roof
- [ ] Drill 2–3 small drainage holes in the floor
- [ ] Mount at least 5 feet up, facing away from prevailing wind
- [ ] Clean out the box once a season between nesting periods
What You’ll Need:
| Product |
|---|
| Unfinished wooden birdhouse kit |
| Exterior-grade red and black paint |
| Matte UV-protectant wood sealant |
| Tree-mount bracket or wood screws |
| Fine sandpaper (150–220 grit) |
19. Ladybug Nightlight for Kids’ Rooms
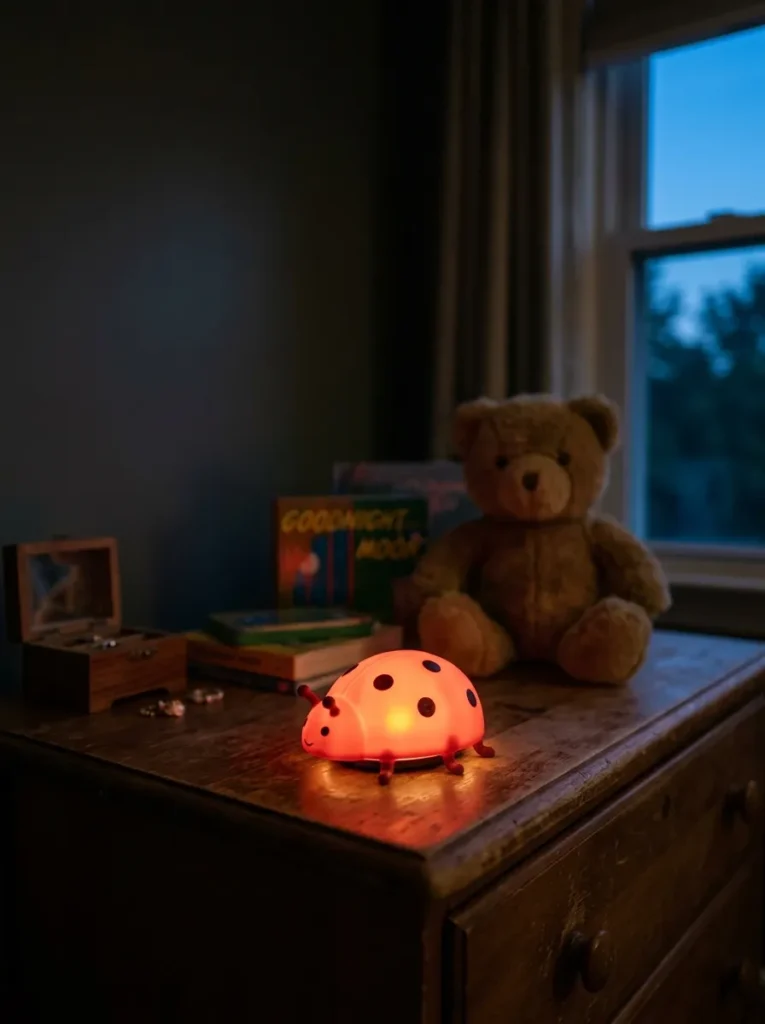
What it looks like: A small dome-shaped nightlight glowing soft amber-red from within, black dots visible against the illuminated shell.
Why it works: A warm-toned glow rather than a cool white one is what actually reads as calming in a dark room cooler light tends to feel clinical and can make it harder for kids to settle, which is why most nightlight guides specifically recommend warm bulbs for bedrooms.
How to copy it: Use a battery LED puck light as the base, cover it with a translucent red silicone dome or frosted plastic shell, and hand-paint small black dots directly onto the shell’s exterior with enamel paint made for plastic.
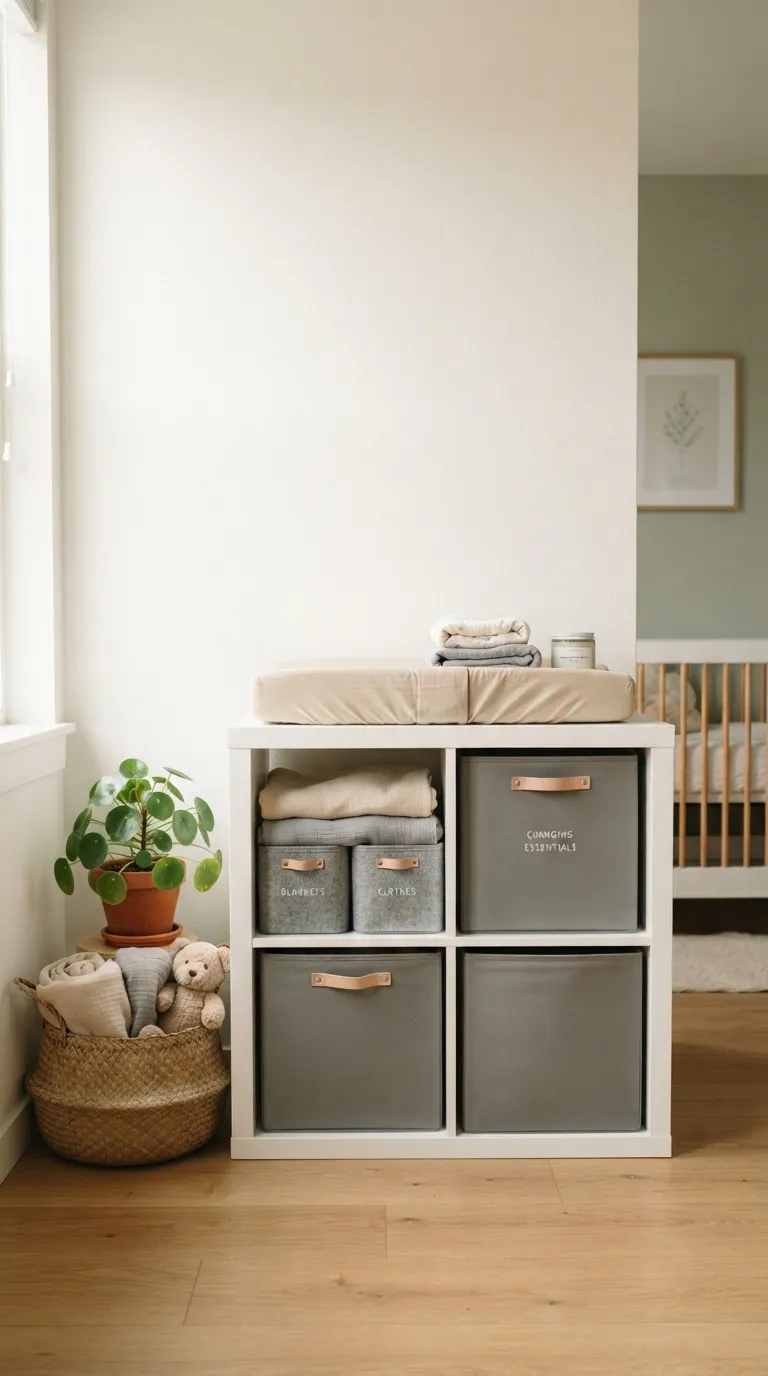
Best for: Parents decorating a themed kids’ room who want something functional, not just decorative.It’s an easy add-on once you’ve already tackled the bigger nursery storage projects in the room.
Pro Tip: Stick with a low-wattage warm LED puck (under 1 watt) anything brighter turns a cozy nightlight into something too bright to actually sleep near.
How to Start Your Ladybug DIY Collection
What I’ve found with real ladybug projects is that painted rocks are the right place to start, not the birdhouse. A dozen smooth river rocks, a base coat of matte red acrylic, and a paint pen for the dots gets a finished project done the same afternoon momentum matters more than ambition on the first attempt.
The most common mistake is skipping the sealant on anything that lives outside. Acrylic paint chalks and fades within a season without a UV-rated matte or satin topcoat; two thin brushed-on coats cost about $8 total and hold up for years longer than an unsealed piece.
Three items under $50 that make an immediate difference: a two-pack of wire-handle mason jars for lanterns, a yard of black and red craft felt for no-sew accents, and a set of fine-tip paint pens for dot detail a brush can’t manage cleanly.If your supplies have already outgrown a kitchen drawer, a few of these she shed craft room ideas are worth a look too.
A single painted rock or cork magnet takes under 30 minutes and costs less than $10. A full themed corner planters, lanterns, and a short stepping stone path runs closer to $120–$180 and is realistic over one weekend; the birdhouse or garden stool is really the only build worth spreading across two.
Ready to Bring These Ladybug Ideas Home?
Between the painted rocks, the felt pillows, the mason jar lanterns, and the full birdhouse build, these 19 ladybug ideas cover a fair amount of color, texture, and honest trial and error. None of it needs to happen in one weekend a single painted rock on a windowsill is a complete project, not a first draft.
Start today with whatever’s already in the house: a smooth stone from the yard and red paint already sitting in a drawer. The best ladybug projects feel a little unserious in a good way, like the garden’s in on the joke. Pin whichever ones made you smile twice those are the ones that actually get built.