23 Crochet Wall Hangings That Turn Empty Walls Into Handmade Focal Points
A crochet wall hanging is just yarn worked into a shape sturdy enough to hang no frame, no nails, no fuss, and it fills a blank wall the same afternoon you start it. This roundup breaks down 23 crochet wall hangings anyone can actually make, from ten-minute mini pieces to statement-sized panels.
There’s a specific kind of satisfaction in walking past a wall you made something for texture where there used to be flat paint, movement where there used to be nothing. Yarn catches light differently than anything printed or framed; fringe shifts when a door opens, chunky stitches throw soft shadows by late afternoon. None of these projects need a sewing machine, a loom, or years of practice just hands, a hook, and an evening. Grab one that fits your grip and let’s get into it.
Jump To
- Why Crochet Wall Hangings Make Such a Difference
- 23 Crochet Wall Hangings to Make This Week
- How to Start Making Crochet Wall Hangings
- Ready to Fill Your Walls With Crochet?
Why Crochet Wall Hangings Make Such a Difference
Crochet wall art rides the same fiber-craft wave that brought macramé back, but crochet builds denser texture and cleaner color-blocking than knotting ever could. The best pieces mix unbleached cotton or jute with a chunky wool accent for contrast.
It’s having a real moment because handmade decor reads as intentional in a way printed art doesn’t and it’s one of the cheapest ways to fill vertical wall space. Small apartments benefit most: one 12-inch piece anchors a whole gallery wall without taking up floor space. Start small before going oversized.
| Best starting point | An 8–10 inch mandala circle in worsted-weight cotton |
| Biggest impact area | Above a sofa, bed headboard, or empty stairwell wall |
| Budget to start | $8–$25 for a hook and one skein |
| Time to complete | 1–3 hours for a small piece; a full weekend for a statement panel |
23 Crochet Wall Hangings to Make This Week
1. Two-Tone Mini Mandala Circle
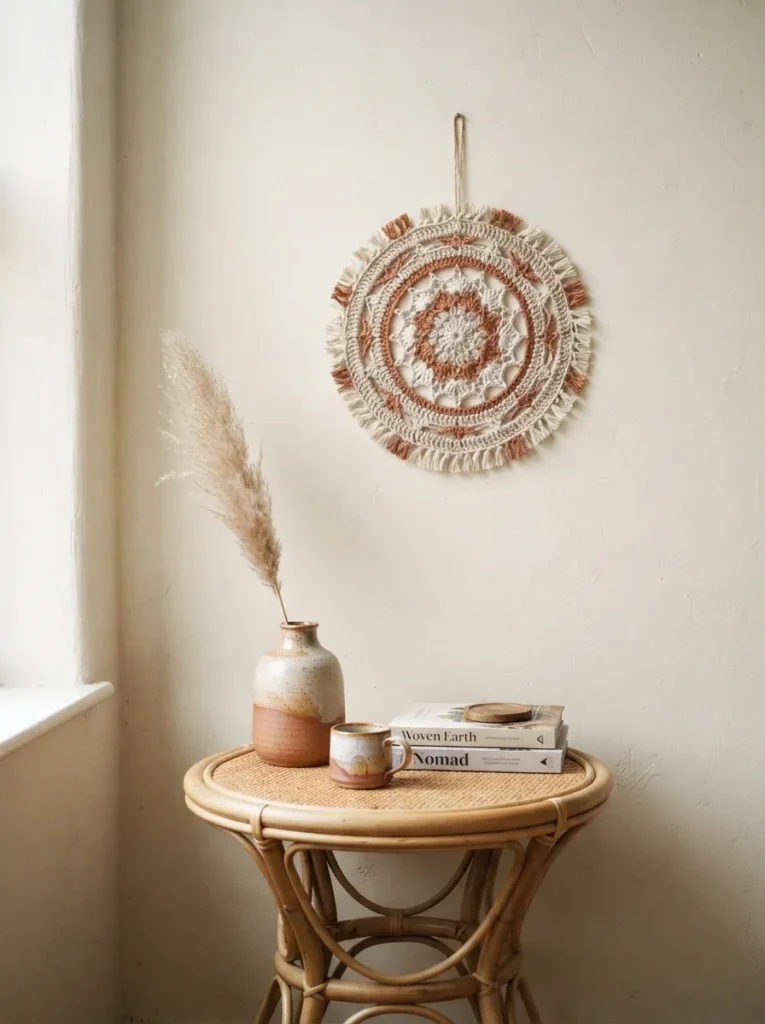
What it looks like: Two flat rounds of color spiraling outward, still small enough to fit in one hand.
Why it works: Concentric rounds create visual rhythm through repetition, and swapping color every few rounds keeps the eye moving without adding any real difficulty.
How to copy it: Work single crochet in the round starting with a magic ring, switching yarn color every 3–4 rounds, and finish with a simple 6-inch fringe knotted directly into the last round’s stitches.
Best for: Total beginners who want a finished piece in one sitting if hooks and yarn still feel intimidating, easy button crafts for adults are a gentler entry point.
Pro Tip: Count your stitches at the end of every round for the first four rounds only after that, the mandala naturally corrects itself as long as you’re not adding extra stitches.
2. Raw Jute Fringe Strip
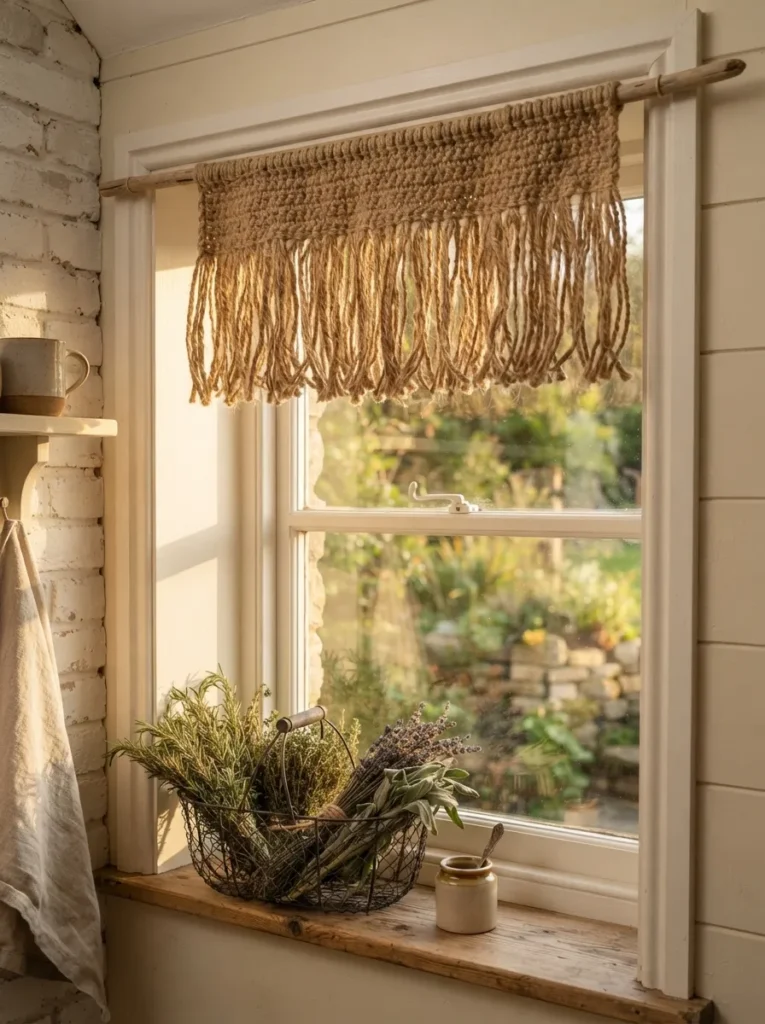
What it looks like: A narrow, textured band of chunky stitches with long fringe trailing below.
Why it works: Jute’s rough, uneven fiber does the visual work on its own no color-blocking or shaping needed, which makes texture the entire design principle here.
How to copy it: Crochet a simple 4-row double crochet strip in jute twine, then cut 10-inch strands and loop-knot them along the bottom edge for fringe.
Best for: Renters who want texture without committing to a large piece.
Budget Version: One ball of jute twine (under $6) makes two full strips enough for a matching pair flanking a mirror.
3. Mini Granny Square Cluster
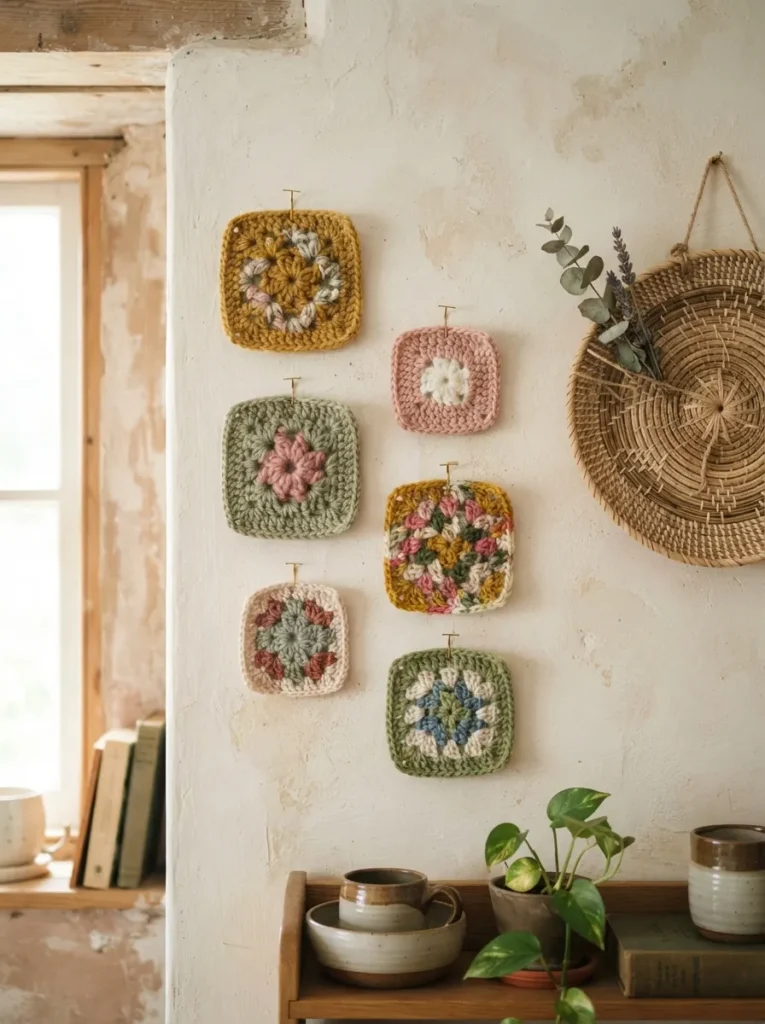
What it looks like: Small squares scattered in a loose grid, each in a different color combination.
Why it works: Repetition of shape with variation in color reads as curated rather than chaotic the same principle behind a mismatched gallery wall.
How to copy it: Work five classic granny squares in leftover scrap yarn, block them flat under a damp towel overnight, then pin each one directly to the wall with small upholstery pins.
Best for: Crafters with a scrap yarn stash and no clear plan for it yet a proper craft closet setup keeps leftover skeins from taking over a shelf.
Warning: Skipping the blocking step is the mistake that ruins this idea unblocked granny squares curl at the corners and never sit flat against a wall no matter how you pin them.
The next idea trades tiny scraps for one long, deliberate gradient worth the extra hour it takes.
4. Sunset Ombré Circle Panel
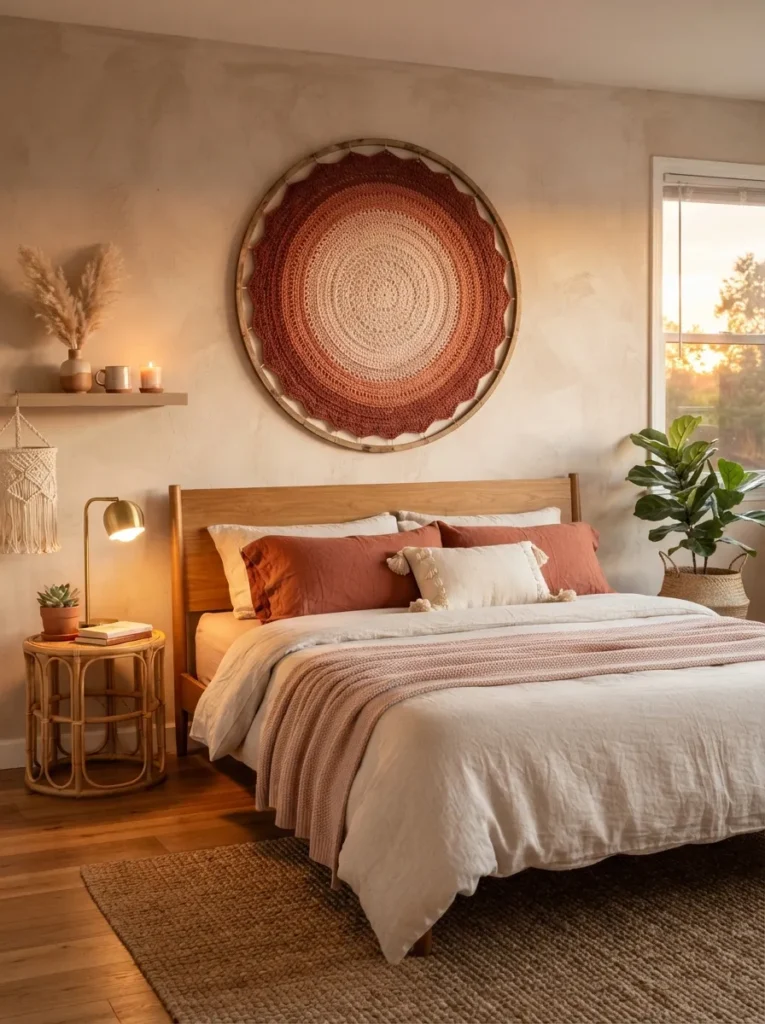
What it looks like: One large circle that shifts color gradually from center to edge, like a sunset flattened into rounds.
Why it works: A true color gradient relies on incremental hue shifts rather than hard color blocks, which is why it reads as sophisticated instead of crafty.
How to copy it: Choose five yarns in the same color family from darkest to lightest, crochet 3–5 rounds per shade in double crochet, and blend transitions by alternating two colors for one round between shades.
Best for: Intermediate crocheters ready to plan a color story instead of grabbing whatever’s on hand.
Styling Note: Hang it slightly off-center above the headboard rather than dead-center a small asymmetry makes a large circular piece feel considered instead of accidental.
5. Chunky Merino Wool Statement Tapestry
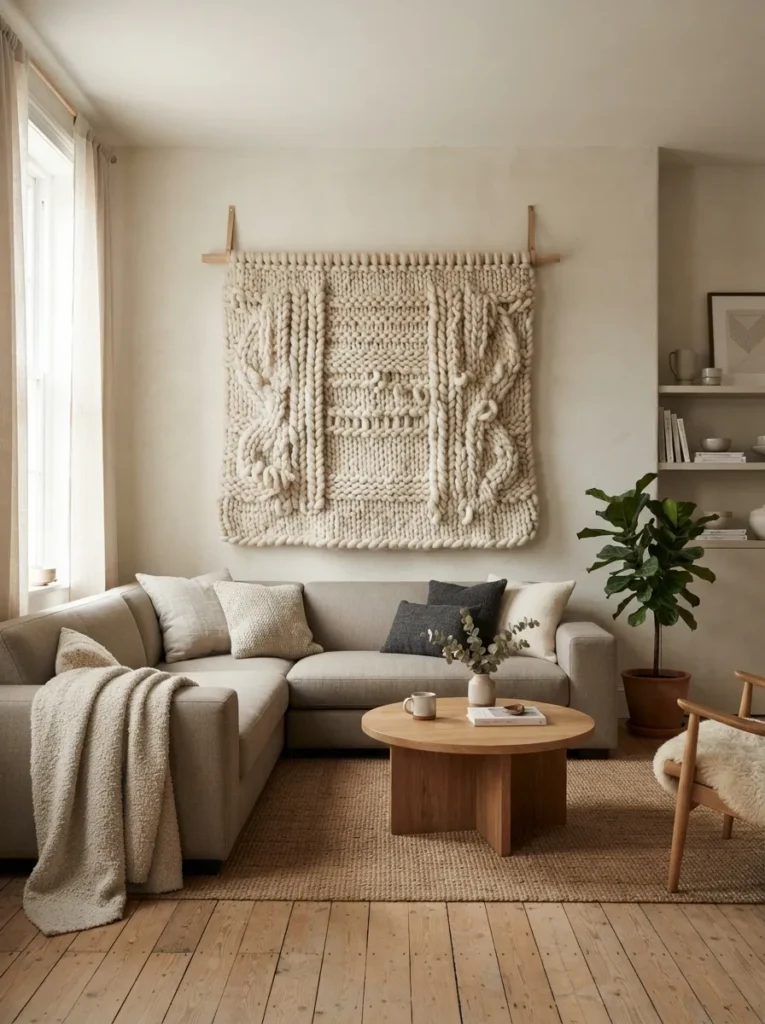
What it looks like: Thick, pillowy stitches stacked into a wide rectangle with visible dimension between rows.
Why it works: Chunky merino creates real physical depth on the wall, giving the piece shadow and texture that flat cotton pieces can’t produce at this scale.
How to copy it: Use a 12mm hook with super-bulky merino roving, work basic double crochet rows for 18 inches, and mount on a 24-inch dowel so the weight distributes evenly.
Best for: People decorating a large, empty wall who don’t want to hang multiple small pieces.
6. Cascading Fringe Waterfall Panel
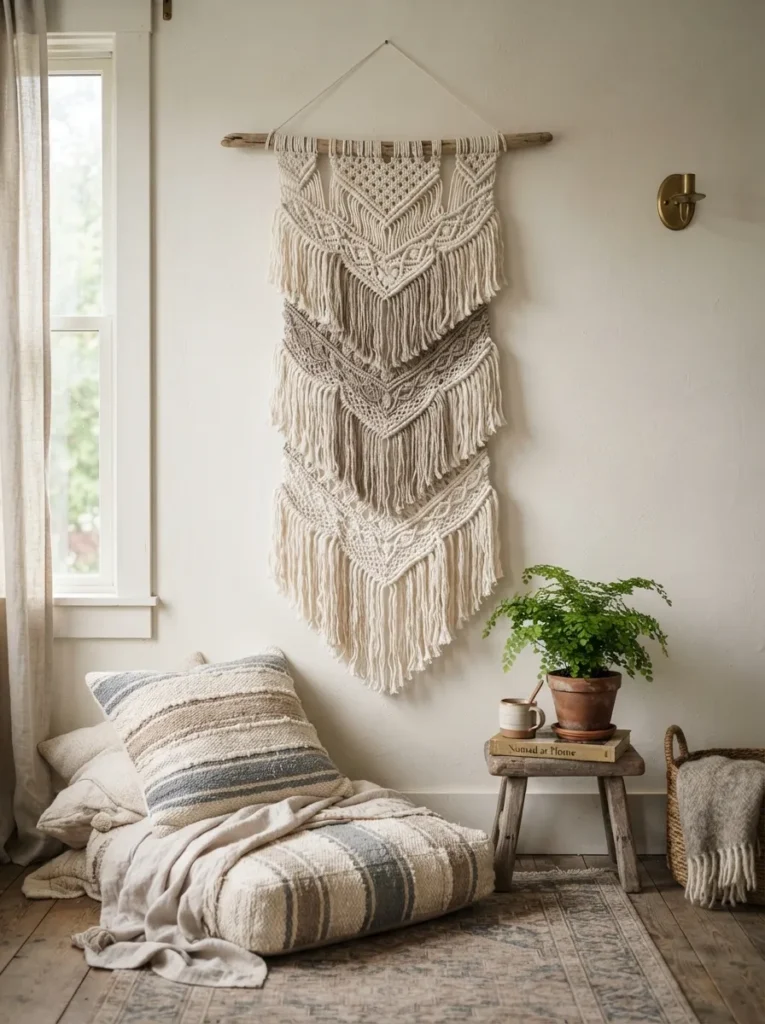
What it looks like: Three horizontal bands of stitches, each releasing a new layer of fringe that falls past the one above it.
Why it works: Staggering fringe lengths creates visual movement without any actual motion the eye reads it as flowing even in a still photograph.
How to copy it: Crochet three separate 6-inch double crochet bands, stack and stitch them together at the top edge, then attach progressively longer fringe (6, 9, and 12 inches) to each tier.
Best for: Crafters comfortable assembling multiple pieces into one finished hanging.
Quick Win: Pre-cut all your fringe strands to their final lengths before attaching any of them it’s faster than trimming after the fact and prevents uneven edges.
Coming up: two celestial shapes most people assume need a pattern chart they don’t.
7. Celestial Sun & Moon Duo
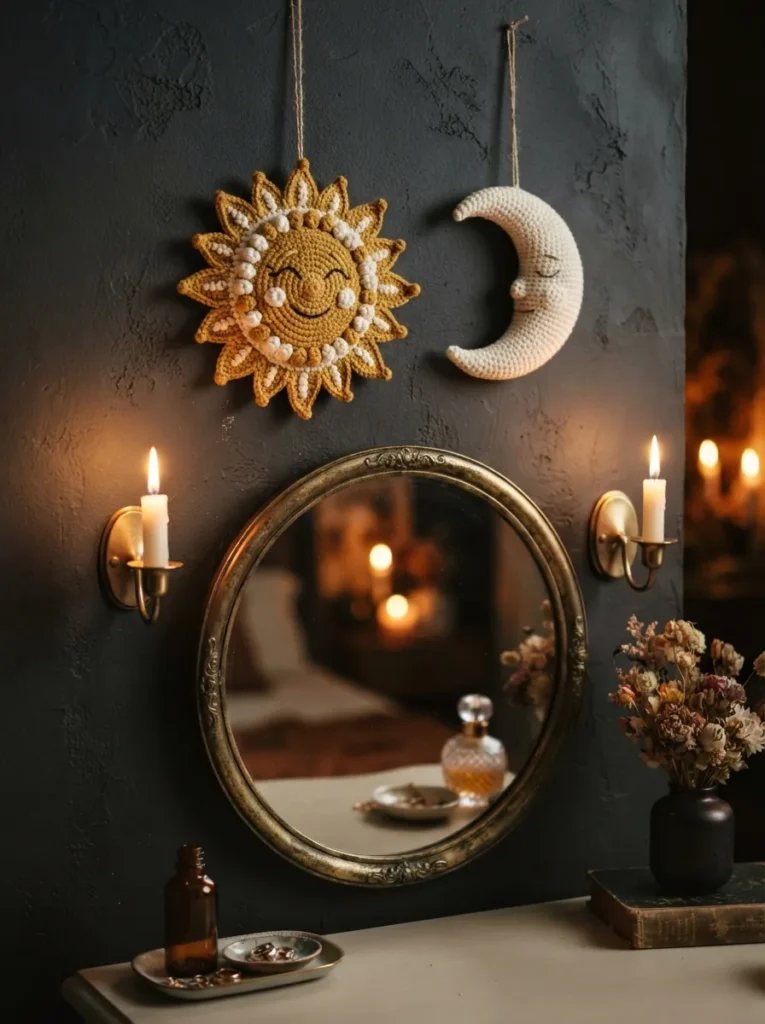
What it looks like: A round sunburst shape paired with a slim crescent, hung at slightly different heights.
Why it works: Pairing two related but visually distinct shapes creates a mini focal point without needing a large single piece the negative space between them does real design work.
How to copy it: Crochet the sun as a mandala with raised front-post double crochet rays, and the moon as two overlapping half-circles seamed together, leaving one edge open for shape.
Best for: Anyone styling a small, awkward wall gap that a single square piece won’t fit.
Important: Front-post stitches (the ones that give the sun’s rays their raised texture) use more yarn per stitch than standard double crochet buy an extra half-skein so you don’t run short mid-project.
8. Dowel-Mounted Geometric Diamond Panel
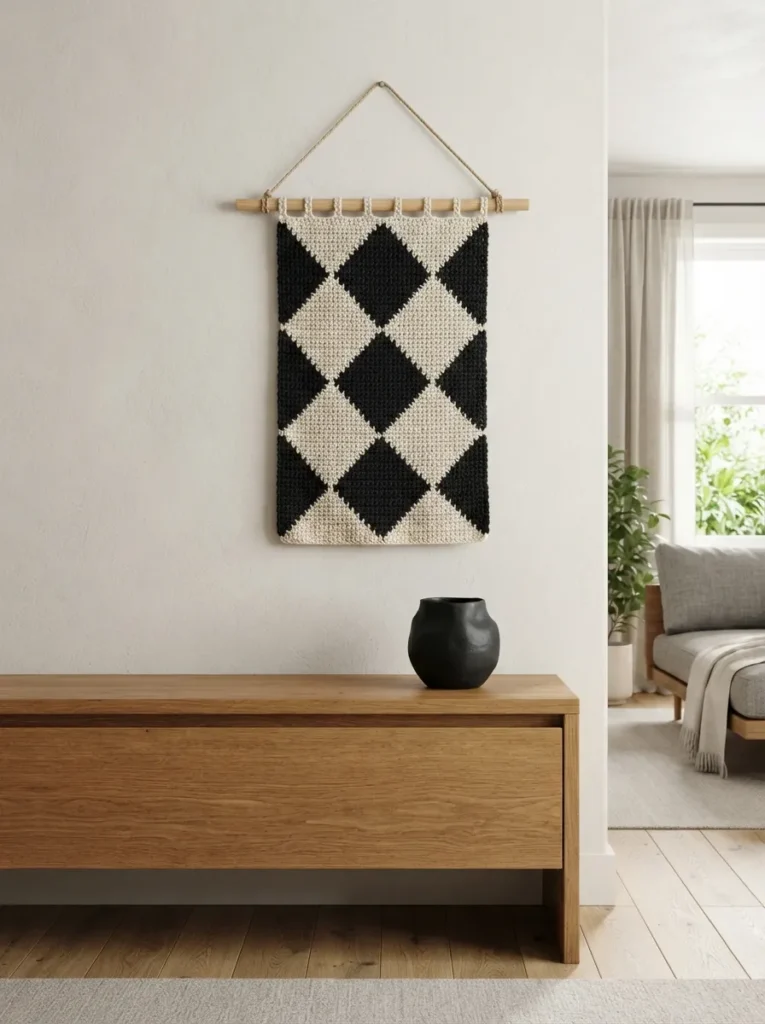
What it looks like: A rectangular panel with a bold diamond shape color-blocked into the center, hung from a visible wooden dowel.
Why it works: Graphic color-blocking against a neutral wall creates strong contrast, and the exposed dowel adds a structural line that softer fringe pieces lack.
How to copy it: Follow a basic single crochet diamond color-change chart worked in rows, then create loops along the top edge in every third stitch to thread the dowel through.
Best for: People who want a more architectural, less “craft fair” look.
✅ What to Do First:
- [ ] Sand and finish the dowel before threading it raw wood snags yarn loops
- [ ] Space top-edge loops evenly so the panel hangs level, not tilted
- [ ] Thread the dowel through all loops before attaching wall twine
- [ ] Tie mounting twine to the dowel ends, not the panel itself, to spread the weight
- [ ] Hang and check the panel sits flush against the wall before final adjustments
Up next: the yarn-color choice that quietly makes or breaks a nursery wall.
9. Pastel Gradient Nursery Piece
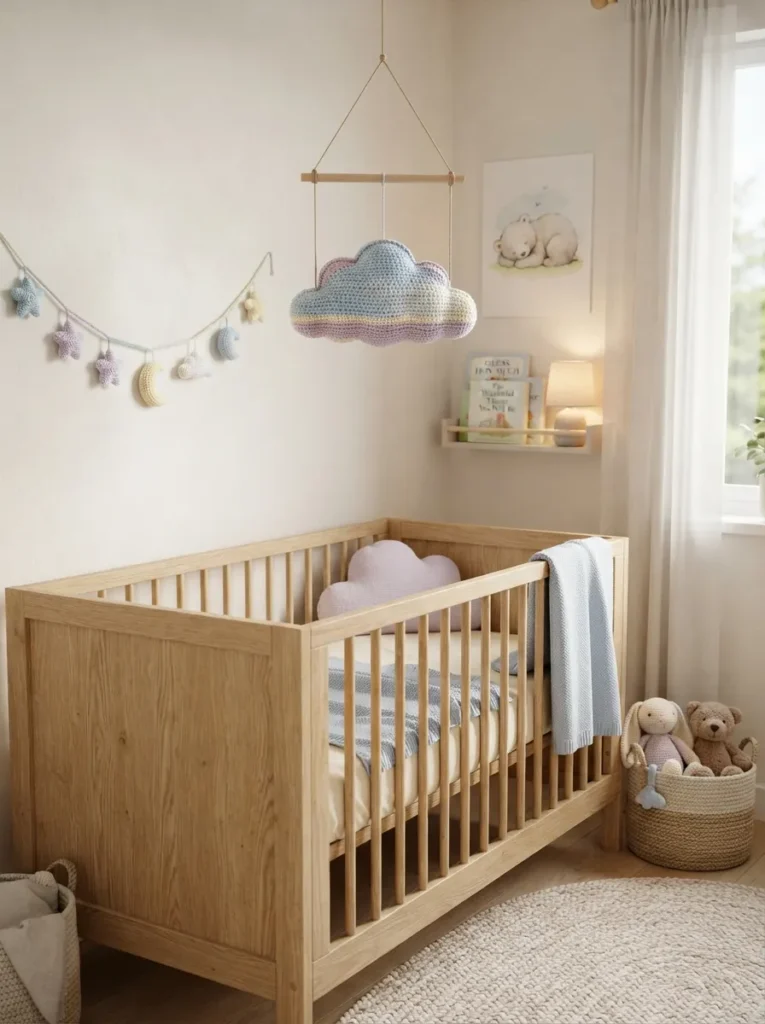
What it looks like: A soft cloud silhouette with rounded bumps, shaded in two barely-different pastel tones.
Why it works: Low-contrast color pairing keeps a nursery piece visually calm instead of stimulating, which matters more here than in any other room in the house.
How to copy it: Crochet a simple cloud outline using increase and decrease rows to shape the bumps, working the bottom third in a second, slightly darker pastel for gentle shading.
Best for: New parents decorating on a tight timeline before a due date it pairs naturally with other quick handmade nursery touches, like mason jar crafts repurposed as floss and notion holders.
Mistake to Avoid: Using acrylic yarn with a rough finish against a baby’s reach zone is the common misstep here keep it out of arm’s reach or choose a soft cotton-acrylic blend instead.
10. Cotton Rope & Crochet Hybrid
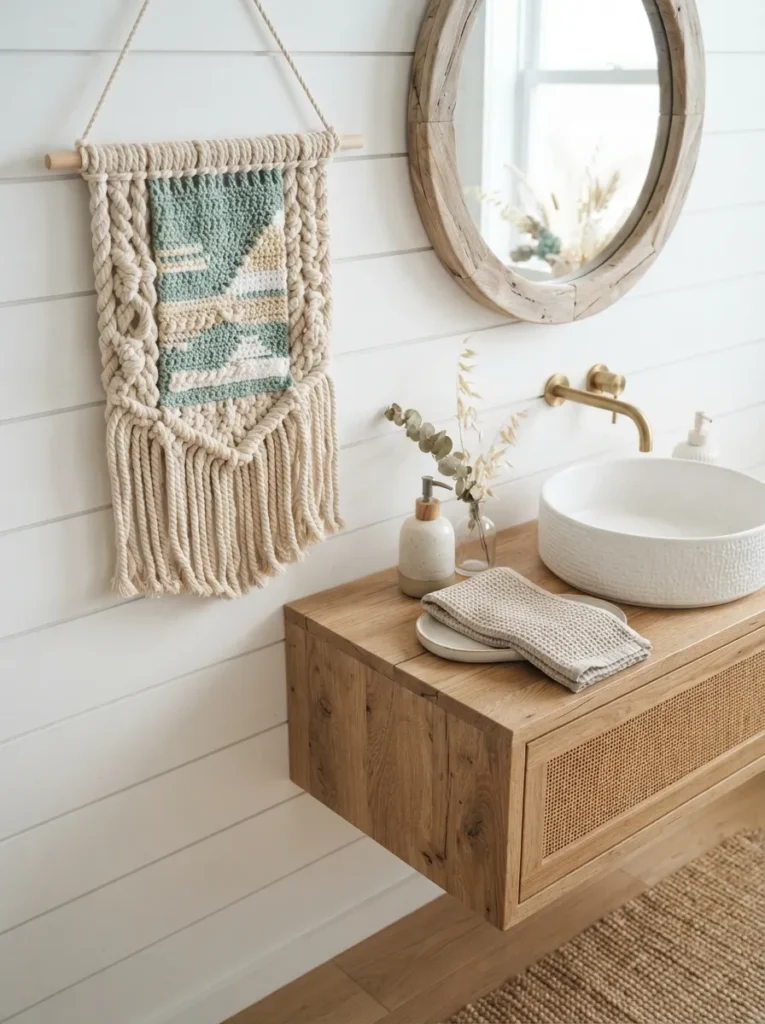
What it looks like: A thick rope frame with a smaller crocheted panel worked directly into its center.
Why it works: Mixing two fiber textures smooth twisted rope against dense stitchwork creates contrast without needing any color variation at all.
How to copy it: Coil and stitch 3/8-inch cotton rope into an oval frame, then single crochet a mini panel directly through the rope coils to anchor it in place.
Best for: Coastal or nautical-leaning spaces that already lean neutral.
11. Freeform Asymmetrical Cloud Shape
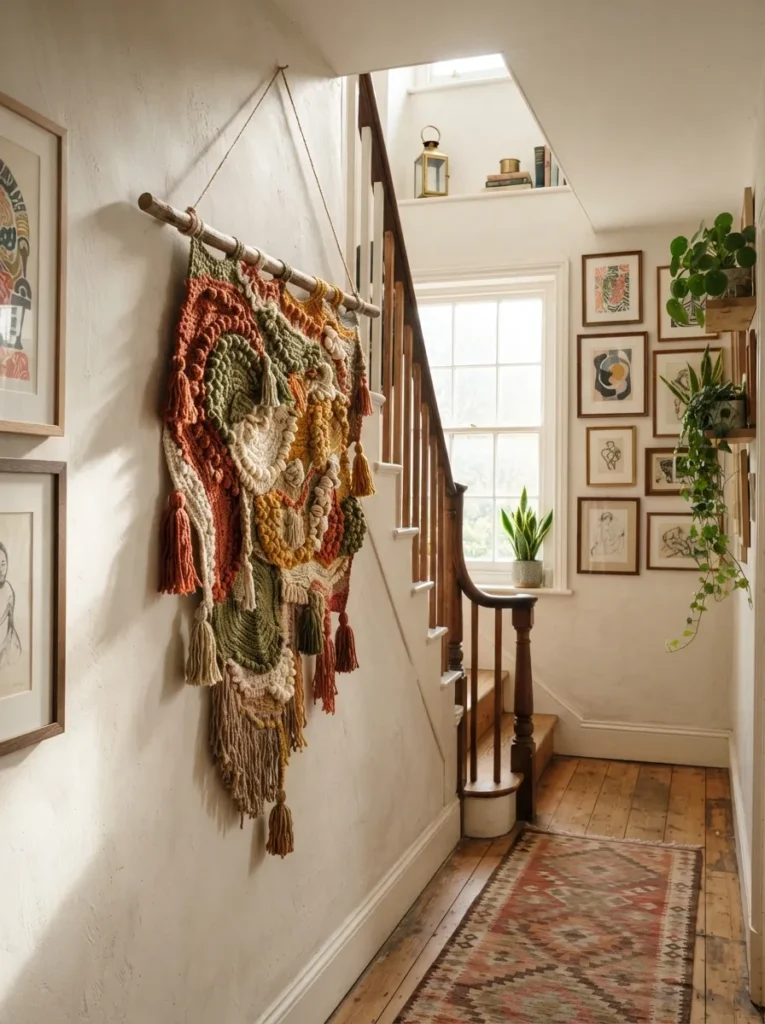
What it looks like: An irregular, organic blob shape with no symmetry, mixing tall and short stitches across its surface.
Why it works: Freeform crochet breaks the visual predictability of neat rows and grids, giving a wall texture that reads as art rather than craft.
How to copy it: Work without a pattern combine single, double, and treble crochet stitches freely, adding or dropping stitches wherever the shape feels like it should grow or shrink.
Best for: Confident crocheters who want to stop counting stitches for once also a fun one to bring to a craft night since there’s no pattern to explain.
Budget Version: This is the ideal project for mismatched leftover yarn freeform shaping hides weight and color inconsistencies that would look like mistakes in a structured pattern.
This next one surprised even experienced makers the first time they tried it lit up after dark.
12. Fairy-Light Woven Panel
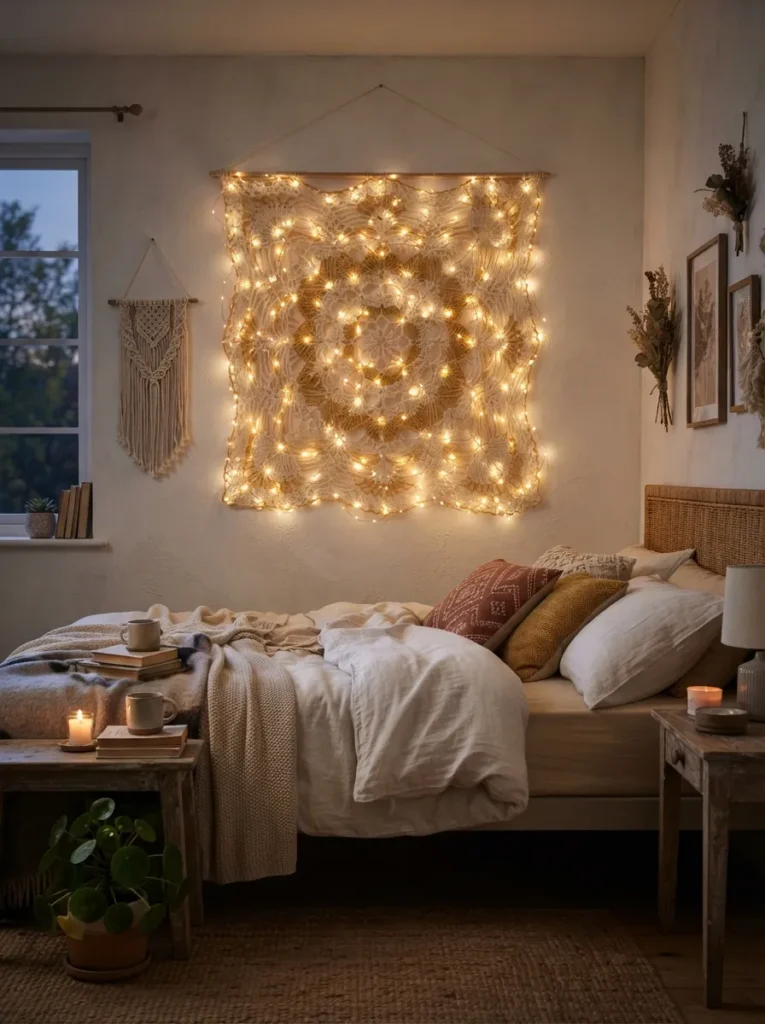
What it looks like: An open, lacy panel with small warm lights peeking through the gaps between stitches.
Why it works: Negative space between stitches is what makes this idea work a dense piece would hide the lights entirely, so the open lace pattern is doing double duty as both texture and light diffuser.
How to copy it: Crochet a simple filet-style open mesh panel, then weave a battery-powered warm-white fairy light strand through the gaps after the piece is finished and blocked.
Best for: Bedrooms or reading corners that need ambient light, not just decor.
Important: Battery packs run heavier than most people expect sew a small fabric pocket on the back of the panel to hold the pack, rather than letting it dangle and pull the piece off-level.
13. Beaded Wood-Ring Accent Hanging
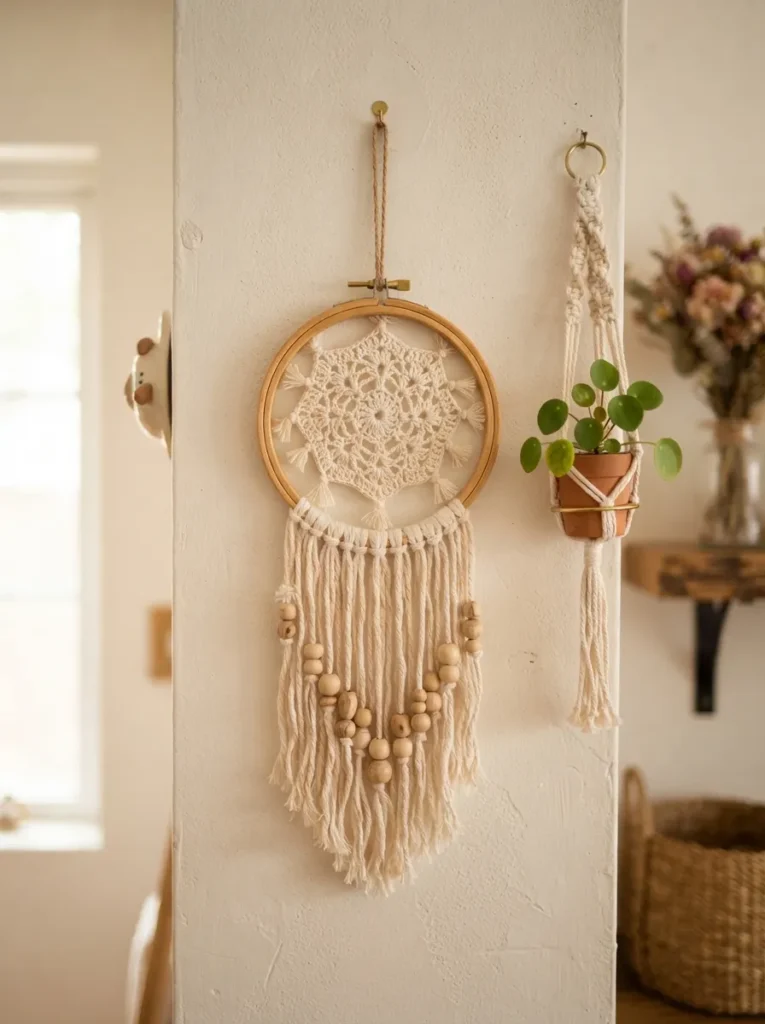
What it looks like: A round wooden ring with a small crochet motif inside it and wood beads threaded onto the hanging fringe.
Why it works: The wooden ring provides a clean geometric boundary around otherwise loose stitchwork, which keeps a small piece from reading as unfinished or scrappy.
How to copy it: Crochet a small doily-style round to fit inside an 8-inch wooden embroidery hoop, tack the edges to the inner ring with a whip stitch, then thread wooden beads onto the bottom fringe before knotting the ends.
Best for: Anyone who wants a finished, framed look without buying an actual frame group it with a few paper craft pieces for a mixed-media gallery wall.
14. Popcorn-Stitch Textured Cloud
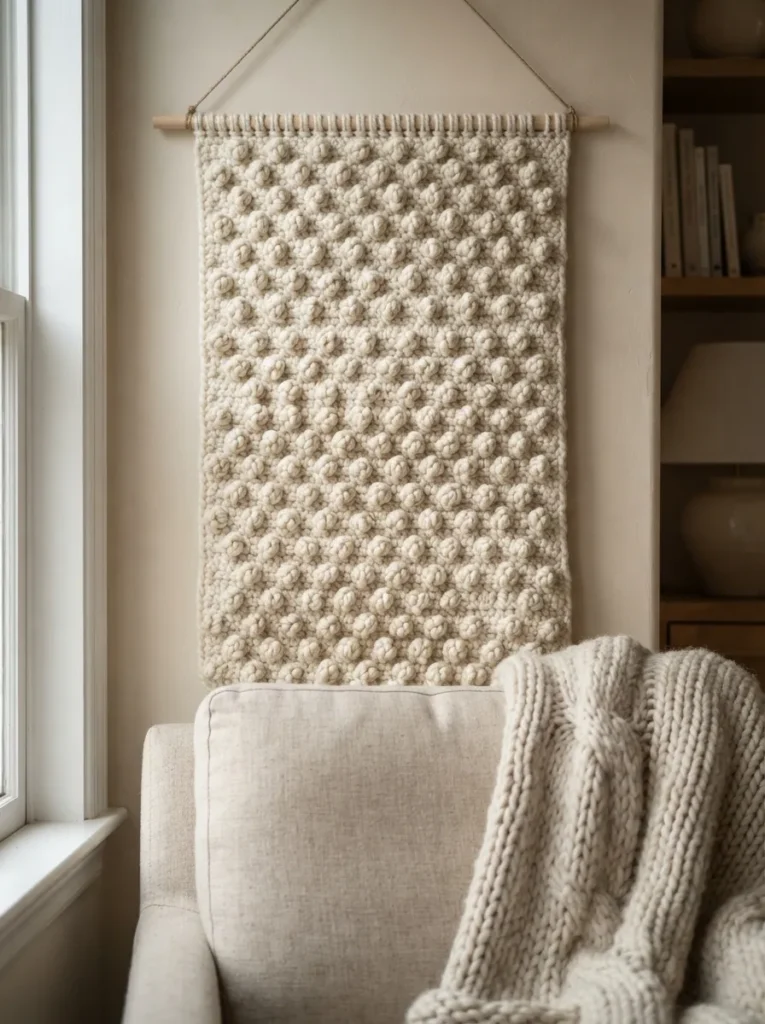
What it looks like: An all-over textured surface of small raised bumps, monochrome and dimensional rather than colorful.
Why it works: Side lighting catches the raised popcorn stitches and throws small shadows across the piece, which means the texture itself becomes the entire visual interest no color needed.
How to copy it: Work rows of popcorn stitch (5 double crochets into one stitch, then closed into a bump) evenly across a rectangular base in a single warm-white cotton yarn.
Best for: Monochrome or all-neutral rooms that need texture without adding another color.
Pro Tip: Popcorn stitch eats yarn fast budget roughly 1.5 times the yarn you’d use for a plain double crochet panel of the same size.
After 14 ideas, here’s the one most guides skip entirely: sizing for tight spaces.
15. Single-Strand Mini Hallway Piece
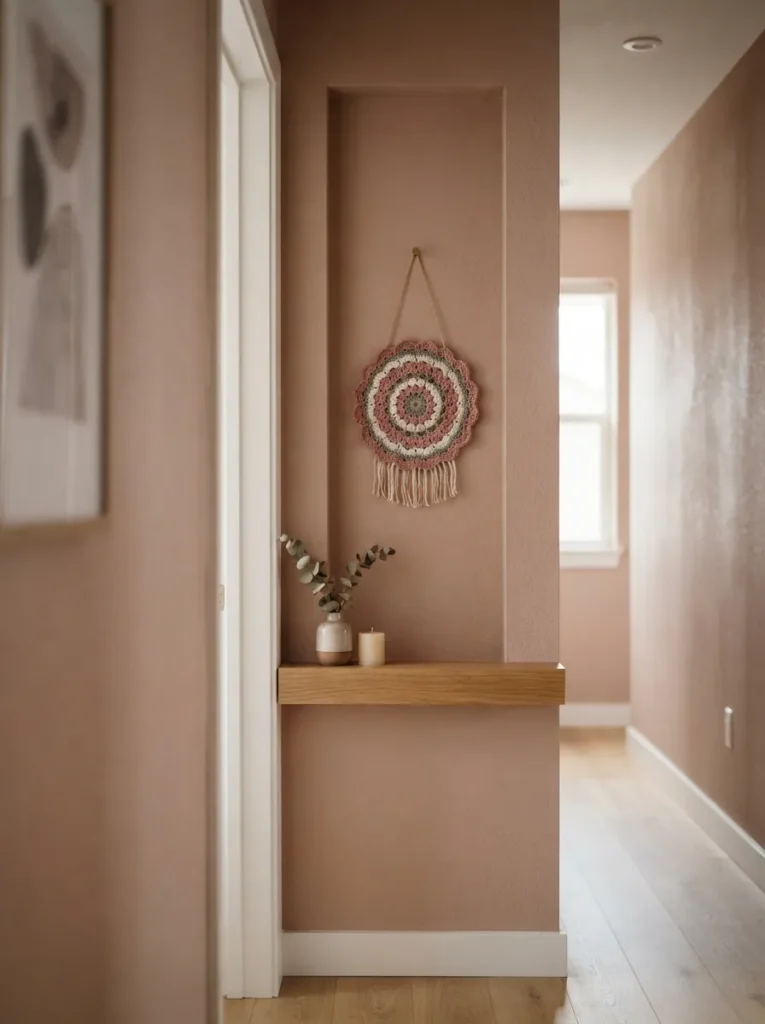
What it looks like: A single small motif, under 6 inches across, with short fringe that doesn’t compete with a narrow wall.
Why it works: Scale is the entire design decision here a piece sized under 6 inches avoids the cramped, overcrowded feeling that oversized hangings create in narrow hallways.
How to copy it: Crochet a basic 5-round mandala capped at 6 inches, and keep fringe under 3 inches so nothing brushes against passersby in a tight corridor.
Best for: Small apartments and hallways under 36 inches wide.
Styling Note: Hang it at eye level rather than centered on the wall in a narrow hallway, people notice pieces they walk past directly, not ones centered on empty wall space above their sightline.
16. Doorway Curtain Strands
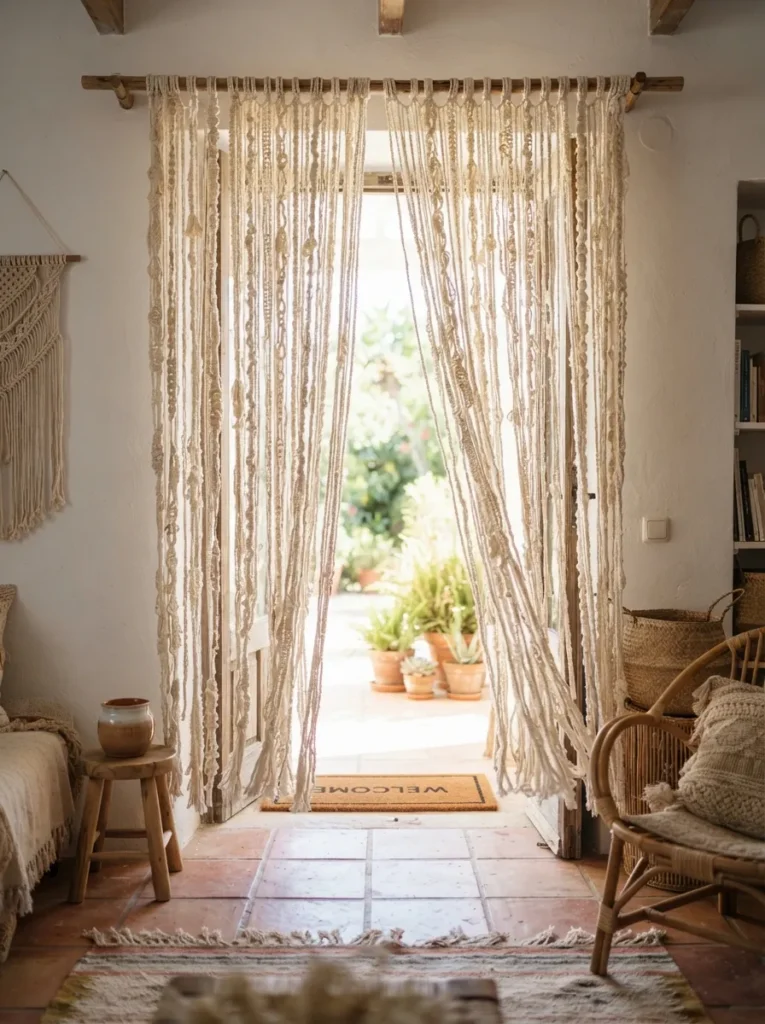
What it looks like: Dozens of long crocheted strands hanging from a rod across an open doorway, like a soft beaded curtain.
Why it works: Vertical repetition at doorway scale creates a threshold moment it signals a transition between rooms the way a real door would, just without blocking light or airflow.
How to copy it: Crochet 30–40 individual chain-and-single-crochet strands in varying lengths, then loop each one over a tension rod sized to the doorway width.
Best for: Studio apartments dividing one room into two zones without adding a wall.
Two ideas left before the statement piece starting with one that plays entirely with shape.
17. Two-Tone Geometric Diamond Grid
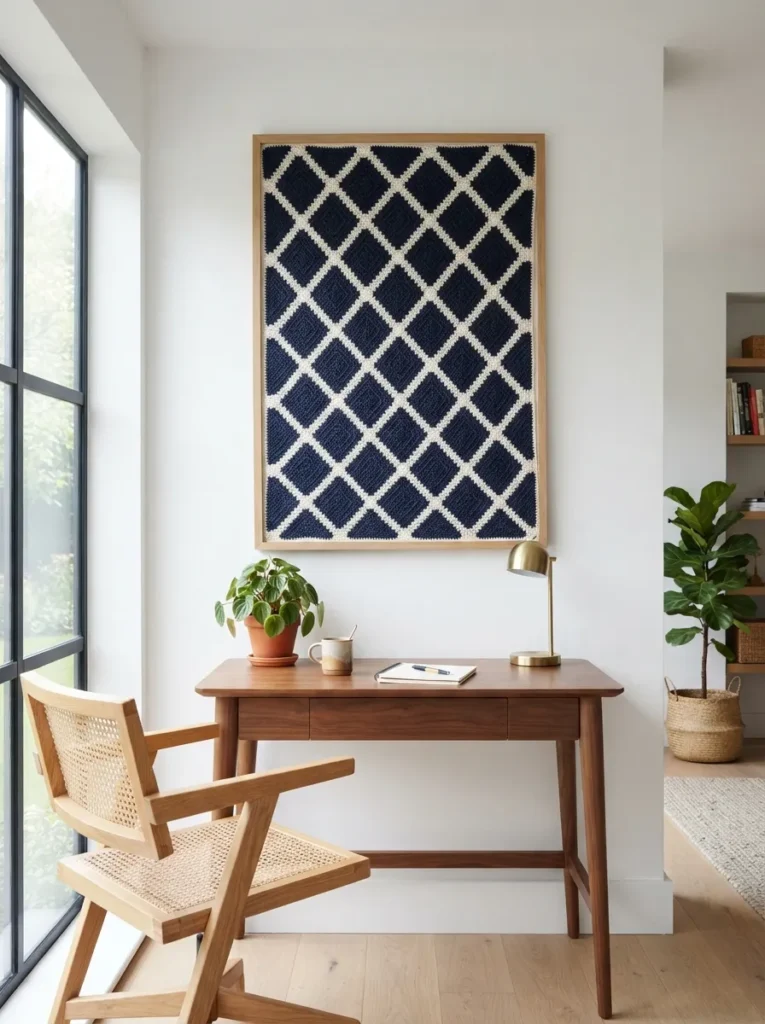
What it looks like: A tight grid of alternating diamonds in just two colors, more graphic than boho.
Why it works: High contrast between only two colors reads as modern and intentional, proving crochet wall art doesn’t have to default to earth tones to work.
How to copy it: Use the corner-to-corner (C2C) technique with a two-color diamond chart, working diagonally block by block rather than in standard rows.
Best for: Modern or minimalist rooms where boho fringe would feel out of place.
Quick Win: C2C is graph-paper simple one square of color per block which makes it faster to plan than it looks in the finished photo.
18. Backlit Sheer Lace Panel
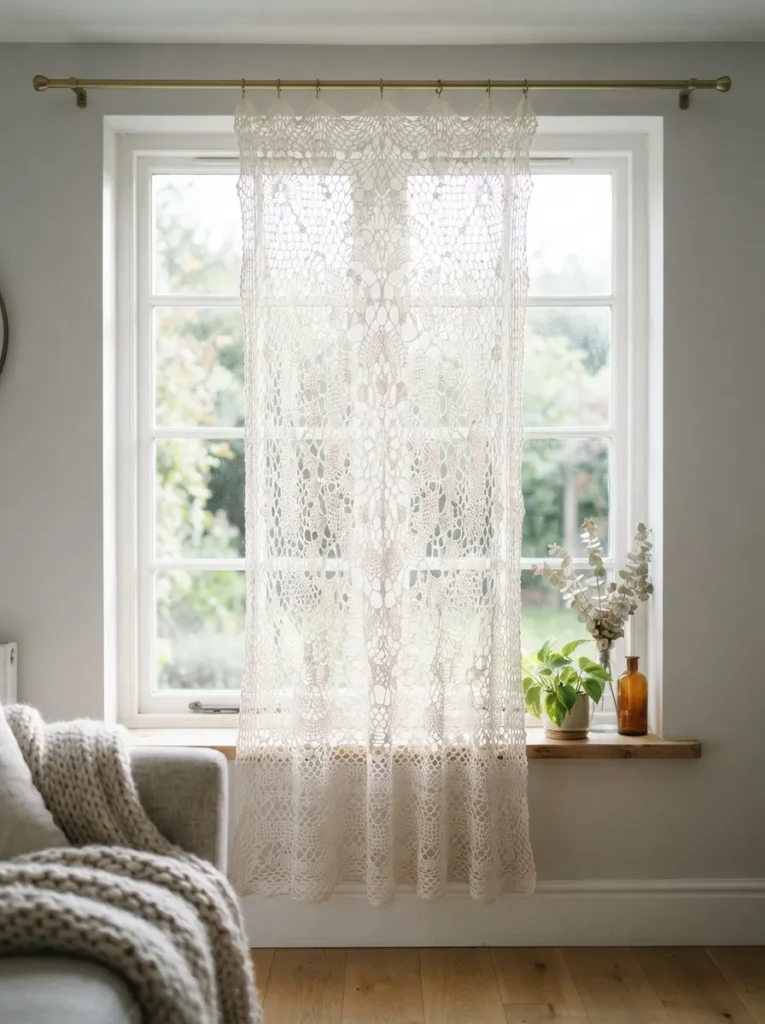
What it looks like: A delicate, open-weave lace panel positioned so light passes directly through the gaps between stitches.
Why it works: Backlighting turns negative space into the main visual feature the holes in the lace matter more here than the yarn itself.
How to copy it: Work a simple filet crochet lace pattern in fine cotton thread with a small hook (2.5mm), and mount it on a slim curtain rod directly in front of a window rather than a solid wall.
Best for: Sunny rooms where you want privacy without blocking all the light.
Important: Fine thread crochet takes noticeably longer than worsted-weight projects expect 4–6 hours for a panel this size, not the one evening a chunkier piece might take.
19. Corner-to-Corner Pixel Motif
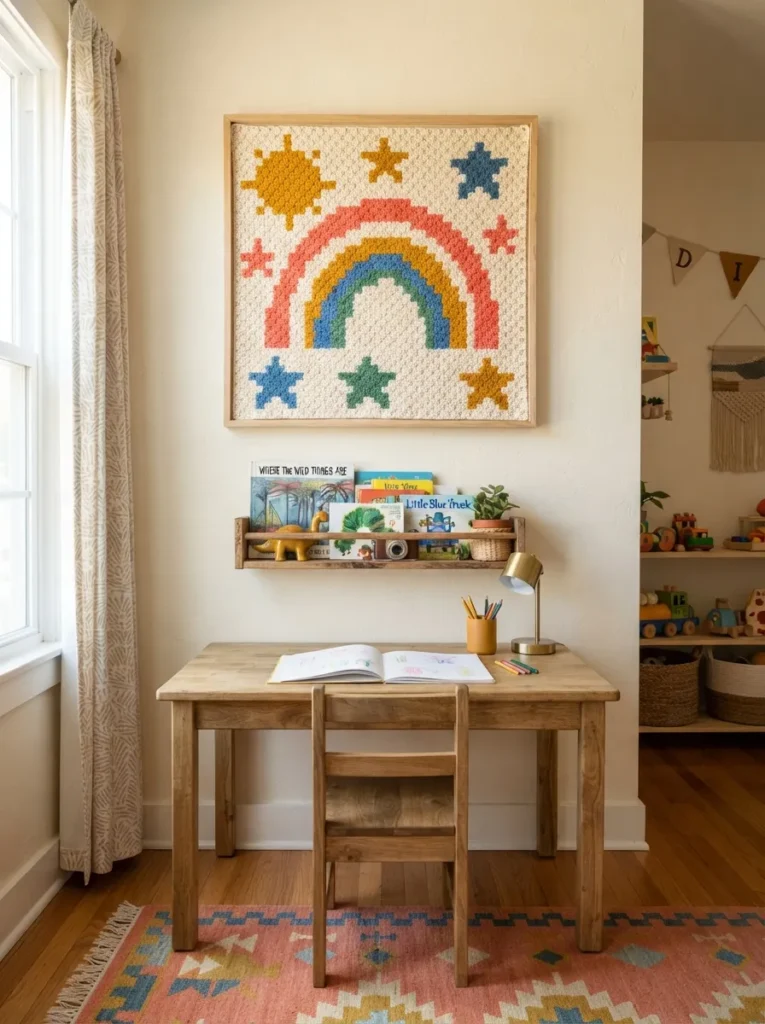
What it looks like: A blocky, pixelated image a simple heart, star, or initial built entirely from small colored squares.
Why it works: Corner-to-corner construction turns crochet into a grid medium, essentially letting you “draw” a simple image in yarn the same way cross-stitch works in thread.
How to copy it: Use any free C2C pixel chart or design a simple 20×20 grid motif yourself, working diagonally in blocks and changing color exactly where the chart indicates.
Best for: Personalizing a kid’s room, or adding to a list of handmade gift ideas for someone whose initial you already know.
Budget Version: A motif this size uses under one full skein per color three mini skeins from the clearance bin easily covers it.
20. Stacked Trio for a Narrow Wall
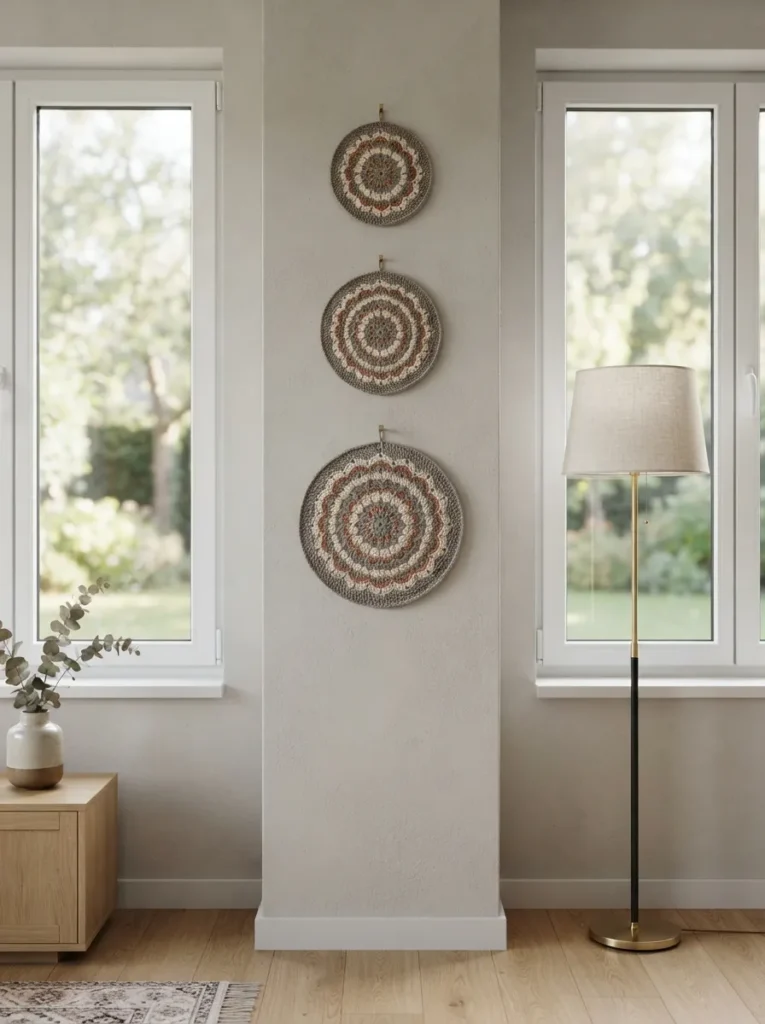
What it looks like: Three matching circles in graduating sizes, stacked directly above one another on a slim vertical wall.
Why it works: Vertical stacking solves a specific spatial problem narrow wall strips that are too tall and thin for one horizontal piece but perfect for a repeated vertical rhythm.
How to copy it: Crochet the same mandala pattern three times at 6, 8, and 10 inches, and hang them with 4 inches of consistent space between each.
Best for: Awkward strips of wall between windows or beside a doorframe.
21. Loom-Style Woven Tapestry Edge
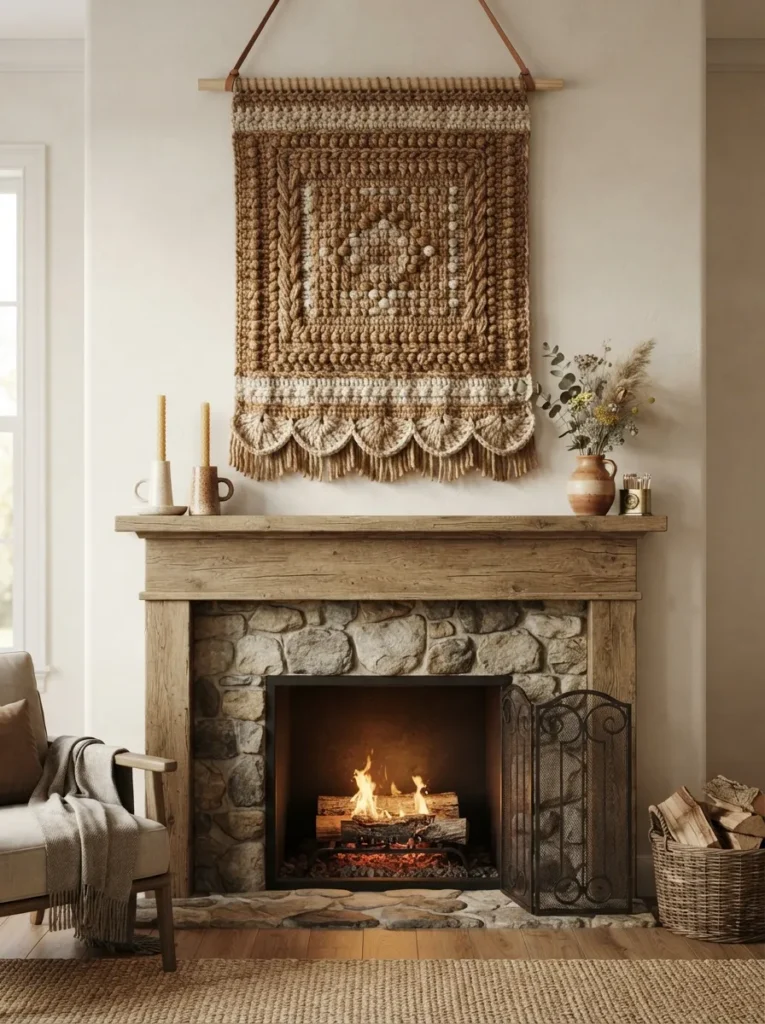
What it looks like: A dense, tightly-stitched rectangle that mimics a woven loom tapestry, finished with a scalloped shell-stitch edge instead of fringe.
Why it works: A scalloped border reads as more finished and formal than raw fringe, which makes this the closest crochet gets to a traditional framed tapestry look.
How to copy it: Work tight single crochet rows for the body to mimic a woven texture, then finish the bottom edge with a row of shell stitches (5 double crochets into every third stitch) instead of cutting fringe.
Best for: Mantels or formal living rooms where fringe would feel too casual.
Mistake to Avoid: Working the body too loosely is what makes this piece sag out of shape drop down half a hook size from what the yarn label recommends to keep the weave tight.
One idea to go before the statement piece and it’s the most colorful entry on this list.
22. Rainbow Arc Motif
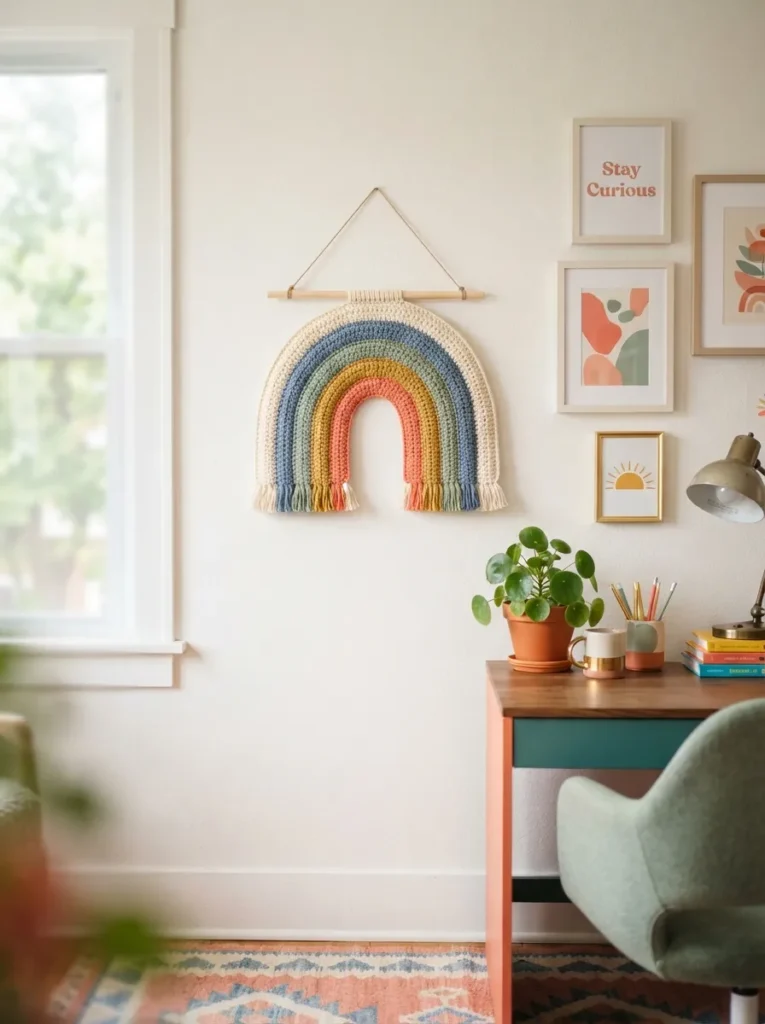
What it looks like: A rounded arc shape striped in five distinct colors, more graphic and playful than the earthy pieces earlier on this list.
Why it works: A saturated multi-color piece works as a single deliberate accent precisely because everything else on a typical neutral wall isn’t competing with it.
How to copy it: Crochet five separate arched rows in single crochet, each a different color, and seam them together along the curved edges before trimming the bottom flat.
Best for: Playrooms, home offices, or anyone whose room could use one unapologetically bright piece.
Pro Tip: Weave in yarn ends as you finish each arc rather than saving them all for the end with five color changes, loose ends pile up fast and get tangled if left until last.
23. Oversized Macramé-Crochet Hybrid Statement Panel
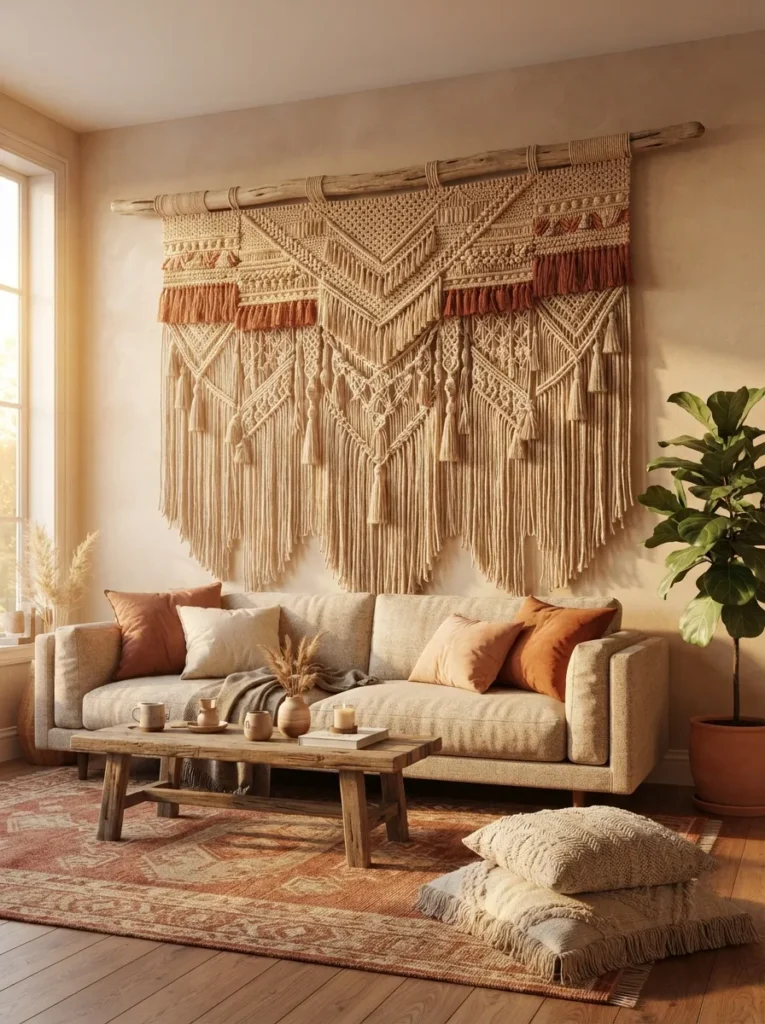
What it looks like: A large crocheted top panel that gradually gives way to long, loosely knotted macramé fringe below.
Why it works: Combining two fiber techniques in one piece creates visual weight distribution dense stitchwork up top grounds the piece, while the loose knotted fringe below keeps it from feeling heavy.
How to copy it: Crochet a 20-inch double crochet panel for the top third, then attach long unspun cotton cord along the bottom edge and finish it in basic square macramé knots for the remaining two-thirds of the length.
Best for: Anyone ready to commit a full weekend to one anchor piece instead of several small ones.
Styling Note: Size this one to roughly two-thirds the width of the furniture below it a common mistake is going full wall-width, which overwhelms the room instead of anchoring it.
In my experience, the wall hangings that actually get finished are never the most ambitious ones on the list they’re the small mandalas and mini clusters, because a project you can complete in one evening gets hung immediately, while the statement panel sits half-done in a project bag for three months. If you’re new to this, make three small pieces before you touch anything over 18 inches.
How to Start Making Crochet Wall Hangings
In practice, the first piece worth making is always small an 8-inch mandala circle in worsted-weight cotton, because it teaches tension control before you commit hours to something bigger. Getting one piece finished and hung anchors the whole habit; the next one comes twice as fast.
The single most common beginner mistake is pairing yarn that’s too thin with a hook that’s too big, which leaves gaps between stitches that look unintentional. It’s an easy fix match a worsted 4-weight yarn to a 5.5mm hook until you’ve got a feel for tension, then experiment from there.
Three items under $50 that create immediate impact: a 5.5mm ergonomic crochet hook (under $10), a 12-inch wooden dowel for mounting (under $8), and one skein of unbleached cotton or jute twine (under $12) together under $30, and enough to finish and hang one full piece.
A small piece runs one to three hours and costs $15–25 in materials; a full statement panel like the one covered above takes a full weekend and $60–90 in yarn. Most people get through the whole learning curve mandala to statement panel inside a single month of evening sessions.
Ready to Fill Your Walls With Crochet?
Between the color-blocked mandalas, the chunky wool tapestries, and the fringe-heavy waterfall panels, these 23 crochet wall hangings cover a lot more ground than a single boho wall art search usually turns up. None of it needs to happen this weekend one small piece, hung and finished, still counts as a real start.
Pick up a 5.5mm hook and a skein of cotton today and work rounds until the mandala reads 8 inches across; that’s the whole first project. Handmade texture on a wall does something printed art can’t it makes a room feel worked on, not just decorated. Save the pieces that pulled at you most; chances are the yarn colors already match something else in your space.
Keep Exploring
- 15 Macrame Wall Hanging Ideas for Boho Bedrooms
- 12 Yarn Craft Ideas to Decorate Small Apartments
- 18 DIY Gallery Wall Ideas Using Handmade Pieces