11 Mason Jar Crafts for Men to Organize the Garage
Small hardware disappears into coffee cans, and clear glass jars at eye level are the cheapest way to make it visible again. Here are 11 mason jar crafts for men to organize the garage, from jars that hang under a shelf to a spinning parts carousel for the workbench.
Picture a wall where every screw, washer, and zip tie has an address. Glass catches the overhead light and shows what’s inside before a hand goes near it. Lids thread on with a dry, metallic click. Ten seconds to find the right bolt, no dumping a bin across the bench. Everything visible. Nothing lost.
Quick Navigation
- Why Mason Jar Crafts to Organize the Garage Make Such a Difference
- The Ideas, Starting With the Two Mistakes Everyone Makes
- How to Start Your Mason Jar Garage Organization Transformation
- Ready to Create Your Dream Organized Garage?
Why Mason Jar Crafts to Organize the Garage Make Such a Difference
A garage fills with small, awkward things that cardboard boxes handle badly: screws, washers, drill bits, zip ties, twine, leftover paint. Mason jars solve most of it with clear glass, a wide threaded mouth, and a lid that keeps out dust and, with a little help, damp.
Wide-mouth pints are the workhorse size, since a full hand fits inside and the load stays light enough for a shelf. Small fasteners are the best place to begin, and one free shelf is enough to start.
Quick Reference
| Best starting point | Wide-mouth pint jars hung under one existing shelf |
| Biggest impact area | Loose fasteners and small parts |
| Budget to start | Roughly $20–$60 (approximate) |
| Time to complete | One afternoon for a starter set; a weekend for a full wall |
The Ideas, Starting With the Two Mistakes Everyone Makes
1. Hang Jars From the Underside of a Shelf Instead of Standing Them on It
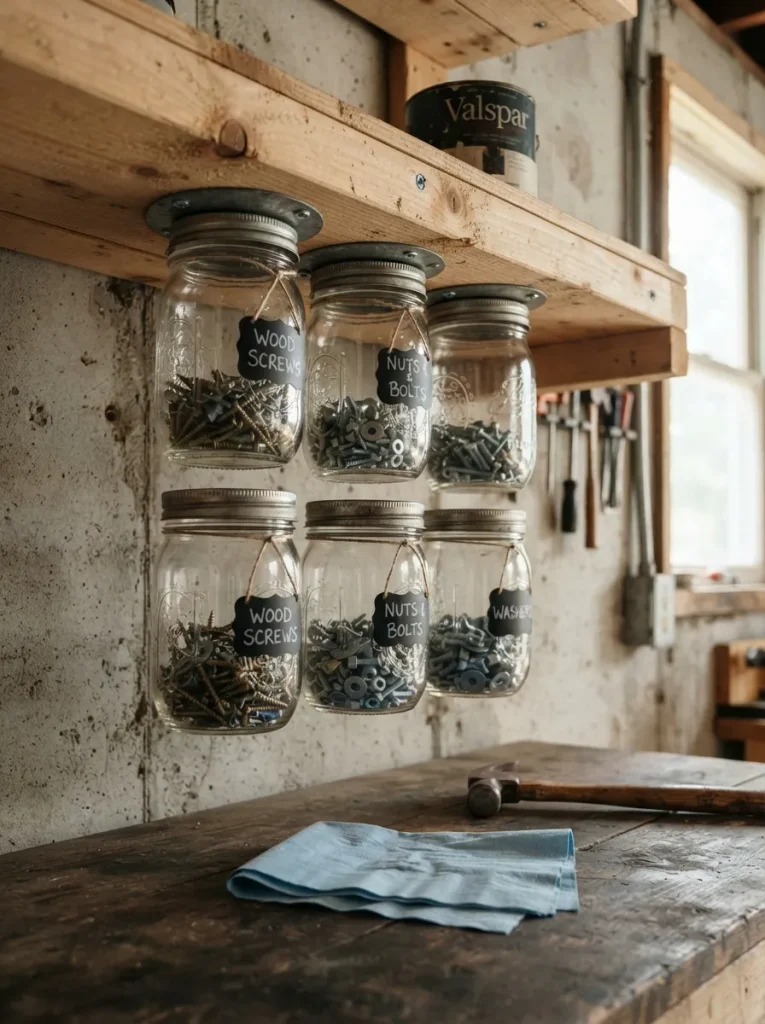
Standing jars on a shelf feels logical until you need one screw. The whole row gets unscrewed, shuffled, or knocked, and every jar eats shelf space a paint can could use.
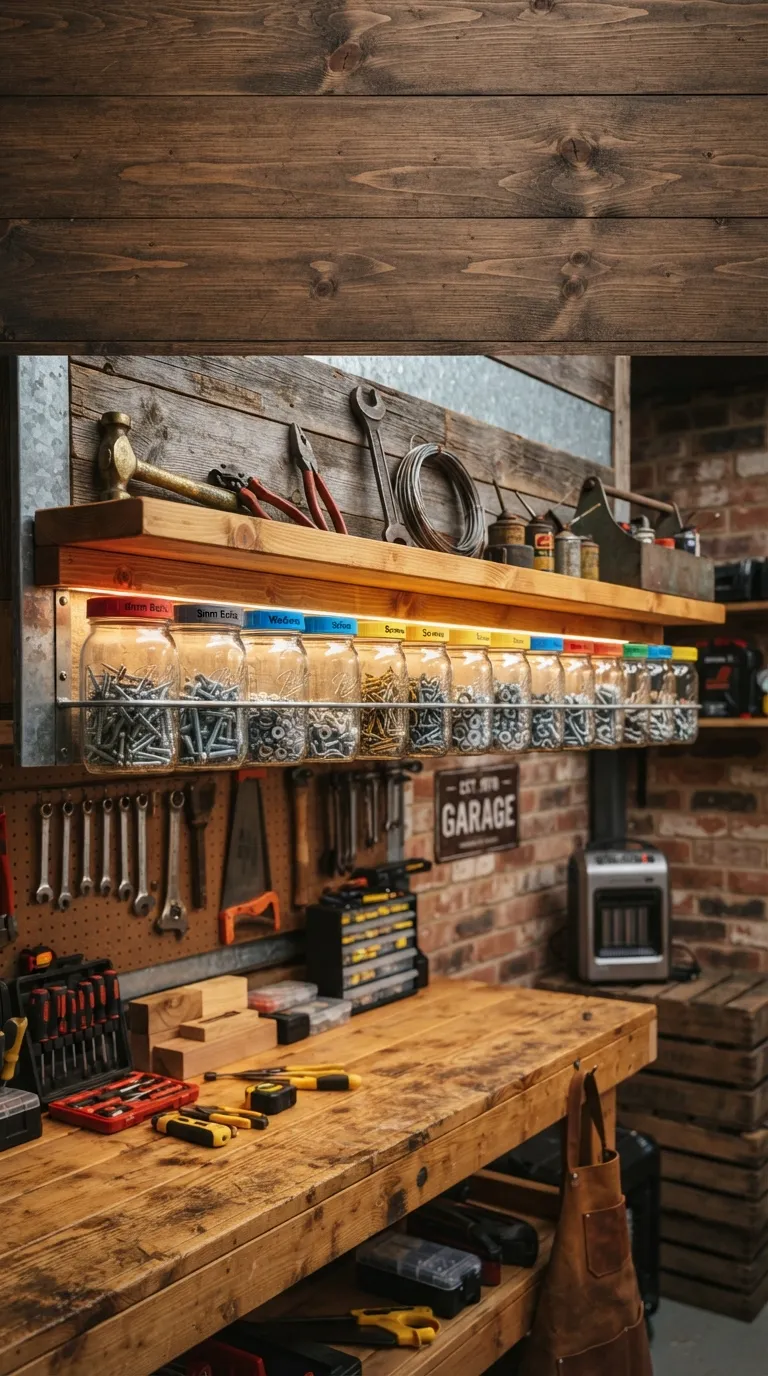
Flip it. Drive two short wood screws up through a one-piece lid into the underside of the shelf, short enough that they don’t poke through the top, then twist a filled jar up into it. The shelf above stays free, and the contents hang at eye level, readable from below.
Leave the jar bottoms clear of the bench and about a finger-width apart so they twist off without bumping. Pint wide-mouths are the size to standardize on. More jar projects live in our roundup of mason jar crafts.
Warning: Fill a hanging jar no more than halfway with heavy hardware such as bolts or nails, and pilot-drill into solid wood. Thin particleboard shelves can pull loose under a full glass jar, which drops it onto concrete.
Shop This Look
| Product |
|---|
| Wide-mouth pint mason jars |
| One-piece screw lids for wide-mouth jars |
| Chalkboard-style jar labels |
2. Give Every Jar One Job and Epoxy a Sample to the Lid
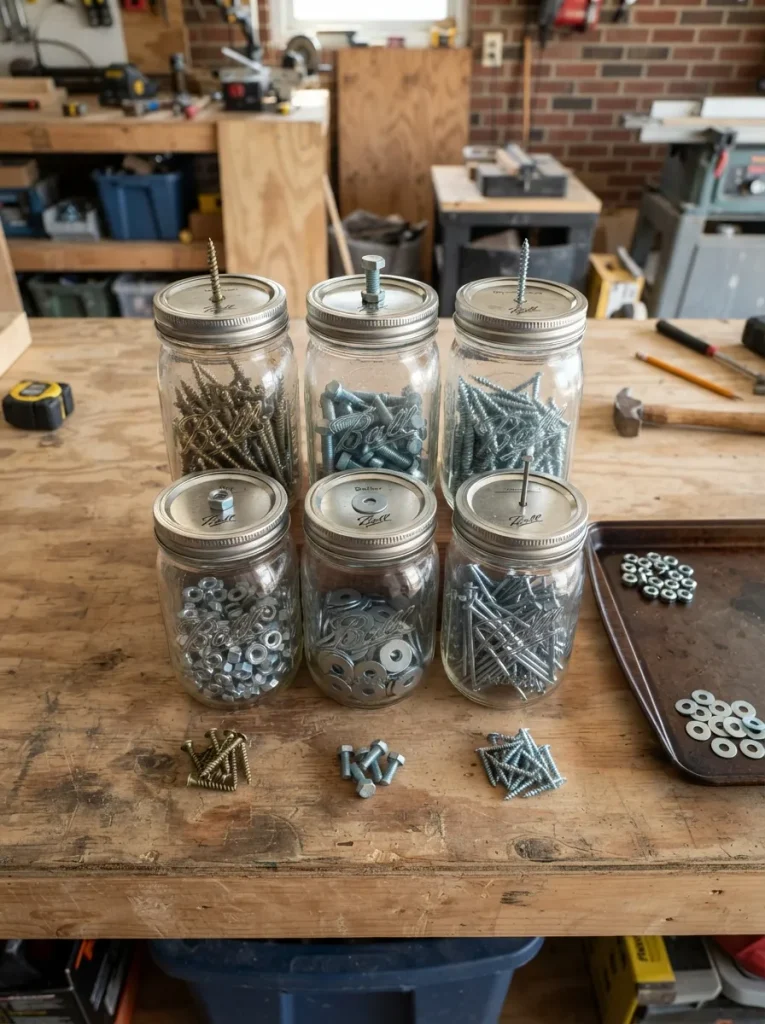
Here’s one for anyone whose current system is a coffee can labeled “misc.” Sort by fastener family first: wood screws, drywall screws, machine bolts, nuts and washers, nails.
Then epoxy one sample of what’s inside to the top of each lid. Hot glue tends to let go of metal after a few hot-and-cold swings, while two-part epoxy stays put.
A sample beats a label because head shape and thread type are what separate screws, and both show at a glance. Keep lengths apart too: 1-inch and 2½-inch wood screws get separate jars.
Quick Win: Tip the coffee can onto a rimmed baking sheet and sort by head type first, length second. Two piles of head types beat ten piles of lengths at the start.
3. Color-Code the Lids by Fastener Family
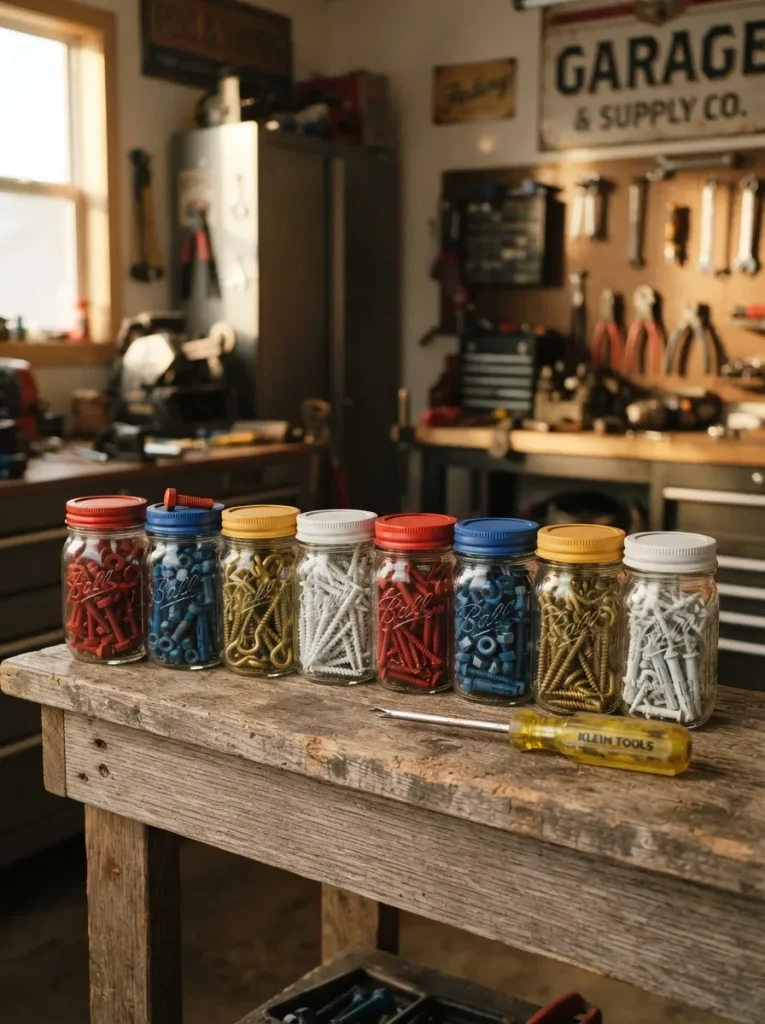
A shelf of identical jars reads as noise until color enters. Paint the lids, not the glass, which chips when jars knock together. Assign each color one job: red for wood screws, blue for machine bolts, yellow for electrical parts, white for anchors.
Skip red beside green in any system like this, since plenty of people can’t tell them apart. Two light coats of spray paint beat one heavy one, and lids should dry fully before they touch threads. Four or five colors is the ceiling. Past that, nobody remembers the code.
Pro Tip: Paint the lid before you epoxy the sample on. Masking a sample with tape leaves a ragged edge, and paint over the sample hides the one thing it’s there to show.
Next comes one pine board, a handful of hose clamps, and the hardware that lets you lift a fully loaded rail off the wall without emptying it.
4. Build a Pine Plank Rail With Hose-Clamp Jar Holders
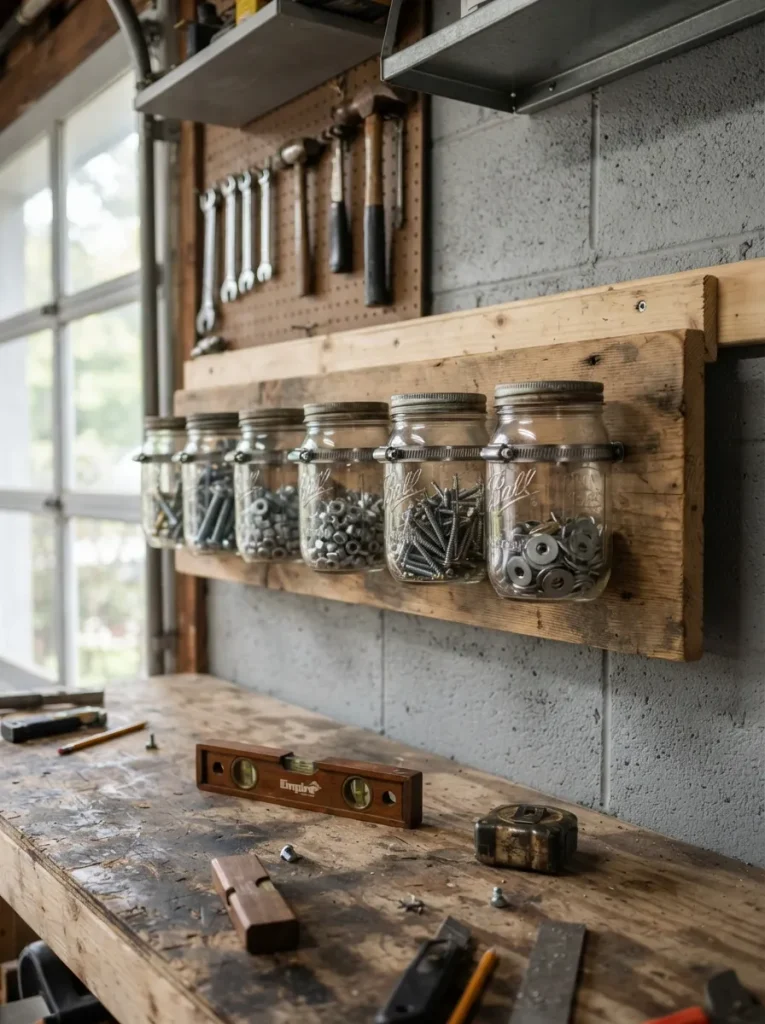
Cut a 1×6 pine board to fit your wall space, then fasten a stainless worm-gear hose clamp to it for each jar, sized to grip the neck just below the threads.
Tighten each clamp so the jar’s shoulder rests on it and the lid faces up. Jars lift out for the bench without any unscrewing. Space clamps a jar’s width plus a couple of inches apart so hands fit between them.
Hang the plank on a French cleat rather than screwing through its face. Loaded glass is heavy, and a cleat lets you lift the whole rail off the wall to move or repaint it. Anyone with studs and a free stretch above the bench can build this; more wood-board thinking lives in our pallet-wood storage ideas.
✅ Rail build order:
- [ ] Mark stud centers and draw a level line on the wall
- [ ] Screw the wall half of the French cleat into the studs
- [ ] Fasten each hose clamp to the plank, then seat the jars
- [ ] Hang the loaded plank on the cleat
Shop This Look
| Product |
|---|
| Stainless steel worm-gear hose clamps |
| 1×6 pine board |
| French cleat hanger set |
5. Light the Hanging Jars From Above
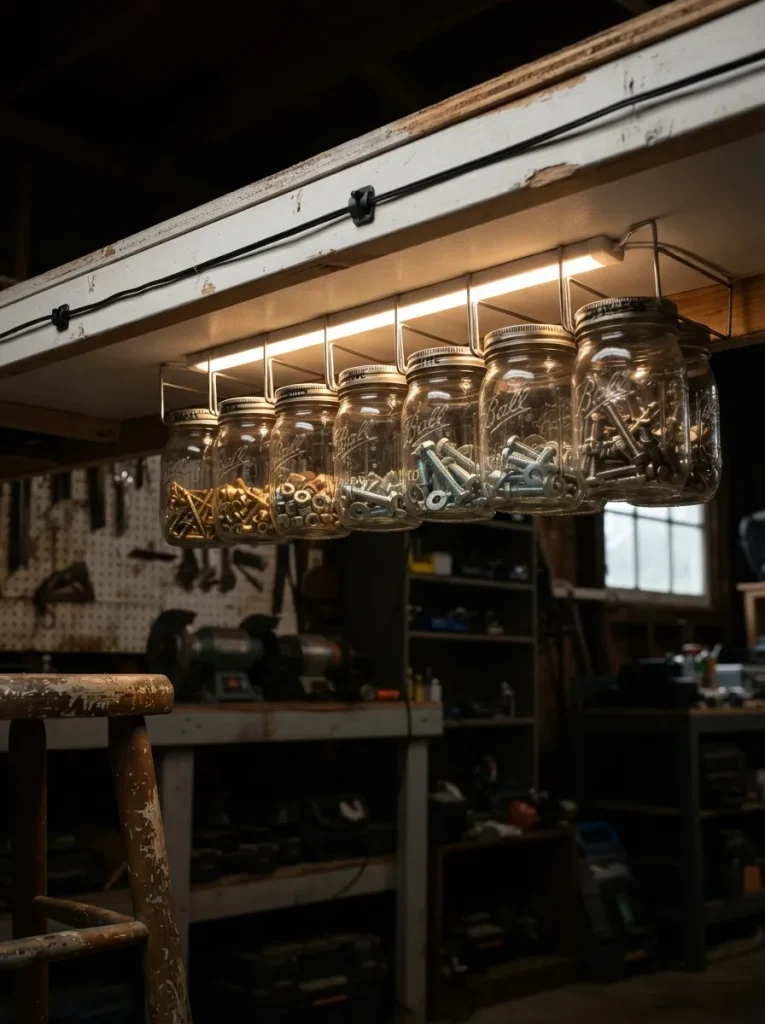
Glass carries light, so a strip mounted on the shelf underside behind the jars sends it through the contents and shows fill level and part color without opening anything. Neutral or cool white makes zinc, brass, and stainless easier to tell apart than warm yellow does.
A rechargeable motion-sensor bar removes wiring, and it switches on as a hand reaches in. Line the shelf underside with white peel-and-stick liner to bounce extra light back toward the jars. Garages with a single overhead bulb that throws shadows under the shelf gain the most.
Styling Note: Aim the light slightly behind the row, not straight at the glass. Direct aim creates glare that hides chalk-style labels.
Shop This Look
| Product |
|---|
| Rechargeable motion-sensor LED light bar |
| White peel-and-stick shelf liner |
| Adhesive cord clips |
6. Zone the Jar Wall by How Often You Reach for It
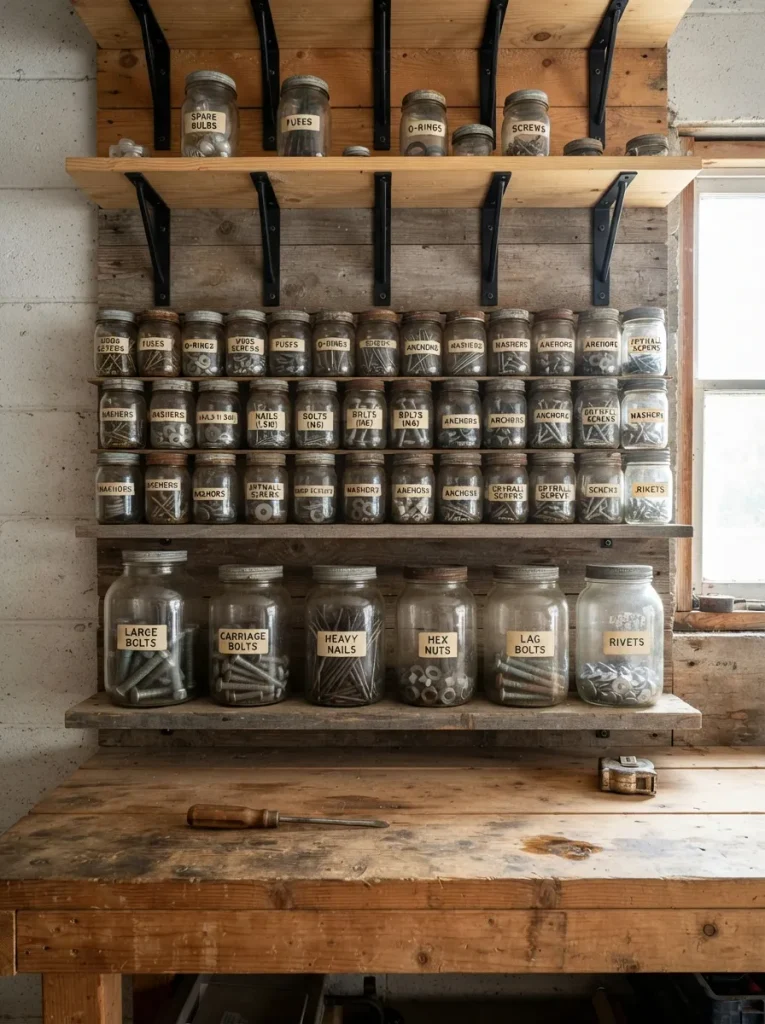
Alphabetical or by-size systems put the most-used screws wherever the alphabet lands, often on the top shelf. Zones based on reach do better. Everyday fasteners go between belt and eye height. Specialty or seasonal items go above.
Heavy jars of bolts, nails, and washers sit lowest, where a slip does less damage. Walk the wall once with a screwdriver in hand and notice what you grab first; those jars get the prime spots. For a wall that mixes cubbies with jars, our IKEA Kallax garage organization ideas show how zones scale up.
Important: Higher isn’t clearer. Jars above eye level look organized but go unused because they’re a reach and a squint away. Give the belt-to-eye band to the handful you open every project.
Next: a jar that keeps bare steel from rusting, and why the lid you already own is its weak point.
7. Make Rust-Resistant Jars for Bare Steel Hardware
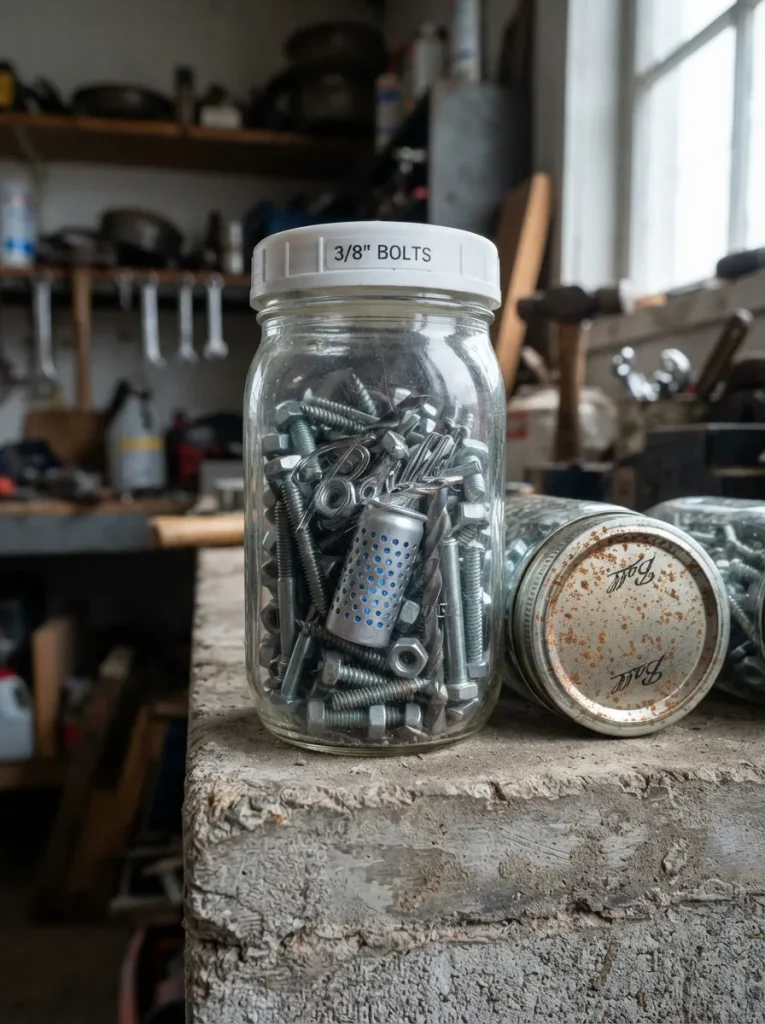
Garages that swing between damp and dry, such as coastal, unheated, or next to a basement, rust bare steel bolts and drill bits in a plain jar. Add a rechargeable desiccant canister or a silica gel packet, and swap the standard metal lid for a plastic storage cap.
Standard lids are coated steel that can start rusting at scratches, and rust spreads to what’s inside. Check the desiccant’s directions for when to recharge or replace it. Stainless and coated hardware need less protection, so put the effort into plain steel first.
Mistake to Avoid: Sealing damp parts in the jar. Dry everything first, since a lid traps moisture as easily as it keeps it out.
8. Turn a Quart Jar Into a Twine, Wire, or Zip-Tie Dispenser
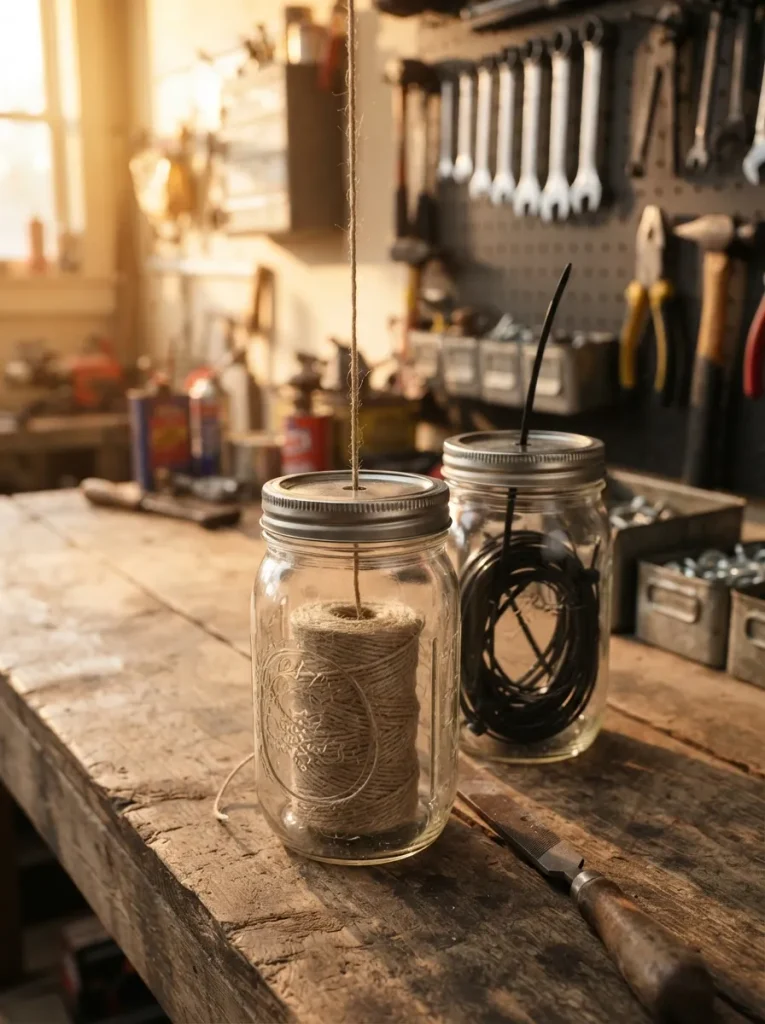
A spool of twine or garden wire sits inside a quart jar while its end feeds out through the lid, dust-free and hard to tangle. Drill a small pilot hole in a metal lid, then step up to a hole just wider than the material.
Stand a spool on end, or drop in a coil of zip ties and thread one tie’s tail through. Pull from the center of the spool, not the outside, or it unwinds in loops. Keep quarts for light bulk like this; heavy hardware belongs in pints.
Pro Tip: File the cut edge of the hole smooth. A raw burr frays twine and snags wire, and one pass with a small file fixes it.
9. Stick Small-Parts Jars to a Steel Panel With Magnets
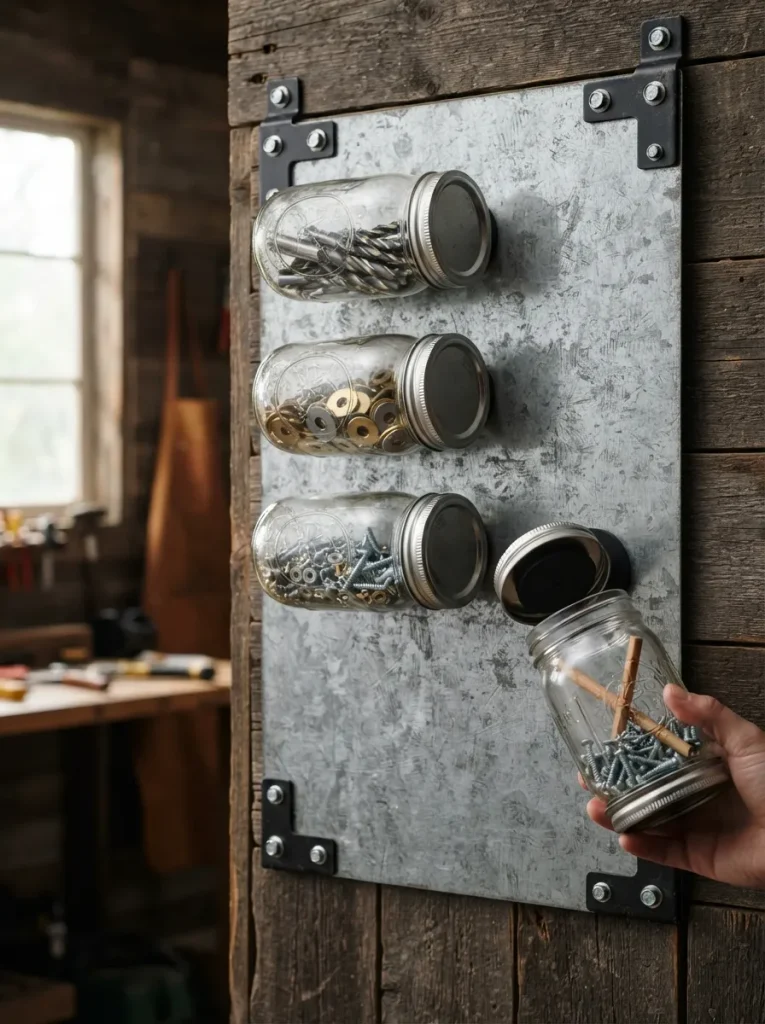
Magnets grip hardest when pulled straight off and slip more easily sideways, which matters because a jar stuck to a wall hangs sideways.
The load is the design limit. Epoxy a rare-earth disc magnet or two to each lid, mount a galvanized steel panel to the wall on brackets, and keep contents light: drill bits, washers, small connectors. Half full is plenty. Jars lift off and travel to the job, which no fixed shelf allows.
Budget Version: Skip the panel. Stick magnet-lid jars to the side of a steel toolbox or a metal shelving upright you already own, and the project costs little more than the magnets.
Shop This Look
| Product |
|---|
| Galvanized steel panel |
| Rare-earth disc magnets |
| Steel L-brackets |
Observation
Most guides skip this: bigger jars make worse storage. A quart of mixed steel hardware is heavy enough to strain a lid mount, and finding one screw means pouring it all out. Sorted pints give you the same wall space, lighter loads, and faster finds. Reserve quarts for light bulk like twine or zip ties.
Idea 10 turns leftover paint into a small touch-up kit, and one hard freeze can ruin it.
10. Store Touch-Up Paint in Labeled Pint Jars
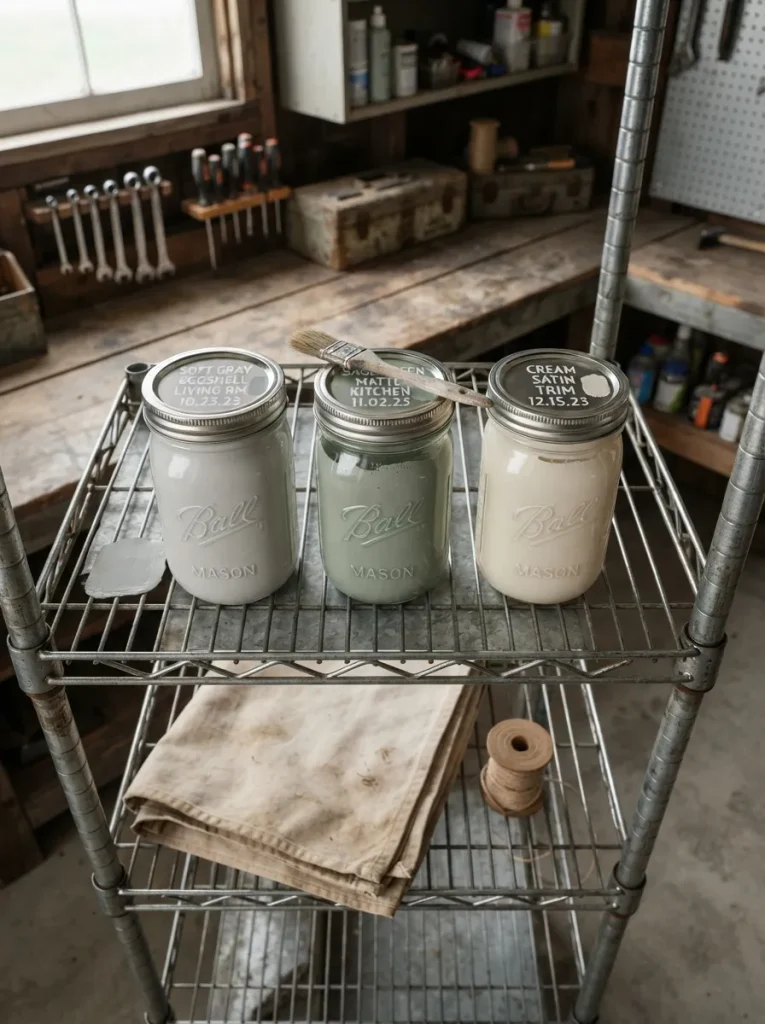
Pour leftover paint into a pint jar to about a finger below the rim; less air means less skin. Wipe the threads clean so the lid seals and opens again later. Write color name, sheen, room, and date on the lid with a paint marker, then dab a swatch beside it.
A small jar lives on a shelf, while a gallon can lives in the way. Homeowners with scuffs to fix, wall by wall, get the most from it.
Important: Latex paint can be ruined by freezing, and a garage doesn’t always stay above it. If yours drops below freezing in winter, keep the jars indoors.
11. Spin Parts on a Bench-Top Jar Carousel
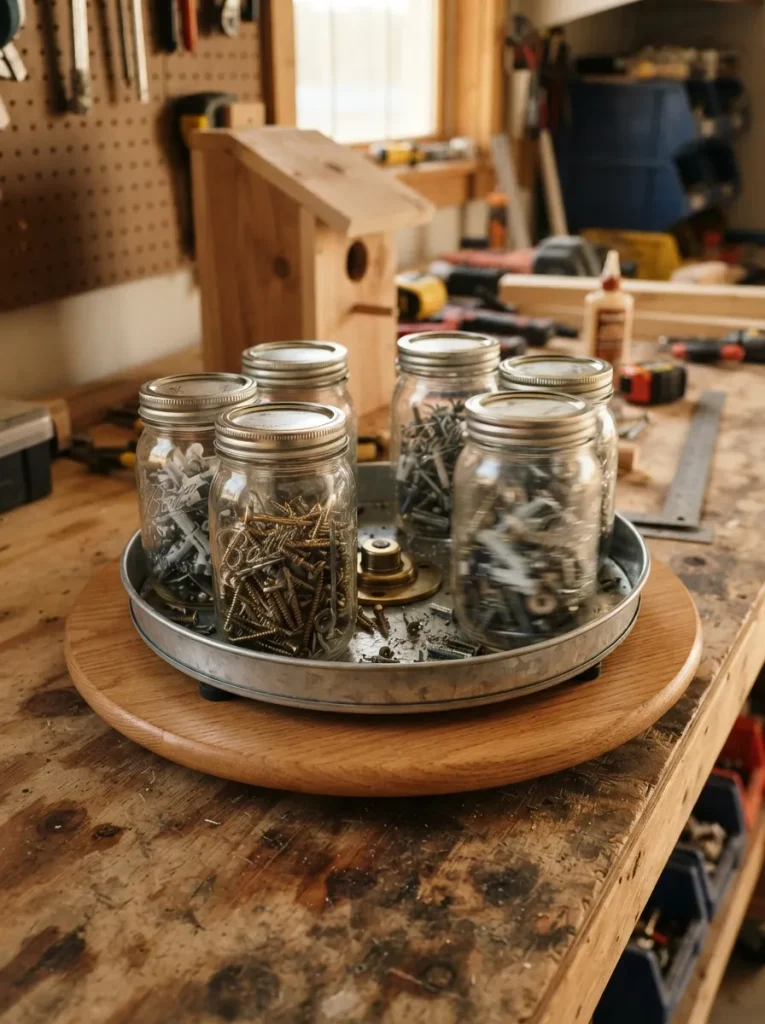
A wooden lazy susan carries a ring of pint jars, each fixed by a one-piece lid screwed to the turntable from underneath. Spin, spot, grab. Size the turntable so jars sit inside its edge, since anything overhanging catches on the bench.
Slip a shallow steel tray under it to catch dropped parts and add small rubber feet so the base doesn’t creep as it turns. Anyone who does repetitive bench work, like assembly or repairs, and keeps twisting around to hunt for the same fasteners will use this daily.
Small-Space Tip: Tuck the carousel into a bench corner so only the front arc sticks out. Parts stay within reach without claiming more bench.
Shop This Look
| Product |
|---|
| Wooden lazy susan turntable |
| Shallow steel tray |
| Adhesive rubber feet |
How to Start Your Mason Jar Garage Organization Transformation
Start here: a case of wide-mouth pint mason jars, and one shelf near the workbench to hang the first six from. Every later idea assumes those jars exist, so buying them first anchors the whole system.
Sorting the entire garage before hanging anything is the beginner mistake that stalls projects. Three hours in, there’s nowhere for the piles to go. Sort one coffee can, fill three jars, hang them, and repeat.
Three items under $50 each: a rimmed aluminum baking sheet reserved for sorting, a magnetic parts bowl to catch steel while you work, and a wide-mouth canning funnel for pouring fasteners into jars without spilling. Prices vary, and each sits comfortably in budget territory.
A starter set, meaning jars, lids, and one shelf of sorted hardware, runs roughly $20–$60 and fits in one afternoon. A full wall with the plank rail, lighting, and steel panel lands closer to $100–$250 and takes a weekend. Both figures are approximate and shift with the jars you already own.
Ready to Create Your Dream Organized Garage?
Eleven mason jar crafts for men to organize the garage add up to a system, not a single project: hanging jars, color coding, a plank rail, lighting, rust control, magnets, and a spinning carousel for the bench. Small starts count.
One coffee can sorted into three jars is a real first step, so do that today and hang them under whatever shelf is closest. Give it a few weeks and the garage stops fighting you; you’ll walk in, know where the right wood screw lives, and get on with the actual project. Pin the ideas you’ll try first so they’re waiting when the weekend comes.
Keep Exploring
- 9 Garage Wall Storage Ideas That Clear Every Inch of Floor
- 12 Mason Jar Organization Ideas for the Laundry Room
- 8 Workbench Lighting Ideas That Make Small Parts Easy to See