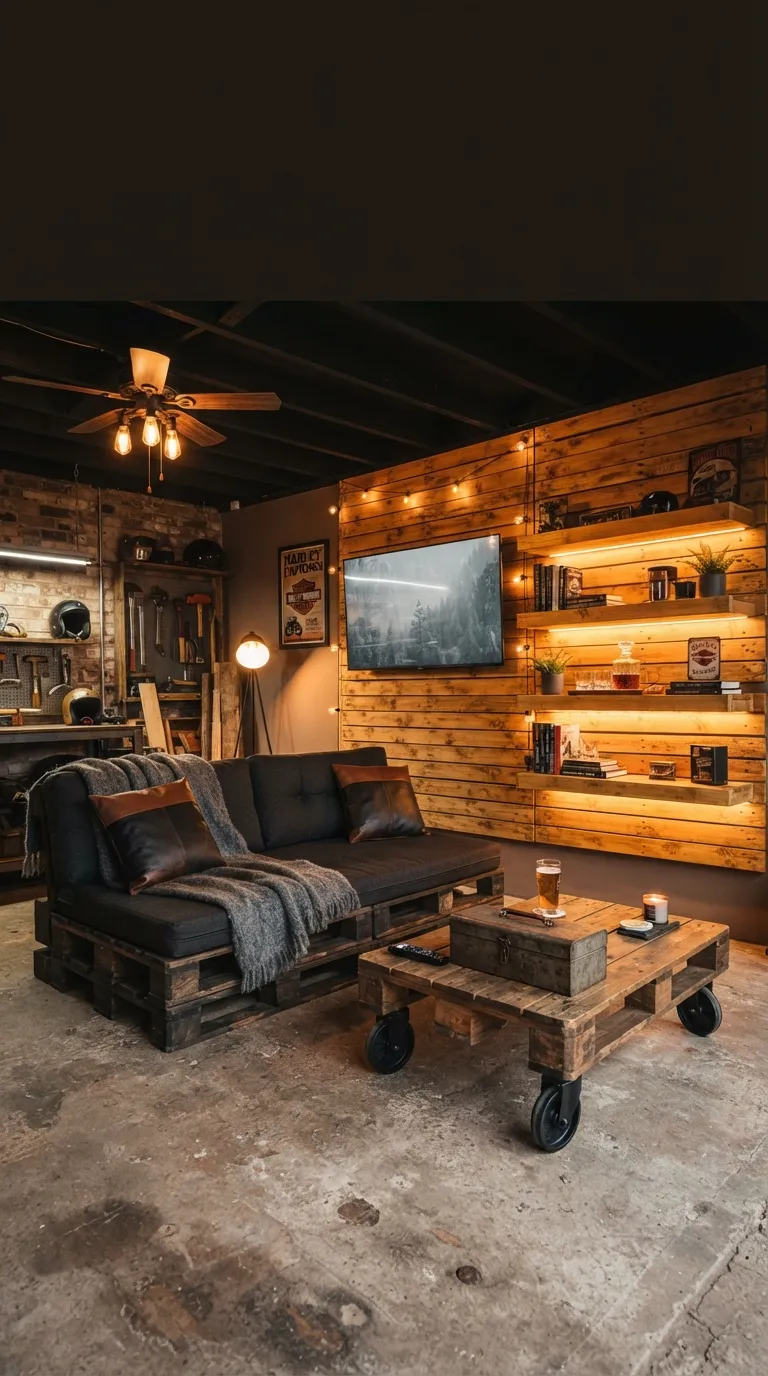
15 Man Cave Pallet Furniture Ideas for the Garage
Pallet furniture turns a cold, echoing garage into a room worth sitting in, using lumber that’s often free for the asking. These 15 man cave pallet furniture ideas for the garage cover seating, a bar, lighting, storage, and the finishing choices that keep raw pallet wood from looking like a pile left at the curb.
Picture a low couch of dark-stained boards, a bar edge lit by a warm strip of LEDs, and a slab floor you barely notice because everything sits above it. Sanded pine feels warm under a palm, even in a room that smells faintly of oil and rubber. Wheels and folding brackets let the car keep its spot. Salvaged boards, finished right.
Jump To
- Why Man Cave Pallet Furniture Makes Such a Difference
- The Builds, Mistakes First
- How to Start Your Man Cave Pallet Furniture Transformation
- Ready to Create Your Dream Garage Man Cave?
- Keep Exploring
Why Man Cave Pallet Furniture Makes Such a Difference
Pallet wood gives a garage what drywall and concrete can’t: warmth, texture, and furniture that often costs far less than store-bought seating. Pine boards take dark walnut or charcoal stain well, oak pallets run heavier and hold up to bar-top abuse, and matte black hardware plus warm white LEDs make rough lumber read as deliberate.
A one-car garage can handle it, provided each piece rolls, folds, or hangs. Start with seating and light.
Quick Reference
| Best starting point | A rolling two-pallet coffee table on locking casters |
| Biggest impact area | Seating zone plus warm, low-glare lighting |
| Budget to start | Roughly $50–$150 for hardware and finish (approximate) |
| Time to complete | One weekend per piece; several weekends for a full cave |
The Builds, Mistakes First
1. Heat-Treated Pallets Checked Before You Cut a Single Board
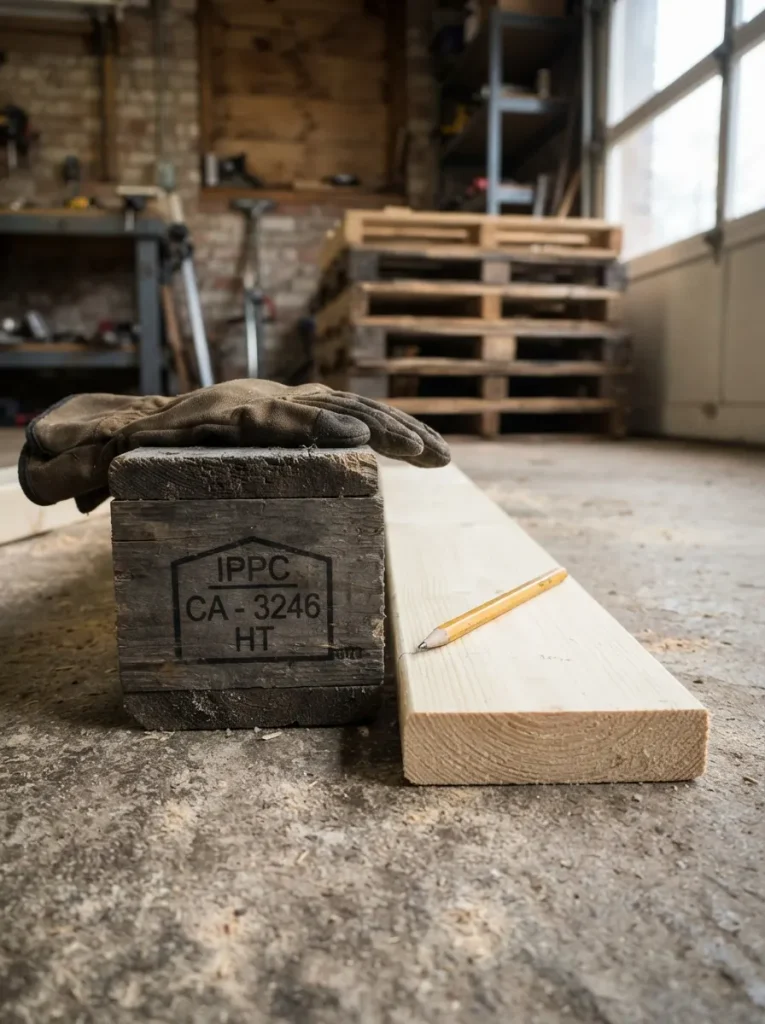
Grabbing the first free pallet off a loading dock is how this project usually goes wrong. Check the side block or stringer for an IPPC stamp. HT means heat-treated, and that’s the one to take; MB means methyl bromide fumigation, so leave it.
No stamp at all doesn’t mean untreated, because domestic pallets are often unmarked and come with no history. Pass on dark stains, oily patches, or a chemical smell, and skip brightly colored rental pallets (blue and red are common), which belong to pooling companies. Oak and other hardwood pallets run heavier and suit load-bearing frames. Lighter pine is better for shelves and wall boards.
Warning: Smell every pallet before it comes home, not after the sofa is built. Sanding reshapes the surface and won’t pull out anything that soaked in, so an oily or chemical-smelling pallet means the build starts over.
2. A Two-Pallet Coffee Table on Locking Casters
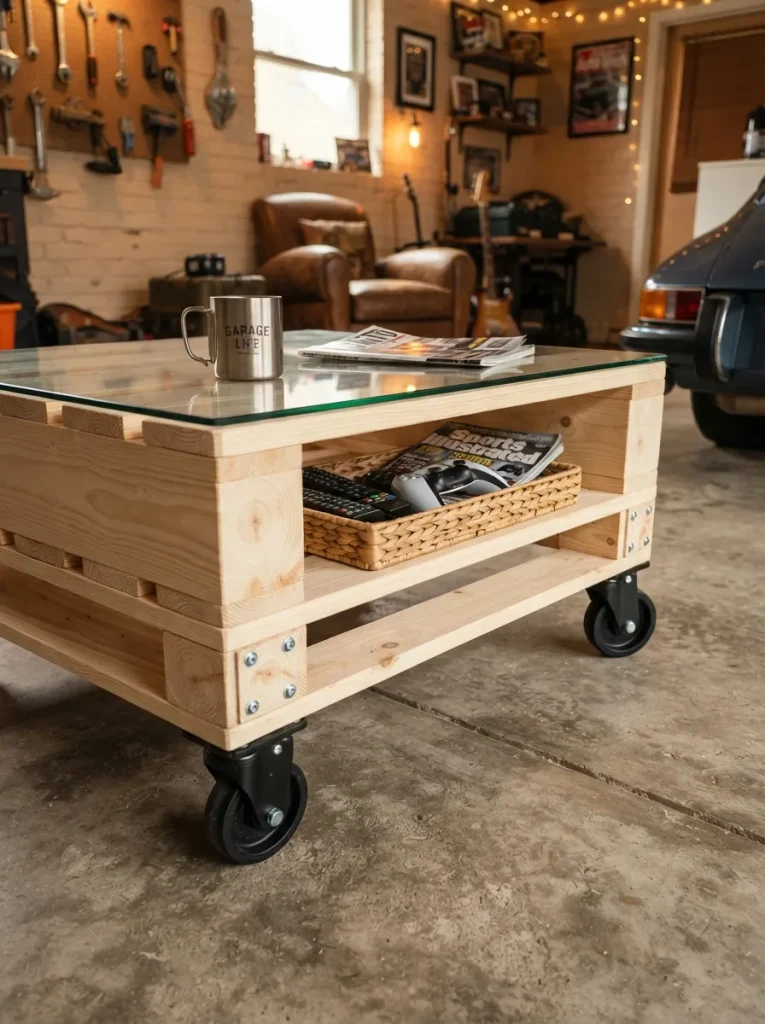
Anyone whose car still sleeps in the garage needs furniture that gets out of the way. This table rolls off in seconds, and the wheels keep the wood clear of a slab that can hold moisture and stays cold. Stack two pallets, typically about 11 inches together, and add casters roughly 4 to 5 inches tall overall, so the top lands around 15 to 16 inches.
That sits just under a couch seat at 17 inches. Bolt the caster plates through the thick corner blocks and stringers, never the thin deck boards. Choose swivel casters with brakes on all four, or the table creeps every time someone sets down a drink.
Quick Win: Fit the casters before you sand or stain. A frame that rolls is easy to spin around the driveway and reach on every side.
Get the Look
| Product |
|---|
| Locking swivel casters, set of four |
| Tempered glass tabletop panel sized to your pallet |
| Shallow woven basket for remotes and controllers |
3. Dark-Stained Frames With Natural Slats
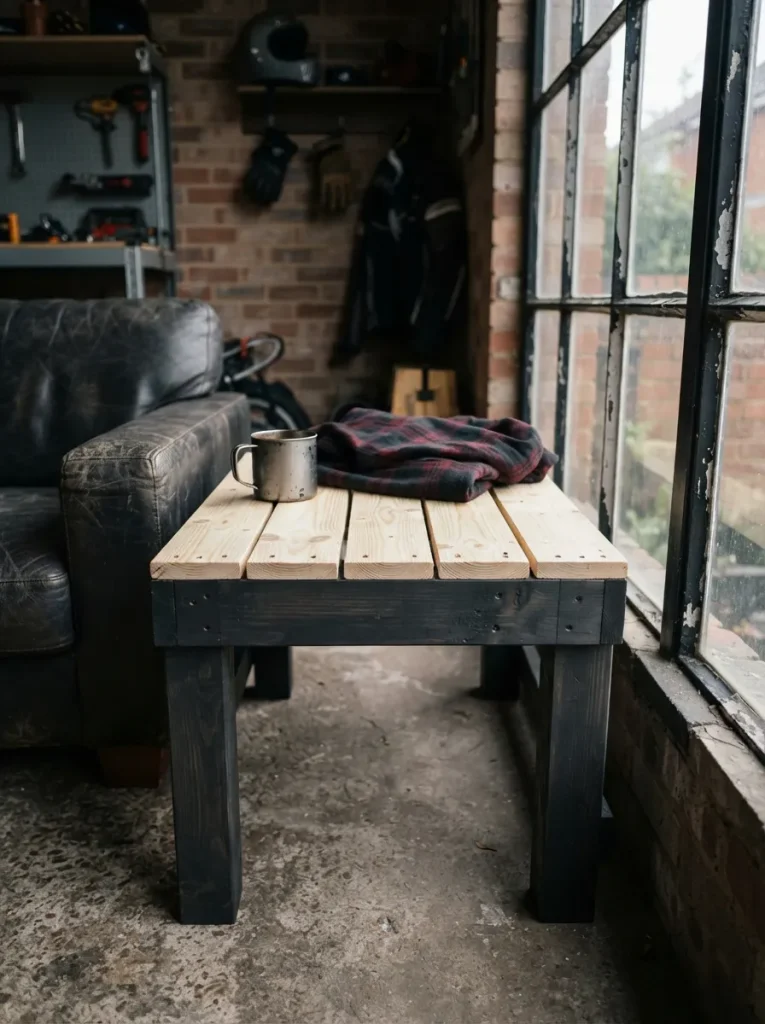
Charcoal stringers and blocks frame slats left close to raw pine, and a piece built from mismatched boards suddenly looks planned. Contrast does the hiding: the eye reads the dark structure first and forgives color differences between boards.
Pallet slats come in mixed species and soak up stain unevenly, so brush wood conditioner onto softwood before staining, and test on a scrap cut from the same pallet. Sand to 150 grit and no further. Finish the natural slats with a clear matte coat so greasy garage hands leave no marks. Best for anyone whose pallet stack doesn’t match.
Pro Tip: Stain the frame parts before assembly. Brushing dark stain around installed slats leaves drips on the pale boards, while loose parts take color cleanly.
The next idea uses a few feet of adhesive LED strip to make one shelf light an entire wall, but it only works if the strip faces the wall instead of the room.
4. A Floating Pallet Shelf With a Warm LED Halo
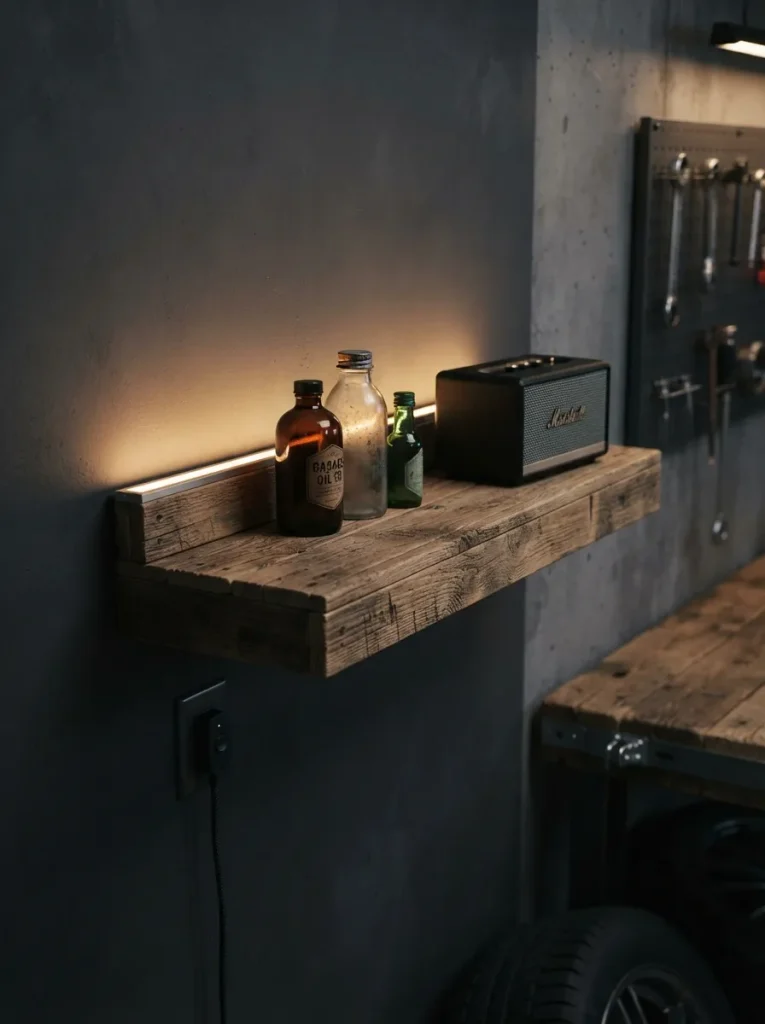
Light bounced off a wall reads as glow, while light aimed at the room reads as glare. Mount a pallet board or half a pallet on the wall as a floating shelf and tuck an LED strip along the back edge, facing the wall, about an inch or two out from the surface so the wash spreads.
The rough wood texture catches that grazing light and throws tiny shadows, which is what makes raw boards look expensive. Pick strips rated warm white, around 2700–3000K. Cool white near 5000K turns pine gray and makes a cave feel like a workshop. Ideal for a cave lit by one overhead bulb and nothing else.
Important: Peel-and-stick backing isn’t a mounting method on rough wood or dusty garage walls. Wipe the surface clean, then add small mounting clips every foot or two so the strip doesn’t sag as the garage heats and cools.
Get the Look
| Product |
|---|
| Warm white LED strip lights |
| Aluminum diffuser channel for the strip |
| Plug-in dimmer compatible with the strip |
5. Two Zones, One Garage: The Car Bay and the Cave
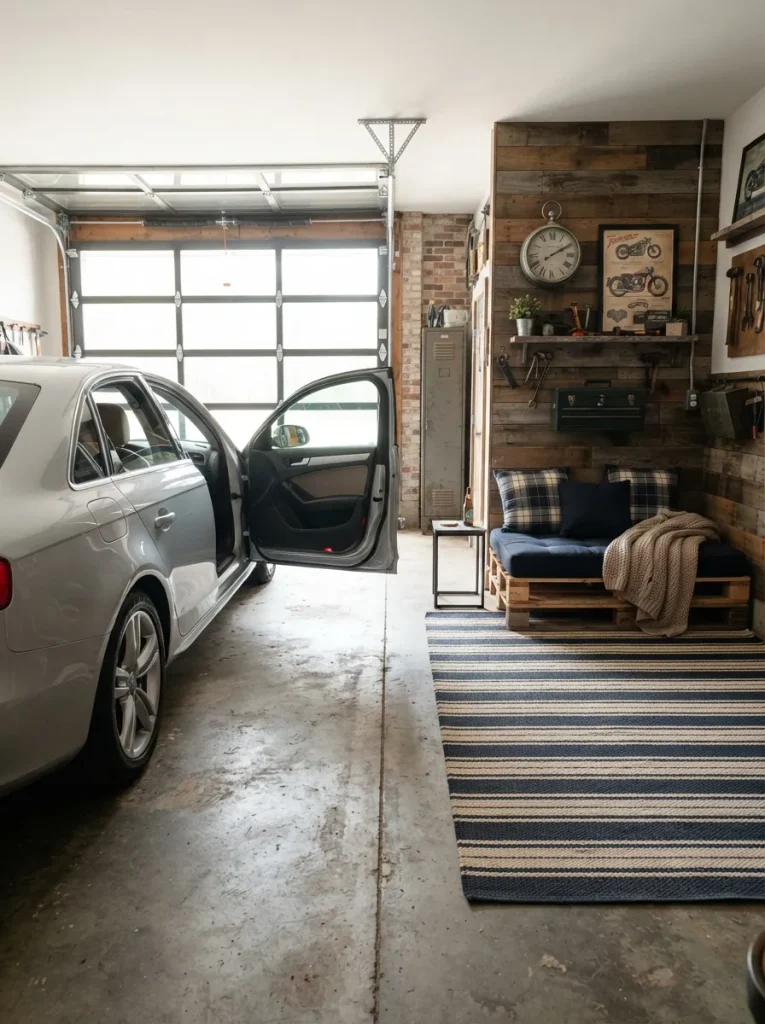
Before building anything, park the car, open every door fully, and mark the swing on the floor. Leave a walking lane of about 36 inches between an open door and the nearest furniture, then put the cave on the side with the fewest door openings, often the back wall. Seating belongs far from the overhead door, which lets in dust and temperature swings.
Check the door’s track and opener rail too, since tall pallet builds can collide with them. Keep any pallet furniture well clear of a gas water heater or furnace, following the appliance’s labeled clearances, because wood is combustible. Ideal for shared garages where the car still needs to come home at night.
Small-Space Tip: In a one-car bay, confine the cave to the back wall and make every piece roll, fold, or hang so the car still fits when the weekend’s over.
6. A Pallet Dartboard Backer Set to Regulation Height
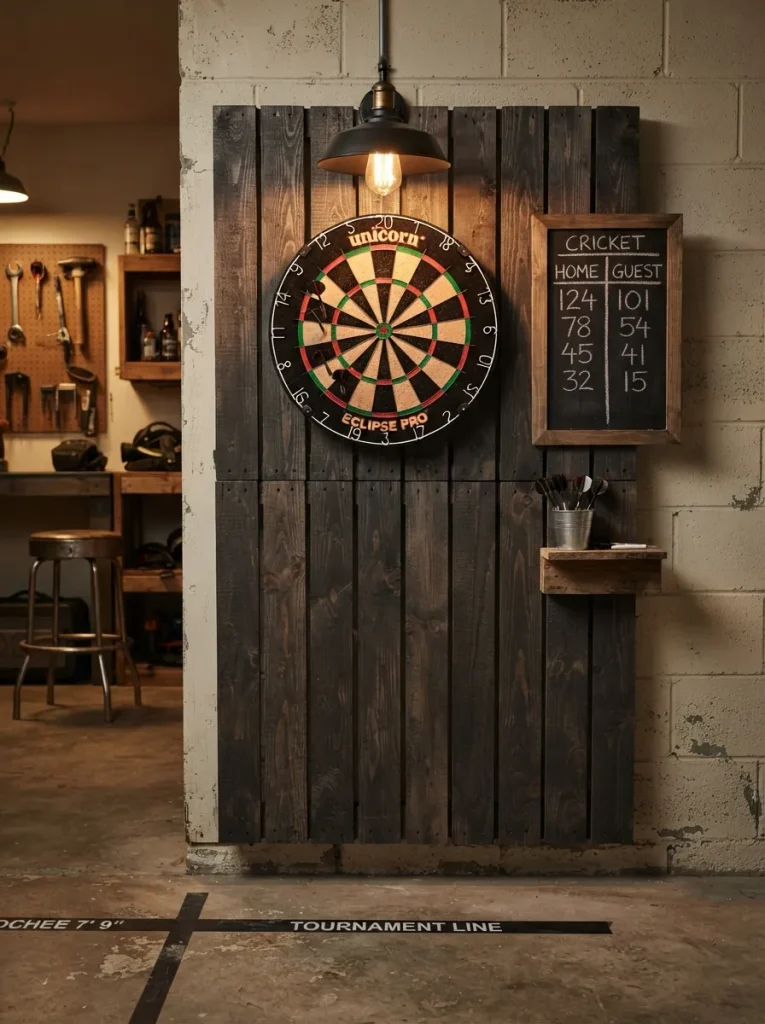
Screwing a dartboard straight onto open pallet slats is the mistake to skip: darts slide into the gaps and chew up the boards. Build the backer from tightly butted boards, or fix slats over a sheet of plywood, then center the board so the bullseye sits 5 feet 8 inches off the floor.
Mark the throw line 7 feet 9¼ inches from the board face, measured horizontally; both are the widely recognized regulation measurements. Anchor the backer into wall studs, since repeated impacts loosen drywall anchors. Best for a cave with at least 9 feet of clear floor in front of the wall.
Pro Tip: Light the board face, not the thrower. Mount a light above the board, angled down onto it, because a shadow from the throwing arm falling across the numbers is a common lighting mistake.
Get the Look
| Product |
|---|
| Bristle (sisal) dartboard |
| Steel-tip darts set |
| Chalkboard or dry-erase scoreboard |
The next build hangs on a single number, 17 inches, and getting it wrong is the difference between a couch and a low bench nobody wants to climb out of.
7. A Two-Pallet Sofa Built to a 17-Inch Seat Height
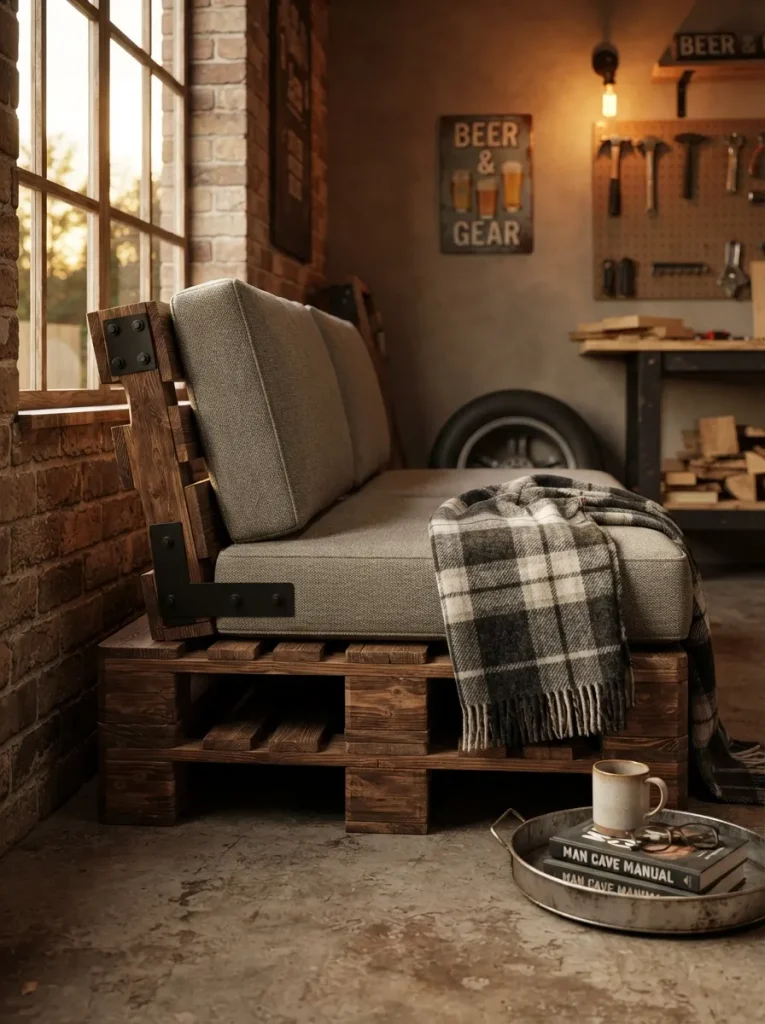
Made for anyone who wants a real spot to watch a game instead of a folding chair. Stack two pallets, about 11 inches together, and top them with a firm 5-to-6-inch cushion so the seat lands near 17 inches. Lower than that and standing up gets awkward.
Set a third pallet upright at the rear as the back, cut so its top sits 30 to 34 inches off the floor, and fix it with metal corner brackets. Fasten everything with screws through the stringers, since nails work loose as wood moves. Round every corner your calves and elbows can reach, then finish with a matte clear coat.
✅ Sofa Build Sequence:
- [ ] Dry-fit the two base pallets and mark where the back pallet will sit.
- [ ] Sand every surface your calves and elbows will touch, stopping at 150 grit.
- [ ] Stain and seal the pieces separately, and let the finish cure fully.
- [ ] Screw the base pallets together through the stringers, then attach the back with corner brackets.
- [ ] Add the cushions last and confirm the seat sits near 17 inches.
Get the Look
| Product |
|---|
| Firm high-density foam seat cushions |
| Heavy-duty steel corner brackets for the backrest |
| Wool-blend throw blanket |
8. A Drop-Leaf Pallet Table That Folds Flat Against the Wall
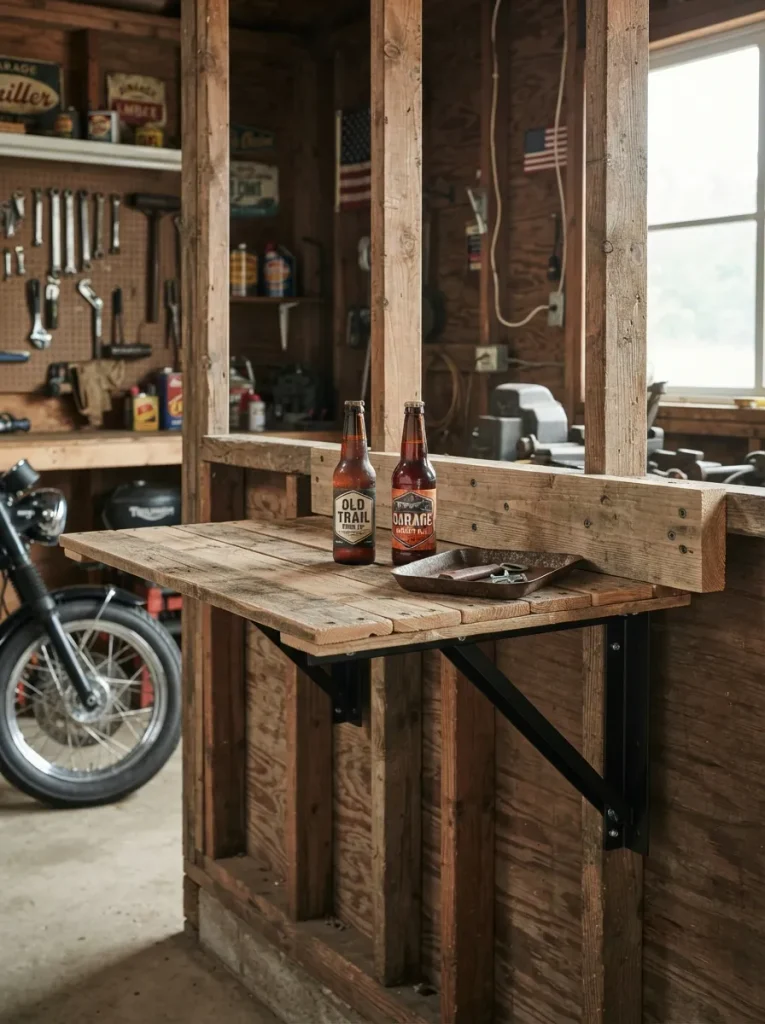
Hinge a panel of pallet boards to a wall-mounted ledger, add folding shelf brackets underneath, and the table drops to a flat slab against the wall whenever the car needs the room. Keep the open leaf to about 14 inches deep, enough for drinks or a project, and shallow enough to leave the 36-inch walking lane intact.
Choose brackets rated well above what will ever sit on the leaf, because people lean on shelves. Small garages get the most from this piece, since it gives back the floor when folded.
Pro Tip: Studs sit 16 inches apart in many walls, though 24 is also common. Screw a horizontal 2×4 ledger into at least two studs and mount the brackets to that; drywall anchors alone won’t hold a leaf that gets leaned on.
9. Pallet Boards Ripped Into a Slat Wall Behind the TV
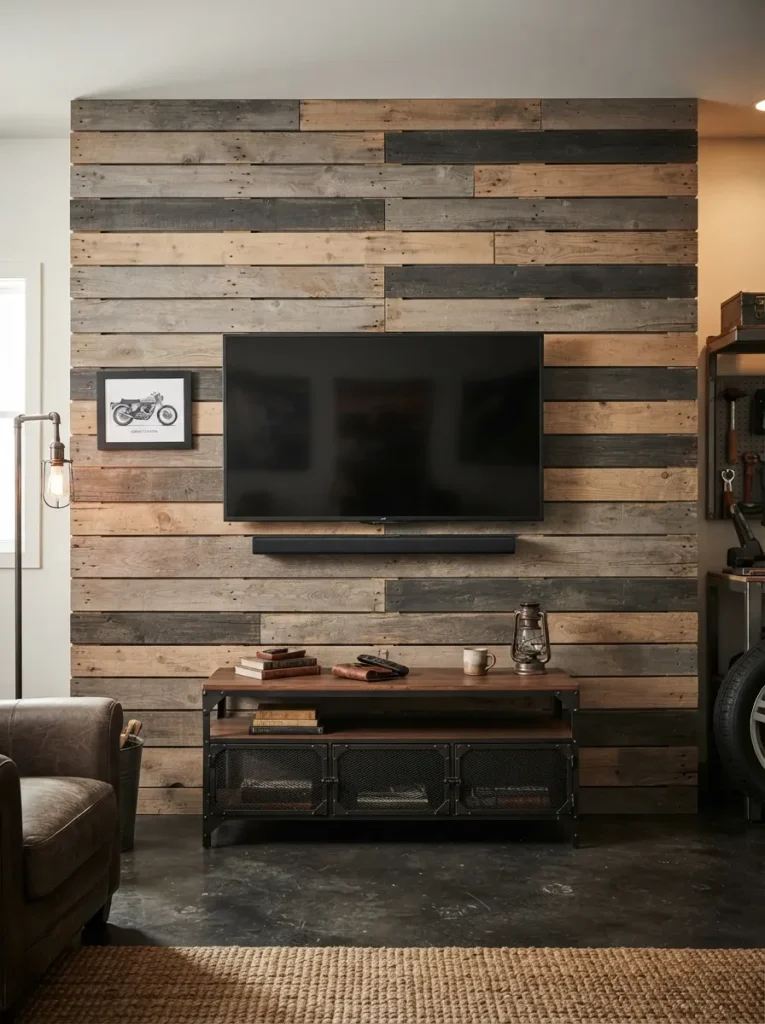
Repeating texture with shallow shadow gaps makes a plain garage wall look built-in, and it hides dinged drywall in the process. Take pallets apart by cutting through the nails between boards and stringers with a reciprocating saw, since prying splits the wood.
Sort boards by thickness and width before nailing them up, because pallet boards rarely match, then mount the TV plate through the boards into the studs behind. Fastening only into boards would pull free under the screen’s weight. Suits anyone whose wall is currently bare drywall or open studs.
Budget Version: Warehouses, hardware stores, and appliance retailers often give pallets away if you ask first. Add a box of finish nails and a quart of stain, and the wall commonly runs well under $100 (approximate).
The next idea wraps a mini fridge in slats, and the gap you leave around it matters more than the slats themselves.
10. A Slatted Pallet Cabinet Built Around a Mini Fridge
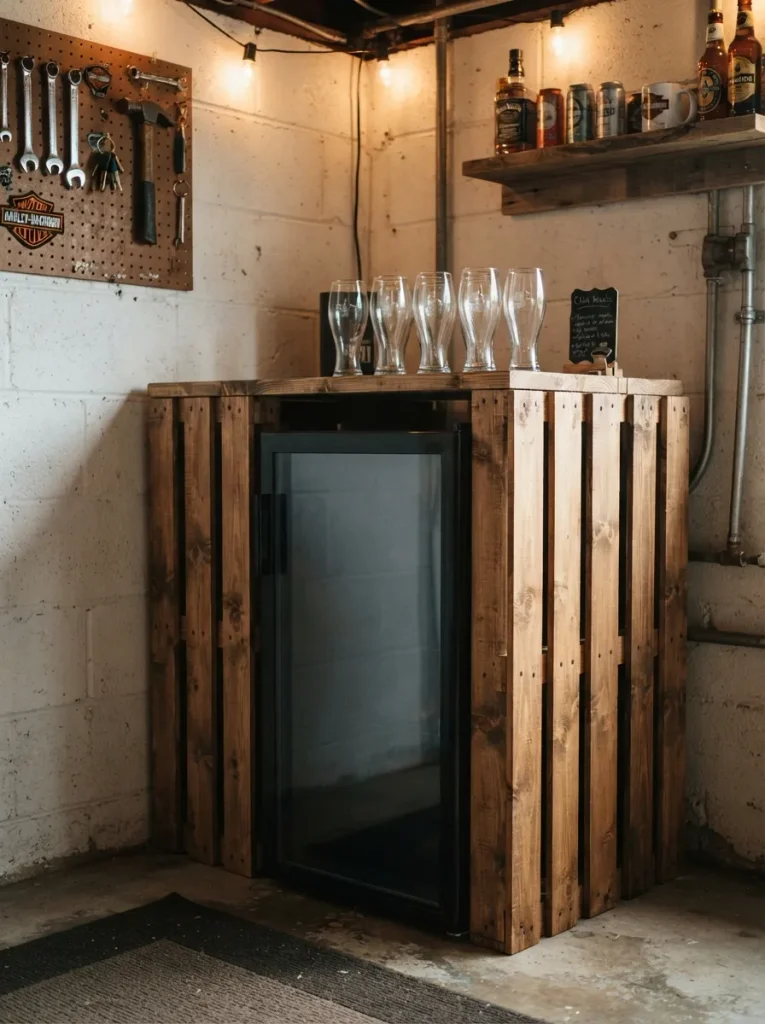
Vertical slats frame a compact fridge on three sides, a plank shelf on top holds glasses, and the whole thing reads as built-in cabinetry rather than an appliance on a garage floor. Build from the fridge outward: measure width, height, and depth, then add the clearance its manual specifies at the back, sides, and top.
Open slat gaps work in your favor, letting heat escape where a solid plywood box would trap it. Keep the door’s hinge side clear of the frame so it swings fully open. Best for anyone tired of walking back into the house for cold drinks.
Important: Most people assume a mini fridge works anywhere it fits and plugs in. Check the manual’s ambient temperature range as well, since some units are rated only for conditioned rooms and may cool poorly in an unheated garage.
11. Torch-Charred Slats for a Black, Grain-Forward Finish
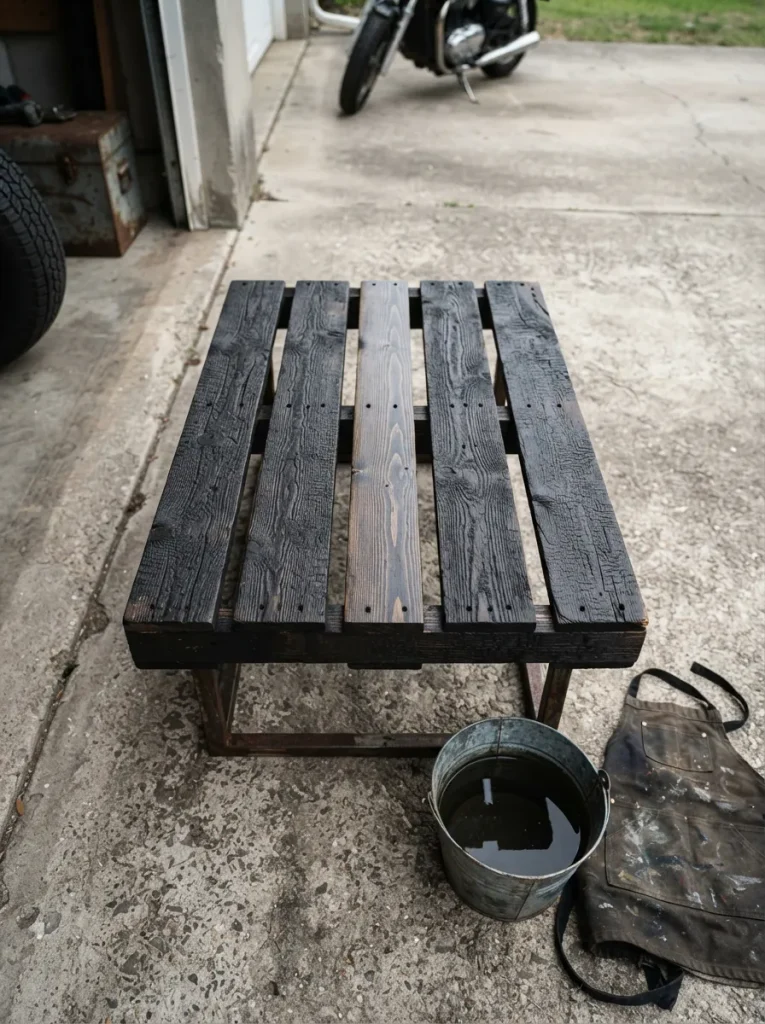
Pass a propane torch steadily across a pine slat until the surface blackens, scrub off the loose char with a stiff brush, then seal it with a penetrating oil or clear coat. Softwood chars quickly and the grain stands out in dark relief, which hides old nail marks and mismatched boards better than stain can.
Practice on a scrap first, because a few seconds too long turns a slat to fragile charcoal. Only char pallets you’ve already vetted for a clean HT stamp. Best for anyone who wants black wood without stain blotching and has a patch of open driveway to work on.
Warning: Char outdoors on bare concrete with a bucket of water or a hose nearby, never inside the garage. Rags soaked in finishing oil can self-heat and ignite, so lay them flat outside to dry before you throw them away.
12. A Vertical Pallet Gear Rack for Bats, Rods, and Helmets
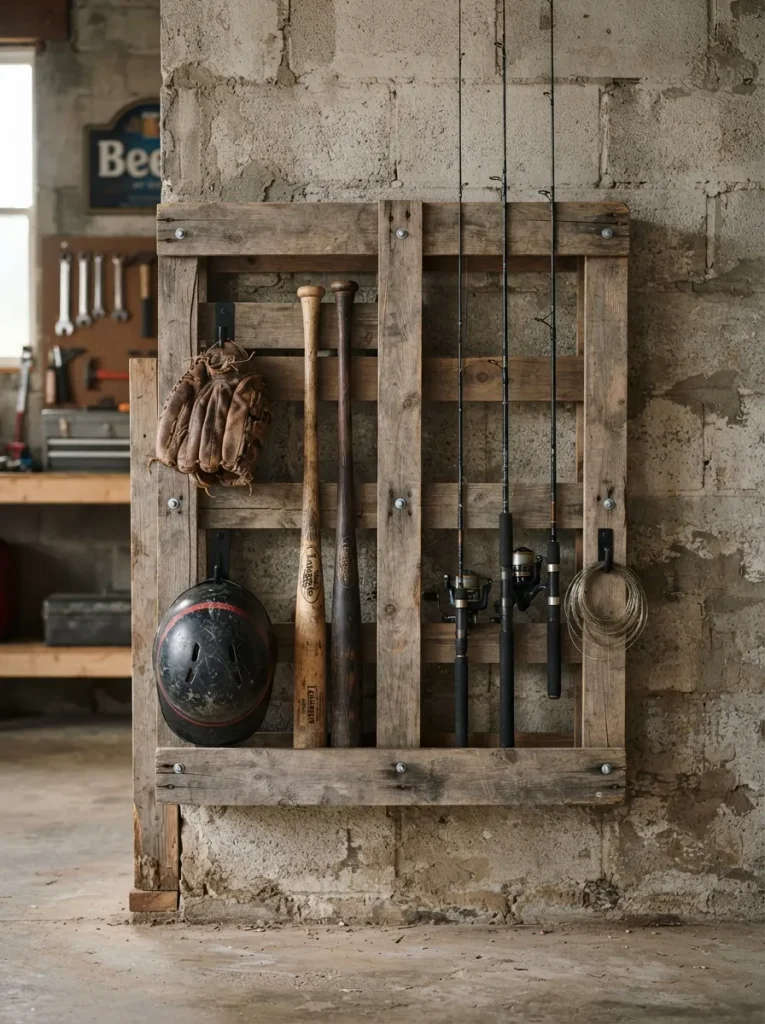
Built for garages that already hold more gear than shelf space, this rack is one whole pallet stood upright and fixed to the wall, with the slat gaps doing the holding. Measure the gaps first, since they vary between pallets, then match what hangs where: barrels and rod tips slot into narrow ones, and wide ones take hooks.
Anchor through the stringers into the studs rather than the slats, which would tear out under weight. Set the bottom edge a few inches off the floor so damp slabs and mop water can’t reach the wood.
Quick Win: Stick self-adhesive felt to the contact points inside the gaps so bat barrels and rod handles don’t scuff.
The next build is a bench with a lid, and the one part you shouldn’t improvise is the hinge.
13. A Lidded Pallet Bench That Swallows the Clutter
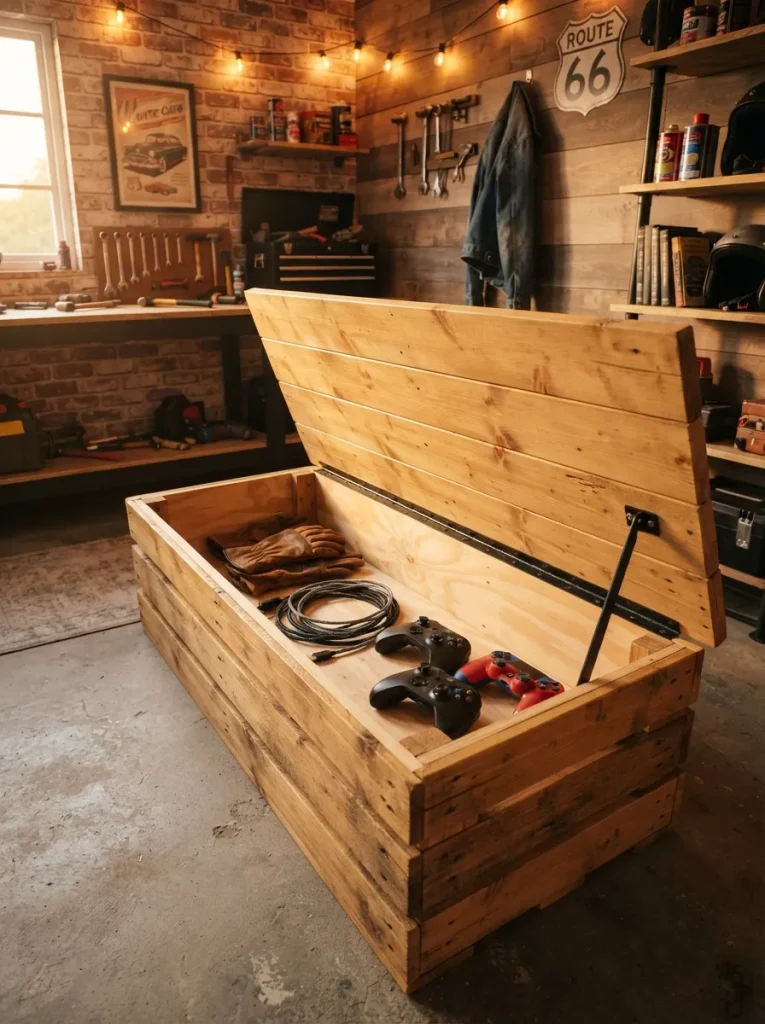
A seating zone needs somewhere to drop the stuff that would otherwise land on the couch, and a lid turns that clutter into a seat. Build a box from pallet boards, then line the inside with thin plywood, because open slats let in dust, sawdust, and the occasional mouse.
Make the lid from solid boards rather than open deck so it takes a cushion. Fit a lid stay so a heavy lid can’t slam on fingers. Load it with soft goods, chargers, and controllers, and keep fuel, solvents, and paint in a metal cabinet elsewhere. Best for a shared garage where gloves and cables pile up.
Pro Tip: Pre-drill every screw within about an inch and a half of a board end. Pallet boards split there first.
Observation
The counterintuitive part: sanding pallet boards to a glass-smooth 220 grit before staining makes the color go on paler and streakier, not richer. Fine sandpaper burnishes the surface and closes the pores, so stop at 150 grit and let the wood drink the stain.
14. Whitewashed Pallet Pieces to Push Back Against a Dark Garage
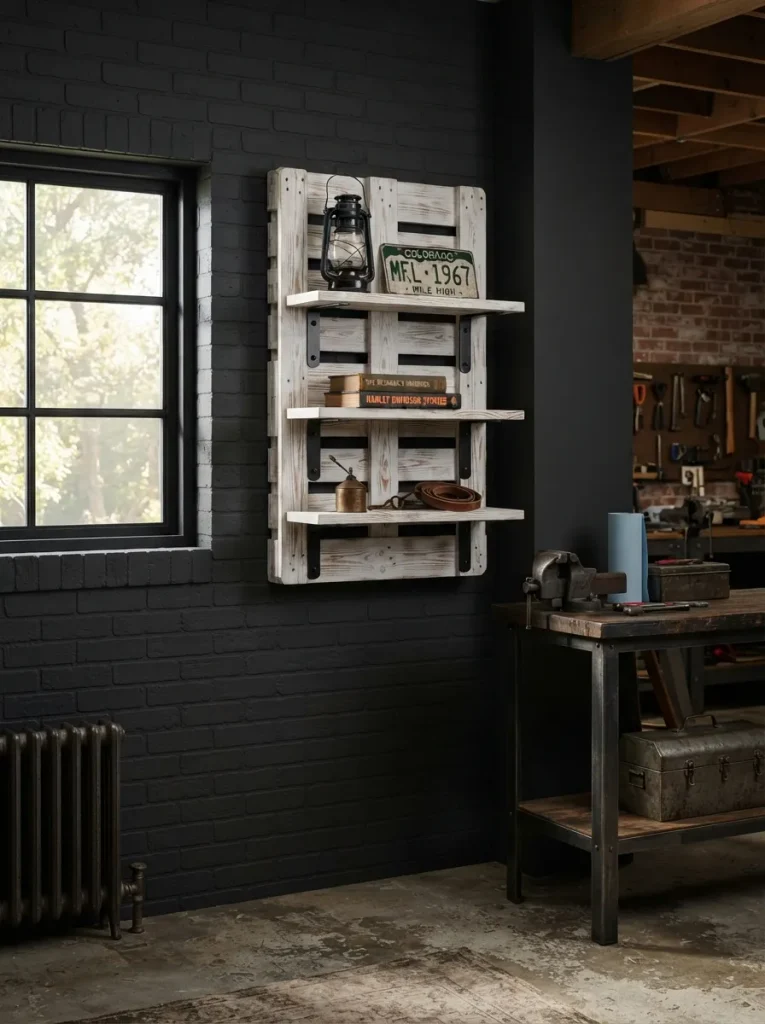
Going all charcoal in a garage with one small window is how a cave turns into a dungeon. Whitewash a few pieces instead: thin white latex paint with roughly an equal part of water, brush it on, and wipe back with a rag so the grain shows through.
Pale surfaces bounce light around a room, and garage walls rarely have much to spare. Put the whitewashed pieces against the darkest wall and keep the sofa, table frames, and bar in darker finishes so the room holds its weight. Suits caves with limited windows and plenty of dark wood already built.
Styling Note: Matte black hardware keeps whitewashed wood from drifting into beach-house territory.
15. A Standing Pallet Bar With Back-Bar Shelving
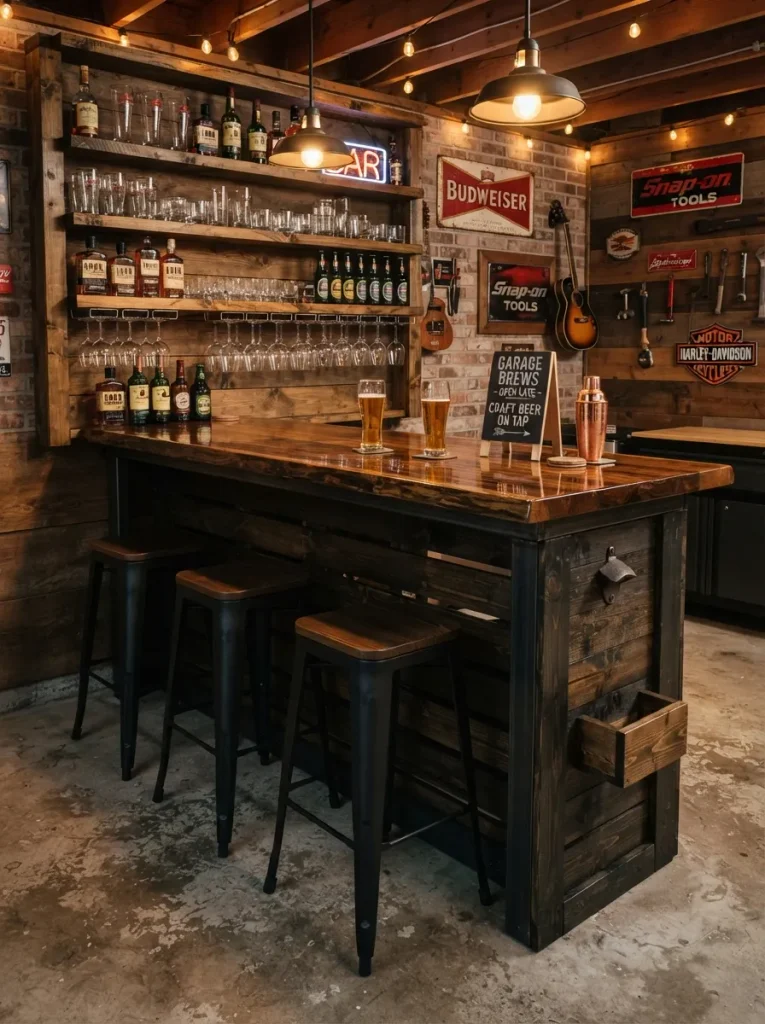
A dark counter, a row of stools, and open shelves behind stocked with glasses: the corner starts to look like a place instead of a garage. Many pallets measure about 48 by 40 inches, so two stood on their 40-inch edges give a base that reaches roughly 42 inches once a 1½- to 2-inch top goes on, a common bar height.
Leave a 10 to 12 inch overhang for knees, seal the top with polyurethane so spills don’t soak in, and anchor the base to a wall stud or the floor. Stools with a seat near 30 inches leave the usual 10 to 12 inches of thigh room.
Get the Look
| Product |
|---|
| Bar-height stools with a seat near 30 inches |
| Wall-mounted bottle opener with a cap catcher |
| Hanging glassware rack that mounts under a shelf |
How to Start Your Man Cave Pallet Furniture Transformation
The right first move is almost always the rolling coffee table from idea 2. It uses one or two pallets, teaches the sand, stain, and screw routine every other build repeats, and sets the lift-off-the-slab habit for the rest of the cave.
Skip the original nails. They loosen as pallet wood dries and flexes, and popped heads and wobbly joints are what make a sofa or bar look homemade in the wrong way. Drive screws through pre-drilled holes into the stringers, long enough to bite the second board without poking through.
Three items, each typically under $50, cover most of the prep: a bi-metal reciprocating saw blade made for cutting through nails, a mixed pack of 80-, 120-, and 150-grit sanding sheets, and a quart of water-based clear polyurethane in matte or satin.
A single piece takes a weekend, with drying time built in. A full cave runs roughly four to six weekends. A starter budget of $50–$150 covers screws, sandpaper, and finish (approximate), while a full build with lighting, cushions, a dartboard, and stools lands closer to $300–$800. The coffee table, dartboard backer, gear rack, and drop-leaf table are weekend jobs. The slat wall and bar can stretch across a month, mostly waiting on finishes to cure.
Ready to Create Your Dream Garage Man Cave?
Fifteen ideas cover a lot of ground: safe pallet selection, three finishes (two-tone stain, char, and whitewash), a sofa and a lidded bench for sitting, a fold-away table, and a full bar as the statement piece. Nothing here has to happen in one go. A single rolling coffee table already changes how a garage feels, and starting small counts.
Tonight, find the stamp on the next pallet you pass and check whether it reads HT. In a few weekends the garage stops being where things get stored and becomes a warm, textured place you choose to sit in. Pin your favorite man cave pallet furniture ideas for the garage so the measurements are on hand at the pallet stack.