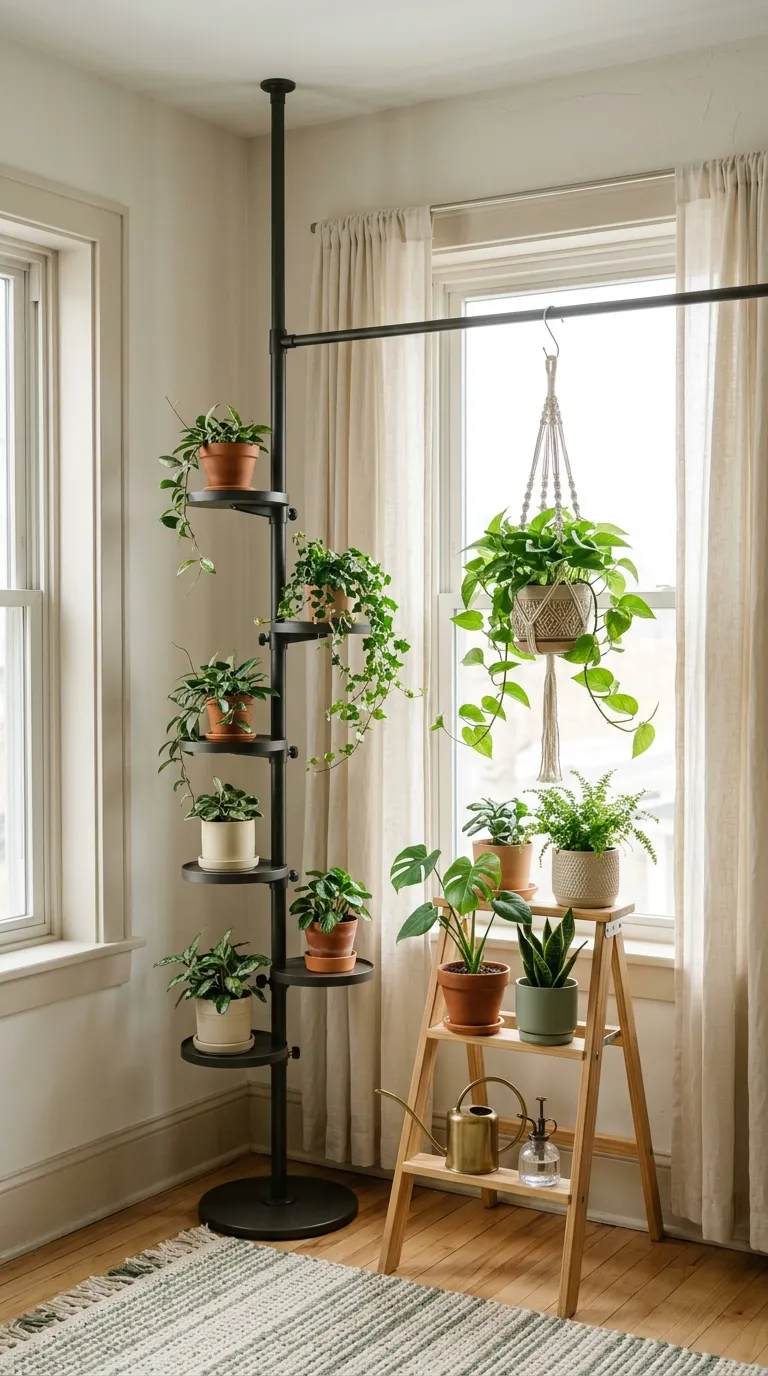
15 DIY Planters for Renters That Need No Drilling or Paint
A rental doesn’t have to look like storage while you wait to actually decorate the trick is picking planters and mounts that grip, lean, or hang without a single hole or drop of paint. Here are 15 renter-friendly planter ideas built entirely from tension, adhesive, and weight instead of drills, all reversible enough that you still get your deposit back.
Picture a kitchen window lined with trailing pothos on a shelf that isn’t screwed to anything. A hallway corner filled with a leafy plant stand that came flat-packed and leaves the same way. Sunlight catching a row of hanging planters clipped, not bolted, to a curtain rod. Nothing here needs a landlord’s permission slip.
Jump To
- Why DIY Planters for Renters Make Such a Difference
- 15 Planter Ideas That Skip the Drill and the Paint
- How to Start Your Renter-Friendly Planter Setup
- Ready to Green Up Your Rental?
Why DIY Planters for Renters Make Such a Difference
DIY planters for renters solve what most plant styling advice ignores: shelves, hooks, and painted pots all assume you’re allowed to leave a mark. Command-rated adhesive strips, tension rods, S-hooks, and weighted floor stands do the same job without touching drywall, and they hold real ceramic now, not just a trailing vine.
Removable contact paper and vinyl wrap stand in for spray paint, so color happens without voiding a deposit. It works in a studio as easily as a three-bedroom start wherever gets the most light.
| Best starting point | A weight-rated command hook or tension rod in your brightest window |
| Biggest impact area | Plants grouped near one light source, not scattered as singles |
| Budget to start | Roughly $20–$40 for a first cluster, approximate |
| Time to complete | A weekend afternoon for a full shelf or corner |
15 Planter Ideas That Skip the Drill and the Paint
1. Macramé Hangers on Weight-Rated Command Hooks
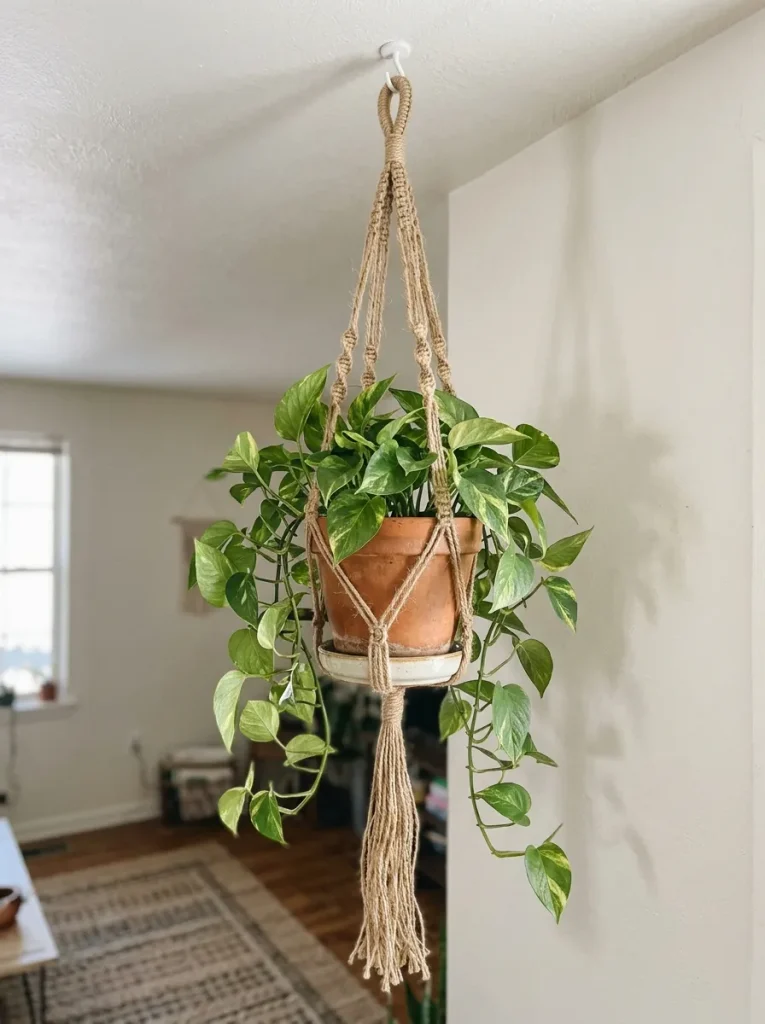
Hang a macramé sling from a ceiling-rated command hook and the whole setup comes down clean when you move no anchor, no patch, no touch-up paint. The hooks are rated by weight, not by looks, so match the number printed on the package to the combined weight of pot, soil, and water rather than guessing from the size of the plant.
Jute and cotton cord both work, but jute holds shape better in humid bathrooms while cotton drapes softer for a bedroom corner. This suits anyone starting their first plant wall who wants one statement piece before committing to a full shelf. For more ways to style pots once they’re hanging, these modern succulent planter ideas pair well with a mixed hanging arrangement.
Warning: Command hooks list a maximum hold weight for a reason a wet 10-inch pot of soil regularly runs 8–12 lbs, and overloading the hook peels paint off the ceiling when it finally lets go, the exact damage you were trying to avoid.
What You’ll Need
| Product |
|---|
| Ceiling-rated adhesive hook, heavy-duty |
| Macramé plant hanger, cotton or jute |
| Lightweight ceramic or plastic pot with drainage |
| Trailing houseplant (pothos or philodendron) |
2. A Tension Rod Turned Window Plant Ledge
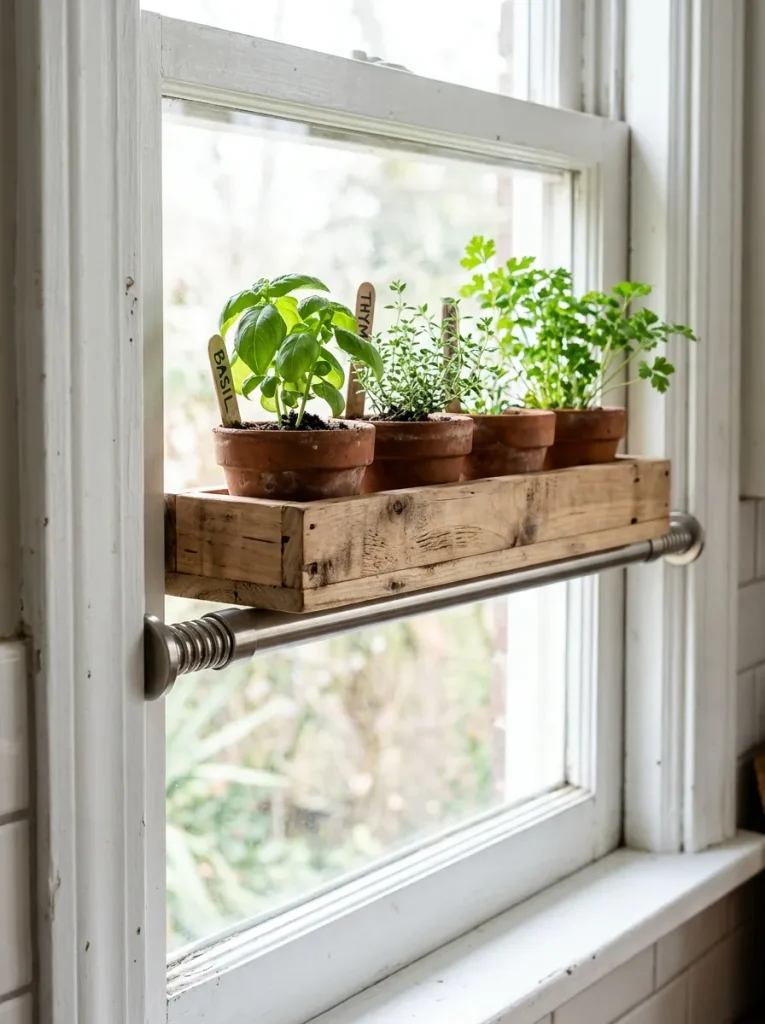
A spring-tension rod wedged inside a window frame turns dead glass space into a plant shelf, and it grips by pressure alone twist to extend, and it locks without a bracket. Set a slim wooden tray or a metal utility shelf across two rods for a stable base, then keep the load under the rod’s rated weight (usually printed on the packaging in a range like 5–15 lbs) so it doesn’t bow or slip mid-afternoon.
This works best in a window that gets at least four hours of direct light, since anything shadier makes the ledge decorative rather than functional. Pull it out entirely on move-out day and the frame looks untouched.
What You’ll Need
| Product |
|---|
| Spring tension rod, adjustable |
| Narrow wood or metal utility tray |
| Small terracotta pots with saucers |
| Fast-draining potting mix |
3. Removable Vinyl Wrap for Color-Blocked Terracotta
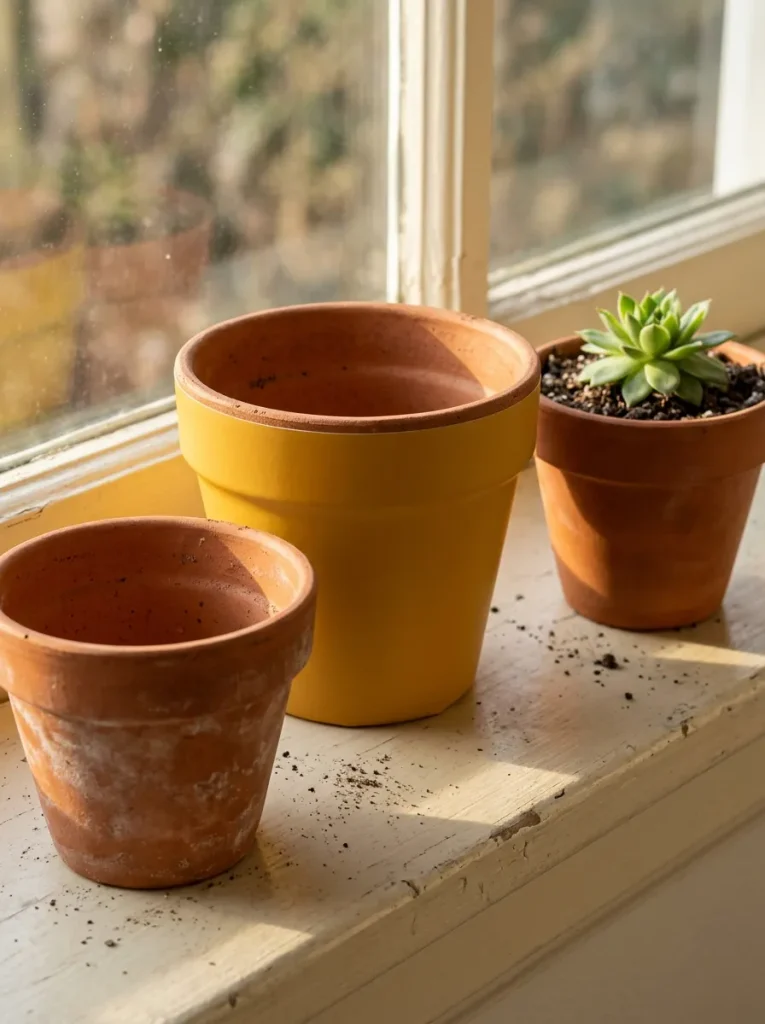
Spray paint isn’t the only way to get a color-blocked pot self-adhesive vinyl wrap does the same job and peels off clean when your taste changes. Where a painted pot commits you to one finish until it chips, vinyl wrap swaps out in minutes and never touches the terracotta’s surface directly enough to seal it, so the clay still breathes and drains the way unglazed pots are meant to.
Wrap only the top two-thirds and leave the base bare for a two-tone look that reads more intentional than a full color change. It fits anyone who rotates their color palette seasonally instead of settling on one.
Pro Tip: Warm the vinyl slightly with a hairdryer before applying it around the pot’s curve it stretches without creasing and lies flatter than it will cold.
Up next: the fix for the one plant-styling mistake almost every apartment makes without noticing.
4. Light-Zone Mapping Instead of Random Placement
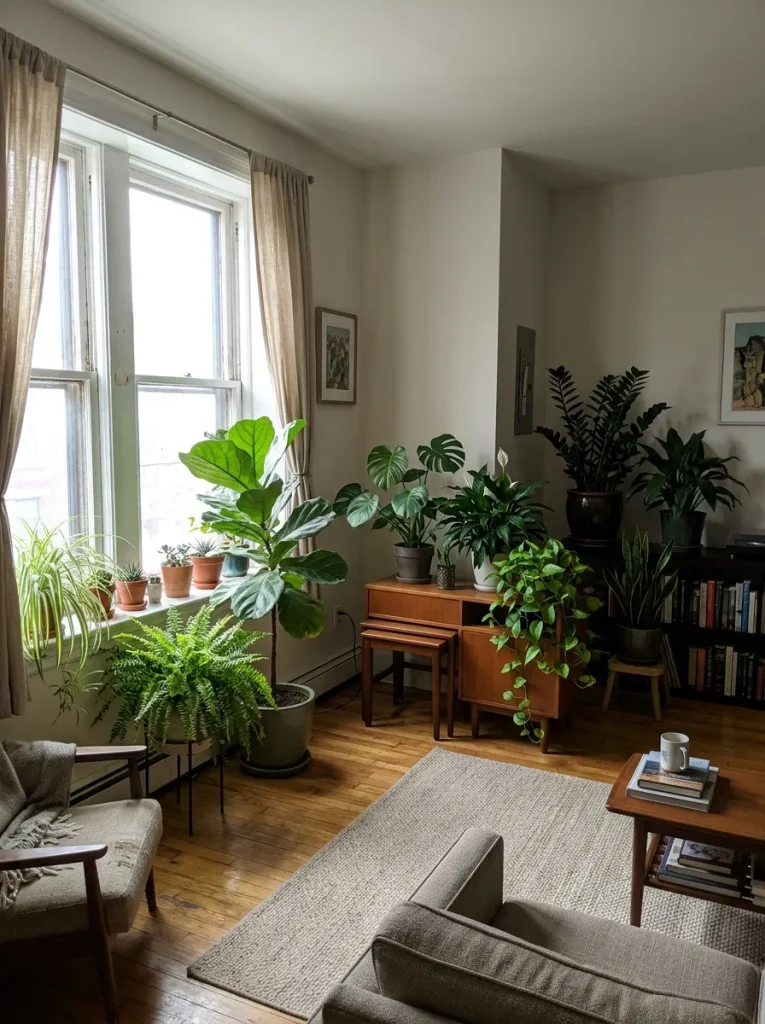
Most plant deaths in rentals trace back to one habit: placing pots by how a corner looks rather than how much light actually reaches it. Light behaves in bands, not evenly across a room the first three feet from a window can run five times brighter than the wall eight feet back, even in the same “bright” living room.
Walk your space at midday and sort plants into three rough zones: direct-light plants within arm’s reach of the glass, medium-light plants a few feet back, and low-light varieties like pothos or ZZ plants for the far wall. Fixing placement before buying more pots solves more problems than any hanger or shelf will.
Quick Win: Snap a phone photo of each zone at noon the shadow density tells you more about real light levels than staring at the room ever will.
5. Fabric-Wrapped Tin Cans for No-Paint Texture
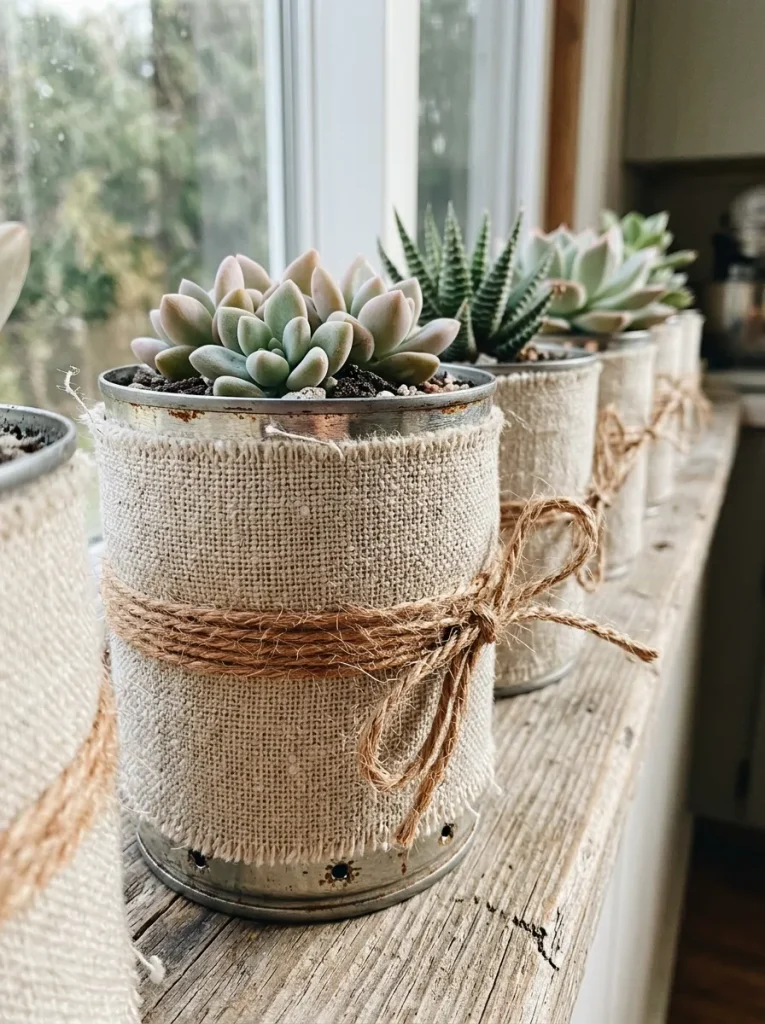
For renters who want texture without buying new containers, a rinsed tin can wrapped in scrap linen or burlap and cinched with twine gets there for close to nothing. Skip spray-painting the metal paint on tin chips fast with watering splash, while fabric hides the label entirely and can be swapped when it stains instead of scraped and redone.
Punch two or three drainage holes in the base with a hammer and nail before wrapping, since tin cans hold water far longer than terracotta and rot roots quickly without an exit. A cluster of three or four different can sizes reads more like a designed set than a single repurposed jar ever does for more ways to dress up recycled containers, these mason jar crafts use a similar wrap-and-tie approach.
Budget Version: Save cans from pantry staples for two weeks instead of buying containers a full windowsill row costs nothing but the fabric scraps.
6. An Over-the-Door Organizer as a Vertical Herb Garden
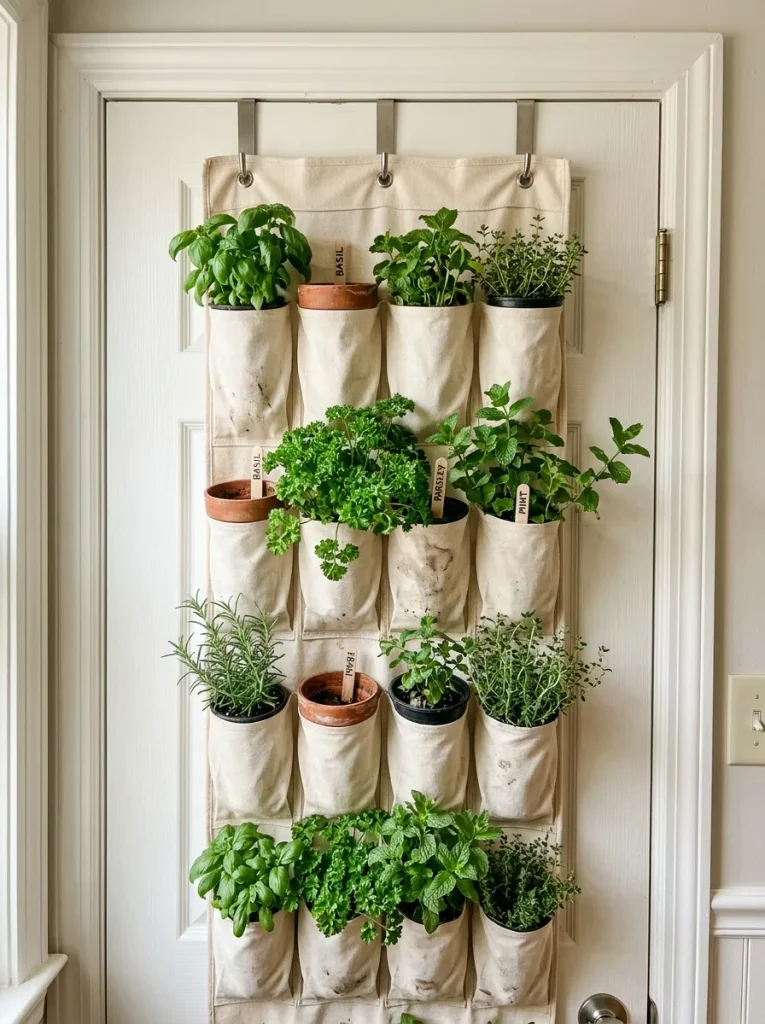
A canvas shoe organizer hangs entirely on the door itself, using its own weight and a set of over-the-door hooks instead of anything screwed into wood, and it turns a flat vertical surface most renters ignore into a working herb garden.
Each pocket holds a 3–4 inch nursery pot, so buy the herbs already potted rather than repotting into the fabric directly, which traps moisture against the canvas and mildews within weeks. Kitchen doors work best since herbs want to be near where they’re used, and a south- or east-facing door gets enough light without a grow light add-on. This suits anyone tight on counter and sill space who still wants fresh basil on hand.
✅ Setting Up the Door Garden:
- [ ] Measure the door width and confirm the organizer’s over-the-door hooks clear the frame
- [ ] Add a small saucer or liner behind each pocket to catch drainage
- [ ] Slot in pre-potted herbs, heaviest plants toward the bottom rows
- [ ] Water lightly and check pockets haven’t sagged after the first soak
More storage-repurpose ideas like this one are in these closet organization ideas, which cover other over-the-door and vertical fixes.
Next up: a freestanding piece that solves small-space planting without leaning on a single wall.
7. A Corner Ladder Stand for Tight Floor Space
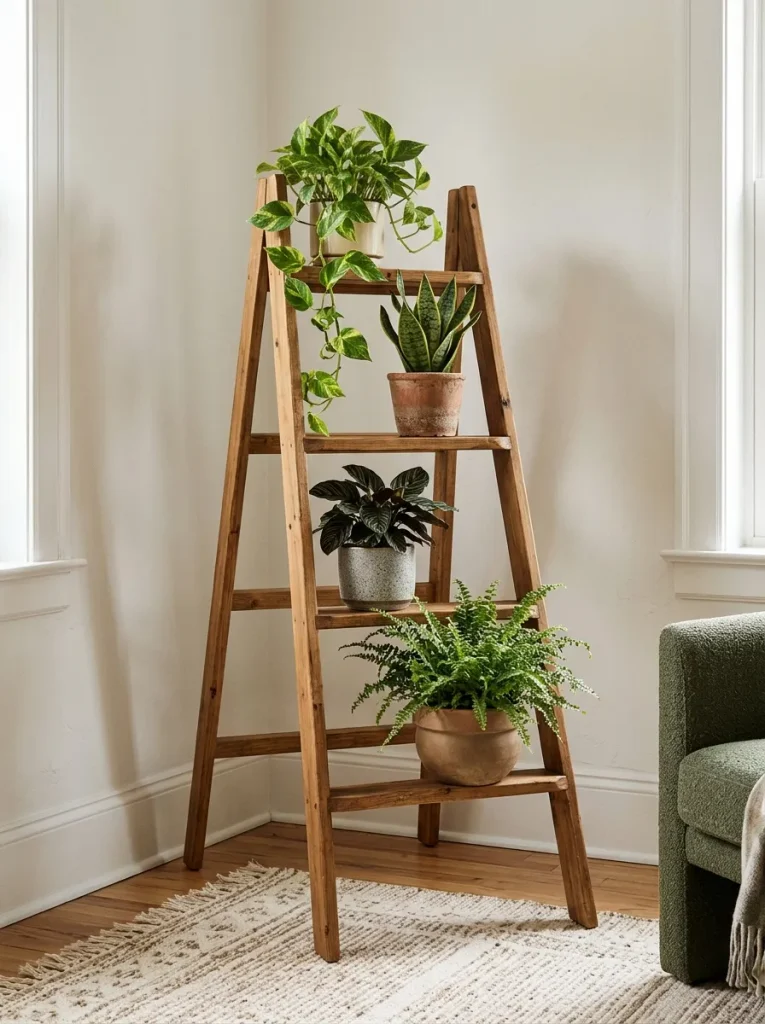
A ladder-style plant stand leans into a corner and holds its own weight across four or five rungs, so it never touches a wall for support the way a bracket-mounted shelf would. Stagger pot sizes from largest at the base to smallest at the top rung it keeps the structure visually and physically bottom-heavy, which matters more in a corner than most people expect, since a top-loaded stand tips on uneven flooring.
Most flat-pack versions assemble with just a screwdriver and leave zero trace beyond the tool marks on the wood itself when it’s time to move. It’s the single best fix for a narrow studio corner that’s too small for a full shelf but too empty to leave bare.
Small-Space Tip: A 12-inch-wide ladder stand fits corners a standard 24-inch shelf can’t, and the open rungs let light reach every tier instead of shading the plant below it.
What You’ll Need
| Product |
|---|
| Freestanding wood ladder plant stand |
| Assorted potted plants, tiered sizes |
| Small saucers for drip protection |
8. Contact-Paper Ombré Instead of a Painted Gradient
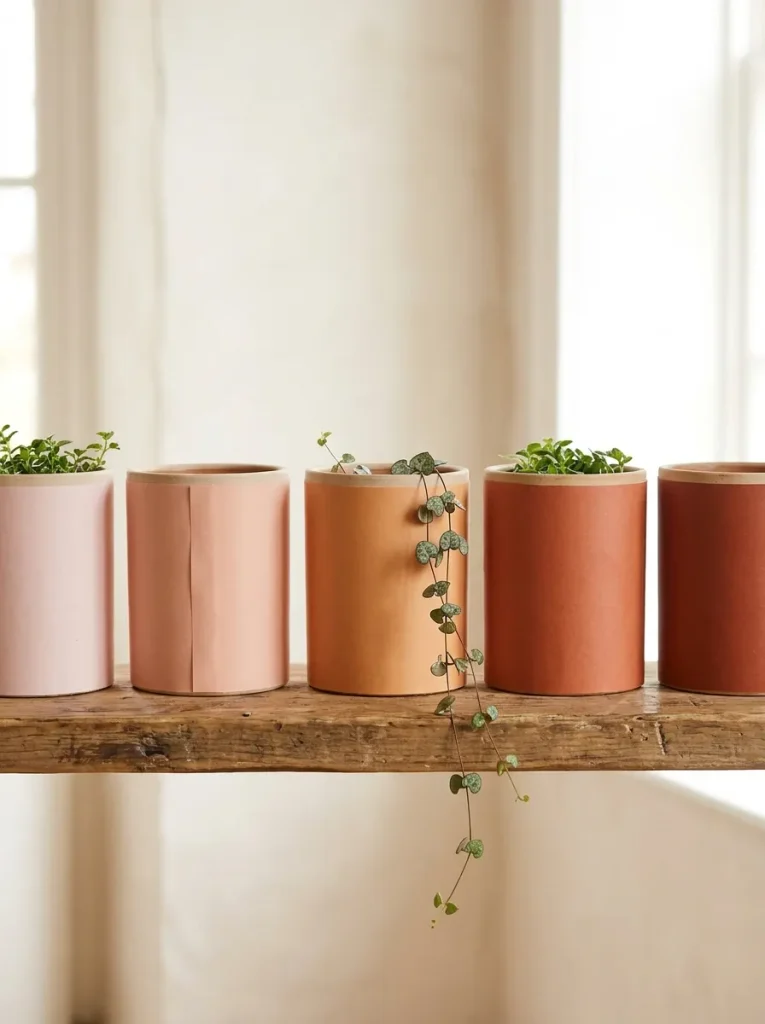
A painted ombré takes multiple coats and careful blending; contact paper gets the same graduated effect from five pre-cut sheets in ascending shades, applied dry with no drying time between pots. The principle underneath it is simple color theory a gradient reads as one cohesive set even when the individual pots are different shapes, because the eye tracks the color shift more than the silhouette.
Buy the sheets in one product line so the finish and sheen match across all five; mixing brands shows in how light reflects off each pot differently. Anyone nervous about painting freehand gets a cleaner result this way than most first attempts with a brush.
Important: Contact paper traps condensation against ceramic in humid rooms, so wipe pots dry after watering rather than leaving splashback to sit under the wrap, which lifts the edges within a season.
9. Command-Strip Floating Shelves for a Plant Ledge
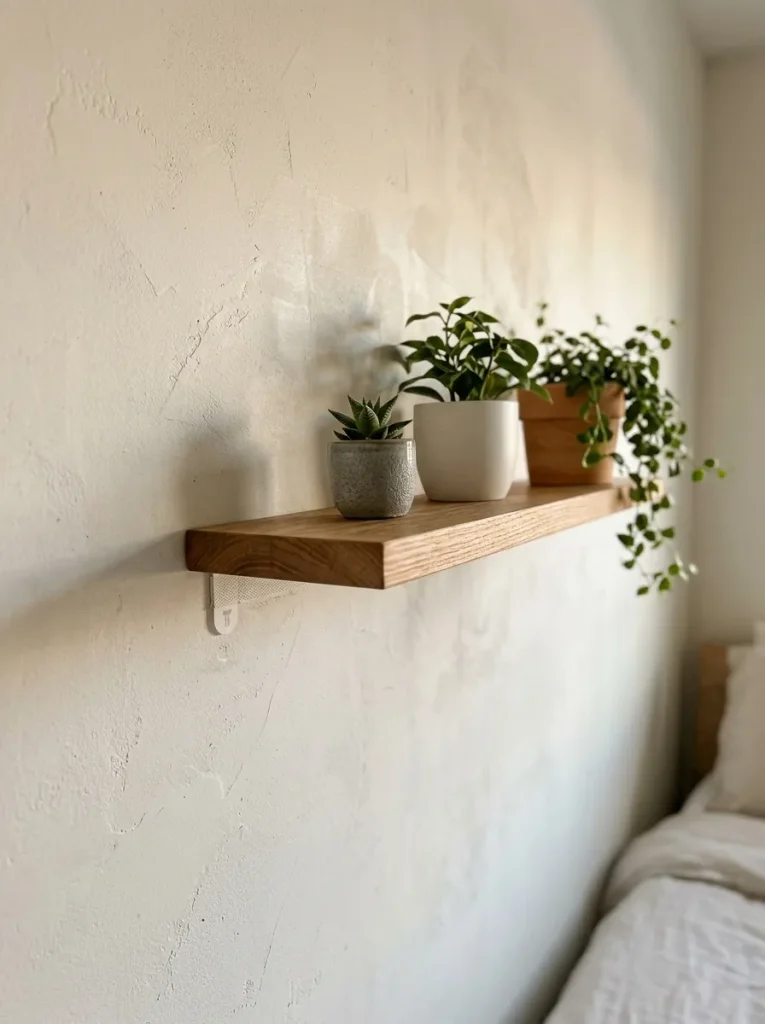
Regular floating shelves need a stud or an anchor; the adhesive-strip version holds through sheer surface contact instead, using a bracket that presses flush against smooth drywall or plaster. It replaces the drilled version entirely rather than compromising on strength modern heavy-duty strips rate up to 15 lbs per shelf, enough for two or three small pots with room to spare.
Keep the shelf under 24 inches wide, since longer spans concentrate more torque on the same two adhesive points and increase the odds of sag over months. For more no-drill mounting tricks that use the same adhesive-strip logic, these Kallax no-drill hacks apply the same principle to furniture instead of shelving.
Coming up: a layout that turns an unused doorway into hanging garden space.
10. A Doorway Curtain Rod Row of Hanging Planters
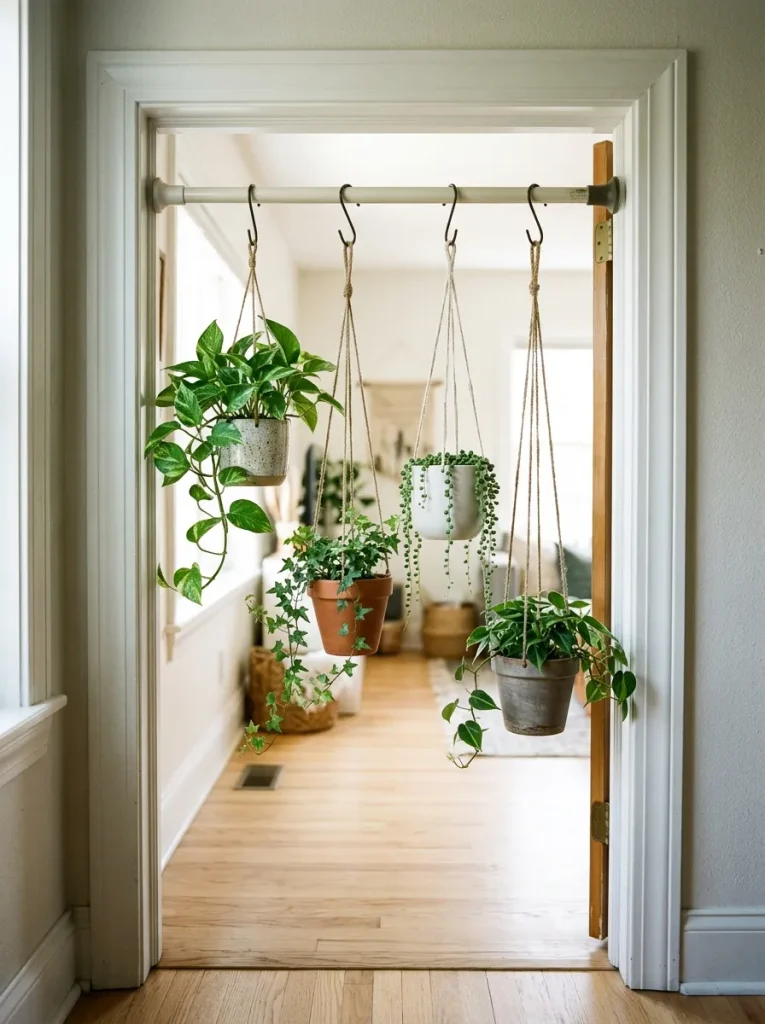
A doorway that doesn’t get much foot traffic a spare room, a closet nook makes better hanging-garden space than most people give it credit for, since a tension rod wedged into the frame gives you a mounting point at exactly head height.
This suits renters with more vertical space than floor or sill space, which describes most narrow city apartments more than it doesn’t. Stagger four S-hooked planters at slightly different lengths rather than lining them up flat, so each plant gets its own light rather than shading the one below it.
Mistake to Avoid: Centering the rod in a door you actually walk through daily reserve this for a secondary doorway, since ducking under trailing vines gets old by week two.
11. A Woven Basket Sleeve Over Plain Nursery Pots
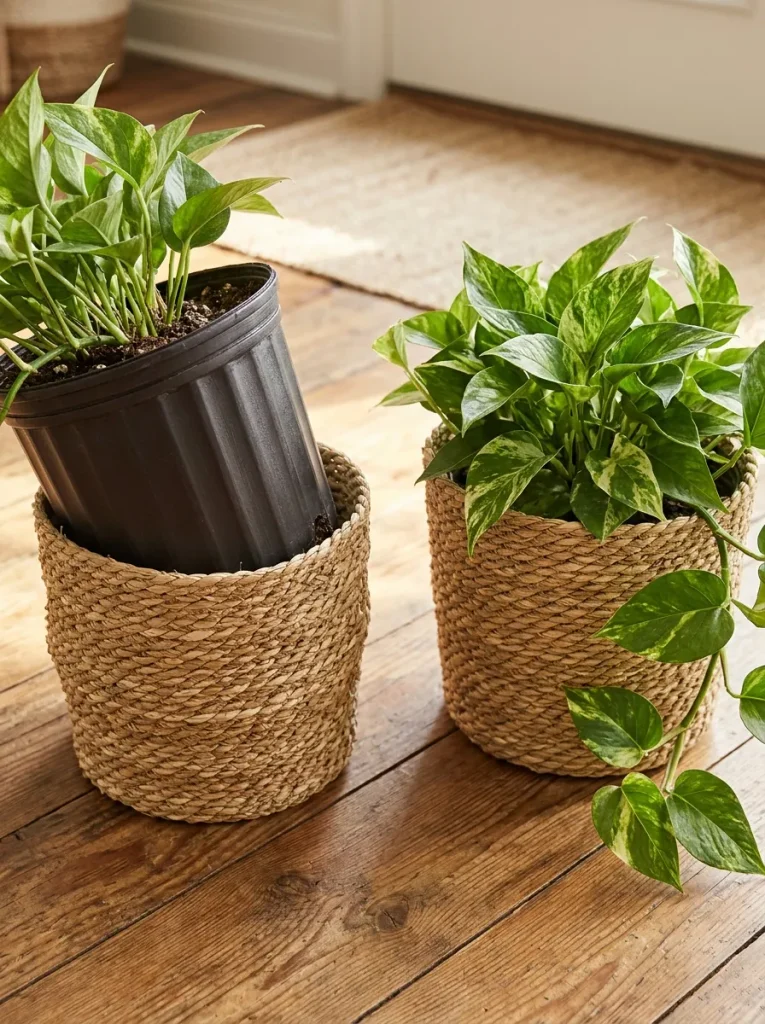
Skip repotting entirely and slide the plastic nursery pot a plant already came in straight into a woven seagrass or rattan basket one size up the plant never gets disturbed, and the basket does all the visual work. Measure the nursery pot’s diameter before buying, since a basket even an inch too narrow won’t seat the pot below the rim and defeats the disguise.
This technique works especially well for plants that dislike being repotted often, like fiddle leaf figs or snake plants, where the basket swap costs zero root stress compared to moving into a new ceramic pot. Line the basket base with a plastic liner or saucer first if it’s tightly woven, since water will pass straight through the fibers otherwise.
Pro Tip: Buy the basket a half-size larger than you think you need nursery pots run bigger than their labeled size once the root ball fills out.
12. A Clip-On Grow Light for the One Dark Corner

Every rental has one corner that looks perfect for a plant and gets almost no usable light, and a clip-on grow light solves that without an outlet installation or a wall-mounted fixture. The clip grips a shelf edge or bookcase spine the same way a reading lamp would, drawing power from a standard outlet rather than anything hardwired. Run it eight to ten hours a day on a cheap plug-in timer, since grow lights left on constantly stress plants nearly as much as darkness does.
This is the fix for the shadowed hallway console or windowless bathroom corner that every other idea on this list quietly assumes has some daylight to work with.
Styling Note: Full-spectrum LED clips run cooler and less pink than older grow lights, so the glow reads as ambient lighting rather than an obvious grow-light giveaway.
What You’ll Need
| Product |
|---|
| Clip-on LED grow light |
| Low-light tolerant houseplant |
| Plug-in outlet timer |
Last stretch: three finishing touches before the featured pieces close out the list.
13. Washi Tape Stripes for a No-Paint Pattern
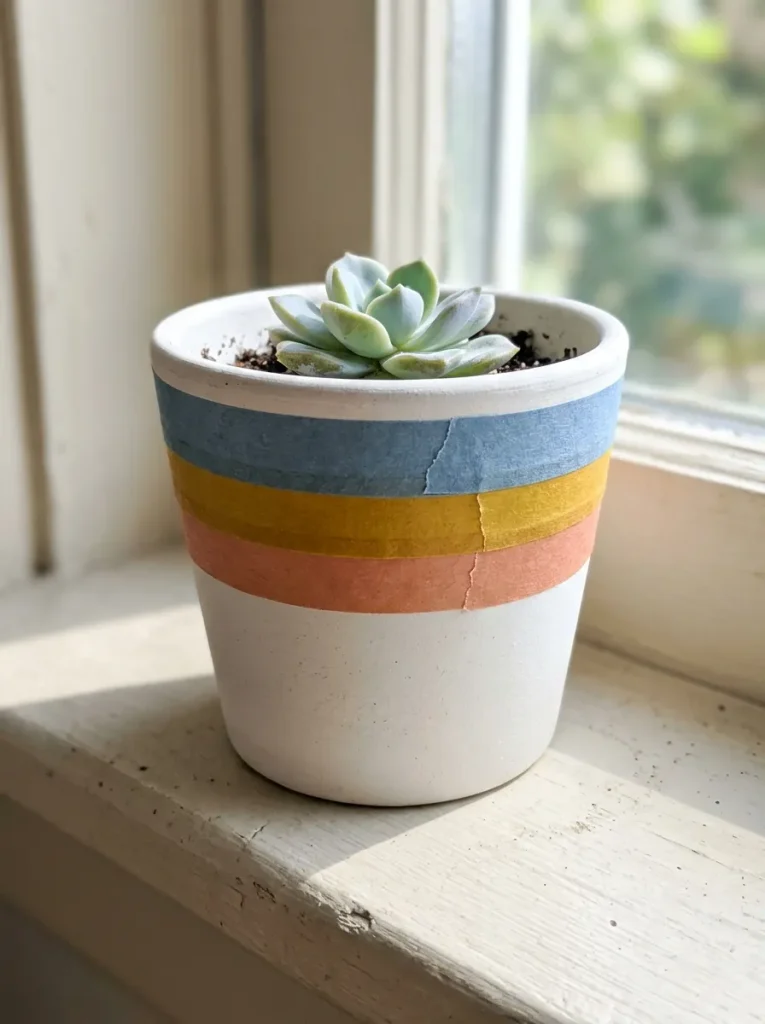
Pattern on a pot usually means paint and a steady hand, but washi tape gets stripes, blocks, or a simple grid with nothing more than scissors and a ruler. The paper tape’s low-tack adhesive is the whole point here it’s designed to remove cleanly from paper and glass alike, so it lifts off ceramic without pulling glaze or leaving a sticky ring, unlike packing or duct tape.
Three evenly spaced bands near the rim read as a deliberate pattern; a single stripe reads more like an accident. This suits anyone testing a pattern idea before committing to a paint job on a pot they actually own.
Important: The adhesive residue risk here is on the wall or shelf underneath a sweating pot, not the tape itself washi tape won’t damage the ceramic, but a damp base left directly on painted wood trim can.
The counterintuitive part: most renters assume the safest planters are the smallest ones, since a tiny pot seems like it can’t do much damage. It’s actually the reverse small pots need watering so often that spills and drip rings pile up fast, while one larger, well-drained planter with a proper saucer gets watered less frequently and causes far less incidental damage to floors and sills over a year. If you’re choosing between five small pots and one 10-inch planter for the same corner, the single larger pot is usually the lower-risk option for a security deposit, not the higher one.
14. A Leaning Wire Basket Grid for Wall-Adjacent Storage
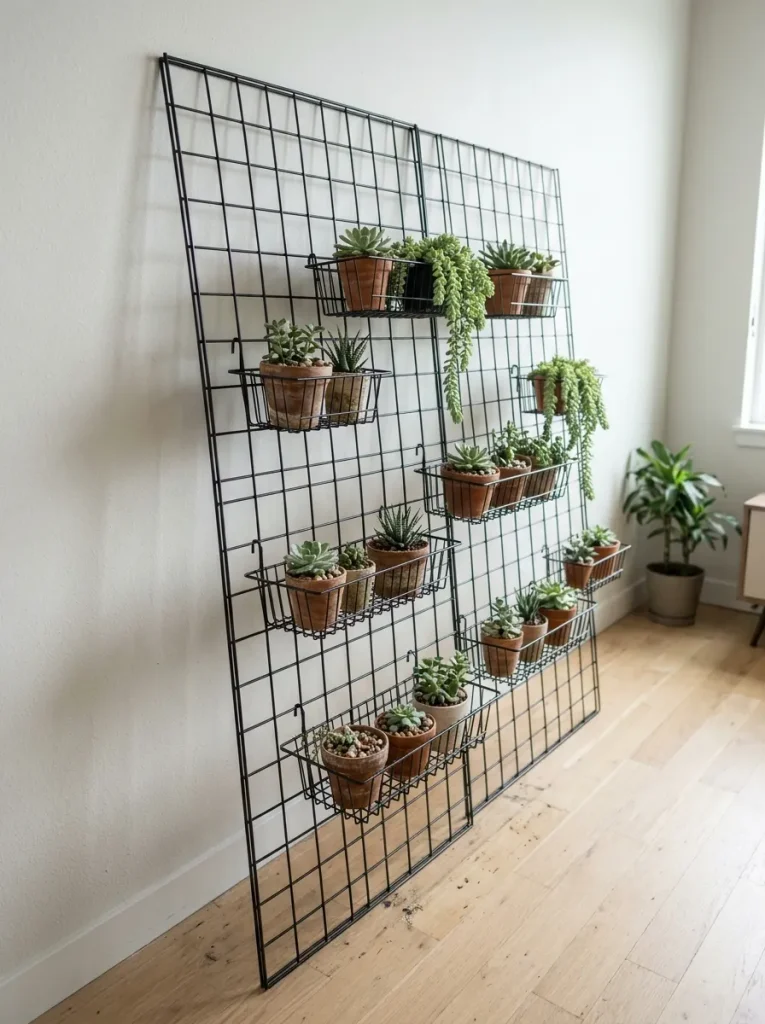
Wire grid panels sold for closets and dorm rooms lean against a wall under their own weight rather than hanging from it, and small wire basket planters clip onto the grid the same way a photo or a notecard would.
Where a wall-mounted grid needs anchors, the leaning version depends entirely on a stable floor footprint set it against a wall with a baseboard lip or add a small furniture strap for peace of mind if you’ve got pets or kids nearby. Clip baskets in a loose diagonal rather than a strict grid pattern, since perfectly even spacing tends to flatten what’s otherwise a fairly textural, dimensional piece.
Pro Tip: Line each wire basket with a coconut coir liner before potting it hides the soil from view through the grid gaps and adds a layer of drainage the wire alone doesn’t provide.
15. Self-Adhesive Stone-Look Wrap for a Concrete Finish
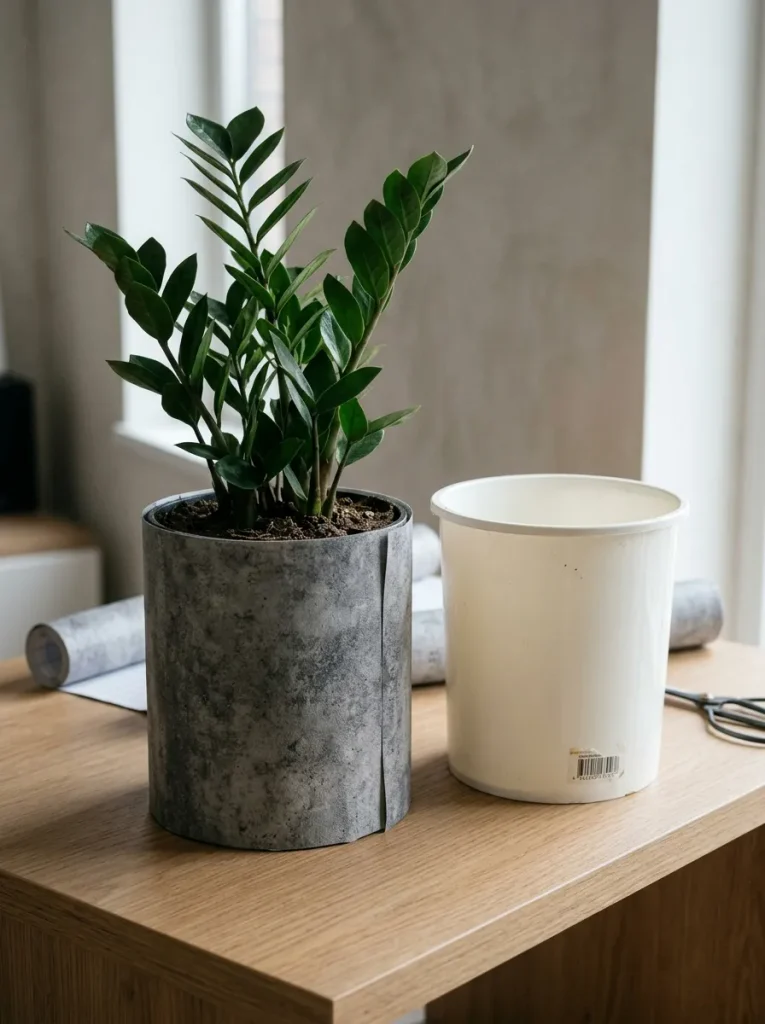
For renters chasing a concrete planter look without the weight or the price, self-adhesive stone-textured contact paper wraps a plain plastic cylinder in minutes and reads convincingly from normal viewing distance.
It suits anyone drawn to a heavier, more architectural look but working with a lightweight plastic pot for portability, since real concrete planters often run too heavy to move solo. Trim the sheet slightly oversized and fold the excess under the pot’s base rather than cutting it flush, which hides the seam entirely from eye level. A single oversized wrapped planter as a statement piece does more for a room than several smaller matching ones.
Styling Note: Choose a stone-look pattern with subtle color variation rather than a flat gray print uniform gray reads as printed paper up close, while mottled texture reads as material.
How to Start Your Renter-Friendly Planter Setup
The right first move is almost always the hardware, not the plant. A pair of weight-rated command hooks or one spring tension rod, installed in your brightest window, gives every idea on this list somewhere to attach buy the mounting piece before the pot, since it decides what the pot can weigh.
The most common fixable mistake is matching hardware to the plant you want today instead of the plant plus soil plus water it’ll weigh in six months, once roots fill out and the pot gets upgraded a size. Check the hook or rod’s rated weight against a fully soaked pot, not a dry one, and round up rather than down.
Three items under $50 cover a first setup completely: a multi-pack of heavy-duty adhesive hooks, one adjustable spring tension rod, and a set of clear plastic saucers sized to catch drips before they reach the floor. None of these show up in the product tables above, so there’s no overlap with what you’ve already picked for a specific idea.
A single corner or window comes together in a weekend afternoon for $20–$40, mostly the cost of hardware and a first plant or two. A full-room setup multiple hanging points, a ladder stand, and a repeat trip for more pots runs closer to $150–$300 approximate and tends to happen gradually over a season rather than in one weekend, which is normal and not a sign you’re doing it wrong.
Ready to Green Up Your Rental?
These 15 ideas cover a lot of ground on purpose hanging, freestanding, wrapped, and lit, so there’s an entry point whether your rental gives you a bright bay window or one dim hallway corner. None of it requires doing everything at once; one tension rod and one plant this weekend is a complete, valid start, not a half-measure.
If you’re picking just one thing to do today, hang a single macramé sling from a rated command hook and see how the corner feels before committing to more. The best sign it’s working is a room that finally feels lived-in instead of temporary, plants included. Save whichever three or four ideas fit your space so they’re easy to find again when you’re ready for the next corner.
Read Next
- 12 No-Drill Wall Decor Ideas That Still Look Custom
- 9 Small-Space Balcony Garden Ideas for Renters
- 10 Command Hook Hacks That Replace Nails Anywhere in Your Home