12 DIY Planters Kids Can Make With Zero Mess
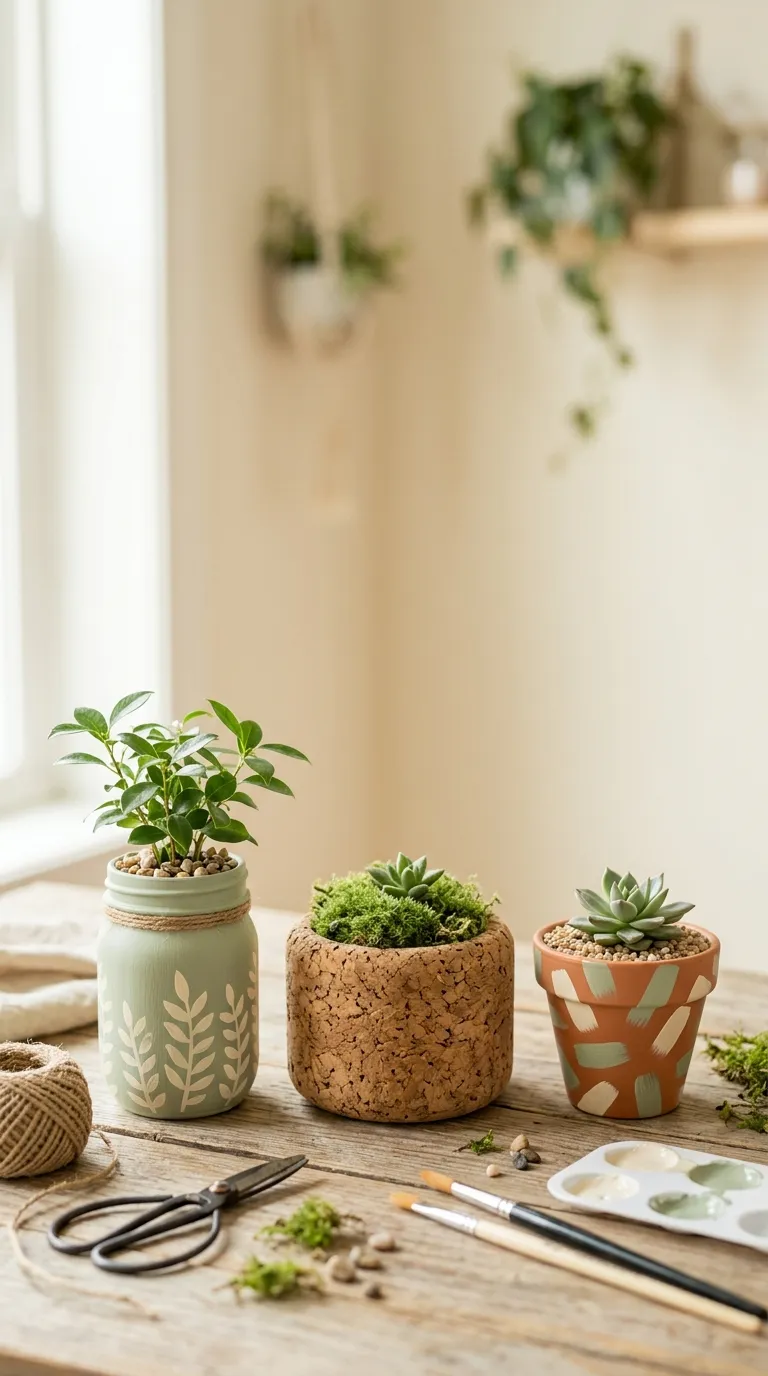
“Zero mess” isn’t a promise it’s a swap: trade loose bagged soil for pre-measured pods, poured-not-scooped mixes, or no soil at all, and most of the dirt problem disappears before it starts. This roundup covers 12 DIY planters kids can finish without a dustpan in sight, built around methods that keep dirt off the table and off the floor.
Some of these smell like wet moss and crushed mint. Others rattle with painted rocks and popsicle sticks before a single seed goes in. A few stay completely dry the whole time just water, glass, and a cutting doing its slow, quiet thing on a windowsill. Pick two or three and let the rest wait for a rainy Saturday.
Skip Ahead
- Why Zero-Mess Planters Make Such a Difference
- The Quickest, Cleanest Projects First
- How to Start Your Zero-Mess Planter Sessions
- Ready to Start Your Zero-Mess Planter Projects?
Why Zero-Mess Planters Make Such a Difference
Zero-mess planting means controlling where the soil (or moss, or water) goes before a kid ever touches it pre-measured scoops, sealed pods, poured pours instead of hand-scooped ones, or skipping soil completely in favor of water propagation or moss. It matters more with younger kids, who tend to treat loose potting mix like sand at a beach.
Most of these projects work on a kitchen table with a single towel underneath, and several scale down easily for small apartments with no yard to hose off afterward.
| Best starting point | Start with a no-soil project — water propagation needs nothing but a jar and a cutting |
| Biggest impact area | Swapping hand-scooped bagged soil for pre-measured pods or a poured mix |
| Budget to start | Roughly $5–$15 for a first single-planter project (approximate) |
| Time to complete | Most projects run 20–40 minutes start to finish |
The Quickest, Cleanest Projects First
1. Water-Propagation Jar Garden
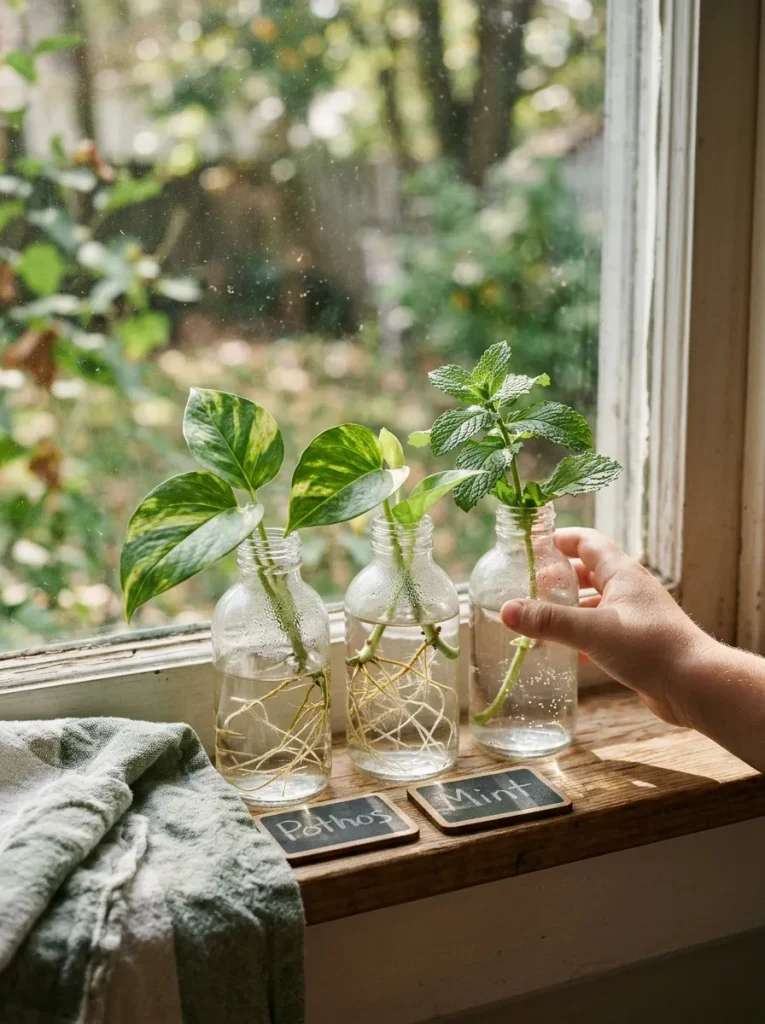
No soil touches this one at all just water, a jar, and a cutting from a pothos, mint, or basil stem. Fill a clean jar two-thirds with water, strip the bottom leaves off the cutting so nothing rots underwater, and set it somewhere bright but out of direct afternoon sun.
Roots usually show within one to two weeks; change the water every four or five days so it doesn’t cloud. Best for kids under seven who aren’t ready for scooping mixes yet the cleanest entry point on the list, and a good companion read is mason jar crafts if the jars themselves turn out to be the more interesting project.
Pro Tip: Mark the jar with the start date in permanent marker kids lose interest fast without a visible countdown to “first roots.”
What You’ll Need
| Product |
|---|
| Single-stem glass propagation vases |
| Small chalkboard plant tags |
2. Cotton Ball Seed-Starter Bags
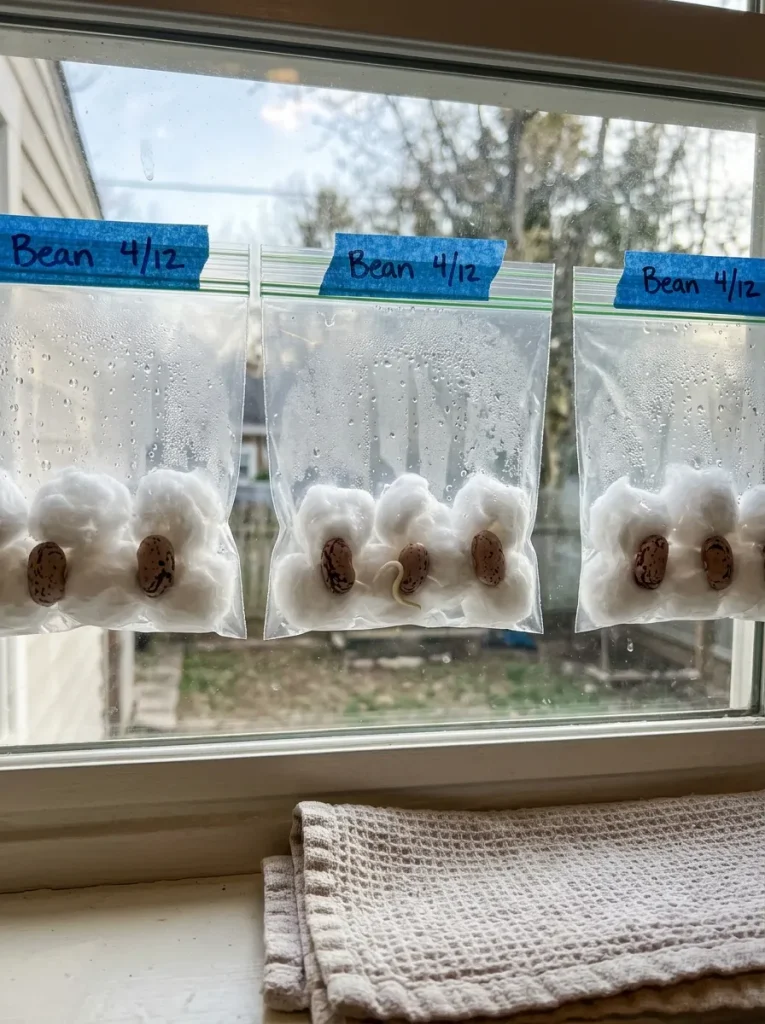
The setup takes ninety seconds: a damp cotton ball, a few bean or sunflower seeds pressed against it, sealed inside a sandwich bag, taped to a sunny window. There’s no pot, no tray, no soil the bag becomes the greenhouse, and any moisture stays sealed inside instead of dripping onto a windowsill.
Germination runs on moisture and warmth, not soil, so the cotton ball does the work a whole pot of dirt would normally handle. Once roots appear, the seedling transplants into soil for its second life; this stage is only about watching germination happen, visibly, through plastic.
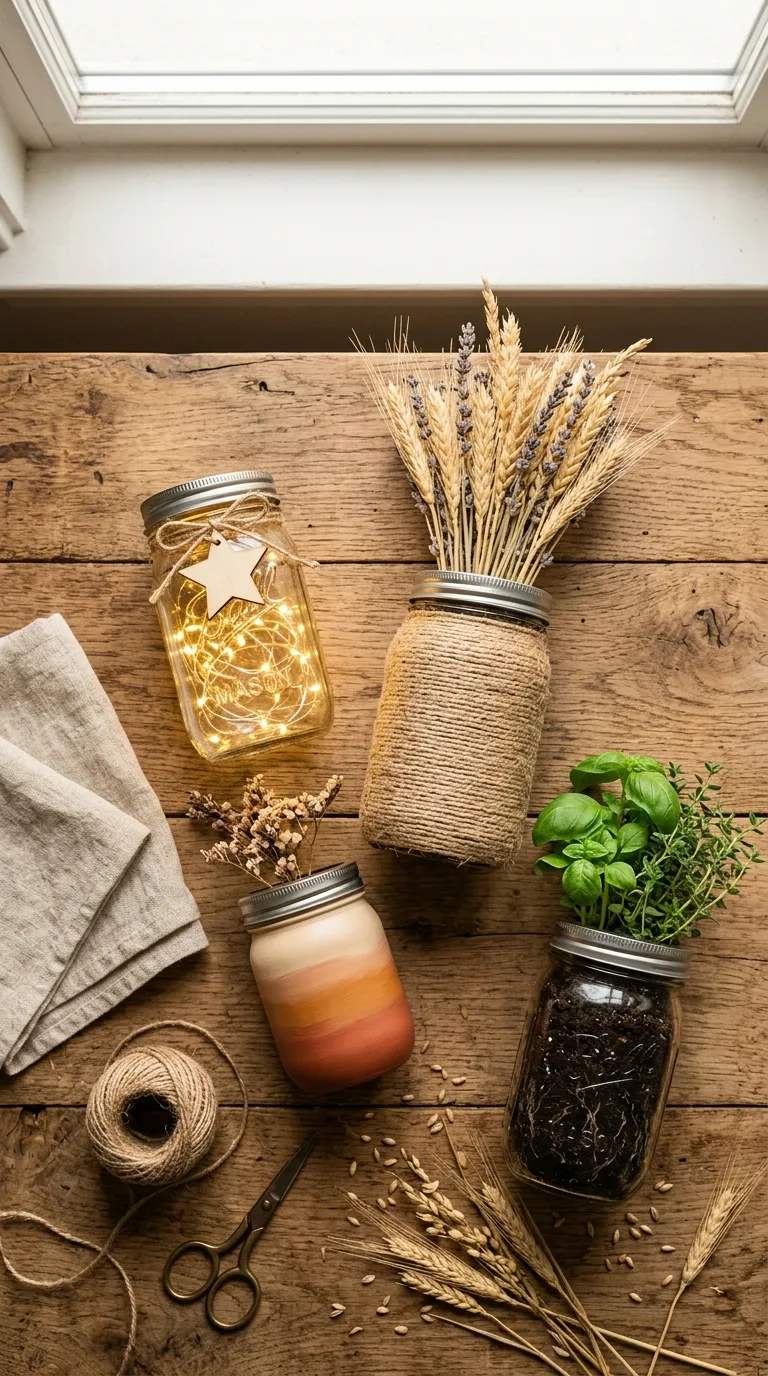
3. Painted Mason Jar Succulent Planters
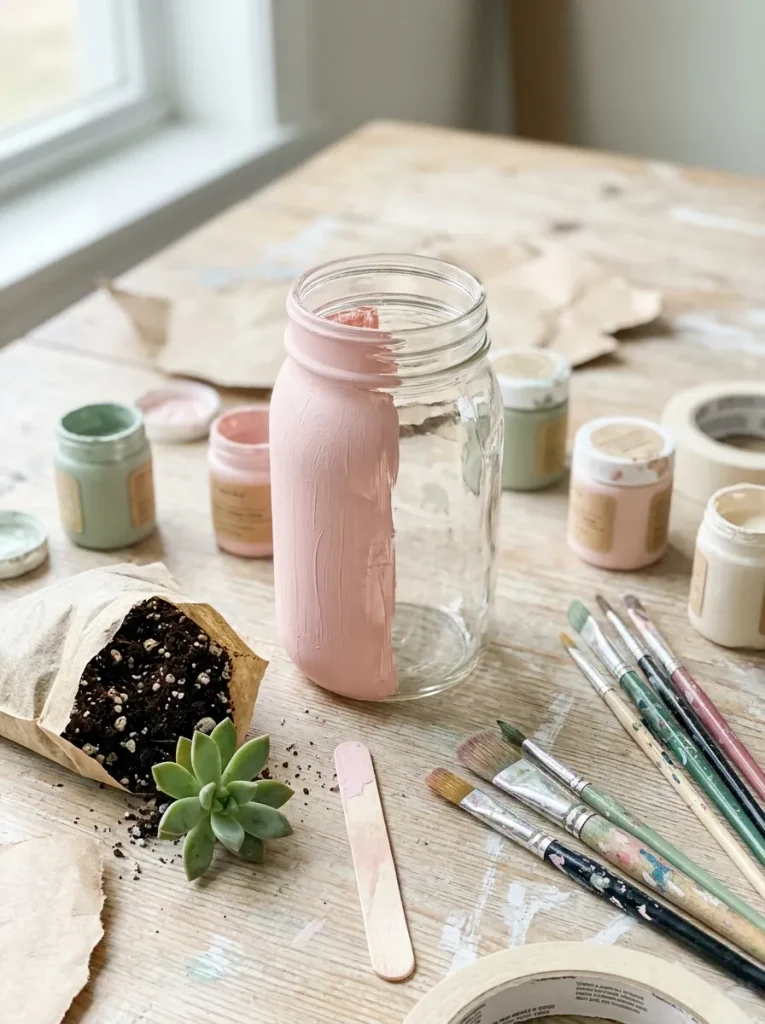
Buying a small pre-potted succulent instead of a bag of loose soil is the trick that keeps this one clean the plant transfers straight from its nursery pot into the jar without anyone scooping dirt by hand.
Paint the jar first with chalk-style acrylic paint, which grips glass without primer, and let it dry fully before the plant goes in, or fingerprints show up in the finish. A layer of pebbles at the jar’s base gives roots drainage, since mason jars have no hole. Pair it with the ideas in modern succulent planter ideas if the jar style needs a second look before committing to paint colors.
What You’ll Need
| Product |
|---|
| Wide-mouth mason jars |
| Chalk-style acrylic paint set |
| Small pre-potted succulent |
Next up: the seed-starting method that swaps a windowsill for a shell.
4. Eggshell Herb Planters
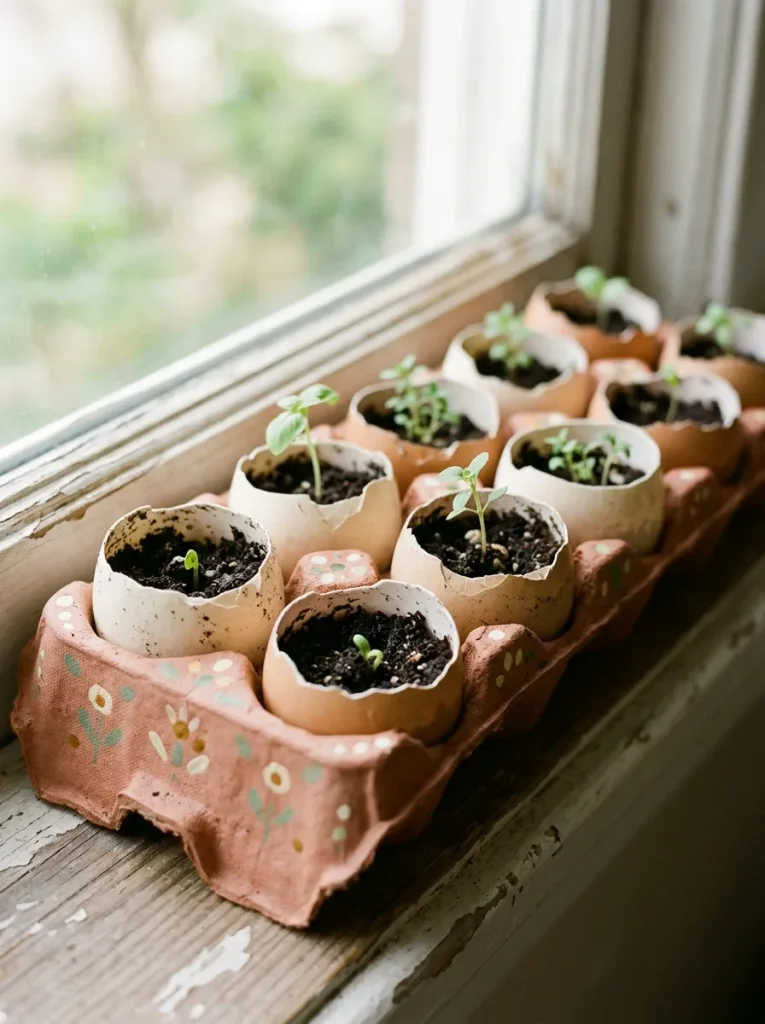
This one suits kids who want to plant something small and watch it fast basil and cress both sprout within days. The eggshell keeps mess contained because it never leaves its carton slot; soil goes in with a small spoon, one shell at a time, and the carton catches any spill before it reaches the table.
Herb seedlings, not flowers, are the right pick here, since they’re forgiving of shallow root space and don’t need transplanting for several weeks. When roots do need more room, the whole shell lightly cracked first goes straight into a bigger pot; shell and all breaks down in soil over time.
Important: Rinse shells and let them air-dry for a day before filling. Leftover egg residue attracts gnats faster than most people expect.
5. Toilet-Paper-Roll Seed Pots
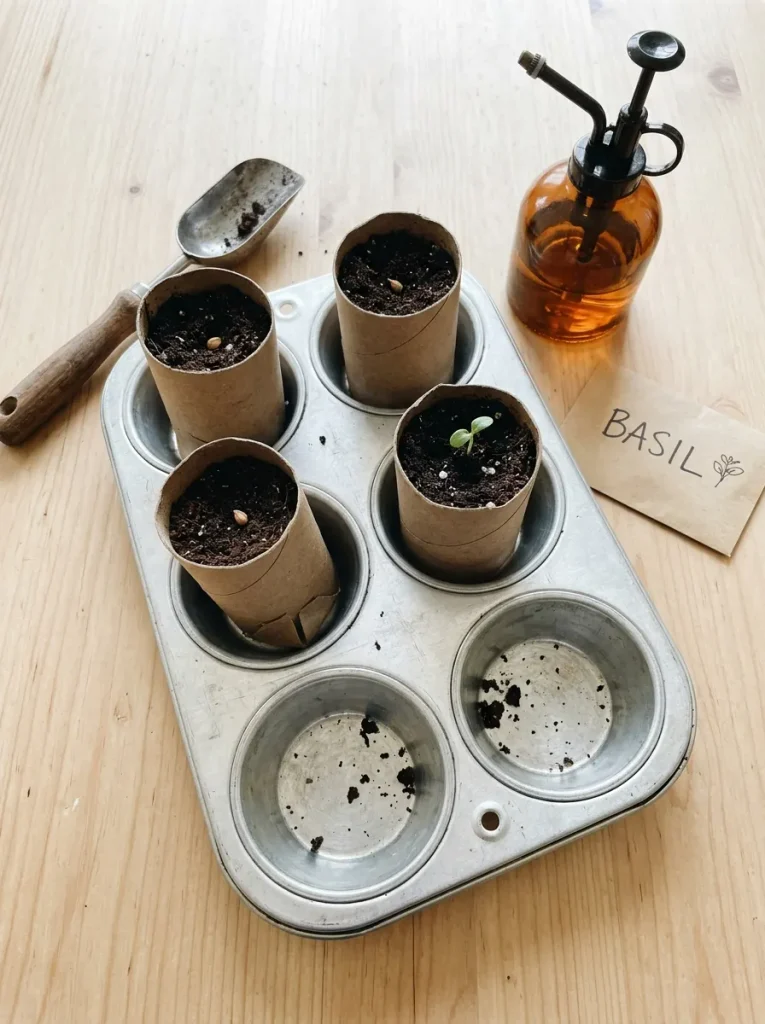
Cut a cardboard tube into four equal sections, fold the bottom of each into flaps like a small box, and stand them upright in a muffin tin. The muffin tin does the real work here: each cup holds one tube steady and catches anything that falls, so soil never spreads across the table the way it does in a flat tray.
Fill each tube with a single pre-measured scoop of soil rather than free-pouring from the bag, press in a seed, and water lightly. Once the seedling outgrows the tube, the whole cardboard pot goes into the ground it breaks down in a few weeks, so nobody has to pry a root-bound seedling loose.
Warning: Oversaturating the tubes turns cardboard to mush within a day. Water lightly and only when the top layer feels dry a fully soaked tube collapses and takes the seedling with it.
6. Recycled Yogurt Cup Planters
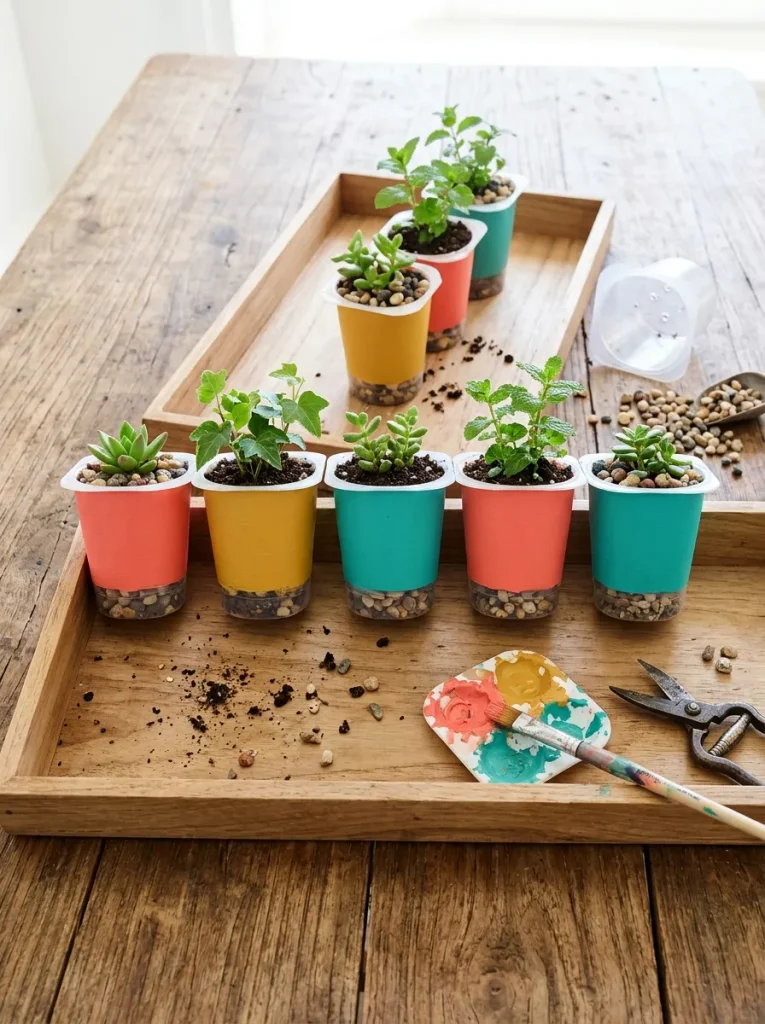
A clean yogurt cup gets one drainage hole poked in the bottom, then a base layer of small pebbles before any soil goes in that layer keeps roots from sitting in standing water once the hole eventually clogs. Pre-scoop soil into a separate small cup before handing it over, so kids pour from a contained portion instead of digging straight into an open bag. Herbs and small flowering annuals both do fine in a cup this size; anything with a deep taproot, like carrots, won’t. Hand this one to a child who wants to paint more than they want to garden the plant is almost secondary to the decorating.
Quick Win: Use a pushpin instead of scissors to poke the drainage hole safer for small hands, and one press does the job.
The next one skips soil completely just cork and moss, forgiving enough for a four-year-old.
7. Wine Cork Moss Planters
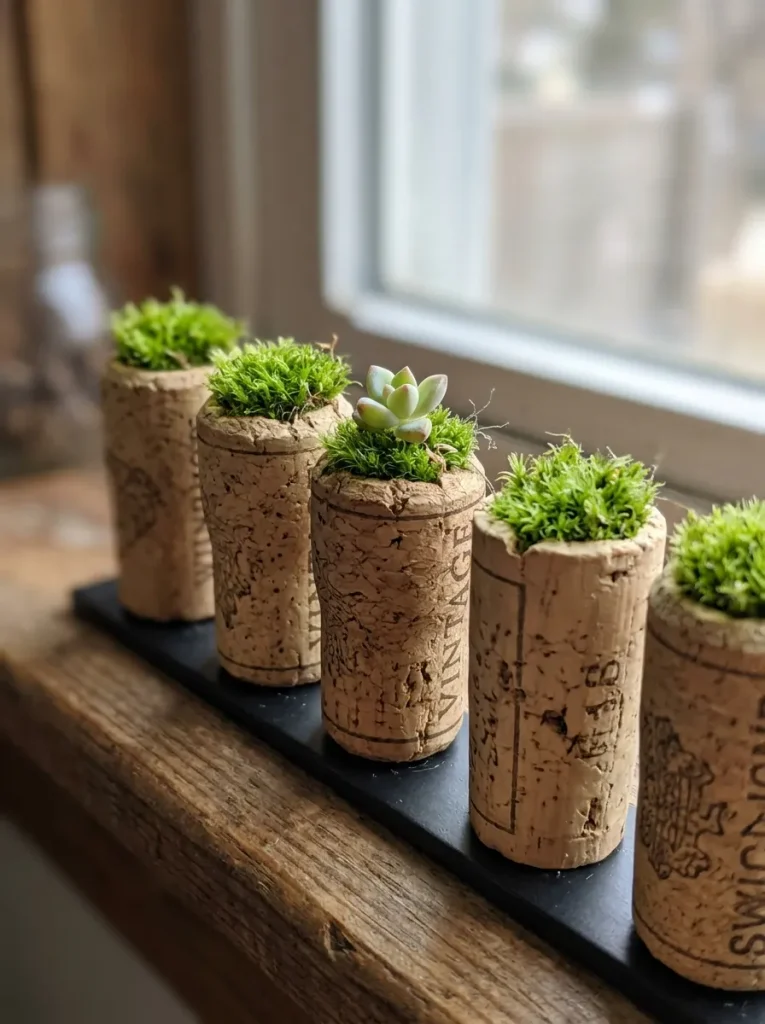
Skip soil completely and pack a small hollowed-out cork with damp sheet moss instead it holds moisture without crumbling or spilling, which makes this the most forgiving project on the list for younger kids.
A teaspoon-sized succulent cutting or a sprig of air plant tucks into the moss and roots slowly over a few weeks. Because there’s no loose material at any point, this is the one project that works cleanly on a rug or carpeted floor, not just a hard table. Glue a small magnet to the cork’s flat side afterward and the finished planters double as fridge décor.
8. Terracotta Pot With Compressed Soil Disc
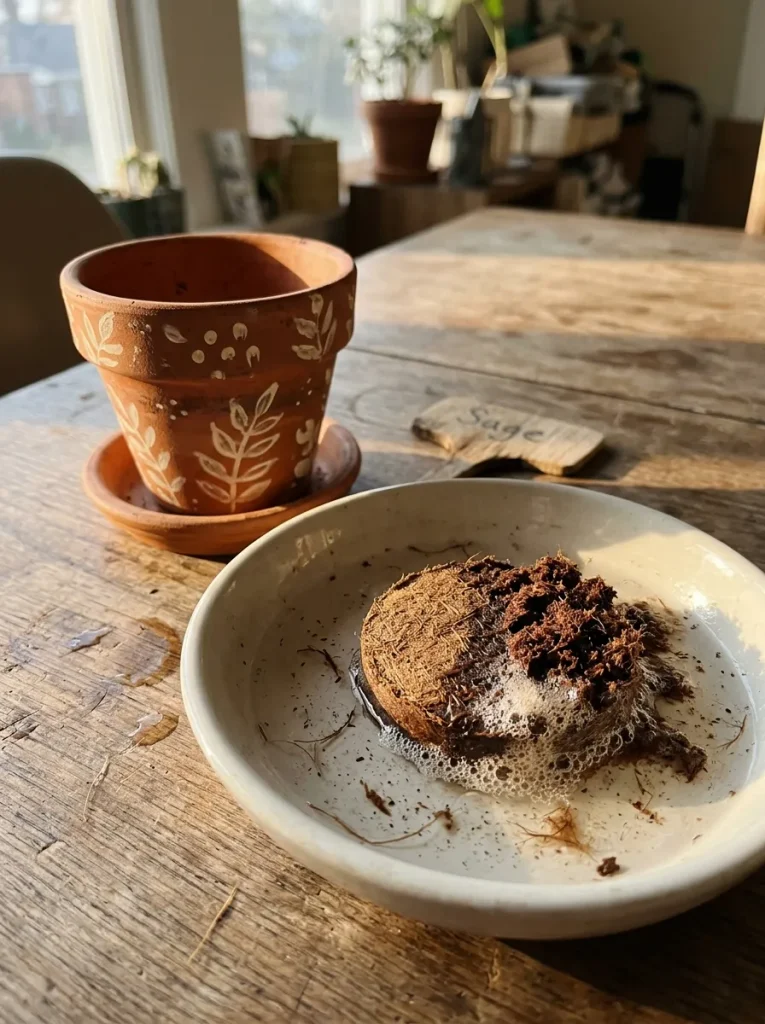
Compressed coco-coir discs sold flat and dry, about the size of a cookie expand into a full cup of loose, ready-to-plant medium once soaked in warm water for a few minutes. Nothing gets scooped or poured; the disc does the expanding on its own inside a bowl, and only the expanded result goes into the painted pot.
Painting the terracotta first and letting it dry completely avoids the classic mistake of setting a wet disc into wet paint and smearing the whole design. Reach for this one when the goal is decorating more than gardening the disc step can happen a full day ahead of the painting.
Important: A disc that hasn’t fully expanded looks done at the surface but stays compressed in the center press down after soaking to check, or seeds planted on top won’t reach loose enough medium to root.
What You’ll Need
| Product |
|---|
| Small unglazed terracotta pots |
| Compressed coco-coir soil discs |
| Matching terracotta saucers |
9. Fabric-Wrapped Planter Sleeves
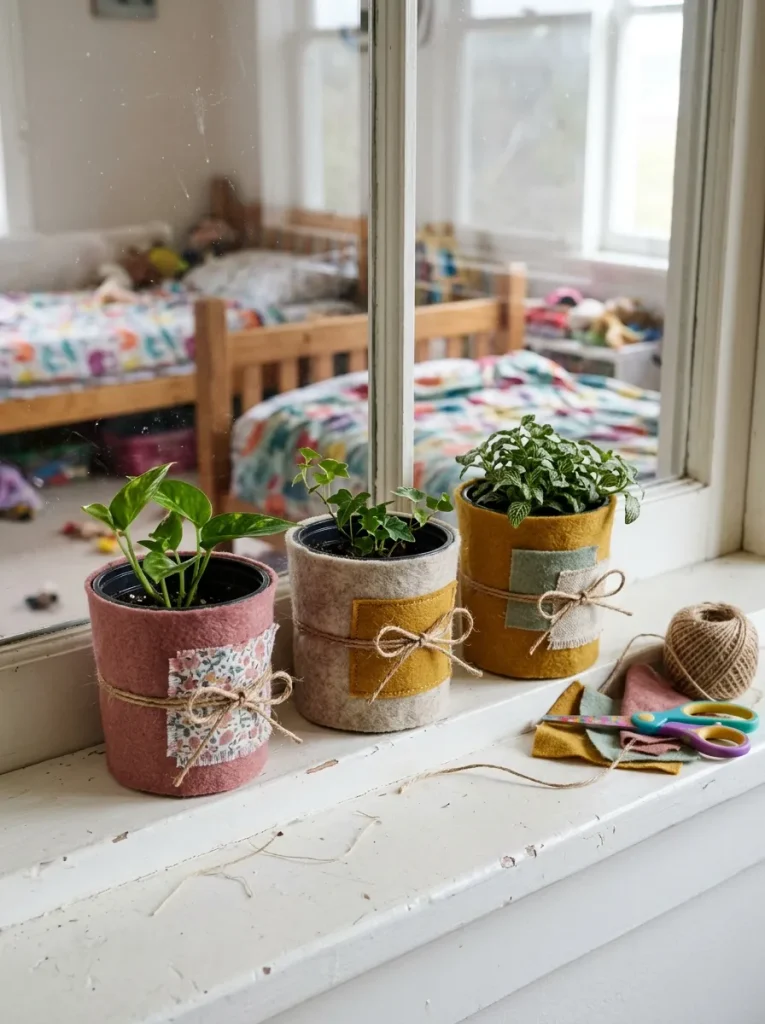
Nothing about this one involves soil at all it dresses up a plant the household already owns. Cut a rectangle of felt or scrap fabric to wrap around an existing plastic nursery pot, hot-glue the seam closed, and cinch the top or bottom with twine or a ribbon.
Kids who want to help but shouldn’t be near dirt at all think toddlers, or anyone recovering from a cast or stitches can do the entire project with nothing but fabric, scissors, and glue. It works on pots from two inches to six inches across; anything larger needs more fabric than a single felt sheet provides.
Small-Space Tip: This is the one project sized for a windowsill in a shared bedroom or dorm no floor space, no tray, no water involved until the sleeve goes over an already-watered pot.
Two projects left, starting with the one that turns a mason jar into layered stripes you can see from the side.
10. Layered Mason Jar Terrarium
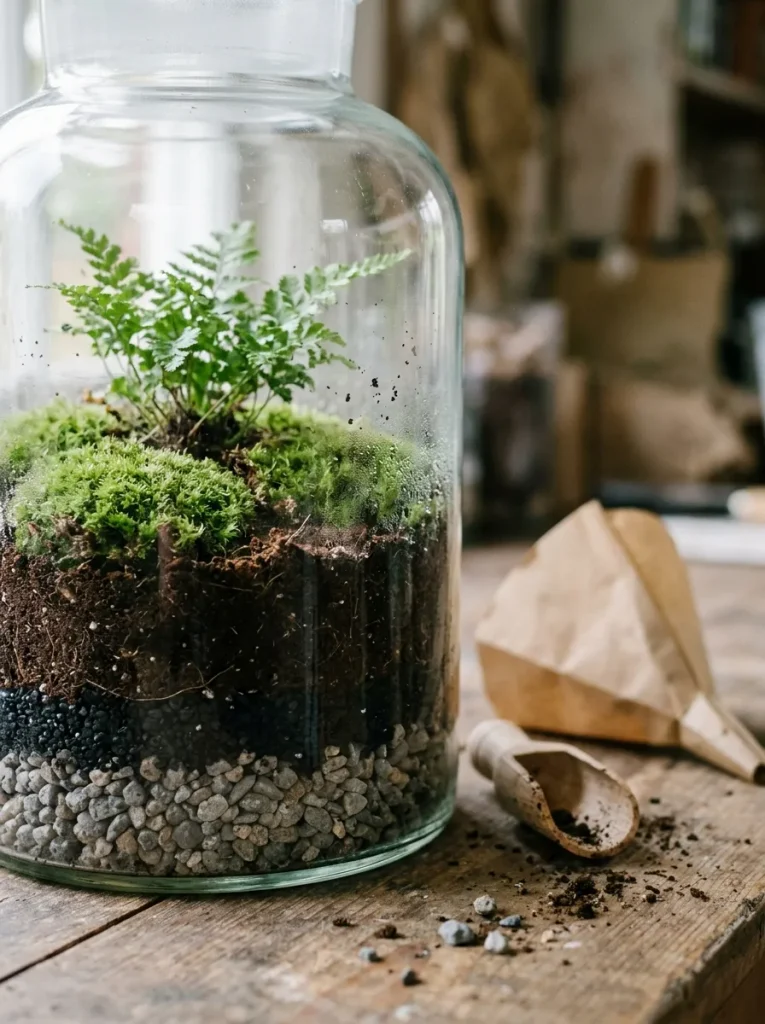
The mess in this project stays inside the jar by design every layer gets poured through a rolled paper funnel instead of dropped in by hand, which keeps loose material from ever touching the table’s edge.
A terrarium needs its layers in order for drainage to actually work, which makes this the one idea on the list built around a real sequence rather than a single step. A related project worth bookmarking for the supplies angle: handmade gift ideas, since a finished terrarium jar makes an easy one built specifically as a gift.
✅ Layer Order Checklist:
- [ ] Pebbles first, about half an inch, for drainage
- [ ] A thin layer of activated charcoal to keep water from souring
- [ ] Potting soil, roughly an inch and a half deep
- [ ] Moss or a small fern pressed gently into the top layer
What You’ll Need
| Product |
|---|
| Large glass apothecary jar |
| Activated horticultural charcoal |
| Sheet moss |
OBSERVATION
The counterintuitive part: the projects that look messiest on paper moss, terrariums, layered jars are often cleaner in practice than the ones that look simple, like a plain potted succulent, because contained materials never touch a surface outside their container. Loose bagged soil is the actual mess source in nearly every “easy” planter project; swap it out and the project’s difficulty rating barely matters anymore.
11. Grow-Kit Pod Desktop Planters
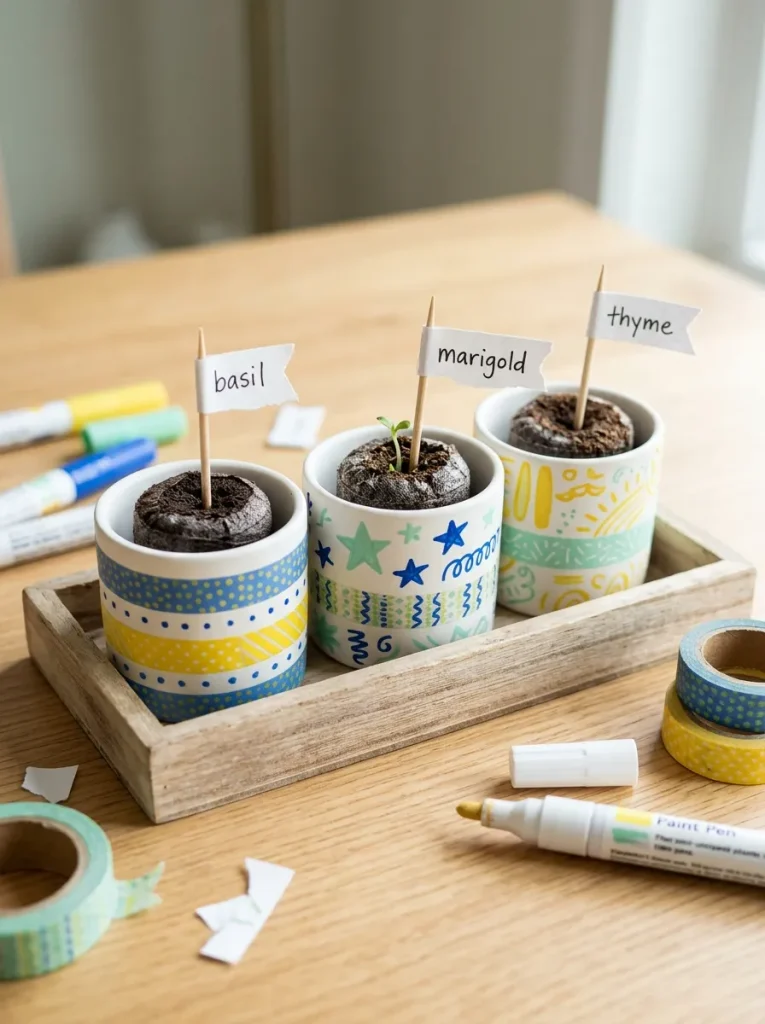
Pre-filled grow pods sold as a single compressed capsule that drops into a small planter remove the soil step completely; the pod expands and seeds germinate inside it with no separate potting mix at all.
A child’s job is decorating the outer planter with paint pens or washi tape and dropping the pod in once it’s ready, so the entire “planting” moment takes under a minute. These work well for classroom sets or party favors, since a dozen pods cost about the same as a single bag of potting soil and produce zero loose material across a dozen kids working at once.
Pro Tip: Flag each pod’s variety with a toothpick label before planting. Most pods look identical until sprouts appear, and by then nobody remembers which is basil and which is marigold.
What You’ll Need
| Product |
|---|
| Compressed grow-kit pods |
| Small desktop planters |
| Paint pens for glass or ceramic |
12. Painted Tin Can Herb Planters
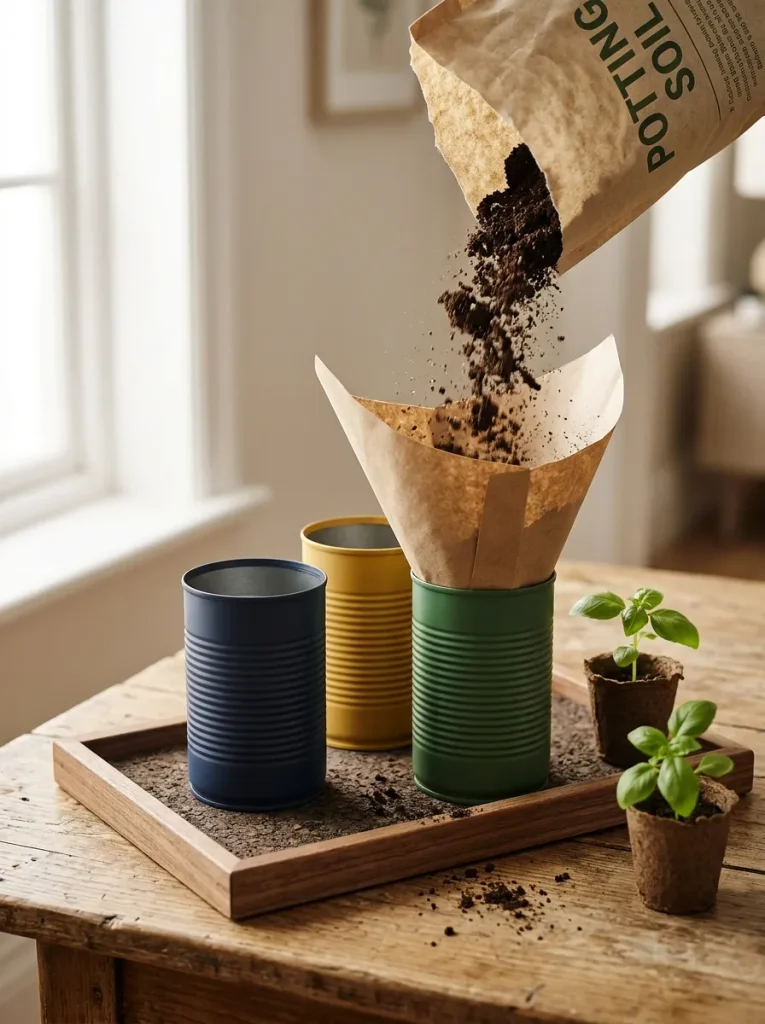
A clean, dry tin can with the lid’s sharp edge filed down and a drainage hole punched through the base becomes a sturdy herb planter once painted in enamel craft paint, which holds up to metal better than regular acrylic.
The pouring step keeps this one tidy: roll a piece of paper into a cone-shaped funnel, set it in the can’s mouth, and pour soil straight from the bag through it instead of scooping by hand. A cork-lined tray underneath catches drips from watering later, since the can’s single hole drains fast and needs somewhere to land. Best for kids old enough to handle a filed can edge safely generally eight and up.
Styling Note: Stick with one paint finish across the whole set matte enamel on every can so a row of mismatched herbs still reads as one collection.
How to Start Your Zero-Mess Planter Sessions
The right first move is almost always the cheapest one: a single water-propagation jar with a cutting from a houseplant already in the house. It needs no purchase at all, takes under five minutes to set up, and gives kids something to check on daily usually what keeps a craft project from getting forgotten on a shelf by day three.
The most common mistake is skipping the pre-measure step and letting a child scoop straight from an open soil bag. It seems faster in the moment, but it’s the single biggest source of spilled dirt across every project on this list measuring a scoop or a disc into a separate cup first solves nearly all of it.
Three items under $50 that cover most of these projects: a bag of compressed coco-coir discs, a set of small terracotta pots, and a roll of enamel craft paint made for metal and glass surfaces.
A single planter project runs 20 to 40 minutes for most kids, start to finish. A full afternoon covering three or four of these a jar garden, a terrarium, and a set of painted pots, say fits comfortably into a weekend without turning into an all-day production.
Ready to Start Your Zero-Mess Planter Projects?
Twelve ways in, and the range covers water-only propagation, moss instead of soil, pre-measured pods, and poured pours through paper funnels different techniques, not just different pots. Starting small is genuinely fine here; one mason jar on a windowsill is a complete project on its own, not a lesser version of something bigger.
For today, the easiest move is pulling a clean jar and a cutting from whatever’s already growing on a shelf. Watching roots appear over the next week or two tends to hook kids more than the craft part ever does. Pin the two or three that fit this weekend and save the rest for later.
Keep Exploring:
- 15 Mason Jar Crafts Kids Will Actually Finish
- 10 Modern Succulent Planter Ideas for Small Spaces
- 12 Ladybug DIY Ideas for a Garden-Themed Craft Afternoon