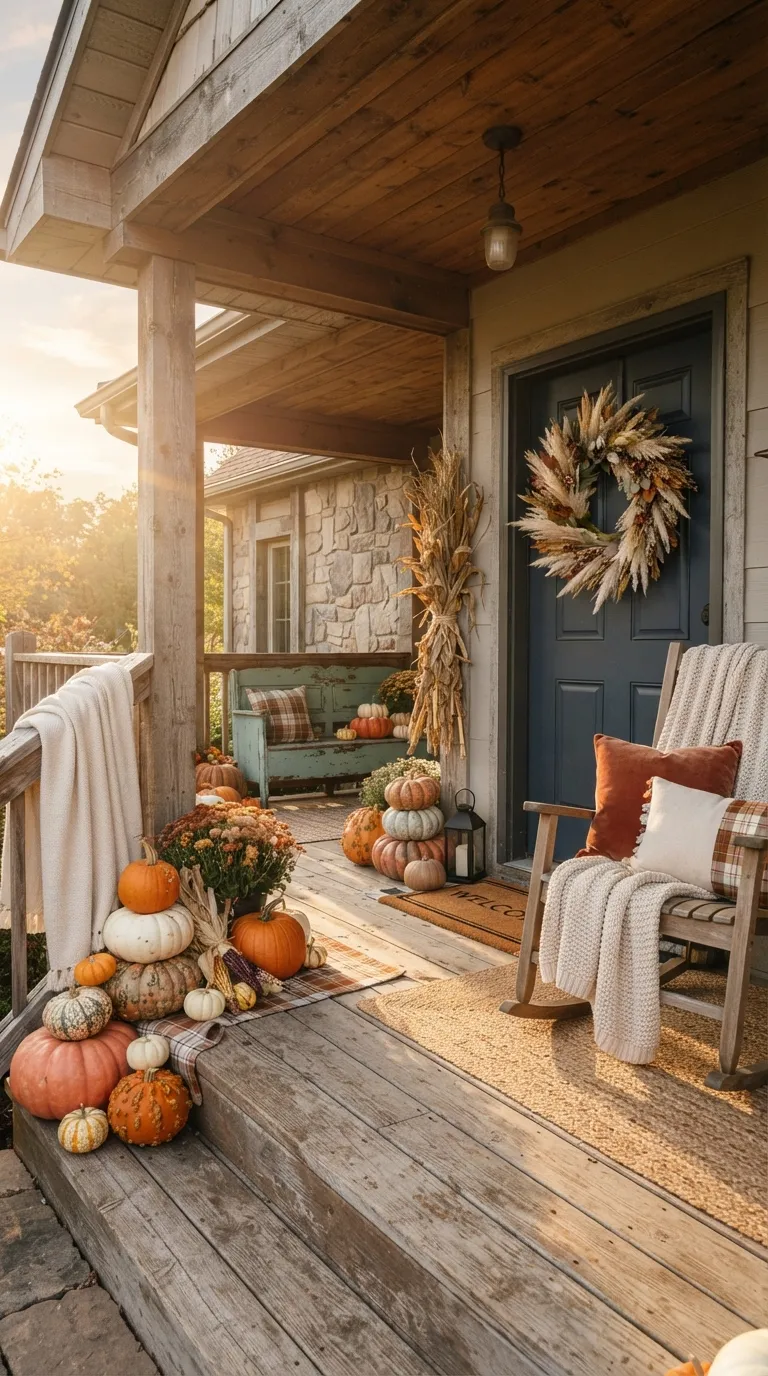
21 Halloween Decor Ideas That Turn Your Home Into a Storybook Haunt
Halloween decor is the seasonal styling that turns an ordinary porch and living room into something a little theatrical part cozy autumn, part gentle spook. Here are 21 ideas, from five-minute wins to weekend projects, that actually hold up once the candy bowl comes out.
There’s a particular kind of light that shows up in late October low, orange, a little smoky at the edges. Get the styling right and a hallway feels hushed and expectant instead of cluttered with plastic skeletons. Get it wrong and the whole house reads like a costume shop clearance aisle. Let’s not do that.
Jump To
- Graphic Black-and-White Pumpkins
- Dried Botanical Door Wreath
- Flicker-Flame Candle Glow
- Spooky Bookshelf Styling
- Console Table Vignette
- Deep Plum & Black Table Runner
- Cheesecloth Ghost Cluster
- Backlit Window Silhouettes
- Porch Entry Procession
- Vintage Apothecary Bottle Display
- Ombre Pumpkin Gradient
- Bar Cart Potion Station
- Small Apartment Door Cluster
- Moss & Twig Centerpiece
- Pathway Luminaries
- Cobweb-Framed Vintage Mirror
- Black Taper Candle Cluster
- Layered Dining Chair Sashes
- Balcony Mini Display
- Dried Wheat & Pampas Bundles
- Staircase Garland Cascade
Why Halloween Decor Ideas Make Such a Difference
Halloween styling borrows its mood from harvest season more than horror movies think ink black, pumpkin orange, bone white, and a deep aubergine, layered over natural textures like dried corn husk, raw pumpkin stem, unbleached cheesecloth, and blackened metal.
It’s having a real moment because people are decorating for the whole month now, not just one night, which means pieces need to double as autumn decor before they go full spooky. Small entries and apartment balconies work fine here the trick is picking two or three anchor pieces (a wreath, a lantern, a pumpkin cluster) instead of scattering ten small ones.
| Best starting point | One graphic black-and-white pumpkin display at your entry |
| Biggest impact area | Front porch and entry — it’s what trick-or-treaters see first |
| Budget to start | $30–$75 for the essentials, $150–$300 for a full-home refresh |
| Time to complete | A weekend afternoon for the basics, 2–3 weekends for every room |
21 Halloween Decor Ideas for Every Room
These first three are the fastest, cheapest wins start here if you’re short on time.
1. Graphic Black-and-White Pumpkins
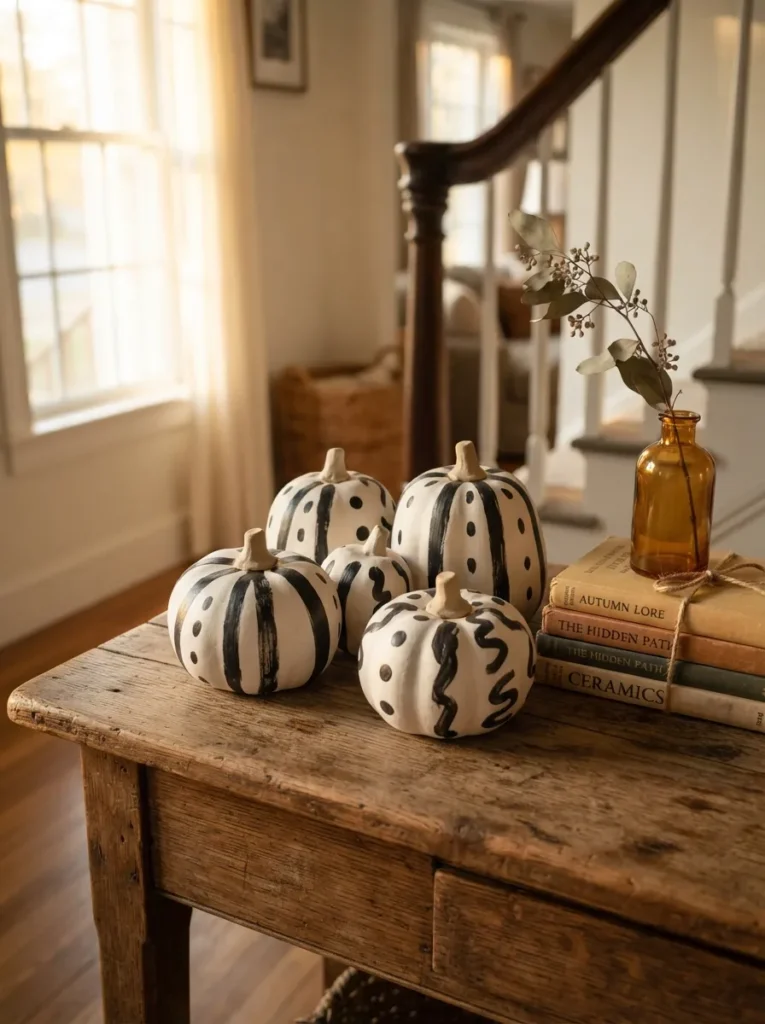
What it looks like: Bold, graphic, almost sculptural against a plain surface.
Why it works: High-contrast black and white reads as intentional rather than seasonal clutter, and it borrows the same visual weight principle designers use with black picture frames a small amount of true black anchors everything around it.
How to copy it: Paint real or faux pumpkins with matte chalkboard paint in freehand stripes, dots, or a single painted line around the widest part no stencils needed, imperfect lines look more handmade.
Best for: Renters and beginners who want maximum visual impact for under $20.
Pro Tip: Matte chalkboard spray paint dries streak-free on real pumpkins if you do two thin coats instead of one heavy one heavy coats crack as the pumpkin naturally shrinks.
2. Dried Botanical Door Wreath
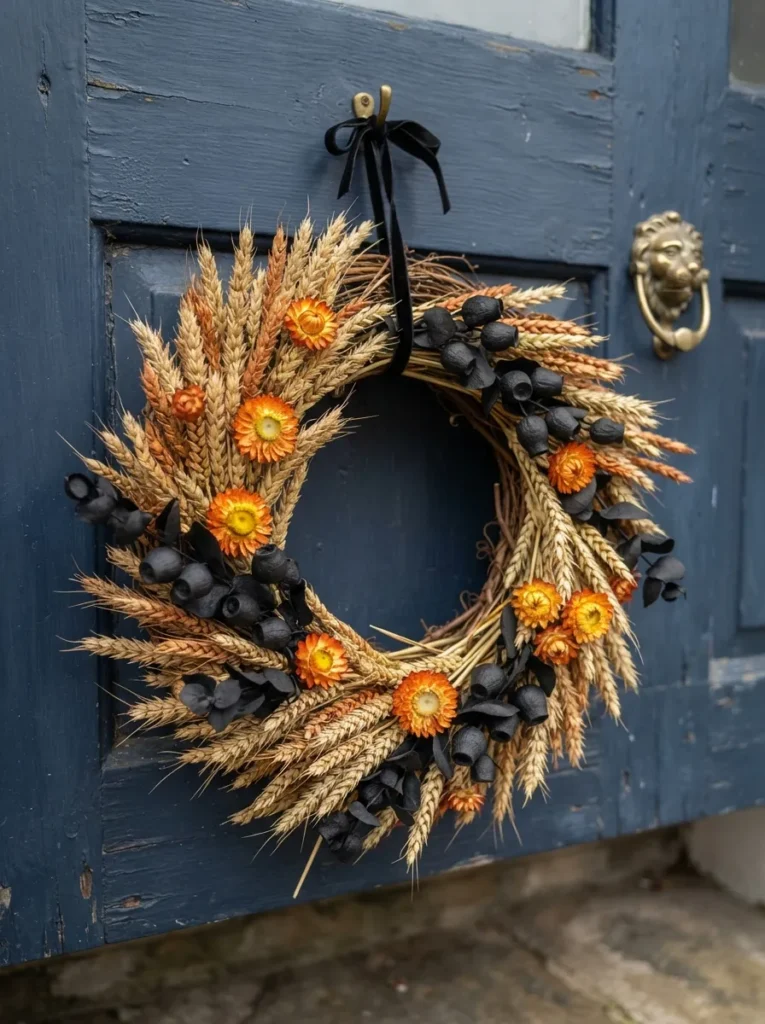
What it looks like: Textured and sun-warmed, like something gathered rather than bought.
Why it works: Mixing three or more dried textures stalk, pod, bloom creates the layering effect designers call visual rhythm, which reads as more expensive than a single-material wreath.
How to copy it: Start with a grapevine base, wire in dried wheat first for structure, then tuck strawflower and painted pods into the gaps last so nothing gets crushed.
Best for: Anyone who wants their Halloween decor to transition straight into Thanksgiving without a full swap.
Budget Version: Skip the florist and buy a bundle of dried wheat from a craft store one $8 bundle makes a wreath base plus leftover stems for a vase.
3. Flicker-Flame Candle Glow
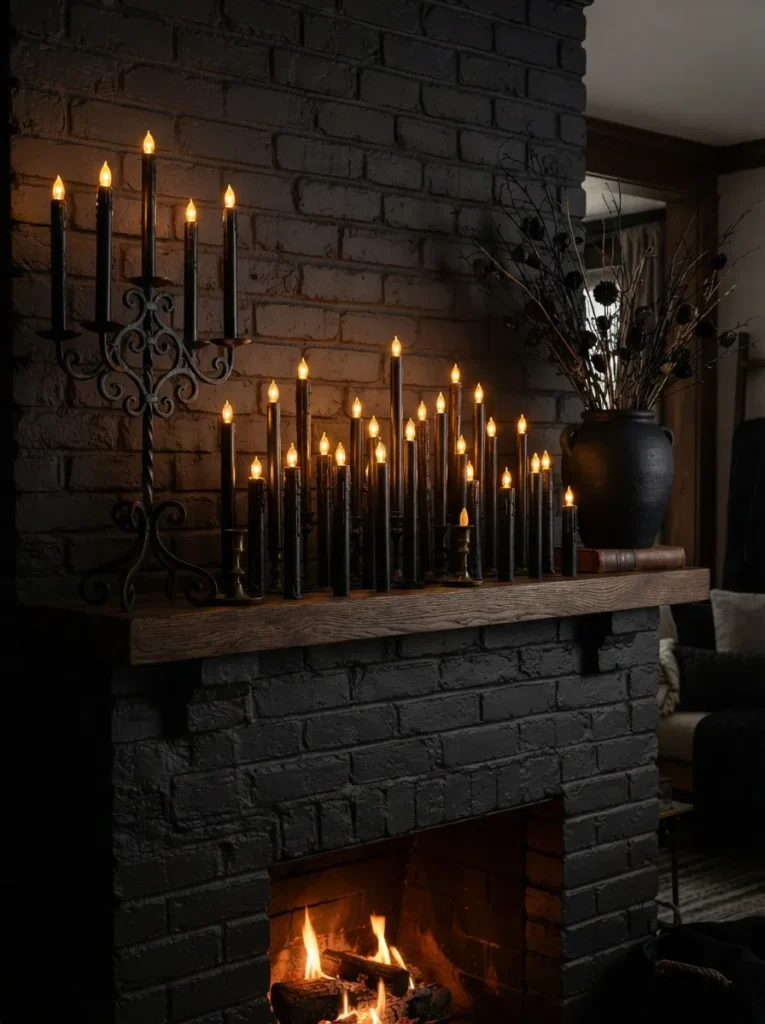
What it looks like: Warm and slightly theatrical, the kind of light that makes a room feel occupied even when it’s empty.
Why it works: Varying candle height by two to four inches across a cluster creates depth instead of a flat row a basic proportion trick that photographs well and looks intentional in person.
How to copy it: Group flameless taper candles in odd numbers of three or five, mixing heights, and set them on a mirrored tray so the glow doubles back up.
Best for: Households with kids or pets where real flame isn’t practical.
Warning: Real taper candles left burning near dried florals or cheesecloth decor are a genuine fire risk if you love the look, flameless LED tapers with realistic flicker are worth the extra few dollars.
The next idea is one people usually save for last but it’s one of the easiest to get right.
4. Spooky Bookshelf Styling
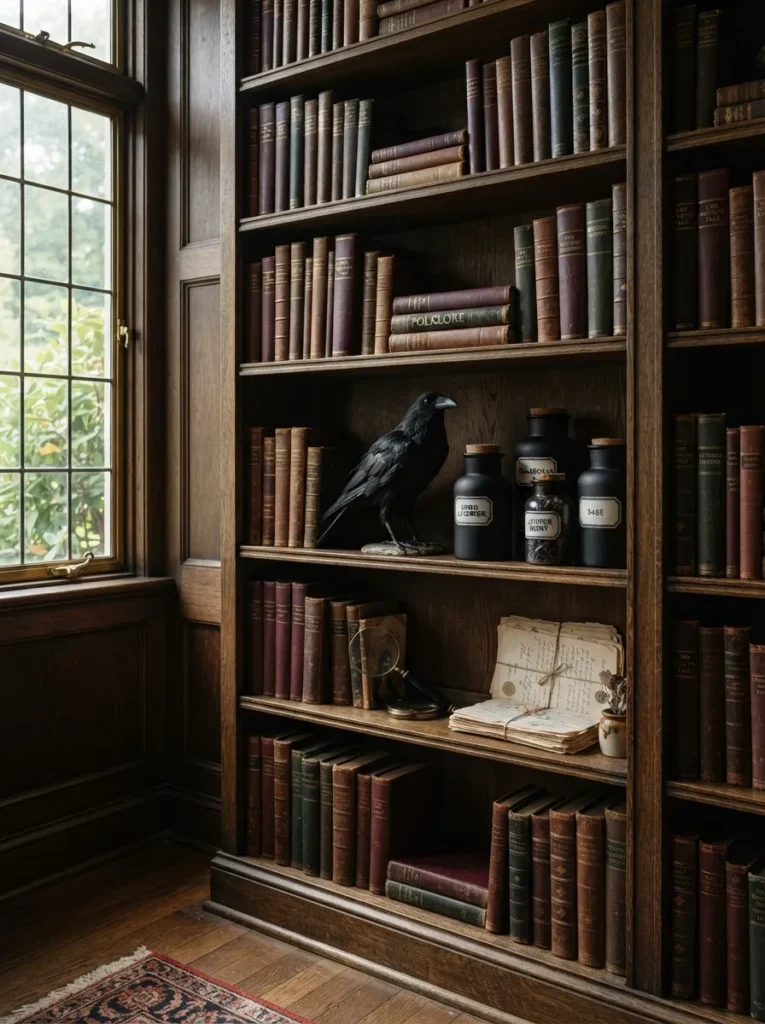
What it looks like: Layered and a little literary, like a study that’s been left mid-story.
Why it works: Grouping objects by height and material rather than theme keeps the shelf from looking like a costume store the raven and jars work because they share a black, matte finish, not because they’re all “Halloween.”
How to copy it: Pull books you already own, stack some flat and some upright, then add one dark object and one glass container per shelf section never more than three items grouped together.
Best for: People who already have a full bookshelf and don’t want to buy new decor.
(No optional block or callout here the styling logic is covered fully above, and stacking a third element would crowd the idea.)
Styling Note: Face a few book spines backward so the plain cream page edges show it breaks up the color pattern and looks deliberately curated rather than staged.
5. Console Table Vignette
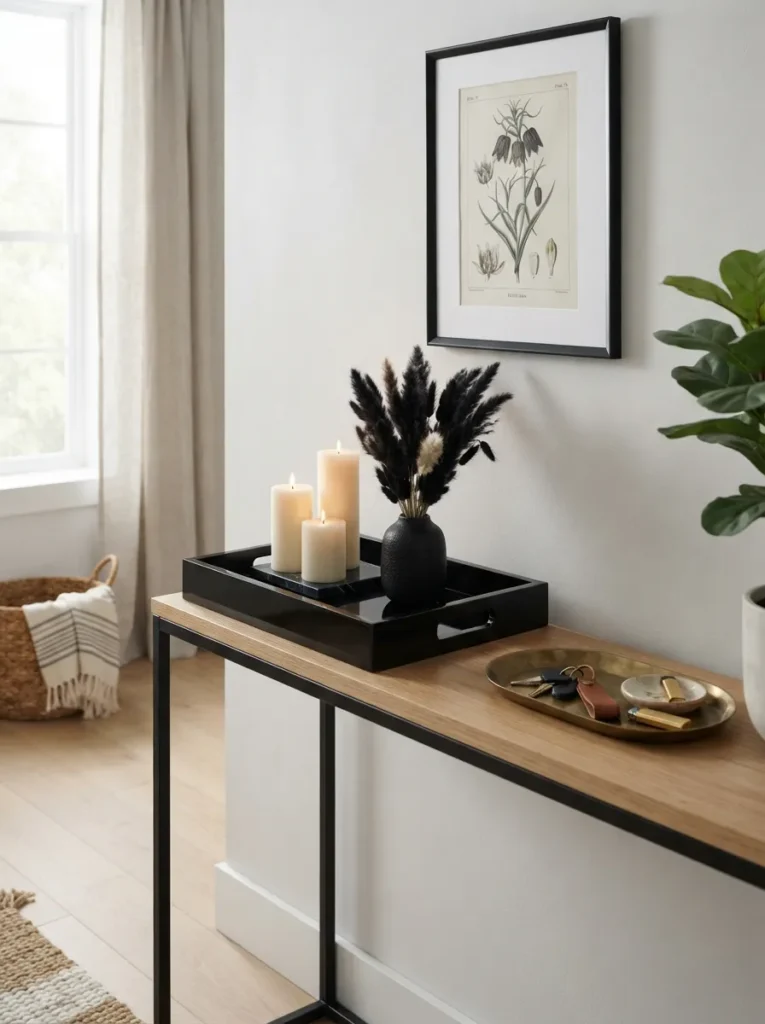
What it looks like: Clean and a little dramatic, without feeling overloaded.
Why it works: Anchoring a vignette with a tray creates a defined boundary, which is the same trick used in everyday styling it keeps candles and small objects from looking scattered across the surface.
How to copy it: Use a matte or lacquered tray as your base layer, then build height with one tall element, one medium, and one low never three items of the same height.
Best for: Entryways that double as a landing spot for keys and mail, since the tray keeps decor and daily clutter separate.
Shop This Look
| Product |
|---|
| Black lacquer rectangular serving tray |
| Unscented black pillar candles, set of 3 varying heights |
| Dried black-dyed pampas grass bundle |
| Small brass catch-all dish |
| Framed vintage botanical print, dark background |
The next one solves the biggest color mistake people make with Halloween tablescapes.
6. Deep Plum & Black Table Runner
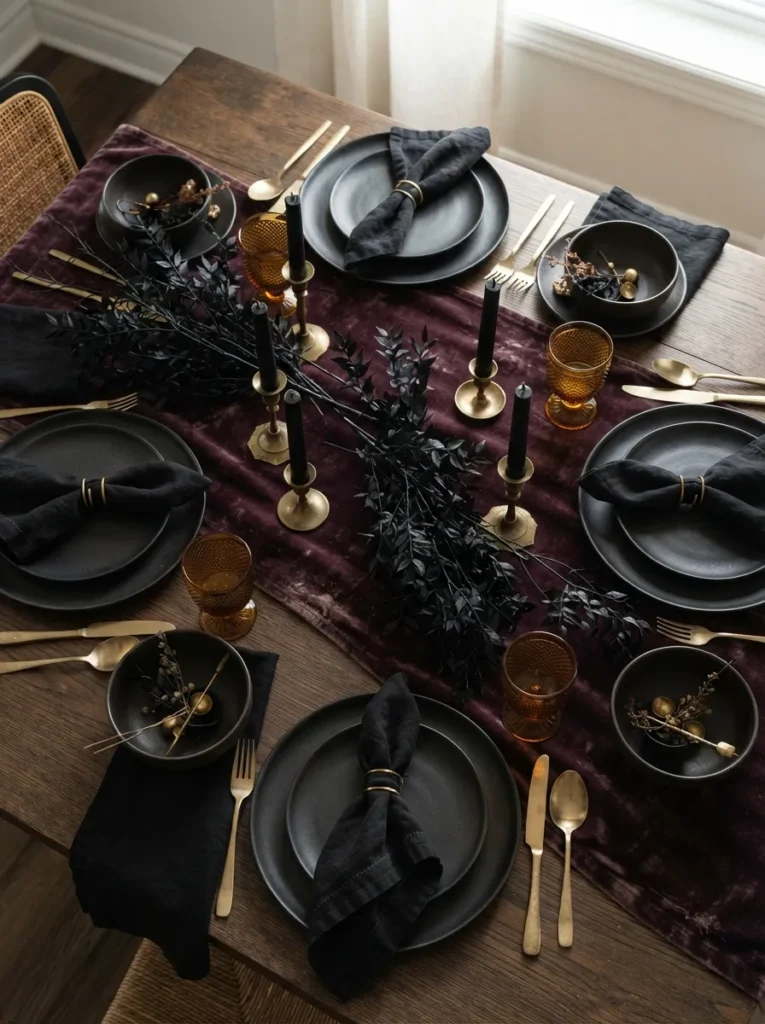
What it looks like: Rich and a little formal, closer to a dinner party than a costume party.
Why it works: Plum reads as sophisticated where pure orange can read as juvenile it’s still warm-toned enough to feel autumnal, but the added blue undertone keeps it from looking like a kids’ party.
How to copy it: Layer a plum velvet or matte cotton runner over your existing tablecloth, then repeat the color just once more elsewhere on the table in napkins or a single floral stem so it doesn’t look accidental.
Best for: Anyone hosting a Halloween dinner who wants the table to still photograph well in daylight.
Quick Win: Don’t own a plum runner? A $12 length of plum velvet ribbon fabric from a craft store, cut and hemmed, works just as well down the table’s center.
Up next: the DIY that photographs better than almost anything store-bought.
7. Cheesecloth Ghost Cluster
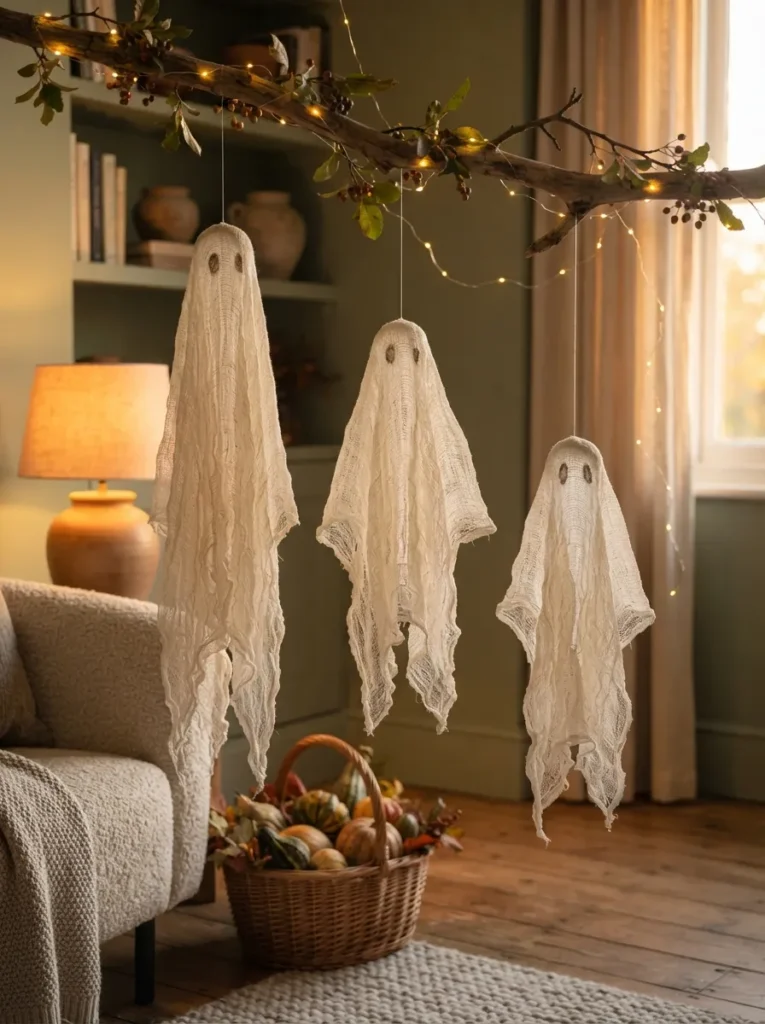
What it looks like: Soft and slightly ghostly, more ethereal than gimmicky.
Why it works: Stiffening the cheesecloth with fabric starch lets it hold a rounded head shape instead of hanging flat, which is the detail that separates a convincing ghost from a draped sheet.
How to copy it: Soak unbleached cheesecloth in a mix of fabric stiffener and water, drape it over a balloon or foam ball to form the head, let it dry fully, then remove the form and hang from fishing line at staggered heights.
Best for: Crafters who want a genuinely handmade centerpiece rather than a store display.
Important: Fabric stiffener needs 24 hours minimum to fully cure handling the cheesecloth too early causes it to sag permanently instead of holding shape.
8. Backlit Window Silhouettes
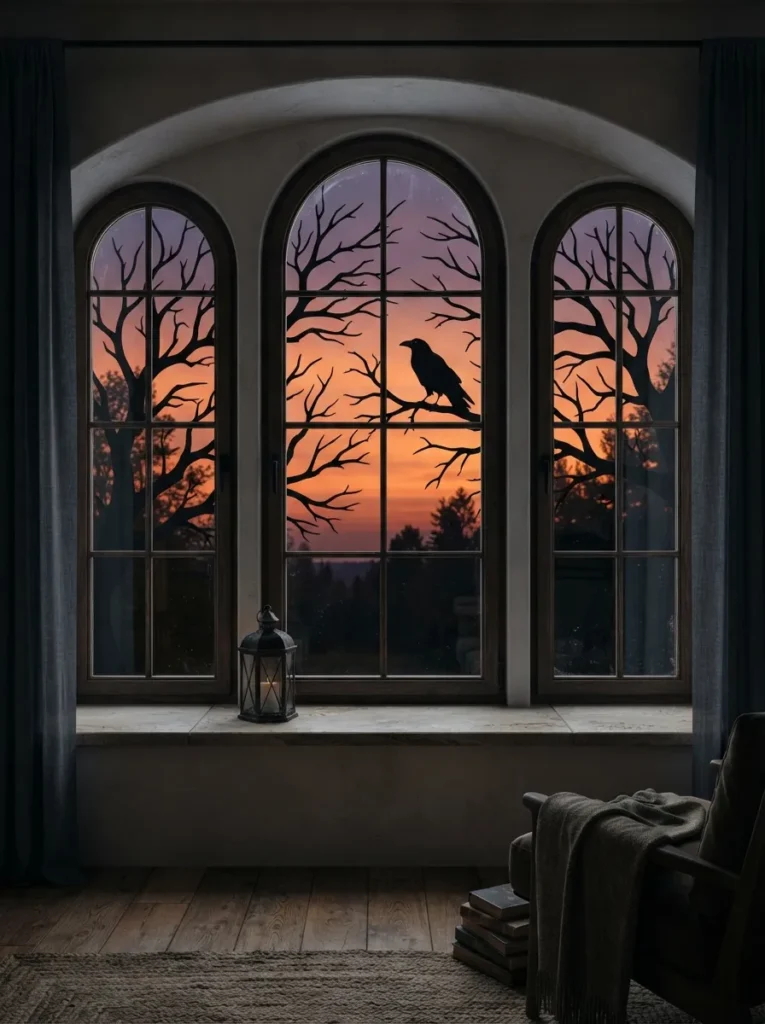
What it looks like: Dramatic at dusk, almost invisible in daylight a decor idea that changes with the hour.
Why it works: Silhouettes rely entirely on light behind them, so they use the window itself as the light source instead of competing with it one of the few decor ideas that costs nothing to run.
How to copy it: Cut branch and bird shapes from black cardstock using a printed template, then apply with a light removable adhesive directly to the glass, positioning pieces off-center rather than symmetrically.
Best for: Renters who can’t drill or nail anything into walls.
Pro Tip: Removable poster putty holds better than tape on glass and won’t leave a sticky residue when Halloween is over.
Here’s the one idea worth planning before anything else it sets the tone for your whole entry.
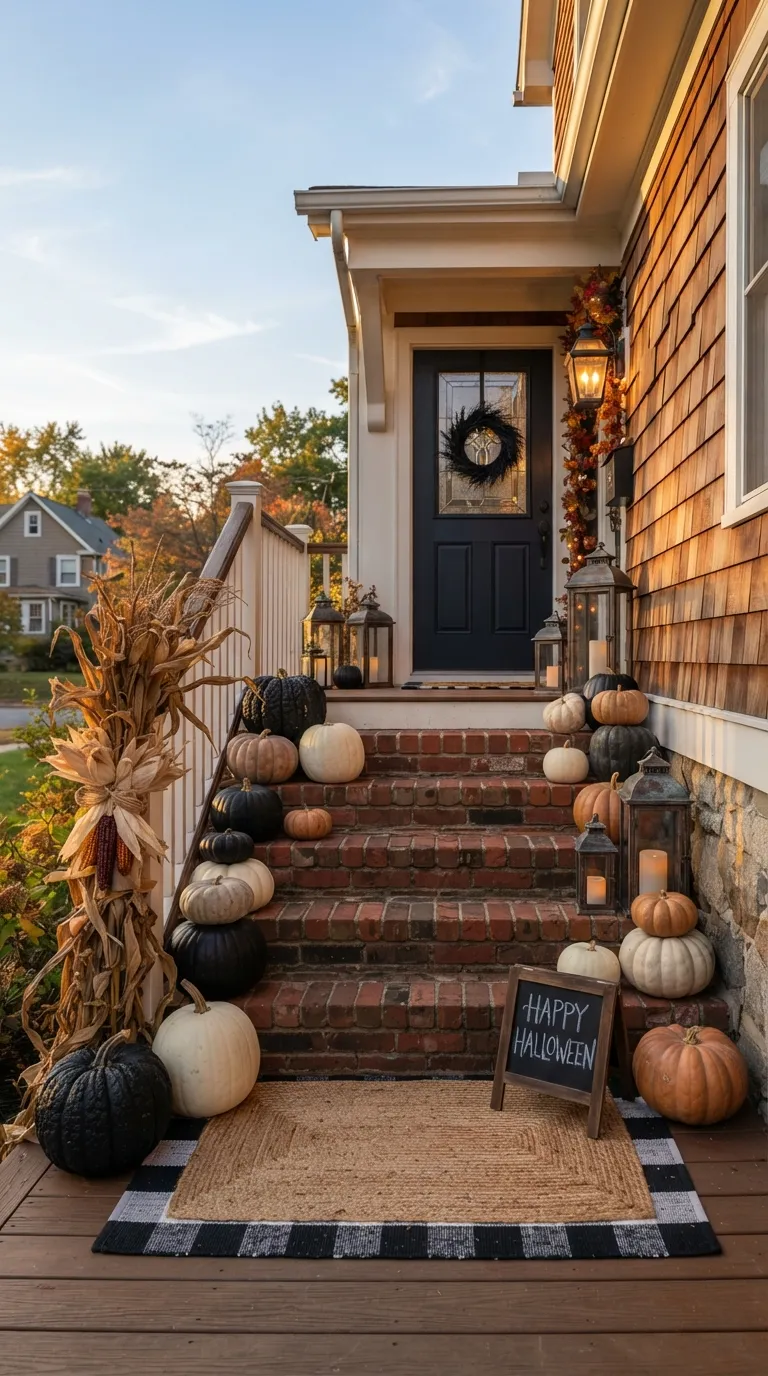
9. Porch Entry Procession
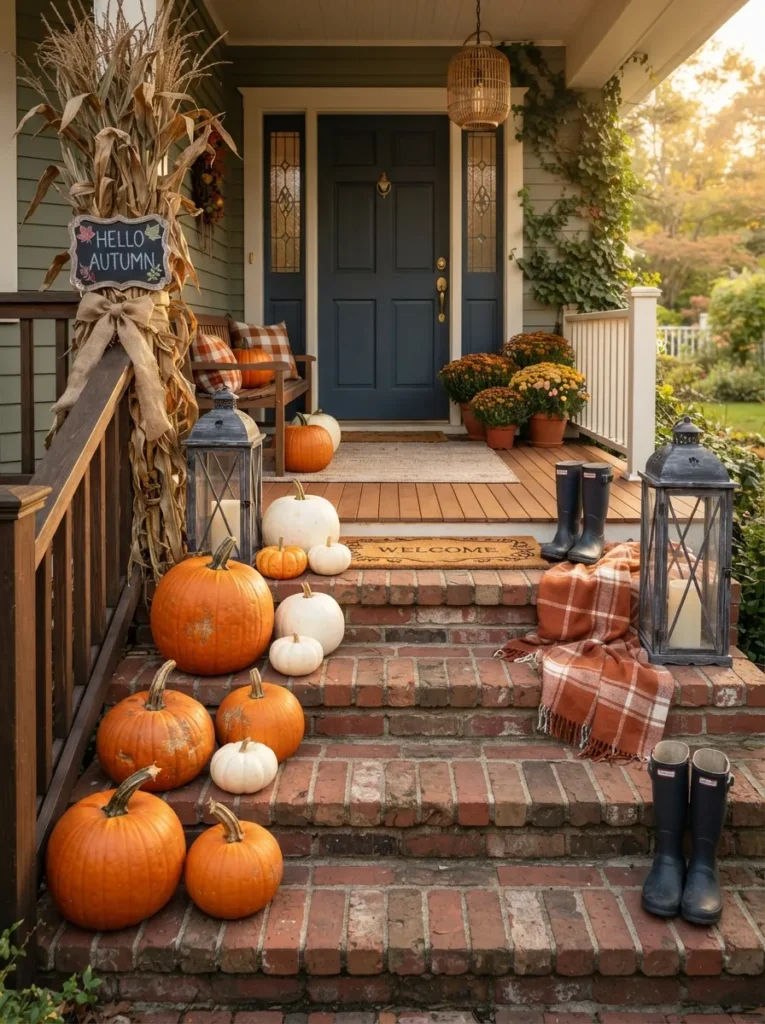
What it looks like: A clear visual path that draws the eye straight to the front door.
Why it works: Graduating pumpkin sizes from largest at the bottom step to smallest at the top creates a sightline principle designers call visual sequencing it guides a visitor’s eye without any signage.
How to copy it: Place your largest pumpkins at the base of the steps, medium ones at the midpoint, and small ones at the door, keeping odd numbers per step for a more natural, less “matched set” look.
Best for: Homeowners who want their porch to be the seasonal showpiece of the house.
Shop This Look
| Product |
|---|
| Weathered black metal lanterns, set of 2 |
| Natural woven jute doormat |
| Bundle of dried cornstalks with twine |
| Small chalkboard A-frame sign |
| Faux pumpkins in graduated sizes, natural finish |
✅ Before You Buy:
- [ ] Measure your step width to confirm how many pumpkins fit per step without crowding
- [ ] Buy pumpkins in three distinct sizes, not just two
- [ ] Place the largest pumpkins first, working up toward the door
- [ ] Add lanterns last, positioned at eye level on the top step or beside the door
Next up: the display that looks like it belongs in an old chemist’s shop.
10. Vintage Apothecary Bottle Display
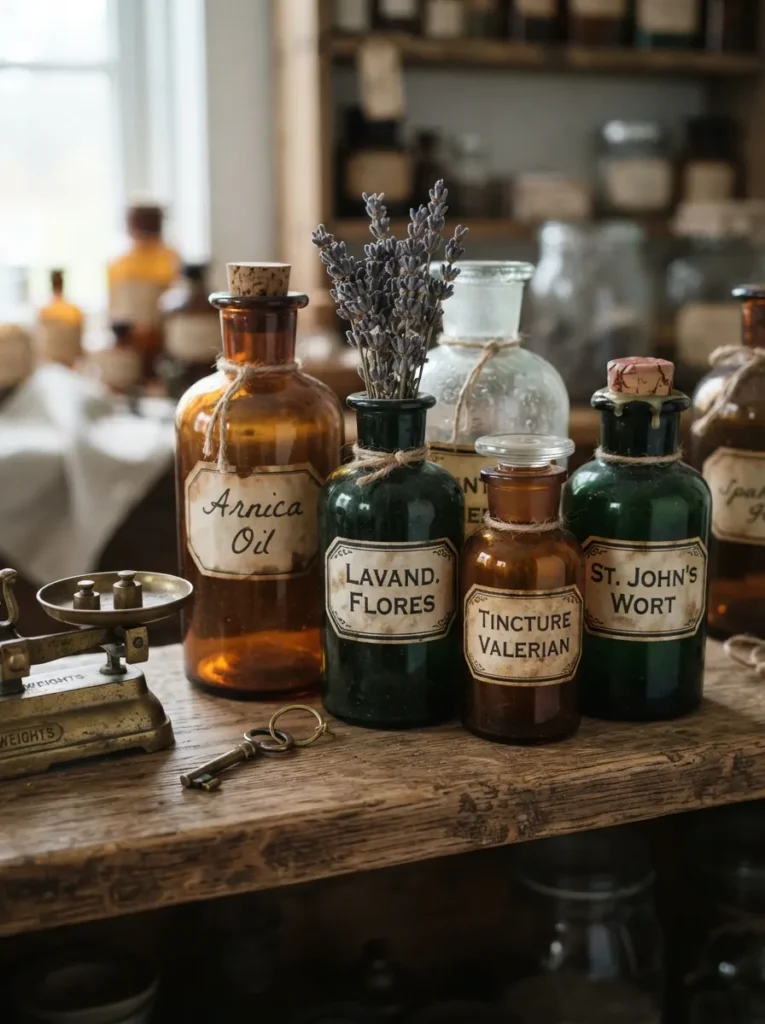
What it looks like: Curious and a little old-world, like a shelf that’s been collecting for decades.
Why it works: Mismatched bottle heights and colors work here because they’re unified by a single material glass the same principle that makes a mismatched gallery wall work when every frame shares one finish.
How to copy it: Collect amber and green glass bottles from thrift stores, fill a few with colored water or dried herbs, then hand-letter simple labels with a fine-tip paint pen for an aged look.
Best for: Anyone building a Halloween display slowly over several years instead of all at once.
Budget Version: Save vinegar, wine, and olive oil bottles year-round instead of buying apothecary glass a soaked-off label and a coat of matte spray paint gets most of the way there.
This next idea leans into color more than any other on the list.
11. Ombre Pumpkin Gradient
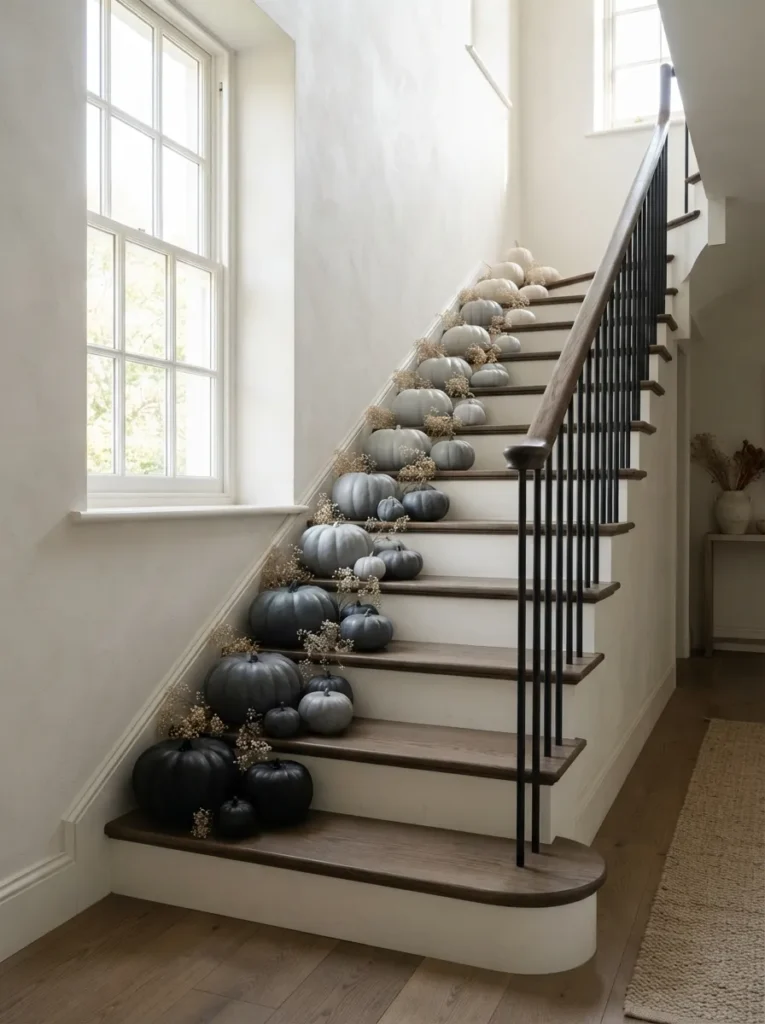
What it looks like: Calm and almost architectural more art installation than seasonal decor.
Why it works: A tonal gradient uses color value rather than variety to create visual interest, which reads as more sophisticated than mixing bright orange with black.
How to copy it: Buy five to seven pumpkins of similar size, then mix white and black craft paint in progressively lighter ratios for each one, painting from darkest to lightest so you can adjust the gradient as you go.
Best for: Design-forward decorators who want Halloween styling that doesn’t compete with existing home decor.
Important: Craft paint on real pumpkins needs a matte clear-coat sealant, or the paint will absorb pumpkin moisture and start peeling within a week.
This next one turns a bar cart into the party’s centerpiece.
12. Bar Cart Potion Station

What it looks like: Functional and festive at once, built for actual use rather than just display.
Why it works: Giving the cart a working purpose drinks people will actually pour means the styling gets used and refreshed naturally throughout the party instead of sitting untouched.
How to copy it: Keep the base bar setup as-is and add only three seasonal touches: dark glass bottles up front, a small cauldron-shaped ice bucket, and a chalkboard label for one signature drink.
Best for: Hosts planning an actual Halloween gathering rather than static decor.
Styling Note: Swap your everyday napkins for black ones just for the season it’s a five-dollar change that ties the whole cart together without adding a single new object.
This next idea is the easiest to overdo, so pay attention to the restraint here.
13. Small Apartment Door Cluster
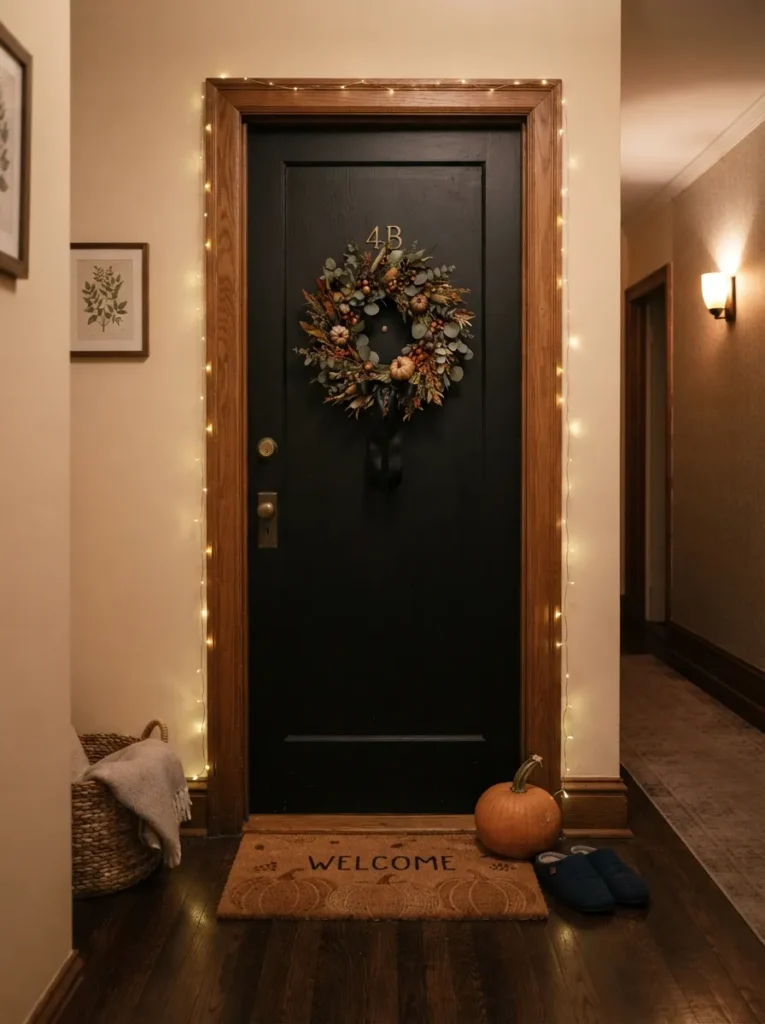
What it looks like: Compact and tidy, proof that a small entry doesn’t need less impact just less volume.
Why it works: Limiting the display to three elements total keeps a narrow apartment doorway from feeling cluttered, since small spaces amplify visual noise faster than large ones.
How to copy it: Choose one wreath sized to roughly a third of your door’s width, one floor pumpkin no taller than knee height, and one light source skip anything that requires floor space beyond the doormat.
Best for: Apartment dwellers with shared hallways or limited entry space.
Shop This Look
| Product |
|---|
| Small-scale wreath, 14–16 inch diameter |
| Battery-operated warm string lights |
| Single medium faux pumpkin, matte black finish |
| Compact jute welcome mat |
The next idea works even if you’ve never arranged a centerpiece before.
14. Moss & Twig Centerpiece
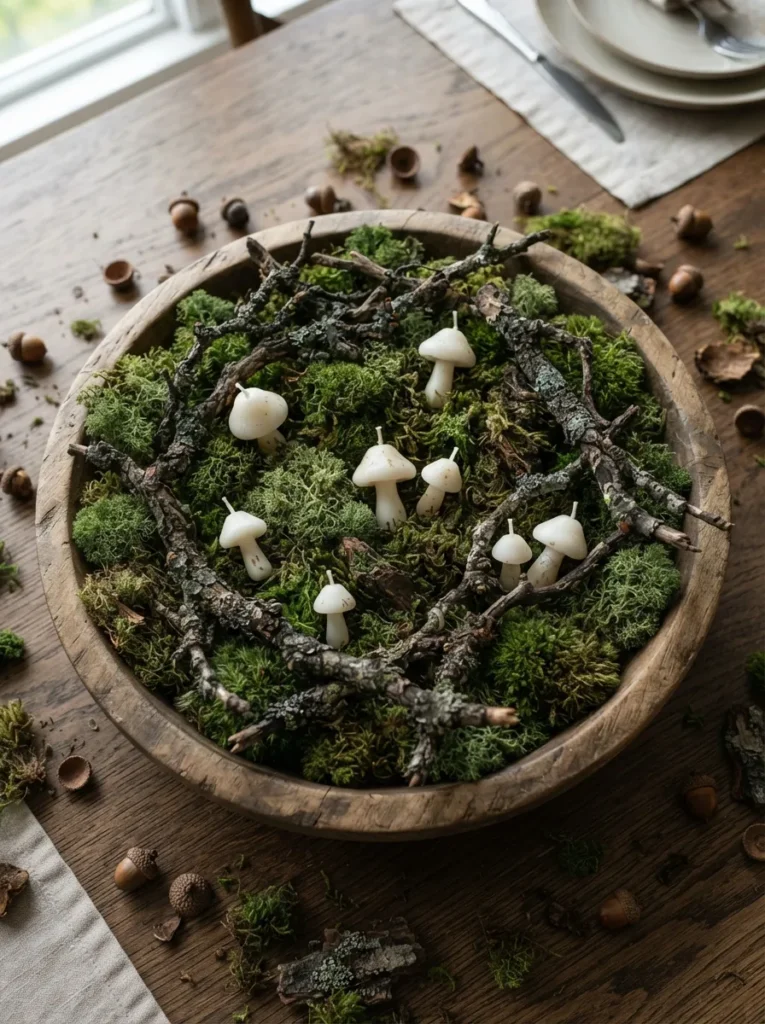
What it looks like: Grounded and woodland-toned, closer to a forest floor than a party store.
Why it works: Preserved moss holds color and texture for months without maintenance, which makes this one of the few Halloween ideas that can sit out from September through Thanksgiving without looking tired.
How to copy it: Fill a low wooden or ceramic bowl with preserved moss as a base layer, then push twisted twigs in at varying angles before nestling in small candles or acorns last.
Best for: People who want their Halloween decor to feel like autumn styling first, spooky second.
Quick Win: Preserved moss comes in sheets or loose fill loose fill is easier to shape into a natural-looking base for beginners.
Here’s something most guides skip entirely.
In my experience, the biggest mistake isn’t under-decorating it’s mixing plastic-finish props with matte natural materials in the same sightline. A glossy plastic skeleton next to a preserved moss centerpiece breaks the illusion instantly, because the eye catches the finish difference before it registers anything else.
If you’re using any plastic pieces, keep them in a separate zone from your natural-material styling, or give them a coat of matte spray paint first it costs about four dollars and changes the entire read of the piece.
Next: a lighting idea for the walkway that most people forget entirely.
15. Pathway Luminaries
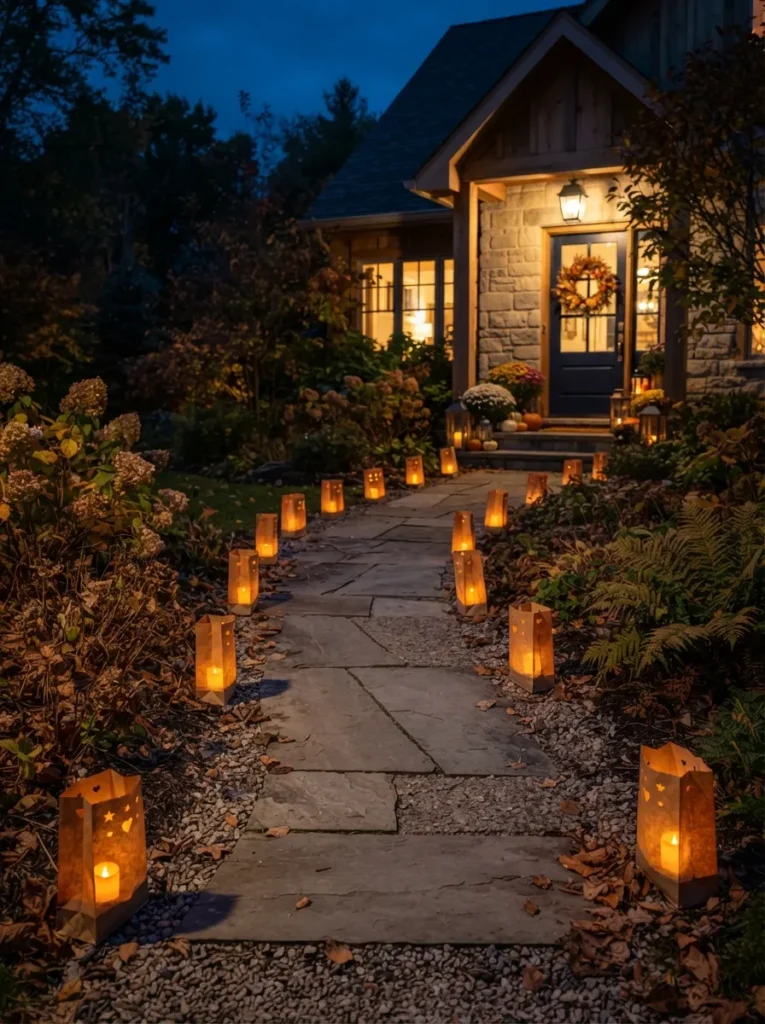
What it looks like: Soft and welcoming, the kind of detail that makes trick-or-treaters slow down.
Why it works: Low, ground-level lighting changes how a whole yard reads at night, since most homes only light the porch and leave the approach dark the pathway itself becomes part of the display.
How to copy it: Weight the bottom of kraft paper bags with a cup of sand each, punch simple shapes near the top for light to escape, and set a flameless tea light inside each one along the walkway edge.
Best for: Homes with a front walkway longer than a few steps.
Warning: Real tea lights inside paper bags are a fire hazard once the flame burns low enough to reach the paper flameless LED tea lights solve this completely for a couple dollars more per pack.
16. Cobweb-Framed Vintage Mirror
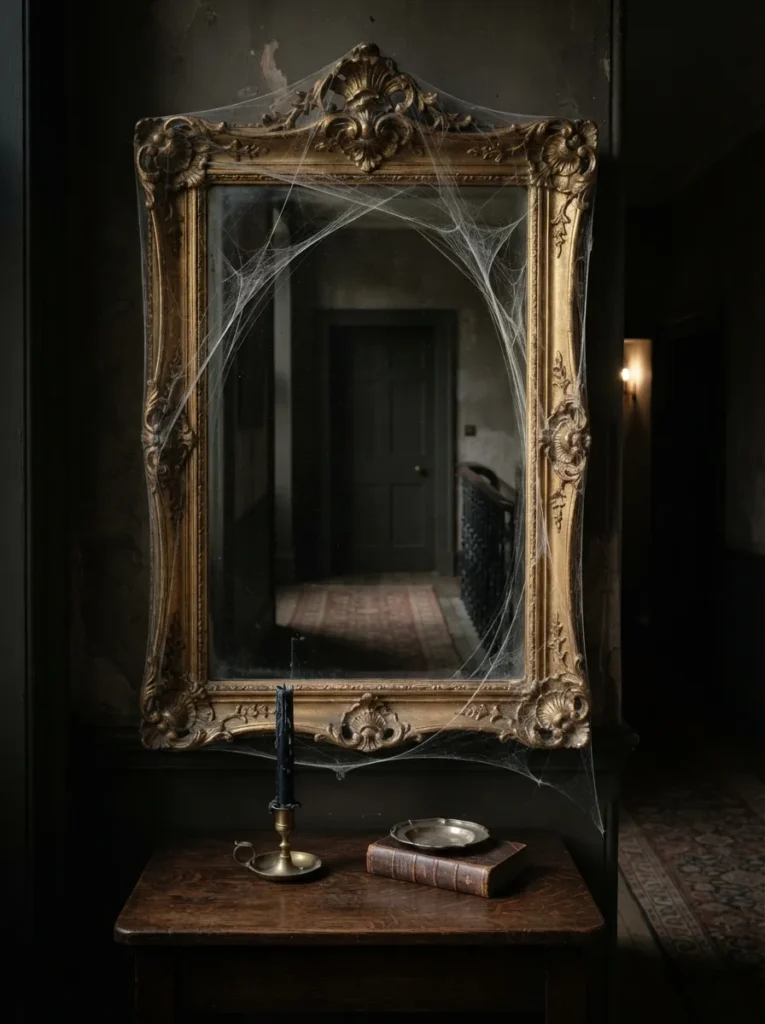
What it looks like: A little unsettling in the best way, elegant rather than gimmicky.
Why it works: Applying cobweb material only to the corners rather than the whole mirror keeps the piece functional and readable, using restraint instead of coverage to create the eerie effect.
How to copy it: Stretch a small amount of synthetic cobweb material by hand until it’s thin and fibrous, then anchor it only at the top two corners of an existing mirror or picture frame, letting it drape naturally.
Best for: Anyone with an existing vintage or ornate mirror they don’t want to fully cover.
Mistake to Avoid: Piling cobweb material on thick makes it look like cotton balls instead of webbing pull and stretch it thin first, then add just enough to suggest rather than announce.
17. Black Taper Candle Cluster
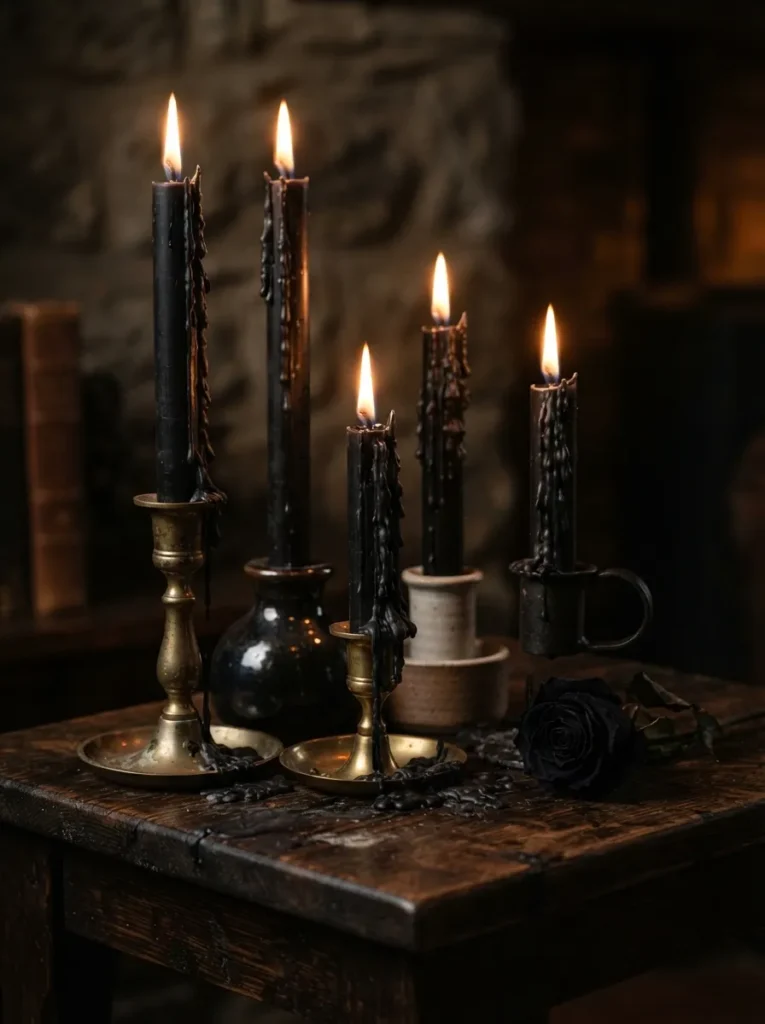
What it looks like: Dramatic in a small footprint, built for close-up viewing rather than across the room.
Why it works: Letting real wax drip down the candle sides over several nights actually improves the look here this is one of the rare cases where “used” reads better than pristine.
How to copy it: Mix three or four holder styles you already own rather than buying a matching set, and burn the candles partway before guests arrive so the drips have already started forming.
Best for: Side tables and bathroom vanities where the display gets seen up close.
Important: Black candle dye can stain wood and fabric permanently if wax drips onto an unprotected surface always set the cluster on a tray or coaster, not directly on wood.
18. Layered Dining Chair Sashes
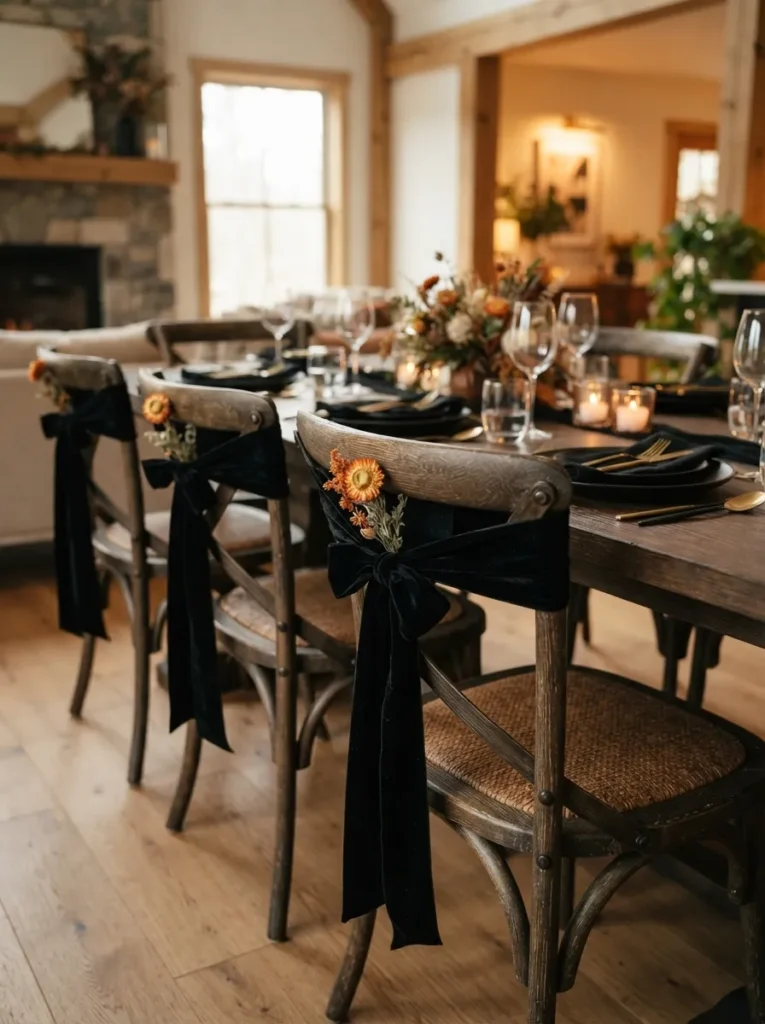
What it looks like: Festive without being loud the kind of detail guests notice on their way to sit down.
Why it works: Repeating a single ribbon-and-flower combination across every chair back creates rhythm through repetition, one of the simplest professional styling tricks for making a dining room feel finished.
How to copy it: Tie one length of black velvet ribbon around each chair back at the same height, then tuck a single dried flower stem under the knot so every chair matches exactly.
Best for: Anyone hosting a sit-down Halloween dinner who wants a cohesive table without redecorating the whole room.
Budget Version: A single spool of black velvet ribbon from a craft store, cut into equal lengths, covers eight chairs for under fifteen dollars.
One more small-space idea, then two final ideas to close out the list.
19. Balcony Mini Display
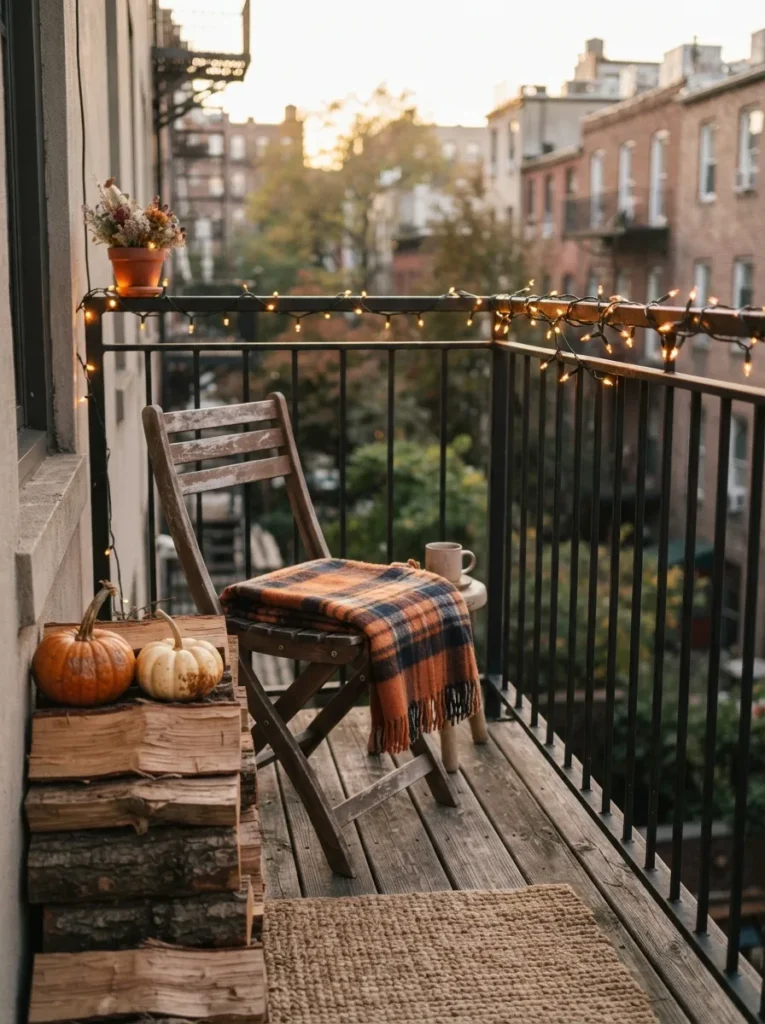
What it looks like: Compact and cozy, built for a footprint of just a few square feet.
Why it works: Using a stacked-log riser instead of a table saves floor space while still creating height variation, which matters more on a balcony where every surface has to earn its place.
How to copy it: Stack three or four real or faux firewood logs as a base, set two mini pumpkins on top at different heights, and run a short strand of warm lights along the railing rather than across the floor.
Best for: Apartment balconies and small patios with limited floor space.
20. Dried Wheat & Pampas Bundles
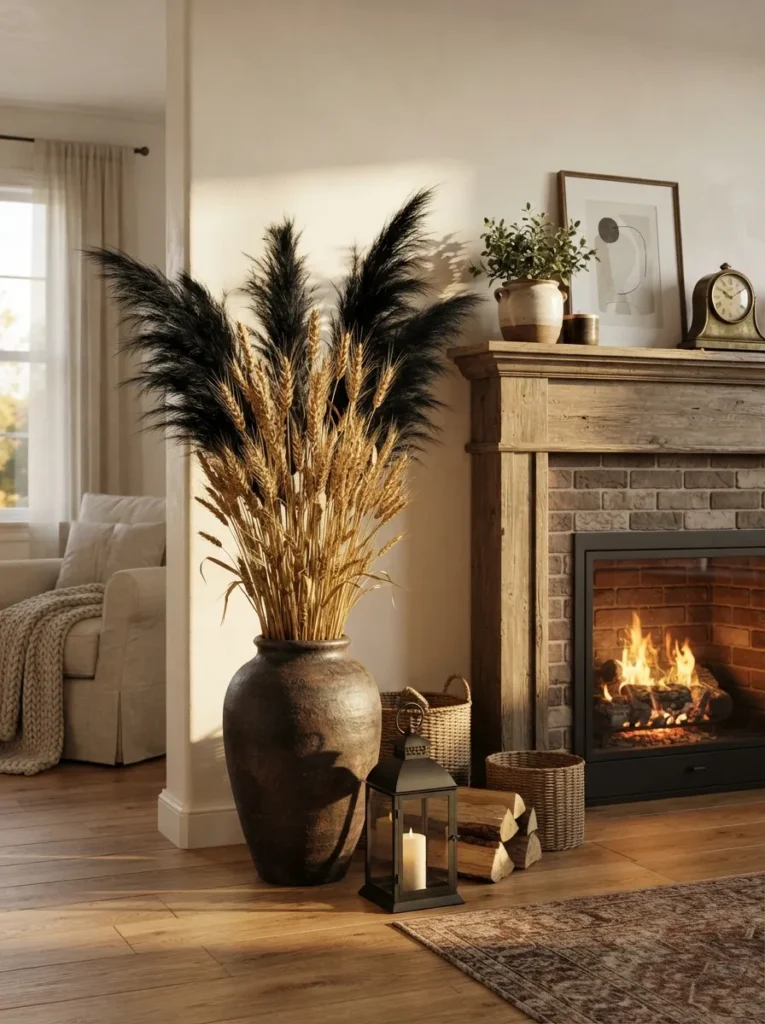
What it looks like: Tall and airy, filling vertical space without any weight or clutter.
Why it works: Height variation between the wheat and the pampas creates a natural silhouette, using negative space around the stems rather than filling the vase densely the same restraint that makes a single dried arrangement outperform a full bouquet.
How to copy it: Trim wheat stalks slightly shorter than the pampas grass, arrange the wheat toward the back of the vase and pampas toward the front, and let the bundle lean slightly rather than standing perfectly straight.
Best for: Empty floor corners that need height without adding furniture.
Shop This Look
| Product |
|---|
| Tall dried wheat stalk bundle |
| Black-dyed dried pampas grass bundle |
| Large floor vase, matte ceramic finish |
| Small black metal lantern |
Styling Note: Leaning the arrangement a few degrees off-vertical, rather than centering it perfectly, is what keeps a tall dried display from looking stiff.
21. Staircase Garland Cascade
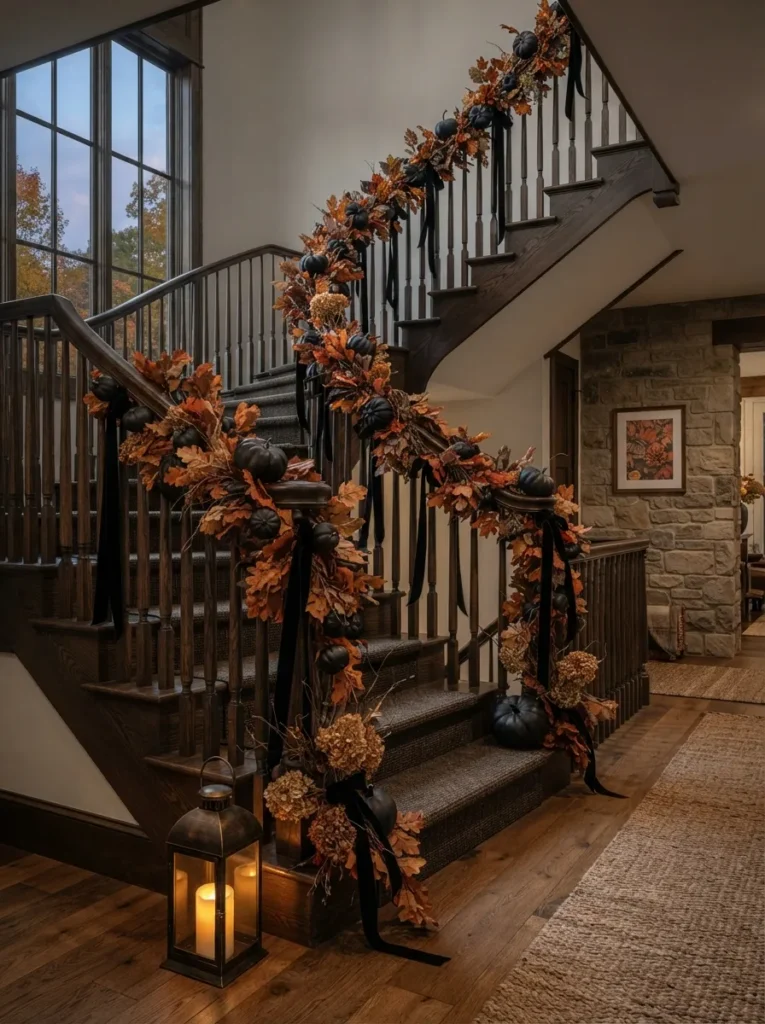
What it looks like: Flowing and full, the kind of detail that photographs beautifully from the bottom of the stairs looking up.
Why it works: A garland that cascades rather than lies flat against the railing uses gravity to create natural movement, which is why letting sections hang slightly loose between anchor points looks more organic than pulling it taut.
How to copy it: Wire a base garland of dried leaves first, then wrap it around the railing loosely, anchoring every twelve to eighteen inches with twine before tucking in painted gourds and ribbon last.
Best for: Homes with an open staircase that’s visible from the front entry.
Important: A garland pulled too tight against the railing loses its shadow and depth leave a little slack between anchor points so it reads as draped, not strapped down.
How to Start Your Halloween Decor Transformation
What I’ve found with real spaces: start with your front door, not your living room. A single wreath or graduated pumpkin cluster at the entry does more visual work than any single indoor piece, since it’s the one element every visitor and neighbor actually sees.
The most common fixable mistake is mixing too many finishes at once glossy plastic props next to matte natural ones. It breaks the illusion because the eye clocks the material difference before anything else. Stick to one or two finishes per room: matte and natural, or glossy and graphic, not both.
Three items under $50 that create real impact: a bundle of dried wheat stalks in a plain vase, a set of three flameless taper candles with realistic flicker, and a length of black velvet ribbon for chair backs or a wreath bow.
A basic entry-and-mantel refresh takes a single weekend afternoon and runs $30 to $75. A full room-by-room transformation porch, entry, dining table, and mantel realistically takes two to three weekends and lands between $150 and $300 depending on how much you already own.
Ready to Create Your Halloween Home?
Between the color work, the natural materials, and the layout tricks in these 21 ideas, there’s a version of this that fits a studio apartment balcony and a version that fills a full front porch. Transformation here doesn’t need to happen all at once pick one anchor idea, live with it for a weekend, then build outward.
If you’re starting today, paint one set of pumpkins in bold black and white and set them by your door before anything else. The best Halloween styling feels less like a costume and more like the house exhaling into autumn. Save the ideas that fit your space now the graduated pumpkin porch and the cheesecloth ghosts tend to get repinned the most, so don’t lose track of them.
You Might Also Like
- 15 Fall Mantel Decorating Ideas That Aren’t Just Pumpkins
- 12 Small-Space Halloween Decorating Ideas for Apartments
- 9 Budget Halloween Porch Ideas Under $100